
Lighthouse 400 - Camping GOAL ZERO - Free user manual and instructions
Find the device manual for free Lighthouse 400 GOAL ZERO in PDF.
| Product Type | Rechargeable Camping Lantern |
| Brand | Goal Zero |
| Model | Lighthouse 400 |
| Dimensions | 11.4 x 12.7 x 16.5 cm |
| Weight | 498 g (1.1 lb) |
| Battery | Li-ion NMC, 16.3 Wh (3.7 V, 4400 mAh) |
| Power Input | USB (5 V, 1 A), dynamo crank (1 W), Goal Zero solar panels |
| Light Output | 400 lumens (2x3W warm white LED, 3500K) |
| Runtime | 48 h (1 side low), 6 h (1 side high), 24 h (2 sides low), 2.5 h (2 sides high) |
| Charge Time (USB) | 5 h |
| Charge Time (Nomad 7 panel) | 7 to 14 h |
| USB Output Port | 5 V, up to 1.5 A (7.5 W max) |
| USB Input Port | 5 V, up to 1 A (5 W max) |
| Main Features | Dual Directional Lighting (2 sides), red emergency light, USB port for charging devices, hanging hook, retractable feet |
| Demo Mode | Deactivate by turning the crank quickly three times |
| Maintenance | Recharge every 3 to 6 months; clean with a soft, dry cloth |
| Safety | Integrated charge and low battery protection, no fuse |
| Repairability | Integrated battery, contact customer service for replacement |
| Warranty | 12 months (registration recommended at goalzero.com/support) |
| Operating Temperature | 0 to 40 °C |
| Compatible Accessories | Nomad solar panels, Sherpa power banks, Yeti generators |
Frequently Asked Questions - Lighthouse 400 GOAL ZERO
User questions about Lighthouse 400 GOAL ZERO
0 question about this device. Answer the ones you know or ask your own.
Ask a new question about this device
Download the instructions for your Camping in PDF format for free! Find your manual Lighthouse 400 - GOAL ZERO and take your electronic device back in hand. On this page are published all the documents necessary for the use of your device. Lighthouse 400 by GOAL ZERO.
USER MANUAL Lighthouse 400 GOAL ZERO
| Table of Contents | |
| Frequently Asked Questions 1 | |
| Get To Know Your Gear 2-3 | |
| How It Works 4-5 | |
| Technical Specifications 6-7 | |
| François 8-15 | |
| 日本語 | 16-23 |
| Deutsch 24-31 | |
| Espanol 32-39 | |
DEMO MODE
Take the Lighthouse 400 out of the current demo mode by quickly turning the hand crank three times, enough for the blue battery indicator to illuminate.
FREQUENTLY ASKED QUESTIONS
How often do I need to charge the Lighthouse 400? It is recommended to charge your Lighthouse 400 lantern every 3 months. The blue LED lights indicate the current battery level.
Does it matter what direction I turn the hand crank? Nope. You can turn the hand crank in either direction for power. Remember, 1 minute of crank time equals about 10 minutes of light on low.
CHARGE FROM
Goal Zero products: Nomad Solar Panels Sherpa Power Packs Goal Zero Yeti Solar Generators
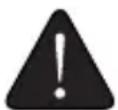
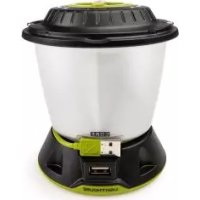
GET TO KNOW YOUR GEAR
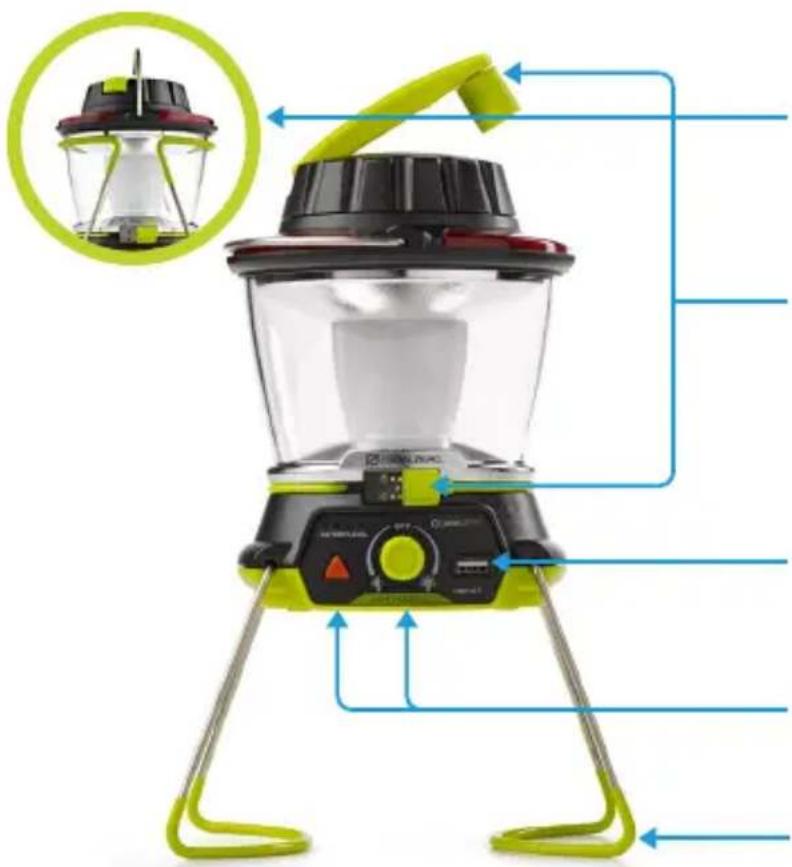
HANGIT
Put the Lighthouse 400 anywhere with the built-in hanger.
CHARGE IT
Charge through any USB port, with the dynamo crank, or with Goal Zero solar panels.
POWERIT
Use the USB port to recharge a phone or boost a tablet.
LIGHT IT
Multiple brightness and directional lighting options. Red light for emergencies.
STANDIT
Convenient foldaway legs for easy transport and hassle-free storage.
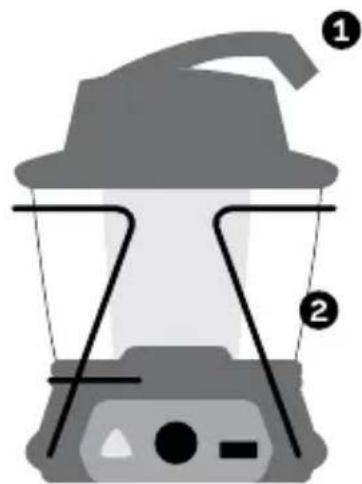
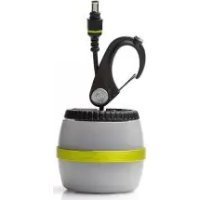
HOW IT WORKS
Dynamo Crank
Recharge by dynamo crank function: flip the crank handle up from the top of the lantern and rotate. One minute of cranking will provide approximately ten minutes of light on low power.
USB Rechargeable Light
Power up the Lighthouse 400 from any USB port with the built-in cord. Blue LED lights indicate battery level.
3 Dualite™ Directional Lighting
Turn the knob right or left for different directional lighting and brightness options.
Emergency Light
Push the triangle button for red, emergency alert mode.
5 Power Your Gear
Recharge smartphones, and boost tablets through the USB port.

TECHNICAL SPECIFICATIONS
Charge times:
| Nomad 7 7-14 hrs | |
| USB Source 5 hrs | |
| Run time: | |
| One Side Lit (low power) 48 hrs | |
| One Side Lit (high power) 6 hrs | |
| Both Sides Lit (low power) 24 hrs | |
| Both Sides Lit (high power) | 2.5 hrs |
| Battery: | |
| Cell Chemistry | Li-ion NMC |
| Cell Capacity | 16.3Wh (3.7V, 4400mAh) |
| Lifecycles | Hundreds of cycles |
| Shelf-life Charge every 3-6 months | |
| Fuses | None |
| Management System | Charging and low-battery protection built-in |
| Light: | |
| LED (output) | 2x3W warm white LED 400 Lumens |
| Color Temperature | 3,500 Kelvin |
Hand Crank:
| Hand Crank 1 W (cranking at 130 RPM) |
| 1 minute of crank = 10 minutes of light on low |
| Ports: |
| USB Port (output) 5V, up to 1.5A (7.5W max), regulated |
| USB Port (input) 5V, up to 1A (5W max) |
| General: |
| Chainable No |
| Weight 1.1 lbs (498 g) |
| Dimensions 4.5 x 5 x 6.5 in (11.4 x 12.7 x 16.5 cm) |
| Operating Usage Temp. 32-104 F (0-40 C) |
| Certs |
| Warranty 12 months |
| Be sure to register your product at goalzero.com/support |
FRANCAISI
Table des matieres
Foire aux questions 9
Designed in the U.S.A.
Made in China
Nomad is a trademark of Goal Zero.
This equipment has been tested and found to comply with the limits for a Class B digital device, pursuant to part 15 of the FCC Rules. These limits are designed to provide reasonable protection against harmful interference in a residential installation. This equipment generates, uses and can radiate radio frequency energy and, if not installed and used in accordance with the instructions, may cause harmful interference to radio communications. However, there is no guarantee that interference will not occur in a particular installation. If this equipment does cause harmful interference to radio or television reception, which can be determined by turning the equipment off and on, the user is encouraged to try to correct the interference by one or more of the following measures:
—Reorient or relocate the receiving antenna.
—Increase the separation between the equipment and receiver.
- Connect the equipment into an outlet on a circuit different from that to which the receiver is connected.
—Consult the dealer or an experienced radio/TV technician for help.
This device complies with part 15 of the FCC Rules. Operation is subject to the following two conditions: (1) This device may not cause harmful interference, and (2) this device must accept any interference received, including interference that may cause undesired operation.

Brand : GOAL ZERO
Model : Lighthouse 400
Category : Camping