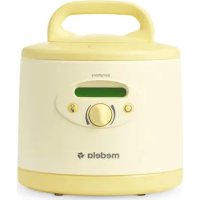
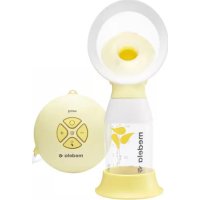
Symphony - Breast pump MEDELA - Free user manual and instructions
Find the device manual for free Symphony MEDELA in PDF.



| Product type | Hospital-grade electric breast pump |
| Brand | Medela |
| Model | Symphony |
| Weight (with battery) | 3.5 kg |
| Weight (without battery) | 2.9 kg |
| Mains power supply | 100-240 V~, 50/60 Hz, 0.5 A |
| Integrated battery | 2 batteries 6 V, 1200 mAh (lead-acid, Yuasa NP 1.2-6) |
| Maximum vacuum | -250 mmHg (-33 kPa) |
| Cycles per minute | 45 to 120 cpm |
| Available programs | Standard (2-Phase Expression) and PLUS (INITIATE and MAINTAIN) |
| Usage | Single or double pumping |
| Cleaning of parts in contact with milk | Hand wash in warm soapy water or dishwasher (top rack) |
| Recommended disinfection | Boiling for 10 minutes or using the Quick Clean Micro-Steam bag |
| Breast shield material | Silicone (PersonalFit) |
| Warranty | 3 years on mechanism, 90 days on parts and accessories |
| Protection rating | IP21 |
| Electrical class | Class II |
| Fuse | T0.8A, 250V (slow-blow, 5x20 mm) |
| Spare parts available | Yes (breast shields, membranes, valve heads, tubing, program cards, etc.) |
| Optional accessories | Hard case, cart, vehicle adapter, carry bag |
| Manufacturer | Medela AG (Switzerland), assembled by Medela LLC (USA) |
Frequently Asked Questions - Symphony MEDELA
User questions about Symphony MEDELA
0 question about this device. Answer the ones you know or ask your own.
Ask a new question about this device
Download the instructions for your Breast pump in PDF format for free! Find your manual Symphony - MEDELA and take your electronic device back in hand. On this page are published all the documents necessary for the use of your device. Symphony by MEDELA.
USER MANUAL Symphony MEDELA
Read all instructions before using this product.
PLEASE SAVE THESE INSTRUCTIONS
- Important Safeguards 3-6
- Product Description 7-11
- Getting Started 12
- Cleaning Overview 13
- Wash - Before first use and after each use* 14-15
- Sanitize - Before first use and once per day* 16-17
- Tubing & Breast Pump Care 18-19
7A. Tubing care. 18-19
7B. Cleaning and disinfecting the breast pump and pumping area 19
- Powering Your Pump 20-21
8A.Card and Cord Protector 20-21
8B. Powering On 20-21
8C. Changing the Program Card 21
8D. Traveling Outside the U.S. 21
- Assembly of Pump Kit 22-24
- Breast Shield Sizing 25
- Determine the Program Card 26-27
11A. Determining Program Card by LCD Screen 27
11B. Determining Program Card by Card Image 27
- Pumping 28-30
12A.Before pumping. 28
12B.Preparing for pumping. 29
12C. Finish Pumping 30
- Program Cards 31-33
13A. Symphony® Standard Program Card 31
13B. Symphony PLUS® Program Card 32-33
- Breast Milk Collection and Storage 34
- Troubleshooting 35-36
16.Error Codes 37
17.Supplemental Information 38
18.Warranty 39 - Meaning of Symbols 40-41
- EMC/Technical Description 42-47
- Technical Specifications 48
- Disposal 49
1. Important Safeguards
IMPORTANT
- Plastic bottles and component parts become brittle when frozen and may break when dropped.
- Bottles and component parts may become damaged if mishandled, e.g. dropped, over-tightened, or knocked over.
- Take appropriate care in handling bottles and components.
- Do not use the breast milk if bottles or components become damaged.
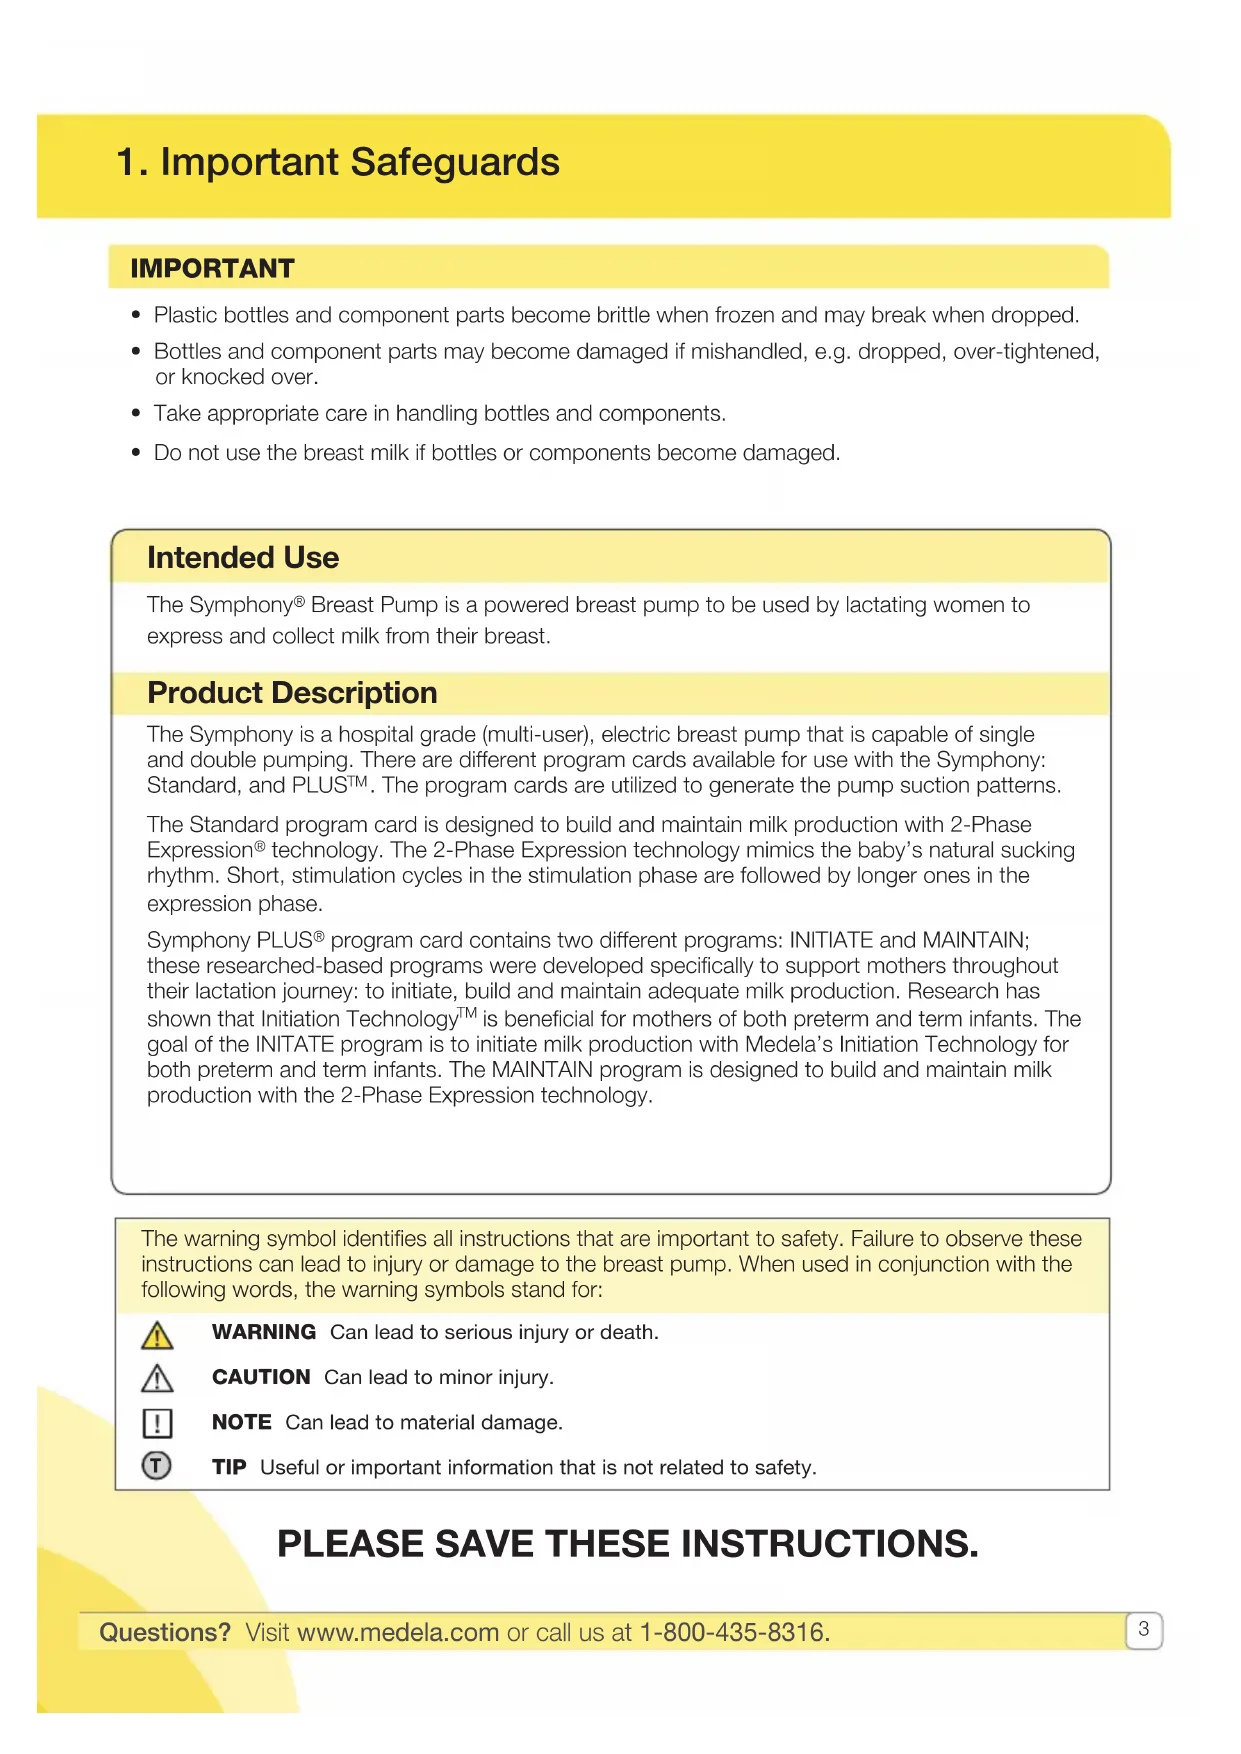
Intended Use
The Symphony® Breast Pump is a powered breast pump to be used by lactating women to express and collect milk from their breast.
Product Description
The Symphony is a hospital grade (multi-user), electric breast pump that is capable of single and double pumping. There are different program cards available for use with the Symphony: Standard, and PLUS™. The program cards are utilized to generate the pump suction patterns.
The Standard program card is designed to build and maintain milk production with 2-Phase Expression® technology. The 2-Phase Expression technology mimics the baby's natural sucking rhythm. Short, stimulation cycles in the stimulation phase are followed by longer ones in the expression phase.
Symphony PLUS® program card contains two different programs: INITIATE and MAINTAIN; these researched-based programs were developed specifically to support mothers throughout their lactation journey: to initiate, build and maintain adequate milk production. Research has shown that Initiation Technology™ is beneficial for mothers of both preterm and term infants. The goal of the INITAte program is to initiate milk production with Medela's Initiation Technology for both preterm and term infants. The MAINTAIN program is designed to build and maintain milk production with the 2-Phase Expression technology.
The warning symbol identifies all instructions that are important to safety. Failure to observe these instructions can lead to injury or damage to the breast pump. When used in conjunction with the following words, the warning symbols stand for:

WARNING Can lead to serious injury or death.

CAUTION Can lead to minor injury.

NOTE Can lead to material damage.

TIP Useful or important information that is not related to safety.
PLEASE SAVE THESE INSTRUCTIONS.
1. Important Safeguards (cont.)
When using electrical devices, basic safety precautions shall always be followed, including the following:

READ ALL INSTRUCTIONS BEFORE USING THIS PRODUCT.

WARNING: To avoid fire, electrocution, or serious burns:
- Always unplug electrical product immediately after use.
- Do not use while bathing or showering.
- Do not place or store product where it can fall or be pulled into a tub or sink.
- Do not submerge pump unit into water or other liquid.
- Do not reach for a product if it has fallen into water or other liquid. Immediately unplug from electrical outlet and contact manufacturer.
- Do not spray or pour liquid directly onto the pump unit.
- Do not leave product unattended when plugged into an electrical outlet.
- Close supervision is necessary when this product is used near children.
- Use the product only for its intended use as described in this manual.
- Do not use attachments not recommended by the manufacturer, as this may cause hazards.
- Never operate this product if it has a damaged cord or plug, if it is not working properly, if it has been dropped or damaged, or dropped into water.
- The Symphony breast pump is not heat resistant. Keep away from radiators and open flames.
- Never use while sleeping or when drowsy.
- Never drop or insert any object into any opening or tubing.
- Do not use outdoors.
- Keep appliance dry and do not place in direct sunlight.
- Do not operate where aerosol (spray) products are being used or where oxygen is being administered.
- Equipment not suitable for use in the presence of a flammable anesthetic mixture with air or with oxygen or nitrous oxide.
- Separation from the mains is only assured through the disconnection of the power cord from the wall socket outlet.
- Position the device to ensure easy disconnection of the power cord from the supply mains.
- Use Medela original authentic accessories only.
- There are no user-serviceable parts inside the Symphony. DO NOT ATTEMPT TO REPAIR THE Symphony breast pump YOURSELF. No modifications to the device are permitted.
- Always inspect power cord wires prior to use for damage or exposed wire. If damage is found, immediately discontinue use of power cord and call Medela Customer Service at 1-800-435-8316.
- Only use the power cord that comes with the Symphony. Make sure the voltage of the power cord is compatible with the power source.

WARNING: To avoid health risk and reduce the risk of injury:
- Breast pump kits are personal care items intended for use by a single user only and should not be shared between users.
- Inspect the breast pump kit components prior to each use.
o Do not use the components if they are damaged. o Do not use the components if dirt, mold or other contamination is visible.
- Inspect all appropriate pump components before each use.
- Clean and sanitize all parts that come in contact with your breast and breast milk prior to first use.
- Do not modify any breast pump kit components.
- Do not drive while pumping.
- Do not use the Symphony breast pump while operating a motor vehicle.
- Never use while pregnant, as pumping can induce labor.
- Wash all parts that come in contact with your breast and breast milk after every use.
- Do NOT continue pumping for more than 2 consecutive pumping sessions if no results are achieved.
- Do not thaw frozen breast milk in a microwave or in a pan of boiling water. Do not microwave breast milk. Microwaving can cause severe burns to baby's mouth from hot spots that develop in the milk during microwaving. (Microwaving can also change the composition of breast milk.)
- If you are a mother who is infected with Hepatitis B, Hepatitis C or Human Immunodeficiency Virus (HIV), pumping breast milk will not reduce or remove the risk of transmitting the virus to your baby through your breast milk.
- If problems or pain occurs, consult your lactation consultant or physician.
1. Important Safeguards (cont.)

CAUTION: Can lead to minor injury:
- Pump only with the breast pump in an upright position.
- Do NOT shorten tubing between breast shield and pump.
- Make sure the voltage of the device is compatible with the power source.
- Plug the power cord into the breast pump first and then into the wall socket.
- Do NOT use abrasive cleaners/detergents when cleaning breast pump or breast pump parts.
- Never put breast pump in water or in a sterilizer, as you can cause permanent damage to the breast pump.
- Do not attempt to remove the breast shield from your breast while pumping. Turn the breast pump off and break the seal between your breast and breast shield with your finger, then remove breast shield from your breast.
- If pumping is uncomfortable or causing pain, turn the unit off, break the seal between the breast and the breast shield with your finger and remove the breast shield from your breast.
- Do not store wet or damp parts as mold may develop.
- Inspect the tubing for condensation or milk after each use. Wash or replace the tubing immediately after use, if milk is observed in the tubing.
- If tubing becomes moldy, discontinue use and replace tubing.
- Do not use the Medela Symphony breast pump kit with a non-compatible breast pump.
- Do not use the breast pump kit for any other purpose than expressing breast milk.
- Separate and wash all parts that come in contact with breast milk immediately after use to avoid dry up of breast milk residue and prevent growth of bacteria.
- Portable and mobile radio frequency communications equipment can affect the Symphony breast pump.
- The Symphony breast pump needs special precautions regarding EMC (Electromagnetic compatibility) and needs to be installed and put into service according to the EMC information provided in these instructions for use.
- Wash hands thoroughly with soap and water before touching breast pump, kit and breasts and avoid touching the inside of containers or lids.
- Pressing shields too firmly onto breasts may affect milk flow.
- Only use drinking-quality tap or bottled water for cleaning.
- Unplug breast pump before cleaning.
- Contact your healthcare professional or lactation professional if you can only express only minimal or no milk or if expression is painful.
- Do not try and express with vacuum that is too high and uncomfortable (painful). The pain, along with potential breast and nipple trauma, may decrease milk output.
2. Product Description
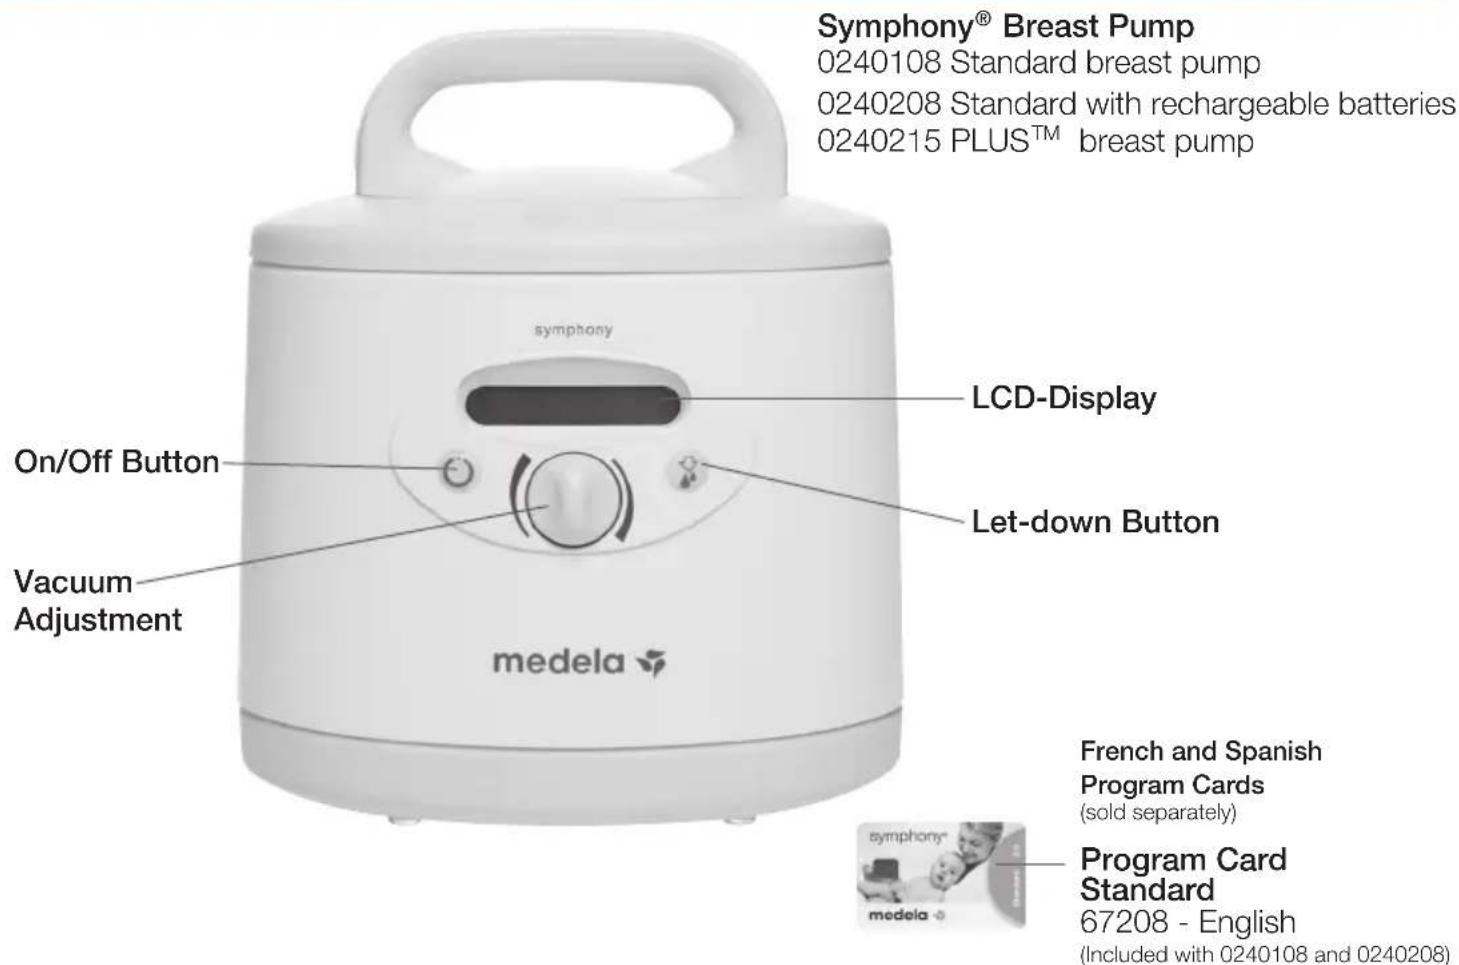
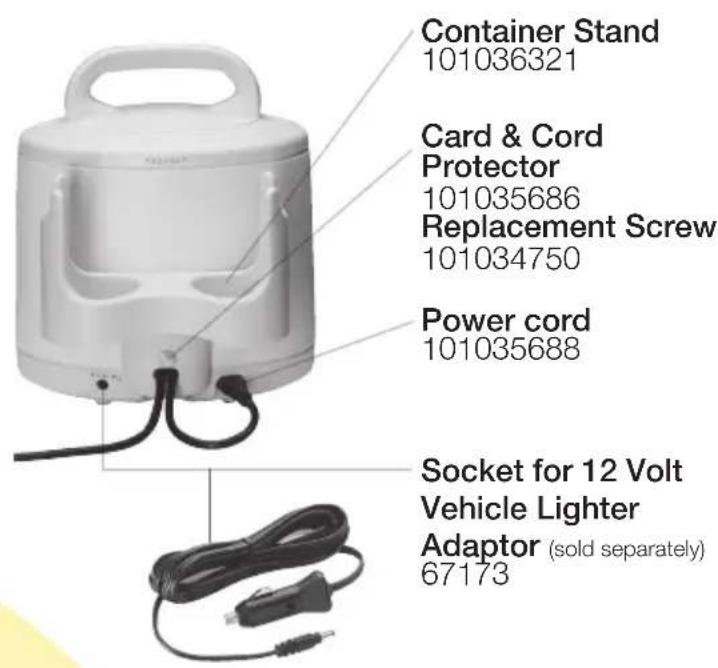
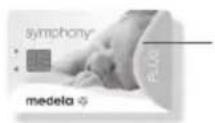
Program Card PLUS
67242 - English
(Included with 0240215)
2009190 - Spanish

Case
6007080
(sold separately)
2. Product Description (cont.)
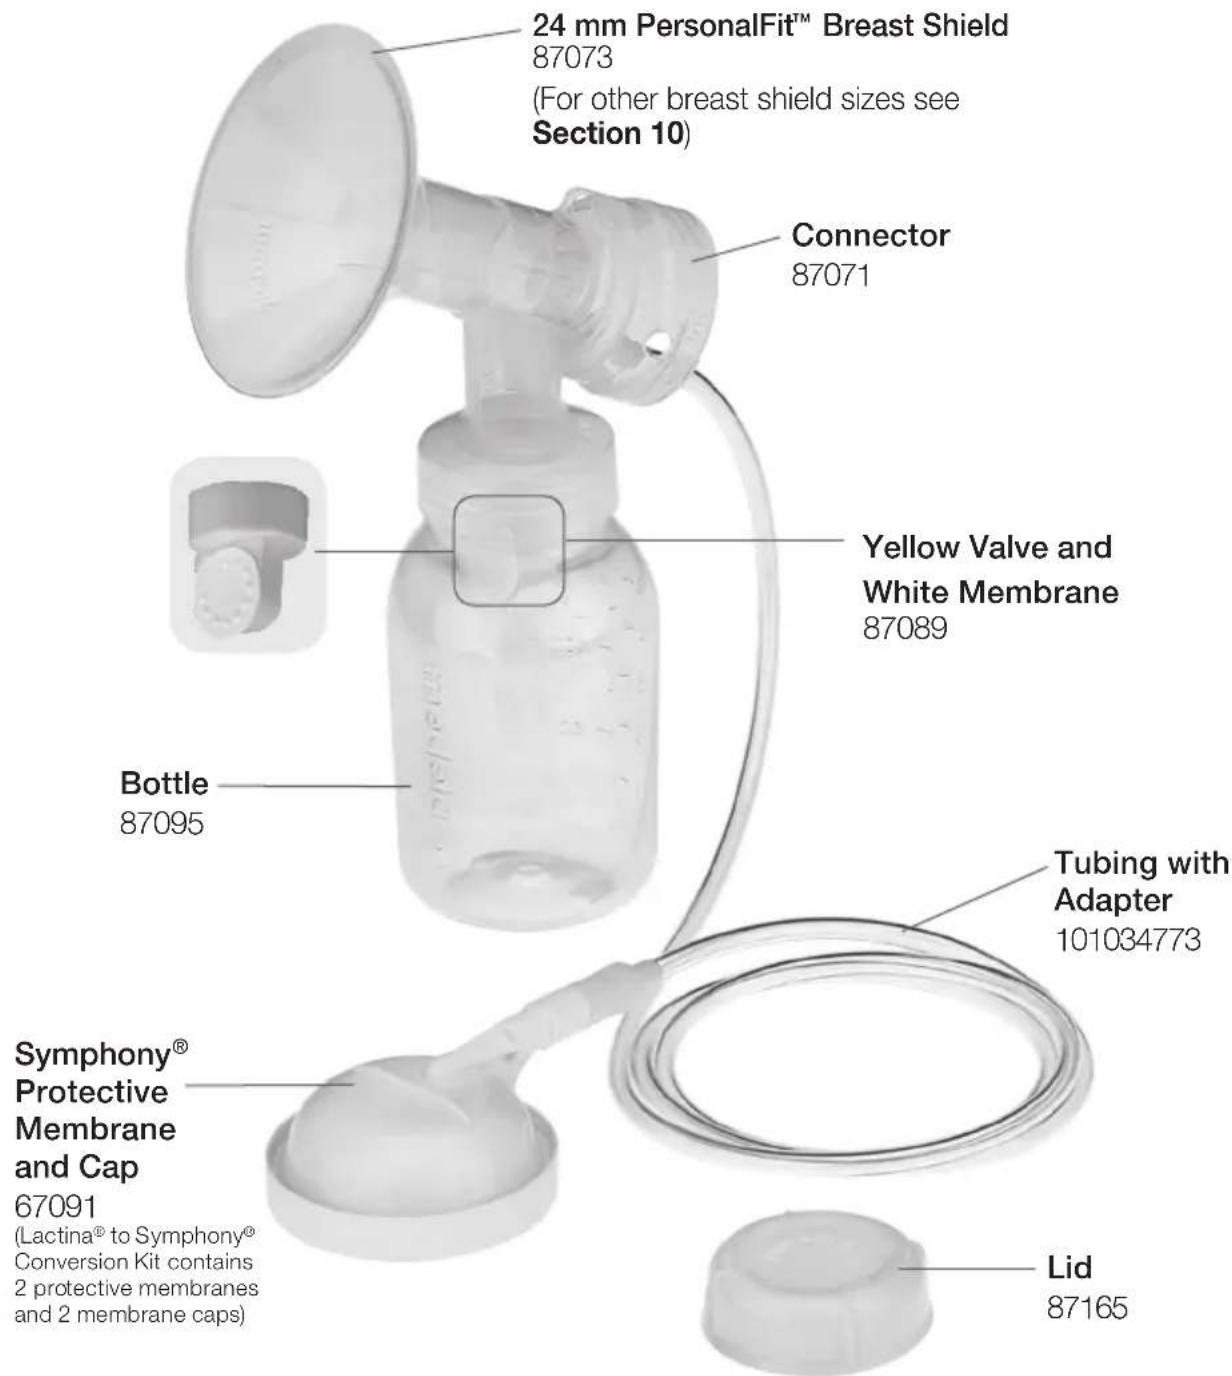

Breast pump kit sold separately
Replacement parts can be ordered by visiting shopmedela.com.
Authentic Medela Spare Parts are made with the quality materials and workmanship you expect and trust, only from Medela.
Non-Medela spare parts can vary significantly in terms of product design, materials, and workmanship; all of which may affect the performance of your
Medela breast pump.

AUTHENTIC medela spare parts
Quality & performance you can trust
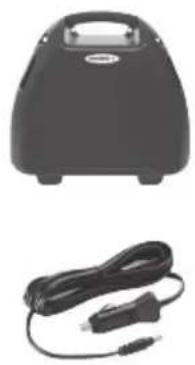
Optional Accessories
| Symphony® Hard Case 6007080 | |
| Symphony Trolley 6007092 | |
| Symphony Vehicle Lighter Adaptor 67173 | |
| Symphony Cooler Carrier - Black 37002 | |
| Breast Milk Transport Bag™ - NICU 67235-06 |
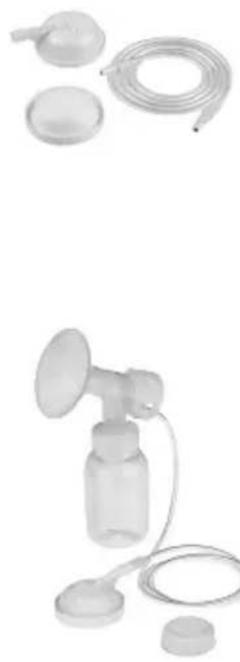
Breast Pump Kits
| Symphony Double Pumping Kit - Retail 67099-06 | |
| Symphony Double Pumping Kit - Retail - (Not Case Qty) 67099 | |
| Symphony & Lactina® Double Pumping Kit - Sterile 67316S | |
| Symphony Double Pumping Kit - Sterile 67399S | |
| Symphony Breast Milk Initiation Kit - Sterile 67350S | |
| Symphony Harmony™ Double Duet Breast Pump Kit - Sterile 67115S | 5S |
| Symphony Harmony Double Duet Breast Milk Initiation Kit - Sterile | 67355S |
| Symphony Lactina Breast Milk Initiation Kit - Sterile 67340S | |
| Symphony Single Pumping Kit - Sterile 67026S | |
| Symphony Harmony Duet Breast Pump Kit - Sterile 67114S | |
| Symphony Lactina Double Pumping Kit - Retail 67116-06 | |
| Symphony Lactina Double Pumping Kit - Retail - (Not Case Qty) | 67116 |
| Symphony & Lactina Carrier Kit | 67206-03 |
| Symphony & Lactina Carrier Kit - (Not Case Qty) | 67206 |
| Symphony to Lactina Conversion Kit | 67090 |
| Lactina to Symphony Conversion Kit | 67091 |
| Harmony to Symphony Conversion Kit | 67023 |
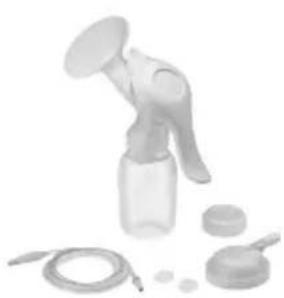
2. Product Description (cont.)
Replacement Parts
| Symphony® Diaphragm Kit 8007199 | |
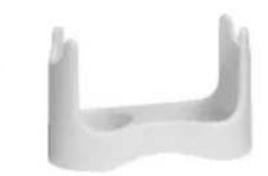
| Symphony Container Stand 101036321 | |
| Symphony Protective Membrane and Cap (Lactina® to Symphony Conversion Kit contains 2 protective membranes and 2 membrane caps) | 67091 |
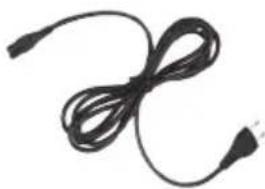
| Symphony Power Cord 101035688 | |
| Battery Cover 101035685 | |
| Slotted Screw 101034749 | |
| Rubber Foot 101035680 | |
| Fuse 101035687 | |
| Trolley Repair Kit 6007116 | |
| Strap for Symphony Carry Case 101034759 | |
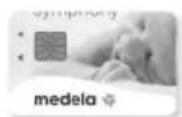
| Symphony Standard Program Card - English 67208 | |
| Symphony Standard Program Card - French 67209 | |
| Symphony Standard Program Card - Spanish 67210 | |
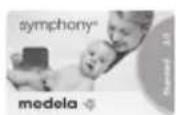
| Symphony PLUS® Program Card - English 67242 | |
| Symphony PLUS® Program Card - Spanish 2009190 | |
| Symphony Program Card/Power Cord Protector | 101035686 |
| Symphony Program Card/Power Cord Protector Replacement Screw | 101034750 |
| PersonalFit™ Connector | 87071 |
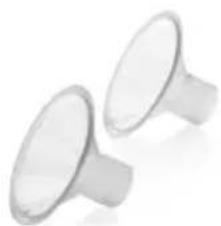
| PersonalFit 21mm Breast Shield | 87072 |
| PersonalFit 24mm Breast Shield | 87073 |
| PersonalFit 27mm Breast Shield | 87274 |
| PersonalFit 30mm Breast Shield | 87075 |
| PersonalFit 36mm Breast Shield | 87084 |
| Replacement White Membranes | 87088 |
| Replacement Yellow Valve Heads & White Membranes | 87089 |

Replacement Parts cont.
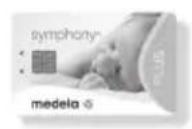
| Symphony PLUS® Sticker - English 2009092 | |
| Symphony Standard Quick Start Card (cable tie sold separately) 1907703 | |
| Symphony PLUS® Quick Start Card (cable tie sold separately) 1908524 | |
| Cable Tie for Quick Start Cards 101034776 | |
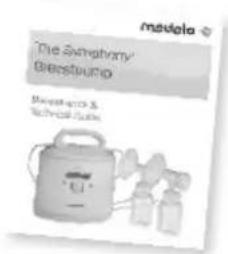
| Symphony Maintenance & Technical Guide 1907555 | |
3. Getting Started

Note
It's important for you to do the following before using Symphony® for the first time:
- For models that include a rechargeable battery, fully charge the battery 12 hours uninterrupted. For further battery care information see Section 8.
- Separate all parts
-
Clean - see instructions:
-
Wash - Section 5
- Sanitize - Section 6
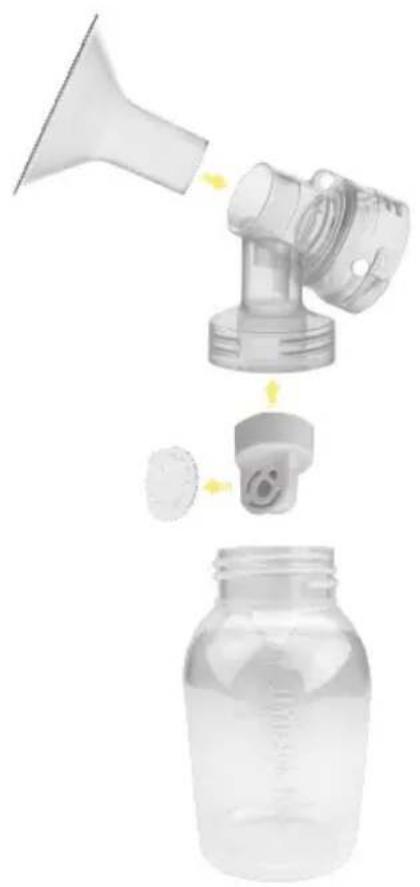
Breast shield assemblies come assembled. Separate all parts that will come into contact with the breast and breast milk before cleaning.
Parts to clean:
- Breast shields
- Breast milk bottles
Lids - Connectors
- Yellow Valve Heads
- White Membranes
4. Cleaning Overview
| Breast pump kit & bottles | Tubing | Symphony® Breast Pump and case | |
| Before 1st use | ✓ wash ✓ sanitize | ||
| After each use | ✓ wash | ||
| Once per day | ✓ sanitize | ||
| As needed | ✓ wash only if milk is in tubing or tubing is soiled | ✓ wipe with clean, damp cloth |
Detailed cleaning instructions on pages 14-19:
- Wash - page 14-15
- Sanitize - page 16-17
- Tubing & Breast Pump Care - pages 18-19

Note
Sterile kits are ready to use and do not require washing prior to first use.

Warning
Breast pump kits are a personal care item intended for use by a single user only and should not be shared between users.

Caution
Unplug breast pump before cleaning. Clean breast pump after every use and disinfect between users.
5. Wash - Before first use and after each use*
Supplies needed:
- Mild dish soap
- Clean dish cloth or soft brush
- Clean wash basin
- Drinking-quality water
Parts to wash:
- Breast shields
- Breast milk bottles
Lids - Connectors
Yellow Valve Heads - White Membranes

Note
*Sterile kits are ready to use and do not require washing prior to first use.

Warning
Breast pump kits are a personal care item intended for use by a single user only and should not be shared between users.
1
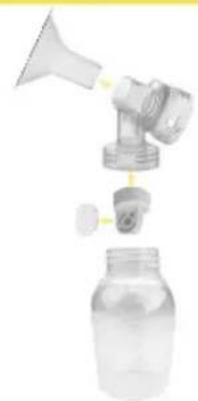
- Separate parts for washing

Caution
Separate and wash all parts that come in contact with breast and breast milk immediately after use to avoid dry up of breast milk residue and prevent growth of bacteria.

Note
- Wash breast pump kit parts after each use.
- Take care not to damage parts of the pump kit during cleaning.
- It is not necessary to wash tubing, membrane cap or protective membrane prior to first use.
- Only wash tubing if milk is present or tubing is soiled.
4
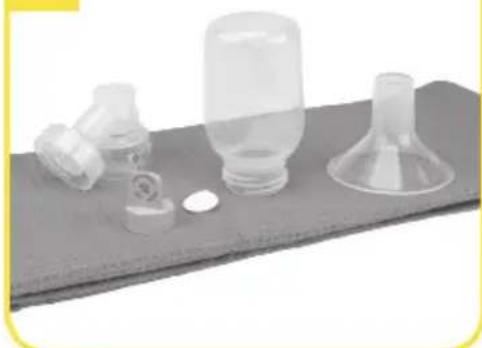
- Place parts on a clean surface and/or towel.
- Allow all parts to air dry.
- Store dry parts in a clean, cool place when not in use. Do NOT store wet or damp parts.

Note
Store the pump kit in a clean bag/container until next use.
Wash in sink with dedicated basin
23
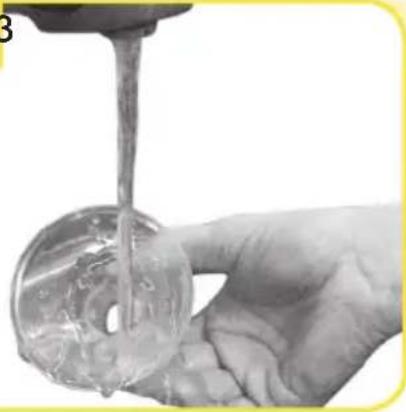
Rinse all separated parts that came in contact with breast and breast milk in cool water in order to remove breast milk residue.
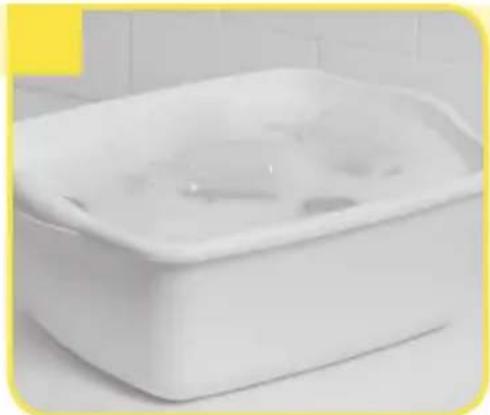
- Once rinsed, parts that have touched the breast or breast milk should be placed in a clean wash basin, dedicated to only cleaning these items. Do not place parts directly in the sink.
- Soak all separated parts in warm, soapy water for 5 minutes.
- Wash each part with a clean dish-cloth or soft brush.
- Rinse all separated parts with clear water.
Alternatively, wash in dishwasher
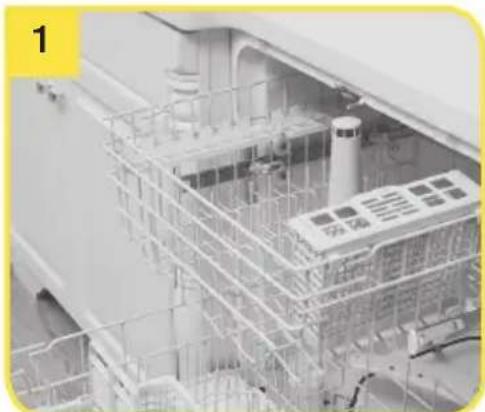
- Wash all separated parts on top rack of dishwasher.
- Allow all breast pump parts to air dry in a clean area.
- Store dry parts in a clean, cool place when not in use.

Note
If the individual components of the pump kit are cleaned in a dish washer, parts may be discolored by food pigments. This will not impact part function.
Caution
Only use drinking-quality tap or bottled water for cleaning.
You may also wash your kit parts by following the instructions on the Quick Clean™ Breast Milk Removal Soap bottle. (sold separately)
6. Sanitize - Before first use and once per day*
Supplies needed:
- Clean pot for boiling water
- Drinking-quality water
Tongs
Parts to sanitize:
- Breast shields
- Breast milk bottles
Lids - Connectors
Yellow Valve Heads - White Membranes

Note
Sanitize breast pump kit parts once daily.

Warning
Breast pump kits are a personal care item intended for use by a single user only and should not be shared between users.
Medela pump kit parts can be sanitized by boiling or using the Medela Quick Clean™ Micro-Steam™ bag. (sold separately).

Note
*Sterile kits are ready to use and do not require washing or sanitizing prior to first use.
1
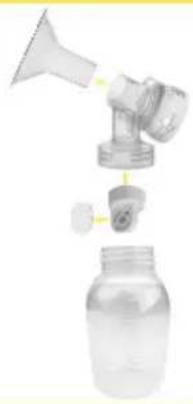
- Separate all parts that come in contact with breast milk.
4
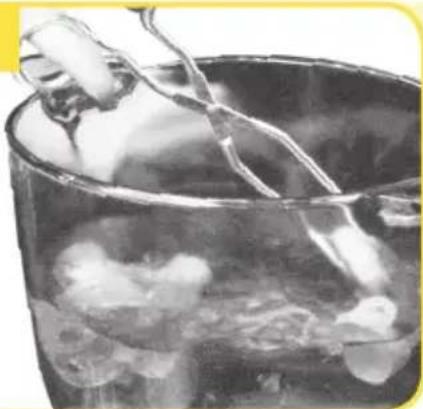
Allow water to cool and gently remove parts from water with tongs.

- Wash hands thoroughly.
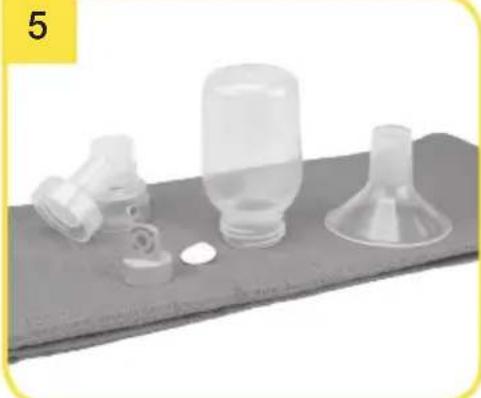
- Place parts on a clean surface and/or towel.
- Allow all parts to air dry.
- Store dry parts in a clean, cool place when not in use. Do NOT store wet or damp parts.
! Note
Store the pump kit in a clean bag/ container until next use.
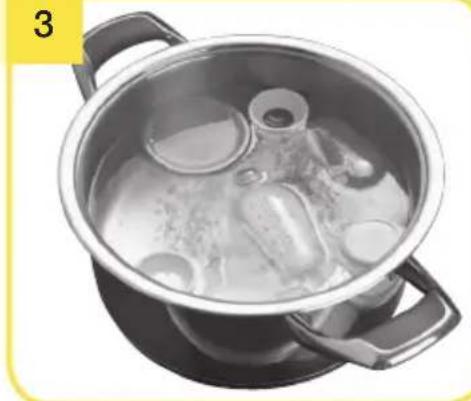
- Fill a pot with enough water to cover all parts.
- Bring water to a boil.
- Place parts in boiling water for 10 minutes.
! Note
If you notice a white residue on your parts after boiling, you may have a high mineral content in your water. Remove residue by wiping parts with a clean washcloth and air dry. We recommended that you boil parts with distilled water to prevent substantial mineral build-up over time which may compromise your parts.

If sanitizing your pump kit parts with the Quick Clean Micro-Steam bag, separate all parts that come in contact with your breast or breast milk and follow the instructions on the Quick Clean Micro-Steam bag.
7. Tubing & Breast Pump Care
Supplies needed:
- Mild dish soap
- Clean dish towel
- Clean sink or bowl
- Drinking quality water
- Damp (not wet cloth)
Parts needed:
- Tubing
- Symphony® Breast Pump
- Membrane cap
- Protective membrane
7A. Tubing care
- Inspect tubing after each pumping session.

Caution
- Do not store wet or damp parts as mold may develop.
- Inspect the tubing for condensation or milk after each use. Wash or replace the tubing immediately after use if soiled or milk is observed in the tubing.
If tubing becomes moldy, discontinue use and replace tubing. Replacement parts can be purchased at www.ShopMedela.com.

Note
If there is condensation in the tubing: Shake water droplets out of the tubing and hang it up to dry or let the pump run with tubing attached for 1-2 minutes or until dry.
3
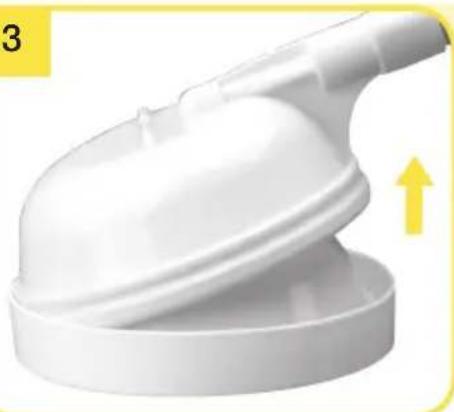
Remove, tubing, protective membrane, and membrane cap. Clean protective membrane and membrane cap by following steps in Section 5.

Note
- Tubing should be washed if milk is present or tubing is soiled.
- Cleaning tubing is not necessary if condensation present is from previous washings or atmospheric conditions.

Warning
Breast pump kits are a personal care item intended for use by a single user only and should not be shared between users.
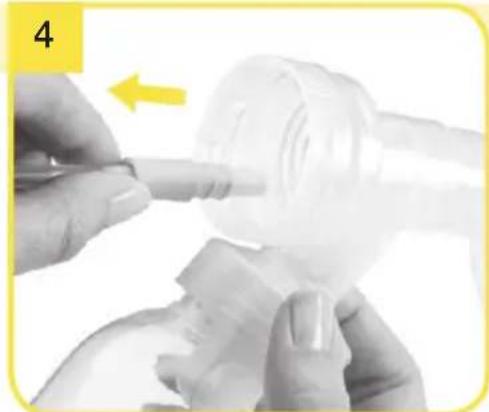
Remove tubing from breast shield.
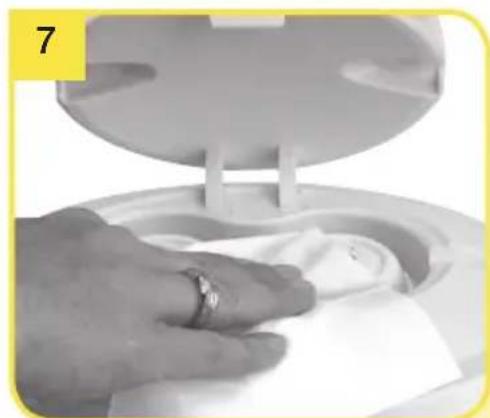
Use a damp (not wet) cloth to wipe the pump and membrane area.
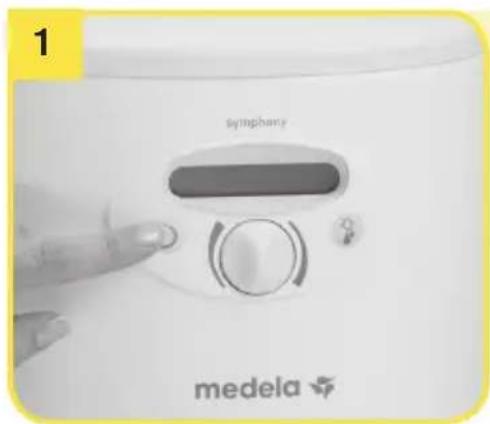
Turn off breast pump.
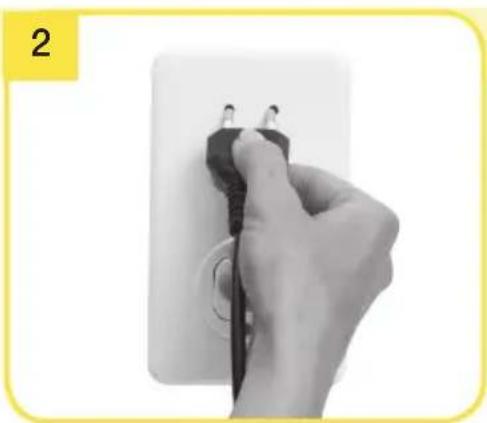
Unplug breast pump from power source.
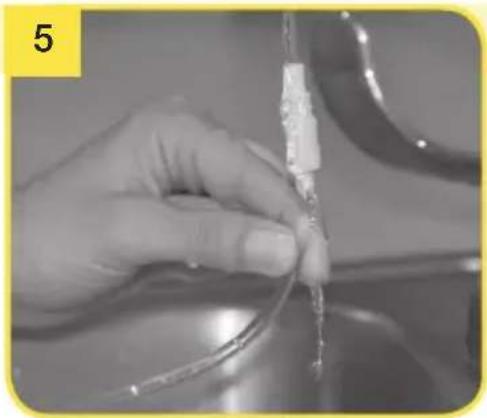
Rinse tubing in cool water to remove breast milk.
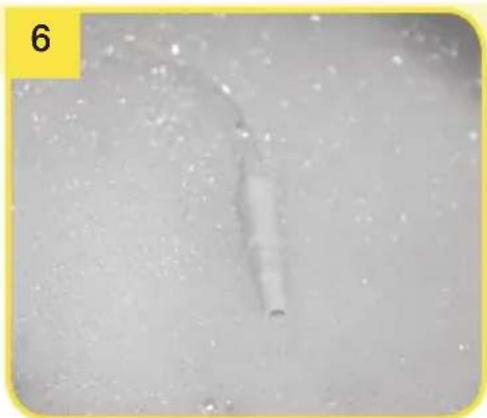
- Wash tubing in warm soapy water.
- Rinse tubing with clear water.
- Hang to air dry.
- Or shake out any drops of water from the tubing and let the pump run with tubing attached until dry.
7B. Cleaning and disinfecting the breast pump and pumping area
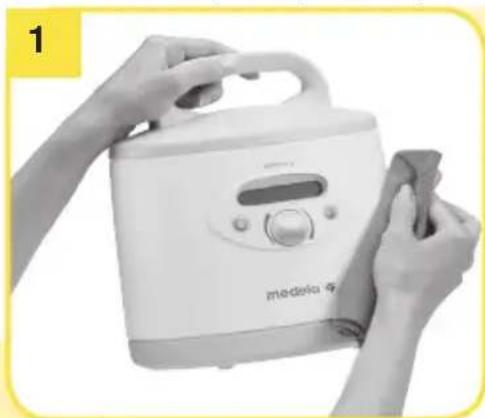
Wipe off breast pump and pumping area (ex: countertop or table) with a clean, damp (not wet) cloth. Water and mild dish soap or non-abrasive detergent may be used.
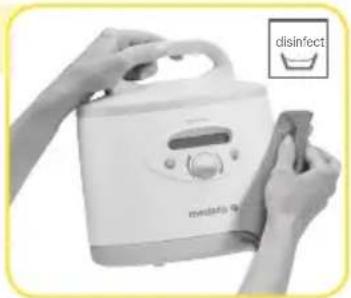
Wipe off the breast pump and pumping area with a clean, damp (not wet) cloth. Alcohol based disinfectant agent may be used to disinfect the breast pump and pumping area (ex: countertop or table); follow the disinfectant agent's instructions for use.
8. Powering Your Pump

Note
- Only use the pump with the appropriate program card (Standard, Preemie+or PLUS).
Optional for pump with battery:
Built-in battery must be charged for 12 hours on receipt of the device.
- The pump can be used during charging.
- If the pump is to remain unused, charge the battery every two months (for 12 hours each time).
- For optimum service life of the battery, charge the battery while breast pump is not in use and avoid fully discharging the battery on a regular basis.
Pumping time (fully-charged battery)
approx. 60 min.
Charging time (for full charge)
12 hours
8A. Card and Cord Protector
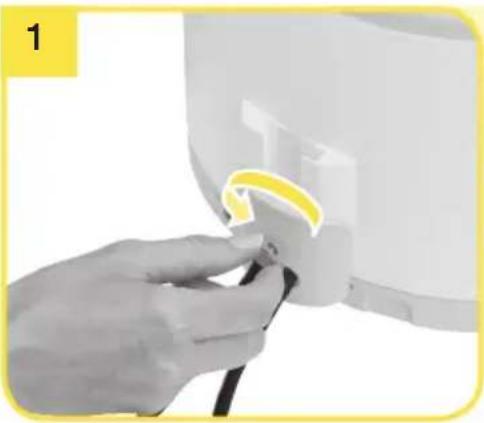
To remove, unscrew the card and cord protector and slide it out of the guide rail.
8B. Powering On
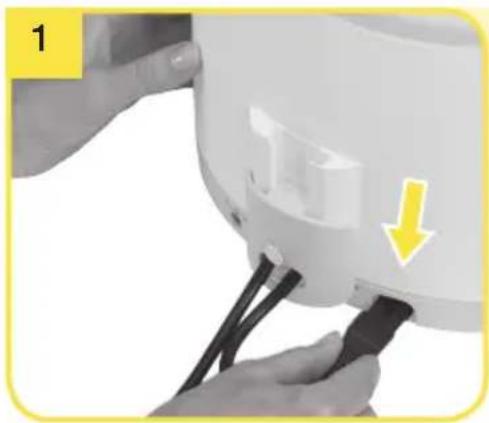
Insert the power cord into the power socket on the back of the pump.
23
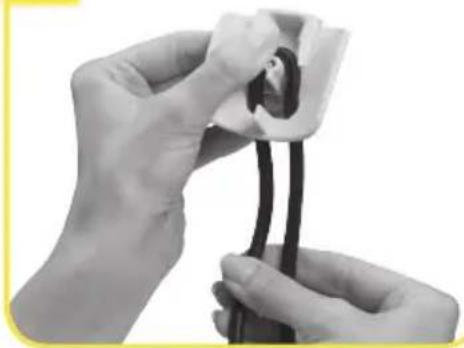
Insert the cord into the card and cord protector in a loop around the pin.
Make sure there is enough play to plug the cord in.
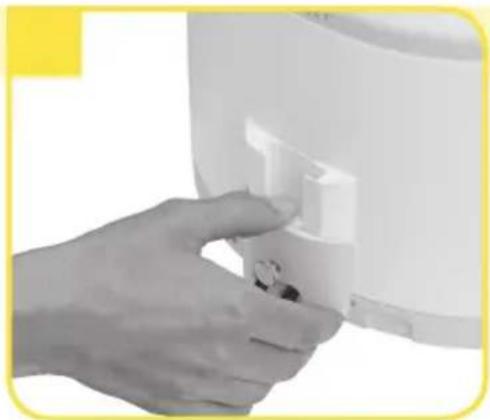
Push the card and cord protector over the guide rail on the back until it stops and tighten the screw.
8C. Changing the Program Card
2
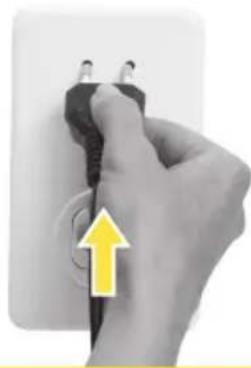
Plug the power cord into the mains socket.
1
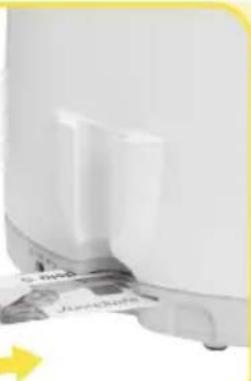
As soon as the card compartment is revealed, the card can be removed and replaced or changed.

Warning
- Only use the power cord that comes with the Symphony®.
- Make sure the voltage of the power cord is compatible with the power source.
8D. Traveling Outside the U.S.
While travelling internationally, we recommend purchasing a Universal Power Plug Adaptor (not included). Please consult with the country you are visiting to find out what type of adaptor will work best. Symphony power cord is two-pronged and does not require a grounded outlet.
For information about traveling with your breast pump and expressed breast milk, visit www.TSA.gov.
9. Assembly of Pump Kit

Tip
Carry out all the steps with care and assemble the pump kit correctly for optimum performance.
Parts Needed:
Tubing
- Symphony® pump
- Breast shields
- Breast milk bottles
Lids
- Connectors
Yellow Valve Heads
- White Membranes
- Membrane cap
- Protective membrane

Note
- Use Authentic Medela Spare Parts only. See Section 2 for details.
- Check pump kit components for wear or damage before use and replace if necessary.
- All components must be completely dry before use for proper performance and to prevent damage to the pump.


Caution
Wash hands thoroughly with soap and water before touching breast pump, kit and breasts and avoid touching the inside of containers or lids.
Push the yellow valve head head and white membrane onto the connector.
Position valve head laterally.
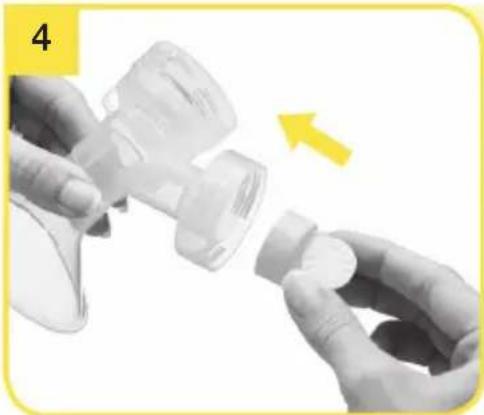
Place the protective membrane onto a flat surface and carefully push the membrane cap down until it engages.
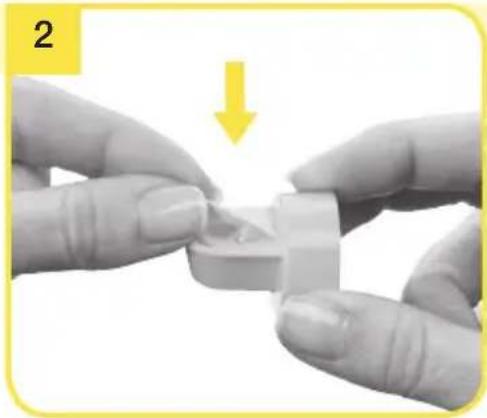
Carefully push the white membrane onto the yellow valve head until it engages and is laying flat.
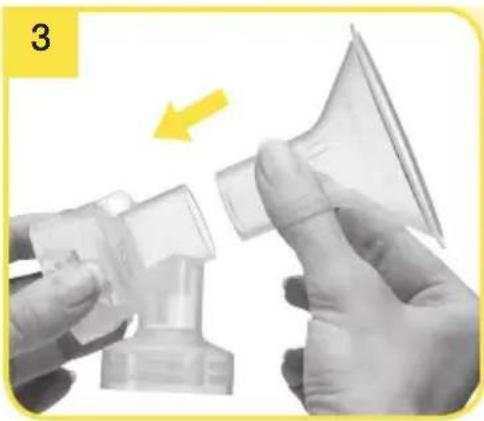
Push the breast shield onto the connector.
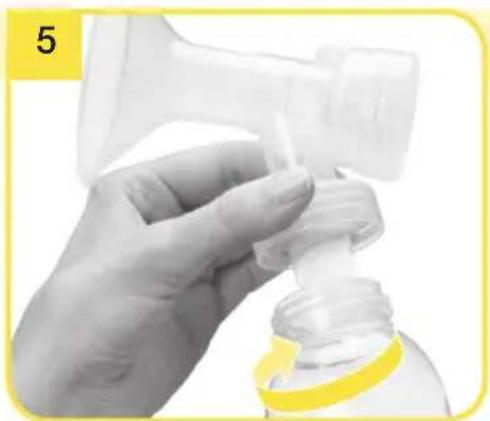
Screw the bottle into the connector. Insert the tubing into the corresponding opening in the connector.
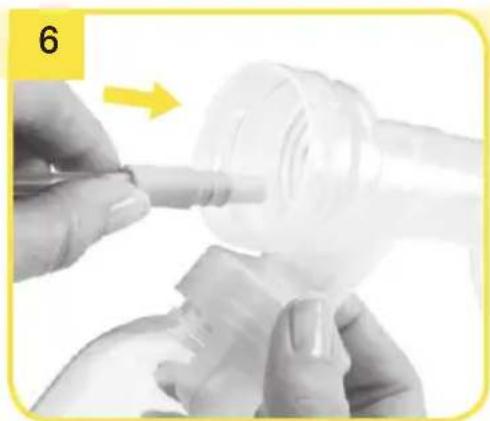
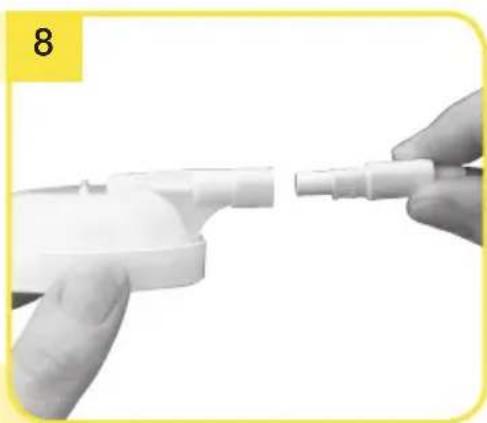
Insert the tubing adapter into the opening in the membrane cap.
9. Assembly of Pump Kit (cont.)
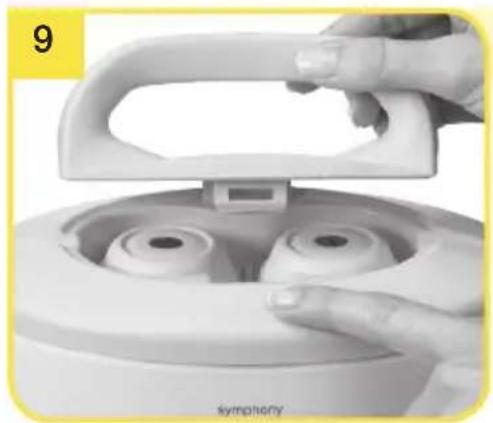
Open the lid of the breast pump.
Press the oval button on the top of the Symphony and lift the handle.
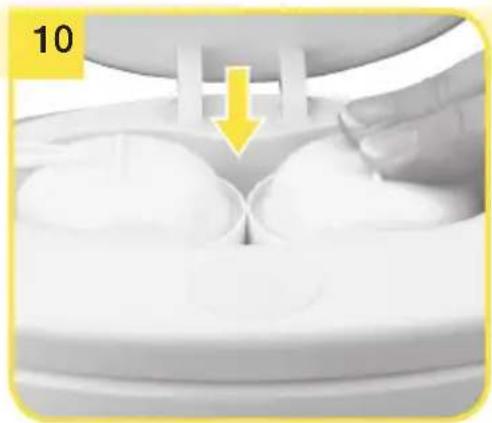
Position the membrane cap firmly on the breast pump membrane to form a seal. Center the tubing connector in the recess in the pump housing.
Make sure that the membrane cap engages and lies flush to the surface.
! Note
If single pumping seat only one membrane cap.
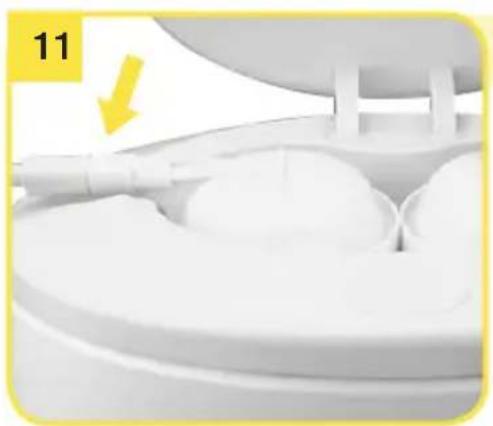
Center the tubing connector in the recess in the pump housing.
Make sure that the membrane cap engages and lies flush to the surface.
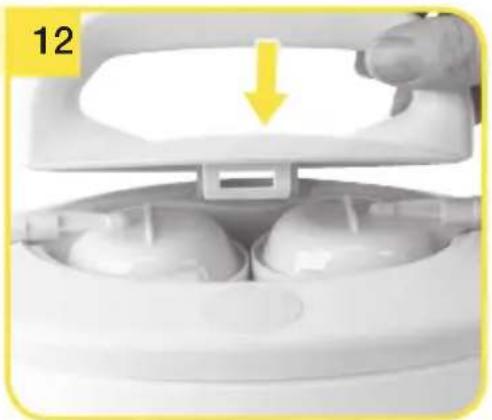
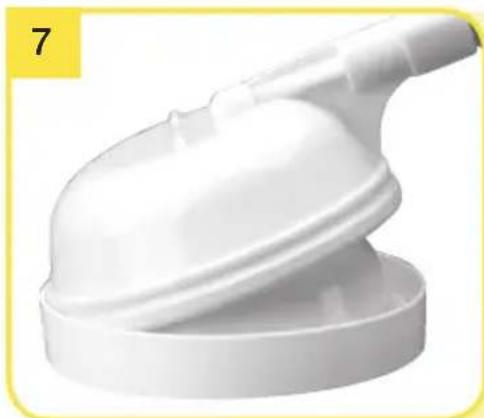
Close the lid.
! Note
- For step 12: Always close the lid when pumping. The lid keeps the membrane cap pushed down to prevent a loss of vacuum that could occur if the membrane cap came off.
10. Breast Shield Sizing
PersonalFit™ Sizing
1. Medela's PersonalFit™ sizing
Pumping should not hurt. For maximum comfort and pumping efficiency, Medela offers five breast shield sizes.


For additional information visit MedelaBreastshields.com.
2. Test your breast shield size
- Start with the 24mm that came with your pump, or the size determined by measuring.
- Center nipple and gently hold breast shield against your breast.
- Adjust for Maximum Comfort Vacuum™, to achieve optimum suction level.
- Refer to images while pumping in expression.
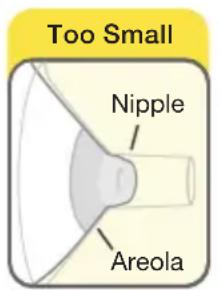
- Nipple rubs along side of tunnel
Try a larger size
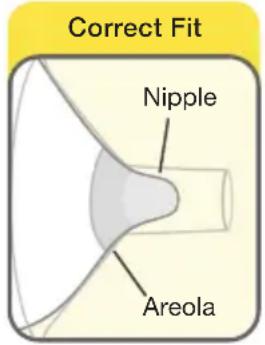
- Nipple is centered and moves freely
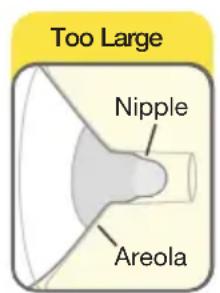
- Nipple and excessive areola are pulled into the tunnel
Try a smaller size
3. Should you try a new size?
- Does your nipple rub sides of tunnel, to the point of causing discomfort?
- Do you see excessive areola being pulled into tunnel?
- Do you see any redness?
- Is your nipple or areola turning white?
- Do you feel unexpressed milk after pumping?
If you answered "YES" to any of these questions, consider trying a new size by following the measuring instructions above.
If you are still unsure if you selected the correct size, see a lactation consultant, breastfeeding specialist, or visit MedelaBreastshields.com for assistance in choosing the right size breast shield.

Caution
- While some discomfort may be felt when first using a breast pump, using a breast pump should not cause pain. If you are unsure about breast shield sizing, please contact a healthcare professional or breastfeeding specialist who can help you get a proper fit.
11. Determine the Program Card
Medela offers two different program cards for the Symphony®: Standard and PLUS™. The program cards are utilized to generate the pump's suction patterns.
The Symphony Standard program card is designed to build and maintain milk production with 2-Phase Expression® technology. The 2-Phase Expression technology mimics the baby's natural sucking rhythm. Short, stimulation cycles in the stimulation phase are followed by longer ones in the expression phase. ^1,2,3
Symphony PLUS® program card contains two different programs: INITIATE and MAINTAIN; these researched-based programs were developed specifically to support mothers throughout their lactation journey: to initiate, build and maintain adequate milk production. Research has shown that Initiation Technology is beneficial for mothers of both preterm and term infants.
11,12,13,14
The INITIATE program supports pump-dependent mothers to successfully initiate milk production. The program mimics the irregular sucking pattern, rapid sucking and pausing, of a term infant in the first days of lactation.[11]
The MAINTAIN program is designed to optimize milk output after secretory activation (milk coming in) has occurred, in order to build and maintain an adequate milk production. The program has 2-Phase Expression technology that mimics a term infant's sucking pattern during established lactation. ^1,2,3
11A. Determining Program Card by LCD Screen
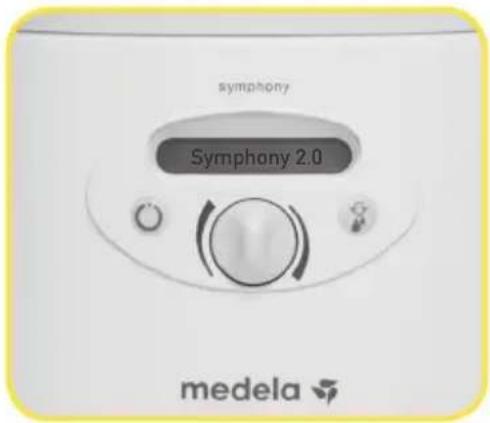
Standard Program Card: The LCD screen will display "Symphony 2.0" when plugged in.
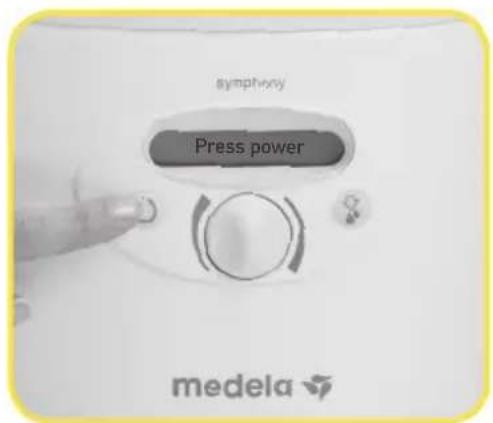
PLUS Program Card: The LCD screen will display "Press power" when plugged in.
11B. Determining Program Card by Card Image
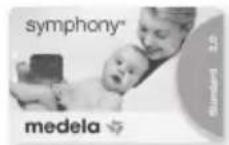
Standard Card
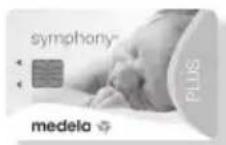
PLUS Card
12. Pumping

Note
- If the pump has been running for 30 minutes without any user action (e.g. adjustment of the vacuum), the Symphony will automatically switch off.

Tip
- Do not fill bottle above maximum volume indictor line.

12A. Before pumping

Caution
Wash hands thoroughly with soap and water before touching breast pump, kit, and breast. Avoid touching the inside of containers or lids.
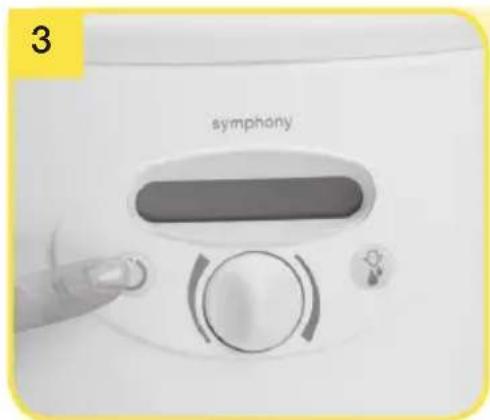
Switch on the breast pump with
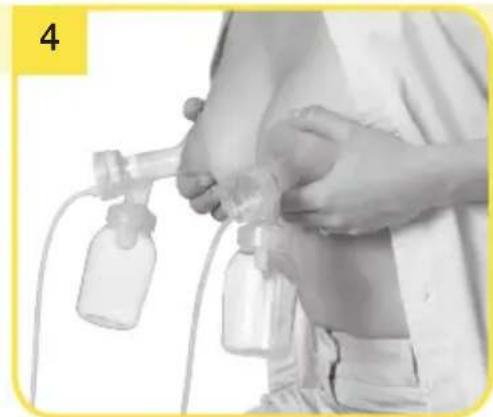
Place the second breast shield on the breast so that the nipple is properly centered in the tunnel.
12B. Preparing for pumping
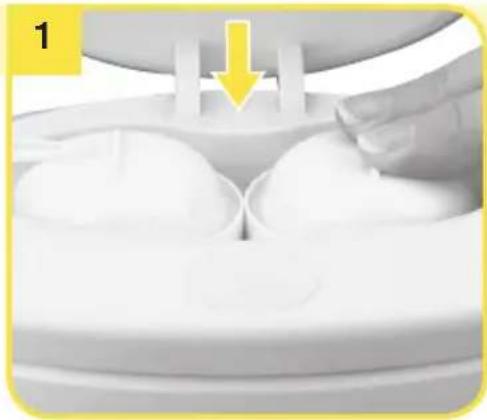
Push membrane caps into place on the pump. A"click" will be heard once properly seated. (Note: if single pumping, only seat one membrane cap.)
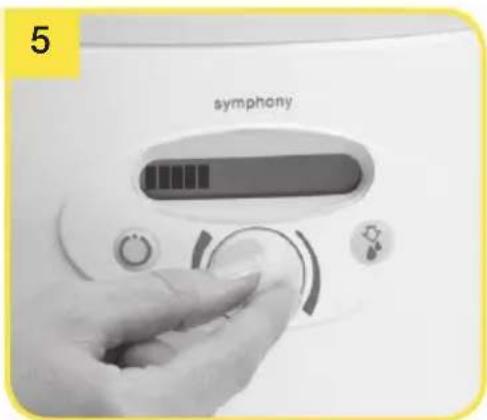
Set to Maximum Comfort VacuumTM:Rotate the vacuum to the right and increase until there is slight discomfort. Rotate to the left to reduce the vacuum slightly.
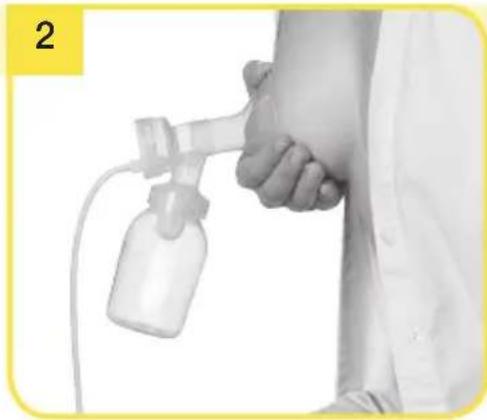
Place the breast shield on your breast so that your nipple is properly centered in the tunnel. Hold the breast shield onto your breast with your thumb and index finger. Support your breast with the palm of your hand.

Caution
Pressing shields too firmly onto breasts may affect milk flow.
12. Pumping (cont.)
12C. Finish Pumping
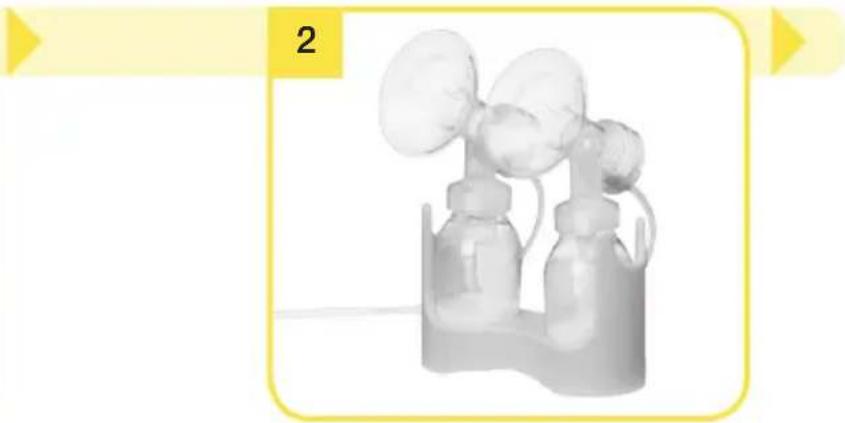
Switch off the breast pump with
Do not fill the bottle above maximum volume indicator line. Always disconnect the Symphony from the power source after expression.
Use the container stand to prevent the bottle from tipping over.

Close the bottle with a lid. Follow the instructions in Section 14 "Breast Milk Collection and Storage".
Caution - Contact your healthcare professional or lactation professional if you can express only minimal or no milk or if expression is painful. See Section 10 and 17 for more information. - Do not try and express with vacuum that is too high and uncomfortable (painful). The pain, along with potential breast and nipple trauma, may decrease milk output.
If you are experiencing low or no suction, refer to Troubleshooting Section 15.
13. Program Cards
13A. Symphony® Standard Program Card

Note
- Symphony Standard program card is designed to build and maintain milk production.
Symphony Standard has 2-Phase Expression technology, which mimics the baby's natural sucking rhythm.1,2,3 - Symphony Standard has two pumping patterns, stimulation and expression.
→ Stimulation Phase: Research-based fixed cycles per minute1,2,3
Expression Phase: supports milk production5,8,9
The combination of double pumping with 2-Phase Expression Technology, compared to single pumping, allows mothers the following benefits ^1-10 :
- Time saving - more milk in less time
- Maintenance of milk supply when not able to directly breastfeed
Milk with higher energy content (as measured by cream content) - comfort and efficiency

Tip
- Press the "Let down" button to revert from the expression phase to the stimulation phase if necessary. If milk has not begun to flow after two successive stimulation phases, take a break and try again in 15-30 minutes. Try breast massage (ask your lactation professional or health care practitioners) and then pump using the expression phase.
The program stores the last vacuum setting in the stimulation phase.
Operation: Standard program

Press On/Off Button to switch on the breast pump. The program will automatically start in Stimulation.
Stimulation phase will automatically change to the expression phase after two minutes.
If your milk starts to flow before the end of the two minutes, press "Let-down button to change to the expression phase
Make sure that the milk flows into the bottle properly.
Set to Maximum Comfort Vacuum in both stimulation and expression phases. Refer to Section 12.
13. Program Cards (cont.)
13B. Symphony PLUS® Program Card

Note
- Symphony PLUS program card helps initiate, build and maintain breast milk supply. ^11
- Symphony PLUS program card contains two pumping programs, INITIATE and MAINTAIN.
- INITIATE program: Program for the immediate postnatal period until initiation of milk production, then use MAINTAIN program. The INITIATE program runs uninterrupted for 15 minutes and comprises a sequence of various phases. "Program complete" appears in the display when the program is complete.
- MAINTAIN program: Use the MAINTAIN program after secretory activation (milk has come in):
Once the mother has pumped at least 20~mL in total, in each of her last three pumping sessions (from both breasts combined), OR
Beginning on day six, whichever comes first.
Operation: INITIATE program
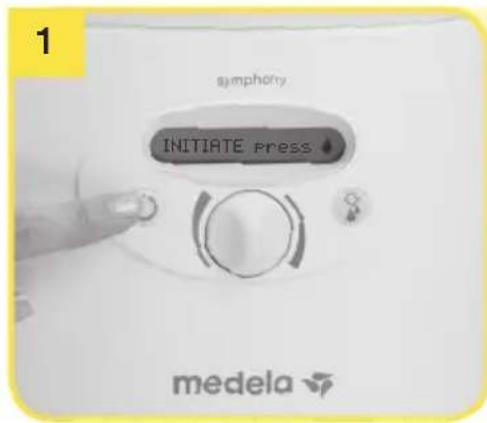
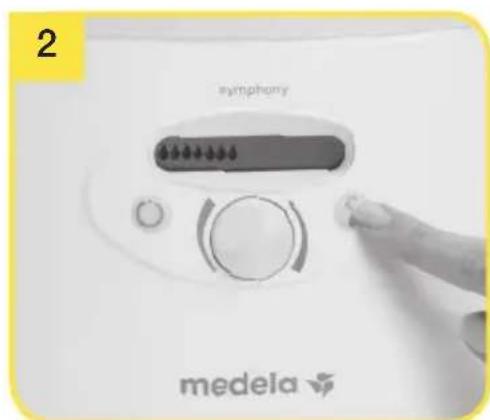
Press On/Off Button to switch on the breast pump. The display text shows "INITIATE press
Operation: MAINTAIN program
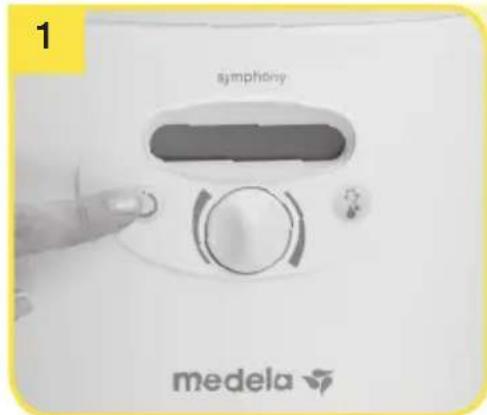
Press On/Off Button to switch on the breast pump. The MAINTAIN program will start automatically with stimulation phase after 10 seconds.
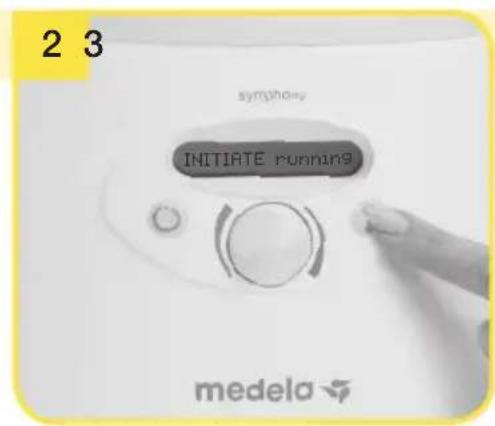
Press the "Let-down" button within 10 seconds. The display text will change to "INITIATE running".
It is important to complete the entire 15 minute INITIATE program.
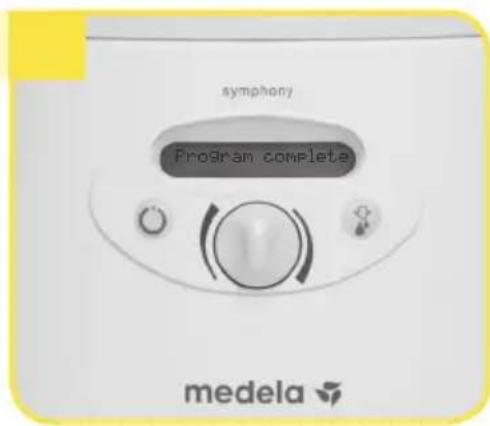
The INITIATE program runs automatically for 15 minutes with stimulation, expression and pauses phases. An auditory signal indicates the end of the program. The display shows "Program complete". The pump will automatically turn off.
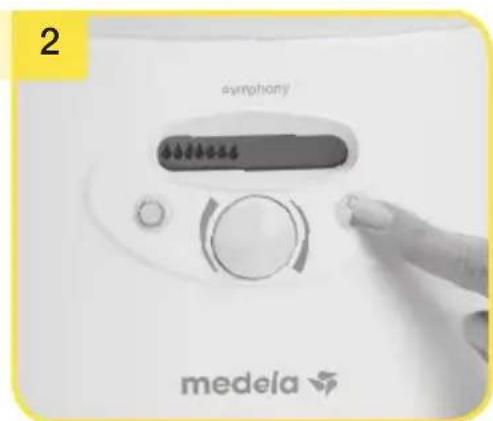
If your milk starts to flow before the end of the two minutes, press "Let-down button to change to the expression phase
Make sure that the milk flows into the bottle properly.
Set to Maximum Comfort Vacuum in both stimulation and expression phases. Refer to Section 12.
14. Breast Milk Collection and Storage
| Storage Guidelines for Freshly Expressed Breast Milk (For Healthy Term Babies) | |||
| Room Temperature 60°F to 77°F (16°C to 25°C) | Refrigerator 39°F (4°C) or colder | Freezer 0°F (-18°C) or colder | Breast Milk Thawed in the Refrigerator |
| Up to 4 hours is best *Up to 6 hours for milk expressed under very clean conditions | Up to 3 days is best *Up to 5 days for milk expressed under very clean conditions | Up to 6 months is best *Up to 9 months for milk expressed under very clean conditions | At room temperature: Up to 2 hours Refrigerator: Up to 24 hours DO NOT REFREEZE |
References: www.BreastmilkGuidelines.com
*Guidelines for expressing milk under very clean conditions:
- Before expressing milk, wash your hands with soap and water or use an alcohol-based hand sanitizer.
- Pump parts, bottles and pumping area must be clean.
- Breasts and nipples do not need to be washed before pumping. These guidelines for storage and thawing of breast milk are a recommendation. Contact your lactation consultant or breastfeeding specialist for further information.
15. Troubleshooting
| If the breast pump is not running | Check whether electrical outlet power/battery is available. Check that the device is switched on. Check whether program card is inserted correctly in the card compartment on the back of the breast pump. |
| If there is low or no suction | Assemble the pump set in accordance with the instructions in Section 9. Check whether all connections of the pump set and breast pump are secure. Pump in accordance with Section 12. Make sure that the breast shield forms a complete seal around the breast. The white membrane must lie flat against the yellow valve head. Check that the yellow valve head and white membrane are clean and not damaged. See Section 9 "Assembly of Pump Kit". • The ends of the tubing must be firmly connected to the connector and the opening in the membrane cap. • The protective membrane and membrane cap should be correctly assembled and the membrane cap must be firmly fitted to the breast pump membrane to form a seal. • The protective membrane must be intact. • Do not kink or pinch the tubing during expression. • All components must be completely dry. Yellow Valve Head and Membrane Check • Remove and separate yellow valve head from the white membrane. • Inspect the yellow valve head for chips or cracks. Inspect the membrane for holes or tears. If flawed or damaged, replace the yellow valve head and/or membrane prior to pumping. • Wash yellow valve head and membrane per Cleaning Instructions in Section 5. • Reassemble. Make sure the white membrane lays flat on the yellow valve head, and if it does not, replace the yellow valve head and/or membrane prior to pumping. Breast Shield and Breast Shield Connector Check • Inspect breast shield and breast shield connector to make sure there are no cracks and they securely attach to each other. • Make sure the breast shield forms a complete seal around the breast. Other Checks Inspect the following to check for damage and secure connections. • Secure tubing adapter to the breast shield connector. • Test vacuum. If suction is not improved, contact Medela Customer Service at 1-800-435-8316. Tubing Check • If damaged replace prior to pumping. • Inspect tubing for damage and secure connections. • Check that the ends of the tubing are firmly connected to the connector and the opening in the membrane cap. • If single pumping, make sure only one membrane cap is seated. Take care not to kink or pinch tubing. |
15. Troubleshooting (cont.)
| If there is an overflow 1. Place the pump set into the bottle holder. 2. Turn off the pump and unplug the power cord from the electrical outlet. 3. Use a damp (not wet) cloth to wipe the pump and membrane area. 4. If there is milk in the tubing: Remove tubing, protective membrane and membrane cap and clean in accordance with Section 7. Shake out any drops of water from the tubing and hang up the tubing to dry or let the pump run with tubing attached until dry. If there is condensation in the tubing: Let the pump run with tubing attached until dry. 5. When components are completely dry, reassemble breast pump and accessories set. |
| Condensation or Milk in Tubing | ·Turn off the pump and unplug from power source. ·Use a damp (not wet) cloth to wipe the pump. ·Refer to cleaning instructions "Tubing Cleaning" Section 7. ·If necessary, clean the pump kit. ·When components are completely dry, reassemble breast pump and kit. |
| No "Let-Down" or Breast milk Expression | ·Ensure your breast pump kit is assembled correctly and suction is available. ·Relax and take a 10-15 minute break, if let down is not achieved after 2 consecutive pumping sessions. ·Consult with a healthcare or lactation professional if expression does not occur. |
If you have not resolved the problem with your breast pump or your have further questions, please contact Medela Customer Service at 1-800-435-8316 or fill out the contact us form at www.medelabreastfeedingus.com.
16. Error Codes
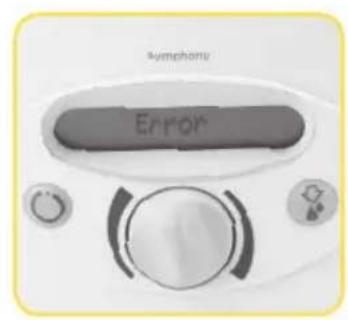
There are two ways in which a Symphony® breast pump will communicate that the unit has an issue. If the Symphony is experiencing an issue, an error code will be displayed on the LCD screen (see fig. 1). Previous problems are recorded in the Menu function under "Err:" To retrieve a history of errors, hold down the "On" button while turning the vacuum control knob, then continue to move the knob until you reach "Err" (see fig. 2). If you continue to experience issues with your Symphony, please contact Customer Service at 1-800-435-8316.
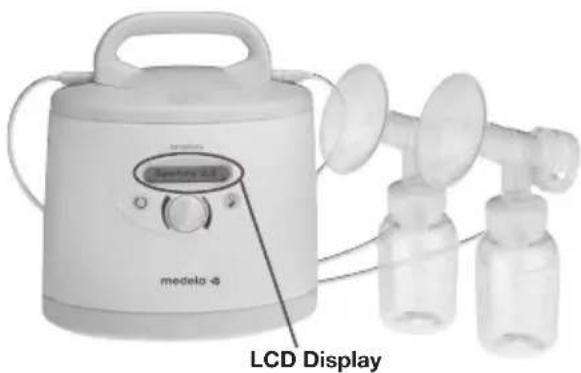
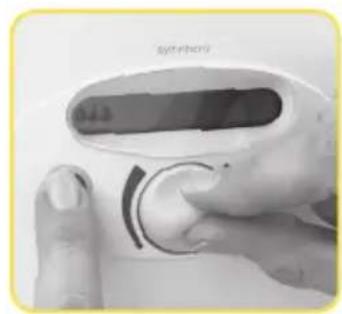
| LCD Display Messages The following describes LCD messages that may be displayed indicating an issue with the unit, the potential causes, and action steps to correct the issue. | ||
| Potential Issue Actions | ||
| Invalid card | Program card isn't a Symphony card Check if correct program card is used | |
| Program card is incorrectly inserted Check that card is positioned correctly | ||
| Program card is damaged and not working Replace program card | ||
| No card | Program card isn't inserted Insert program card | |
| Program card isn't completely inserted Push card in all the way | ||
| Battery low | Battery needs charging soon, will beep every 20 seconds (15 minutes of pumping time remaining from when the indication started) | Be sure power cord is plugged into back of pump |
| Battery flat | Battery is completely discharged Charge the batteries, but you may continue to pump | |
| Motor overload | Motor is drawing too much current | Send Symphony pump to Medela service center if this happens repeatedly* |
| Configuration | Software configuration | Replace program card if experiencing error (See Maintenance and Technical Guide 1907555) |
| Error | Potential fault in electronics of gear control | Send Symphony pump to Medela service center if this happens repeatedly* |
| Power fault | Potential fault in electronics of power supply | Send Symphony pump to Medela service center if this happens repeatedly* |
*All returns require prior authorization, including rental equipment. For the Return/Exchange/Repair form, please visit the Client Accounts page at www.medelabreastfeedingus.com – login, then click on Account Communication. Or, contact customer service at accountsupport@medela.com for the form. You will receive return instructions and a Return Authorization Number, which must be clearly written on the outside of the package in order to process your return.
17. Supplemental Information
Supplemental Information
Following are some common breastfeeding related conditions. If you experience any of these symptoms, contact a healthcare professional or lactation professional.
| Symptom Potential Causes | ||
| Engorgement Breasts | are hard and uncomfortable, possibly with reddened areas. | Milk not draining properly from breast.Milk can drain back into the tissue causing areas to swell and become tender. |
| Blocked/Plugged Ducts | Area of breast will look reddened and may be tender to touch. | Milk not being drained from a specific duct. The area becomes "clogged" up and milk is then prevented from flowing. |
| Mastitis It often follows | engorgement but can just occur suddenly. The initial symptoms are similar to flu - fatigue, headache and muscle aches, fever and localized breast tenderness.It can be in one or even both breasts and needs immediate treatment. | A bacterial infection in the breast tissue which is often accompanied by cracked nipples. |
| A Healthcare Professional or Lactation Professional can give you guidance in breastfeeding your baby and using a breast pump. Their guidance is valuable in terms of the lifetime of health benefits for both you and your baby.A listing of lactation professionals are available at www.medelalocator.com or calling 1-800-TELL-YOU (1-800-835-5968). | ||
18. Warranty
This product is warranted by Medela LLC to the original purchaser to be free from defects in material and workmanship for the period of three (3) years for pump mechanism (90 days for other parts and accessories) from the date of purchase. In the event of a defect or failure to conform to this warranty, Medela will, at Medela's option, repair or replace this product without charge for such replacement, on parts or labor, at the Medela office listed below. The Purchaser shall bear all responsibility and expense for returning this product to Medela, including risk of loss prior to receipt by Medela, and shipping, packing, and insurance costs.
Medela will have no obligation under this warranty to repair any malfunction or damage arising from any misuse, abuse, or alteration of this product. Without limiting the generality of the foregoing, bending, or dropping of this product or its components, visible cracking of the equipment housing will be presumed to be defects resulting from misuse or abuse. Accessories that are not expressly manufactured by Medela and subsequently attached to the equipment will immediately void this warranty.
ANY AND ALL IMPLIED WARRANTY ARE LIMITED TO THE DURATION OF THREE YEARS FROM DATE OF PURCHASE. SOME STATES DO NOT ALLOW LIMITATIONS ON HOW LONG AN IMPLIED WARRANTY LASTS, SO THE ABOVE LIMITATIONS MAY NOT APPLY TO YOU.
THE LIABILITY OF MEDELA FOR BREACH OF ANY WRITTEN OR IMPLIED WARRANTY IS LIMITED TO REPAIR OR REPLACEMENT OF THIS PRODUCT, AND MEDELA WILL HAVE NO LIABILITY UNDER ANY CIRCUMSTANCES FOR ANY INCIDENTAL, PUNITIVE OR CONSEQUENTIAL DAMAGES. SOME STATES DO NOT ALLOW THE EXCLUSION OR LIMITATION OF INCIDENTAL OR CONSEQUENTIAL DAMAGES, SO THE ABOVE LIMITATIONS OR EXCLUSIONS MAY NOT APPLY TO YOU.
THIS WARRANTY GIVES YOU SPECIFIC LEGAL RIGHTS AND YOU MAY ALSO HAVE OTHER RIGHTS WHICH VARY FROM STATE TO STATE.
If you wish to make a claim under this warranty, you must return this product to Medela at the address below. You must contact Medela Customer Service and obtain a Return to Merchant Authorization (RMA) Number and reference the number on your return package. The original Invoice Number or Purchase Order Number must be referenced on the RMA.
Customer Service toll free number: 1-800-435-8316.
Medela LLC - Returns, Door 4501
1101 Corporate Dr.
McHenry, IL 60050
ATTENTION:RETURNS
Medela Canada Inc.
4160 Sladerview Cres., Unit #8
Mississauga, ON
Canada L5L 0A1
Call first for authorization number. Returns not accepted without an authorization number.
19. Meaning of Symbols
The warning symbol identifies all instructions that are important for safety. Failure to observe these instructions can lead to injury or damage to the breast pump. When used in conjunction with the following words, the warning symbol stands for:
Symbols on the packaging

This symbol indicates that the material is part of a recovery/recycling process.

This symbol indicates a carton package.

This symbol indicates to keep the device away from sunlight.

This symbol indicates to handle the fragile device with care.

This symbol indicates the temperature limitation for operation, transport and storage.

This symbol indicates the humidity limitation for operation, transport and storage.

This symbol indicates the atmospheric pressure limitation for operation, transport and storage.

This symbol indicates to keep the device dry.

This symbol indicates that the packaging contains products intended to come in contact with food according to regulation 1935/2004.

This symbol indicates unique GSI Global Trade Item Numbers (GTIN)
Symbols on the device

This symbol indicates to follow instructions for use.

This symbol indicates the compliance with the essential requirements of the Council Directive 93/42/EEC of 14 June 1993 concerning medical devices.

This symbol indicates the manufacturer.

This symbol indicates the compliance with additional USA and Canada safety requirements for medical electrical equipment.

This symbol indicates a type BF applied part.

This symbol indicates manufacturer's serial number of the device.

This symbol indicates manufacturer's catalog number of the device.
IP21
This symbol indicates the protection against ingress of solid foreign objects and against harmful effects due to the ingress of water.

This symbol indicates the date of manufacture (four digits for the year and two digits for the month).

This symbol indicates that the Symphony is a class II device.

This symbol indicates fuse (to identify fuse boxes or their location).

This symbol indicates that the fuse box is safety tested.

This symbol indicates open the cover of the mains socket.

Let-down button

On/off button.

Vacuum adjustment knob.
Indication to press letdown button for PLUS program
Vacuum level indicator/Stimulation Phase - in Standard and PLUS Maintain Program

Vacuum level indicator/Expression Phase - in Standard program and PLUS MAINTAIN Program

Vacuum level indication/Expression Phase - PLUS INITIATE Program
20. EMC/Technical Description
The Symphony® breast pump is EMC-tested in conformity with the requirements of IEC 60601-1-2:2007 and 60601-1-2:2014 4th Edition according to clause 7 and 8.9.
The Symphony breast pump needs special precautions regarding EMC (Electromagnetic compatibility) and needs to be installed and put into service according to the EMC information provided in these instructions for use.
Wireless communications equipment such as wireless home network devices, mobile phones, cordless telephones and their base stations and walkie-talkies can affect the Symphony electric breast pump and should be kept at least a distance 30cm away from the equipment.
This device complies with part 15 of the FCC Rules. Operation is subject to the following two conditions: (1) This device may not cause harmful interference, and (2) this device must accept any interference received, including interference that may cause undesired operation. This equipment has been tested and found to comply with the limits for a Class B digital device, pursuant to part 15 of the FCC Rules. These limits are designed to provide reasonable protection against harmful interference in a residential installation. This equipment generates, uses and can radiate radio frequency energy and, if not installed and used in accordance with the instructions, may cause harmful interference to radio communications. However, there is no guarantee that interference will not occur in a particular installation. If this equipment does cause harmful interference to radio or television reception, which can be determined by turning the equipment off and on, the user is encouraged to try to correct the interference by one or more of the following measures: • Reorient or relocate the receiving antenna. • Increase the distance between the equipment and receiver. • Connect the equipment to a different outlet on the circuit than that to which the receiver is connected. • Consult the dealer or an experienced radio/TV technician for help.
Electromagnetic Compatibility (EMC, IEC 60601-1-2:2007 3rd Edition and IEC 60601-1-2:2014 4th Edition, Table 1)
Electromagnetic emissions
The Symphony electric breast pump is intended for use in the electromagnetic environment specified below. The customer or the user of the Symphony electric breast pump should assure that it is used in such an environment.
Emission tests Compliance Electromagnetic environment - guidance
RF emissions CISPR 11
Group 1
The Symphony electric breast pump uses RF energy only for its internal function. Therefore, its RF emissions are very low and are not likely to cause any interference in nearby electronic equipment.
RF emissions CISPR 11
Class B
Harmonic emissions IEC 61000-3-2
Class A
The Symphony electric breast pump is suitable for use in all establishments, including domestic establishments and those directly connected to the public low-voltage power supply network that supplies buildings used for domestic purposes.
Voltage fluctuations/ flicker emissions IEC 61000-3-3
Complies

Warning
Warning - The Symphony electric breast pump should not be used adjacent to or stacked with other equipment. If adjacent or stacked use is necessary, the Symphony electric breast pump should be observed to verify normal operation in the configuration in which it will be used.
Electromagnetic immunity
The Symphony electric breastpump is intended for use in the electromagnetic environment specified below. The customer or the user of the Symphony electric breastpump should assure that it is used in such an environment.
The Symphony breastpump has no Essential Performance but was tested for immunity to electromagnetic disturbances and passed using the following criteria:
- Change of operation mode except reset into standby mode (pump is switched off)
- Change of pressure value more than 20mmHg (the specified tolerance), when the EUT is operated as intended
- Change in programmable parameters, including mode and suction level
-
Error codes, including the following:
-
Error indicated; no further restriction in device performance
- Error indicated, the pump turns off but is restartable
- No error indicated; the pump turns off and is not restartable
Permanent hardware failure is induced in the EUT
| Immunity test | IEC 60601 test level | Compliance level | Electromagnetic environment – guidance |
| Electrostatic discharge (ESD) IEC 61000-4-2 | ± 6 kV contact ± 8 kV air | ± 6 kV contact ± 8 kV air | Floors should be wood, concrete or ceramic tile. If floors are covered with synthetic material, the relative humidity should be at least 30%. |
| Electrical fast transient / burst IEC 61000-4-4 | ± 2 kV for power supply lines ± 1 kV for input / output lines | ± 2 kV for power supply lines ± 1 kV for input/ output lines | Mains Power quality should be that of a typical commercial or hospital environment. |
| Surge IEC 61000-4-5 | ± 1 kV line(s) to line(s) ± 2 kV line(s) to earth | ± 1 kV differential mode ± 2 kV common mode | Mains Power quality should be that of a typical commercial or hospital environment. |
20. EMC / Technical Description (cont.)
| Voltage dips, short interruptions and voltage variations on power supply input lines IEC 61000-4-11 | <5 % UT(>95 % dip in UT) for 0,5 cycle40 % UT(60 % dip in UT) for 5 cycles70 % UT(30 % dip in UT) for 25 cycles<5 % UT(>95 % dip in UT) for 5 s | <5 % UT(>95 % dip in UT) for 0,5 cycle40 % UT(60 % dip in UT) for 5 cycles70 % UT(30 % dip in UT) for 25 cycles<5 % UT(>95 % dip in UT) for 5 s | Mains Power quality should be that of a typical commercial or hospital environment. If the user of the Symphony electric breast pump requires continued operation during power interruptions, it is recommended that the Symphony electric breast pump is powered from an uninterruptible power supply or a battery. |
| Power frequency (50/60 Hz)magnetic field IEC 61000-4-8 | 3 A/m 3 A/m | Power frequency magnetic fields should be at levels characteristic of a typical location in a typical commercial or hospital environment. | |
| NOTE UTis the a.c. voltage prior to application of the test level. | |||
Electromagnetic Compatibility (EMC, IEC 60601-1-2:2007, Table 4)
Electromagnetic immunity
The Symphony electric breast pump is intended for use in the electromagnetic environment specified below. The customer or the user of the Symphony electric breast pump should assure that it is used in such an environment.
| Immunity test | IEC 60601 test level | Compliance level | Electromagnetic environment – guidance |
| Conducted RF IEC 61000-4-6 Radiated RF IEC 61000-4-3 | 3 Vrms 150 kHz to 80 MHz 3 V/m 80 MHz to 2,5 GHz | 3 Vrms 3 V/m | Portable and mobile RF communications equipment should be used no closer to any part of the Symphony electric breast pump, including cables, than the recommended separation distance calculated from the equation applicable to the frequency of the transmitter. Recommended separation distance d = 0,35√P d = 1,2√P 80 MHz to 800 MHz d = 2,3√P 800 MHz to 2,5 GHz where P is the maximum output power rating of the transmitter in watts (W) according to the transmitter manufacturer and d is the recommended separation distance in meters (m). Field strengths from fixed RF transmitters, as determined by an electromagnetic site survey a, should be less than the compliance level in each frequency range. b Interference may occur in the vicinity of equipment marked with the following symbol: (▲) |
20. EMC / Technical Description (cont.)
NOTE 1 At 80 MHz and 800 MHz, the higher frequency range applies.
NOTE 2 These guidelines may not apply in all situations. Electromagnetic propagation is affected by absorption and reflection from structures, objects and people.
a Field strengths from fixed transmitters, such as base stations for radio (cellular/cordless) telephones and land mobile radios, amateur radio, AM and FM radio broadcast and TV broadcast cannot be predicted theoretically with accuracy. To assess the electromagnetic environment due to fixed RF transmitters, an electromagnetic site survey should be considered. If the measured field strength in the location in which the Symphony electric breast pump is used exceeds the applicable RF compliance level above, the Symphony electric breast pump should be observed to verify normal operation. If abnormal performance is observed, additional measures may be necessary, such as re-orienting or relocating the Symphony electric breast pump.
b Over the frequency range 150 kHz to 80 MHz, field strengths should be less than 10V / m
Electromagnetic Compatibility (EMC, IEC 60601-1-2:2007, Table 6)
Recommended separation distances between portable and mobile RF communications equipment and the electric breast pump Symphony
The Symphony electric breast pump is intended for use in an electromagnetic environment in which radiated RF disturbances are controlled. The customer or the user of the Symphony electric breast pump can help prevent electromagnetic interference by maintaining a minimum distance between portable and mobile RF communications equipment (transmitters) and the Symphony electric breast pump as recommended below, according to the maximum output power of the communications equipment.
| Rated maximum output power of transmitter W | Separation distance according to frequency of transmitter M | ||
| 150 kHz to 80 MHz d = 0,35√P | 80 MHz to 800 MHz d = 1,2√P | 800 MHz to 2.5 GHz d = 2,3√P | |
| 0,01 0,04 0,12 0,23 | |||
| 0,1 0,11 0,37 0,74 | |||
| 1 0,35 1,2 2,3 | |||
| 10 1,11 3,7 7,4 | |||
| 100 | 3,50 | 12 | 23 |
For transmitters rated at a maximum output power not listed above, the recommended separation distance d in metres (m) can be estimated using the equation applicable to the frequency of the transmitter, where P is the maximum output power rating of the transmitter in watts (W) according to the transmitter manufacturer.
NOTE 1 At 80 MHz and 800 MHz, the separation distance for the higher frequency range applies.
NOTE 2 These guidelines may not apply in all situations. Electromagnetic propagation is affected by absorption and reflection from structures, objects and people.
21. Technical Specifications

vacuum (approx.)
-50…-250mmHg
-7…-33kPa
45...120cpm
100-240V~
50/60Hz
0.5A
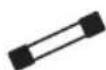
TO.8A,250V
(slow blow)
5 x 20 mm L = Low Breaking Capacity

12V
T 2.5 A
(slow blow)

2x6V,1200mAh
Pb (lead acid)
Yuasa NP 1.2-6
Car adapter
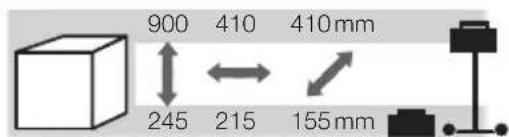
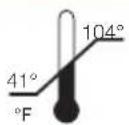
Operation
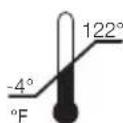
Transport/Storage
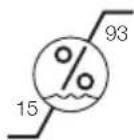
Operation
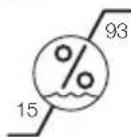
Transport/Storage
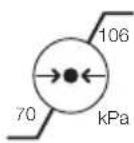
Operation/Transport/Storage
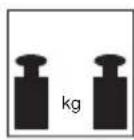
3.5kg
2.9kg
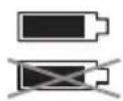
22. Disposal
Disposal
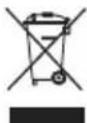
The unit is made of various metal and plastics. Before disposal, the device is to be rendered unusable and it must not be disposed of as unsorted municipal waste in accordance with local regulations. Use your local return and collection system for waste electrical and electronic equipment (incl. batteries). Improper disposal may have harmful effects on the environment and on public health.
(1) Wolff, P.H. The serial organization of sucking in the young infant. Pediatrics 42, 943-956 (1968).
(2) Woolridge, M.W. The 'anatomy' of infant sucking. Midwifery 2, 164-171 (1986).
(3) Kent, J.C., Ramsay, D.T., Doherty, D., Larsson, M., & Hartmann, P.E. Response of breasts to different stimulation patterns of an electric breast pump. J Hum Lact 19, 179-186 (2003).
(4) Meier, P.P. et al. A comparison of the efficiency, efficacy, comfort, and convenience of two hospital-grade electric breast pumps for mothers of very low birthweight infants. Breastfeed Med 3, 141-150 (2008).
(5) Kent, J.C. et al. Importance of vacuum for breastmilk expression. Breastfeed Med 3, 11-19 (2008).
(6) Prime, D.K., Kent, J.C., Hepworth, A.R., Trengove, N.J., & Hartmann, P.E. Dynamics of Milk Removal During Simultaneous Breast Expression in Women. Breastfeed Med 7, 100-106 (2011)
(7) Mitoulas, L., Lai, C.T., Gurrin, L.C., Larsson, M., & Hartmann, P.E. Effect of vacuum profile on breast milk expression using an electric breast pump. J Hum Lact 18, 353-360 (2002).
(8) Burton, P., Kennedy, K., Ahluwalia, JS., Nicholl, R., Lucas, A., and Fewtrell, M.S. Randomized Trial Comparing the Effectiveness of 2 Electric Breast Pumps in the NICU. J Hum Lact published online 17 June 2013
(9) Kent, J.C. et al. Volume and frequency of breastfeeds and fat content of breastmilk throughout the day. Pediatrics 117, e387-e395 (2006).
(10) Prime, D.K., Garbin, C.P., Hartmann, P.E., & Kent, J.C. Simultaneous Breast Expression in Breastfeeding Women Is More Efficacious than Sequential Breast Expression. Breastfeed Med 7, 442-447 (2012).
(11) Meier PP, Engstrom JL, Janes JE, Jegier BJ, Loera F. Breast pump suction patterns that mimic the human infant during breastfeeding: greater milk output in less time spent pumping for breast pump-dependent mothers with premature infants. Journal of Perinatology 2012;32 (2):103-10
(12) Lawrence RA, Lawrence RM. Breastfeeding: A guide for the medical profession, 7th Edition. Elsevier Health Sciences 2010
(13) Cregan MD, de Mello TR, Kershaw D, McDougall K, Hartmann PE. Initiation of lactation in women after preterm delivery. Acta Obstetricia et Gynecologica Scandinavica 2002; 81: 870-77
(14) Post EDM, Stam, G. More milk with irregular breastpump suction (Abstract A14), Early Human Development 2013; 89 (S1): S79
Índice

- Important Safeguards
- IMPORTANT
- Intended Use
- Product Description
- Important Safeguards (cont.)
- READ ALL INSTRUCTIONS BEFORE USING THIS PRODUCT.
- WARNING: To avoid fire, electrocution, or serious burns:
- WARNING: To avoid health risk and reduce the risk of injury:
- CAUTION: Can lead to minor injury:
- Product Description
- Product Description (cont.)
- Getting Started
- Note
- Parts to clean:
- Cleaning Overview
- Warning
- Caution
- Wash - Before first use and after each use*
- Supplies needed:
- Parts to wash:
- 1
- Wash in sink with dedicated basin
- Alternatively, wash in dishwasher
- Sanitize - Before first use and once per day*
- Parts to sanitize:
- ! Note
- Tubing & Breast Pump Care
- Parts needed:
- 7A. Tubing care
- 7B. Cleaning and disinfecting the breast pump and pumping area
- Powering Your Pump
- Optional for pump with battery:
- 8A. Card and Cord Protector
- 8B. Powering On
- 23
- 8C. Changing the Program Card
- 2
- 8D. Traveling Outside the U.S.
- Assembly of Pump Kit
- Tip
- Assembly of Pump Kit (cont.)
- Breast Shield Sizing
- PersonalFit™ Sizing
- Medela's PersonalFit™ sizing
- Test your breast shield size
- Should you try a new size?
- Determine the Program Card
- 11A. Determining Program Card by LCD Screen
- 11B. Determining Program Card by Card Image
- Pumping
- 12B. Preparing for pumping
- Pumping (cont.)
- 12C. Finish Pumping
- Switch off the breast pump with
- Program Cards
- 13A. Symphony® Standard Program Card
- Operation: Standard program
- Program Cards (cont.)
- 13B. Symphony PLUS® Program Card
- Operation: INITIATE program
- Operation: MAINTAIN program
- Breast Milk Collection and Storage
- Troubleshooting
- Troubleshooting (cont.)
- Error Codes
- Supplemental Information
- Supplemental Information
- Warranty
- Meaning of Symbols
- Symbols on the packaging
- Symbols on the device
- EMC/Technical Description
- Electromagnetic emissions
- Emission tests Compliance Electromagnetic environment - guidance
- Electromagnetic immunity
- EMC / Technical Description (cont.)
- Recommended separation distances between portable and mobile RF communications equipment and the electric breast pump Symphony
- Technical Specifications
- Disposal
- Disposal
- Índice
Brand : MEDELA
Model : Symphony
Category : Breast pump