Gaia - Weather Station TFA - Free user manual and instructions
Find the device manual for free Gaia TFA in PDF.
Download the instructions for your Weather Station in PDF format for free! Find your manual Gaia - TFA and take your electronic device back in hand. On this page are published all the documents necessary for the use of your device. Gaia by TFA.
USER MANUAL Gaia TFA
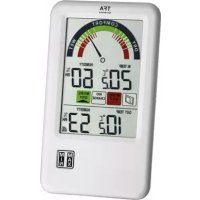
GAIA – Wireless weather station
This new wireless weather station consists on a base station with indoor sensors for room temperature, humidity and atmospheric pres- sure and an outdoor sensor for measuring outdoor temperature and humidity. So you get useful information about climate and weather in and around your house. This is fun and makes you curious to know more. Please read this instruction manual thoroughly to fully understand the correct operation of your weather station and benefit from its unique features.
- Outdoor temperature and humidity wireless (433 MHz), long- distance range up to 100 m (free field)
- Indoor temperature and humidity
Weather forecast with symbols and tendency of atmospheric pressure
- Absolute and relative atmospheric pressure
- Programmable alarm functions for certain weather conditions, like temperature alarm, storm warning
- Maximum and minimum values with time and date of recording
- Radio controlled clock with alarm, snooze-function and date
- For wall mounting or table standing
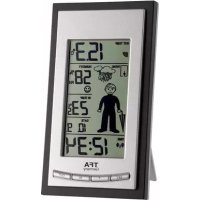
2. Radio controlled time DCF
4. Radio controlled time icon
5. Alarm on indicator
6. Day of week/ time zone
9. Indoor temperature and humidity low alarm and high alarm
13. Outdoor transmitter signal
GAIA – Wireless weather station
17. Outdoor temperature and humidity low alarm and high alarm
26. Pressure history graph of the last 24 hours
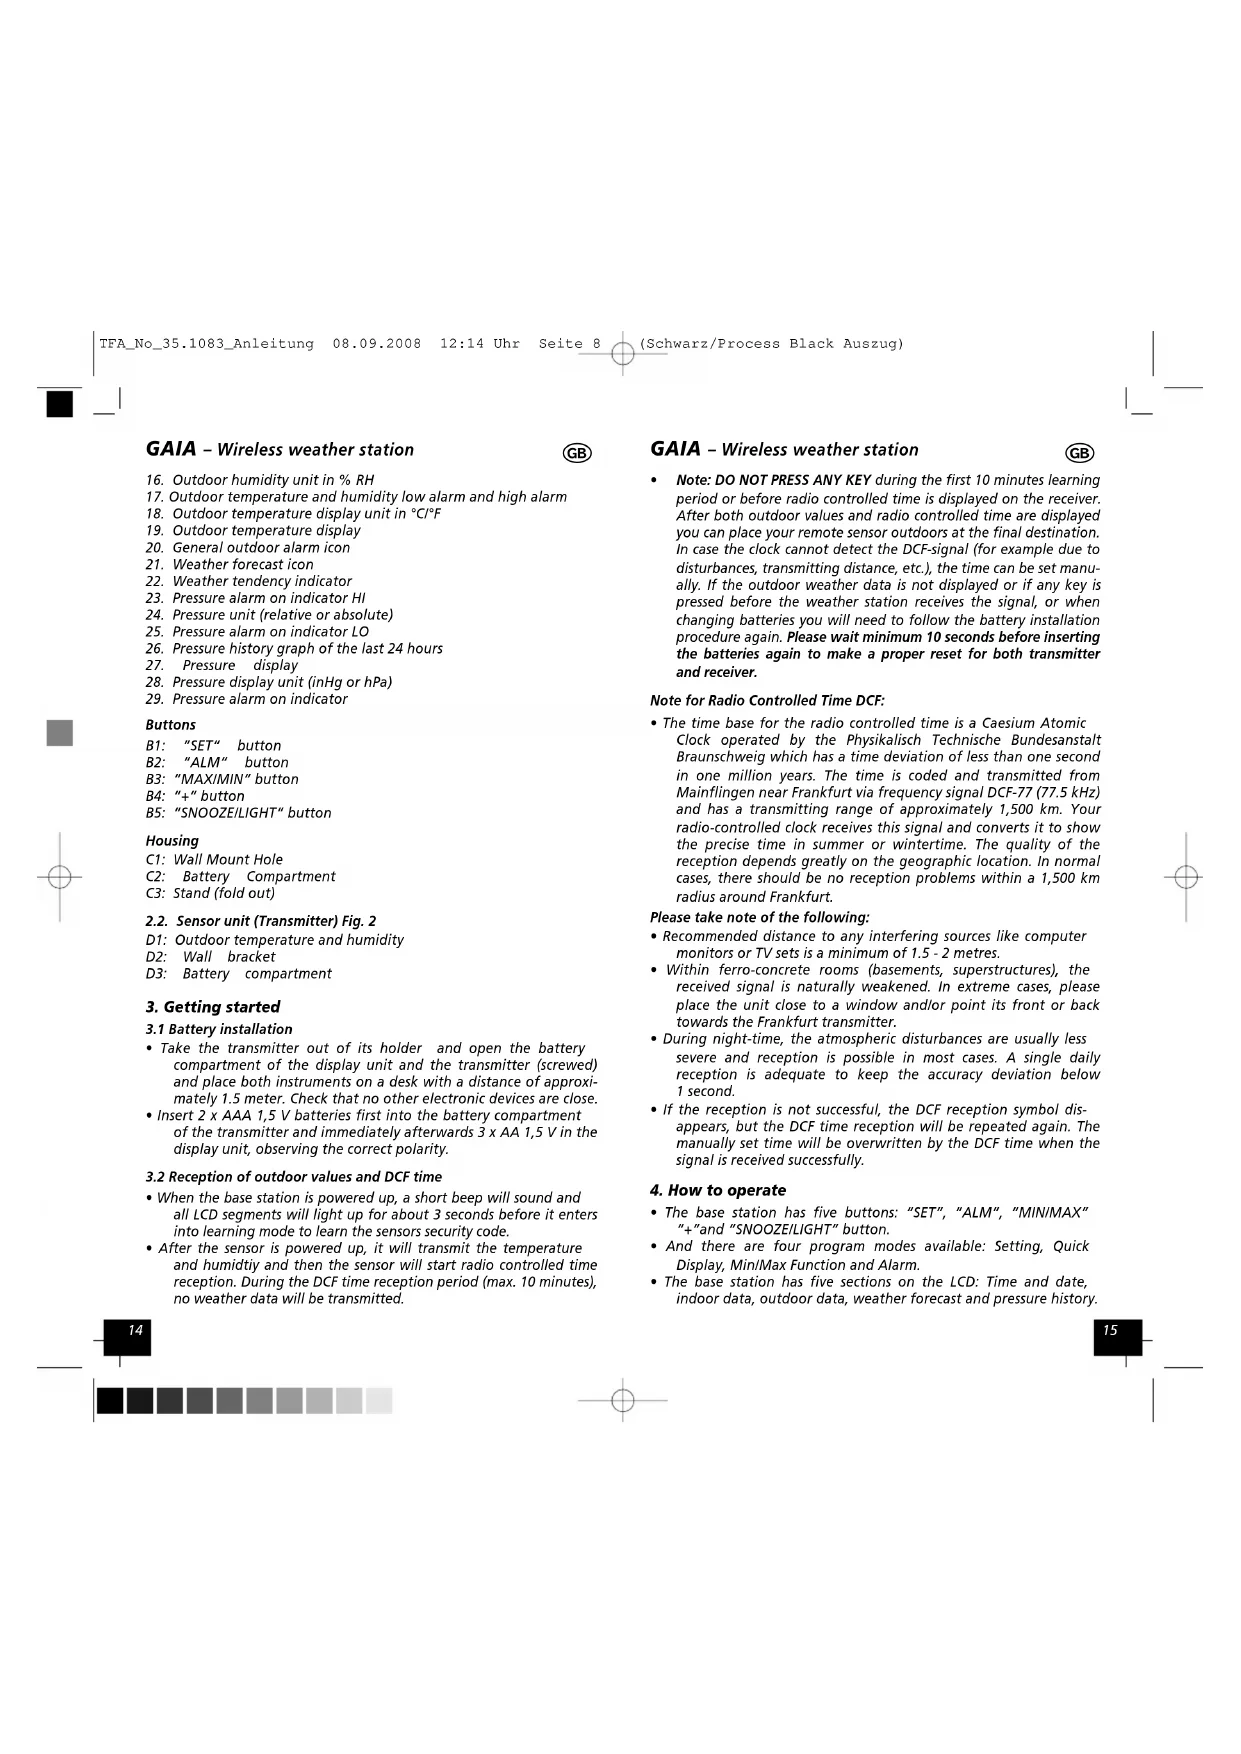
Buttons B1: ”SET“ button B2: “ALM“ button B3: “MAX/MIN“ button B4: “+“ button B5: “SNOOZE/LIGHT“ button Housing C1: Wall Mount Hole C2: Battery Compartment C3: Stand (fold out) 2.2. Sensor unit (Transmitter) Fig. 2 D1: Outdoor temperature and humidity D2: Wall bracket D3: Battery compartment
3.1 Battery installation
- Take the transmitter out of its holder and open the battery compartment of the display unit and the transmitter (screwed) and place both instruments on a desk with a distance of approxi- mately 1.5 meter. Check that no other electronic devices are close.
- Insert 2 x AAA 1,5 V batteries first into the battery compartment of the transmitter and immediately afterwards 3 x AA 1,5 V in the display unit, observing the correct polarity.
3.2 Reception of outdoor values and DCF time
- When the base station is powered up, a short beep will sound and all LCD segments will light up for about 3 seconds before it enters into learning mode to learn the sensors security code.
- After the sensor is powered up, it will transmit the temperature and humidtiy and then the sensor will start radio controlled time reception. During the DCF time reception period (max. 10 minutes), no weather data will be transmitted.
- Note: DO NOT PRESS ANY KEY during the first 10 minutes learning period or before radio controlled time is displayed on the receiver. After both outdoor values and radio controlled time are displayed you can place your remote sensor outdoors at the final destination. In case the clock cannot detect the DCF-signal (for example due to disturbances, transmitting distance, etc.), the time can be set manu- ally. If the outdoor weather data is not displayed or if any key is pressed before the weather station receives the signal, or when changing batteries you will need to follow the battery installation procedure again. Please wait minimum 10 seconds before inserting the batteries again to make a proper reset for both transmitter and receiver. Note for Radio Controlled Time DCF:
- The time base for the radio controlled time is a Caesium Atomic Clock operated by the Physikalisch Technische Bundesanstalt Braunschweig which has a time deviation of less than one second in one million years. The time is coded and transmitted from Mainflingen near Frankfurt via frequency signal DCF-77 (77.5 kHz) and has a transmitting range of approximately 1,500 km. Your radio-controlled clock receives this signal and converts it to show the precise time in summer or wintertime. The quality of the reception depends greatly on the geographic location. In normal cases, there should be no reception problems within a 1,500 km radius around Frankfurt. Please take note of the following:
- Recommended distance to any interfering sources like computer monitors or TV sets is a minimum of 1.5 - 2 metres.
- Within ferro-concrete rooms (basements, superstructures), the received signal is naturally weakened. In extreme cases, please place the unit close to a window and/or point its front or back towards the Frankfurt transmitter.
- During night-time, the atmospheric disturbances are usually less severe and reception is possible in most cases. A single daily reception is adequate to keep the accuracy deviation below 1 second.
- If the reception is not successful, the DCF reception symbol dis- appears, but the DCF time reception will be repeated again. The manually set time will be overwritten by the DCF time when the signal is received successfully.
- The base station has five buttons: “SET”, “ALM”, “MIN/MAX” “+”and “SNOOZE/LIGHT” button.
- And there are four program modes available: Setting, Quick Display, Min/Max Function and Alarm.
- The base station has five sections on the LCD: Time and date, indoor data, outdoor data, weather forecast and pressure history. TFA_No_35.1083_Anleitung 08.09.2008 12:14 Uhr Seite 8 (Schwarz/Process Black Auszug)1716 GAIA – Wireless weather station
GAIA – Wireless weather station
- Press the “SET” button for 3 seconds while in normal mode to enter the normal setting mode.
- In the setting mode, press “+” button or “MIN/MAX” button to select the units or scroll the value. Holding the “+” button or “MIN/MAX” button will increase/decrease digits in great steps.
- The program mode can be exited at any time by either pressing the “SNOOZE/LIGHT” button, or waiting for the 10-second time- out to take effect.
- Press the “SET” button to select the following setting in sequence:
1. Time Zone Setting +/-12 hrs.: The time zone is used for coun-
tries where the DCF signal can be received but the time zone is different from the German time (e.g. + 1=one hour later).
4. Calendar setting (year/month/date, weekday will be calculated)
1013.2 hPa). Relative pressure is referred to sea level’s pressure and has to be adjusted first to your local altitude. Ask for the present atmospheric pressure of your home area (Local weather service, www, optician, calibrated instruments in public buil- dings, airport).
Note: Please set the units firstly before change units’ value. During change of units setting, the previous set value will be changed accord- ing to the new units. However it might cause resolution loss due to its internal calculation algorithm.
4.2 Quick Display Mode
- In Quick Display Mode you get quick information about several weather data. While in Normal Mode, press the “SET” key to enter the Quick Display Mode and to toggle through the display mode. Press “+” key or “MIN/MAX” key to select the desired information:
- While in Normal Mode, press the “MIN/MAX” button to enter the maximum mode.
- In the maximum reading mode, press the “+” button to display the following maximum values together with the time and date stamp when these values were recorded. Press “SET” button while the corresponding maximum value is displayed to reset to the current reading together with the current time and date:
- Indoor humidity maximum
- Indoor temperature maximum
- Outdoor humidity maximum
- Outdoor temperature maximum
- While in Normal Mode, press twice the “MIN/MAX” button to enter the minimum mode.
- In the minimum reading mode, press the “+” button to display the following minimum values together with the time and date stamp when these values were recorded. Press “SET” button while the corresponding minimum value is displayed to reset to the current reading together with the current time and date:
- Indoor humidity minimum
- Indoor temperature minimum
- Outdoor humidity minimum
- Outdoor temperature minimum
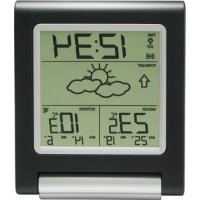
- The four weather icons “sunny, partly cloudy, cloudy and rainy” represent the weather forecast.
- The weather forecast symbols indicate an improvement or worsening of the future weather conditions based on the current weather, which does not have to correspond exactly with the weather indicated on the symbol.
4.4.1 Weather forecast tendency indicator
- The weather tendency indicators arrow is located between the weather icons to show the air pressure tendency and provide a forecast of the weather to be expected by the decreasing or in- creasing air pressure. The rightward arrow means that the air pres- sure is increasing and the weather is expected to become better. The leftward arrow means that the air pressure is decreasing and the weather is expected to become worse. sunny partly cloudy cloudy rainy TFA_No_35.1083_Anleitung 08.09.2008 12:14 Uhr Seite 9 (Schwarz/Process Black Auszug)1918 GAIA – Wireless weather station
GAIA – Wireless weather station
- The change of weather forecast icon is in accord to the relation- ship between current relative pressure and the pressure change since the last twelve hours. If the weather is changing, weather tendency indicator (animated arrows) will be flashing. And after the next three hours if weather conditions have become stable, the arrows will fix indicating a stable condition happened. Notes to pressure sensitivity setting for weather forecasting:
- The pressure threshold can be set to suit the user’s requirement for weather forecasting from 2-4 hPa (default 3 hPa). Areas that experience frequent changes in air pressure require a higher setting compared to an area where the air pressure is stagnant. For example if 4 hPa is selected, then there must be a fall or rise in air pressure of at least 4 hPa before the weather station will register this as a change in weather.
4.4.2 Storm warning indicator
The storm threshold can be set to suit the user’s requirement for storm forecasting from 5-9 hPa (default 6 hPa). When there is a fall over pressure threshold within 3 hours, the storm forecasting will be acti- vated, the clouds with rain icon and tendency arrows will flash for 3 hours indicating the storm warning feature has been activated.
- The weather station can be programmed in that way that in cer- tain weather conditions an alarm is activated. For this purpose an upper (High Alarm) and lower limit (Low Alarm) can be set for many parameters.
- While in Normal Mode press the “ALM” button to enter the High Alarm Mode.
- Press the “SET” button to select the following alarm modes. Press “+” button or “MIN/MAX” button to set the high alarm value. Press and hold the buttons to change the number in great step.
- Press the “ALM” button to choose the alarm on or off. “HI AL” and an alarm symbol appears or disappears next to the correspon- ding parameter in the display.
1. Time alarm (hours/minutes, at low alarm setting mode, the
same time alarm setting sequence will repeat)
2. Indoor humidity high alarm
3. Indoor temperature high alarm
4. Outdoor humidity high alarm
5. Outdoor temperature high alarm
- While in Normal Mode press twice the “ALM” button to enter the Low Alarm Mode.
- Press the “SET” button to select the following alarm modes. Press “+” button or “MIN/MAX” button to set the low alarm value. Press and hold the buttons to change the number in great step.
- Press the “ALM” button to choose the alarm on or off. “LO AL” and an alarm symbol appears or disappears next to the corresponding parameter in the display.
1. Time alarm (hours/minutes, at high alarm setting mode, the
same time alarm setting sequence will repeat)
5. Outdoor temperature low alarm
- Remark: After the initial pressing of “ALM” button, “- - -“ will be displayed for all segments. Later the high and low alarm values appear if they are activated.
- When a set weather alarm condition has been triggered, that par- ticular alarm will sound for 120 seconds. The corresponding value, “HI AL” or “LO AL” and the alarm symbol are flashing until the weather condition does not meet the user set level. Press any key to mute the alarm.
- Example: Dew point high alarm was triggered:
4.5.2 Alarm clock function
- In the Alarm-Mode HI or LO you can adjust the alarm time. Press “SET” button.
- The hours are flashing. Press “+” or “MIN/MAX” button to adjust the hours. Press “SET” button again for to set the minutes.
- Press “ALM” button to switch the alarm off (the alarm symbol disappears) or on. Confirm with the “SET” button.
- When alarm is sounding, press any button to stop the alarm.
- Once the alarm starts to ring, you can activate the snooze func- tion by pressing the top button “SNOOZE/LIGHT”. The alarm will be interrupted for 10 minutes.
GAIA – Wireless weather station
- With the foldable leg at the back of the unit, the base station can be placed onto any flat surface or wall mounted at the desired location by the hanging hole at the back of the unit. Avoid the vicinity of any interfering field like computer monitors or TV sets and solid metal objects.
- Choose a shady and dry position for the transmitter. (Direct sun- shine falsifies the measurement and continuous humidity strains the electronic components needlessly)
- Check the transmission signal from the transmitter to the display unit (transmission range 100 m free field). Within ferro-concrete rooms (basements, superstructures), the received signal is naturally weakened.
To wall mount the transmitter, use 3 screws to affix the wall bracket to the desired wall, plug in the remote sensor to the bracket (D2).
6. Battery replacement
- If battery change happened on remote sensor side, then the base station must be power up again to re-learn the transmitter.
- Use alkaline batteries only. Observe correct polarity. Low batteries should be changed soon to avoid the damage resulting from a leaking battery. Batteries contain harmful acids. Wear protective glasses and gloves when handling with leaked batteries. Attention: Please do not dispose of old electronic devices and used batteries in household waste. To protect the environment, take them to your retail store or to appropriate collection sites according to national or local regulations.
Transmission distance in open field: 100meter max. Frequency: 433 MHz Measuring interval sensor: 48 sec Alarm duration: 120 sec Temperature Measuring unit: °C/°F Measuring range outdoor: -40°..+65°C/-40°..+149°F (shows OFL if outside range) Measuring range indoor: 0°… +60°C / +32°…+140°F (shows OFL if outside range) Humidity Measuring unit: %RH Measuring range outdoor: 20% …95% Measuring range indoor: 1% …99% Resolution: 1% Accuracy: ±5% @ 0...45°C Atmospheric pressure Measuring unit: hPa / inHg Measuring range: 919 hPa – 1080 hPa Resolution: 0.1 hPa Accuracy: ±1.5 hPa Batteries (not included) Base station: 3 x AA 1.5V LR6 Alkaline Remote sensor: 2 x AAA 1.5V LR6 Alkaline
- Keep your weather station in a dry place.
- Do not expose the instrument to extreme temperatures, vibration or shock.
- Clean it with a soft, damp cloth. Do not use solvents or scouring agents.
- Avoid placing the clock near interference sources/metal frames such as computer or TV sets.
- Please reset the unit and follow the battery installation procedure if the unit does not work properly. Change the batteries.
9. Liability disclaimer
- The product is not a toy. Keep it out of reach of children.
- The product is not to be used for medical purpose or for public information, but is determined for home use only.
- The specifications of this product may change without prior notice.
- No part of this manual may be reproduced without written con- sent of TFA Dostmann.
GAIA – Wireless weather station