Speedi SX - Stroller QUINNY - Free user manual and instructions
Find the device manual for free Speedi SX QUINNY in PDF.
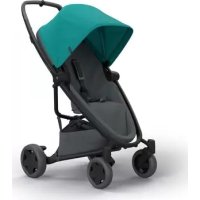
| Product type | Stroller for children from birth to 4 years (max weight 20 kg) |
| Brand | Quinny |
| Model | Speedi SX |
| Safety standards | NFS 54-001, EN 1888:2003, BS 7409:1996 |
| Combined use | With Dreami carrycot (up to 9 kg) or Maxi-Cosi car seat (up to 13 kg) |
| Maximum basket weight | 5 kg (main basket), 0.5 kg (other compartments) |
| Adjustments | Continuously reclining backrest (sitting to lying), 2-position footrest, height-adjustable handlebar |
| Braking | Foot parking brake (rear wheels) and hand brake decelerator |
| Child safety | 5-point harness (waist, shoulder, crotch straps) height-adjustable |
| Wheels | Swivel or fixed front wheels, inflatable tires (max pressure 28 PSI / 2.0 Bar) |
| Folding | Compact fold with transport lock, wheels can be removed |
| Compatible accessories | Dreami carrycot, Maxi-Cosi car seat, rain/wind cover, footmuff, diaper bag |
| Frame maintenance | Clean with soft cloth and water, no abrasive detergents or silicone lubricants |
| Cover maintenance | Hand wash (warm water, mild detergent), do not remove inner padding |
| Warranty | 24 months for metal frame, 12 months for textile parts and wear parts |
Frequently Asked Questions - Speedi SX QUINNY
User questions about Speedi SX QUINNY
0 question about this device. Answer the ones you know or ask your own.
Ask a new question about this device
Download the instructions for your Stroller in PDF format for free! Find your manual Speedi SX - QUINNY and take your electronic device back in hand. On this page are published all the documents necessary for the use of your device. Speedi SX by QUINNY.
USER MANUAL Speedi SX QUINNY
GB Instructions for use/Warranty 7-12
F Mode d'emoci/Carsnte 13-18
D Gsueaneaeewieig 19-24
NL Georukesamwzng /Garntle 25-30
Fmrnrsrnnnns/Garrrn 31-38
1nepnper Pne / Gannr 37 42
Congratulations on the purchase of your Quinny Speedi SX.
Safety, comfort and user friendliness have played an important role in the development of the Quinny Speedi SX. This product meets the most stringent safety regulations.
Research shows that a high number of pushchairs are used incorrectly. Therefore, please take the time to read through the instruction manual carefully.
The Quinny Speedi SX only offers maximum safety only when it is used in accordance with the instructions.
Continuous research by our development team, user tests and consumer reactions ensure that we are kept fully up to date in the field of child safety. If you have any questions concerning the use of your Quinny Speedi SX, please do not hesitate to contact us.
Dorel Netherlands
IMPORTANT: Read first!
Read the instruction manual carefully and keep it for future reference. Not following the instructions in this manual may endanger the safety of your child. The Speedi SX has been approved in accordance with: NFS 54-001, EN 1888:2003, BS 7409:1996.
- WARNING: A child's safety is your responsibility.
- WARNING: It may be dangerous to leave your child unattended.
- WARNING: Ensure that all locking devices are engaged before use.
- WARNING: Any load attached to the handle affects the stability of the pram/pushchair.
- WARNING: Use a harness as soon as your child can sit unaided, even when using the footmuff.
- WARNING: Always use the crotch strap in combination with the waist belt.
- WARNING: The plugs and the valves of the wheels must be sufficiently tightened to avoid any hazard due to small parts which may be swallowed. Also keep the hand pump out of the reach of children.
- WARNING: This product is not suitable for running or skating.
- WARNING: Check that the pram body or seat unit attachment devices are correctly engaged.
- WARNING: The tyres may leave behind black marks on some surfaces (particularly smooth floors like parquet, laminate and linoleum).
General instructions
- The Speedi SX is suitable for children from birth to 4 years of age (maximum weight 20kg ). When used with a Maxi-Cosi car safety seat or Dreami carrycot, the maximum weight shown on the car safety seat or carrycot applies.
- Only use the Speedi SX for one child at a time.
- It is recommended that you do not use the Speedi SX as a pushchair until your child is able to sit up unassisted, usually at around 6 months.
- The pushchair seat should not be used with children under 6 months.
- Always make sure that the Speedi SX is completely unfolded and that the safety locks are properly secured before placing your child in the Speedi SX.
- Keep children away from moving parts while folding, unfolding or adjusting the Speedi SX.
- Always use the parking brake when parking the Speedi SX, even when just standing still.
- The bicycle-style handbrake should only be used as an extra brake. It should never be used as a parking brake.
- Inspect and clean the Speedi SX regularly. Never use abrasive cleaners or lubricants (containing silicone).
- Never lift the Speedi SX or use on escalator or stairs when there is a child in the pushchair.
- Use original accessories and manufacturer-approved parts only.
- No alterations may be made to the product. If you have any complaints or problems, please contact your supplier or importer.
- Keep all plastic packaging material out of the reach of children, as these materials pose a choking hazard.
To unfold
- The frame has been secured by means of a transport safety lock to prevent it from unfolding during transport. Release the lock by pulling the left handlebar safety lock in the direction of the arrow (1).
- Pull the handlebar upwards (2) until it "clicks" into the handlebar safety lock (3).
- Check this by pushing down on the handlebar.
- Make sure that the handlebar safety locks are released (4,1).
- Adjust the handlebar to the desired height (4,2).
- Click both handlebar safety locks back into place (5).
Placing / removing the wheels
- The 2 wheels with the brake cylinder should be mounted as rear wheels.
- Press the button in the middle of the hubcap (6/10) while pushing the axle into the axle opening (7).
- Check to make sure the wheel is secure.
- Place the wheel into the front fork by pressing the button (8,1) and then clicking the wheel into the opening on the front (8,2).
- The swivel wheel can be adjusted into 2 different positions: fixed or swivelling (9,1). To lock it into the fixed position, rotate the swivel lock until 2 straight arrows appear in the display (9,2).
- The swivelling front wheel will lock itself the moment the pushchair is pushed forward.
- Check the tyre pressure and inflate the tyre if necessary (see maintenance section for the maximum tyre pressure allowance).
- To remove the rear wheels, press the button on the hubcap (6/10) and pull the wheel out of the axle opening (11).
- To remove the swivel wheel, press the button and pull the wheel out of the axle opening.
Folding
- IMPORTANT: The swivel wheel must be in a swivelling position before folding (9,1).
- IMPORTANT: Always remove the Dreami carrycot or Maxi-Cosi car seat before folding.
- Apply the brake on the Speedi SX (see Using the parking brake).
- Fold up the sun canopy (see Using the sun canopy).
- Make sure the footrest is in the lowest position (see Footrest).
- Click open both handlebar safety locks (12,1).
- Push in the release button on the handlebar (12,2).
- Push down the handlebar until the stop (13), and then further downwards until you hear a clearly definite "click".
- Make sure the transport safety lock clicks over the catch again.
- Remove the wheels to make the pushchair even smaller.
- IMPORTANT: It is advisable to remove the sun canopy before folding the pushchair (see Using the sun canopy).
INSTRUCTIONS FOR USE
For use with the Dreami carrycot (up to 9 kg) and the Maxi-Cosi car safety seat (up to 13 kg) (see illustrations 14 - 16)
Placing / removing the adapters
- Remove both guards by pushing in the button (14,1) whilst simultaneously pushing the guards upwards (14,2).
- Slide the adapter marked R into the right-hand side and the adapter marked L into the left-hand side of the adapter attachment.
- Continue sliding until you hear a "click" (15).
- Check to make sure the adapters are secure.
- To remove the adapters, push in the spring-loaded button (16,1) whilst simultaneously pushing the adapters upwards (16,2).
- Place both guards back onto adapter attachments.
Placing / removing the Dreami carrycot (see illustrations 17 - 18) and Maxi-Cosi car safety seat (see illustrations 19 - 20)
- Apply the brake on the Speedi SX (see Using the parking brake).
- Place the carrycot / car safety seat onto the adapters (17/19) with the foot end between the sides of the handle.
- Check to make sure the carrycot/car seat is secured by lifting it up by the handles.
To remove, place your thumbs on the control buttons on both sides of the carrycot/car seat (18,1/20,1). - Push in the buttons while lifting the carrycot / car safety seat from the Speedi SX (18,2/20,2).
When used as a pushchair (see illustrations 21 - 29)
Placing / removing the pushchair seat
- Apply the brake on the Speedi SX (see Using the parking brake).
- To remove the pushchair seat undo the velcro under the foot rest (21,1) and undo the clasp (21,2) and the press stud (21,3).
- Open the press studs on the bottom (22,1) and undo the velcro near the handlebar safety lock (22,2).
- Remove the pushchair seat from the frame.
- When placing the pushchair seat back onto the frame, make sure to re-attach all press studs, clasps and velcro.
- IMPORTANT: Make sure you remove the adapters before attaching the pushchair seat (see Placing / removing the adapters).
- Check to make sure everything is securely fastened by lifting up the pushchair seat.
Safety harness
- Apply the brake on the Speedi SX (see Using the parking brake).
- Make sure the safety harness is loosened before placing your child (carefully!) into the seat.
- Slide the buckle sections together (23,1) and fasten the lap and shoulder belts into the crotch strap by clicking the buckle sections into the fastener (23,2).
- Adjust the belts to the size of your child by lengthening or shortening the belts using the clasps (24).
- Push the buttons (25,1) to open the fastener (25,2).
- There are D-rings for securing an additional safety harness. Make sure the safety harness complies with all safety standards (i.e. BS 6684) before using it.
- The shoulder belts are height adjustable. To change the height, open the cover on the back and adjust the clasp both on the front in the cover and in the board. Tilt the clasp when adjusting (26).
- IMPORTANT: The press studs on the side of the seat are for attaching a footmuff only (27).
Footrest
- The footrest can be adjusted into 2 positions.
- Press both buttons under the footrest at the same time (28,1), and then adjust the footrest into the desired position (28,2).
- IMPORTANT: Never let your child sit or stand on the footrest.
Cover
- Remove the pushchair seat from the Speedi SX (see Placing / removing the pushchair seat).
- Remove the safety harness (see Safety harness).
- Remove the support plate from the back (34).
- The cover and basket can be washed by hand in lukewarm water using a regular detergent (see Washing instructions).
- To re-attach the cover, slide the board back in.
- Re-attach all clasps, press studs and velcro.
- IMPORTANT: Make sure the safety harness is secured properly.
- IMPORTANT: Never use the pushchair seat without the support plate.
Back rest adjuster
- The pushchair seat back can be adjusted continuously from a sitting to a reclining position.
- To adjust the back rest, squeeze the adjusting section on the back (29,1) and adjust the strap until the seat is in the desired position (29,2).
Using the parking brake (see illustration 30)
- Always use the parking brake when parking Speedi SX, "also when at a standstill".
- Step on the pedal on the rear axle to lock the wheels (30).
- Always check whether the wheels are locked.
- Release the parking brake by pulling the pedal upward.
- The handbrake is for slowing down and should not be used as a parking brake. The handbrake works on both rear wheels. If you squeeze the handbrake too firmly or quickly, there is a risk that you will stumble over the Speedi SX, thus endangering your child.
Using the sun canopy (see illustrations 31 - 32)
- To attach the sun canopy, push the clips onto both sides of the frame at the desired height (31).
- Fasten the clasps onto the back of the pushchair seat (32).
- Remove the sun canopy by unfastening the clasps and pulling the clips from the handlebar.
Using the shopping basket (see illustration 33)
- The maximum weight allowance for the shopping basket under the Speedi SX is 5kg
- The other storage compartments on the pushchair have a maximum weight allowance of 0.5kg .
- The shopping basket can be enlarged using the zipper on the side (33,1).
- The shopping basket can be removed by undoing the hooks (33,2).
- IMPORTANT: Only use the storage compartments provided and do not exceed the maximum weight allowance.
- IMPORTANT: The shopping basket must be completely empty before folding the frame.
MAINTENANCE (see illustrations 34 - 35)
Frame
- Check whether everything functions properly on a regular basis.
- If the Speedi SX becomes damaged, have your supplier check and / or repair it before using it again.
To ensure the long-lasting use of the Speedi SX, dry it off with a soft rag after using it in rainy weather. - Clean the frame using a damp cloth. Do not use any abrasive detergents.
- Riding through seawater is not advised. After use on the beach, clean the frame and wheels thoroughly in order to prevent rust formation.
- Never use lubricants (containing silicone), as they attract dirt and grime.
NOTE: Oil and grease will damage the functioning of the handbrake.
Cover
- Remove the pushchair seat from the Speedi SX (see Placing / removing the pushchair seat).
- Remove the safety harness (see Safety harness).
- Remove the support plate from the back (34).
- The cover and basket can be washed by hand in lukewarm water using a regular detergent (see Washing instructions).
- To re-attach the cover, slide the board back in.
- Re-attach all clasps, press studs and velcro.
- IMPORTANT: Make sure the safety harness is secured properly.
- IMPORTANT: Never use the pushchair seat without the support plate.
Wheels
- Inflate the tyres to a maximum pressure of 28 PSI (2.0 Bar) using the pump supplied. Insufficiently inflated tyres can lead to unnecessary wear and tear.
-
If the inner tube has a puncture, you can repair it as you would a bicycle tyre or have it repaired at a bicycle repair shop.
-
To replace the front tyre, first push in the pins on the front fork (35,1) and then slide the tyre off of the front fork (35,2).
- Always deflate the tyres when taking the Speedi SX on an aircraft, as the tyres could burst out due to the pressure difference.
- Clean the wheels regularly and remove all sand and dirt. Do not use oil, grease or cleaners.
Accessories
The following original accessories are available for the Speedi SX:
Dreami carrycot
Maxi-Cosi car seat
- Rain/wind cover
- Footmuff
- Nappy bag
IMPORTANT: The use of non-original accessories can have an adverse effect on the working of the Speedi SX.
IMPORTANT: Minor colour variation may occur between the pushchair and accessories and generally does not constitute a reason for replacing the product once it has been used.
Questions
Contact your supplier or importer (see address on the back).
Warranty
Dorel Netherlands guarantees that this product complies with all safety requirements as specified in the current European safety standard EN 1888 / 2003, and that this product is free from defects in workmanship and material at the time of purchase. If this product shows material and / or workmanship defects after purchase and during the warranty period (with normal use as described in the instruction manual), Dorel Netherlands will assume the responsibility to repair or replace it. The warranty period is 24 months for the metal frame and 12 months for fabric components and other parts subject to wear, such as tyres, wheel bearings, and so forth. Normal wear and tear that can be expected with daily use of the product is therefore hereby excluded.
The warranty does not apply in the following circumstances:
- The product is not supplied to the manufacturer together with the original sales receipt.
The defect is the result of incorrect or negligent use, or maintenance that is contrary to the instructions given in the manual. - Repairs have been carried out by third parties.
- There is discolouration, damage to the fabric or watermarks due to washing or rainwater and excessive exposure to sunlight (UV).
The defect is the result of negligence or damage to the fabric or frame due to a blow to the pushchair. - The defect is the result of an accident or airplane travel.
- The defect is the result of overloading (exceeding the maximum weight allowance for the child and any items being carried).
- The defect is the result of using a standing board or seat for a 2nd child.
- There is normal wear and tear to the wheels, tyres and / or fabric (such as a flat tyre and / or loose snaps).
- The product has been involved in a "collision" with a sidewalk kerb or heavy shop door, as this could cause the wheels and/or axles to be thrown out of alignment or bent, as a result of which the pushchair will not track well.
- Damage to surfaces, such as plastic laminate floors, due to tire marks.
- The stated warranty terms and conditions have not been satisfied.
Date of effect:
- The warranty period goes into effect as of the date of purchase of the product.
Warranty term:
- The warranty on the frame is valid for a period of 24 consecutive months. A term of 12 consecutive months applies to the fabric components and other parts susceptible to wear and tear. The warranty applies solely to the original owner and is non-transferable.
If you discover a defect:
- In the event of a defect, contact your retailer. If your retailer is unable to assist you, he will return the product to the manufacturer together with a description of the complaint and the original, dated sales receipt. Products that are returned directly to the manufacturer will NOT be eligible for the warranty.
Fabric components and other parts subject to wear:
- The cover should be cared for properly (see the instruction manual for care instructions). It is normal for fabric to discolour from sunlight and to show wear and tear after a long period of use, even when used normally. The warranty period for the cover and other parts subject to wear, such as the tyres, is therefore limited to a period of no more than 12 months as of the date of purchase.
This Warranty Clause conforms to European Directive 99/44/EG of 25 May 1999.