Snow King 7011 BE - Snow blower Texas - Free user manual and instructions
Find the device manual for free Snow King 7011 BE Texas in PDF.
Frequently Asked Questions - Snow King 7011 BE Texas
User questions about Snow King 7011 BE Texas
0 question about this device. Answer the ones you know or ask your own.
Ask a new question about this device
Download the instructions for your Snow blower in PDF format for free! Find your manual Snow King 7011 BE - Texas and take your electronic device back in hand. On this page are published all the documents necessary for the use of your device. Snow King 7011 BE by Texas.
USER MANUAL Snow King 7011 BE Texas
natural_image
Two yellow snowplow machines with visible blades and control panels, no text or symbols present.VIGTIGT!
HUSK AT PÄFYLDE CA 1.1 LITER
MOTOROLIE SAE-30
F∅R START!
IMPORTANT!
REMEMBER TO FILL WITH
ENGINE OIL SAE-30 ABOUT 1.1 LITRE
BEFORE START!
ACHTUNG!
DENKEN SIE DARAN, VOR
INBETRIEBNAHME ETWA 1.1 LITER
MOTORÖL (SAE-30) AUFZUFÜLLEN!
IMPORTANT!
text_image
Technical diagram of a snowmobile robot with numbered parts and control panel labels in Chineseill2
natural_image
Two industrial components: a yellow industrial device with black handles and a black plastic component with white spherical features (no visible text or symbols)ill3
natural_image
Four-panel sequence showing a yellow industrial machine with a tool inserted, connected to a yellow vehicle interior via cable and lock (no text or symbols visible)| ill4 | 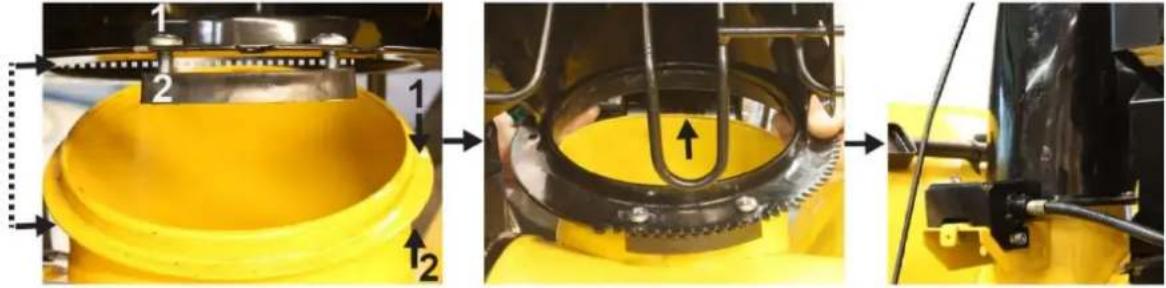 |
| ill5 |  |
| ill6 | 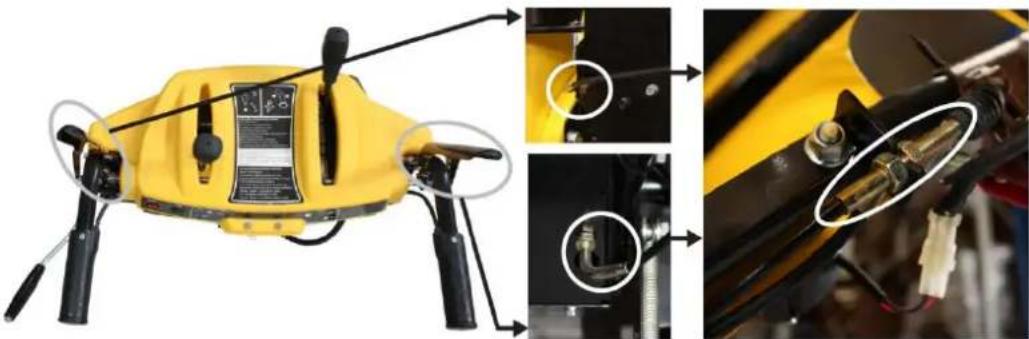 |
| ill7 |  |
| ill8 |  |
| ill9 |  |
DK - ORIGINAL BRUGSANVISNING
SIKKERHEDSFORSKRIFTER....3
SIKKERHEDSINSTRUKTIONER.... 3
SIKKERHEDSSYMBOLER 3
IDENTIFICATION AF DELENE....5
MONTERINGEN 5
JUSTERING 5
BETJENING AF MOTOR 6
FUNKTIONER....6
BETJENING AF MASKINE 6
VEDLIGEHOLDELSE 7
OPBEVARING....8
VEDLIGEHOLDELSE/FEJLFINDING 10
SPECIFICATION....60
SAFETY REGULATIONS ....11
SAFETY INSTRUCTIONS ....11
SAFETY SYMBOLS....11
IDENTIFICATION OF CONTENT 13
ASSEMBLY 13
ADJUSTMENT 13
ENGINE OPERATION....13
FUNCTION....14
MAINTENANCE/TROUBLESHOOT 17
SPECIFICATIONS 60
Please follow the safety instructions provided in this manual and ensure that you fully understand all safety instructions. Please keep this manual for future reference or in preparation for resale.
SAFETY REGULATIONS
WARNING! Parts of the machine components and engine exhaust, contains chemicals known to cause sustain damage to body and health.
DANGER! This machine was built to be operated according to the safe operation practices in this manual. As with any type of power equipment, carelessness or error on the part of the operator can result in serious injury. This machine is capable of amputating fingers, toes and feet and throwing foreign objects. Failure to observe the following safety instructions could result in serious injury or death.
SAFETY INSTRUCTIONS
You should pay particular attention to safety precautions, marked with the exclamation point!
Please read and understand this manual and the safety information prior to starting the engine.
Warning: Indicates a potentially hazardous situation which, if not avoided, could result in death or serious injury.
Please read this manual thoroughly before operating the machine. If you do have questions about safety and operating features, contact your dealer. Failure to comply with the safety instructions can result in serious injury or death. All instructions regarding safety and maintenance of the snow blower are for your own safety.
SAFETY SYMBOLS
See III 9
READ THE MANUAL
Read, understand and follow all instructions in the manual before assembling and operating the snow blower.
WARNING - DISCHARGER
Keep hands out of discharge opening while machine is working.
WARNING - ROTATING AUGER
Do not put hands or feet near auger housing or discharge opening. The auger is capable of amputating fingers, toes and feet. Failure to observe could result in serious injury or death.
WARNING - THROWNING OBJECTS
The machine may pick up and is capable of throwing heavy foreign objects, which can cause serious injury which can cause serious personal injury
WARNING - FIRE HAZARDOUS
Do not fill the gasoline tank indoors, while the engine is running, or while the engine is still hot. Spilled gasoline is extremely flammable. Allow the engine to cool before refueling.
WARNING - CARBON MONOXIDE
Never start the engine indoor or in areas with low ventilation. The exhaustion from the engine contains carbon monoxide. Failure to observe could result in perm injury or death.
WARNING - ELECTRICAL SHOCK
Do not use the engines electric starter in the rain
Setup
Do not put hands or feet near or under rotating parts.
Read this manual carefully. Make sure that you are familiar with the different controls, settings and handles of the equipment.
Know how to stop the unit and ensure that you are familiar with emergency stop.
A. Never allow children or people unfamiliar with these instructions to use the machine. Note, that local regulations can restrict the age of the operator.
If you feel unwell, tired or have consumed alcohol or drugs, do not operate the machine.
Always inspect the machine before usage Ensure that no parts are worn or damaged.
Replace worn out or damaged elements and bolts in sets to preserve balance.
The operator of the machine is responsible for people's safety.
Never use the machine near children or animals.
The operator of the machine is held liable for any accidents or hazards to other people and their property.
Thoroughly inspect the area, where the equipment is to be used, if necessary remove any foreign objects.
Do not refuel gasoline indoors or while the engine is running.
Spilled gasoline is extremely flammable, never refuel while the engine is still hot.
Wipe off any spilled gasoline before starting the engine. It may cause a fire or explosion!
⚠ Beware of hazards, while working on difficult soil hence; extremely stony or hard soil.
Boots with non-slip soles with steel jacket is required. Avoid loose-fitting clothes.
Operation
Always start the engine from safety zone.
Do not leave the safety zone while operating the machine, if it is necessary to leave the safety zone, turn off the engine before leaving the zone.
After striking a foreign object, stop the engine immediately, remove the spark plug cap and inspect the machine thoroughly for damage. Repair the damage before continuing
If the machine should start to vibrate abnormally, stop the engine and check immediately for the cause. Vibration is generally a warning of damage.
Always disengage the levers, turn off the engine, and remove the spark plug, when the unit is left unattended.
Always turn off the engine and ensure that all moving parts have come to a complete stop before making any repairs, adjustments, or inspections.
Exercise extreme caution when operating on slopes.
△ Never operate the machine at a fast pace.
Do not overload machine capacity by attempting to work at too fast a rate.
Do not carry passengers.
Pay attention, while the machine is in reverse.
⚠️ Never allow any bystanders in front of unit.
△ Always disengage the blades, if not in use.
Only operate the machine at daylight or in fully illuminated areas
⚠ Ensure a stable foothold and always keep a firm hold on the handles. Always walk, never run.
Do not operate the equipment when barefoot or wearing sandals.
Exercise extreme caution when changing direction on slopes
Never attempt to make any adjustments, while the engine is running.
Use extreme caution when reversing or pulling the machine backwards
Never operate the engine indoor or in areas with low ventilation. The exhaustion from the engine contains carbon monoxide. Failure to observe could result in permanent injury or death.
Gasoline safety
Use extreme care in handling gasoline.
Gasoline is extremely flammable and the fumes are explosive.
⚠ Serious personal injury can occur, when gasoline is spilled on yourself or your clothes. Rinse your skin and change clothes immediately!
Use only an approved gasoline container. Do not use soft drink bottle or similar!
Extinguish all cigarettes, cigars, pipes and other sources of ignition.
Never refuel your machine indoors.
Let the engine cool down before refilling
A. Never fill the fuel tank to more than 2.5 cm below bottom of filler in order to provide space for fuel to expansion.
After refueling, ensure that the cap tighten securely.
Never use the lock-function on the gasoline gun, when refueling.
Do not smoke while refueling.
A Never refuel inside a building or where gasoline fumes may get in contact with an ignition source.
Keep gasoline and engine away from appliance, pilot lights, barbecues, electric appliances, power tools, etc.
If the fuel tank has to be drained, this shall be done outdoors
Maintenance and storage
The engine shall be stopped when carrying out maintenance and cleaning operations, when changing tools and when being transported by means other than under its own power.
Check regularly that all bolts and nuts are tightened. Retighten if necessary.
The engine must be completely cooled before storing indoors or covered.
If the machine unused for a period of time, please refer to the instructions in this manual.
Maintain or replace safety and instruction labels, as necessary.
A Only use orginal spare parts or accessories. If not orginal parts or accessories is used, the liability is no longer applied.
⚠️ Replace faulty silencers.
Miscellaneous
A The gears are delivered pre-greased. However, always ensure they are well greased before each use.
The motor is not pre-filled with oil.
A Factory-fitted control devices, such as the handle-mounted clutch cable, must not be removed or exposed.
A. Only drain the fuel tank outdoors. Gasoline is extremely flammable and the fumes are explosive.
1 Ensure that the machine is properly secured when transported on a flatbed etc.
Reduce the throttle during engine shutdown and close the fuel valve.
See ill1
- Snow blower
- Clutch lever
- Gear (6 Forward - 2 Reverse)
- Auger activation lever
- Chute adjustment lever (Horizontal)
- Deflector adjustment lever (Vertical)
- Electric start (power socket)
- Chute
- Auger
- Guards* (For large quantities of snow e.g. Snowdrift)
- Choker
- Primer
- Throttle
- Ignition Key
- Start Button for electric start
- Switch heat to grip
- Headlight switch
- Headlight
- Differential*
Notice: the illustrations may vary from your present model
* - may vary from your actual model.
ASSEMBLY
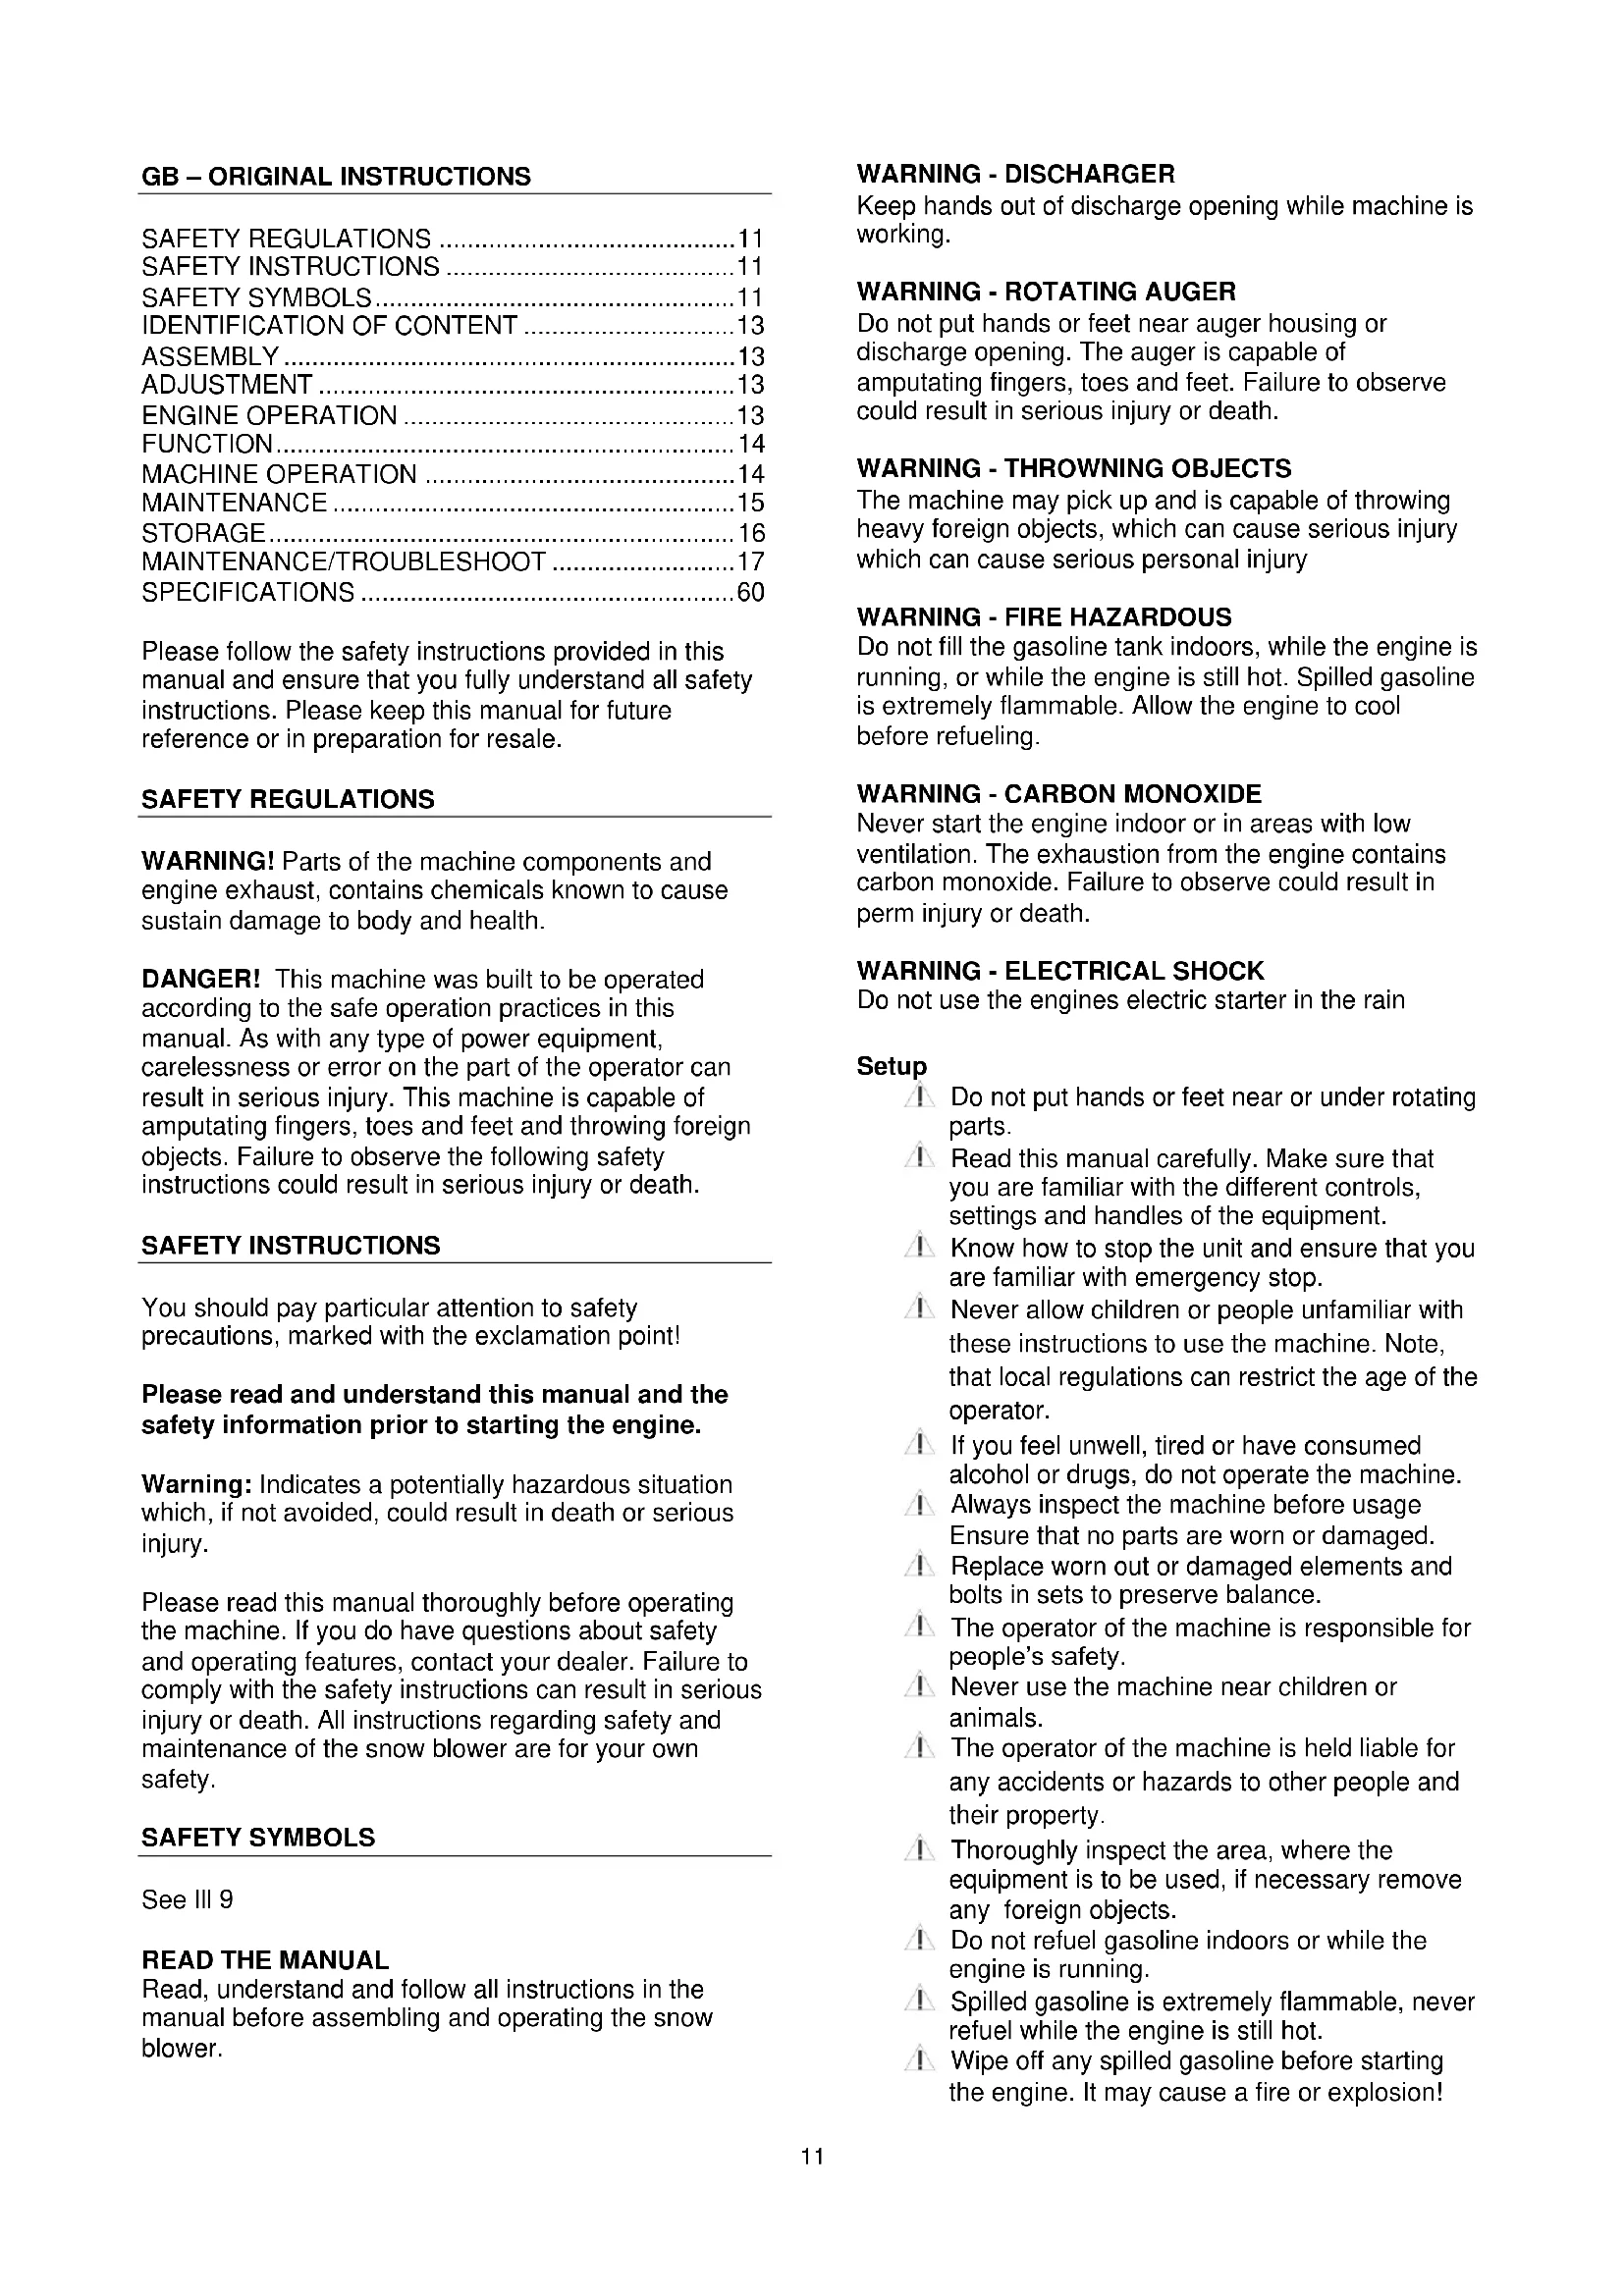
Control panel (ill2)
- Attach the control panel onto the lower handlebar
- Align the handlebars. Insert bolt, washer and fasten.
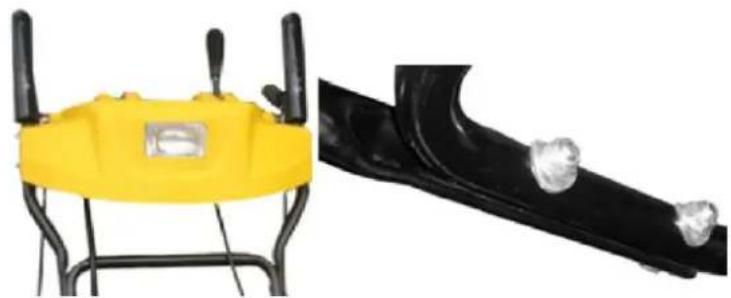
Gear control (ill3)
- Attach the rod onto the transmission axle
- Attach and fit rod onto the gear lever under the control panel insert split to fasten.
Chute (ill4)
Follow the instruction in illustration 4
Once the chute discharger is assembled, it should be free to move by hand. If not please recheck whether the plates are in the correct sequence and that the bolts are mounted to tight. If the chute control knob is over-turned. The teeth might slip and thereby jam the chute assembly. In such case please loosen the support plates and readjust teeth and plates.
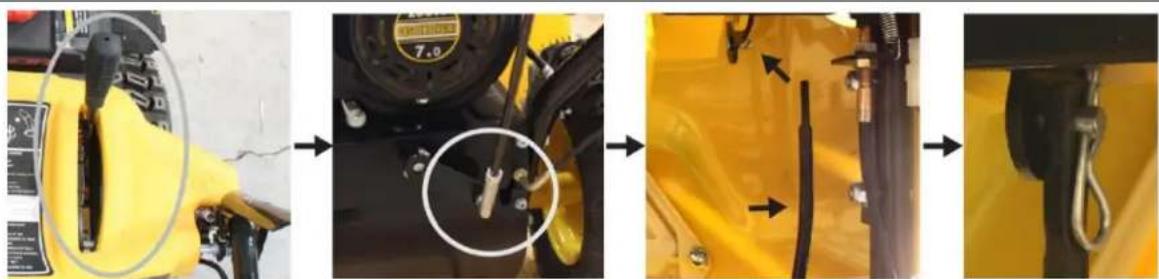
Deflector adjustment (vertical) (iII5)
- Pull the discharge cable towards the control panel and align.
- Attach the cable to the deflector adjustment lever (vertical) (ill1-6)
- Adjust and tighten the cable by tighten the nut.
- Check the tension of the cable by pulling the handle, readjust if necessary
ADJUSTMENT
Clutch and Auger activation lever (ill6)
The auger and traction cable will need to be adjusted for proper traction and impeller loading. Please follow the steps below.
Important: The cables must in emergency situations, trigger the dead man lever, once the handles are released.
Warning: Do not engage the auger while adjusting the traction cable!
Warning: Ensure that no people are around the machine during this adjustment!
- Block up the Snow blower.
- This step will stop the machine from moving, if the cables are too tight.
- Tighten the turnbuckle until there is no slack in the cables.
- Start the engine once the cables are adjusted.
Clutch lever adjustment (ill1-2) and (ill6)
- Pull the traction lever, the wheels should spin.
- If the wheels do not spin, tighten the cable even more using the turnbuckle
- Release the traction lever, the wheels should immediately stop spinning.
- If the wheels still spin, release the tension in the cable using the turnbuckle.
Auger activation lever adjustment (ill1-4) and (ill6)
- Pull the auger lever, the auger should turn.
- If the auger does not turn, tighten the cable even more using the turnbuckle
- Release the auger lever; this should immediately stop the auger from turning.
- If the auger turns, release the tension in the cable using the turnbuckle.
Emergency stop Release both traction and auger lever at the same time, if proper adjusted the dead man levers and shut off the engine switch. If not; the clutch or auger activation lever needs to be readjusted.
Skid adjustment (ill7)
- Loosen the 2 nuts
- Adjust the skids so the auger house is level with ground and fasten.
ENGINE OPERATION
Important! You must fill up with engine oil and fuel before you can start the engine.
- Check the fuel and engine oil levels and top up it necessary
- Make sure that the spark plug cap is secured to the spark plug
Starting the engine
Engine choke (ill1-11)
- To start a cold engine, move the choke lever to the close position. (only cold engine)
- To restart a warm engine, leave the choke lever in the open position.
Primer (ill1-12)
- When the engine is cold the primer supplies the carburetor with more gasoline. Push the primer at least 3 times for best performance
Throttle (ill1-13)
- Move the throttle lever about 1/3 away from the slow (turtle) position towards the fast (rabbit) position.
Ignition key (ill1-14)
- Insert the ignition key in the keyhole.
230V electric starter (ill1-15)
- Plug the cord into electrical outlet and press the start button. After the engine is started remove the plug from the socket alternatively pull the recoil starter to crank the engine
Recoil (Alternatively)
- Pull the recoil starter gently until you feel resistance in the rope. Then pull quickly and energetic. Do not at any time let go of the recoil starter but slide it gently back and pull again.
Engine choke (ill1-11)
- Push the choker gradually from close position to open position as the engine warms up.
Turn off the engine
To turn off the engine use the following procedure.
Throttle (ill1-13)
- Move the throttle lever from the fast (rabbit) position towards the slow (turtle) position
Ignition key (ill1-14)
- Pull the engine key.
FUNCTION
Handle with embedded heat (ill1-16)
- Push the heater button on the control panel to turn the heater for the handles on.
•
Front light (ill1-17)
- Push the contact to turn the headlight on.
Differential - Track models (ill1-19)\*
- Pull the lever on the right side of the handlebar in order to turn right. Pull the lever on the left side of the handlebar in order to turn left.
*Only model 7013TGEX & 7621BEX
MACHINE OPERATION
Important! Clear and secure the work area. The operator of the snow blower can and will be held liable for personal injury or damage on property to injured party.
First stage: Preparation
- Push the throttle (ill1-13) at full throttle (fast-rabbit)
- Turn the chute adjusting lever (ill1-5) to adjust the horizontal ejector angle.
- Turn the chute adjusting lever (ill1-6) to adjust the vertical ejector angle.
Warning: Never direct discharge at bystanders or allow anyone in front of unit.
Caution: Depending on the amount of snow. The ejection range can reach up to 15 meter from the chute.
Second stage: Sweeping
- Pull the right-hand control lever to engage the drive unit and the snow blower will start to move. (ill1-2)
- Use the 6 forward gears and 2 reverse (R1 and R2) to achieve the desired working speed. (ill1-3)
- Push the left-hand control lever to engage the auger unit. (ill1-4)
Note: Do not overload machine capacity by attempting to clear snow at too fast a rate.
Advice: Select a slower speed for wet heavy snow, and a higher speed for light powdery snow.
Warning: Not suitable for sleet!
Warning!
- Exercise extreme caution when operating on crossing gravel drives, walks, or roads.
- Do not clear snow across the face of slopes.
- Exercise extreme caution when changing direction on slopes.
- Do not attempt to clear steep slopes.
Auger unit
The drive shaft on auger is secured by shearing bolts. The shearing bolts will break, if the auger strikes any hard object, this is to prevent the snow blower from sustain further damage. Two spare bolts with nuts are supplied on the control panel.
Warning: Do not replace the shearing bolts with other types of bolts!
If the chute discharger is blocked: Shut the engine down. Ensure that all rotating parts has come to an complete stop. Clean the Chute and auger unit using the cleanout tool. (ill8)
Importance of maintenance
Good maintenance is cost-saving and essential for safe and trouble-free operation.
WARNING:
Improper maintenance or failure to comply with instructions, precautions can result in serious injury or death. Always follow the manual prescribed procedures and precautions.
To ensure a proper upkeep of your machine, the following pages include a maintenance schedule and description plus an inspection procedure of your machine. For tasks that are more difficult, or require special tools, maintenance should be carried out by technician or qualified mechanic.
Maintenance safety
As with any type of power equipment, carelessness or error on the part of the operator can result in serious injury. It is impossible to warn against all hazards or hazardous situations, it is therefore important that the user of the machine exhibits vigilance to operate the machine safely and rationally to avoid bringing yourself and others in danger.
Safety precautions
Important: Before commencing any maintenance or repair ensure that the engine is shutdown
To reduce the possibility of fire or explosion, be careful when working around gasoline. Use only a nonflammable solvent, not gasoline, to clean parts. Keep cigarettes, sparks and flames and other sources of ignition away from the machine.
Refueling
With the engine stopped, remove the fuel tank cap and check the fuel level. Refill the tank if the fuel level is low.
Fuel recommendations
- Use only unleaded gasoline octane 95 or higher.
- Never use stale or contaminated gasoline or an oil/gasoline mixture.
- Avoid getting dirt or water in the fuel tank.
Refuel in a well-ventilated area before starting the engine. If the engine has been running, allow it to cool. Refuel carefully to avoid spilling fuel. Do not fill above the fuel strainer shoulder. After refueling, tighten the fuel tank cap securely.
Engine oil level check
In order to check the engine oil level correctly the engine must be stopped and the machine in a level position.
How to:
- Remove the filler cap/dipstick and wipe it clean.
- Insert and remove the dipstick into the filler neck to check oil level. Note: The Oil level
must be within the specified interval at the end of the stick. If the oil level is at the lower end of the interval, refill with oil SAE.
- Screw in the filler cap / dipstick securely.
Warning: Never refill oil over the higher end of the interval, this will damage the engine.
Engine oil change
Drain the old / staled oil while the engine is warm. Warm oil is more fluid then cold and drains better.
How to:
- Place a suitable container below the engine to catch the used oil.
- Remove the filler cap and the drain plug.
- Drain completely!
- Reattach the drain plug, and tighten it securely.
• Refill new recommended oil.
Please dispose the used engine oil environmentally correct. We suggest that you keep the used oil in a sealed container and dispose at your recycling center or service station for reclamation. Do not throw it in the waste; pour it on the ground; or down a drain.
Engine oil specifications
Oil is affecting the performance of your machine and service life. Use 4-stroke automotive SAE 30 oil.
Spark Plug
Check the spark plug for dirt and grime; if necessary clean it with a copper wire brush.
- First time after approximately 10 hours of operation
- Hereafter service the spark plug after every 50 hours of operation.
How to:
- Disconnect the spark plug cap, and remove any dirt from around the spark plug area.
- Remove the spark plug with a spark plug wrench. Inspect the spark plug.
- Replace it if the electrodes are worn, or if the insulator is cracked or chipped.
- Measure the spark plug electrode gap with a suitable gauge.
- The gap should be 0.70 - 0.80 mm. Correct the gap, if necessary, by carefully bending the side electrode.
- Mount the spark plug carefully, by hand, to avoid cross-threading.
- After the spark plug seats, tighten with a spark plug wrench to compress the water. If reattaching a used spark plug, tighten 1/8 - 1/4 turn after the spark plug seats. If installing a new spark plug, tighten 1/2 turn after the spark plug seats.
- Attach the spark plug cap.
Notice: An incorrect spark plug can cause engine damage.
STORAGE
Proper preparation for long term storage is essential for keeping your snow blower free from rust corrosion and prevent part and function to parts impair. The following steps will make the engine easier to start after storage and prevent your snow blower from rusting during long term storage.
Notice: The warranty does not cover damage on machine or engine as a result of incorrect storage or negligence to comply with maintenance recommendation and warning.
Cleaning If the engine has been running, allow it to cool for at least half an hour before cleaning. Clean all exterior surfaces, seal up any damaged paint, and coat other areas that may rust with a light film of oil.
Notice: Water directly on a hot engine can cause damage or worse crack the aluminum parts in the engine. If the engine has been running, allow it to cool for at least half an hour before washing.
Fuel Gasoline will oxidize and deteriorate during storage. Stale gasoline will cause hard starting, and will leave gum deposits that will clog the fuel system.
Do not keep same gasoline in engine for more than 3 months!!!
Warning: Don't start the engine with oxidize and deteriorate gasoline in the fuel tank, it may damage the carburetor and other fuel system components!
Preparation for long term storage
We recommend draining the fuel tank and carburetor before long-term storage. However adding a fuel stabilizer can extend fuel service life.
Draining the fuel tank and carburetor
We recommend draining the fuel tank first and hereafter the carburetor.
How to:
- Place an approved gasoline container below the carburetor, and use a funnel to avoid spilling fuel.
- Remove the carburetor drain bolt, and then pull out the fuel tube.
- After all the fuel has drained into the container, reattach the drain bolt and fuel tube. Ensure that both bolt and tube are securely tightened.
Adding a fuel additive
Follow the fuel additive scale of the manufacturer.
How to:
- Empty fuel tank for old gasoline and refill fresh.
- Pour the fuel additive in the tank.
- Idle run, the engine outdoors for 10 minutes. This will blend the fuel mixture in the engine block and carburetor.
- Stop the engine.
Precautionary measures against moist
In order to minimize the parts to impair from moist:
- Change the engine oil.
- Remove the spark plugs.
- Pour a tablespoon (5-10 cc) of clean engine oil into the cylinder.
- Pull the starter rope several times to distribute the oil in the cylinder.
- Reinstall the spark plugs.
- Pull the starter rope slowly until resistance is felt. This will close the valves so moisture cannot enter the engine cylinder. Return the starter rope gently.
General advice
- Select a well-ventilated storage location, with low humidity in order to prevent rust and corrosion. Avoid locations where an ignition source is present.
- A drained fuel tank will, minimize the possibility of fuel leakage.
- Position the equipment so the engine is level. Tilting the machine can cause fuel or oil leakage.
- Cover the engine and exhaust system to prevent from dust.
Notice: A hot engine and exhaust system can ignite or melt some materials. Do not use sheet plastic as a dust cover. A nonporous cover will trap moisture around the engine, promoting rust and corrosion.
Preparing the engine after a long term storage
- Check your engine as described under maintenance
- Start your engine as described under operation.
Notice: Gasoline oxidizes and deteriorates over time, causing hard starting. If the cylinders were coated with oil during storage preparation, the engine may smoke briefly at startup. This is normal.
Storage planner
Less than 1-month
- No special preparation is required.
1 to 2 months
- Fill with fresh gasoline and add a gasoline conditioner.
2 months to 1 year
- Fill with fresh gasoline and add a gasoline conditioner.
- Drain fuel from carburetor.
- Clean fuel sediment cup.
1 year or more
- Drain fuel tank and carburetor.
- Clean fuel sediment cup.
- Remove spark plug.
- Put a tablespoon of engine oil into the spark plug cylinder. Turn the engine slowly with the pull rope to distribute the oil. Reinstall spark plug.
- Change Oil.
| Maintenance chart | Everytime | 1st month | Every 3 month | Every 6 month | Once year | |
| Engine oil | Check | X | ||||
| Change | X | X | ||||
| Sediment Cup | Clean | X | ||||
| Spark plug | Check Clean | X | ||||
| Replace | X | |||||
| Spark arrester | Clean | X | ||||
| Idle speed Combustion chamber | Check Adjust Clean | X | ||||
| Valve clearance | Check Adjust | X | ||||
| Fuel tank and strainer | Clean | X | ||||
| Fuel line | Check | Every 2 years (Replace if necessary) | ||||
| Fault | Possible causes | Remedy |
| The unit does not operate smoothly and vibrates intensively | Bolts looseAuger unit mounting loose | Check boltsCheck auger unit mounting |
| Engine does not run | Throttle lever in wrong positionSpark plug defectiveFuel tank emptyFuel cock closed | Check settingReplace spark plugTop up fuelOpen fuel cock |
| Engine does not run smoothly | Bad FuelSpark plug dirty | Empty Fuel Tank and refill with Fresh FuelClean the spark plug |
| Drive power falls | Clutch play too largeDrive Belt loose or damaged | Adjust clutch cableReplace Drive BeltContact authorized customer service |
| The engine will not start or dies after a short period of time | Choke in wrong positionSpark plug FouledNo fuel | Check Choke settingClean or replace spark plug (electrode spacing 0.6mm)Top up fuel |
| Inadequate or no ejection | Snow ejection until blockedPlow screw not turning Shearing bolts sheared | Clean the snow ejection unit with a solid objectAdjust Auger clutch cableReplace shear bolts or contact authorized customer service |
| The snow is not removed fully | Skids maladjusted | Adjust the skids |
2006/42/EC - 2004/108/EC
Overensstemmelsesvurdering procedure i henhold til Annex I • Conformity assessment procedure according to Annex I • Konformitätsbewertungsverfahren nach Anhang I • Procédure d'évaluation de la conformité conformément à l'annexe I • Procedura oceny zgodności zgodnie z załącznikiem I • Postup posuzování shody podle přílohy I • Postopek ugotavljanja skladnosti v skladu s Prilogo I • Procedura di valutazione della conformità secondo l'allegato I
2000/14/EC amended by 2005/88/EC
Responsible for documentation
Johnny Lolk, Purchase Manager
01.06.2013

Verner Hansen
Managing Director