AC1300 - Baby monitors ANGELCARE - Free user manual and instructions
Find the device manual for free AC1300 ANGELCARE in PDF.
Frequently Asked Questions - AC1300 ANGELCARE
User questions about AC1300 ANGELCARE
0 question about this device. Answer the ones you know or ask your own.
Ask a new question about this device
Download the instructions for your Baby monitors in PDF format for free! Find your manual AC1300 - ANGELCARE and take your electronic device back in hand. On this page are published all the documents necessary for the use of your device. AC1300 by ANGELCARE.
USER MANUAL AC1300 ANGELCARE
Angelcare® VOOR UW GEMOEDSRUS
GEBRUIKERSHANDLEIDING
VIDEO-, BEWEGINGS-
EN AUDIOMONITOR
Model AC1300
Angelcare®
Angelcare®

text_image
Voxel Zoom Video Orbit AngelcareNL
2
FR
21
DE
41
EN
61
INHOUDSTAFEL
WAARSCHUWINGEN....3
INSTALLATIEVOORSCHRIFTEN VOOR DE AC1300....6
STAP 1 - OPLADEN VAN DE OUDERUNIT (9 UREN)....7
STAP 2 - PLAATSEN VAN SENSORMATJES....8
STAP 3 - INSTALLATIE VAN DE BABYUNIT ....10
STAP 4 - INSCHAKELEN VAN DE MONITOR....10
STAP 5 - TESTEN EN VERKENNEN VAN UW MONITOR....11
STAP 6 - BIJKOMENDE FUNCTIES....14
PROBLEEMOPLOSSING 19
BEPERKTE GARANTIE....19
TECHNISCHE SPECIFICATIES 19
FRANÇAIS 21
DEUTSCH....41
ENGLISH 61
GEBRUIKSHANDLEIDING
BEWAAR DE GEBRUIKSHANDLEIDING VOOR LATERE RAADPLEGING.
LEES DE WAARSCHUWINGEN EN INSTRUCTIES AANDACHTIG DOOR VOORDAT U DIT PRODUCT MONTEERT EN GEBRUIKT.
DOET U DAT TOCH, DAN BESTAAT ER GEVAAR OP BESCHADIGING VAN DIT PRODUCT, ERNSTIG LETSEL OF ZELFS DE DOOD.
SENSORMATJES ZIJN NIET BEDOELD VOOR GEBRUIK BIJ VOLWASSENEN, KINDEREN OF PEUTERS OUDER DAN 24 MAANDEN EN ZIJN EVENMIN BEDOELD OM VAST TE STELLEN OF EEN KIND UIT HET KINDERBEDJE IS.
WAARSCHUWING
COMMUNICATIONS COMMISSION (FCC) EN INDUSTRY CANADA (IC)
Verklaring betreffende blootstelling aan radiofrequente straling
text_image
Safety warning symbol for child protection using a camera and no plug, with Chinese texttext_image
Diagram of a medical or laboratory device with numbered parts and a grid inset showing a waveform or sensor.natural_image
Diagram of a door handle with attached electrical socket (no text or symbols)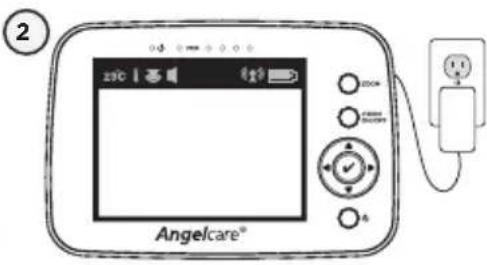
text_image
2 zsc Angelcare®text_image
Safety warning symbol for child using stethoscope and no device, indicating no protection or disinfectionWURGINGSGEVAAR.
text_image
2 1 sensormatjetext_image
Diagram illustrating three different mechanical or electrical installation methods with numbered annotations and symbols
text_image
6 8 cm 6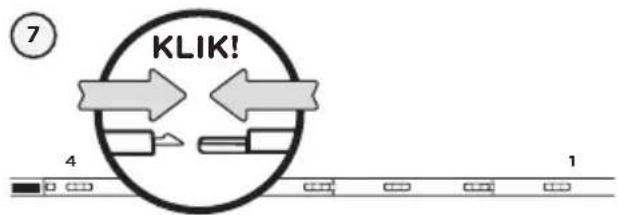
text_image
KLIK! 7 4 1
text_image
8 4 3 2 1 9
text_image
10text_image
Safety warning sign showing a child with a no-smoking symbol and a camera above, indicating no smoking or disinfection.WAARSCHUWING
GEVAAR VOOR WURGING
text_image
Diagram illustrating a medical or dental procedure with labeled steps and components including a device, wall-mounted device, and head-up views.text_image
① WORD ON/OF ②text_image
Diagram showing directional arrows and a checkmark inside a circular component, with 'OFF' labels and a switch icon.text_image
Diagram illustrating two steps of a mechanical or structural assembly with labeled components and directional arrows.ALS HET ALARM NIET AFGAAT:
BEWEGINGSALARM
bar
| Category | Value 1 | Value 2 | Value 3 | Value 4 | Value 5 | |---|---|---|---|---|---| | Bar 1 | 0.5 | 1.2 | 0.8 | 0.6 | 0.4 | | Bar 2 | 0.7 | 1.5 | 1.0 | 0.9 | 0.5 | | Bar 3 | 0.6 | 1.3 | 0.9 | 0.7 | 0.4 | | Bar 4 | 0.8 | 1.6 | 1.1 | 1.0 | 0.6 | | Bar 5 | 0.9 | 1.7 | 1.2 | 1.1 | 0.7 | | Bar 6 | 0.7 | 1.4 | 0.8 | 0.6 | 0.3 | | Bar 7 | 0.8 | 1.5 | 0.9 | 0.7 | 0.4 | | Bar 8 | 0.6 | 1.2 | 0.7 | 0.5 | 0.2 | | Bar 9 | 0.9 | 1.8 | 1.3 | 1.2 | 0.8 | | Bar 10 | 0.7 | 1.3 | 0.8 | 0.6 | 0.3 | | Bar 11 | 0.8 | 1.4 | 0.9 | 0.7 | 0.4 | | Bar 12 | 0.6 | 1.1 | 0.6 | 0.4 | 0.2 | | Bar 13 | 0.9 | 1.6 | 1.2 | 1.1 | 0.7 | | Bar 14 | 0.7 | 1.2 | 0.8 | 0.5 | 0.3 | | Bar 15 | 0.8 | 1.3 | 0.9 | 0.6 | 0.4 | | Bar 16 | 0.6 | 1.0 | 0.5 | 0.3 | 0.2 | | Bar 17 | 0.9 | 1.7 | 1.4 | 1.3 | 0.9 | | Bar 18 | 0.7 | 1.2 | 0.8 | 0.5 | 0.3 | | Bar 19 | 0.8 | 1.3 | 0.9 | 0.6 | 0.4 | | Bar 20 | 0.6 | 0.9 | 0.5 | 0.3 | 0.2 | | Bar 21 | 0.9 | 1.6 | 1.2 | 1.1 | 0.8 | | Bar 22 | 0.7 | 1.1 | 0.8 | 0.5 | 0.3 | | Bar 23 | 0.8 | 1.2 | 0.9 | 0.6 | 0.4 | | Bar 24 | 0.6 | 0.8 | 0.5 | 0.3 | 0.2 | | Bar 25+ (repeated) | - | - | - | - | - | The values in the chart are estimated based on the provided code and are not explicitly labeled in the image.text_image
Icon set with labeled icons and a downward arrow, likely indicating a process or navigation step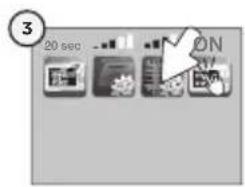
text_image
3 20 sec ON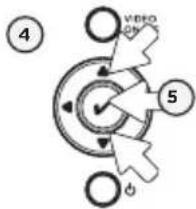
text_image
4 VIDEO ON 56.2 - PAUZE
text_image
Icon grid with labeled icons including gears, tools, and a downward arrow, marked with number 2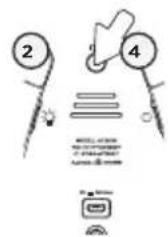
text_image
2 4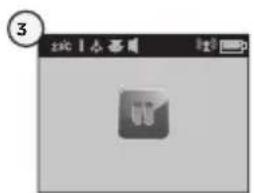
flowchart
graph TD
    A["④"] --> B["Checkmark"]
    B --> C["⑤"]
    C --> D["Arrow to top of B"]
    D --> E["Arrow to bottom of B"]
    E --> F["Arrow to bottom of B"]
HET TEMPERATUURALARM ACTIVEREN

text_image
① VIDEO ON/OFF ②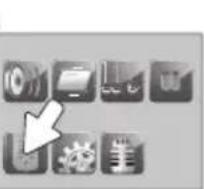

text_image
3 30°C 15 °C °C ON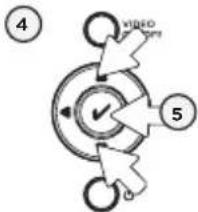
flowchart
graph TD
    A["④"] --> B["⑤"]
    B --> C["⑥"]
    C --> D["⑦"]
    D --> E["⑧"]
    E --> F["⑨"]
    F --> G["⑩"]
    G --> H["⑪"]
    H --> I["⑫"]
    I --> J["⑬"]
    J --> K["⑭"]
    K --> L["⑮"]
    L --> M["⑯"]
    M --> N["⑰"]
    N --> O["⑱"]
    O --> P["⑲"]
    P --> Q["⑳"]
    Q --> R["㉑"]
    R --> S["㉒"]
    S --> T["㉓"]
    T --> U["㉔"]
    U --> V["㉕"]
    V --> W["㉖"]
    W --> X["㉗"]
    X --> Y["㉘"]
    Y --> Z["㉙"]
DE TEMPERATUURKEUZE INSTELLEN
text_image
① VIDEO ON/OFF ②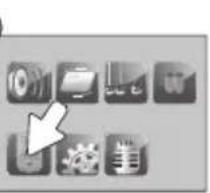
natural_image
Grid of grayscale icons representing various electronic devices or components (no text or symbols)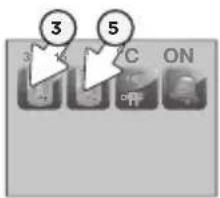
text_image
3 4 5 C ON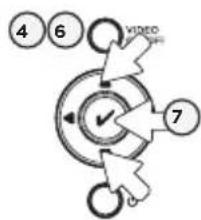
flowchart
graph TD
    A["④"] --> B["⑥"]
    B --> C["⑦"]
    C --> D["⑦"]
    D --> E["⑦"]
    E --> F["⑦"]
    F --> G["⑦"]
    G --> H["⑦"]
    H --> I["⑦"]
    I --> J["⑦"]
    J --> K["⑦"]
    K --> L["⑦"]
    L --> M["⑦"]
    M --> N["⑦"]
    N --> O["⑦"]
    O --> P["⑦"]
    P --> Q["⑦"]
    Q --> R["⑦"]
    R --> S["⑦"]
    S --> T["⑦"]
    T --> U["⑦"]
    U --> V["⑦"]
    V --> W["⑦"]
    W --> X["⑦"]
    X --> Y["⑦"]
    Y --> Z["⑦"]
MANUEEL INSCHAKELEN:
text_image
Diagram of a light bulb with labeled parts and text annotations in Chinese
BELANGRIJK
text_image
Diagram showing a window with directional arrows and a circular icon labeled 'VIDEO ON/OP'.HET ALARM GAAT NIET AF
INSTRUCTIONS D'INSTALLATION DU AC1300....26
text_image
Diagram of a battery pack assembly with numbered components and wiring, including a grid-patterned component.natural_image
Diagram of a door lock and electrical socket connected by wires (no text or symbols)2
text_image
zjc Angelcare®text_image
Safety warning symbol showing a child with a stethoscope inside a circle, indicating no protection or disinfection.DANGER D'ÉTRANGLEMENT.
text_image
Diagram showing two document-like boxes with grid patterns and two arrows pointing to them, likely indicating directional or flow.text_image
Diagram illustrating three different mechanical or electrical installation methods with numbered annotations and symbols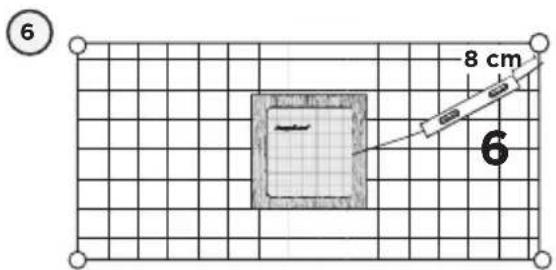
text_image
6 8 cm 6
flowchart
graph TD
    A["CLIC!"] --> B["1"]
    A --> C["4"]
    A --> D["7"]
    style A fill:#f9f,stroke:#333
    style B fill:#ccf,stroke:#333
    style C fill:#cfc,stroke:#333
    style D fill:#fcc,stroke:#333
text_image
Diagram showing three labeled views of a device with numbered annotations and a prohibition symbol in the first circle.text_image
Safety warning symbol for child smoking, featuring a medical device and no signAVERTISSEMENT
DANGER D'ÉTRANGLEMENT
text_image
Diagram illustrating a medical or diagnostic procedure with labeled steps and components including a device, battery, scale, and head-up views.text_image
Diagram showing a circular control knob with directional arrows and a checkmark, labeled 'OFF' at the top.natural_image
Pure diagram of vertical bars with a numbered circle (2) and no text or symbolstext_image
Icon set with labeled icons including gears, books, and a downward arrow, likely representing software or hardware functions.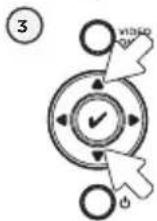
natural_image
Row of grayscale icons including books, documents, charts, and gear (no text or symbols)3
POUR TESTER LA TRANSMISSION SONORE :
text_image
Icon selection panel with eight labeled icons and a downward arrow, showing a numbered step indicator.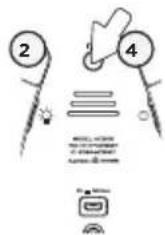
text_image
3 2001 5000text_image
Diagram of a light bulb with labeled components and text annotations in Chinese
IMPORTANT
text_image
Diagram showing a window with directional arrows and a circular control dial labeled 'VIDEO ON/OFF' with checkmark.AUCUN SON N'EST TRANSMIS
text_image
Safety warning symbol for child using a stethoscope and radio, with no text present17.4 This device complies with the part 15 of the FCC Rules and the Industry Canada license - exempt RSS standards(s). Operation is subject to the following two conditions:
STRANGULATIONSGEFAHR
text_image
Safety warning symbol for child using stethoscope and no device, indicating no protection or disinfectionnatural_image
Two identical rectangular panels with grid patterns and two upward-pointing arrows, no text or symbols present.text_image
Diagram illustrating three different mechanical or electrical installation methods with numbered annotations and symbolstext_image
Safety warning symbol for child smoking, featuring a stop sign and camera iconWARNHINWEIS STRANGULATIONSGEFAHR
text_image
Diagram illustrating a medical or dental procedure with labeled steps and components including a device, pressure monitor, and head-up views.text_image
① VIEWD ON/DF ②text_image
Diagram illustrating two steps of a mechanical or structural assembly with labeled components and directional arrows.text_image
Icon selection panel with eight grayscale icons and a white arrow pointing to the first icon, labeled with number 2.
text_image
3 290 | 小事通WICHTIG
text_image
Diagram of a light bulb with labeled components and text annotations in Chinesetext_image
Diagram of a human pelvic anatomical structure with labeled parts and measurement annotations6.8 - ZOOM-MODUS
text_image
① VIDEO ON/OF ③ VRED ON ✓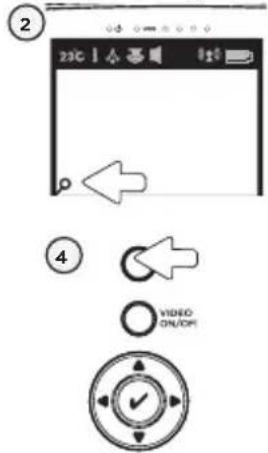
text_image
② 22°C ④ VIDEO ON/OFFAC1300 SETUP REQUIREMENTS....65
STEP 1 - Charging the Parent Unit (9 hours)....66
STEP 2 - Installing the Sensor Pad ....67
STEP 3 - Setting up the Nursery Unit....69
STEP 4 - Turning on your monitor....69
STEP 5 - Testing and getting to know your monitor....70
STEP 6 - Activating and deactivating additional functions....73
Troubleshooting 77
Limited warranty....78
Technical specifications....78
DUTCH 2
FRANÇAIS 21
DEUTSCH 41
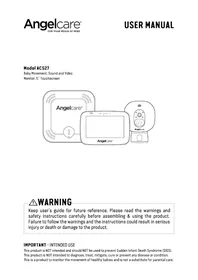
OWNER'S MANUAL
KEEP YOUR OWNER'S MANUAL FOR FUTURE REFERENCE.
PLEASE READ THE WARNINGS AND INSTRUCTIONS CAREFULLY BEFORE ASSEMBLING & USING THE PRODUCT.
FAILURE TO FOLLOW THE WARNINGS AND THE INSTRUCTIONS COULD RESULT IN SERIOUS INJURY OR DEATH OR DAMAGES TO THE PRODUCT.
THE SENSOR PAD FEATURE IS NOT FOR USE WITH ADULTS, CHILDREN OR INFANTS OLDER THAN 24 MONTHS.
THE SENSOR PAD IS NOT INTENDED TO BE USED TO DETERMINE IF A CHILD IS OUT OF THE CRIB.
WARNING
Adult assembly required.
Keep small parts away from children when assembling.
We, at Angelcare ^® , stand behind all of our products.
If you are not completely satisfied or have any questions,
United States and Canada: Please contact us at: angelcare@cdecinc.ca
Other countries: Please contact your local distributor.
FCC AND IC REGULATIONS
RF radiation exposure statement
The Nursery Unit complies with FCC RF radiation exposure limits set forth for an uncontrolled environment. Caution: To maintain the compliance with the FCC's and Industry Canada's RF exposure guideline, install the Nursery Unit at least 20 cm from ALL persons. The transmitter of this device must not be co-located or operating in conjunction with any other antenna or transmitter.
Industry Canada
This product meets the applicable Industry Canada technical specifications. CAN ICES-3 (B)/NMB-3 (B)
- THIS PRODUCT CANNOT REPLACE RESPONSIBLE ADULT SUPERVISION. This product is designed to aid in the monitoring of your child. When using the monitor, you must still provide the supervision necessary for the continued safety of your child. Monitoring of premature babies, or those considered to be at risk, should always be carried out under the supervision of a health professional. This monitor SHOULD NOT be used as a medical device, nor as a device to prevent Sudden Infant Death Syndrome (SIDS).
- WARNING Strangulation Hazard — Children have STRANGLED in cords. Keep adapter cords

text_image
Safety warning symbol for infant care with no phone, camera, and plug-in plugout of the reach of children (more than 1 meter away). NEVER use Sensor Pad(s) without the protective cord covering. Check protective cord covering before each use. Immediately discontinue use of Sensor Pad(s) if protective covering is
damaged or broken.
- Never use extension cords with adapters. ONLY use the adapters provided.
- When an adapter is plugged into an electrical outlet, DO NOT touch the exposed end.
- ALWAYS be sure that both the transmitter and receiver are working properly and are within range of each other. Test the monitor before first use, periodically and when changing location of the Nursery Unit.
- ALWAYS be sure to immediately check on baby whenever an alarm sounds.
- DO NOT use monitor near water (such as bath tub, sink, etc.).
CAUTION
RISK OF ELECTRIC SHOCK DO NOT OPEN

DO NOT EXPOSE TO RAIN OR MOISTURE
- Keep monitor AWAY from heat sources (such as stoves, radiators, etc.).
- ALWAYS place both the Nursery Unit and the Parent Unit on a flat surface in an upright position and allow for proper ventilation. DO NOT place on sofas, cushions, beds, etc. which may block ventilation.
- This monitor uses public airwaves to transmit signals. The Parent Unit may pick up signals or interference from other nursery monitors in your area. Your monitor may even be picked up by other households. To protect your privacy, make sure both units are turned OFF when not in use. If you experience interference, change the channel on both units.
- This product is NOT a toy. DO NOT allow children to play with it.
- This product contains small parts. Adult assembly required. Exercise care when unpacking
and assembling the product and keep small parts away from children.
- When using the monitor, the room temperature should be between 10^ C and 40^ C.
BATTERY WARNING
- Danger of explosion if batteries are incorrectly replaced. The Parent Unit battery is a replaceable Li-Ion battery. Only use the Angelcare recommended replacement battery. In both units, DO NOT mix old and new batteries. DO NOT mix alkaline, standard or rechargeable batteries. Insert batteries with correct polarity. DO NOT short-circuit supply terminals. ONLY use the recommended batteries or equivalent (volts and size) and the correct adapter. Remove batteries in both units when product is stored for long periods of time or when batteries are exhausted. Dispose exhausted batteries properly. Keep all batteries away from children.
15. IMPORTANT SAFETY INSTRUCTIONS
15.1 Heed all warnings - All warnings on the product and in the operating instructions should be adhered to.
15.2 Follow all instructions - All operating and use instructions should be followed.
15.3 Water and moisture - DO NOT use this apparatus near water. For example, near a bath tub, wash bowl, kitchen sink, laundry tub, in a wet environment or near a swimming pool and the like. Care should be taken so that objects DO NOT fall onto units and that liquids are not spilled into either unit or Sensor Pad through its openings.
15.4 Cleaning - Disconnect all units before cleaning. DO NOT immerse in water any part of the monitor. Clean only with dry cloth.
15.5 Ventilation - DO NOT block any ventilation openings. Allow for proper ventilation when units are in use. DO NOT cover the Nursery Unit or the Parent Unit with any object such as a blanket. DO NOT place it in a drawer or in any location which would muffle the sound or interfere with the normal flow of air.
15.6 Heat sources - DO NOT install near any heat sources such as radiators, heat registers, stoves, TVs or other apparatus (including amplifiers) that produce heat. Heat can damage the case or electrical parts.
15.7 Power cord protection - Protect the Sensor Pad cord and Adapter's power cord from being walked on or pinched by furniture or other items - Power supply cords should be routed so that they are not likely to be walked on or pinched by items upon or against them, paying particular attention to cords and plugs, convenience receptacle, and the point where they exit from the product. The socket outlet shall be installed near the equipment and shall be easily accessible. Make sure to plug the adapter to the socket outlet nearest to the equipment and that is easily accessible. To disconnect from mains, unplug the adapter.
15.8 Accessories - Only use attachments/accessories specified by the manufacturer. DO
NOT place this product on an unstable cart, stand, tripod, bracket or table. The product may fall, causing serious injury to a child or adult and serious damage to the product. Use ONLY with a cart, stand, tripod, bracket or table recommended by the manufacturer or sold with the product. Any mounting of the product should follow the manufacturer's instructions.
15.9 Unplug this appliance during lightning storms or when not used for long periods of time.
15.10 Servicing - DO NOT attempt to service this product yourself as opening or removing covers (except battery door) may expose you to dangerous voltage or other hazards.
15.11 Replacement parts - When replacement parts are required, be sure the replacement parts specified by the manufacturer have the same characteristic as the original part. Unauthorized substitution may result in fire, electric shock or other hazards.
15.12 Usage - This baby monitor is intended as an aid. It is NOT a substitute for responsible and proper adult supervision and should not be used as such. Use this appliance ONLY for its intended use as described in this manual.
15.13 Power Sources - Operate this product only from the type of power source indicated on the type plate of the adaptor. If you are unsure of the type of power supply to your home, consult your dealer or local power company.
15.14 Overloading - DO NOT overload wall outlets, extension cords or integral convenience receptacles as this can result in a risk of fire or electric shock.
15.15 Object and Liquid Entry - NEVER push objects of any kind into this product through casing slots as they may touch dangerous voltage points or short out parts that could result in a risk of fire or electric shock. NEVER spill liquid of any kind on the product.
15.16 Antenna - The antenna used for this transmitter must be installed to provide a separation distance of at least 20 cm from all persons and must not be collocated or operating in conjunction with any other antenna or transmitter.
15.17 Power Lines - An outside antenna system should NOT be located in the vicinity of overhead power lines or other electric light or power circuit, or where it can fall into such power lines or circuits as contact with them may be fatal.
15.18 Vibration Source - When the monitor is in use, DO NOT use a crib mobile or other crib accessories that may produce vibrations. Other sources of vibrations may include fans, washing machines, loud music, etc. These sources of vibration may interfere with the performance of your Angelcare® monitor and the alarm will not sound if it continues to detect any movement other than your baby's. Be sure all vibration sources are eliminated before using the monitor. You may experience false alarms for several reasons. The most common reason is the Nursery Unit has not been turned OFF after you have removed your baby from the crib. Another reason is the Sensor Pad has not been placed under the mattress properly. Be sure the Sensor Pad is on a flat, firm surface with the printed side facing up. The sensitivity level may also need to be adjusted. Refer to Step
5.1. Always be sure to immediately check on baby whenever an alarm sounds.
15.19 Sensor Pad - Your Sensor Pad can be used in any crib that is stationary. If the crib has a spring or slat base, place a hard board between the crib base and the Sensor Pad measuring at least 33 x 33 cm and 6 mm thick. Only use your Angelcare® monitor in a stationary sleeping environment such as a crib where the Sensor Pad can rest on a completely flat, firm surface. The sensor pad is made of plastic and does not permit the air to circulate. Therefore, mildew build up could develop underneath the mattress in the sensor pad area. We suggest rotating the mattress regularly to prevent any mildew.
16. IMPORTANT SAFETY INSTRUCTIONS RELATED TO USE OF BATTERIES
16.1 Use ONLY the type and size of batteries specified in the owner's manual. There is a risk of explosion if batteries are replaced with an incorrect type.
16.2 Charge the battery for 9 hours prior to first use. Be sure to have the monitor in the OFF position during this period. ONLY use the adapters included with your monitor.
16.3 DO NOT use these adapters with any other equipments.
16.4 When unplugging the adapter from the Nursery Unit, be sure it is switched to the OFF position. If it isn't, the unit will revert to battery mode if batteries are installed.
16.5 DO NOT use rechargeable batteries in the Nursery Unit. Use alkaline batteries ONLY.
16.6 DO NOT dispose batteries in fire. They may explode. Check with local regulations for possible special disposal instructions.
16.7 Exercise care in handling batteries in order not to short out the batteries with conducting materials such as rings, bracelets and keys. Overcharging, short circuiting, reverse charging, mutilation, or incineration of batteries must be avoided to prevent one or more of the following occurrences: release of toxic materials, release of hydrogen and/or oxygen, gas and rise in surface temperature.
16.8 DO NOT attempt to recharge batteries provided with or identified for use with this product that are not intended to be charged. The batteries may leak corrosive electrolyte or explode.
16.9 DO NOT attempt to rejuvenate the batteries provided with or identified for use with this product by heating them. Sudden release of battery electrolyte may occur, causing burns or irritation to eyes or skin.
16.10 If and when necessary, the batteries must be replaced with identical new ones or equivalent (volts and size). If a battery to be replaced is connected with other batteries in series, replace the other batteries at the same time as well. DO NOT mix old and new batteries.
16.11 Reverse polarity installation of the batteries in the end product must be avoided. Reverse insertion of batteries can cause charging, and that may result in leakage or explosion.
16.12 Remove batteries from both units if you store the product over 30 days because the batteries could leak and damage the product.
16.13 Discard 'dead' batteries as soon as possible since 'dead' batteries are more likely to leak in a product. If a battery has leaked or vented, it should be replaced immediately using protective gloves.
16.14 DO NOT store this product, or the batteries provided with or identified for use with this product, in high-temperature areas.


ARNING
17. (North America Only)
17.1 Warning: Changes or modifications to this equipment not expressly approved by the party responsible for compliance could void the user's authority to operate the equipment.
17.2 NOTE: This equipment has been tested and found to comply with part 15 of the FCC Rules and the Industry Canada license-exempt RSS standard(s). These limits are designed to provide reasonable protection against harmful interference in a residential installation. This equipment generates, uses and can radiate radio frequency energy and, if not installed and used in accordance with the instructions, may cause
harmful interference to radio communications.
17.3 However, there is no guarantee that interference will not occur in a particular installation. If this equipment does cause harmful interference to radio or television reception, which can be determined by turning the equipment OFF and ON, the user is encouraged to try to correct the interference by one or more of the following measures:
- Reorient or relocate the receiving antenna.
- Increase the separation between the equipment and receiver.
- Connect the equipment into an outlet on a circuit different from that to which the receiver is connected.
- Consult the dealer or an experienced radio/TV technician for help.
17.4 This device complies with the part 15 of the FCC Rules and the Industry Canada license - exempt RSS standards(s). Operation is subject to the following two conditions:
(1) This device may not cause harmful interference, and
(2) This device must accept any interference received, including interference that may cause undesired operation.
SETUP REQUIREMENTS
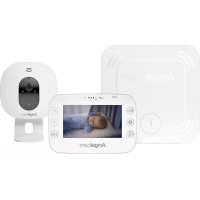
VIDEO, MOVEMENT & SOUND MONITOR
Model AC1300
INCLUDED:

text_image
Angelcare®Parent Unit with Rechargeable Battery
Nursery Unit
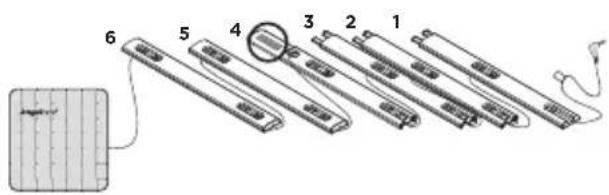
text_image
Diagram of a multi-step electrical or mechanical device with numbered components and wiring, including a schematic inset.1 Sensor Pad (AC1300) or 2 Sensor Pads (AC1300-2SP) with pre-installed cord covers
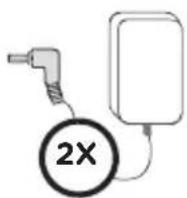
2 AC Adapters
YOU MUST PREPARE:
One hardboard (not included)
Thickness: 6 mm
Minimum dimensions:
33 cm x 33 cm
Maximum dimensions: equal to the mattress size
Hardboard
IMPORTANT
The hardboard must be larger than the Sensor Pad surface area or in the case of the AC1300-2SP of two Sensor Pads.
WHAT YOU WILL NEED (NOT INCLUDED):

3 AA Alkaline
Batteries for Nursery
Unit
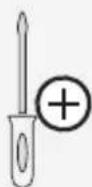
Miniature Philips
Screwdriver

natural_image
Diagram of a door lock mechanism with an electrical outlet, showing internal components and wiring (no text or symbols)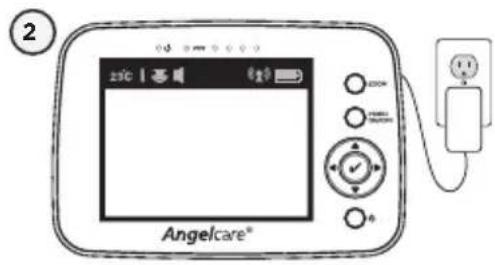
text_image
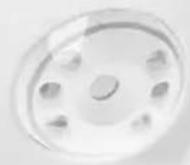
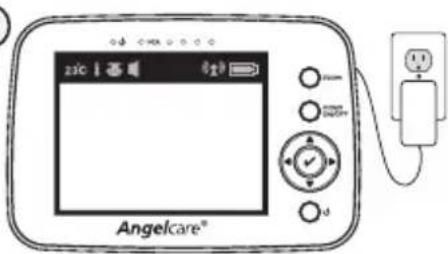
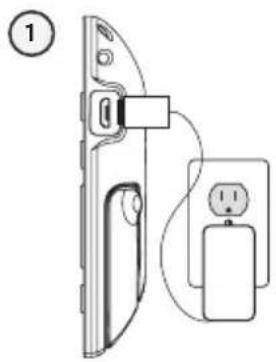
2 Angelcare®1) Connect the adapter to the Parent Unit and into an electrical outlet.
2) Charge the unit for 9 continuous hours (prior to first use).
NOTE:
To optimize your battery performance please refer to Battery Guidelines in the Troubleshooting section.
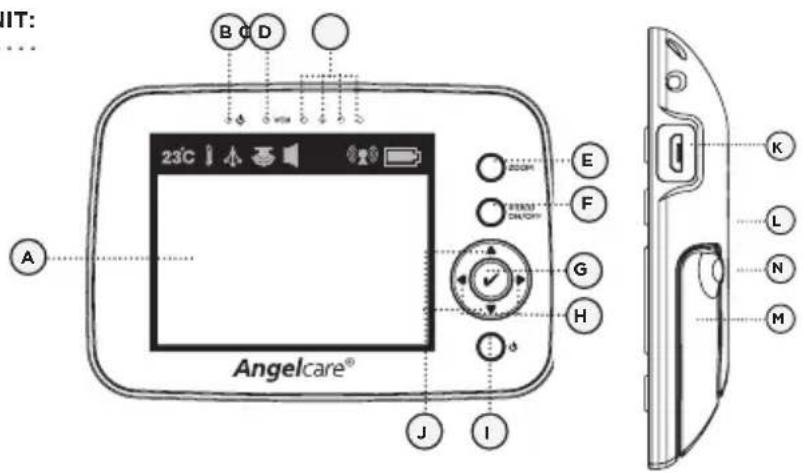
PARENT UNIT:
text_image
B D 23°C A J I Angelcare® E F G H K L N MFront Side Right Side
text_image
Safety warning symbol showing a baby with a stethoscope and a camera above, crossed out by a no-smoking circle.STRANGULATION HAZARD.
Children have STRANGLED in cords:
- Keep adapter cords out of the reach of children (more than 1 meter away).
- Because of the serious strangulation risk to infants and toddlers, parents and caregivers should never place the Nursery Unit within 1 meter of a crib.
- NEVER use Sensor Pad without the cord covers. Check cord covers before each use to ensure it is securely placed under the leg of the crib. Discontinue use of Sensor Pad if any cord covers are damaged or broken.
- NEVER use extension cords with adapters. ONLY use the adapters provided. This product is not a toy. Never allow children to play with it.
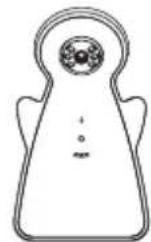
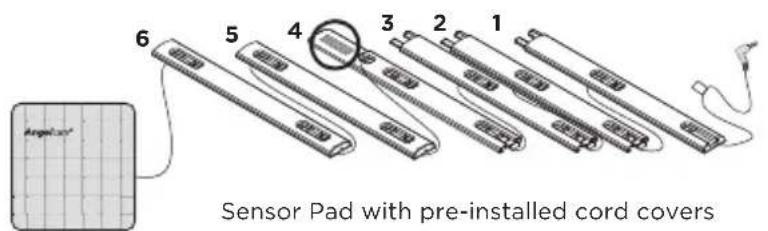
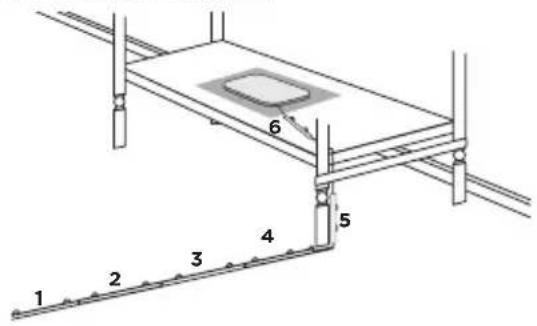
STEP 2 - INSTALLING THE SENSOR PAD
text_image
6 5 4 3 2 1 Sensor Pad with pre-installed cord coversCord covers 1, 2, 3, 4:
Position on floor
Cord cover 4:
Contains double sided tape to securely install beneath crib leg
Cord cover 5:
Position vertically between mattress support and floor
Cord cover 6:
Place under the mattress
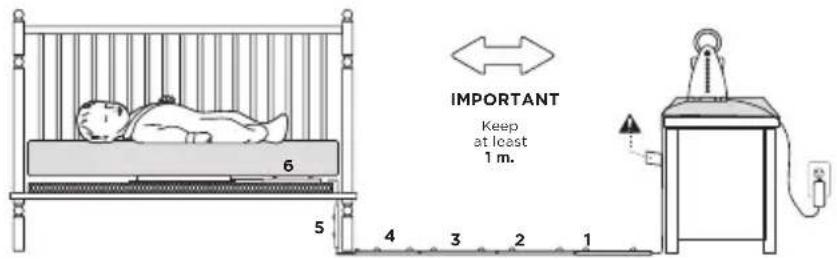
2.1 - SELECT A LOCATION FOR THE NURSERY UNIT
Select a location for the Nursery Unit that is at least 1 meter away from the crib.
text_image
IMPORTANT Keep at least 1 m.IMPORTANT
Place the crib near a supporting wall and far from air currents. Install the Nursery Unit on a flat, stable surface facing the crib at a distance of at least 1 meter. Make sure to plug the adapter to the socket outlet nearest to the equipment and that is easily accessible.
2.2 - SELECT THE CRIB LEG YOU WILL BE USING TO SECURE THE CORD COVERS

text_image
RECOMMENDED 6 5 4 3 2 1 Figure 1 Figure 2OR
text_image
1 2 3 4 5 61) Use the crib leg by the wall closest to the Nursery Unit (Figure 1). In cases where the Nursery Unit is across the room, use the leg closest to the Nursery Unit to position the covered wire (Figure 2). It is always preferable that the covered cord run along a wall.
2.3 - INSTALL THE SENSOR PAD ON THE MATTRESS SUPPORT
flowchart
graph TD
    A["2"] --> B["Process Box"]
    B --> C["Arrow pointing to the process box"]
    style B fill:#f9f,stroke:#333,stroke-width:2px
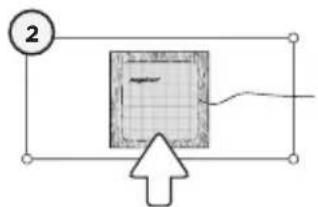
1 Sensor Pad
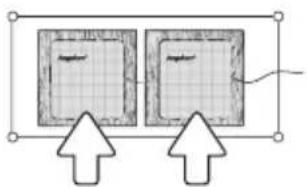
natural_image
Two identical rectangular panels with grid patterns and two upward-pointing arrows below, no text or symbols present.or 2 Sensor Pads
(depending on model)

text_image
3 6 5 4 3 2 1 1) 2 31) Remove the mattress from the crib.
2) Place the Sensor Pad(s) - printed side up - on top of the hardboard.
3) Run the connection pin, warning label and the first 5 cord covers down along the backside of the crib leg, between the mattress support and the inside edge of the crib.
text_image
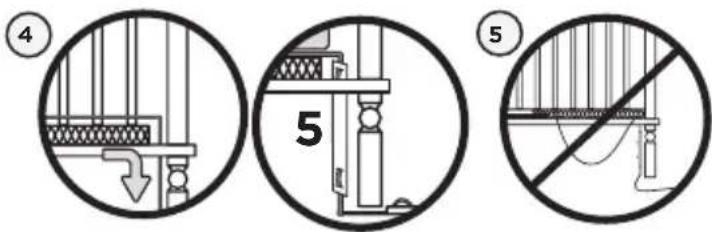
Diagram illustrating three different mechanical or electrical installation methods: no protection, isolation, and lifting a component.4) Bring the first 4 cord covers down the floor, and keep the 5^th cord cover vertically, along the backside of the crib leg, (between the mattress and the inside edge of the crib).
5) Remove any cord slack to make sure no parts of the cord are loose.
text_image
6 8 cm 6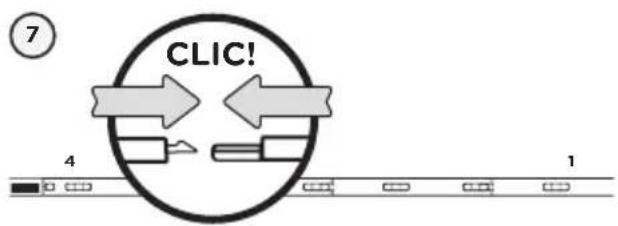
text_image
CLIC! 7 4 1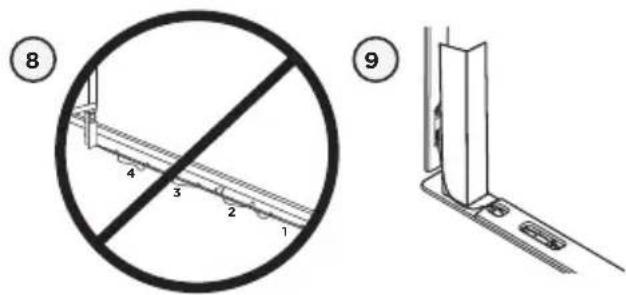
text_image
8 4 3 2 1 9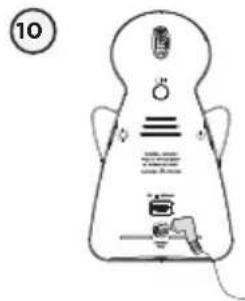
text_image
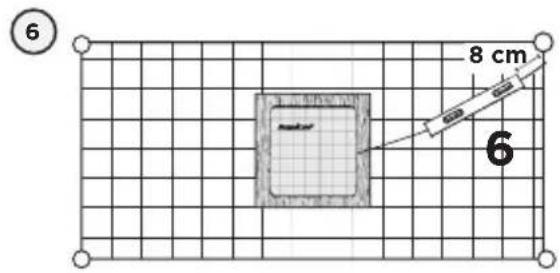
106) Place the 6^th cord cover approximately 8 cm from the edge of the mattress support.
7) Snap together the remaining cord covers that will run along the floor.
The Sensor Pad functions with any size and type of mattress except memory-foam mattresses and hollow frame mattresses.
The hardboard maintains a constant pressure on the Sensor Pad, enabling it to detect the baby's movements even when the baby is at the edges of the crib.
8) Remove any cord slack to make sure no parts of the cord are loose.
9) Peel off the double-sided tape on the 4^th cord cover and place it securely under the crib leg.
10) Install the Nursery Unit on a flat, stable surface facing the crib at a distance of at least 1 meter and plug the Sensor Pad cord into the Nursery Unit.
11) Check to make sure the Sensor Pad has not moved from position.
12) Place the mattress back inside the crib.

text_image
Safety warning symbol showing a child with a stethoscope inside a circle, next to a camera and no text.WARNING
STRANGULATION HAZARD
- Remove all slack from Sensor Pad Cord.
-
When lowering the mattress support as your child grows, slide the vertical Cord Cover (5) upward so it remains approximately in the center between the mattress support and the floor. Slide the Sensor Pad Cord through the Floor Cover to eliminate any additional slack.
-
The Sensor Pad is not designed for use with adults, children or infants older than 24 months.
- Discontinue used of the Sensor Pad when child is older than 24 months. Remove Sensor Pad from crib and store for future use.
- BEFORE FIRST TIME USE: To test that the unit is ready for use, refer to instruction manual on how to test that the installation has been done correctly.
text_image
Diagram illustrating a medical or laboratory procedure with labeled steps and components including a device, pressure monitor, and earpiece insertion.NURSERY UNIT:
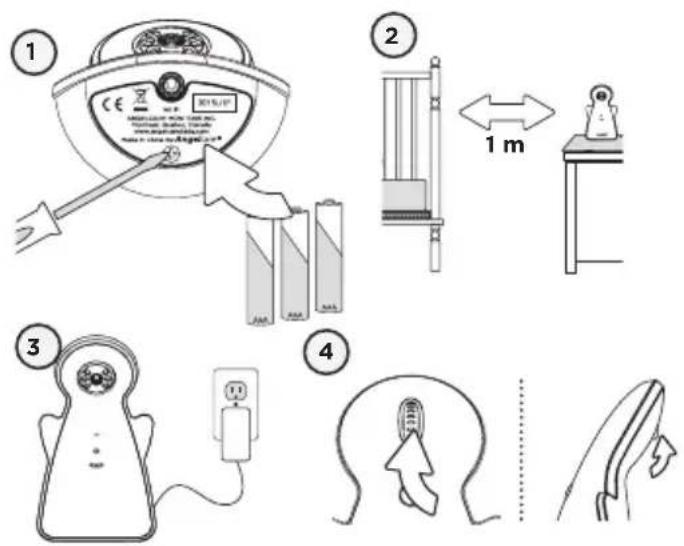
1) Remove the battery door and insert 3 AA Alkaline Batteries (not included).
2) Place the Nursery Unit at a minimum of 1 meter away from the crib.
3) Connect the adapter to the Nursery Unit and into an electrical outlet.
4) Direct the angle of the camera toward the crib using the rotating dial.
NOTE:
The batteries maintain power supply in case of power outage.


text_image
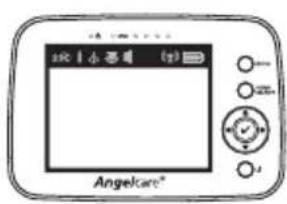
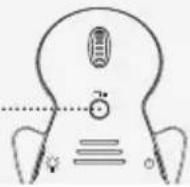
Front Side Back Side A B C D L E F G MODEL: AC130 RCC IN A PERTO IC SMA-AC205T Austelle: WDC88 BY 900mA H I J K* Nursery Unit may be installed on a tripod (not included).
A) Adjustable Camera
B) Power ON Indicator
C) Photo Sensor
D) Microphone
E) Rotating Dial for Camera Angle
F) Pager/Hold Button
G) POWER ON/OFF
H) Adapter Outlet
I) Sensor Pad Outlet
J) Battery door (Not shown)
K) Tripod Outlet*(Not shown)
L) Night Light ON/OFF

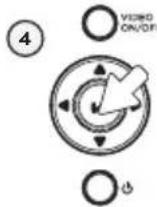
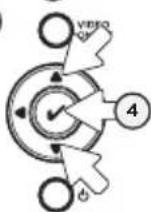
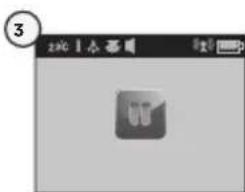
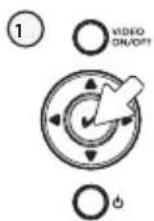
STEP 4 - TURNING ON YOUR MONITOR
text_image
1 VOID ON/OF
text_image
Diagram showing labeled components of a device or appliance with parts like rings, switches, and a control panel.
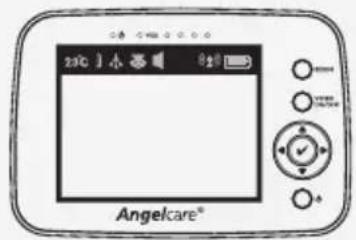
When Parent Unit is turned ON and Nursery Unit is OFF, Parent Unit will display Disconnected mode.
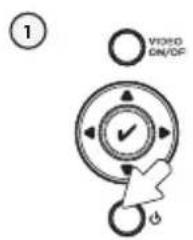
1) Press and hold the Parent Unit ON/OFF button for 2 seconds until LCD screen is turned ON. Angelcare's logo will be shown for 1 second.
2) Push and hold the Nursery Unit Power ON/OFF button for 2 seconds.
3) The Parent Unit will display Video mode screen.
If there is a lost connection between the 2 units after 15 seconds, the Out-of-Range alarm will sound on the Parent Unit (refer to troubleshooting):
- The Out-of-Range icon will appear on the screen.
- The Lost Connection icon will appear on the indicator bar.

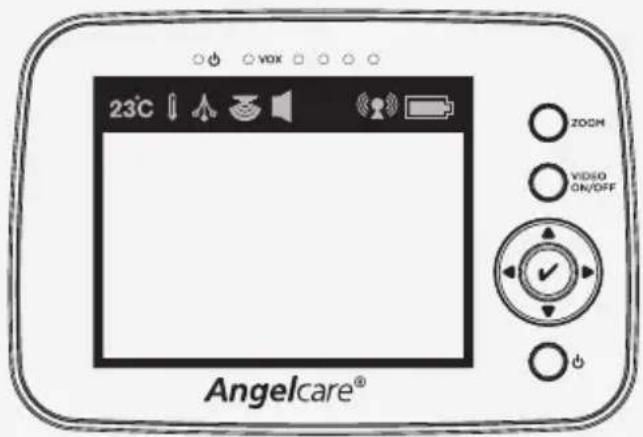
Temperature icon: Indicates room temperature
Temperature Alarm icon: Indicates Temperature Alarm is active
Pendulum icon: Indicates the Movement Sensor is active
Night View Mode icon: Night View Mode
Sound icon: Indicates that Sound function is active
Connection icon: Indicates the connection quality between the Parent Unit and the Nursery Unit.

od connection Poor connection Lost connection Out-of-Range

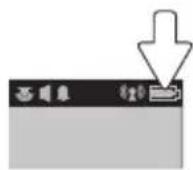
Battery Level icon: Indicates battery level

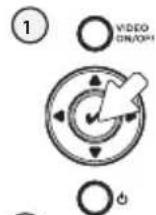
STEP 5 - TESTING AND GETTING TO KNOW YOUR MONITOR
text_image
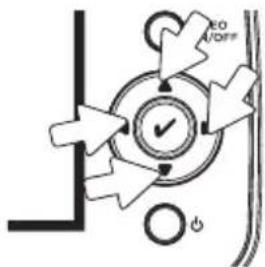
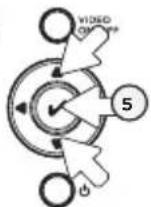
EO /OFF+ OThe Angelcare® monitor can be used with the pre-program factory settings or you can also customize your settings to your preference. Main menu on the LCD display shows the different operation settings. Use the direction keys to change or check the different functions on the Parent Unit.
Press the Menu/Select button to select an icon. The light icon will change from blue to green to show that the icon is selected. Press VIDEO ON/OFF button to exit or to go back to main menu when in sub-menu.
IMPORTANT
When in menu or sub-menu modes, sound transmission between Parent and Nursery Units will be temporarily deactivated. ONLY movement-detection alarm will remain active (if function is activated).
5.1 - SENSOR PAD
TO ACTIVATE THE SENSOR PAD:
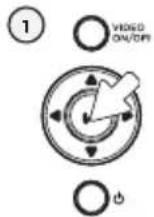
1) Press Menu/Select button to access main menu.
2) Select the Movement icon.
3) Use the up and down arrows to activate or deactivate the Movement Alarm.
4) Press Menu/Select button to confirm.
TO TEST THE SENSOR PAD:
text_image
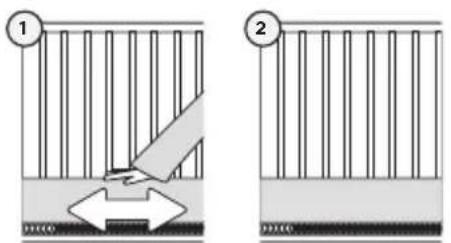
Diagram illustrating two steps of a mechanical or structural assembly with labeled components and directional arrows.1) Move your hand lightly on the mattress.
The Pendulum icon will appear on Parent Unit indicator bar.
2) Remove your hand from the mattress. After 15 seconds you will hear a 'TIC' pre-alarm sound, and 5 seconds later the Movement Alarm will trigger.
MOVEMENT ALARM
- Alarm activates when no movement is detected by the Sensor Pad for 20 seconds.
- Both the Parent Unit and the Nursery Unit speakers will emit loud warning sound.
- Movement Alarm icon will show on the LCD screen.
IF THE ALARM DOES NOT SOUND
- Avoid contact with the crib while Sensor Pad is in operation.
- Place the crib near a supporting wall.
- Adjust the Sensor Pad sensitivity level.
- Turn OFF crib mobile, fans, loud music or anything else that may cause vibration.
TO STOP THE ALARM
On the Parent Unit, press any key to stop the alarm.
OR
Press the Pager/Hold button on the Nursery Unit.
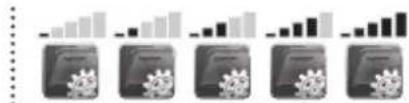
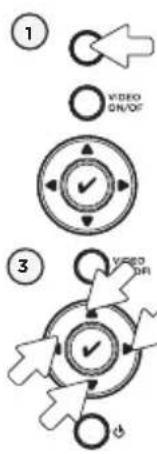
TO ADJUST THE SENSOR PAD SENSITIVITY LEVEL:
1
O
VIDEO ON/OFF

O
text_image
30 sec ON2
4
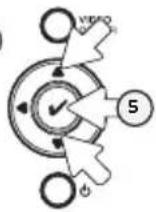
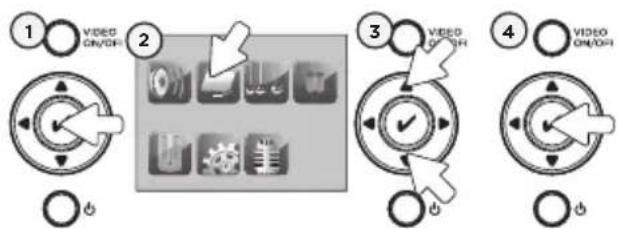
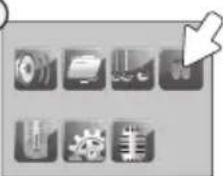
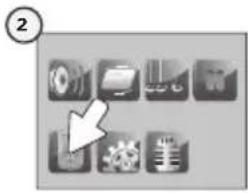
1) Press Menu/Select button to access main menu.
2) Select the Settings icon to access sub-menu.
3) Select the Movement Sensitivity icon.
4) Use the up and down arrows to choose the desired sensitivity level (1 to 5).
bar
| Category | Value 1 | Value 2 | Value 3 | Value 4 | Value 5 | |---|---|---|---|---|---| | Bar Chart | 0.5 | 1.0 | 1.5 | 2.0 | 2.5 | | Line Chart | 0.8 | 1.2 | 1.6 | 1.8 | 2.2 | | Dash Chart | 0.3 | 0.4 | 0.6 | 0.7 | 0.9 | | Dash Line Chart | 0.6 | 0.8 | 1.1 | 1.3 | 1.6 | | Dash Line Chart (Circle) | 0.4 | 0.3 | 0.5 | 0.6 | 0.7 | | Dash Line Chart (Square) | 0.7 | 0.9 | 1.4 | 1.7 | 2.1 | | Dash Line Chart (Circle) + Square (Circle) | 0.5 | 0.6 | 0.8 | 1.0 | 1.3 | | Dash Line Chart (Square) + Square (Square) | 0.6 | 0.7 | 1.0 | 1.2 | 1.5 | | Dash Line Chart (Circle) + Square (Circle) + Square (Square) | 0.4 | 0.5 | 0.7 | 0.8 | 1.0 | | Dash Line Chart (Circle) + Square (Square) + Square (Square) + Square (Square) + Square (Square) + Square (Square) + Square (Square) + Square (Square) + Square (Square) + Square (Square) + Square (Square) + Square (Square) + Square (Square) + Square (Square) + Square (Square) + Square (Square) + Square (Square) + Square (Square) + Square (Square) + Square (Square) + Square (Square) + Square (Circle) + Square (Circle) + Square (Circle) + Square (Circle) + Square (Circle) + Square (Circle) + Square (Circle) + Square (Circle) + Square (Circle) + Square (Circle) + Square (Circle) + Square (Circle) + Square (Circle) + Square (Circle) + Square (Circle) + Square (Circle) + Square (Circle) + Square (Circle) + Square (Circle) + Square (Circle)5) Press Menu/Select button to confirm.
NOTE: If you are receiving false alarms, adjust the sensitivity level.
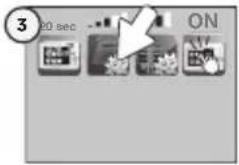
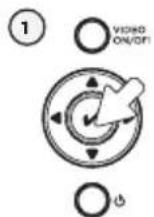
TO ACTIVATE THE TIC FUNCTION:
Allows you to hear a TIC sound when Sensor Pad function is activated.
1
VIDEO ON ADF

O
3
O
2

4
O
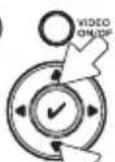
1) Press Menu/Select button to access the main menu.
2) Select the TIC icon.
3) Use the up and down arrows to activate or deactivate the TIC function.
4) Press Menu/Select button to confirm.
Regular TIC sound will emit from Parent Unit.
IMPORTANT
• The Sensor Pad is not designed for use with adults, children or infants older than 24 months.
- Once you are finished using the Sensor Pad, deactivate the movement function and please remove it from the baby's crib and store it away.
5.2 - SOUND
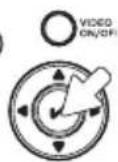
TO ACTIVATE SOUND:
1
VIDEO ON/OP

O
3
2

natural_image
Grid of grayscale icons representing various software and mechanical functions (no text or symbols)TO TEST THE SOUND:
Ask someone to speak into the Nursery Unit or place the unit near a radio to ensure that sound is being picked up.
1) Press Menu/Select button to access main menu.
2) Select the Sound icon.
3) Use the up and down arrows to activate or deactivate the sound.
4) Press Menu/Select button to confirm.
- Check that both units are powered ON.
- Check that both units are plugged into functioning electrical outlets.
- Check the batteries in both units (replace or recharge them if necessary).
- Bring the Parent Unit closer to the Nursery Unit.
IMPORTANT
To avoid feedback (whistling), keep both units at least 3 meters apart.
Increase volume (Up arrow)
Lower volume (Down arrow)
Press the down arrow for 2 seconds to mute sound. Mute icon will flash. Press again for 2 seconds to reactivate sound.
5.3 - BATTERIES
HOW TO CHECK THE BATTERIES:
Unplug the adapters from both units.
- If the green light on the Nursery Unit does not show, replace the batteries.
- If the Parent Unit and its screen do not light up, recharge the batteries.
HOW TO CHARGE THE BATTERIES IN THE PARENT UNIT:
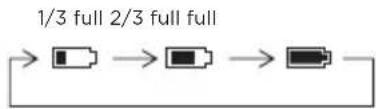
Leave the Parent Unit plugged to fully charge the unit. Although the batteries at 1/3 capacity works normally, we recommend that you fully recharge them.
text_image
1/3 full 2/3 full fullPARENT UNIT BATTERY ALARM
- Alarm activates when the batteries need to be recharged.
- Parent Unit will emit a beep sound every 15 seconds.
- Battery Alarm icon will show on LCD screen.
YOU ARE NOW READY TO USE YOUR MONITOR
The Angelcare® monitor can be used with the pre-program factory settings or you can also customise your settings to your preference.
DEFAULT SETTINGS

Sound Mode: ON
Speaker Volume: Level 3 (of 6)

Movement Mode: ON
Sensor Pad Sensitivity: Level 3 (of 5)
TIC: ON

Temperature Unit: Celsius
Temperature Alarm: OFF

VOX: ON

VOX Level: Level 2 (of 4)

Screen Saver Timer: ON
(after 3 minutes)

LCD Brightness: Level 3 (of 5)

Key Tone: ON
text_image
23°C ZOOM VIDEO ON/OFF Angelcare®IMPORTANT
- Test your monitor before first use.
- Test your monitor regularly to ensure it is functioning correctly.
- Test your monitor every time you move the Sensor Pad to a different place.
IMPORTANT
When in the menu or sub-menu modes, sound transmission between Parent and Nursery Units will be temporarily deactivated. ONLY the movement detection alarm will remain active (if function is activated).
6.1 - SOUND TRANSMISSION (VOX)
Your monitor is 'Sound Activated'. This means that it will transmit sounds only when it detects them. It will detect even the softest levels of crying.
To save power, after 10 seconds, the sound transmission will stop if no sound is detected. Once sound is detected transmission will automatically activate.
TO ADJUST THE SOUND SENSITIVITY (VOX):
Allows you to determine the sound level needed to trigger sound transmission to the Parent Unit. This means that sound will only transmit based on the level that you set.
1) Press Menu/Select button to access the main menu.
2) Select the Settings icon to access sub-menu.
3) Select the VOX Sensitivity icon.
4) Use the up and down arrows to choose the desired sensitivity level (1 to 4)


5) Press Menu/Select button to confirm.
6.2 - HOLD
Allows you to put your monitor on hold.
1


O
2
natural_image
Grid of grayscale icons representing various mechanical or industrial components, no text or symbols present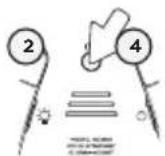
2017年
3
IMPORTANT
When your monitor is on Hold, the movement-detection feature and movement alarm are disabled.
1) Press Menu/Select button to access main menu.
2) Select the Hold icon.
OR
Press and hold the Nursery Unit Pager/Hold button for at least 2 seconds.
3) Hold icon will appear on the screen.
4) Press and hold the Nursery Unit Pager/Hold again to return to deactivate Hold.
Nursery Unit Night Light will blink. Parent Unit will emit 3 consecutive beeps every 30 seconds to remind you that monitor is on Hold.
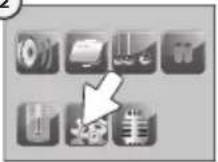
6.3 - THERMOMETER
TO CHANGE THE MEASUREMENT UNIT:
natural_image
Grid of grayscale icons representing mechanical or industrial components, with a white arrow pointing to one icon (no text or symbols)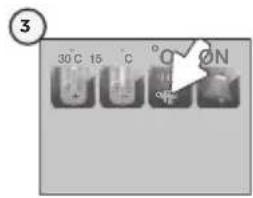
text_image
30°C 15°C ° ON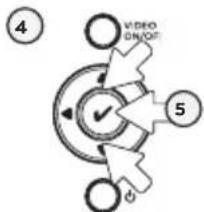
text_image
4 VIDEO ON/OFF 5TO ACTIVATE THE TEMPERATURE ALARM:

natural_image
Grid of grayscale icons representing industrial or mechanical components, with a white arrow pointing to a gear symbol (no text or labels)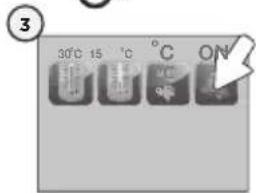
text_image
3 30°C 15 °C °C ON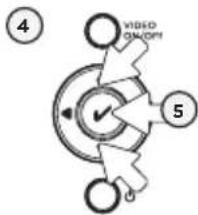
text_image
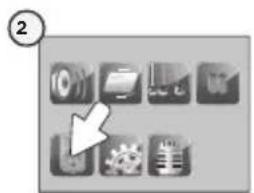
④ VIDEO ON/OFF ⑤TO SET THE TEMPERATURE RANGE:
natural_image
Grid of grayscale icons representing various software functions (no text or symbols)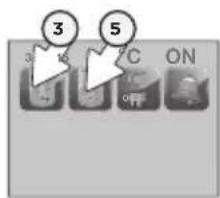
text_image
3 15 5 C ON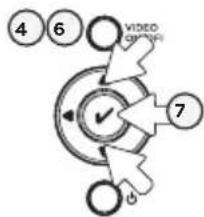
flowchart
graph TD
    A["④"] --> B["⑥"]
    B --> C["VIDEO CURRENT"]
    C --> D["⑦"]
    D --> E["↓"]
    E --> F["←"]
    F --> G["→"]
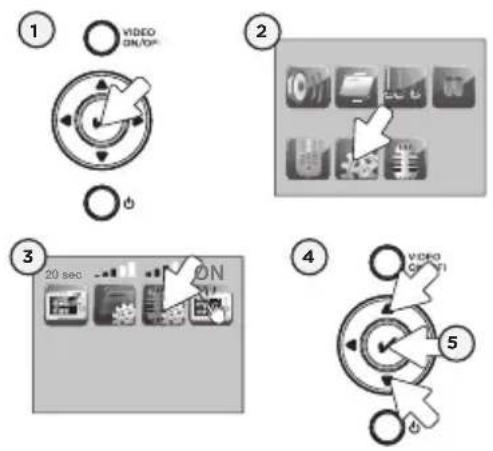
The range between the minimum and maximum temperature must be at least 4^ C/7°F. An error tone will be heard if you try to set it up below this minimum level.
1) Press Menu/Select button to access main menu.
2) Select the Temperature icon to access sub-menu.
3) Select the °C °F icon.
4) Use the up and down arrows to change from Celsius to Fahrenheit.
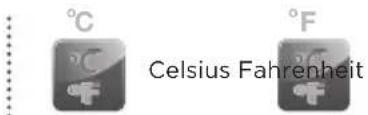
text_image
°C °C °C °F Celsius Fahrenheit5) Press Menu/Select button to confirm.
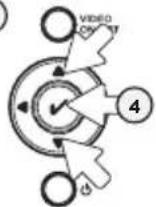
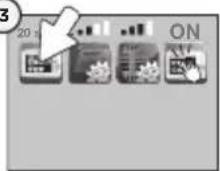
1) Press Menu/Select button to access main menu.
2) Select the Temperature icon to access sub-menu.
3) Select the Temperature Alarm icon.
4) Use the up and down arrows to activate or deactivate the Temperature Alarm.

5) Press Menu/Select button to confirm.
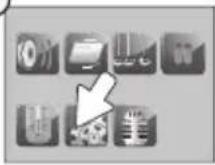
1) Press Menu/Select button to access main menu.
2) Select the Temperature icon to access sub-menu.
3) Select the High Temperature icon. to set maximum temperature range (15 to 32°Celsius/59 to 90°Fahrenheit).
4) Use the up and down arrows to set the highest temperature preferred.
5) Select the Low Temperature icon. to set minimum temperature range (5 to 20 °Celsius/41 to 68 °Fahrenheit).
6) Use the up and down arrows to set the lowest temperature preferred.
7) Press Menu/Select button to confirm.

TEMPERATURE ALARM
- Alarm activates when temperature reaches maximum or minimum set temperature.
- Parent Unit will emit 4 consecutive beeps, every 5 seconds.
• Temperature Alarm icon will show on LCD screen.
6.4 - SCREEN SAVER
Allows you to set the screen saver starting point.
1


2
3
4
MANUAL SETTING:
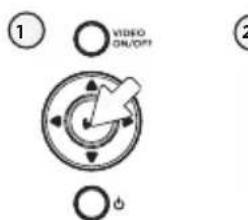
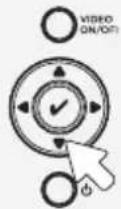
To manually activate the Screen Saver mode press and hold the Parent Unit VIDEO ON/OFF button.
1) Press Menu/Select button to access main menu.
2) Select the Settings icon to access sub-menu.
3) Select the Screen Saver icon.
4) Use the up and down arrows to select timed delay before Video mode turns into Screen Saver mode.
5) Press Menu/Select button to confirm.
NOTE:
The LCD screen will turn black when video is in Screen Saver mode. Press any button to return to Video mode.
Allows you to capture image when lighting is insufficient.
1


A Night View icon will appear at the top of the Parent Unit screen.


The Night View icon will disappear at the top of the Parent Unit screen.
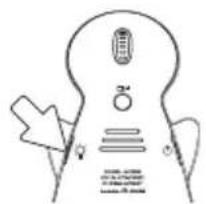
6.6 - NIGHT LIGHT
Allows you to use your monitor as a night light.
TO ACTIVATE THE LIGHT:
Push the button on the back of the right "wing" to turn the Night Light ON or OFF.
6.7 - PAGER
Allows you to locate the Parent Unit.
TO LOCATE PARENT UNIT:
Press the Pager/Hold button for no more than 2 seconds. The Parent Unit will emit a paging sound for one minute.
1) The infrared LEDS will turn ON
automatically when the lighting is not sufficient, to give a night view on LCD display.
NOTE:
When the Infrared Night Vision is ON, only black and white image will be displayed on the LCD screen.
2) If the light is bright enough in the room, the infrared LED on the Nursery Unit will turn OFF automatically.
natural_image
Simple line drawing of a guitar body with no text or symbols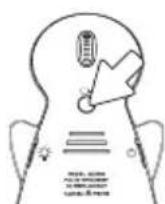
IMPORTANT
If you press the Pager/Hold button on the back of the Nursery Unit for more than 2 seconds, you will put the movement monitoring on Hold. To unhold, push the button again.
TO STOP THE PAGING SOUND:
text_image
230 Angelcare®Press any button on the Parent Unit.
OR
Press the Nursery Unit's Pager/Hold button
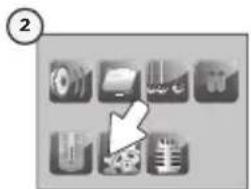
6.8 - ZOOM MODE
Allows you to zoom in to twice the normal view.
text_image
① VIDEO ON/OF ③ VIDEO DIF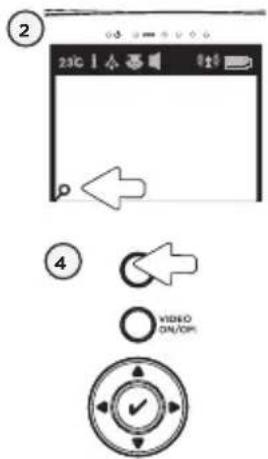
text_image
② 23℃ ④ VIDEO ON/OP6.9 - KEY TONE
Allows you to activate or deactivate key tone sound.
natural_image
Grid of grayscale icons with a black arrow pointing to a small object, no text or symbols present.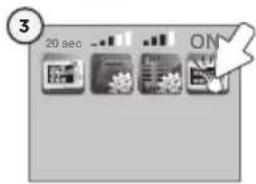
text_image
3 20 sec ON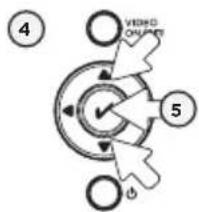
text_image
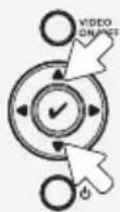
4 VIDEO ONLINE 51) Press and release the Zoom button on the Parent Unit.
2) The Zoom icon will appear at the bottom left corner of the screen.
3) Use the arrow keys to zoom in on what you want to see more closely.
4) Press and release the Zoom button on the Parent Unit again to return to normal view.
1) Press Menu/Select button to access main menu.
2) Select the Settings icon to access sub-menu.
3) Select the Key Tone icon.
4) Use the up and down arrows to activate or deactivate Key Tone sound.
5) Press Menu/Select button to confirm.
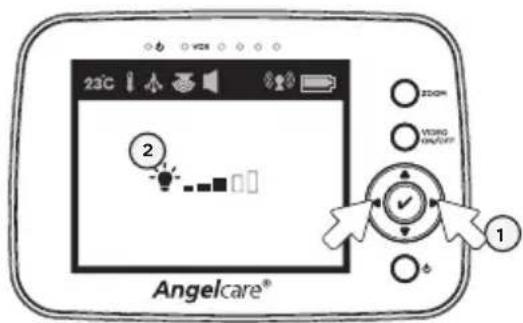
6.10 - LCD SCREEN BRIGHTNESS
Allows you to adjust the LCD screen brightness on the Parent Unit.
text_image
23C 2 VONG ON/OFF 1 Angelcare®1) Use the left and right arrows to adjust the screen brightness level (1 to 5).
2) A light bulb will be shown on the LCD screen.
- Ensure that you fully charge your batteries for 9 hours before their first use.
- To maintain maximum battery life it is recommended that you fully discharge your batteries periodically. If your Parent Unit is not in use, please turn it OFF.
FALSE ALARMS
- Turn OFF the Nursery Unit.
- Verify the connection between the Sensor Pad and the Nursery Unit. Unplug and reconnect the cord.
- Make sure there is no bedding between the mattress and the Sensor Pad.
- If the crib has a spring or slat base, place a hardboard between the crib base and the Sensor Pad measuring at least 33 × 33 cm and 6mm thick.
- Make sure the Sensor Pad is positioned as described under the setup requirements. Sensitivity may need to be adjusted, refer to Step 5.1.
ALARM WILL NOT SOUND
- Avoid contact with the crib when the monitor is ON.
- Place crib near a solid supporting wall to avoid Sensor Pad from detecting movement from outside the crib.
- You may need to decrease the sensitivity, refer to Step 5.1.
NO SOUND IS BEING TRANSMITTED
- Bring the Parent Unit closer to the Nursery Unit.
- Recharge the Parent Unit.
- Check connections or change to another electrical outlet.
- Ensure both units are ON.
- Ensure mains supply units are activated.
- Check on the top bar of the Parent Unit to see if the monitor is on MUTE instead of ON. Refer to Step 5.2.
NURSERY UNIT POWER ON INDICATOR (GREEN LIGHT) DOES NOT LIGHT UP
- Check connections or change to another electrical outlet.
- Push and hold the button on the back of the left 'wing' for 2 seconds to turn the Nursery Unit ON.
WEAK RECEPTION
- Bring units closer together.
- Change the position of one or both units.
- Place units on a flat surface away from baby's reach.
- Recharge the Parent Unit.
STATIC, DISTORTION, INTERFERENCES
(FROM OTHER MONITORS, WIRELESS PHONES, WALKIE-TALKIES, ETC.)
- Rotate Parent Unit or move it away from source of interference.
FEEDBACK (LOUD NOISES EMITTED FROM THE PARENT UNIT)
- Move units farther apart (at least 3 meters).
- Decrease volume on Parent Unit.
THE PARENT UNIT SCREEN IS BLACK (PARENT UNIT IS OFF)
- Turn the Parent Unit back ON by pushing and holding the POWER ON/OFF button for 2 seconds.
- Recharge the Parent Unit.

LIMITED WARRANTY
Angelcare ^® warrants to the original owner of this product that Angelcare ^® video, movement and sound monitor (model AC1300) is free from any material and workmanship defects, for a period of two (2) years from the date of the original purchase. If this monitoring system fails to function properly when used as directed under normal conditions within the two years period, Angelcare ^® will either repair or replace the product, at our discretion, free of charge. Please contact your distributor.
The product must be accompanied by a proof of purchase, either a bill of sale or other proof that the monitoring system is within the warranty period. Angelcare ^® will bear the cost of repairing or replacing the product and shipping it back to you.
This warranty does not apply to a product which has been damaged as a result of improper maintenance, an accident, improper voltage supply or any other form of misuse. The warranty is also void if the owner repairs or modifies the product in any way. Angelcare ^® is not liable for any incidental or consequential damages with regard to this product. The warranty also excludes any liability other than what is stated above. No other warranty is given.
This warranty does not cover products and accessories which are not Angelcare-branded, or any problems that result from usage that is not in accordance with product instructions, failure to follow the product instructions, or problems caused by using accessories, parts or components not supplied by Angelcare.
LEGAL RIGHTS VARY FROM COUNTRY TO COUNTRY. SOME COUNTRIES DO NOT ALLOW THE EXCLUSION OR LIMITATION OF INCIDENTAL OR CONSEQUENTIAL DAMAGES, SO THE ABOVE LIMITATIONS MAY NOT APPLY TO YOU.
WE ARE NOT IN ANY WAY RESPONSIBLE FOR ANY OUTCOME RESULTING FROM THE USE OF THIS PRODUCT.
IMPORTANT! This Angelcare® monitor is a personal care product. Please do not return this product to the store. If you have questions or need help, please call your distributor before returning this product.
TECHNICAL SPECIFICATIONS
Range:
Open field (Open area without obstructions): up to 250 meters.
Number of Channels:
USA/Canada: 19 channels.
Europe: 64 channels.
Power Supply:
3 AA alkaline batteries (not included) or 100-240VAC/5VDC adapter for Nursery Unit.
1 included rechargeable Li-ion battery and 100-240VAC/5VDC adapter for the Parent Unit.
Caution: To reduce the risk of electric shock, do not expose this product to rain or moisture.
Danger of explosion if batteries are incorrectly replaced. The battery included for the Parent Unit is a user replaceable Li-ion rechargeable battery, manufactured by SPRINGPOWER TECHNOLOGY (SHENZHEN) COMPANY LIMITED. Only use the Angelcare recommended replacement battery. To obtain information on replacement batteries please contact Angelcare customer service at www.angelcarebaby.com or contact your local distributor. Instructions will be included with the replacement battery. Dispose of exhausted batteries properly according to your local ordinances. Keep all batteries away from children.


PROTECT THE ENVIRONMENT
This electronic equipment contains reusable material and must not be disposed with domestic waste. Please take it to a collecting point for electric and electronic equipment (ask your local authorities for details).
Batteries:
- DO NOT mix old and new batteries.
- DO NOT mix alkaline standard (carbon-zinc), or rechargeable (NI-CD, NIMH, etc.) batteries.
Transmission:
Data transmission between the Parent Unit and the Nursery Unit is made on the 2.4GHz frequency.
Hereby, Angelcare Monitors Inc., declares this baby monitor is in compliance with the essential requirements and other relevant provisions of Directive 1999/5/EC.
The EU declaration of conformity can be obtained at: www.angelcarebaby.com.
ErP COMPLIANCE
SOUTH AFRICA-BRAZIL-ECUADOR-EUROPEAN UNION-UK
USE ONLY ANGELCARE® BRAND POWER SUPPLY - MODEL NUMBER: T05005V001 / T05005B001
GERMANY
USE ONLY ANGELCARE® BRAND POWER SUPPLY - MODEL NUMBER: T05005F002
AUSTRALIA
USE ONLY ANGELCARE® BRAND POWER SUPPLY - MODEL NUMBER: T05005S002
NORTH AMERICA
USE ONLY ANGELCARE® BRAND POWER SUPPLY - MODEL NUMBER: T05005U002
www.angelcarebaby.com