84 14 08 - Counter CONRAD - Free user manual and instructions
Find the device manual for free 84 14 08 CONRAD in PDF.
Frequently Asked Questions - 84 14 08 CONRAD
User questions about 84 14 08 CONRAD
0 question about this device. Answer the ones you know or ask your own.
Ask a new question about this device
Download the instructions for your Counter in PDF format for free! Find your manual 84 14 08 - CONRAD and take your electronic device back in hand. On this page are published all the documents necessary for the use of your device. 84 14 08 by CONRAD.
USER MANUAL 84 14 08 CONRAD
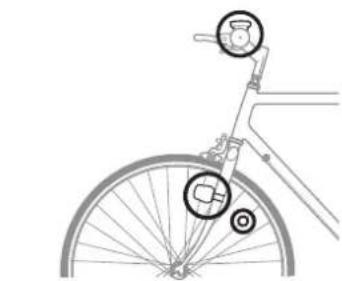
The product is intended to be used for measuring and display certain data on a bicycle (e.g. speed, mileage). A magnet is mounted on the front wheel. A radio sensor recognizes the revolutions of the wheel and sends a radio impulse to the cyclometer.
In addition, there is an integrated thermometer and stopwatch, furthermore the fat and energy consumption can also be displayed. With sufficient sunlight the integrated solar cell provides the power for the cyclometer.
The cyclometer and its accessories are only suitable for use on a standard bicycle. Installation and operation on another vehicle, e.g. a motorcycle is not permitted!
The product is intended for private use. It is not suitable for commercial use. Use of this device in any other way than described above is not permitted.
All names of companies and products are the trademarks of the respective owner.
All rights reserved.
Contents
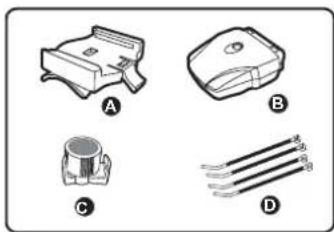
Cyclometer with battery
- Handlebar mounting bracket
- Radio sensor with battery
Magnet
Cable fastener
- Operating Instructions
Safety Instructions

Please read all of the operating instructions before using the product for the first time; they contain important information on correct operation. The warranty will be void in the event of damage caused by failure to observe these safety instructions! We do not assume any liability for any consequential damage!
We do not assume any liability for material and personal damage caused by improper use or non-compliance with the safety instructions!
The warranty will be void in such cases.
- For safety and approval (CE) reasons, unauthorised conversion and/or modifications to the product are not permitted. Never take the product apart (except to change the batteries, as described in these operating instructions).
The product is not a loy. Keep away from children. - Do not leave packing materials unattended. They may become dangerous playthings for children.
- Handle the product with care, it can be damaged by impacts, blows, or accidental drops, even from a low height.
Battery notes
- Keep batteries out of the reach of children.
- Observe the correct polarity when inserting the battery (positive / + and negative/-).
- Do not leave batteries lying around in the open; there is a risk of them being swallowed by children or domestic animals. If swallowed, consult a doctor immediately.
Leaking or damaged batteries can lead to caustic burning of the skin. Therefore, use suitable protective gloves. - Ensure that the batteries are never short-circuited, taken apart or thrown into a fire. There is a risk of explosion!
- Do not recharge normal batteries. There is a risk of explosion!
- If the device is not to be used for a long time (e.g. storage) remove the batteries.
Old batteries can leak and cause damage to the product; loss of guarantee/warranty!
- For the correct disposal of batteries, please read the chapter "Disposal".
Starting Up, Inserting Batteries, Replacing Batteries
-
The batteries have probably been already inserted by the manufacturer. To activate the cyclometer, simply press any key to show the display. Alternatively, remove the batteries and replace them again.
-
When batteries are to be inserted or exchanged open the battery compartment, on the bottom of the product, by turning the battery compartment lid to the left and removing it.
- Insert one battery, of type CR2032, into the cyclometer and into the sender with the correct polarity (Observe Plus/+ and Minus/-, the positive pole (+) always points to the outside).
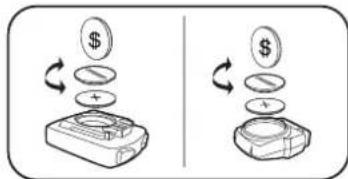
- Replace the lid of the battery compartment and lock it by turning it to the right.
The battery needs to be replaced if the display contrast is poor, or nothing is displayed, or no data is received from the sender (to test, swap the batteries). - Dispose of the batteries with respect for environmental protection (see section "Disposal").
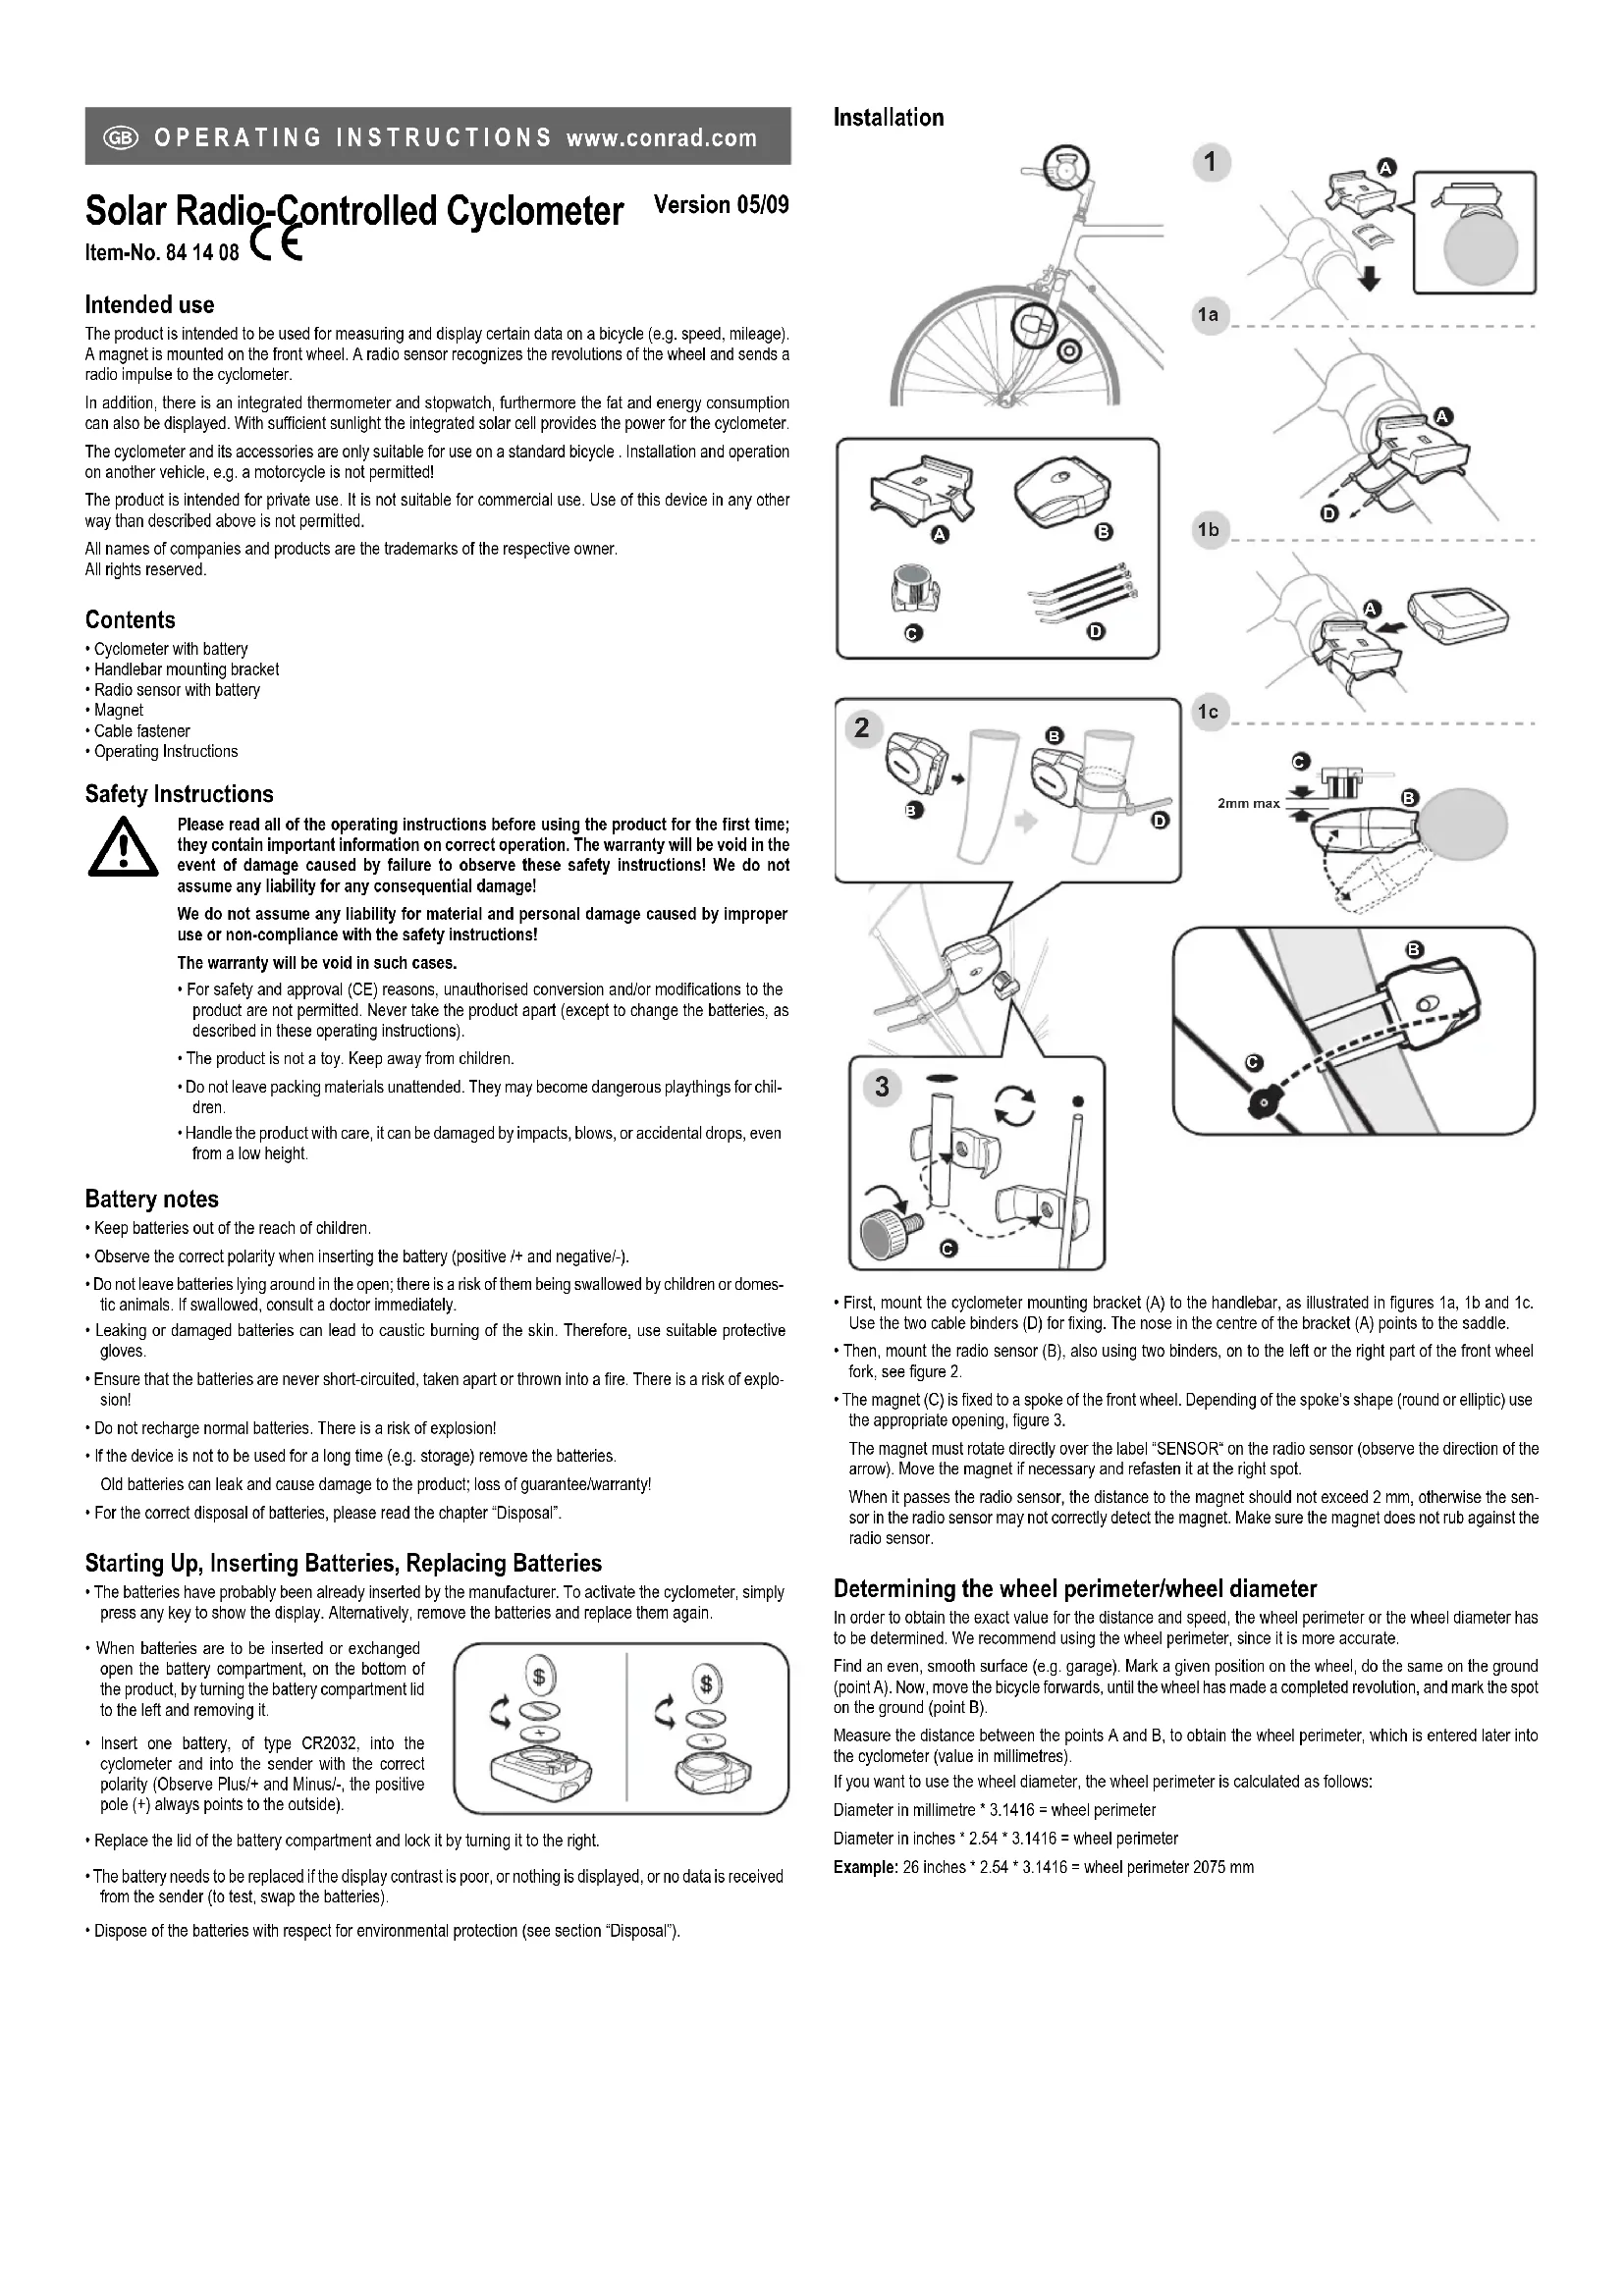
Installation
1
1a
1b
1c
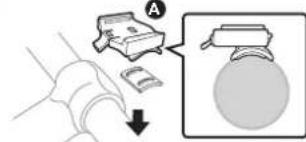
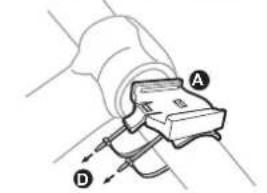
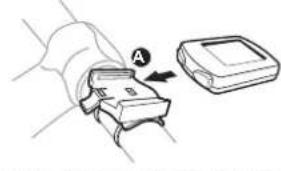
- First, mount the cyclometer mounting bracket (A) to the handlebar, as illustrated in figures 1a, 1b and 1c. Use the two cable binders (D) for fixing. The nose in the centre of the bracket (A) points to the saddle.
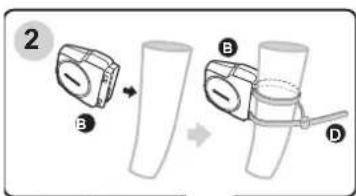
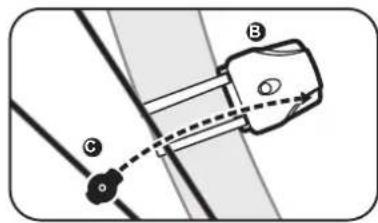
- Then, mount the radio sensor (B), also using two binders, on to the left or the right part of the front wheel fork, see figure 2.
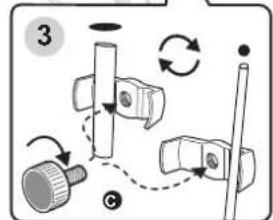
- The magnet (C) is fixed to a spoke of the front wheel. Depending of the spoke's shape (round or elliptic) use the appropriate opening, figure 3.
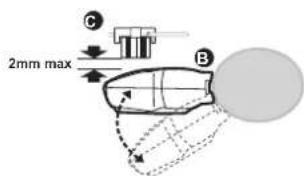
The magnet must rotate directly over the label "SENSOR" on the radio sensor (observe the direction of the arrow). Move the magnet if necessary and refasten it at the right spot.
When it passes the radio sensor, the distance to the magnet should not exceed 2mm , otherwise the sensor in the radio sensor may not correctly detect the magnet. Make sure the magnet does not rub against the radio sensor.
Determining the wheel perimeter/wheel diameter
In order to obtain the exact value for the distance and speed, the wheel perimeter or the wheel diameter has to be determined. We recommend using the wheel perimeter, since it is more accurate.
Find an even, smooth surface (e.g. garage). Mark a given position on the wheel, do the same on the ground (point A). Now, move the bicycle forwards, until the wheel has made a completed revolution, and mark the spot on the ground (point B).
Measure the distance between the points A and B, to obtain the wheel perimeter, which is entered later into the cyclometer (value in millimetres).
If you want to use the wheel diameter, the wheel perimeter is calculated as follows:
Diameter in millimetre * 3.1416 = wheel perimeter
Diameter in inches * 2.54 * 3.1416 = wheel perimeter
Example: 26 inches * 2.54 * 3.1416 = wheel perimeter 2075 mm
Controls
Button“A”
- Press briefly: confirms a setting
Activates the illumination for a few seconds
- press for 3 seconds: Time mode: Setting the Time
In the function modes: Reset values
Button“B”
- Press briefly: Selects a function
Changing a value
- press for 3 seconds: Activate scan mode

Switching On/Off
If there is nothing displayed, turn the cyclometer on by briefly pressing any key. If this does not work check the cyclometer's battery and replace it if necessary.
If no button is pressed, or no movement detected via the radio sensor, the cyclometer turns off automatically after about 5 minutes in order to save energy.
The radio sensor cannot be turned off. However, it needs less energy so it does not need to be turned off.
Basic Setting
Hold down both buttons of the cyclometer for about 3 seconds, allowing all display elements to appear, now release the buttons.
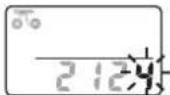
The value for the wheel perimeter (in millimetre) is flashing on the display. Change the value using the right button "B"; hold the button down for faster setting. Using the left button "A" takes you to the next digit to the left.
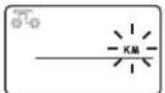
After setting the fourth digit for the wheel perimeter, and confirming with the left button "A", the distance unit flashes. Choose between "KM" (kilometres) and "M" (miles), using the right button (B). Confirm the selection, by pressing the left button (A).
Enter your age. As usual, you set the flashing digit with the right button (B); change to the next digit using the left button (A).
Enter your weight. As usual, you set the flashing digit with the right button (B); change to the next digit using the left button (A). If you have set "KM" (kilometres) as the unit for the distance, use kilograms here. If you have chosen "M" (miles), enter this value in British pounds.
In the last setting, the right button (B) can be used to set the distance for the service interval (e.g. checking tire pressure and suchlike). After covering the set distance a small wrench icon is displayed.
Press the left button "A" to leave the setting mode and the time of day appears in the lower display.
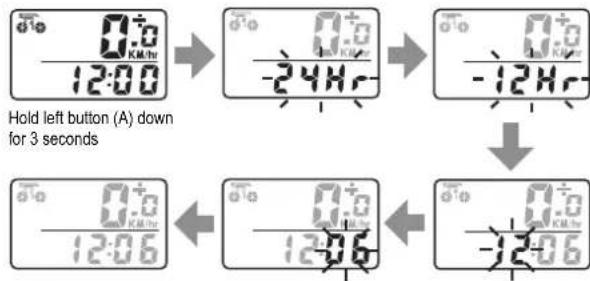
12/24 hr Mode + Setting the Time
- Keep pressing the right button "B", until the time appears in the display.
- Hold down the button "A" for about 3 seconds, until "24" (or "12") flashes on the display.
- Select the 12 hr or the 24hr mode, using the right button (B). Press the left button (A) to confirm.
The hours of the time display start to flash. Set the value using the right button (B); hold the button down for faster setting. Press the left button (A) to confirm. - The minutes of the time display start to flash. Set the minutes using the right button (B); hold the button down for faster setting. Press the left button (A) to confirm.
The setting mode is exited; the set time appears on the display.
Operation
If the cyclometer is in the normal display mode (which is not the basic setting or the time setting mode), the following functions can be selected using the right button "B":
To select the 12/24 hr mode and to set the time please see the chapter 12/24 hr Mode + Setting the Time, see above.
Briefly press the right button "B" to get to the next function.
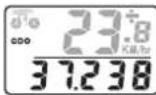
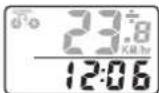
When "ODO" is shown on the display, the total distance covered since the initial set-up is displayed.
This data, however, is lost after replacing the batteries.
In order to re-enter the distance, press and hold the left button "A" down for 3 seconds, until the last digit starts flashing. Use the right button "B", to set the value. Confirm the entry with the left button "A" and move to the next digit.
After entering the last digit, you can return to the normal display by using the left button "A".
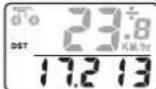
"DST": Here the distance travelled during the day is displayed. It can be reset to "00000" by pressing and holding down the left button "A" down for 3 seconds.
Briefly press the right button "B", to get to the next function.
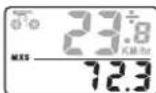
"MXS": The bottom display line shows the previous maximum speed. It can be deleted by pressing and holding the left button "A" down for 3 seconds.
Briefly press the right button "B", to get to the next function.
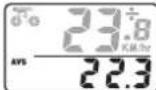
"AVS": The bottom line of the display shows the average speed over the distance so far travelled during the day. This is also deleted when resetting the distance for the day (refer to 'DST').
Briefly press the right button "B", to get to the next function.

"TM": The time displayed at the bottom shows the time travelled today. Only the time during which the cyclometer detected movement is displayed. The time stops during a standstill (e.g. during a break). It is also deleted when the day's distance (refer to "DST") is reset.
Briefly press the right button "B", to get to the next function.
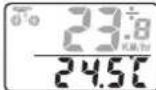
The current temperature appears, as next function.
In order to change the temperature unit between ^C (degree Celsius) and ^F (degree Fahrenheit), press and hold the left button "A" down for 3 seconds. The temperature unit flashes, and you can change it, by briefly pressing the right button "B". Confirm the selection by briefly pressing the left button "A".
When the temperature is displayed, you can change between the maximum and minimum temperature by briefly pressing the button. The maximum temperature is indicated by "H" (see figure on the left), the minimum temperature by "L".
When the maximum and minimum temperature are displayed (see figure on the left), they can be deleted by pressing and holding the left button "A" down for 3 seconds. Three short dashes appear in the display (e.g. "L---") before the current temperature is set as the maximum and minimum value.
Briefly press the right button "B", to get to the next function.
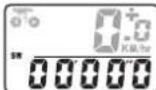
"SW": This is the cyclometer's integrated stopwatch. It can be started and paused by briefly pressing the left button "A".
Hold the left button "A" down for 3 seconds, to reset the stopwatch to "00000". Briefly press the right button "B", to get to the next function.
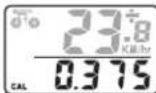
"CAL": The cyclometer calculates the calorie consumption from the entered values for weight and age and the distance covered or time.
Hold the left button "A" down for 3 seconds, to reset the displayed value to "0000".
Briefly press the right button "B", to get to the next function.
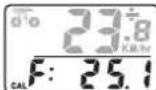
"CAL F". Analogous to the display for the calorie consumption (see above), the fat "burnt" value is displayed here.
Hold the left button "A" down for 3 seconds, to reset the value to "0".
Briefly press the right button "B", to get to the next function.
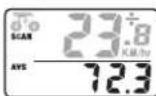
"SCAN": The cyclometer automatically switches between displaying the distance for the day ("DST") and the maximum speed ("MXS"), the average speed ("AVS") and the time taken for day's distance travelled ("TM").
By pressing the right button "B" you can get back to the start (function "ODO").
Resetting the Cyclometer
Hold down both buttons of the cyclometer for about 3 seconds, allowing all display elements to appear; now release the buttons. All data are deleted.
Alternatively, remove the batteries from the cyclometer, this also deletes all the data.
Proceed as described in "basic setting" and enter the wheel perimeter, units for the distance, the age, weight and the service interval.
Integrated Solar Cell
The solar cell integrated in the cyclometer powers the cyclometer when there is sufficient sunlight. When there is not sufficient light the battery automatically takes over the power supply.
Troubleshooting
No indication on the cyclometer's display
- Press any key briefly to turn it on.
- Check the cyclometer battery and replace it by a new one if necessary.
Revolutions of the wheel are not detected, no data transmission from the radio sensor.
The distance between radio sensor and magnet must be about 2 mm.. Use a another spoke, if necessary.
- Check the position of the magnet and the radio sensor relative to each other. The magnet has to move exactly across the middle of the radio sensor.
- Check the battery in the radio sensor and replace it by a new one if necessary.
Black display
- The display has been exposed to direct sunlight for too long. When the display cools down, the indication returns.
Maintenance and Cleaning
The product is maintenance free, therefore you should never open or dismantle it (except to change the battery as described in this operating instruction).
Please use a dry, clean, soft cloth for cleaning. Do not apply too much pressure on the display, as it may be damaged. It may become scratched.
Do not use any chemical cleaning agents, they can discolour the plastic housing.
Do not use the cyclometer in or under water!
Disposal
a) Product
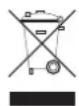
Electronic devices are recyclable waste and must not be disposed of in the household waste!
Please dispose the product, when it is no longer in use, according to the current statutory requirements.
b) Batteries and rechargeable batteries
As the end user, you are required by law (Battery Ordinance) to return all used batteries/rechargeable batteries; disposal of them in the household waste is prohibited!
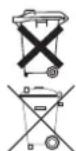
Contaminated batteries/rechargeable batteries are labelled with these symbols to indicate that disposal in the domestic waste is forbidden. The symbols for dangerous heavy metal constituents are: Cd=cadmium, Hg=mercury, Pb=lead (the marking can be seen on the battery/rechargeable battery e.g. below the refuse bin symbol shown on the left).
You can return used (rechargeable) batteries free of charge at the official collection points in your municipality, our stores, or where ever (rechargeable) batteries are sold!
You thus fulfil your statutory obligations and contribute to the protection of the environment.
Tips and Instructions
- Remove the cyclometer and take it with you, if you park and lock the bicycle, e.g. for a break. The cyclometer is not protected against theft.
- Check the mountings for the cyclometer, the radio sensor and the magnet from time to time.
- Due to safety reasons you should not set-up the cyclometer whilst cycling. Your attention will be distracted, which could lead to a fall!
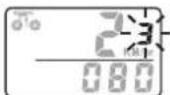
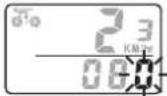
The bicycle icon in the upper left display moves when data are received from the radio sensor. - In the upper right display the symbol shows "+" or "-" if the speed is increasing or decreasing.
Technical Data
a) Cyclometer
Current supply .1 battery of type CR2032
Weight.. Approx. 35g
b) Radio sensor
Current supply 1 battery of type CR2032
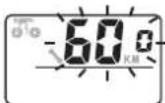
Radio range.. Max. approx. 60cm
Weight.. Approx. 15g
Declaration of Conformity (DOC)
We, Conrad Electronic, Klaus-Conrad-Straße 1, D-92240 Hirschau, hereby declare that this product conforms to the fundamental requirements and the other relevant regulations of the directive 1999/5/EG.

You can find the declaration of conformity at www.conrad.com.
Indications relatives aux piles
© Copyright 2009 by Conrad Electronic SE.
Copyright 2009 by Conrad Electronic SE.01_0509_02HK