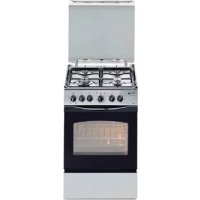
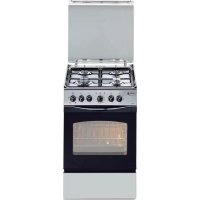
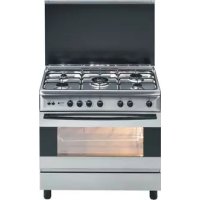
CFF 964E - Cooker FAGOR - Free user manual and instructions
Find the device manual for free CFF 964E FAGOR in PDF.
Frequently Asked Questions - CFF 964E FAGOR
Download the instructions for your Cooker in PDF format for free! Find your manual CFF 964E - FAGOR and take your electronic device back in hand. On this page are published all the documents necessary for the use of your device. CFF 964E by FAGOR.
USER MANUAL CFF 964E FAGOR
1 - plaque chauffante
INTRODUCTION Thank you for choosing one of our quality products, capable of giving you the best service. Read carefully these instructions for use and maintenance before installing and using your appliance. They include the important safety information, and guidelines and recommendation which enable you to take full advantage of all the functions available. To ensure its appliances are always at the state of the art, and/or to allow constant improvement in quality, the manufacturer reserves the right to make modifications without notice, although without creating difficulties for users. Our appliances comply with the safety regulations EN 60335-1 and EN 60335-2-6. The appliance must only be installed by a certified electric fitter or technician of an authorised service shop, in accordance with the local regulations in force. The manufacturer declines all responsibility for injury or damage caused by poor installation or improper use of the appliance. CAUTION !
1. The appliance must only be repaired by authorised service staff. If your appliance is
not repaired properly, you could be putting yourself in danger. Do not use a damaged cooker until it is put in order.
2. Never lift the cooker by taking hold of the oven door handle.
3. If the surface is cracked, switch off the apliance to avoid the possibility of electric
4. During use the appliance becomes hot. Care should be taken to avoid touching heating
elements inside the oven.
5. Ensure that the apliance is switched off before replacing the lamp to avoid the possibility
5.4.2 Disassembly of guides and side catalytic shields ...............................14
13 - cooker operation indicator light
Cooker is intended for preparing meals at household only. If must not be used for other purposes. Table 14
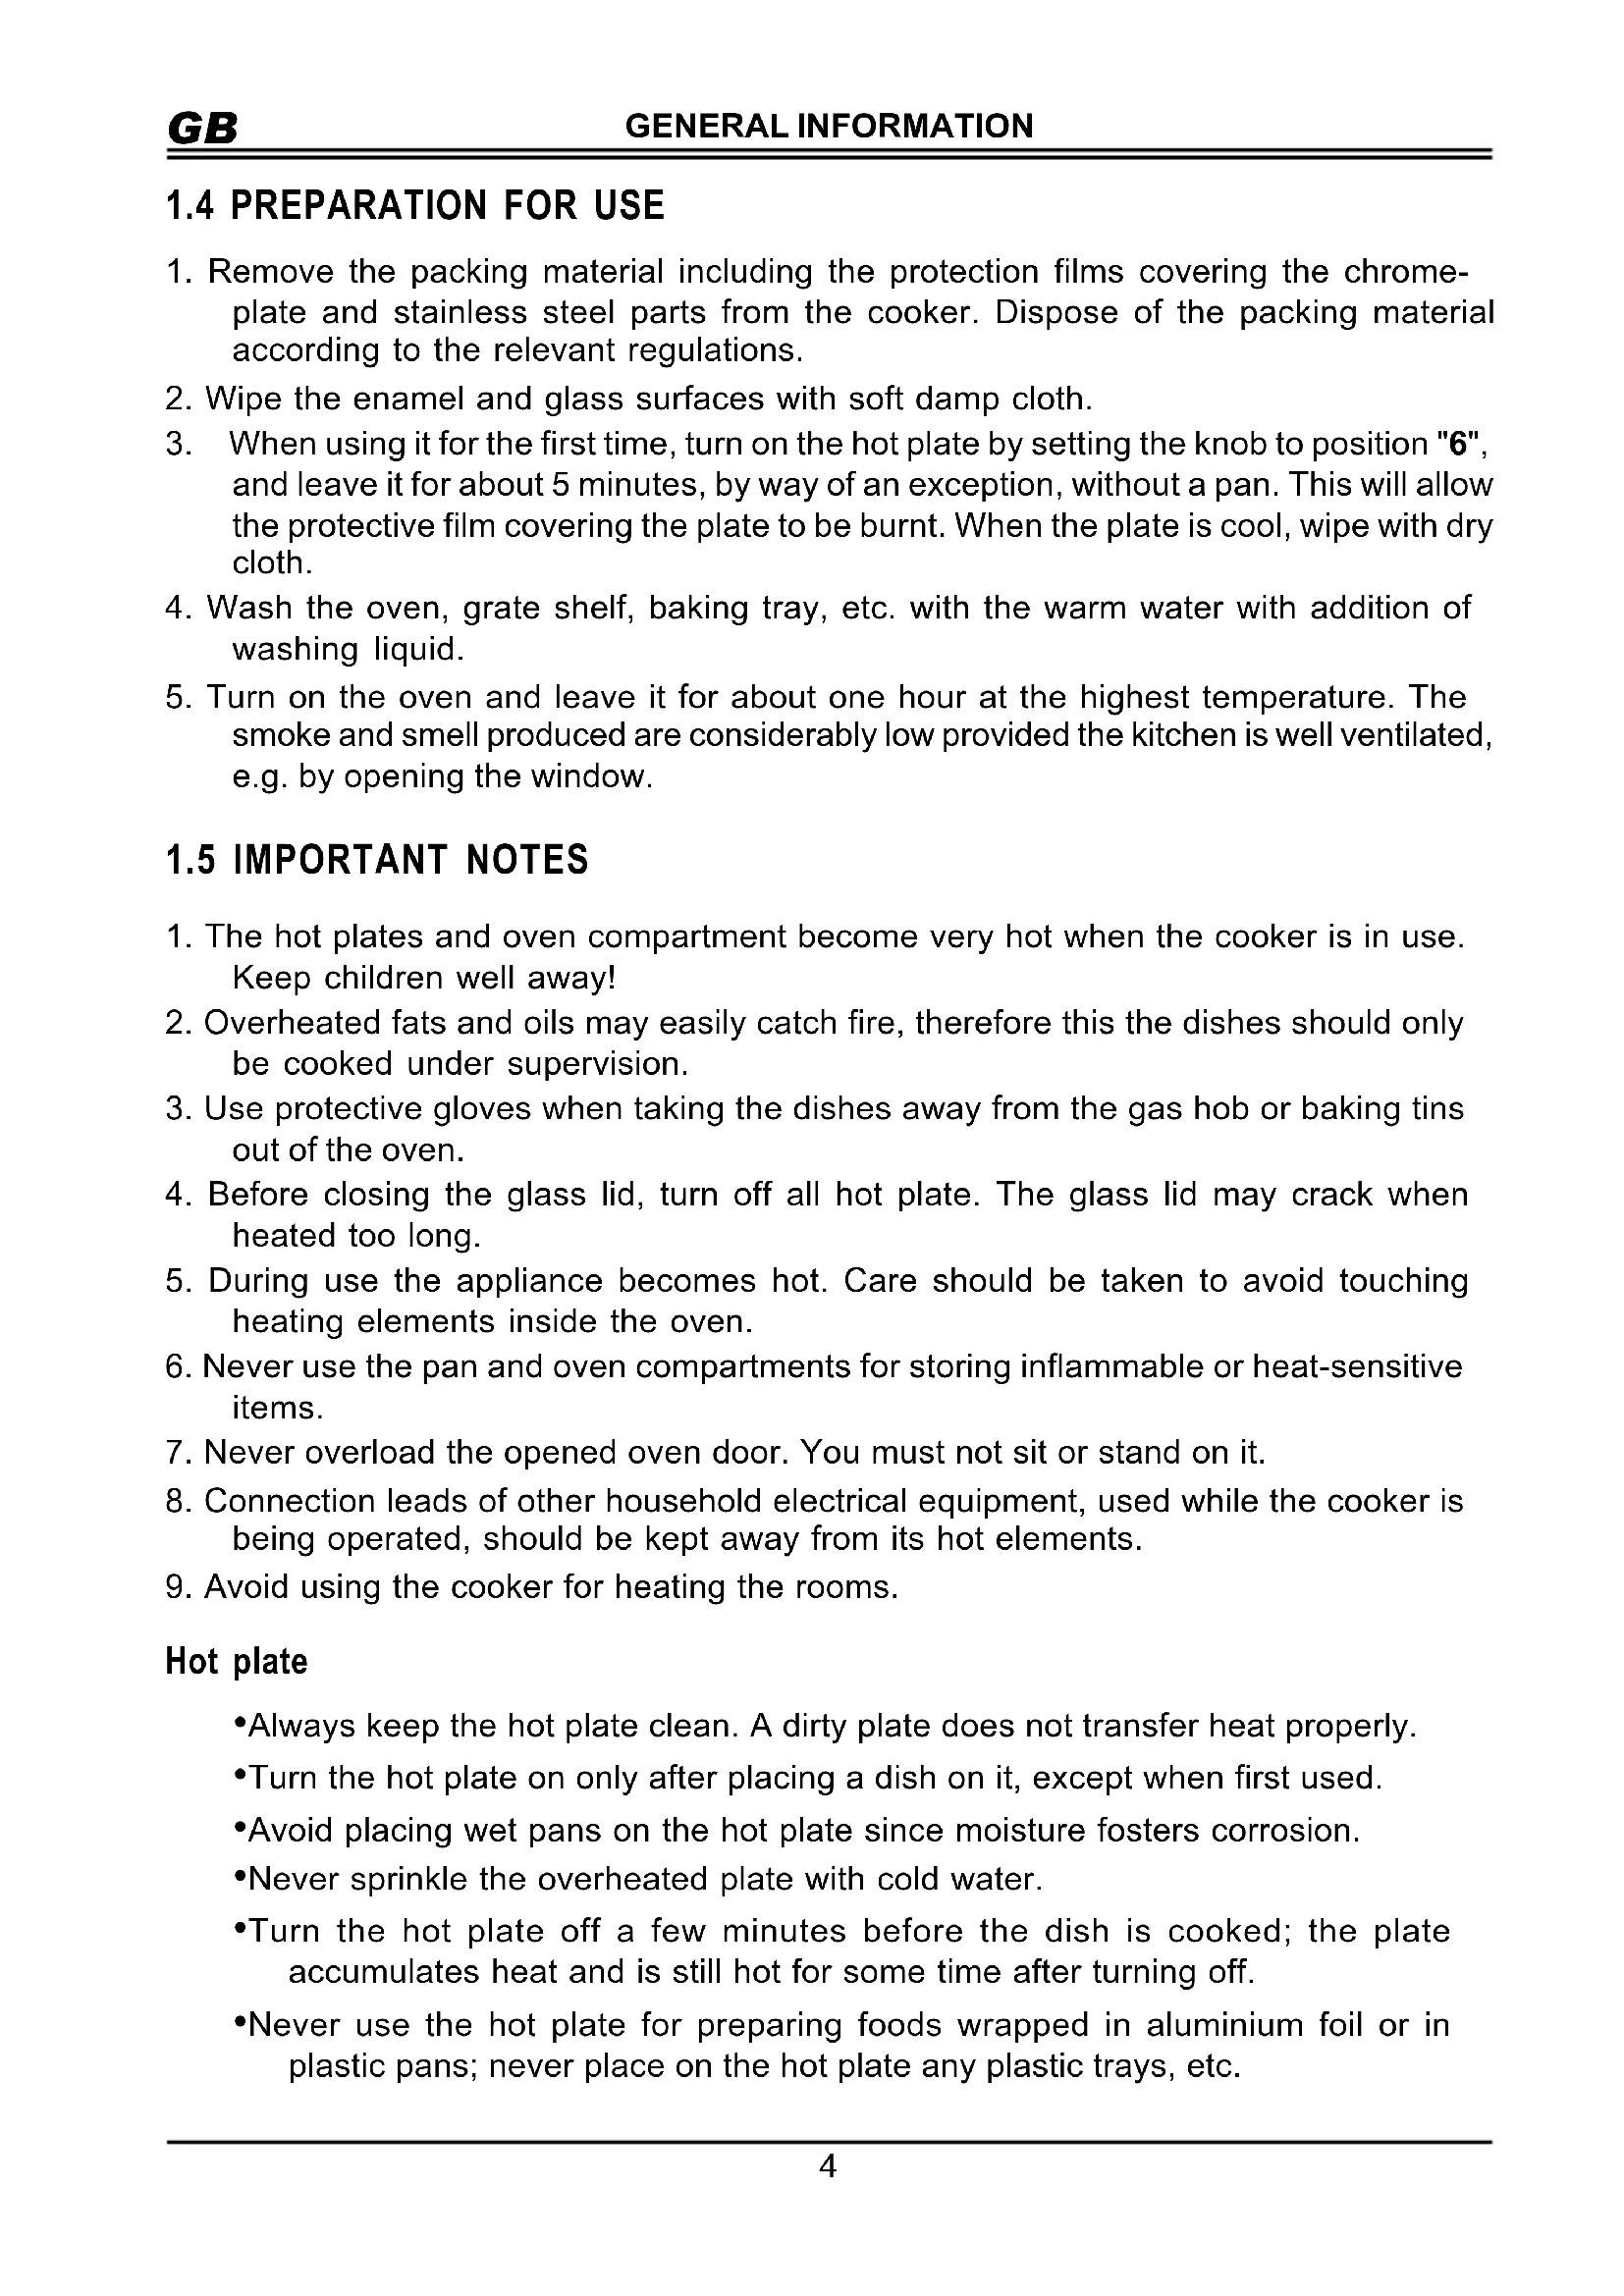
1. Remove the packing material including the protection films covering the chrome-
plate and stainless steel parts from the cooker. Dispose of the packing material according to the relevant regulations.
2. Wipe the enamel and glass surfaces with soft damp cloth.
3. When using it for the first time, turn on the hot plate by setting the knob to position "6",
and leave it for about 5 minutes, by way of an exception, without a pan. This will allow the protective film covering the plate to be burnt. When the plate is cool, wipe with dry cloth.
4. Wash the oven, grate shelf, baking tray, etc. with the warm water with addition of
5. Turn on the oven and leave it for about one hour at the highest temperature. The
smoke and smell produced are considerably low provided the kitchen is well ventilated, e.g. by opening the window.
1. The hot plates and oven compartment become very hot when the cooker is in use.
Keep children well away!
2. Overheated fats and oils may easily catch fire, therefore this the dishes should only
be cooked under supervision.
3. Use protective gloves when taking the dishes away from the gas hob or baking tins
5. During use the appliance becomes hot. Care should be taken to avoid touching
heating elements inside the oven.
6. Never use the pan and oven compartments for storing inflammable or heat-sensitive
7. Never overload the opened oven door. You must not sit or stand on it.
8. Connection leads of other household electrical equipment, used while the cooker is
being operated, should be kept away from its hot elements.
9. Avoid using the cooker for heating the rooms.
- Always keep the hot plate clean. A dirty plate does not transfer heat properly.
- Turn the hot plate on only after placing a dish on it, except when first used.
- Avoid placing wet pans on the hot plate since moisture fosters corrosion.
- Never sprinkle the overheated plate with cold water.
- Turn the hot plate off a few minutes before the dish is cooked; the plate accumulates heat and is still hot for some time after turning off.
- Never use the hot plate for preparing foods wrapped in aluminium foil or in plastic pans; never place on the hot plate any plastic trays, etc. GENERAL INFORMATION5
- Remove all packaging components off the cooker, including protective coatings applied to chromium-plated surfaces and stainless steel components.
2.2 ELECTRICAL CONNECTIONS
Cooker shall be properly connected to mains by qualified electrician according to safety regulations in force. No modifications or changes to electric system of the cooker are allowed. Before starting with connecting the unit, make sure for: - rated voltage of the mains is identical to that specified in the data plate of the cooker; - feeding line for the cooker is sufficient for the maximum power consumed by the appliance as specified in its data plate. Electric mains feeding the cooker shall be provided with safety switch allowing disconnecting power in emergency. Working contacts of the safety switch shall be spaced each other to at least 3 mm. When connecting the supply cable to the mains bear in mind the following: - yellow-green wire shall be connected to earth terminal identified
- blue wire is the neutral, - brown, black and red wires shall be connected to live terminals, - any lead must never touch hot surfaces over 75
- if the cooker comes without mains cable, use cable type H05RR-F or H05V2V2 sized as specified below.
- Kitchen room shall be dry and well ventilated. Cooker shall be positioned so as to ensure free access to all its controls.
- By placing the cooker in series with kitchen furniture the distance between its cooker lateral walls and the cupboards cannot be less than 20mm.
- The distance between the heating plate and kitchen hood shall be at least 650 mm.
- Level the cooker before using it. To do this, use adjustable feet accessible when you remove the drawer. Fig. 26
Warning ! When any crack is visible on the hot plate, disconnect the appliance from the electrical mains immediately and call a person authorised to perform repairs.
- The power of the hot plate is regulated with a 7-position selector knob. Such control allows for the correct and economical regulation of heat transfer to the dish.
- On the knob, which may be freely turned in both directions, there are numerical designations from 1 to 6 (Fig. 3). These positions correspond to the particular power of the hot plate. Selector knob setting Suitable for 6 fast boiling or roasting
strong roasting of meat or fish
moderate roasting 3 further cooking of big amount of dish, thick soups 2 stewing potatoes, soups
stewing vegetables, fish in natural sauce
- We recommend to turn off the hot plate 5 to 10 minutes before the dish is ready, which allows you to use the heat accumulated in the hot plate.
Possible wiring diagrams are as shown below:
Int. nominal by phases/Protection 35,7 A/40A; 26,1A/32A; 15,2A/16A; 35,7 A/40A; 20,4A/25A7
1. Never turn the hot plate on before placing a dish on it, except when first used;
2. If the hot plate is not to be used for a long time, apply a little grease to its
3. Do not allow spills to be burnt onto the hot plate since baked stains are very
difficult to remove. Cooking Set the selector knob to position 6 until the dish gets boiled, continue further cooking with the knob in position 2; if necessary, set it to position below or above. Roasting Set the selector knob to position 6 and warm the fat. Then place the dish in the pan and turn the knob to position 4. If necessary, select higher or lower power setting.
3.2 COOKWARE SELECTION
- Cookware should have a thick, flat and dry bottom of the diameter equal or slightly bigger than the hot plate. If cookware diameter is smaller than the hot plate, big amounts of heat will be lost.
- The uneven bases of the cookware make the cooking time last longer and cause higher consumption of energy.
- Cookware made of flameproof glass, suitable for cooking on the hot plate, should match the hot plate size. The pans projecting beyond the hot plate may be broken due to temperature stresses. The heated pan must never be filled up with cold water or taken away onto the cold metal or stone surfaces.
- The pan should be covered with a lid, which prevents the kitchen room from the accumulation of excessive amounts of vapour. Pan too small ! Uneven pan bottom ! Lid not properly placed ! Fig. 5 Correct !
- Low current consumption
- Good heat transfer - even pans - pan and plate diameters are equal - pan covered with lid Wrong !
- High current consumption
4.1 STRUCTURE AND ACCESSORIES
- Installed on five levels, there are guides [1], [2], [3], [4] and [5], for placing the baking tray or grate shelf with the dishes.
- Installed in the upper part of the oven, there are upper heater 1 and grill heater 2, and lamp 4 for lighting its interior, and beneath the floor there is (invisible) lower heater 3.
- The oven side walls are equipped with additional covers 7. Covers 7 are coated with special catalytic enamel featuring self-cleaning properties. THE OVEN Fig. 6
4 - oven lighting lamp
7 - side self-cleaning covers
ACCESSORIES Enamelled baking tray for cooking meat, fish and casseroles. It can also be used as a drip tray to catch dripping fat when grilling directly on the grate shelf. Grate shelf is designed to take normal oven dishes. It can also be used without a pan for grilling foods, such as fish. Fig. 7
- The temperature control knob (Fig. 9) allows for setting and automatically maintaining the oven inside temperature on the set level.
- On the knob there are following settings - 50, 100, 150, 200, and 250, which correspond to the selected temperatures in [°C].
- When selecting the temperature - turn the knob in the clockwise direction, to switch the control off - turn in the opposite direction.
- On selecting a temperature, the control light will come on. When reaching the set temperature, the heaters are automatically turned off and the indicator lamp goes out. The heaters and indicator lamp are turned on and off as a result of temperature controller operation.
1. Set the cooking method with the function selector.
2. Set the temperature with the temperature selector.
4.4.2 TURNING THE OVEN OFF
Always remember to set the function and temperature selector back to 0 when you finish using the oven. THE OVEN The following functions can be selected: - grill
- oven turned off - lower heater - Conventional Heating (lower and upper heater)
This function allows for extra heating of the cake bottom. It is used during the last
10 - 15 minutes of the dish stay in the oven.
CONVENTIONAL SYSTEM (lower heater and upper heater turned on) With this function, dishes are heated from the bottom and from the top. This kind of heating is ideal for cooking cakes, meat, fish, pizza and bread. The dishes should be placed on a single, preferably middle level of the oven.
- On selecting a function the appropriate indicator light will come on and the oven light will also come on.
- Always turn the function selector back to 0 when you have finished using the oven.10
TRADITIONAL GRILLING How to use the electric grill: - put the dish in the oven, - insert on the highest runner, - insert the drip tray on the bottom runner, - set the function change-over switch knob to position
- set the required temperature, - After half of the grilling time, turn the grilled portions over. When the grilling is over - turn the oven off. THE OVEN WARNING ! While grilling, the appliance must not be left without supervision. Accessible parts of the cooker are very hot ! Keep children well away.
4.6 GENERAL HINTS ON PREPARING DISHES
4.6.1 HINTS ON OPERATING THE OVEN
- When the indicator lamp goes off, it means the oven reached the temperature required. If along with the baking tray delivered with cooker you use other baking tins, they shall be placed in the centre of the wire shelf.
- When selecting the temperature of baking, consider the following rules: Dough rolled out to thin cake - high power, short baking time. Thick and liquid dough - lower power, longer baking time.
- To check if the baking food is ready, insert a wooden stick into it a few minutes before the oven is turned off. If the pastry does not stay stuck to the stick - the food is ready. After the baking, leave the pastry in the oven for another 5 minutes.
4.6.2 BAKING / ROASTING IN THE OVEN
The baking should be carried out using the convectional heating after setting the required temperature. Place the dish in the oven when the red indicator light goes out. In the oven compartment, it is possible to cook any dish. The meat can be grilled on the baking tray or grate shelf with the tray placed underneath for catching the dripping fat. WHEN YOU BAKE/ROAST IN THE OVEN, OBSERVE THE FOLLOWING RULES Keep proper temperature of roasting!
- Roasting temperature is mainly dependent of the type and size of meat. Typically, the roasting temperature is form 200 to 250
- Easy boiling foodstuffs such as meat, vegetables, fruits, etc. may be stewed in the oven.
- Preheat the oven to 170-200
C. This setting may be kept for the full time of stewing. Oven door shall be closed during stewing. When stewing vegetable, pour a little water and stew for the shortest time possible. Excessive time of stewing deprive vegetables from valuable nutrients. Below, Tables 3 and 4 summarize approximate cooking timings for dough and meat. These are indicative values, which in practice may vary up or down. They depend on the pots used, their shapes and sizes and on the browning you prefer. Table 3. Cakes Table 4. Meat dishes Dish Temperature [ C]
of meat thickness Meat - long roasting
Chicken 225 -250 50 - 60 Goose, duck, turkey 200 - 210 Up to 3 hours depending on the size Venison 190 - 210 Fish - roasting, up to 2 kg - stewing, up to 2 kg
20-30 30-50 Cake Temperature [ C]
Warning ! Before proceeding with washing and cleaning, disconnect the cooker from the electric power supply and wait until it cools down.
- The cooker must be regularly cleaned. While cleaning, avoid using any coarse-grained, abrasive powders, wire sponges aggressive chemicals and sharp objects.
- The parts made of stainless steel, knobs and fascia panel should be cleaned with soft cleaning liquids without any abrasive agents.
- Clean the enamelled parts with a soft cloth or sponge moistened in lukewarm water with addition of soft detergent, avoiding too much water. Remove heavy stains with special agents used for cleaning the kitchen.
- After using them, baking tins and forms, and meat roasting pans should be soaked in lukewarm water with the addition of washing liquid, then washed and carefully dried.
- Check to make sure that the oven door seal is clean.
5.2 CLEANING THE LID
- When cleaning the cooker, it is possible to remove the cover.
- In order to do so, turn the lid to its vertical position, take hold of its side with both hands, move the cover upwards pulling it out of the hob holes (Fig. 10).
- Then wash the cover, dry it and put aside. Fig. 10
CLEANING AND MAINTENANCE
5.3 CLEANING THE HOT PLATE
- Clean the hot plate with a damp sponge, and then dry it by turning it on for a few seconds. To ensure the aesthetic appearance, apply any commercially available grease intended for the maintenance of hot plates.
- The hot plate rings can be cleaned with agents intended for the maintenance of stainless steel parts. As a result of overheating, the ring can get yellow tint, which is normal.
- If the hotplate is to be out of use for a long time, apply some grease periodically.13
1. Before cleaning you should wait until oven cools down. Hot heaters may
2. Cleaning the oven in use of appliances for steam generation under
pressure is not allowed.
3. It is the best to clean the bottom of the oven after each use, not to allow
the remains of food and spots of oil to roast again.
- The oven compartment is coated with ceramic enamel, and both of the side covers and the rear cover are coated with catalytic enamel.
- During normal use, the oven compartment is heated to high temperatures, which facilitates absorbing the emitted fumes by the catalytic enamel.
- Periodically, especially after cooking very fat dishes, the self-cleaning cycle must be carried out. It is done by in turning the oven on for one hour's time and setting the maximum temperature (250°C). During this time, the oven door should be closed. During the self-cleaning cycle, the dirt deposited on the oven walls oxidizes and evaporates.
- After some time, the catalytic covers will loose their self-cleaning properties; when their surface becomes glossy they should be replaced.
- In order to replace the catalytic covers, it is necessary to remove the oven door and guide assembly.
5.4.1 DISASSEMBLY OF OVEN DOOR
- Open the door entirely
- Lock hinges on both sides of the door by placing the clamping ring 1 on the catch 2 of the hinge bow 3 (fig. 11)
- Next grasp the door with both hands, turn it in closing direction through an angle of
and take out the hinges.
CLEANING AND MAINTENANCE
Fig. 11 Taking out the oven door When the oven door is removed, you can dismantle both pairs of quides. The quides and oven bottom should be preferably cleaned each time they get dirty.14
CLEANING AND MAINTENANCE
1. The hinge bow is tense with a big strength, therefore while taking out the
door a special care must be taken not to cut one's own fingers.
2. During cleaning the upper wall of oven you should pay attention to electric
heaters, temperature sensor and lamp of oven illumination; do not change position of sensor setting.
3. Do not pour water onto the bottom of oven otherwise it may trickle through
some possible leakage and get on the lower heater. In order to replace the side catalytic shields, first disassemble both sets of the guides. Removing the guides:
− press down the top bar of guides 1 in order to release catch 2 from hole 3, − tilt guides 1 toward the inside of the oven and release the lower bars from holes 4, − put catalytic shields 5 aside, − steep the guides in a solution of warm water and detergent, and then brush them with the use of a sponge or soft brush. Clean the ladder guides with a sponge or brush using dish washing agent. After cleaning, take all actions in the reverse sequence to disassembly.
5.4.3 CLEANING OF THE CHAMBER INTERIOR
- After removing all catalytic shields you can clean the inside of the chamber
- Clean the enamelled surfaces with agents intended for cleaning the kitchen.
- In order to clean stubborn baked stains you can use a special cleanser intended for oven cleaning. As these detergents are caustic, you should use them in minimal amount and with a great caution, observing the recommendations of detergent manufacturer. " In order to make cleaning of the oven interior easier, you can switch on the lamp. In order to do it, set the function selection knob to any function and the temperature control knob in "0" position. The lamp will remain lit. " In order to clean glass cover of the lamp (item 1 in fig. 13), unscrew it, wash in warm water and deter-gent, dry and refit. Fig. 12
TROUBLESHOOTING 6 TROUBLESHOOTING WARNING ! Before proceeding with the troubleshooting, disconnect the cooker from the electric mains. In case of disturbances in the cooker operation, check the guidelines below to learn if you are able to remedy the problem by yourselves. Oven fails to be turned on
- Burnt fuses - replace them.
- If the fuses burn again, it may mean that too many units are operated at the same time. Oven lighting does not function If the oven has been operated and is still hot, wait until it cools down.
- Bulb is not screwed all the way in - unscrew glass bowl 1 from lamp socket 2, and screw the bulb 3 all the way in (Fig. 13)
- Burnt bulb - unscrew glass bowl 1 of the lamp, and replace with a new bulb featuring the following parameters: type E14; 230 V; 25 W; temperature resistance 300°C. Fig. 13 Too much smoke in the oven
When the appliance reaches the end of its service life, you should not dispose of it with the general domestic waste. It can be taken free of charge to the local administrations' specific selective collect ion centres, or to distributors who provide this service. Separating a domestic appliance before disposing of it means you will prevent possible negative consequences for the environment and health which may be given rise to by incorrect disposal, and it means the materials making it up can be treated and recycled, obtaining important savings on energy and resources. To remind you that you must collaborate with a selective co llection scheme, there is a symbol on the product warning you not to dispose of i t i n traditional refuse containers. For further information, contact your local authority or the shop where you bought the product.