WXR890 - Weather Station Cresta - Free user manual and instructions
Find the device manual for free WXR890 Cresta in PDF.

| Product type | Weather station with radio-controlled clock and wireless outdoor sensor |
| Brand | Cresta |
| Model | WXR890 |
| Main unit power supply | 2 AA alkaline batteries (not included) |
| Outdoor sensor power supply | 2 AAA alkaline batteries (not included) |
| Indoor temperature range | 0 °C to +50 °C |
| Outdoor temperature range | -20 °C to +60 °C |
| Indoor humidity range | 20 % to 99 % RH |
| Barometric pressure range | 900 to 1050 hPa (mb) |
| Altimeter | -100 to 2500 meters |
| Temperature resolution | 0.1 °C |
| Humidity resolution | 1 % RH |
| Pressure resolution | 1 hPa (mb) |
| Number of sensor channels | 3 maximum |
| Transmission range | Up to 30 m (100 ft) outdoors |
| Radio frequency | 434 MHz |
| Display | Backlight (5 seconds) |
| Main functions | Weather forecast, moon phase, max/min memory, dual alarm, temperature trend, temperature alert |
| Clock | Radio-controlled DCF77, with backup quartz |
| Maintenance | Replace batteries when low battery indicator appears; clean with a soft cloth; do not immerse outdoor sensor |
| Safety | Use batteries of the same type; do not discard used batteries with household waste; observe polarity |
Frequently Asked Questions - WXR890 Cresta
User questions about WXR890 Cresta
0 question about this device. Answer the ones you know or ask your own.
Ask a new question about this device
Download the instructions for your Weather Station in PDF format for free! Find your manual WXR890 - Cresta and take your electronic device back in hand. On this page are published all the documents necessary for the use of your device. WXR890 by Cresta.
USER MANUAL WXR890 Cresta
text_image
RF WIRELESS 3 20.5 45% REMOTE SENSOR crestaGEBRUIKSAANWIJZING
INSTRUCTION MANUAL
MODE D' EMPLOI
GEBRAUCHSANWEISUNG
INSTRUZIONI RER L'USO
INTRODUKTIE
natural_image
Technical line drawing of a vertical cabinet or rack unit with internal components and mounting holes (no text or symbols)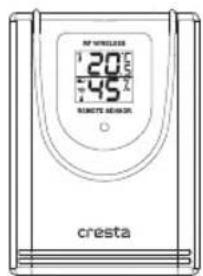
text_image
20 45 CRESTA CRESTA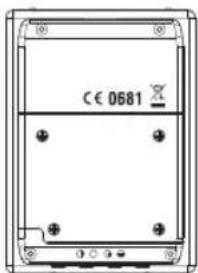
text_image
CE 0681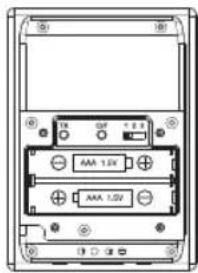
text_image
18 TIN OFF + 0.1 AAA 1.0V + AAA 1.5Vnatural_image
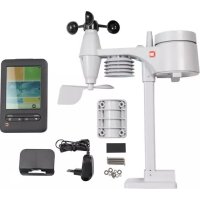
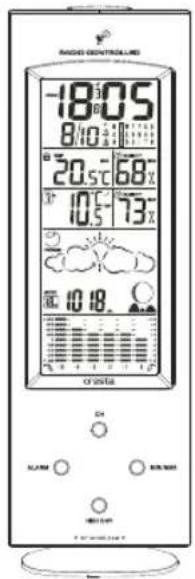
Five weather icons showing sun, cloud, rain, snowman, moon, and cloud with raindrops (no text or symbols)Congratulations with the purchase if the In/Out Thermometer with wireless sensor and radio controlled clock.
The basic package comes with a main unit (the temperature/clock station) and a remote unit (the thermo sensor).
The main unit has large displays for time/date, indoors temperature and humidity, outdoors temperature and humidity as received from the remote unit. The main unit can receive data from up to 3 remote units.
The main unit has a memory for maximum and minimum reached temperatures and humidity of different sites.
The remote units have a range up to 30 meters, this range can be influenced by several factors (concrete walls, electric wires, other sending devices, etc.)
The sensors are weatherproof and can be used outdoors, but should not be submerged into water or hung in a place where rain can reach the unit.
The clock/calendar function is radio controlled and the unit has a 2 minute crescendo weekly and daily alarm.
The clock is synchronised with the atom clock in Frankfurt Germany, this clock has a range of 1.500 km and your clock will receive the time signal 12 to 24 times a day and will correct, if necessary. When you first operate your clock, it can take up to 60 minutes before the radio signal is received and the correct time is set.
When you put the main unit and the remote unit next to each other, you will notice a minimal difference in temperature. This is caused by the software used and the insulation of the outdoors sensor, this sensor is calibrated on the average outdoors temperature, whereas the main unit is calibrated on the average indoors temperature.
This is no defect in the units
At temperatures below freezing point the operation can be distorted, this is caused because the batteries cannot deliver the power needed to operate the unit correctly.
You can avoid this by using branded batteries and change them just before the winter starts.
text_image
RADIO CONTROLLED -18:05 8/10 12:11 20.5 - 68% 10.5 - 73% 10:18 crista ON RUNS RUNS RUNS
natural_image
Technical line drawing of a vertical panel with internal components and mounting base (no text or symbols)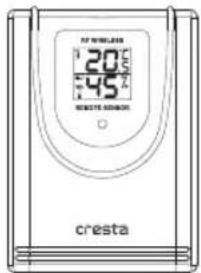
text_image
20°C 45°C CREATE ASSISTANCE cresta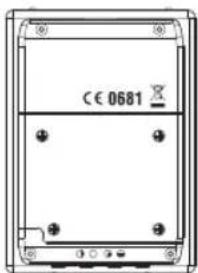
text_image
CE 0681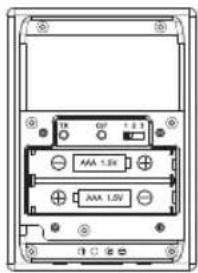
text_image
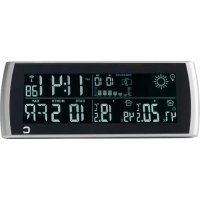
AAA 1.5V AAA 1.5VName and Functions of Buttons (front):
Press Functions
Hold 3 seconds
CH Select Channel 1,2,3, auto scroll Delete current channel
HISTORY View past hr 0 to -12 Set current pressure
ALARM Read Alarm 1, Alarm 2 Alarm time setting Read alarm time 5 sec at normal mode
MIN/ MAX Read maximum/ minimum temperatures, humidity & air pressure
Name and Functions of Buttons (back & top):
Press Functions
Hold 3 seconds
SET/ + R/C force synchronization on/off Enter clk & cal setting
ALERT/ - Temp/ hygro alert on/ off Enter alert setting
BARO ▲Step advance for pressure
Fast advance
BARO▼
Step backward for pressure
Select hPa/ inHg
Fast backward
[NO TEXT]
Alarm 1, 2 on/off
C/F-
(ZONE)
C/F setting
Select Zone
SNOOZE/LIGHT
Trigger snooze alarm & extended backlight
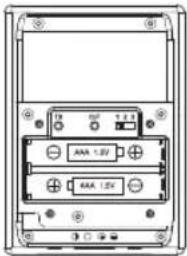
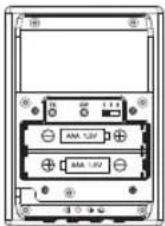
BATTERY INSTALLATION
Home Receiver:
Lift off the battery cover at the back, install 2 pcs AA batteries according to the polarity indicated, close the battery cover.
Remote Sensor:
Lift off the bracket stand, loose the 4 screws with a small screwdriver, insert 2 pcs AAA batteries according to the polarity indicated. Replace the cover and tighten the 4 screws.
SETTING UP THE WIRELESS THERMOMETER:
- For the first installation, always insert batteries to the home unit and then the remote sensor. Set Channel 1 for the first remote sensor. Set channel 2 and channel 3 for the 2nd and 3rd sensor.
- Press the Tx button on the back of remote sensor to verify the RF reception.
- If more than 1 sensor is connected, press "CH" to select Ch1, Ch2, Ch3 and Auto Ch Scrolling.
C/F SELECTION, HOME TIME & WORLD (ZONE) TIME
Press "C/F" to select C/F
Hold "ZONE" button 3 seconds to select display home time and world time (only with manual time setting).
RADIO-CONTROLLED CLOCK
The unit will start synchronizing the clock after the 1st channel of the RF thermometer is registered. Press SET for 2 seconds to force synchronization.
The antenna icon will appear during synchronization, if the icon disappear afterwards, radio time signal is not available at the moment. Try other locations later. Place the unit away from source of interference such as mobile phones, appliances, TV etc.
Antenna icon will appear fix on screen if the radio time reception is successful.
The radio-controlled clock will have a daily synchronization at 01:00 everyday. Each reception cycle is minimum 2.5 minutes and maximum 5 minutes.
MOON PHASE
Moon phase will be displayed automatically according to current calendar.
SETTING UP THE BAROMETER
When power up, the pressure section will display 1013hPa. Press HISTORY for 3 seconds, the value flashes. Press BARO▲, BARO▼ to adjust the air pressure according the current sea level pressure value (available from local authorities or the Internet), press HISTORY to save the setting.
There is no need to enter the existing weather to the unit, the digital barometer will calculate & forecast the weather conditions based on the air pressure data.
To change the scale between hPa/mb and inHg, hold BARO▼ for 3 seconds.
To view air pressure for the past 12 hours, press HISTORY each time to view the pressure history for each hour. The corresponding pressure history values can only be available after the barometer operated and recorded the pressure data in the past 12 hours.
The spectrum bar chart indicates the pressure changes (range from +0.24 inHg to -0.24 inHg/ -8 hPa mb to +8 hPa mb) of the current and past 1, 2, 3, 6 and 12 hour.
WEATHER FORECAST
The unit predicts weather condition of the next 12 - 24 hours based on the change of atmospheric pressure. The coverage area is around 30 - 50 km. The weather forecast is based on atmospheric pressure change and is about 70-75% correct. As weather conditions cannot be 100% correctly forecasted, we cannot be responsible for any loss caused by an incorrect forecast.

SUNNY SLIGHTLY CLOUDY CLOUDY RAINY STORMY
Pressure Tendency:


Rising Steady Falling
MANUAL CLOCK & CALENDAR SETTING
Hold "SET" button for 3 seconds to enter clock set. Using "+, -" to adjust and "SET" to confirm, the following values can be set in sequence: Year > Month > Date > Hr > Min > 12/24 > ZONE > confirm & exit.
ZONE : Enter hour offset value from -12 to +12 for world time zone. Hold the "ZONE" button 3 seconds to select viewing home time and zone time.
ALARM SETTING
Select AL 1 or AL2 by press ALARM key. Hold "ALARM" for 3 seconds. Press "+,-" to enter the desired Hr/ Min values and press "ALARM" to confirm setting.
To view alarm time 1 and 2, repeat press "ALARM" button at normal mode. Alarm time 1 or 2 will display for 5 seconds and resume to normal clock thereafter.
To turn Alarm 1, 2 on and off, repeat press “+” button at normal mode.
SNOOZE/ LIGHT
Press SNOOZE/ LIGHT to trigger a 5 minutes snooze alarm. To stop alarm for one day, press "ALARM" key. At normal mode, press SNOOZE/ LIGHT for an extended backlight.
MAX / MIN MEMORY
Press "MAX/ MIN" to view the maximum values (In/ Out Temp and Humidity, Air Pressure) for 5 seconds, press again to view the minimum memory.
To clear the memory record, hold Max/ Min button while the respective values are displaying on screen. Air Pressure record will not be cleared manually, it will be cleared automatically every 12 hours.
TEMPERATURE & HUMIDITY TREND INDICATOR:
The icons will indicate Rising, Steady, Falling if the temperature or humidity change is more than 1 degree within an hour.
TEMPERATURE/ HUMIDITY ALERT
Press "ALERT" to turn alert on and off.
Hold "ALERT" 3 seconds to enter the alert setting mode. The indoor channel and the Upper/Lower limit icons flash.
Press “+,-” to select indoor channel, Ch1, 2 or 3 and press “ALERT” to confirm the channel. The Upper limit icon and temperature value will flash, enter the desired upper limit with the “+,-” buttons, press “ALERT” to confirm and go to the lower limit setting.
The Lower limit icon and temperature value will flash, enter the desired lower limit with “+,-” buttons, press “ALERT” to confirm and go to set upper/ lower humidity limits.
Each setting cycle will allow setting one channel for the temperature/ humidity alert. The unit allows to enter temperature & humidity alert for the indoor channel and all of the channel 1, 2, 3.
When temperature/ humidity hits the preset limits, the Upper & Lower limit icons and the temperature/ humidity values of the respective channel will flash, press "ALERT" keys to stop the alarm.
LOW BATTERY INDICATION
Low battery indication is available for the home unit itself and all of the 3 remote channels. Replace the batteries and follow the setup procedure as mentioned in this instruction manual.
BATTERY DISPOSAL
Replace only with the same or equivalent type recommended by the manufacturer.
Please disposal of old, defective batteries in an environmentally friendly manner in accordance with the relevant legislation.
SPECIFICATIONS
Range of temperature measurement:
Indoor unit : 0 C to +50 C (+32 F to +122 F)
Indoor Humidity : 20% - 99% RH
Remote sensor : -20 C to +60 C (-4 F to +140 F)
Barometer : 900 to 1050 mb/hPa
Altimeter : -100 to 2500 meter
Channel : max. 3 remote sensors
Transmission : up to 30M (100 ft.) open area, RF434 MHz
Resolution : 0.1 degree for temperature, 1% for humidity, 1 hPa mb for pressure
Clock : DCF77 Radio-Controlled, Quartz back-up
Batteries : AA x 2 pcs for main unit, AAA x 2 pcs for remote sensor
CE 0681
INTRODUCTION
natural_image
Technical line drawing of a vertical cabinet or rack unit with internal components and mounting base (no text or symbols)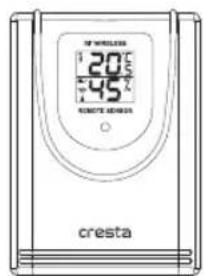
text_image
20°C 45°C CRESTA cresta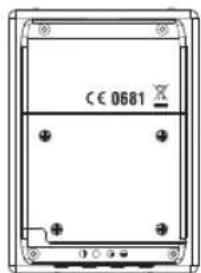
text_image
CE 0681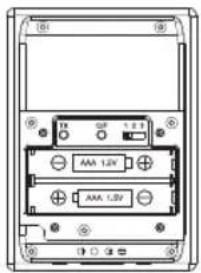
text_image
AAA 1.2V AAA 1.2Vnatural_image
Technical line drawing of a vertical electrical cabinet with control panel and base (no text or symbols)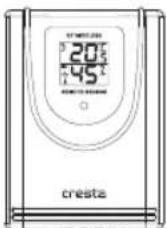

natural_image
Technical line drawing of a vertical cabinet or enclosure with internal components and mounting brackets (no text or symbols)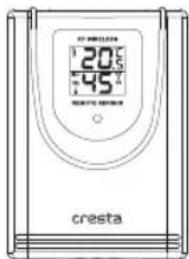
text_image
20°C 45°C CRESTA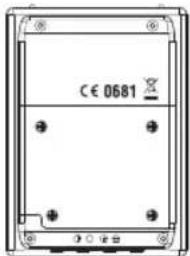
text_image
CE 0681