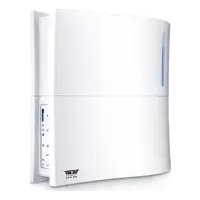
AX 600 - Humidifier Turmix - Free user manual and instructions
Find the device manual for free AX 600 Turmix in PDF.
User questions about AX 600 Turmix
0 question about this device. Answer the ones you know or ask your own.
Ask a new question about this device
Download the instructions for your Humidifier in PDF format for free! Find your manual AX 600 - Turmix and take your electronic device back in hand. On this page are published all the documents necessary for the use of your device. AX 600 by Turmix.
USER MANUAL AX 600 Turmix
natural_image
Two electronic devices: a silver hard drive and a black stopwatch (no visible text or symbols)
text_image
3.4.
text_image
20:15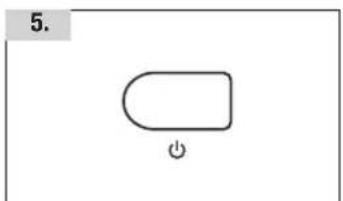
natural_image
Simple diagram with a rounded rectangle and an 'Power' button, no text or symbols present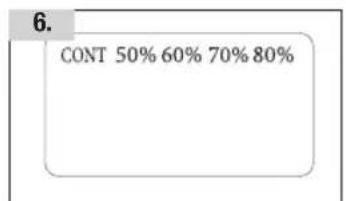
text_image
6. CONT 50% 60% 70% 80%
natural_image
Simple diagram with a rectangular frame containing a central abstract symbol (no text or labels)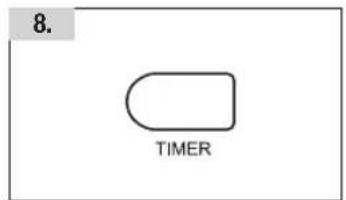
text_image
8. TIMER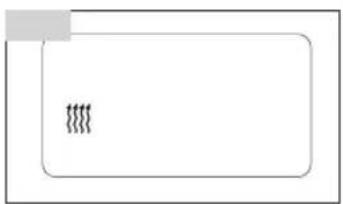
natural_image
Simple diagram with a rectangular box and a small gray rectangle, containing no text or symbols.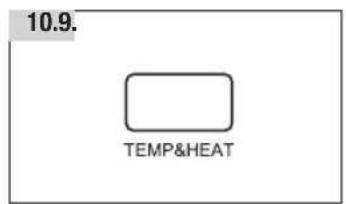
text_image
10.9. TEMP&HEAT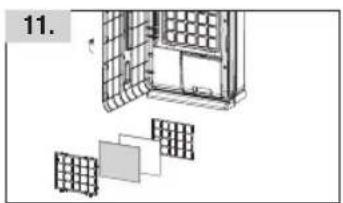
natural_image
Diagram showing a window with grid panels and a separate panel array, no text or symbols presentnatural_image
Technical line drawing of a modular device with grid layout and internal components (no text or symbols)1
natural_image
Technical line drawing of a modular device with grid panels and an open panel (no text or symbols)4
natural_image
Technical line drawing of a modular device with grid panels and an open panel (no text or symbols)5
3M™ High Air Flow-Filter
natural_image
Technical line drawing of a device with open lid, internal grid panel, and two labeled boxes (no text or symbols)natural_image
Three technical line drawings of mechanical components or enclosures, showing internal structures with no visible text or symbols.natural_image
Technical line drawing of a device with two circular components and a close-up view of its internal structure (no text or symbols)9
FR Chères clientes, chers clients,
natural_image
Two items: a silver hard drive case and a stopwatch (no text or symbols visible)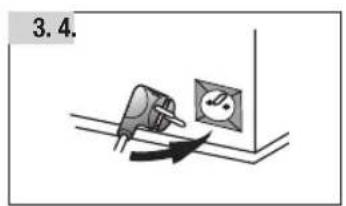
text_image
3.4.
text_image
20:15
natural_image
Simple diagram with a rounded rectangle and an 'Power' button, no text or symbols present
text_image
6. CONT 50% 60% 70% 80%
natural_image
Simple diagram with a rectangular frame containing a central abstract symbol (no text or labels)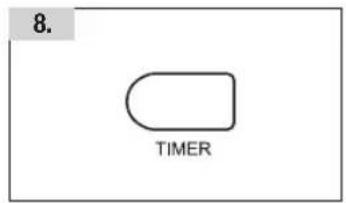
text_image
8. TIMER
natural_image
Simple diagram with a rectangular frame and a small gray rectangle above it, containing no text or symbols.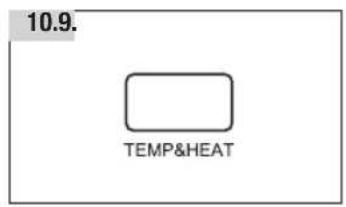
text_image
10.9. TEMP&HEAT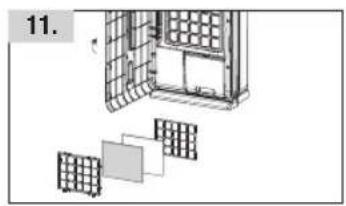
natural_image
Diagram showing a window with grid panels and a small rectangular object, no text or symbols presentnatural_image
Technical line drawing of a modular device with grid panels and an open panel (no text or symbols)natural_image
Technical line drawing of a modular device with grid panels and an open panel (no text or symbols)4
natural_image
Technical line drawing of a modular device with grid panels and an open panel (no text or symbols)5
natural_image
Technical line drawing of a device with internal components and housing (no text or symbols)natural_image
Three technical line drawings of a mechanical component with no visible text or symbolsnatural_image
Technical line drawing of a device with two circular components and a close-up view of the internal structure (no text or symbols)9
7.1 Elimination (recyclage)
natural_image
Two electronic devices: a silver hard drive and a black stopwatch (no visible text or symbols)
text_image
3.4.
text_image
20:15
natural_image
Simple diagram with a rounded rectangle and an 'Power' button, no text or symbols present
text_image
6. CONT 50% 60% 70% 80%
natural_image
Simple diagram with a central swirl symbol and number 7, enclosed in a rounded rectangle (no text or labels)
text_image
8. TIMER
natural_image
Simple diagram with a rectangular frame and a small gray rectangle above it, containing no text or symbols.
text_image
10.9. TEMP&HEAT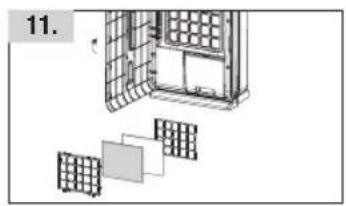
natural_image
Diagram showing a window with grid panels and a small panel, no text or symbols presentnatural_image
Technical line drawing of a modular device with grid panels and an open panel (no text or symbols)1
text_image
UP DOWN SET CONT 50% 40% 70% 80% 80℃ 38:88:00natural_image
Technical line drawing of a modular device with grid panels and an open panel (no text or symbols)4
natural_image
Technical line drawing of a modular device with grid panels and an open panel, showing internal structure and assembly (no text or symbols)5
natural_image
Technical line drawing of a device with open lid and two internal compartments, showing internal structure (no text or symbols)natural_image
Three technical line drawings of a mechanical component with no visible text or symbolsnatural_image
Technical line drawing of a mechanical device with two circular views and a close-up inset showing internal components (no text or symbols)9
Lafnes and Gentlemen,
Thank you for choosing to purchase this TURMIX product. Since 1933 we have been working to one end alone – to give you pleasure in using our equipment. Our philosophy can be summed up in just four words: lasting, uncomplicated, fascinating and reliable.
This means that we lay a great deal of stress on quality, ergonomics, simplicity and service and repairs, with a view to offering you the very best in the way products and services.
We hope you will get a lot of pleasure out of your new TURMIX product!
Table of Contents
| 1 Initial operation | 1.1 Description of parts 52 | |
| 1.2 Brief instructions 54 | ||
| 2. Safety regulations 552 Important safety instr | ||
| 3.1 Functionality of the AX 600 563 Functionality | ||
| FR | ||
| 4 Starting operation | 4.1 Initial operation 57 | |
| 4.2 Setting up 57 | ||
| 4.3 Air purification 58 | ||
| 4.4 Adjustment of the time 59 | ||
| 4.5 Turning on the device 59 | ||
| 4.6 Humidity adjustment 59 | ||
| 4.7 Adjustment of fan position 59 | ||
| 4.8 Adjustment of the timer 59 | ||
| 4.9 Adjustment of the light 60 | ||
| 4.10 Adjustment of the heater 60 | ||
| 4.11 Humidistat 60 | ||
| 4.12 Room temperature 60 | ||
| 4.13 Maintenance and cleaning 61 | ||
| 4.14 Storage 62 | ||
| 4.15 Emptying of the water tank 62 | ||
| 4.16 Connecting the drainage tube 63 | ||
| 5 Dysfunctions | 5.1 Dysfunctions 63 | |
| 5.2 Storage/transport 64 | ||
| 6 Technical Data | 6.1 Technical Data 65 | |
| 7.1 Disposal 657 Disposal | ||
| 8 Addendum | 8.1 Defect analysis 69 | |
| 8.2 Guarantee 70 | ||
| 8.3 Accessories 71 | ||

text_image
TUR MIX52
text_image
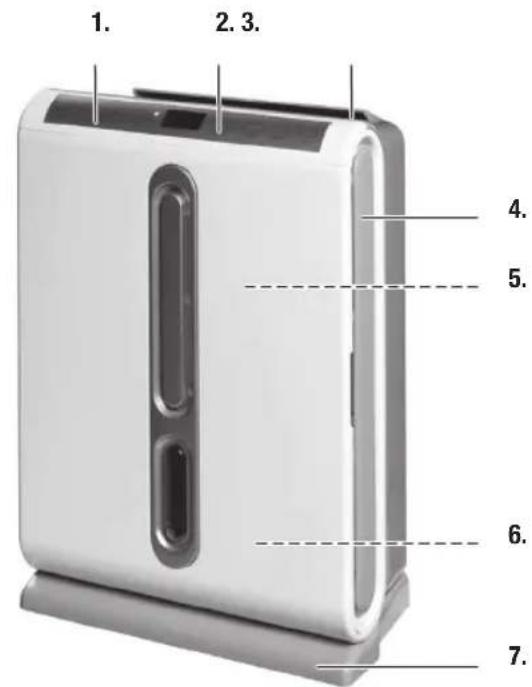
1. 2.3. 4. 5. 6. 7.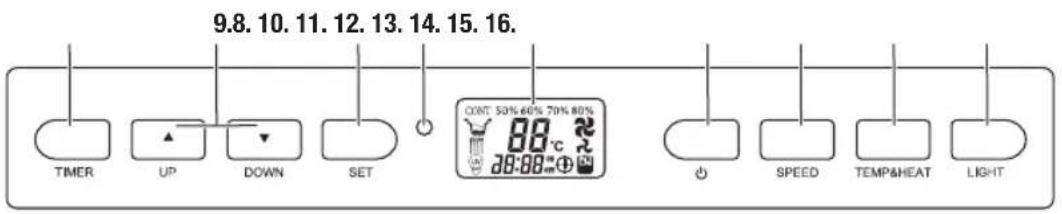
text_image
9.8. 10. 11. 12. 13. 14. 15. 16. TIMER UP DOWN SET CONT: 50% 60% 70% 80% 88°C 28:88" m SPEED TEMPAHEAT LIGHT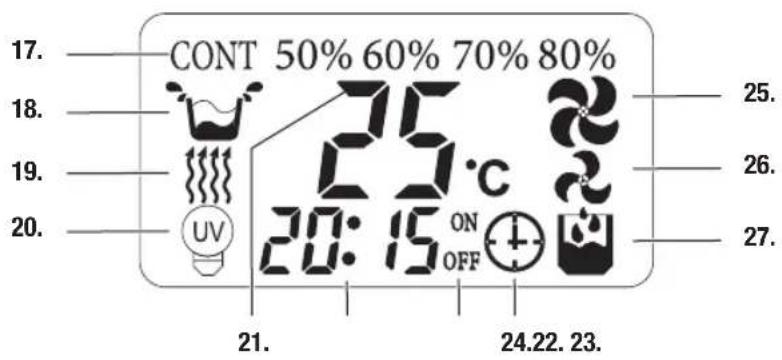
text_image
17. CONT 50% 60% 70% 80% 18. 25°C 19. 20:15 ON OFF 20. 21. 24.22. 23. 25. 26. 27.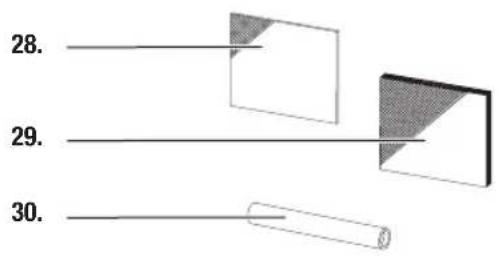
text_image
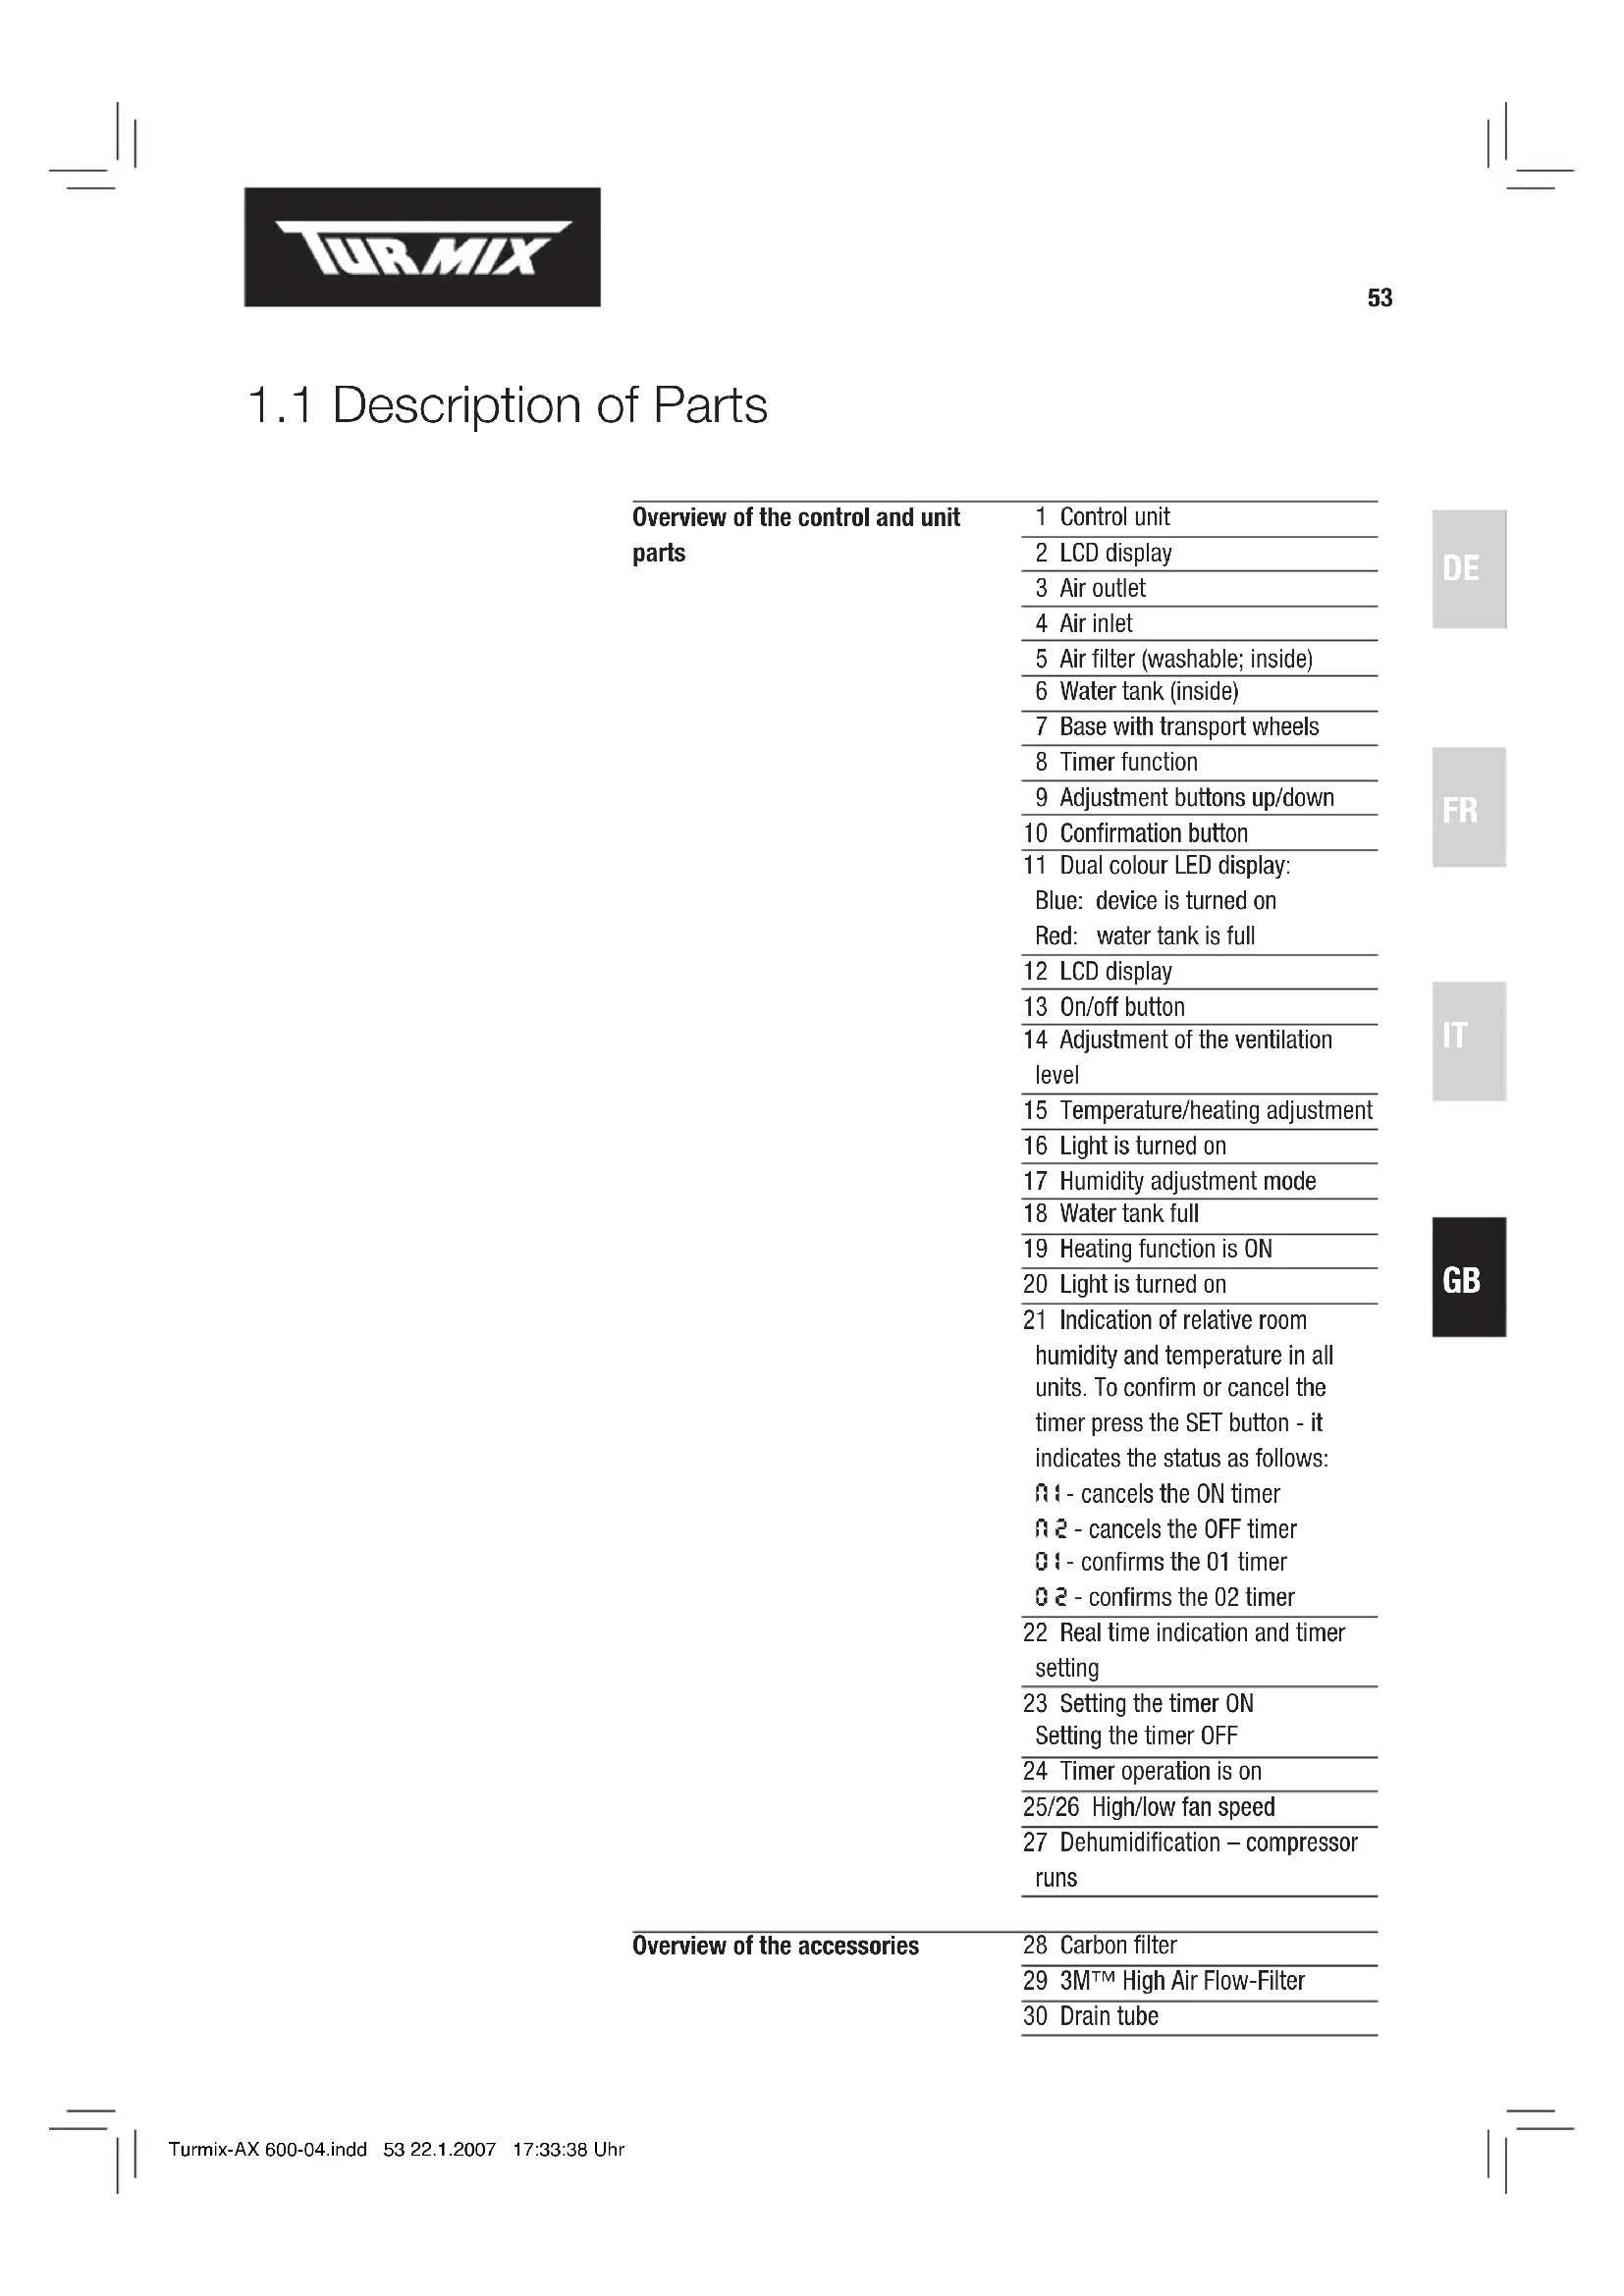
28. 29. 30.1.1 Description of Parts
| Overview of the control and unit parts | 1 Control unit |
| 2 LCD display | |
| 3 Air outlet | |
| 4 Air inlet | |
| 5 Air filter (washable; inside) | |
| 6 Water tank (inside) | |
| 7 Base with transport wheels | |
| 8 Timer function | |
| 9 Adjustment buttons up/down | |
| 10 Confirmation button | |
| 11 Dual colour LED display:Blue: device is turned onRed: water tank is full | |
| 12 LCD display | |
| 13 On/off button | |
| 14 Adjustment of the ventilation level | |
| 15 Temperature/heating adjustment | |
| 16 Light is turned on | |
| 17 Humidity adjustment mode | |
| 18 Water tank full | |
| 19 Heating function is ON | |
| 20 Light is turned on | |
| 21 Indication of relative room humidity and temperature in all units. To confirm or cancel the timer press the SET button - it indicates the status as follows:R1 - cancels the ON timerR2 - cancels the OFF timerR1 - confirms the 01 timerR2 - confirms the 02 timer | |
| 22 Real time indication and timer setting | |
| 23 Setting the timer ONSetting the timer OFF | |
| 24 Timer operation is on | |
| 25/26 High/low fan speed | |
| 27 Dehumidification – compressor runs | |
| Overview of the accessories | 28 Carbon filter |
| 29 3M^TM High Air Flow-Filter | |
| 30 Drain tube |

text_image
TUR MIX1.2 Brief instructions
text_image
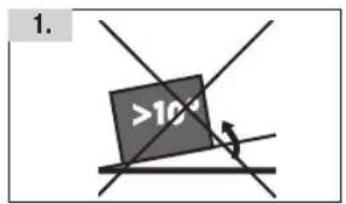
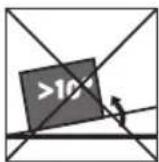
1. >10%
natural_image
Two electronic devices: a silver hard drive and a black stopwatch (no visible text or symbols)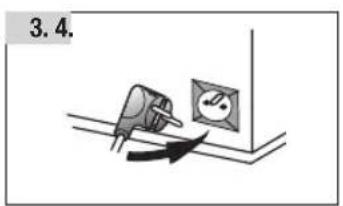
text_image
3.4.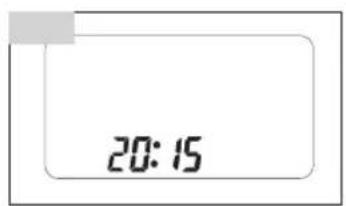
text_image
20:15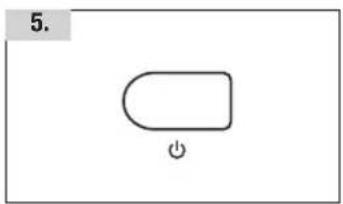
natural_image
Simple diagram with a rounded rectangle and an 'Power' button, no text or symbols present
text_image
6. CONT 50% 60% 70% 80%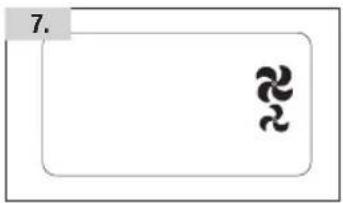
natural_image
Simple diagram with a rectangular frame containing a central abstract symbol (no text or labels)
text_image
8. TIMER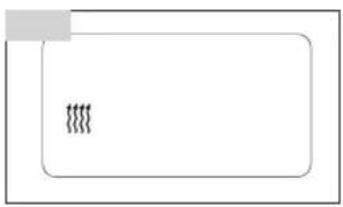
natural_image
Simple diagram with a rectangular frame and a small gray bar above it, containing no text or symbols.
text_image
10.9. TEMP&HEAT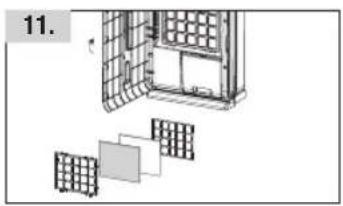
natural_image
Diagram showing a grid layout with a cabinet and solar panels, no text or symbols present- Place the unit on a stable surface. Regard the positioning instructions on page 9
- Allow the unit to rest in an upright position for at least 2 hours before initial operation
- Plug in power plug
- Set the time: Press SET button 2 seconds long, then set the hour with ▲ or ▼. Again press the SET button for 2 sec. and then set the minutes with ▲ or ▼. Confirm with the SET button
- Turn on the unit with the on/off button
- Adjust the desired humidity with the buttons ▲ or ▼ : 50, 60. 70, or 80 %. Select CONT for continuous dehumidification
- Set fan level with SPEED button (low or high)
- Timer-adjustment see page 59
- Turn on the heating with the TEMP&HEAT button
- Indicate room temperature: Keep TEMP&HEAT button pressed for 2 seconds
- Clean the unit regularly (s. page 61)
2. Important Safety Instructions

When using the air dehumidifier the following safety precautions must be observed:
- It is essential to read the operating instructions carefully and thoroughly.
- Attention! Before the unit may be turned on for the first time it must rest in an upright position for at least 2 hours!
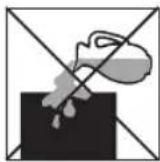
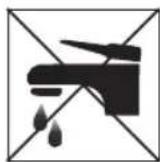
- There is the risk of an electric shock if the unit, power cable or plug is dipped in water or any other liquid medium.
- Do not touch the unit with wet hands.
- Place the unit on a stable and horizontal surface.
- Children should only operate electrical equipment under supervision.
- Alway unplug the power when the unit is not in use or before cleaning. Always allow the unit to cool off before inserting or removing parts (filter, water tank etc.) for the purpose of cleaning.
- Units with a defective plug or power cable and units which have been damaged or show impaired functionality should be inspected and repaired by an authorised customer service agent before trying to be put it back into operation.
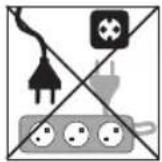
- Do not use extension cable.
- The use of accessories or spare parts which are not authorised by the manufacturer may result in fires, electric shocks or personal injury.
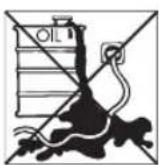
- Do not use the unit outdoors and do not expose it to high humidity (exemple in a bathroom).
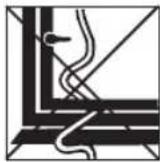
- The power cable may not come in contact with hot surfaces and should not hang down from tables or working surfaces.
- Do not set up the unit in the immediate vicinity of gas stoves, electric stoves or grills.
- Do not enter into the vents with any objects: risk of an electric shock.
- The unit should only be used in the household for the purposes for which it is intended.
- In order to turn off the unit first turn off the power switch and then unplug the power plug.
- After unpacking the unit please make sure that the plastic wrapping is kept out of reach of children.
- Persons, including children, who in view of the level of their physical, sensory or mental capacities, or their lack of experience or knowledge, are not in a position of using the unit safely may not use the unit without supervision or instructions from a responsible person.


PLEASE SAVE THESE SAFETY INSTRUCTIONS!
3. Functionality
3.1 Functionality of the AX 600
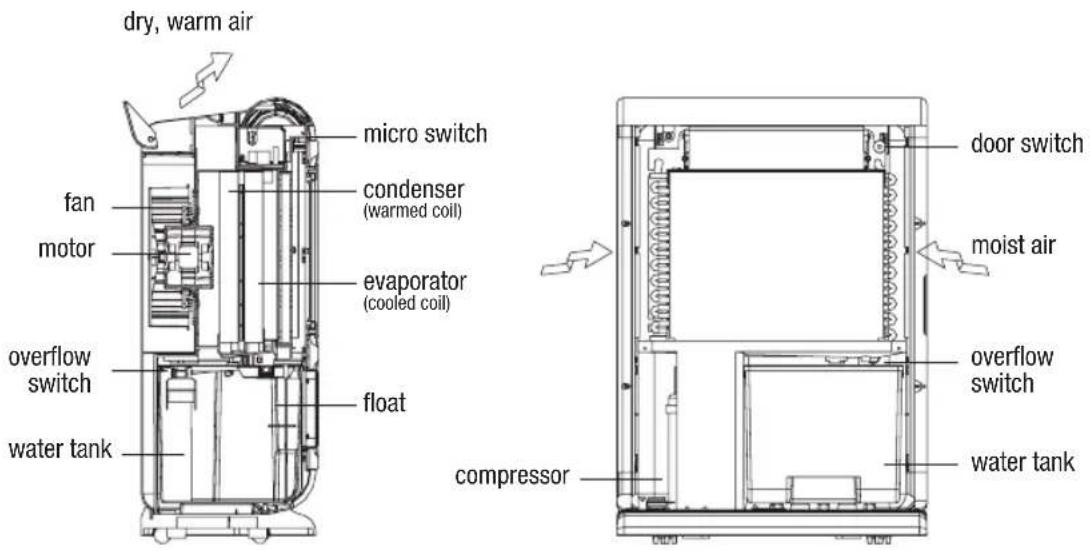
Your dehumidifier directs air through a multi-stage, highly efficient, washable filter into a cooledcoil. As the air in the room passes over the cold surface, moisture condenses and collects into a removable water tank. The drier, slightly warmer air is then expelled through the air outlet located behind the control panel of the unit into the room.
When the water tank is full the unit is automatically stopped in order to avoid flooding. The control lamp on the control panel lights up red when the tank is full. A drainage hose can be connected in order to continuously draining the water.
The air purifier and dehumidifier fight condensation, a high level of humidity and mould in your living space and therefore prevent damage to furniture and possessions. The combination of air purifier and dehumidifier may aid in relieving medical conditions such as arthritis and allergies linked to high humidity and airborne allergens by removing excess moisture, dust, smoke, animal dander, mould spores and pollen to create a less irritating living environment which you benefit from.
The air is cleaned in the air purifier as well as during operation of the dehumidifier.
It is also possible to help dry your laundry with the dehumidifier in a drying room!
text_image
dry, warm air fan motor overflow switch water tank micro switch condenser (warmed coil) evaporator (cooled coil) float compressor door switch moist air overflow switch water tank3. Starting Operation
4.1 Initial operation
Before initial operation please read the instruction manual thoroughly.

Attention! Before the unit may be turned on for the first time it must rest in an upright position for at least 2 hours!
4.2 Setting up
Excess moisture spreads throughout your entire apartment or as the case may be home in the same way that cooking smells spread to every room in the house. Therefore the dehumidifier should be positioned in a central room in order to be most effective. In a warm hallway for example If possible leave doors slightly ajar to allow the air to circulate freely.
In case you have a serious problem in a specific room you can begin by positioning the dehumidifier there and move it to a more central point later on.
For the most effective use run your dehumidifier with outer doors and windows closed.
Place the unit on a stable surface. Please note the unit should not be placed directly against a radiator or other heat source.
When positioning your dehumidifier ensure that it is placed securely on a level surface clear of any obstacles which may limit the air movement as e.g. furniture. Pay attention to that nobody can trip over the power cable and keep the unit out of reach of children.
Your dehumidifier is fitted with 4 wheels for easy movement. Before you move the unit turn it off and empty the water tank.
Note: the unit may only be operated in a temperature range of 5 - 35 °C.

text_image
TUR MIX4.3. Air purification
natural_image
Technical line drawing of a modular device with grid panels and an open panel (no text or symbols)1
Your dehumidifier is equipped with a high definition, multi-stage air purification system.
Stage one
The first stage consists of a washable dust filter. The filter absorbs irritating odours, mould, stale cigarette smoke or vehicle fumes so that they are not recirculated into the clean air.
Stage two
The second stage consists of an activated carbon filter.
Stage three
This consists of a 3M ^TM High Air Flow-Filter and keeps the air free of bacteria.
Note
You can use the air purifier function even when dehumidification is not needed. Simply press the «LIGHT» button and set the humidity level to 80%. For details on cleaning the filter see the section on «Maintenance and Cleaning» (page 61).

text_image
TUR MIX4.4. Setting the time
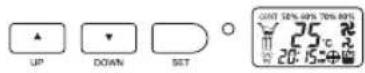
The time is continuously shown on the LCD display. When plugging in the power plug (or after power failure) 12:00 is shown on the display. In order to set the time push the SET button for 2 seconds (the left-sided hour display begins to blink). Adjust the hour by pressing the ▲ or ▼ button. To set the minutes push the SET button again for 2 seconds (the right-sided minutes display begins to blink). Press the ▲ or ▼ button to adjust the minutes. Press the SET button to conclude the setting.
4.5. Switching the unit ON and OFF
4.6. Setting the humidity level
Push the button to turn on the unit. Pushing the button again will turn the unit off.
To set the desired relative humidity level repeatedly press the ▲ or ▼ button: CONT: continuous dehumidification regardless of the room's humidity 50 %: maintains the relative humidity at around 50%, ideal for personal comfort and dry storage 60 %: maintains the relative humidity at around 60% for personal comfort 70 %: maintains the relative humidity at around 70% 80 %: maintains the relative humidity at around 80%. In most cases the compressor will turn off
Press the SPEED button to change the fan speed, the chosen speed will be indicated on the LCD, so the high speed and for the low speed.
4.8. Setting the Timer
The timer switches the unit on and off automatically. The timer only operates correctly if the time on the unit is set accurately (see 4.4.)
When the unit is turned on:
Press the TIMER button (the left-sided hour display begins to blink) and adjust the desired turn off time by pressing the ▲ or ▼ button. Press the TIMER button again (the right-sided minutes display begins to blink). Adjust the minutes by pressing the ▲ or ▼ button. (The minutes can be set in steps of 5 minutes). If you would like the unit to turn itself back on at a later time please repeat the above procedure. To activate the timer settings push the SET button once again.
When the unit is turned off:
Repeat the procedure as mentioned above. First set the turn on time (and if desired afterwards the turn off time).
Cancelling the timer:
Cancel the timer setting(s) by pressing the TIMER button.

text_image
TUR MIX4.9. Light adjustment
Normally the blue light is turned on as soon as the unit is connected to the power supply. In order to turn the blue light off push the LIGHT button (the light will go off and the icon on the LCD will disappear). Pushing the button again will turn the light back on. When opening the front door the electricity is disconnected and the light extinguishes.
4.10. Heater adjustment
To operate the heating function, press the TEMP&HEAT button. Pressing the button again will turn the heating function off.
The heating function may be operated with the compressor or independent of it. The heater will only function at temperatures below 25 °C.
The heating improves the dehumidification performance in chilly rooms.
4.11. Room relative humidity
The relative humidity is normally indicated in the 2 digit display (relative humidity in %).
If the relative humidity is lower then 35 % the 2 digits indicate LO. If the relative humidity is higher then 95 % the 2 digits indicate HI.
4.12. Room temperature
Push the TEMP&HEAT button for 2 seconds and the LCD will indicate the room temperature.
4.13. Maintenance and Cleaning

Always unplug the unit from the mains before conducting any maintenance or cleaning of the unit!
Cleaning the casing
Only use a soft cloth to wipe the unit clean. Do not use volatile chemicals, petrol, detergents, chemically treated cloths or other harmful cleansing solutions. These can damage the casing.
natural_image
Technical line drawing of a modular device with grid panels and an open panel (no text or symbols)4
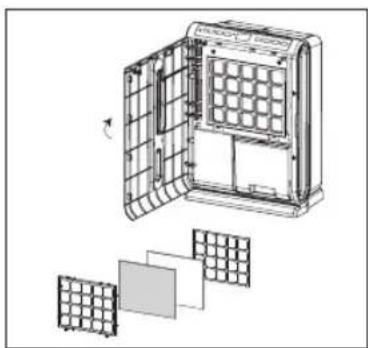
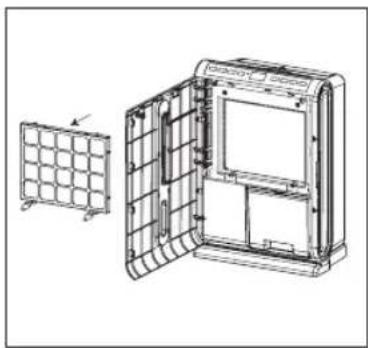
Cleaning the washable air filter
The dehumidifier is equipped with a washable filter. This holds back dust, smoke, animal danders, mould spores and pollen to create a less irritating living environment.
It is recommended to check the filter regularly (at least monthly and after a longer period of non-use) and to clean if necessary:
- remove the filter from the frame 4
– clean the filter carefully with a vacuum cleaner
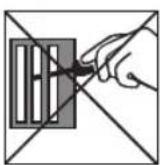
If the filter is particularly dirty use luke-warm water with a small amount of medium strength detergent and rinse thoroughly under the cold water tap. Make sure the filter is completely dry before replacing 5. Do not expose the filter or frame to direct sunlight or other sources of direct heat as this may cause the filter and frame to warp.
natural_image
Technical line drawing of a modular device with grid panels and an open panel, showing internal structure and assembly (no text or symbols)5
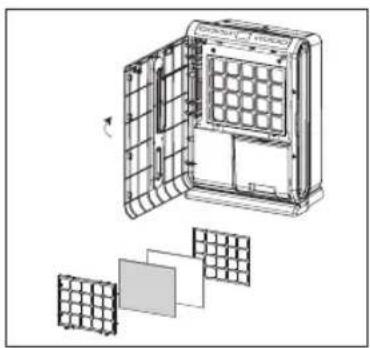
Cleaning and replacing the carbon filter.
The carbon filter can be cleaned with a vacuum cleaner. Never rinse it with water as this can cause damage to it. We recommend replacing the carbon filter every 6 months for hygienic reasons.
3M™ High Air Flow-Filter
The 3M ^TM High Air Flow-Filter can be purchased as a spare part from customer service.

text_image
TUR MIX4.14. Storage
If the dehumidifier is not used for longer period of time please initiate the following steps:
- disconnect the unit's plug and wrap up the power cable
- empty the water tank
- clean the unit and filter, place the unit in its original packaging or cover to protect from dust
- store the unit in an upright position in a cool, dry place out of reach for children
4.15. Emptying and cleaning the water tank
natural_image
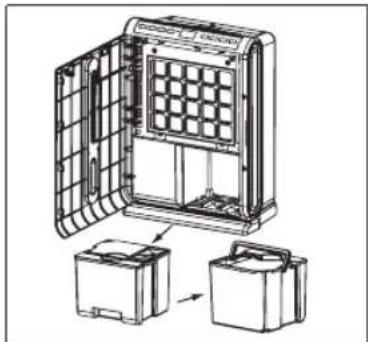
Technical line drawing of a device with open lid, internal grid, and two labeled boxes (no text or symbols)When the water tank is full the unit will turn off automatically and beep 10 times. Furthermore the colour on the control panel switches from blue to red and the icon will be displayed on the LCD.
In this case please empty the water tank as follows:
- open the front door
- hold the water tank by the recessed grip on the bottom and pull out slowly 6.
- Continue to hold the water tank on the grip and carry it to a sink 6.
6
- Drain the water through the triangular opening 7.
- After emptying gently push the tank back into the unit. Close the door and check if the red indicator switched to blue and the icon has extinguished
7
natural_image
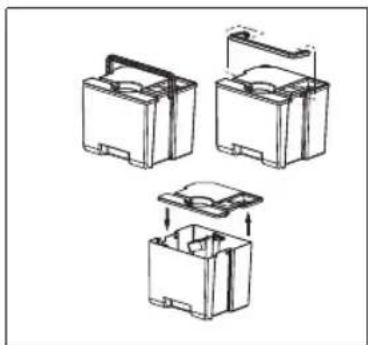
Three technical line drawings of a mechanical component with no visible text or symbolsClean the water tank as follows 8:
- turn the handle of the watr tank to the position which aligns the notch on the handle's hinge to the slot in the water tank
- carefully pull the handle out of its position and remove it
- take off the cover
- thoroughly clean the water tank and the cover (do not place in a dishwasher!)
- replace the cover
- insert the handle back into its position.
8

text_image
TUR MIX4.16. Connecting the drainage tube
natural_image
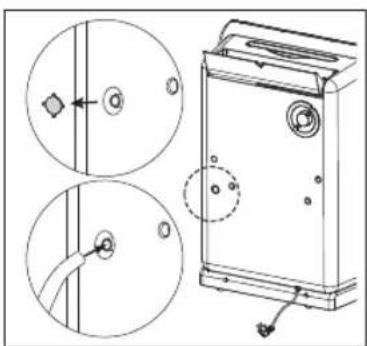
Technical line drawing of a mechanical device with two circular views and a close-up inset showing internal components (no text or symbols)9
The humidity withdrawn from the room air can also be continuously drained off by the drainage line:
- Pull out power plug
- Cut out/pry out the round cover on the rear (this is retained with four small brackets)
- Insert the included drain tube into the opening and attach it
- The water tank must also be in the unit when the drainage tube is connected
- Ensure that the drainage tube has a continuous downward slop all the way to the outlet (it must have a consistent decline)
- Do not insert the end of the drain tube below the water level
5. Troubleshooting
| PROBLEM POSSIBLE CAUSES / SUGGESTED SOLUTIONS | |
| The unit does not operate – Is the unit plugged in? Is the mains power supply on? | |
| – Does the water tank indicate full Empty the water tank or reposition properly | |
| Unit does not seem to extract enough water | – Are too many windows or doors open? |
| – Is there something in the room producing a lot of heat? | |
| – Is the room cold? (the colder the air the less moisture the unit will extract). Switch on heater. | |
| – Is the filter dirty? | |
| – Is the room humidity already quite low? | |
| The unit does not seem to be functioning | – Is the filter dirty? |
| – Is the air inlet or outlet blocked? | |
| – Is the room humidity already quite low? | |
| – Is the room temperature below 5 °C? | |
| Too loud – Is the unit positioned | unevenly so as to create vibration? |
| – Is the floor underneath the unit uneven or of unstable material? | |
| – Is there any foreign body interfering with the unit? | |
| The unit’s fan doesn’t seem to be revolving. | – Is the filter blocked? |
| – Is there any foreign body interfering with the unit? | |
| The continuous drainage is not working | – Does the hose have a downward slope throughout its entire length? |
| – Is there a kink or sharp bend in the hose? | |
5.2 Storage and transport
When the unit is not in use or if it is being sent to the service centre the water tank must be emptied. On/off switch must be deactivated and the power plug disconnected.

text_image
TUR MIX6. Technical Data
| Power supply 220 – 240 V / 50 Hz | |
| Power consumption(at 32 °C at 90% RH) | 300 W |
| Heater 470 W | |
| Moisture removal (at 32 °C at 90% RH) 18 l / 24 h | |
| Cooling agent R-134A | |
| Cooling capacity 155 g | |
| Working temperature 5–35 °C | |
| Dimensions 42 x 24 x 60 cm | |
| Net weight 14.5 kg |
Alterations without prior notification possible. For detailed information please regard label on the unit.
7. Disposal
7.1 Disposal of unit

Units which are of no further use can be disposed of at a sales agency free of charge.
Units which have dangerous defects should be disposed of immediately and it should be ensured that they will no longer be used.
Do not dispose of units with household rubbish (for environmental reasons).

text_image
TUR MIX
text_image
TUR MIX
text_image
TUR MIX
text_image
TUR MIXOur TURMIX electrical household appliances carry a warranty of 2 years from the date of purchase. We undertake to replace, free of cost, any parts of the appliance that get damaged as a consequence of material or manufacturing defects during the warranty period. Return shipments should be packed in the original packing or something equivalent. In case of improper handling or in case repairs are attempted by third parties, the warranty is rendered null and void. Damage from hydro-chemical influences (e.g. owing to calcification) as well as parts that are subjected to normal wear, do not fall under the warranty. Moreover, damage or function faults that are a consequence of water from softening plants are excluded from the warranty.
Please preserve your receipt carefully, it serves as the warranty certificate as well.
SERVICE CENTER
Grindelstrasse 3-5, 8303 Bassersdorf, Switzerland
Tel. +41 (0)43 266 16 00, Fax +41 (0)43 266 16 27
info@sckt.ch www.turmix.ch
SERVICE CENTER
office@turmix.at www.turmix.at

text_image
TUR MIX71
Zubehör/Accessoires/Accessori/Accessories
DE
FR
IT
GB

text_image
TUR MIXD0510.20010/01.2007
Änderungen vorbehalten / Sous réserve de modifications / Con riserva di modifiche / Alterations reserved
www.turmix.com