
AX 230 - Humidifier Turmix - Free user manual and instructions
Find the device manual for free AX 230 Turmix in PDF.


| Product type | Air humidifier |
| Brand | Turmix |
| Model | AX 230 |
| Dimensions (L x W x H) | 25 x 25 x 30 cm |
| Weight | 2 kg |
| Power supply | 220-240 V ~ 50 Hz |
| Tank capacity | 3 litres |
| Rated power | 25 W |
| Operating time | Up to 10 hours |
| Humidification rate | 200 ml/h |
| Coverage area | Up to 20 m² |
| Main functions | Humidification, automatic shut-off, water level indicator |
| Noise level | < 35 dB |
| Care and cleaning | Regular cleaning of the tank with warm water and white vinegar |
| Safety | Automatic shut-off when tank is empty |
| Spare parts and repairability | Tank, diffuser, filter available online |
Frequently Asked Questions - AX 230 Turmix
User questions about AX 230 Turmix
0 question about this device. Answer the ones you know or ask your own.
Ask a new question about this device
Download the instructions for your Humidifier in PDF format for free! Find your manual AX 230 - Turmix and take your electronic device back in hand. On this page are published all the documents necessary for the use of your device. AX 230 by Turmix.
USER MANUAL AX 230 Turmix
Bedienungsanleitung
Mode d'emploi
Istruzioni d'uso
Operating Manual

2
Elimination (recyclage)
Ulteriore accessorio per AX 230/260


15
Guida rapida
Riempire d'acqua
Accessory for the AX 230/260


21
1. Cover
2. Water tank
- Clean the water tank once weekly.
- AX 230: capacity 4 litres
- AX 260: capacity 7 litres
3. Water opening with screw-on lid
- To open, turn the tank upside down and unscrew the lid.
Caution!
- Use tapwater only, never use mineral water or softened water!
Never add anything to the water (e.g. aroma essence)!
Before filling:
- Empty out the remaining water with residues.
- Rinse out the water tank well.
- Fill with water and close the lid tightly.
4. Water level indicator lamp
- Blue = full
- Red = empty (evaporator hotplate switched off). Note: when first starting up, wait 1–2 minutes for the water circuit to fill. The lamp will change from red to blue when the tank is full.
5. Integrated hygrostat controller
- Setting range: 20–90 % relative air humidity.
- White dots = recommended comfort range.
6. 2-stage output selector with LED display:
- «O O» High output for daytime operation (blue light).
- «G Low output for nighttime operation (green light).
7. ON/OFF power switch with monitor light
- Blue when switched on.
8. Power lead with external hygrostat sensor
- The sensor precisely measures air humidity in the room. DO NOT COVER IT! Keep the power lead and sensor dry at all times.
9. Steam outlet
- Hot steam: keep away from children.
- Do not obstruct the steam outlet. Make sure it is not blocked e.g. by furniture or curtains.
Keep at least 50 cm away from walls, furniture or curtains.
Caution! Never fill water through the steam outlet!
Interior view:
10. Steam outlet
- See 9.
11. Aroma container («ring»)
- Only put a small quantity of aroma essence or inhalation agent in the aroma container. Caution! Never put aroma essence directly in the water tank!
12. Evaporator cover
- Remove for cleaning only. Caution! Hot! First allow to cool down!
13. Evaporator stainless steel hotplate
- Generates steam. Caution! Hot!
14. Water level sensor
After use
- Turn off the power switch ON/OFF.
- Pull out the power plug.
- Empty out the remaining water and rinse out the water tank well.
- Clean and maintain the humidifier weekly to ensure hygienic trouble-free operation.
Accessory for the AX 230/260
15. Lime filter cartridge, art. A53454
- Recommended for hard water to prevent excessive evaporator scaling.
- Lime filter cartridge is not included in delivery.
- Cartridge filler life 1–2 months depending on water hardness.
- Refill granulate (3 bags): art. A53455.
How to use: - First screw the cartridge on to the lid (3.).
- Then screw the lid with cartridge on to the water tank.

22
2. Operating the appliance
Operation
Setting up
- Place on a flat, stable and waterproof surface.
- Never place directly under the power socket.
- Make sure the machine stands safely and the airflow is not blocked by e.g. furniture or curtains. Never place near curtains, furniture or walls (risk of damage by moisture).
- Never place near radiators or other heat sources. Make sure that nobody can trip over the power cable and that the machine is out of reach of children (Caution: hot steam!). Never let children play with the appliance.
Important:
- Only use the humidifier in dry rooms up to 50m2 /125m3 in size (AX 260: 70 m2 /175 m2) and without extension cable.
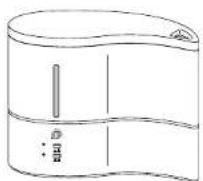
Filling the water tank
- Turn off the power switch ON/OFF (7.).
- Pull out the power plug.
- Take off the cover (1.) and remove the water tank (2.).
- Turn the water tank upside down and unscrew the lid.
- Empty out residual water and rinse the tank well.
- Fill with water and close the lid tightly.
Tip:
- For very hard water we recommend using the filter cartridge (15., not included in delivery; see page 21).
Caution!
- Use tapwater only. Never use mineral water or softened water! Never add salt or anything else to the water!
- Never add water through the steam outlet!
- Never put aroma essence in the water tank, only in the aroma container (11.)!
Water level indicator lamp
- Blue = full. Red = empty. When the tank is empty the evaporator hotplate switches off automatically. It switches on again as soon as the tank is full. Note:
- When starting up or after a long period of disuse, wait 1–2 minutes for the water circuit to fill. The lamp goes blue when the tank is full.

23

Aroma container (ring)
- Only put a small quantity of aroma essence or inhalation agent in the aroma container (11.).
Caution! Never put aroma essence directly in the water tank!
Information on warm-mist type humidifiers
- This type of humidifier turns water into steam on the hotplate (13.).
- Air humidity is monitored by the integrated hygrostat.
- Air circulation strongly interferes with humidification (e.g. due to open or loose windows in high rooms).
- Please note that moisture rises with warm air and may cause undesirable condensation.
- Recommended room air humidities:
50% humidity at 18 °C room temperature
45% humidity at 20 °C room temperature
40% humidity at 22 °C room temperature
○
○


Starting up
- Insert the power plug.
- Turn on the power switch ON/OFF. The LED goes blue.
2-speed output control with LED lamps
- Select the required output:
- « ▲ for high output (daytime operation or in large rooms / blue LED).
- × for low output (nighttime operation / green LED).
Integrated hygrostat controller
- Turn the knob (5.) to adjust the hygrostat. This monitors the air humidity. Setting range: 20–90 % relative air humidity.
- The recommended comfort range is marked with white dots.
After use
- Turn off the power switch ON/DFF.
- Pull out the power plug.
- Wait for the humidifier to cool down completely.
- Empty out the residual water and rinse out the water tank well.
- Regularly clean and maintain the humidifier to ensure hygienic and trouble-free operation:
- Weekly: clean the housing parts.
- Depending on scaling; descale the evaporator hotplate (see next page).

25

- Every 1–2 months: change the filter cartridge if used (change it earlier in case of bad odours, dirt or lime deposits and noticeably lower humidification performance).
- Annually: clean the humidifier when the heating season is over.
- Let the humidifier dry out completely before storage.
Accessory for the AX 230/260
Lime filter cartridge, art. A53454
- Recommended for hard water to prevent excessive evaporator scaling.
- Lime filter cartridge, not included in delivery.
- Cartridge filler life 1–2 months depending on water hardness. Refill granulate (3 bags): art. A53455.
How to use:
- First screw the cartridge (15.) on to the lid (3.).
- Then screw the lid with cartridge on to the water tank.
Cleaning and maintenance
Caution!
- Pull out the power plug before cleaning, maintenance, decalcification or rinsing.
- Allow to cool down completely.
- Never immerse the basic unit (Including cable) in water or any other liquids.
- Empty out residual water and rinse the water tank well.
- Lift off the evaporator unit cover (12.).
- The evaporator hotplate (13.) must also be descaled regularly. Spread descaling fluid on the cold stainless steel hotplate (not on the plastic parts!) and allow to work. Wipe off residues, and afterwards wipe dry with a clean cloth.
- Wipe down the casing with a damp cloth, then dry off thoroughly.

Notes:
- Regularly clean and maintain the humidifier and water tank to ensure hygienic and trouble-free operation.
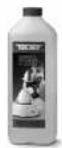
- In case of lime deposits on the evaporator hotplate (13.), descale with TURMIX household decalcifier A51455 (mixing ratio decalcifier/water: 2:1).

25


Correct utilization
This humidifier is intended for household use and not for commercial purposes.
Please keep these instructions in a safe place and pass them on to the next user.
Disposal
Equipment that has reached the end of its service life can be handed over at a sales outlet, and will be professionally disposed of free of charge. Equipment that has hazardous defects should be disposed of immediately. Please ensure that it will not be used again. Do not dispose of equipment with household rubbish (for environmental reasons!).
Dispose of old and used lime filter cartridges with household rubbish.
Safety instructions
Risk of electric shock!
Connect and operate the appliance only in accordance with the specifications on the rating plate.
Do not use the appliance if the power cord and/or appliance are damaged. Keep children away from the appliance. Caution: hot steam! Always pull out the power plug after use, also before filling the water tank, before cleaning, before assembling, or in case of a defect.
Do not lay the power cord near sharp edges or hot surfaces. To prevent injury, repairs to the appliance, such as replacing a damaged power cord, should be carried out by our customer service only. Only use the humidifier with untreated tapwater. Never operate the humidifier without water in the tank. Operate the appliance with original accessories only.
Do not immerse the appliance in liquid. If there is a power failure, the appliance remains switched on.
Persons, Including children, who in view of the level of their physical, sensory or mental capacities, or their lack of experience or knowledge, are not in a position to use the equipment with safety, may not use the equipment without supervision or instruction from a responsible person.

Garantie/Garantie/Garanzia/Warranty
Gadentle
Our TURIMX electrical household appliances carry a warranty of 2 years from the date of purchase. We undertake to replace, free of cost, any parts of the appliance that get damaged as a consequence of material or manufacturing defects during the warranty period. Return shipments should be packed in the original packing or something equivalent. In case of improper handling or in case repairs are attempted by third parties, the warranty is rendered null and void. Damage from hydro-chemical influences (e.g. owing to calcification) as well as parts that are subjected to normal wear, do not fall under the warranty. Moreover, damage or function faults that are a consequence of water from softening plants are excluded from the warranty.
Please preserve your receipt carefully, it serves as the warranty certificate as well.

DKB Household Switzerland AG, Eggbühlstrasse 28, Postfach, CH-8052 Zürich Tel. 044 306 11 11 / Fax 044 306 11 12
DKB Household Switzerland AG, Service Center, Grindelstrasse 3-5, CH-8303 Bassersdorf Tel. 043 266 16 00 / Fax 043 266 16 10
DKB Household Austria GmbH, Dückegasse 15/Top 2, A-1220 Wien Tel. +43 (0)1 203 56 00 / Fax +43 (0)1 203 56 00-19
Service Center SZOT, Haushaltsgeräte-Service, Erlaer Strasse 171, A-1230 Wien Tel. +43 (0)1 699 90 56, Fax +43 (0)1 699 90 57
D0470.00010 / 03/2010
Änderungen vorbehalten / Sous réserve de modifications / Con riserva di modifiche / Alterations reserved




- ELIMINATION (RECYCLAGE)
- GUIDA RAPIDA
- RIEMPIRE D'ACQUA
- COVER
- WATER TANK
- WATER OPENING WITH SCREW-ON LID
- BEFORE FILLING
- WATER LEVEL INDICATOR LAMP
- INTEGRATED HYGROSTAT CONTROLLER
- 2-STAGE OUTPUT SELECTOR WITH LED DISPLAY
- ON/OFF POWER SWITCH WITH MONITOR LIGHT
- POWER LEAD WITH EXTERNAL HYGROSTAT SENSOR
- STEAM OUTLET
- INTERIOR VIEW
- AROMA CONTAINER («RING»)
- EVAPORATOR COVER
- EVAPORATOR STAINLESS STEEL HOTPLATE
- WATER LEVEL SENSOR
- AFTER USE
- ACCESSORY FOR THE AX 230/260
- LIME FILTER CARTRIDGE, ART. A53454
- OPERATING THE APPLIANCE
- OPERATION
- SETTING UP
- IMPORTANT
- FILLING THE WATER TANK
- TIP
- CAUTION
- AROMA CONTAINER (RING)
- INFORMATION ON WARM-MIST TYPE HUMIDIFIERS
- STARTING UP
- 2-SPEED OUTPUT CONTROL WITH LED LAMPS
- HOW TO USE
- CLEANING AND MAINTENANCE
- NOTES
- CORRECT UTILIZATION
- DISPOSAL
- SAFETY INSTRUCTIONS
- RISK OF ELECTRIC SHOCK
- GARANTIE/GARANTIE/GARANZIA/WARRANTY
- GADENTLE
Brand : Turmix
Model : AX 230
Category : Humidifier