Toaster Easy - Toaster UNOLD - Free user manual and instructions
Find the device manual for free Toaster Easy UNOLD in PDF.
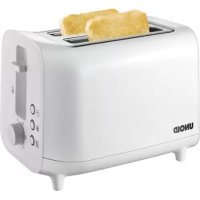
| Product type | Automatic toaster |
| Brand | Unold |
| Model | Toaster Easy (38020) |
| Power supply | 220-240 V~, 50 Hz |
| Weight | 1.70 kg |
| Power cord length | 90 cm |
| Housing material | Plastic, white |
| Functions | Toasting, reheating, defrosting, stop |
| Browning levels | 7 (1 to 7) |
| Indicator lights | On all buttons |
| Automatic shut-off | Yes |
| Crumb tray | Removable |
| Included accessories | Bun warmer, instruction manual |
| Usage | Household and similar (offices, hotels, etc.) |
| Cleaning | Damp cloth; do not immerse or wash in dishwasher |
| Safety | Automatic shut-off, hot surface indicator, do not insert metal objects |
| Warranty | 24 months (Germany and Austria) |
| Spare parts | Crumb tray, bun warmer (accessories) |
| Repairability | Repairs only by manufacturer or authorized service center |
Frequently Asked Questions - Toaster Easy UNOLD
User questions about Toaster Easy UNOLD
0 question about this device. Answer the ones you know or ask your own.
Ask a new question about this device
Download the instructions for your Toaster in PDF format for free! Find your manual Toaster Easy - UNOLD and take your electronic device back in hand. On this page are published all the documents necessary for the use of your device. Toaster Easy by UNOLD.
USER MANUAL Toaster Easy UNOLD
natural_image
Product photo of a UNOLD water tower with various bread slices and food items including omelette, bread rolls, and baked goods (no visible text or symbols)TOASTER DESIGN DUAL
Bedienungsanleitung
natural_image
Modern kitchen appliance with digital display and bucket, no visible text or symbols
natural_image
Modern kitchen bread machine with open lid and two side dishes of bread rolls (no visible text or labels)UNOLD®
Care + Style

natural_image
Black hairdryer with black bristles and a white headband (no visible text or symbols)
natural_image
Pink and black hair dryer with a pair of accessories (no visible text or symbols)UNOLD®
Fan + Heat
natural_image
Close-up of a metallic desktop fan with visible blades and base (no text or symbols)
natural_image
Red electric fan with visible blades and control panel (no text or symbols)INHALTSVERZEICHNIS
Instructions for use Model 38020
Technical Specifications.... 17
Explanation of symbols.... 17
Important Safeguards....17
Tips for ideal toasting results 20
Before using the appliance the first time... 20
Operation - Toasting 21
Operation - Warming 21
Operation - Thawing.... 22
Cleaning 22
Guarantee Conditions.... 23
Waste Disposal /
Environmental Protection 23
Service 16
natural_image
Close-up of golden-brown baked bread slices with visible buns and a textured background (no text or symbols)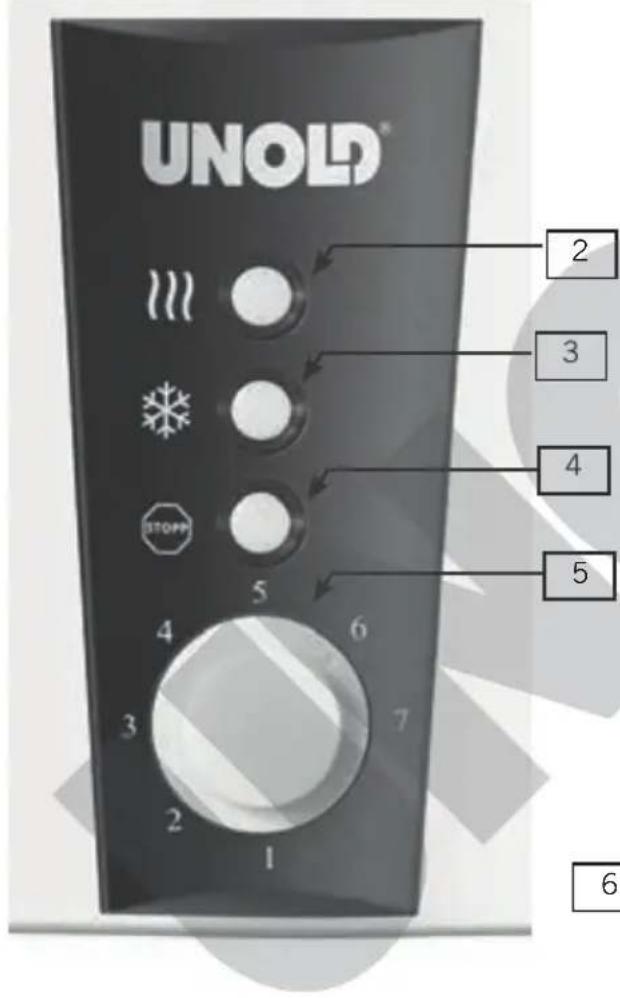
text_image
UNOLD® 2 3 4 5 6 7 1 2 STOPP 3 4 5
text_image
1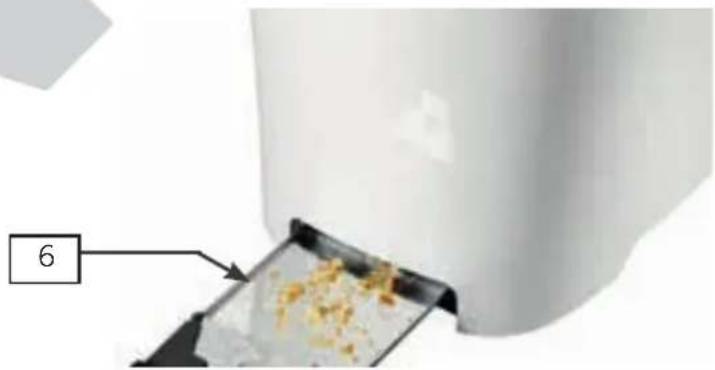
natural_image
Close-up of a white appliance with a tray holding a yellow granular substance, labeled with number 6 (no text or symbols on the main subject)EINZELTEILE
D Ab Seite 8
1 Toasthebel
2 Taste AUFWÄRMEN
3 Taste AUFTAUEN
4 Taste Stop
5 Röstgradkontrolle
6 Krümelschublade
GB Page 17
1 Toast lever
2 Warm button/AUFWÄRMEN
3 Thaw button/AUFTAUEN
4 Stop button/Stop
5 Toast darkness control
6 Crumb tray
F Page 24
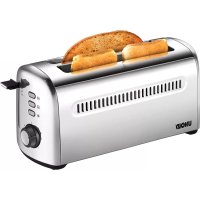
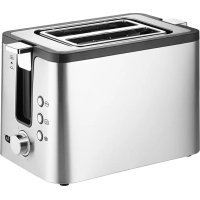
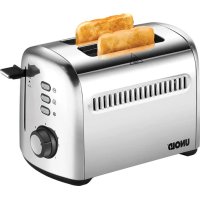
Dimensions: Approx. 39.5 x 17.7 x 16.7 cm (L/D/H)
Power cord: Approx. 90 cm
Weight: Approx. 1.70 kg
Housing: Plastic, white
Features: Variable toasting degree, 4 functions: toast, reheat, defrost, stop, all buttons with pilot light, automatic cut-off, removable crumb tray,
Accessories: Bun warmer, instructions for use

Equipment features, technology, colours and design are subject to change without notice. Errors and omissions excepted
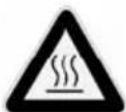
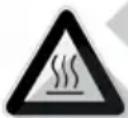
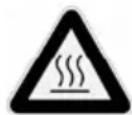
EXPLANATION OF SYMBOLS
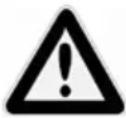
This symbol denotes a possible hazard which could cause injury or damage to the appliance.
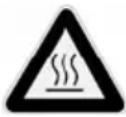
This symbol indicates a potential burning hazard. Please be especially careful at all times here.
IMPORTANT SAFEGUARDS
Please read the following instructions and keep them on hand for later reference.
- This appliance can be used by children aged from 8 years and above and persons with reduced physical, sensory or mental capabilities or lack of experience and knowledge if they have been given supervision or instruction concerning use of the appliance in a safe way and understand the hazards involved. Children shall not play with
the appliance. Cleaning and user maintenance shall not be made by children without supervision.
- Children of less than 3 years should be kept away unless continuously supervised.
- Children aged from 3 years and less than 8 years shall only switch on/off the appliance provided that it has been placed or installed in its intended normal operating position and they have been given supervision or
instruction concerning use of the appliance in a safe way and understand the hazards involved. Children aged from 3 years and less than 8 years shall not plug in, regulate and clean the appliance or perform user maintenance.
- Children should be supervised in order to ensure that they do not play with the appliance.
- Keep the appliance out of the reach of children.
- Connect appliance only to an AC power supply with voltage corresponding to the voltage on the rating plate.
- Do not operate this appliance with an external timer or remote control system.
- Never immerse the appliance or the power cord in water or other liquids.
- Do not clean the toaster or power cord in a dishwasher.
- The toaster should never come into contact with water or other liquids. In case this ever happens, all parts must be completely dry before operating the appliance again.
-
Never touch the appliance or power cord with wet hands.
-
For safety reasons, never place the appliance on hot surfaces, a metal tray or a wet surface.
- This appliance is intended for domestic and similar use such as:
■ staff kitchen areas in shops, offices and other working environments;
■ aghoral enter prises;
■ by clients in hotels, motels and other accommodation facilities;
■ bed and breakfast accommodations and holiday homes.
-
Do not place the appliance or power cord near open flames during operation.
-
Always use the toaster on a level, uncluttered and heat-resistant surface.
- Make sure that the power cord does not hang over the edge of the countertop or table, since this can cause accidents, for example if small children pull on the cord.
- Route the power cord so that there is no possibility of the cord being pulled or tripped over.
-
Use the toaster only indoors.
-
When in use, never cover the toaster with aluminum foil or other materials that could cause the appliance to over-heat.
- Do not touch any hot surfaces, to prevent burns. Always use the handles and control knobs.
- Never use the appliance near flammable materials such as curtains.
- Do not move the appliance as long as it is in operation or connected to power supply, to prevent injuries.
- Never operate the appliance without the crumb tray; empty the tray regularly.
- Do not toast foods that can melt.
- Do not insert excessively large foods or any metal foils, silverware or tools in the appliance. They could cause a fire or short circuit.
- Do not use the appliance with accessories of other
manufacturers or brands, to prevent damage.
- Unplug the appliance from the power supply after use and prior to cleaning. Never leave the appliance unattended when it is plugged in to the power supply.
- Clean the appliance after every use.
- Check the appliance, the plug and the power cord regularly for wear or damage. In case of damage to the power cord or other parts, please send the appliance or the power cord for inspection and repair to our after sales service. Unauthorized repairs can result in serious risks to the user and void the warranty.
- If the supply cord is damaged, it must be replaced by the manufacturer or its service agent or a similarly qualified person in order to avoid a hazard.
CAUTION:
The appliance becomes very hot during operation

Never open the housing of the appliance. Keep body parts and utensils out of the bread slots. This can result in electric shock.
The manufacturer will not be liable in the event of incorrect assembly, improper or incorrect use or if repairs are carried out by unauthorized third parties.
TIPS FOR IDEAL TOASTING RESULTS
- Different types of bread have varying moisture content. Therefore, the same toast darkness setting can produce different results.
- For bread that is slightly dry, use a lower toast darkness setting.
- For fresh bread or whole grain bread, use a higher toast darkness setting.
- Bread with an irregular surface requires a higher toast darkness setting.
-
Thick bread slices need more time for toasting; it may even be necessary to toast the bread a second time.
-
When toasting raisin bread, remove all raisins from the surface, since otherwise they could burn.
- Cut rolls in half before toasting.
- If you toast only one slice, please select a low toast darkness setting.
- If you toast several slices one after the other, the bread will be somewhat darker at the same toast darkness setting.
- To toast frozen bread, waffles, etc. please use the thaw button.
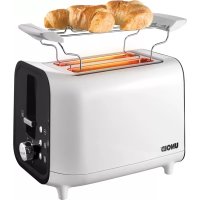
- To warm rolls, please use the bun warmer.
BEFORE USING THE APPLIANCE THE FIRST TIME
- Remove all packaging materials and any transport safeguards. Keep packaging materials away from children – danger of suffocation!
- Check to make sure that all accessories are present.
- Clean the toaste with a damp cloth, as described in the chapter "Cleaning and care".
- Check to make sure that all parts are assembled correctly and the appliance is stable. Make sure that there is sufficient space between the toaster and walls or other appliances, since the
toaster becomes hot during operation.
-
Connect the appliance via the power cord to the power supply (220–240 V\~, 50 Hz).
-
Before toasting bread the first time, conduct one toasting cycle without bread. Press the toast lever down until it locks into place.
-
When the toasting cycle is completed, the toast lever automatically jumps up. Now you can starting toasting bread.
- Prepare the toaster as described in the section "Before using the appliance the first time".
- Place the bread slices in the slots in the toasting chamber.
- Set the desired toast darkness with the darkness control. You can select from seven toast darkness settings: level 1 is very light and level 7 is very dark. For golden brown toast set the lever in the middle position.
-
Press the toast lever down until it locks into place. The toaster starts toasting.
-
You can interrupt the toasting cycle any time by pressing the STOPP (Stop) button.
- When the bread has been toasted to the set darkness, it is automatically ejected. The appliance shuts off automatically.
CAUTION:
The appliance becomes very hot during operation!
OPERATION - WARMING
The warming function can be used to warm up bread or rolls without toasting.
- Place the bread slices in the slots in the toasting chamber.
-
If you wish to warm up rolls, place the bun warmer on the toaster so it is level and then place the rolls on top. To fold the bun warmer again, gently press the left and right brackets to the outside, so that the holders can engage.
-
Press the toast lever down until it locks into place.
-
Then press the button right away.
-
The bread or roll is warmed without being toasted.
-
You can interrupt the warming cycle any time by pressing the STOPP (Stop) button.
- After completion of the warming cycle the bread is automatically ejected. The appliance shuts off automatically.
- Please note that you cannot set the toast darkness when using the warming function.
OPERATION - THAWING
The thawing function first thaws out the bread and then toasts it, which means that the thawing cycle lasts somewhat longer than the normal toasting cycle.
- Place the bread slices in the slots in the toasting chamber.
- If you wish to thaw up rolls, place the bun warmer on the toaster so it is level and then place the rolls on top.
- Press the toast lever down until it locks into place.
- Select the desired toast darkness setting.
-
We recommend the following toast darkness settings: Low for bread from the refrigerator or thin frozen bread slices.
Medium for frozen waffles or rolls High for thicker frozen bread slices and for rolls and thick toast slices. -
Then press the button ✦ght away.
- The bread or roll is thawed and toasted.
- You can interrupt the cycle any time by pressing the STOP(Stop) button.
- After completion of the thawing cycle the bread is automatically ejected. The appliance shuts off automatically.
CLEANING

Before cleaning, always turn off the appliance and unplug it from the electrical outlet.
Allow the appliance to cool before cleaning it.
-
Do not immerse the appliance and power cord in water or other liquids or wash them in the dish-washer.
-
Wipe off the toaster with a damp cloth and a little dishwashing
detergent. Do not use any abrasive scouring agents, steel wool, metal objects, hot cleaning agents or disinfectants, since they can damage the appliance.
-
To remove stuck bread slices, unplug the toaster and turn it over and shake lightly. Never attempt to remove stuck bread slices with sharp or pointed tools or silverware.
-
Remove crumbs and any small pieces of bread from the crumb tray regularly. To do this, pull the crumb tray on the side all the way out and empty it. Wipe the crumb tray with a damp cloth, then dry it
thoroughly and push it back into the appliance.
- The appliance must be completely dry before you use it again.
GUARANTEE CONDITIONS
We grant a 24 months guarantee, and in case of commercial use a 12 months guarantee, starting from the date of purchase for any damage demonstrably due to manufacturing defects and when the appliance has been used according to its intended use. Within the warranty period we will remedy defective materials or workmanship through repair or replacement, at our option. Our warranty terms apply only to appliances sold in Germany and Austria. For other countries, please contact the responsible importer. In the event of a claim for remedy of defects, please send the appliance to our after sales service, properly packaged and postage paid, together with a copy of the automatically generated sales receipt, which must show the date of purchase, and a description of the defect. If the defect is covered by the warranty, the customer will be reimbursed for the shipping costs only in Germany and Austria. The warranty does not cover damage from normal wear, improper handling and failure to comply with the maintenance and care instructions. The warranty is void if repairs or modifications are made to the appliance by third parties. Any claims of the end consumer vis-à-vis the retailer are not limited by this warranty.
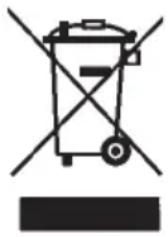
WASTE DISPOSAL / ENVIRONMENTAL PROTECTION
Our appliances are produced on a high quality level for a long lifetime. Regular maintenance and expert repairs by our after-sales service can extend the useful life of the appliance. If an appliance is defective and repair is not possible we ask you to follow the following instructions for disposal. Do not dispose this appliance together with your standard household waste. Please bring this product to an approved collection point for recycling of electric and electronic products. By separate collection and disposal of waste products you help to protect natural resources and ensure, that the product is disposed in an adequate way to protect health and environment.
natural_image
Symbol of a trash bin with crossed lines indicating no waste or restriction, and a solid rectangle below (no text or labels)The instruction booklet is also available for download: www.unold.de
NOTICE D'UTILISATION MODÈLE 38020
SPÉCIFICATION TECHNIQUE
Puissance : 1.350 W, 220–240 V\~, 50 Hz
Dimensions : Env. 39,5 x 17,7 x 16,7 cm (l/p/h)
CONDITIONS DE GARANTIE
natural_image
Symbol of a trash bin crossed with no text or numbers, representing waste sorting or disposal (no text present)natural_image
Symbol of a trash bin with crossed lines indicating no waste or restriction, and a solid rectangle below (no text or labels)MANUAL DE INSTRUCCIONES MODELO 38020
DATOS TÉCNICOS
Potencia: 1.350 W, 220–240 V\~, 50 Hz
Dimensiones: Aprox. 39,5 x 17,7 x 16,7 cm (Largo/Ancho/Alto)
natural_image
Symbol of a trash bin with crossed lines indicating no waste or discharge, and a solid rectangle below (no text or labels)NÁVOD K OBSLUZE MODEL 38020
TECHNICKÉ ÚDAJE
Výkon: 1.350 W, 220–240 V\~, 50 Hz
Velikost: Cca. 39,5 x 17,7 x 16,7 cm (L/B/H)
Přívod: Cca 90 cm