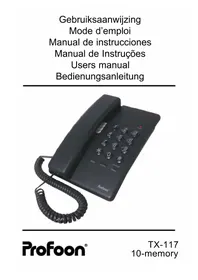
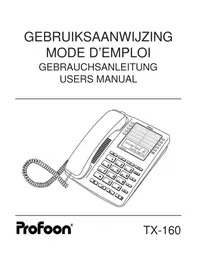
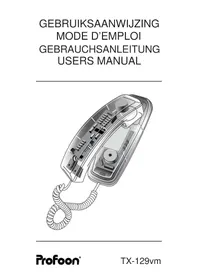
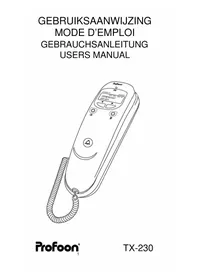
TX240 - Desk Phone PROFOON - Free user manual and instructions
Find the device manual for free TX240 PROFOON in PDF.

User questions about TX240 PROFOON
0 question about this device. Answer the ones you know or ask your own.
Ask a new question about this device
Download the instructions for your Desk Phone in PDF format for free! Find your manual TX240 - PROFOON and take your electronic device back in hand. On this page are published all the documents necessary for the use of your device. TX240 by PROFOON.
USER MANUAL TX240 PROFOON
Warrantycard: page 44
natural_image
Black and white globe icon with 'ww' text overlay (no other symbols or text)www.profoon.com
DÉCLARATION DE CONFORMITÉ
The Profoon TX-240 is designed for use on the ‘public switched telephone networks (analogue single-line)’ of telephone- and cable-companies inside the EU.
Each country and/or provider might require a different telephone-plug.
The Profoon TX-240 complies with the essential requirements and provisions as described in the European Directive 1999/5/EC.
The function Caller-ID is based on both the DTMF and the FSK system (automatic detection). It might be possible that you have to subscribe to this feature.
DECLARATION OF CONFORMITY
The declaration of conformity is available on the website WWW.PROFOON.COM
Attention:
The display is powered by 4 pcs battery, 1.5 Volt, size AAA. Refer to page 22 how to install these batteries. At wish you may also connect a 9V DC power adaptor (PROFOON PCI-A9).
INTRODUCTION
The Profoon TX-240 is a telephone with built-in Caller-ID: the name (when supported by the provider or when stored in the memory) and the number of the person who is calling to you, comes on the display of your telephone.
The Caller-ID memory has a capacity of 80 calls, including the time and date of the call.
The Caller-ID is linked with the dialer of the telephone. Any incoming call can be called back.
The TX-240 has a phonebook-memory of 80 names with telephonenumber.
INSTALLATION
POWER SUPPLY:
Open the battery compartment (bottomside) and install 4 pcs 1.5V AAA batteries. Mind the polarity.
Attention: always disconnect the telephone form the telephone outlet when batteries are to be installed or replaced.
TELEPHONECORD & HANDSETCORD:
- connect the supplied handsetcord between the handset and base
- connect the telephonecord to the backside of the telephone; push the connectors till you hear a click
- plug the telephone plug into your telephone outlet
PABX:
In case the TX-240 will be connected to a PABX, check if the PABX is suitable for Caller-ID. If not, the TX-240 has to be connected directly to the public telephone network.
WALL MOUNT:
- drill two holes in the wall with a distance of 8,5cm and insert two screws. Let the heads of the screws stick out a few millimeters of the wall
- click the wall mount plate to the bottomside of the base-part
- hang the unit on the wall and fixate the telephone wire by means of cable-clips
Once the power adaptor is plugged into a 230V mains outlet or the batteries have been installed, the telephone is ready for use.
PROGRAMMING
Make sure that during the programming, the telephone must be connected to your telephoneline.
DISPLAY LANGUAGE:
The several messages can come on the display with different languages. Follow these instructions to select the required language:
- leave the handset on the cradle
- press and hold the button
- press and hold the button
- press ▲the display shows "NEDERLAND" (or another language), now release the buttons
- use buttons and to select another language
- press to store the selected language
TIME AND DATE:
In idle state, the display shows the actual time and date and with each call, the TX-240 stores the time/date of that call. Set the time following these instructions:
- leave the handset on the cradle
- press and hold button
- press , the display shows "SET TIME" and the hour-indication flashes, now you may release the buttons
- use button Ⓧ to switch between the hours, the minutes, the month, the date and the year (see OPTION) ;note: for the minutes, the date and the year, you must first input the decimals, thereafter you can set the units 0-9)
-
use buttons ▼ and ▲ to increase or decrease the figures
-
press 10 to store the setting
OPTION: optional you can now set whether the LED indicator for the VoiceMail indication must be active (ON) or inactive (OFF).
CONTRAST:
To ensure a good readability. The contrast of the display can be set:
-
leave the handset on the cradle
-
press and hold button
-
press button Ⅱ, the display shows "SET CONTRAST HI" or "SET CONTRAST LO", now release the buttons
-
use and to select the required contrast-level
-
press to store the setting
HOW TO USE
INCOMING CALL:
Adjust the ringer volume with the ringer switch on the backside of the telephone. Lift the handset and start the conversation.
OUTGOING CALL:
Lift the handset. Wait for the dial tone and key-in the desired telephone number. This number also comes on the display. Replace the handset when the conversation is over.
REDIAL:
Last number redial:
In case the person you were calling was busy or you want to dial the last dialed number again, this number is stored in memory:
- pick up the handset and wait for the dialtone
- press button >>; the last dialed number will be redialed
This number can be as long as 32 digits.
Last 30 dialed numbers:
The last 30 dialed numbers are also stored in memory.
-
leave the handset on the cradle and press, the last dialed number comes on the display
-
use buttons and to step through the memory
-
lift the handset and press to dial the number which is on the display
These numbers can be as long as 13 digits.
PAUSE:
In case you are using a PABX system and you must dial a prefix number (0 or 9) to get an outside line, it is recommendable to insert a pause by pressing button P after the cited prefix. This to prevent that redialing the number will go too fast.
CALL TRANSFER AND NETWORK SERVICES:
Use the -R-key to activate special services from your telephone-company or to transfer a call in case you are connected through a PABX. The FLASH time of this feature is 100mS.
TELESERVICES:
The buttons * and # are functionbuttons, needed for divers telecom-services (teleshopping, telebanking, etc) or to control divers telecom devices (PABX, answering machines, etc). Refer to the concerning manual.
CALL TIMER:
Press Ⅱ during the conversation to start the call-timer. Press Ⅲ again to stop the timer.
When replacing the handset on the cradle, the timer-readout disappears from the display.
VOICE MAIL/PHONEMAIL:
System FSK:
In case your provider supports VM facilities and you receive a mail, than the text 'MSG' on the display will light. After you have listened to the mail, the provider will take care that this indication goes off.
System FSK + DTMF:
When you have activated your personal Voice Mail, after 5 rings the caller will be connected to your mailbox and has the possibility to leave a message.
The TX-240 has a LED lamp which starts to flash, indicating that someone might have left a message.
Please note that in case the caller does not leave a message or in case you have not activated the Voice Mail, after 5 rings this LED will flash anyway.
As soon as you lift the handset of this TX-240, the LED will go OFF so it is recommendable to first dial the number of your Voice Mail and listen if someone left a message for you.
If you have questions concerning the Voice Mail feature, please contact your telephone company.
MEMORIES
The TX-240 has an internal phonebook-memory for 80 telephonenumber with name. This memory is linked to the Caller-ID; if the Caller-ID receives a call with a number, which is stored in this memory, the display will show the matching name.
PROGRAMMING:
- Leave the handset on the cradle
- Press and hold button
- press ♠ the display shows "ADD >>", now release the buttons
- press ☑ the text "ADD >>" disappears and on the right side on the display a cursor flashes
-
input the number:
-
use ▼ and ▲ to increase or decrease the figure
- use Ⓤ to go to the next figure
- use ☐ to go to the previous figure
- you can also select PAUSE, FLASH, and #; because however during an incoming call, the received number is compared with the stored number, we recommend to not use these figures
-
a number may be as long as 13 figures, including a dail-pause
-
as soon as the number is programmed, press button and keep it pressed until the cursor starts to flash in the lower left corner
-
input the name:
-
use button ▼ and ▲ to input the name
- use ▼ and ▲ to select the required character
- use Ⓤ to go to the next character
- use to go to the previous character
- you can use all the characters of the alphabet (capitals only), the figures 0 - 9 and several special characters
-
a name can be as long as 16 characters
-
as soon as the name is programmed, press and hold until the name and number disappears and the cursor starts to flash on the right side of the display
-
go to step 5 for a new entry or press 10o end the procedure
DIALING:
- leave the handset on the cradle
- press and hold button
- press ▲the display shows "ADD >>", you may now release these buttons
- press the display shows "REVIEW >>", press
- use and to look for the name / number to be dialed
- lift the handset and press to dial the selected number
MODIFYING NAME:
- repeat the above steps 1 to 5 of the instructions how to dial a number
-
press and keep this button depressed until the first character of the name starts to flash
-
use ▼ and ▲ to change this character
- use Ⓤ to go to the next character
-
use ☐ to go to the previous character
-
as soon as the name is correctly modified, press and hold until the name and number disappears from the display
-
press Ito return to the idle state
It is not possible to change a telephonenumber. If required, you have to delete the complete entry and store it again.
DELETING:
- repeat the above steps 1 to 5 of the instructions how to dial a number
- press momentarily ☐, the display shows "DEL ?"
- press 1 again to delete the entry
CALLER-ID
FUNCTIONING:
Just before or short after the first ring, the Telephone Company sends the telephonenumber (DTMF system) or name + number (FSK system) of the person who is calling to you. This can also be the telephonenumber of a fax or of a mobile phone.
On receipt of this information, the display of the TX-240 shows this name/number combination and stores it into its memory.
Because this information is stored in memory, at any time you can see who called you and at what time and day. The display indicates how many calls are in memory and how many calls are received after the last time you viewed the numbers.
Please note that you must subscribe yourself for Caller-ID. Contact your provider.
MEMORY:
The memory can hold 80 incoming calls (numbers + names). When the memory is full, each new incoming call will overwrite the oldest call. Please make sure to regular read the memory and to delete it contents.
NAME:
In case you receive a call from someone which name and number you have stored in the phonebook memory of the TX-240, then the name you programmed in your telephone will come on the display. Else the name which is transmitted from the provider will be displayed. In case the provider only sends the number and you have not stored this number in your telephone, than only the number will come on the display.
REPEATED CALL:
A repeated call will be displayed as "REPEAT" in the display. The information concerning the first call will be lost, only the time and date of the last call will be memorized.
TIME/DATE:
The time and date of each call are memorized too. In case your provider uses the FSK Caller-ID system, the network provides the time/date information. In case your provider uses the DTMF system, the time/date of the internal clock of the TX-240 will be used.
READ THE MEMORY:
Press ▼ and ▲ to start reading.
Use buttons▼ and ▲ to step through the memory. Next to CALL#, the rotation number of that call is displayed. The upper part of the display shows the time and date of that call.
CALL BACK:
- leave the handset on the cradle and use and to look for the number to be dialed
- as soon as the required number is on the display, lift the handset and press ☎; the number will be dialed
ERASE SPECIFIC NUMBERS:
- leave the handset on the cradle and press and to look for the call to be deleted
- press the display shows "DEL?"
- press I again to erase the selected call or press to return to the idle state
ERASE ALL:
- leave the handset on the cradle and press and to start reading the memory
- press and keep this button depressed until the display shows "ALL DEL?"
- press again to erase all calls or press to return to the idle state
TIPS & REMARKS
POWER SUPPLY:
Not installed or almost empty batteries are indicated by the flashing battery symbol on the display.
When batteries have been replaced, the display shows 12:00. Set the time (DTMF system) or wait for a new call (FSK system).
After the battery replacing, the Caller-ID memory is empty. We recommend to first read the memories prior to change the batteries. The stored names and number will remain in memory. Even during the replacing of the batteries.
Do not just throw away empty batteries but hand them over to your local depot for chemical waste.

PABX:
In case your PABX is not capable to pass the Caller-ID signals, than the TX-240 must be connected directly to the CO-line.
In case the TX-240 is connected through a PABX with prefix -0-, then lift the handset, dial the -0- and than look for the number and press button Ⓤ.
CLOCK:
System DTMF: the clock does not change from winter- to summertime. You have to re-set the clock as described in this manual.
System FSK: together with each call, your provider sends the time and date. An eventual change in time will than automatically be corrected.
ISDN:
The TX-240 only display's the number of the caller when the used ISDN exchange is suitable for CLIP for analogue telephones
NAME/NUMBER COMBINATION:
When just a number is received, than the TX-240 looks in its memory for the same number. In case it finds this number, than the matching name will be displayed.
This only goes OK when the numbers are fully equal. In case of doubt, ask the person to call to you and note the number, which comes on your display. Use this number to store in the TX-240's memory, together with the name of the person.
Tip: private persons and companies who have multiple CO-lines, can be presented to you with different numbers.
The stored name has priority over the name, which comes from the provider.
MAINTENANCE
Do not locate the telephone in direct sunlight or in a moist environment.
Never use chemical cleansers to clean the cabinet, the cabinet may only be cleaned with a moist cloth.
Don't place the TX-240 on furniture with cellulose based coating; the rubber feet will leave stains on the cellulose.
Under certain circumstances the sound of the TX-240 might be influenced by electromagnetic fields of electronic devices like TV, computer or radio transmitters close to the telephone. Relocate the telephone to gain better results in such cases.
Name: Attach here your
Address: purchase ticket
Zipcode:
City:
Telephonenumber:
You have a guarantee of 12 months after the date of purchase of this telephone. We guarantee during this period the free repair of defects caused by material- and construction faults. This at the importers discretion. It is only possible to claim to the guarantee when you enclose your purchase ticket with the TX-240.
HOW TO ACT:
If you notice a defect, consult the manual first. If this manual gives you no definite answer, consult your dealer with a clear description of your complaint. He will collect the device together with this guarantee card and the dated purchase ticket and he will take care of a prompt repair, respectively free sending to the importer.
THE GUARANTEE EXPIRES:
When used inexpert, faulty connections, use of unoriginal parts or accessories, negligence and defects caused by fire, flood, stroke of lightning and natural disasters. With unqualified modifications or repairs by third persons. With incorrect transport without a suitable packing. If the device is not handed in with the correct filled in guarantee card and the purchase ticket.
NOT UNDER THIS GUARANTEE: cords, plugs and batteries.
All further responsibilities, in particular subsequent damages, are excluded.