
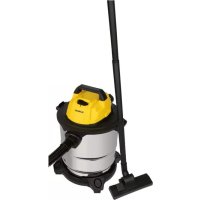
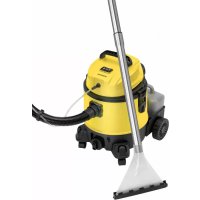
CB 965 - Vacuum Cleaner BOMANN - Free user manual and instructions
Find the device manual for free CB 965 BOMANN in PDF.

| Product Type | Vacuum Cleaner |
| Brand | Bomann |
| Model | CB 965 |
| Power Supply | 230 V ~ 50 Hz |
| Suction Power | Variable (3 levels: low, medium, high) |
| Vacuum Type | Bagged (canister) |
| Motor Protection Filter | Washable, clean every ~10 bag changes |
| Exhaust Filter | 2 washable filters |
| Included Accessories | Crevice tool, upholstery brush, floor brush |
| Telescopic Tube | Yes, height adjustable with release button |
| Power Control | Yes, on the device (rotary control) |
| Bag Full Indicator | Yes, light indicator |
| Cable Storage | Rewind button with cable guide |
| Parking Position | Yes, hook at the back of the device |
| Accessory Compartment | Yes, integrated with cover |
| Safety | Do not vacuum liquids, hot ashes, sharp objects; do not use without filter |
| Maintenance | Washable filters in hot water without detergent; exterior cleaning with dry cloth |
| Warranty | 24 months |
| Cable Length | Approximately 5 meters (yellow mark for maximum unwinding) |
Frequently Asked Questions - CB 965 BOMANN
User questions about CB 965 BOMANN
0 question about this device. Answer the ones you know or ask your own.
Ask a new question about this device
Download the instructions for your Vacuum Cleaner in PDF format for free! Find your manual CB 965 - BOMANN and take your electronic device back in hand. On this page are published all the documents necessary for the use of your device. CB 965 by BOMANN.
USER MANUAL CB 965 BOMANN
General Safety Instructions
- Read the operating instructions carefully before putting the appliance into operation and keep the instructions including the warranty, the receipt and, if possible, the box with the internal packing.
- The appliance is designed exclusively for private use and for the envisaged purpose. This appliance is not fit for commercial use. Do not use it outdoors (except if it is designed to be used outdoors). Keep it away from sources of heat, direct sunlight, humidity (never dip it into any liquid) and sharp edges. Do not use the appliance with wet hands. If the appliance is humid or wet, unplug it immediately. Do not put it in water.
- When cleaning or putting it away, switch off the appliance and always pull out the plug from the socket (pull on the plug, not the cable) if the appliance is not being used and remove the attached accessories.
- Do not operate the machine without supervision. If you should leave the workplace, always switch the machine off or remove the plug from the socket (pull the plug itself, not the lead).
- To protect children from the dangers posed by electrical appliances, make sure that the cable is hanging low and that children do not have access to the appliance.
- Check the appliance and the cable for damage on a regular basis. Do not use the appliance if it is damaged.
- Do not try to repair the appliance on your own. Always contact an authorized technician. To avoid the exposure to danger, always have a faulty cable be replaced only by the manufacturer, by our customer service or by a qualified person and with a cable of the same type.
- Use only original spare parts.
- Pay careful attention to the following "Special Safety Instructions".
Special Safety Instructions
- Do not suck up liquids!
- Do not suck up hot ashes or pointed or sharp objects!
- Do not use the appliance in humid rooms!
- Never use without the filter. Check that the filter is inserted correctly!
- hair, clothing and body parts away from the vacuum nozzle during use!
- Keep the vacuum cleaner away from sources of heat like radiators, ovens, etc!.
GB
Overview of the Components
1 Cable
2 On/off switch
3 Vacuum power regulator
4 Carrying handle
5 Cable-winding key
6 Accessory compartment
7 Accessory compartment opener
8 Dust bag filling display
9 Dust bag compartment
10 Button for opening the dust bag compartment
11 Hose connection
12 Vacuum hose
13 Telescopic suction tube
14 Telescopic suction tube button
15 Hook on the suction tube
16 Floor nozzle
17 Parking assistance
18 Filter cover
Accessories:
Crevice nozzle (not shown)
Upholstery nozzle (not shown)
Brush nozzle (not shown)
Start-up
- Insert the connection head of the suction hose (12) into the hose connection (11) until its locks in place.
- In order to release the hose again, press the two buttons on the side of the suction hose at the same time.
- Keep the buttons pressed and then pull the hose out.
Using the Appliance
- Attach the floor nozzle (16) or the accessory.
- Unwind the length of cable (1) you require.
- Insert the mains plug into a correctly installed safety socket (230 V, 50 Hz) and then switch the machine on using the on/off switch (2).
- Set the vacuum power with the vacuum power regulator (3).
- Vacuum at a steady speed. There is no need to exert pressure.
- Attention: pay attention to the range that can be covered with the cable length.
Accessory Compartment (6):
The integrated accessories (crevice nozzle, upholstery nozzle, brush nozzle) can be found by pressing the opener of the accessory compartment (7). This opens the lid.
Nozzle accessories:
Crevice nozzle: For vacuuming in corners and crevices.
Upholstery nozzle, Brush nozzle: For cleaning upholstery, curtains etc.
Floor nozzle: For cleaning carpets or smooth surfaces.
Smooth floors: Press the lever with the brush symbol down with your foot. The brushes now become visible.
Carpets: Press down the other side of the lever. The brushes are now lowered.
Releasing the accessories: Pull them apart while turning slightly.
Vacuum power regulator (3):
Low vacuum power: For curtains and delicate fabrics Medium vacuum power: For long-pile velour carpets and textile flooring High vacuum power: For sturdy rugs and floors
Telescopic Suction Tube (13):
As the length of the suction tube can be adjusted it can be adapted to your own personal height. Unlock the coupling by pressing the button (14) downwards. Then move the telescopic suction tube to the desired height. To fix the suction tube in position, pull it until it is heard to lock in place.
Cable winding device:
Pull out the cable (1) up to the maximum length indicated with the yellow mark. Never pull the cable out up to the red mark as the cable winding can be damaged. Said damages are not covered by the warranty.
Winding:
Press the cable (5) winding button and guide the cable. Hold the cable to avoid wrapping.
Air Slide:
Open the air slide on the hose handle in order to regulate the airflow or to clear any particles sticking to the nozzle.
Dust bag replacement display (8):
Hold the hose up into air. If the dust bag change display lights up, the bag is full. Please change it.
Changing the dust bag:
- Pull the plug out of the socket.
- Press the button (10) to open the lid of the dust bag compartment (until its locks in place).
- Remove the dust bag holder and pull the dust bag out of the holder.
GB
- Insert a new dust bag. Reinsert the dust bag holder. Close the cover so that it snaps into place.
Filter
Your appliance has two filters.
Motor protection filter (inlet filter):
The inlet filter is located in the dust bag compartment. Press the button (10) to open the lid of the dust bag compartment. The filter is located vertically in the rear section of the dust housing. Remove the filter by pulling upwards. Clean the engine protection filter after 10 dust bag changes. If necessary, the filter can also be washed in warm water without any additives. Place it back into place only once it is completely dry!
Outlet filter:
In addition, this device also has two outlet filters. These are to be found on the back of the device, on the right and left next to the suction power regulator.
Remove the cover (18) by reaching into the recess on the back of the device and pulling the cover upwards. Remove the filter and clean it as described above.
Reinsert the filter and close the cover in the reverse order.
Cleaning and storage
Cleaning:
- Pull the plug out of the socket before cleaning!
- Clean the casing with a dry cloth.
Storage:
- Let the iron cool down completely.
- Wind the cable completely.
- Please place the machine in a vertical position and insert the hook (15) on the suction tube into the parking assistance (17) on the back.
This device has been tested according to all relevant current CE guidelines, such as electromagnetic compatibility and low voltage directives, and has been constructed in accordance with the latest safety regulations.
Subject to technical changes without prior notice!
Guarantee
The device supplied by our Company is covered by a 24 month guarantee starting on the date of purchase (receipt).
During the life of the guarantee any fault of the device or its accessories *) ascribable to material or manufacturing defects will be eliminated free of charge by repairing or, at our discretion, by replacing it. The guarantee services do not entail an extension of the life of the guarantee nor do they give rise to any right to a new guarantee!
Proof of the guarantee is provided by the proof of purchase. Without proof of purchase no free replacement or repair will be carried out.
If you wish to make a claim under the guarantee please return the entire machine in the original packaging to your dealer together with the receipt.
*) Damage to accessories does not mean automatic free replacement of the whole machine. In such cases please contact our hotline. Broken glass or breakage of plastic parts are always subject to a charge.
Defects to consumables or parts subject to wearing (e.g. motor pistons, kneading blades, drive shafts, spare remote control, spare toothbrushes, saw blades, etc.) as well as cleaning, maintenance or the replacement of said parts are not covered by the guarantee and hence are to be paid!
The guarantee lapses in case of unauthorized tampering.
After the expiry of the guarantee
After the expiry of the guarantee repairs can be carried by the competent dealer or repair service against the payment of the ensuing costs.
PL
Regulator sity ssania (3):
Niski stopien ssania: Do firanek, materiałów delikatnych.
CpeHnRA MOUHOCTb: Ira BeIIOPOBbIX IN TEKCTNlBbIX NOJOB C DInHHbIM BOPCOM
Ioxaanycta He BbITraBaTe CeTeBOH uHyp (1) daJee XeJIToM MeTKu. HnB KOem Clyuae He BbITraBaTe erO Do KpaCHoM MeTKu, 3TO MOxET npUBeCTN K IIOLOMKe MexAHn3Ma CMaTbIBaHnA. IODOBhIE NOLOMKn HE NOnaDaIOT NOr rapaHTnIO.
CmatbibaHne:
HaKMTe Ha KONky (5) MexaHn3Ma CmTaIBaHnI N NOMaJIeHbKy NOJaBaIte Ka6eIb. DePKeNTe Ka6eIb KpeNko B pyKaX, YTO6bl IpeIoTbPaTtB erO XJeCTaHne.
Bo3dyuHa 3acJIOHka:
OTkpBbA B03dyuHHyIO 3acJIOHKy Ha pyKoTKe nbJIeOCa MOxHO peYIINPOBaTb CnIy NOTOKa BO3duYa IIn OCBO6OdITb COIIIO OT npICOCABHXcK HEmy PpeDMETOB.
HndkaTOp cMeHbI MeuKa-ntbIeScbOpHka (8):
IOndbIMTe nbIeCOCHyIO Tpy6y B BO3dyx. EcInnHdNkATOp CMeHbI MeuKa- nblne60pHnka CBETITcR, TO OH noJOh. IoxaJIyIcTa CMeHnte erO.
CmeHa MeuKa- nblnc6OpHnka:
BbInbTe cTeByIO BnIKy n3 pO3eTKn.
- OTkpoIe npn nOMOuN KHOJKN (10) KpbIuKy oTceKa nbJIeScbOpHnka (do FHKcaun).
BbHbTe KOHTeHep nbIe6OpHNka HApKy N BbIHbTe n3 HeO nbJIe6OpHNK. BCTaBBTe HOBbIMeUOK.
BCTaBBTe KOHTeHep o6paTHo. 3aKpOte KpbIuKy o6paTHo, do FHKcaUN.
ΦnNbTp:
3NeKtpponpnpO OShaueH DByMЯФnIbTpamN.
3aunTHbI ΦnJIbTp MOTopa (BXoHNo fNJIbTp):
Bxodnoi haohtc B otceke Meka-tnle6opnka. OtkpoTe npi nOMOu KNOpKn (10) KpbuKy OTcKa Pblnc6opnka. NJIbTp pa3MeueH BEPTkAIBHO B 3aDHe qactn Kopnyca nbIeocca. BbTAHnte fNJIbTp BBepx.
PpOuHuaTe erOpnpMepHo nocLe kaxdoi 10 cMeHbI MeUka-tnle6OpHnKa. Pn Heo6xOaHMOCTn erO MOXHO npOMbIT b TeNIOB Oe, 6e3 Do6abok. BCTaBnaTe erO o6paTHo TOnbKO nocLe pONHO npocywn!
BbInyckHoi qnlbTp:
Kpome Bcero nblieoc Ochauhen 2 BbIXoHbIMn fNlIbTpam. OHn HaxOJrTcna Ha 3aJHei CTOpOHe nbIeococa, CLeBa n Cnpaba OT peryIaTopa MOUHOCTn. YTo6bI CHaTB 3aunTHyIO KpbIshKy (18), BO3bMInTeCb 3a BbICTyn Ha 3aJHei CTOpOHe nbIeococa n NotAHnTE KpbIshKy BBepx. BbTaunTe fNlIbTp n IpOuHCTNTe erO, kak bilo OnncaHo paHee. BcTaBbTe fNlIbTp o6paTHO n 3akpoITe KpbIshky B o6paTHOM nopdKe.
Ynctka n xpaheHne
Ynctka:
- Пелед чистковынты сеTeByю Вилky ИЗ рОЗтк!
- Ipoptpnte Koprnyc cyxoi Tprnkoi.
Xpachenne:
JaTe yTHOry NOJIHOCTbIO OCTbITb.
-ПОЛНOCьМСТауTe Kaбел.
- YctaHOBNTe nbJIeOC BepTnKaJIbHO IN BCTaBBTe KPIOK nbJIeCOCHOn Tpy6bl (15) B MexAHN3M ee KpeJIeHnA (17), C TbJIbHOJ CTOpOHbI nbJIeCOca.
RUS
3TO n3dJIeHHe npoJIO BCE Heo6xOIMbIe n aKTyaJIbHbIe npOBepKn, npEiINcaHHbIe dIpeKTHBOI CE, K npM. Ha 3JIeKTpOMarHHTHyIO COBMeCTUMOCt b I COOTBeTCTBnE Tpe6OBAHnM K Hn3KOBoJbTHoI TEXHnke, OHO 6blIO TaKKe cKOHcTpyuPObaHO n NOCTpOeHO C yUeTOM NocJeDnIX Tpe6OBAHn IO TEXHnke 6e3OnacHOCTn.
Mbl octabJem 3a cobn npaBO Ha TexHueckne n3MeHeHnra!
TapaHTnHoe 06a3aTeJbCTBO
TapaHTnHbI cPOK Ha TeppntOpn Pocsncko Fedepaun yCTaHaBnBaETcnoJIOJIHOMOHyIMN IpeDCTaBNTeJIaMn.
KaccobbYek YBnErcrapaHTNHBIM TaHOH. Be3 Hero HeBO3MOXeH 6ecnJIaTHbI peMOHT NJIN 3aMeHa n3dJIInr.
B clyuae BO3HKnHOBXHnnpTeH3n NO rapaHTn, npeIbYBNTe N3dJIne B nIOHOnKOMnEKTaCnN, COpUNHaJIbHOy UNaKOKBON KACCOBbIM YekOM TOpROBOI TOUKe, pOdaBWe 3TO n3dJIne.
*) DepeKtbl npHaIeXHocTe He clykata pnuHOn Ira ABTomaTneCKo 3ameHb Bcero n3deJnB. B 3om clyuae no3BOHnTe Ham, noxaynCTa, no ropuey JInnn! Pa36ntbIe CTekJIHHbIe N NOLOMaHbIe PIACTMaCCOBbIe DeTaNN BO3MeaIOTc T0lbKO 3a DONoIHHTeNbHyO ONLaTy!
Deefekti n3HaunBaembix npHnAdIeXHOCTei IIN TpyuNXcJeTalei (Hanpimep KOHTaKTHbIE 5eTKMOTOPOB, CMEcITeJIbHbIe KPIOKN, pnpBOIDhIe peMHN, 3anachbIe NylbTBI ynpaBHeHn, 3apanchbIe 3y6HbIe 5eTKN, IIbHbIe NOJToHa IN T.D.), a TaKke YnCTKa, TexO6CnykUNBaHne IIN 3ameHa TpyuNXcJeTalei He nonadaIO TNOI rapaHTNU, IN NO3OTMy npOBdAeTc3a OTdeJIbHyIO ONLaTy!
TapaHTnA TepaETcP np BCKpbITnN3deJIy NOCTOpOHHIMN JIuAMN.
После rapаHTи
Iocne OKOHuaHnCpoka rapaHTnn,peMOHT n3deJn npOn3BOoNTc 3a OnlaTy COOTBETCTByIOUzIMMaCTepCKmN nn pNYKtAmn CepBnCHOrO O6CJyXkBaHn.
Technische Daten
Modell: CB 965
- General Safety Instructions
- Special Safety Instructions
- GB
- Overview of the Components
- Accessories:
- Start-up
- Using the Appliance
- Accessory Compartment (6):
- Nozzle accessories:
- Vacuum power regulator (3):
- Telescopic Suction Tube (13):
- Cable winding device:
- Winding:
- Air Slide:
- Dust bag replacement display (8):
- Changing the dust bag:
- Filter
- Motor protection filter (inlet filter):
- Outlet filter:
- Cleaning and storage
- Cleaning:
- Storage:
- Guarantee
- After the expiry of the guarantee
- PL
- Regulator sity ssania (3):
- CmatbibaHne:
- Bo3dyuHa 3acJIOHka:
- HndkaTOp cMeHbI MeuKa-ntbIeScbOpHka (8):
- CmeHa MeuKa- nblnc6OpHnka:
- ΦnNbTp:
- BbInyckHoi qnlbTp:
- Ynctka n xpaheHne
- Ynctka:
- Xpachenne:
- RUS
- TapaHTnHoe 06a3aTeJbCTBO
- После rapаHTи
- Technische Daten
Brand : BOMANN
Model : CB 965
Category : Vacuum Cleaner