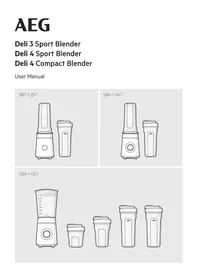
STM3400 - Blender AEG - Free user manual and instructions
Find the device manual for free STM3400 AEG in PDF.
User questions about STM3400 AEG
0 question about this device. Answer the ones you know or ask your own.
Ask a new question about this device
Download the instructions for your Blender in PDF format for free! Find your manual STM3400 - AEG and take your electronic device back in hand. On this page are published all the documents necessary for the use of your device. STM3400 by AEG.
USER MANUAL STM3400 AEG
natural_image
Black and white photo of a handbar with a metallic handle and a circular button, labeled 'AEG' (no additional text or symbols visible)Immersion Blender STM3xxx
GB Instruction book......18–23
Before using the appliance for the first time, please read the safety advice on page 19 carefully.

text_image
Labeled diagram of a blender with parts labeled A through M, including a brush and stand.D
GR
NL
F
GB


D
Teile
A. Start-Taste
B. Turbotaste
C. Handteil
D. Metallmixfuß
E. Messer
F. Netzkabel
G. Becher
H. Schneebesen*
natural_image
Illustration of a handheld device with a plug and a magnified cross-section showing a disassembled component (no text or symbols)
natural_image
Close-up of a metallic tool with curved handle and pointed tip (no text or symbols visible)
natural_image
Close-up of a mechanical component with a circular inset showing a cross symbol (no text or labels)D
natural_image
Diagram of a tool with labeled parts A and B, showing a curved arrow indicating rotation or movement (no text or symbols beyond labels)text_image
Diagram showing a digital thermometer icon and a droplet in a glass with liquid, indicating measurement or filtration process.natural_image
Simple illustration of a dropper falling into a glass beaker with liquid (no text or symbols)- Verwenden des Mini-Zerkleinerers*. Stellen Sie den Zerkleinerungsbehälter auf eine saubere, ebene Fläche. Bringen Sie die Edelstahlklinge an.
- Χρήση της μικρής συσκευής τεμαχισμού*. Τοποθετήστε το μπολ τεμαχισμού σε μια καθαρή, επίπεδη επιφάνεια. Τοποθετήστε την ανοξείδωτη λεπίδα στη θέση της.
- Het gebruik van de minihakker ^* . Plaats de hakkom op een schone, vlakke ondergrond. Bevestig het roestvrijstalen blad.
- Utilisation du mini-hachoir*. Placer le hachoir sur une surface propre et plane. Mettre le couteau en acier inoxydable en place.
natural_image
Close-up of a mechanical component with a downward arrow indicating compression or disassembly (no text or symbols visible)D
natural_image
Illustration of a whisk inside a brush tip with labeled parts A and B (no text or symbols beyond labels)natural_image
Mechanical component diagram showing a shaft with two labeled parts A and B, no text or symbols present.7. Verwenden des
natural_image
Black handheld device with control panel and magnified inset showing a hand interacting with a screen (no visible text or symbols)D
natural_image
Close-up of a medical catheter or sphygmomanometer device (no visible text or symbols)natural_image
Close-up of a hand holding a white object with a magnified circular icon showing a cross symbol (no text or labels)text_image
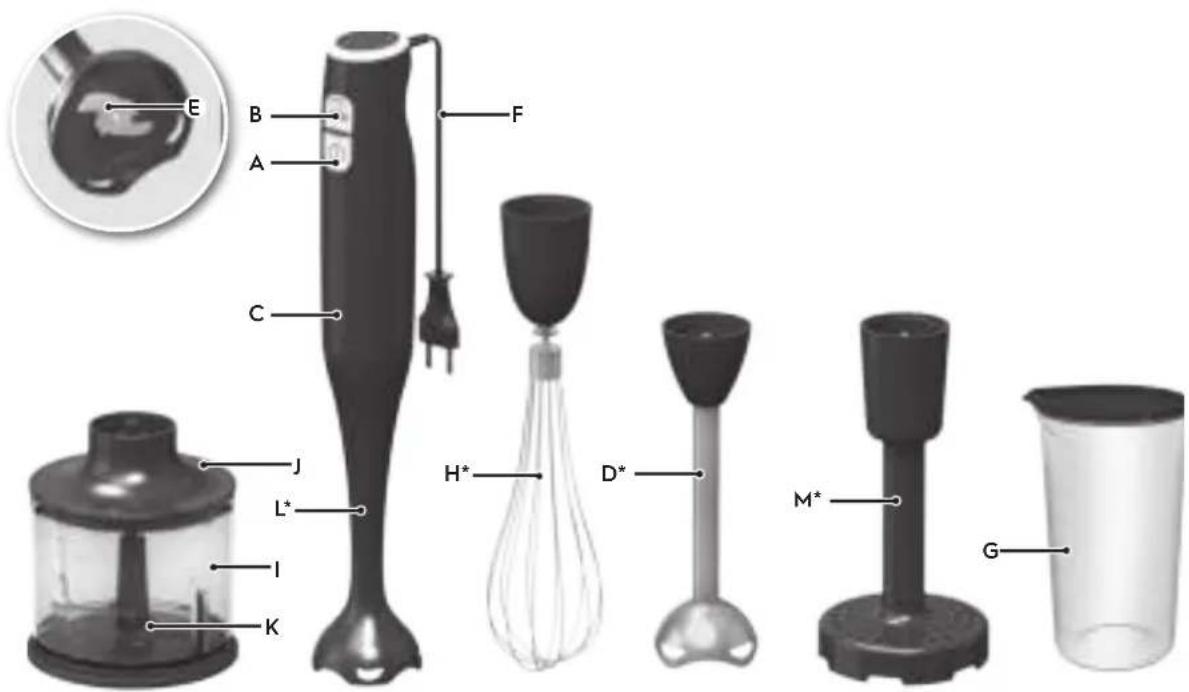
E B A F C J L* H* D* I K M* G


GB
Components
A. Start button
B. Turbo button
C. Handheld part
D. Metal mixing foot
E. Knife
F. Power cord
G. Beaker
H. Traditional whisk*
1. Chopper bowl*
J. Chopper bowl lid*
K. Chopper bowl knife*
L. Plastic mixing foot*
M. Potato masher*
*depending on model

SAFETY ADVICE
GB
Read the following instruction carefully before using the appliance for the first time.
- Appliances can be used by persons with reduced physical, sensory or mental capabilities or lack of experience and knowledge if they have been given supervision or instruction concerning use of the appliance in a safe way and if they understand the hazards involved.
• Children shall not play with the appliance. - This appliance shall not be used by children. Keep the appliance and its cord out of reach of children.
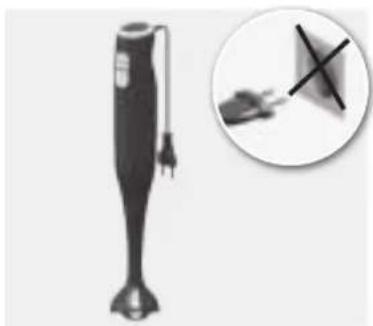
- The appliance may only be connected to a power supply whose voltage and frequency comply with the specifications on the rating plate!
- Never use or pick up the appliance if – the supply cord is damaged, – the housing is damaged.
- If the appliance or the supply cord is damaged, it must be replaced by the manufacturer, its service agent or similarly qualified person, in order to avoid hazard.
- Always disconnect the appliance from the supply if it is left unattended and before assembling, disassembling or cleaning.
- Switch off the appliance and disconnect from supply before changing accessories or approaching parts that move in use.
- Never touch the blades or inserts with your hand or any tools while the appliance is plugged in.
- Care shall be taken when handling the sharp cutting blades, emptying the bowl and during cleaning.
- The blades and inserts are very sharp! Danger of injury! Caution when assembling, disassembling after use or when cleaning! Ensure that the appliance is disconnected from the mains supply.
- The appliance cannot be used for chopping ice or blending hard and dry substance, such as nut, candy; except with specific accessories provided with the appliance. Otherwise the blade could be blunt.
- Do not immerse the appliance in water or any other liquid.
- When processing heavy load, do not use the appliance continuously for more than 30 seconds. Allow to cool down before restarting.
- This appliance is intended for domestic use only. The manufacturer cannot accept any liability for possible damage caused by improper or incorrect use.
Before first use
natural_image
Illustration of a handheld device with a close-up inset showing a hand holding a small object (no text or symbols visible)- Before using your appliance, remove all packing material, plastic, labels, stickers or tags that may be attached to the motor base, bowls or attachments.
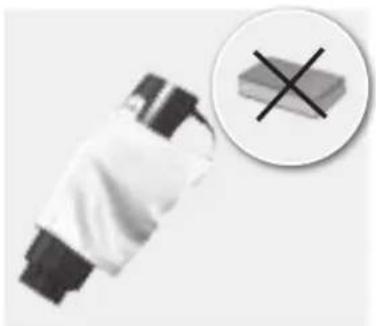
Warning! Never immerse the housing, plug, or cord in water or any other fluid.
Caution! Switch off the appliance and disconnect from supply before changing accessories or approaching parts that move in use.

natural_image
Close-up of a metallic medical or surgical tool with curved handle and pointed tip (no text or symbols visible)- Wash all parts, except for the motor base, in warm soapy water. Dry each part thoroughly before use.
All parts, except for potato masher foot, whisk adapter and chopper upper part, can be washed on the top rack of your dishwasher.
natural_image
Close-up of a white USB flash drive with a magnified circular icon showing a black X symbol (no text or labels)- The housing should only be cleaned with a soft damp cloth, then dried with a cloth.
Note: Do not use abrasive cleansers or scouring pads to clean the surfaces of your appliance.
Getting started
natural_image
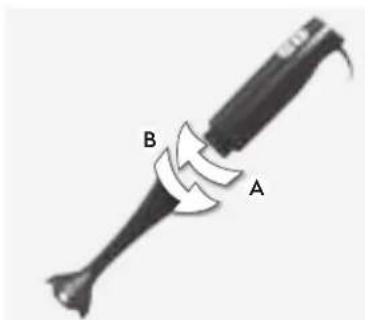
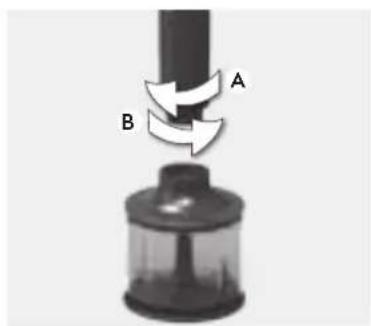
Diagram of a tool with labeled parts A and B, showing a curved arrow indicating rotation or movement (no text or symbols beyond labels)- Insert the mixing foot to handheld part, turn clockwise (A) and lock into position. To remove, turn mixing foot counter clockwise (B).
text_image
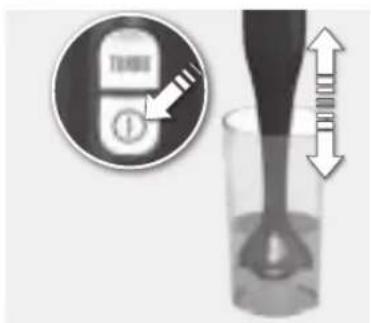
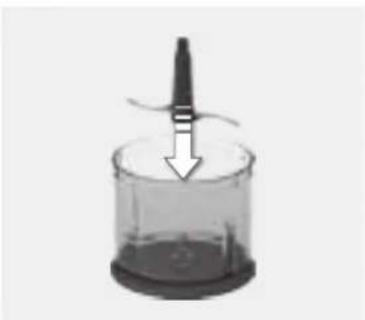
Diagram showing a device with a lock icon and a droplet in a glass, with measurement arrows indicating vertical deviation.- Insert the stick mixer deep into the beaker, begin mixing by starting at normal speed. Make sure the beaker is no more than 2/3 (600 ml) full. If you do not use the beaker, do not immerse the mixing foot more than 2/3 of its length. Move stick mixer lightly up and down to ensure best processing of content. Release switch to stop.
natural_image
Simple illustration of a dropper inside a glass jar with liquid, no text or symbols present- Using the mini chopper*. Place chopper bowl on a clean, level surface. Put stainless steel blade into place.
natural_image
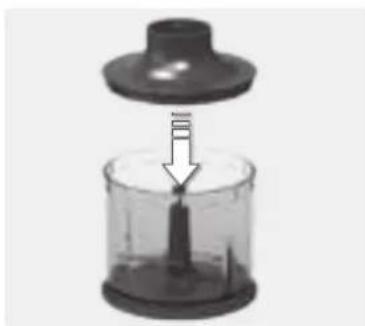
Close-up of a mechanical component with a downward arrow indicating compression or disassembly (no text or symbols visible)- Place food into the chopper bowl*. Amount of food to be chopped cannot exceed 300 g (Indicated max level). Close the lid.
natural_image
Diagram showing a mechanical component with labeled parts A and B, no readable text or symbols present.- Insert handheld part into the chopper lid, turn clockwise (A) and lock into position. Plug into power outlet and press switch to start. Release to stop. Remove handheld part by turning counter clockwise (B).
natural_image
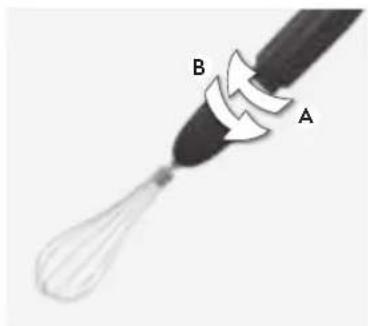
Illustration of a pipette with labeled parts A and B, showing a curved arrow indicating rotation (no text or symbols beyond labels)- Working with the traditional whisk*. To assemble whisk with handheld part, turn handheld part clockwise until tightened. To disassemble, turn counter clockwise.

text_image
D GR NL F GB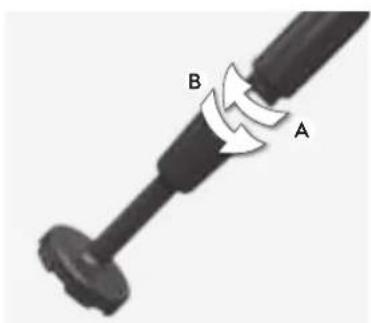
natural_image
Mechanical component diagram showing a shaft with labeled parts A and B, no text or symbols present- Using the potato masher*. To assemble potato masher with handheld part, turn handheld part clockwise until tightened. To disassemble, turn counter clockwise. Note: Potatoes are boiled and then smashed at maximum speed during 60 seconds.
Cleaning and care
natural_image
Black handheld device with control panel and magnified inset showing a hand interacting with a screen (no text or symbols visible)- Switch the appliance off, remove the plug from the wall socket and wait until the tools have stopped completely.
Warning! Never immerse the housing, plug, or cord in water or any other fluid.
natural_image
Close-up of a metallic tool with curved handle and pointed tip (no text or symbols visible)- Wash all parts, except for the motor base, in warm soapy water. Dry each part thoroughly before use.
All parts, except for potato masher foot, whisk adapter and chopper upper part, can be washed on the top rack of your dishwasher.
natural_image
Close-up of a mechanical component with a circular inset showing a cross symbol (no text or labels)- The housing should only be cleaned with a soft damp cloth, then dried with a cloth.
Note: Do not use abrasive cleansers or scouring pads to clean the surfaces of your appliance.
Before storage remove the plug from the power outlet. Ensure the appliance is clean and completely dry.
Blending quantities and Processing Times
Accessory Metal mixing foot and Beaker
| Recipe Ingredients Quantity Time Speed | ||||
| Pineapple-apricots Smoothie Pineapple in slices 250 g | 60 sec Turbo | Dried Apricots 40 g | ||
| Yoghurt 300 g | ||||
| Raspberries Smoothie Frozen raspberries 250 g | 60 sec Turbo | |||
| Banana 1⁄2 pcs | ||||
| Water 100 g | ||||
| Caster sugar | 1 Tbs | |||
| Yoghurt 300 g |
Chopping quantities and Processing Times
Accessory Mini Chopper
| Ingredients | Quantity | Quality | Time | Quality | Time | Quality | Time | Speed |
| Carrots | 100-200 g | Coarse | - | Medium | 5-10 sec | Fine | 10-20 sec Turbo | |
| Onions | 100-200 g | 3-5 sec | 10-20 sec | Turbo | ||||
| Almonds | 100-200 g | 3-5 sec | 7-10 sec | 10-20 sec | Turbo | |||
| Meat | 100-200 g | - | 5 sec | Turbo | ||||
| Ice | 100-200 g | - | 5 Pulses ON for 3 sec, OFF for 2 sec | 10 Pulses ON for 3 sec, OFF for 2 sec | Turbo |
Whisking/Whipping quantities and Processing Times
Accessory Traditional whisk*
| Ingredients Quantity Time Speed | |||
| Cream 500 g 50-70 sec Turbo | |||
| Egg whites 4 units | 60 sec Turbo | ||
| Note: it is possible to use the traditional whisk* for whipping cream in the beaker, as long as the temperature of the cream is between 4 and 8 Degree Celcius. For whisking eggs, please use a 1,5 Litre bowl. | |||
Mashing quantities and Processing Times
Accessory Potato masher*
| Ingredients Max quantity Time Speed | |||
| Cooked-potato pieces, cooked-pumpkin pieces (size 20mm x 20mmx20mm) | 300 g 30 sec High speed |
Troubleshooting
| Problem Possible cause Solution | ||
| Blades do not turn when processing. May be too much food in beaker.Pieces of food are too large.Stuck food around the blades. | Reduce quantity of food.Reduce size of food. | |
| Motor sounds like it is not able to process load. | Speed may not be correct. | See processing guide for correct speeds. |
| The mini chopper* does not work. | The chopper lid is not correctly fastened. | Make sure the lid and the chopper bowl are properly assembled. |
| The mixing foot/traditional whisk* does not work. | The mixing foot/traditional whisk* is not correctly assembled. | Make sure to lock mixing foot/traditional whisk* into position. |
| The potato masher* does not work. | The potato masher* is not correctly assembled. | Make sure to lock potato masher* into position.Make sure blade is correctly mounted in the foot bell |
| * depending on model | ||
Disposal
Recycle the materials with the symbol

. Put the packaging in applicable ainers to recycle it.
Help protect the environment and human health and to recycle waste of electrical and electronic appliances.

This marking indicates that this product should not be disposed with other household wastes
throughout the EU. To prevent possible harm to the environment or human health from uncontrolled waste disposal, recycle it responsibly to promote the
sustainable reuse of material resources. To return your used device, please use the return and collection systems or contact the retailer where the product was purchased. They can take this product for environmental safe recycling.
www.aeg-home.com


Printed on recycled paper


With Electrolux, the choice of professionals.
AEG