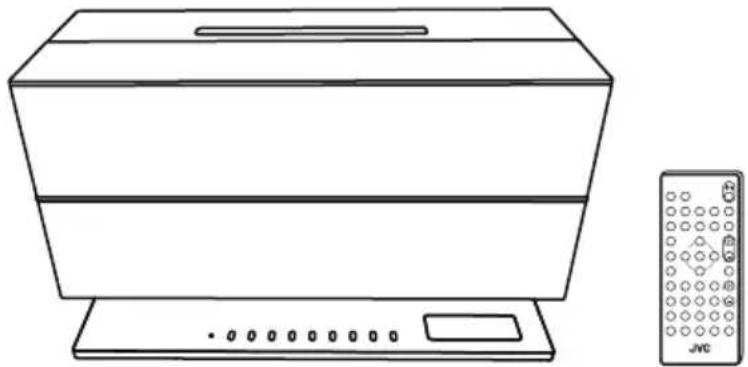
NXW5BE - Hi-Fi System JVC - Free user manual and instructions
Find the device manual for free NXW5BE JVC in PDF.
| Product Type | Compact Hi-Fi System |
| Brand | JVC |
| Model | NXW5BE |
| Dimensions (W x H x D) | 325 mm × 211 mm × 150 mm |
| Weight | Approx. 3.8 kg |
| Power Supply | AC Adapter AA-R1809: input 100-240 V~, 50/60 Hz; output 18 V — 3.35 A |
| Power Consumption | 18 W (operation), less than 1 W (standby) |
| Amplifier Output Power | 20 W + 20 W (1 kHz, 10% THD, 8 Ω) |
| CD Player | Audio CD, MP3, WMA |
| Tuner | FM 87.50-108.00 MHz; AM 522-1629 kHz |
| Bluetooth | Version 3.0, Class 2, range approx. 10 m, profiles A2DP and AVRCP |
| USB Connectivity | USB 2.0 Full Speed, 5 V / 1 A, FAT16/32, MP3/WMA |
| Audio Inputs | AUDIO IN (3.5 mm mini-jack), DIGITAL IN (optical) |
| Headphone Output | 3.5 mm stereo mini-jack |
| Speakers | 2-way Bass-Reflex, 7 cm cone, impedance 8 Ω, max input 20 W |
| Main Functions | CD/USB/iPod/iPhone/Bluetooth playback, FM/AM RDS radio, programming, random, repeat, timer, sound mode, HBS, surround |
| Maintenance and Cleaning | Clean the cabinet with a soft dry cloth; for discs, use a lint-free cloth from center to edge |
| Safety | Class 1 laser product; do not open the cabinet; maintain ventilation clearances |
| Spare Parts and Repairability | No user-serviceable parts; contact qualified service |
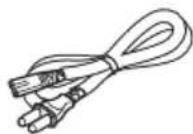
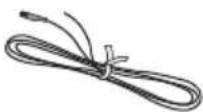
| Supplied Accessories | Remote control RM-SNXW5R, power cord, AC adapter AA-R1809, AM loop antenna |
Frequently Asked Questions - NXW5BE JVC
User questions about NXW5BE JVC
0 question about this device. Answer the ones you know or ask your own.
Ask a new question about this device
Download the instructions for your Hi-Fi System in PDF format for free! Find your manual NXW5BE - JVC and take your electronic device back in hand. On this page are published all the documents necessary for the use of your device. NXW5BE by JVC.
USER MANUAL NXW5BE JVC
natural_image
Line drawing of a desktop computer with monitor and keyboard (no text or symbols)Made for

iPod

iPhone


Bluetooth®
MP3/WMA
Radio Data System
INSTRUCTIONS
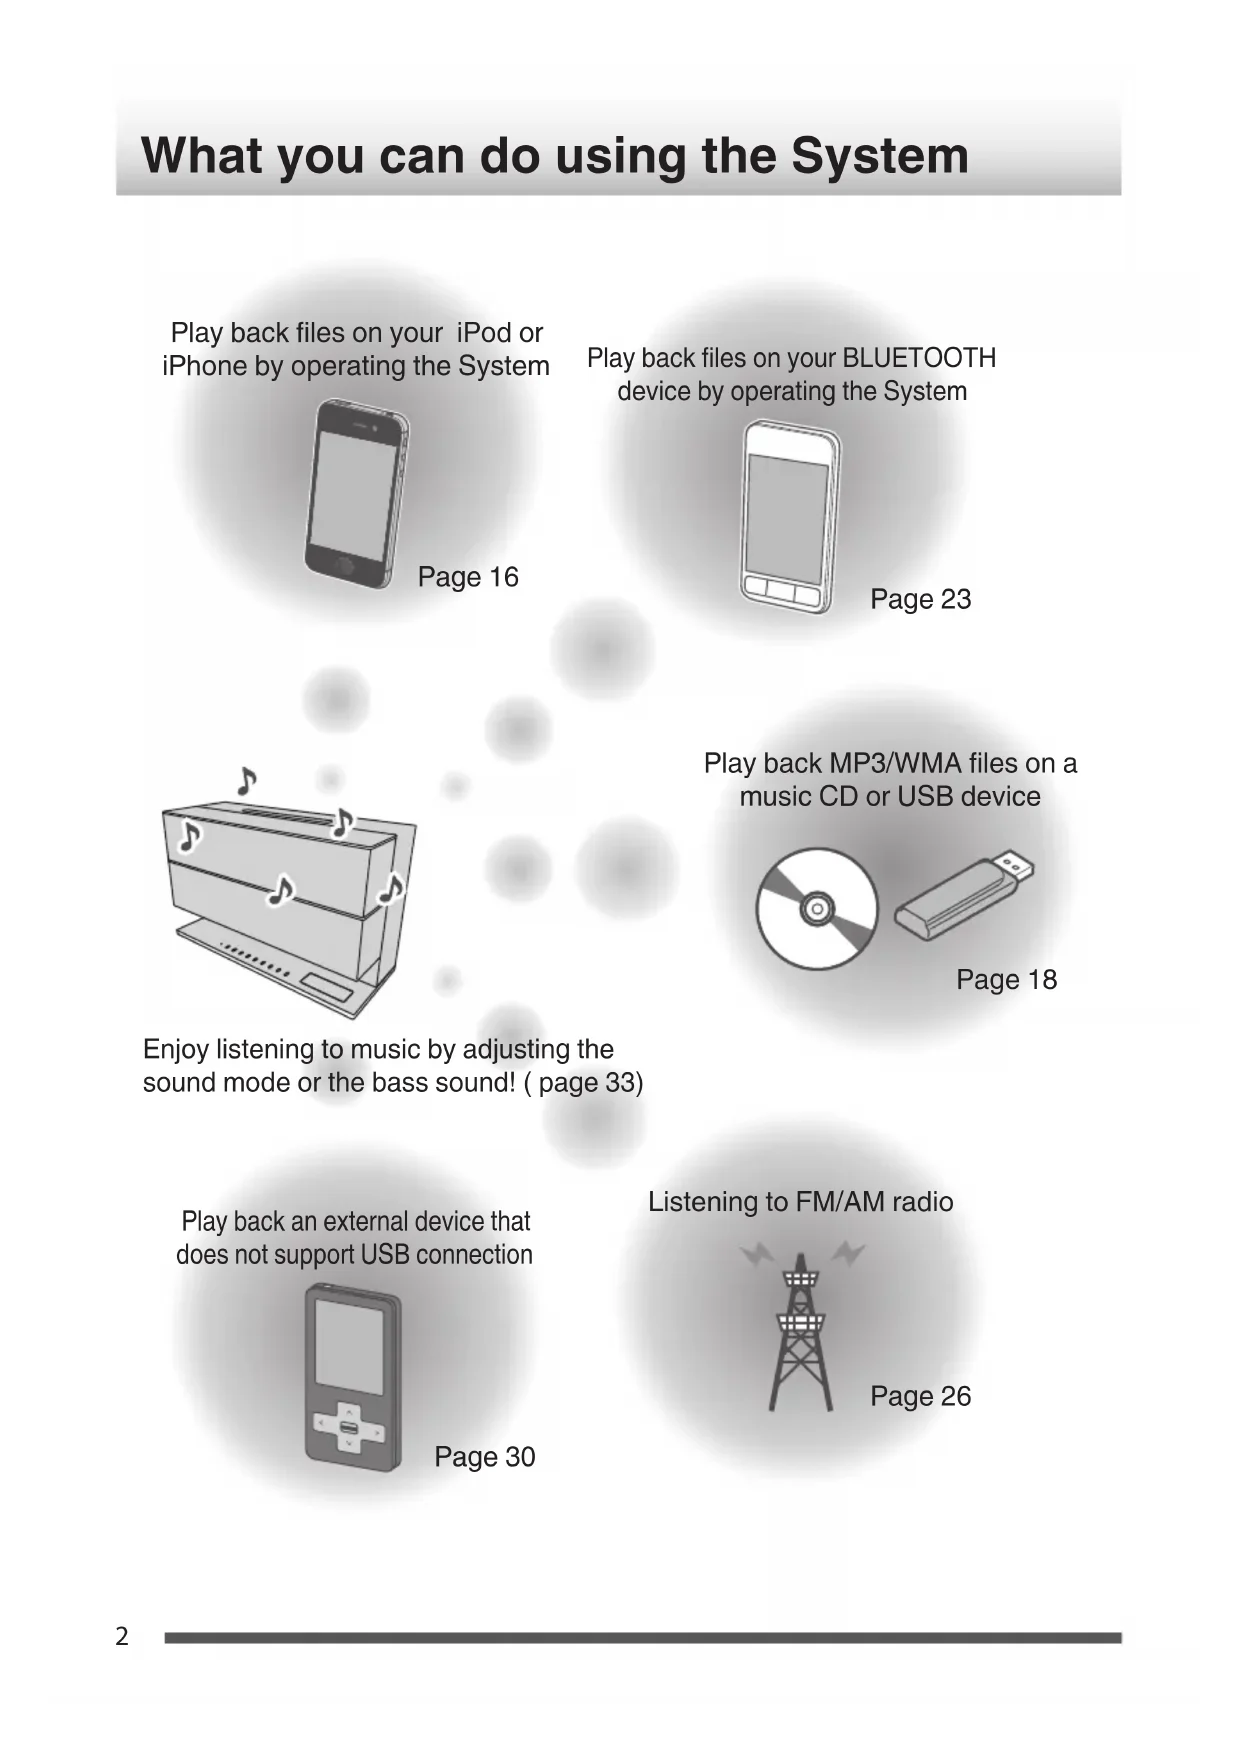
What you can do using the System
Play back files on your iPod or iPhone by operating the System
natural_image
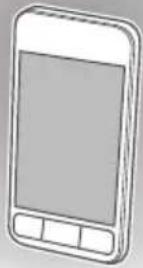
Front view of a smartphone with blank screen (no visible text or symbols)Page 16
Play back files on your BLUETOOTH device by operating the System
Page 23
natural_image
Illustration of a CD-ROM with musical notes and a speaker base (no text or symbols)Enjoy listening to music by adjusting the sound mode or the bass sound! (page 33)
Play back MP3/WMA files on a music CD or USB device
natural_image
Two electronic components: a CD and a rectangular electronic device (no text or symbols visible)Page 18
Play back an external device that does not support USB connection
Page 30
Listening to FM/AM radio

natural_image
Illustration of a transmission tower with power lines above (no text or symbols)Page 26
Introduction
Auto Power Save function (APS)
- The System comes with an “Auto Power Save (APS)” function, which turns off the power automatically when no sound is output for 15 minutes. This function is enabled in the default setting. (page 15)
In this manual...
- The remote control buttons are used for explaining the operations unless mentioned otherwise. Button unless mentioned otherwise indicates the remote control buttons. However, if the System has buttons with the same or similar names, they can also be used for the operations. - The display shown in this manual may differ from the actual display in some cases.
In this manual...
- In this manual, "iPod" includes iPod, iPod touch and iPhone devices. When referring specifically to iPod touch or iPhone, "iPod touch" or "iPhone" is used respectively. - In this manual, the term "Android device" is referred to as a smartphone and a tablet device, that are equipped with the Android OS. - In this manual, "file" and "track", "folder" and "group" are used interchangeably.
A copy of the Declaration of Conformity with regard to the R&TTE Directive 1999/5/ EC can be downloaded from the following Web sites. (http://www.jvc.co.jp/ecdoc/)
CE
Hereby, JVC declares that this System [NX-W5W]/[NX-W5B] is in compliance with the essential requirements and other relevant provisions of Directive 1999/5/EC.
Ways to press the buttons
There are two ways of pressing the buttons on the System. "Short press" refers to the action of pressing a button and releasing it immediately, while "long press" refers to pressing and holding down a button. Short press: Applicable to cases where "long press" is not indicated
Press a button lightly and release it instantly. The System may not respond if excessive force is applied to a button or if the button is not released instantly. If it does not respond as intended, retry by adjusting how long a button is pressed or the amount of force applied.
Release quickly
Long press: Applicable to cases where "long press" is indicated

Press and hold down
Press and hold down a button, followed by releasing the finger.
IMPORTANT FOR LASER PRODUCTS
- CLASS 1 LASER PRODUCT
- CAUTION: Do not open the top cover or cabinet. There are no user serviceable parts inside the unit, leave all servicing to qualified service personnel.
The product label of this product or the other information are located at the bottom of the System.
Installation
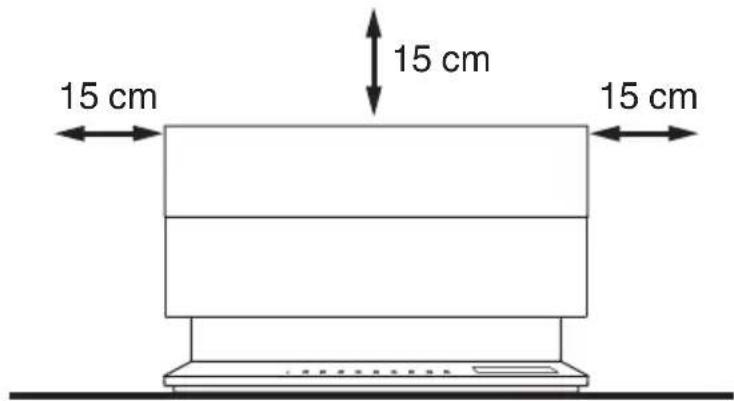
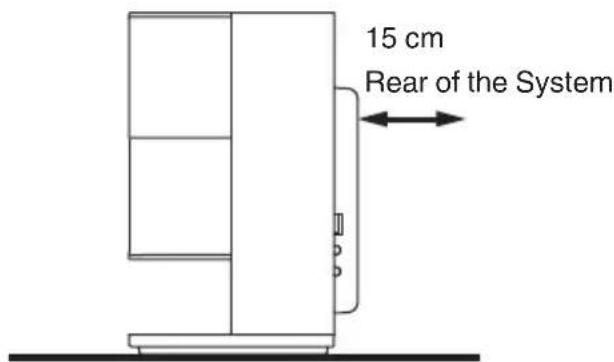
Caution: Proper Ventilation
To avoid the risk of electric shock and fire, and to prevent damage, locate the apparatus as follows:
1 Front: No obstructions and open spacing.
2 Sides/ Top/ Back: No obstructions should be placed in the areas indicated by the dimensions in the illustration.
3 Bottom: Place on a level surface.
Front view
Side view
Notes on installation
Select a place which is level, dry and neither too hot nor too cold — between 5 °C and 35 °C.
Contents
What you can do using the System 2
Introduction 3
Installation 4
Preparation 6
Accessories 6
Preparing the remote control 6
Part names ...... 7
Remote control 7
Top of the main unit / Front 8
Side 9
Rear 9
Display 10
Connections 11
Connecting antennas 11
Connecting an AC adapter 13
Connecting headphones 13
Basic operations ...... 14
Turning on/off the System 14
Setting the clock 14
Getting started 14
Activating/deactivating the Auto Power Save (A.P.S.) 15
Listening to iPod 16
Connecting iPod 16
Playing back 16
iPod menu operation 17
Listening to a USB device/CD ..... 18
Preparing a USB device/CD 18
Playing back 19
Program playback 20
Random playback 21
Repeat playback 22
Listening to a BLUETOOTH device
23
Connecting a BLUETOOTH device 23
Playing back 24
Canceling the connection 25
Listening to the radio 26
Searching for stations 26
Presetting stations 27
Using Radio Data System 28
Listening to an external device ... 30
Connecting an external device 30
Listening to an external device 30
Using the timer 31
Setting the sleep timer 31
Setting the daily timer 31
Other functions 33
Adjusting the sound quality 33
Adjusting the display/downlight 34
Changing the display information 35
References ...... 36
Compatible iPod .... 36
Playable BLUETOOTH devices 36
playable discs/files 36
Important for USB mass storage class devices . 37
Precautions on CD-R/CD-RW 37
Precautions on MP3/WMA files 37
Maintenance 38
Trademarks 38
Troubleshooting 39
Resetting the System 41
Specifications 42
Preparation
Accessories
Check that you have all the following items, which are supplied for the System.
Remote control
NX-W5B: RM-SNXW5R (1)
NX-W5W: RM-SNXW5R-W (1)
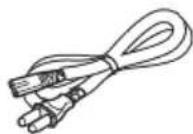
Power cord (1)
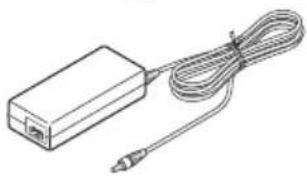
AC adapter
AA-R1809 (1)
natural_image
Line drawing of a rectangular device connected to a coiled cable with a terminal connector (no text or symbols)AM loop antenna (1)FM an
Preparing the remote control
When you use the remote control for the first time, pull out the insulation sheet.
If the range or effectiveness of the remote control decreases, replace the battery.
To replace the battery in the remote control
Match the polarities (+ and −) of the batteries with those indicated on the remote control.
Lithium coin battery (CR2025)
NOTE
- The batteries supplied are intended for checking system operation. Replace them with new ones as soon as possible.
CAUTION
- Danger of explosion if the battery is incorrectly replaced.
- Replace only with the same or equivalent type.
-
Store the battery in a place where children cannot reach. If a child accidentally swallows the battery, consult a doctor immediately.
• To prevent the battery from overheating, cracking, or starting a fire: -
Do not recharge, short, disassemble or heat the battery, or dispose of it in a fire.
- Do not leave the battery with other metallic materials.
- Wrap the battery with tape and insulate when throwing away or storing it.
- Do not poke the battery with tweezers or similar tools.
- Dispose the battery in the proper manner, according to federal, state, and local regulations.
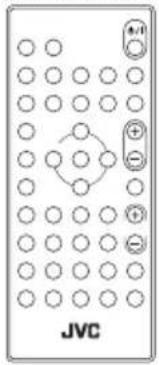
Remote control
- The reference pages are mainly pages containing descriptions of the respective parts.
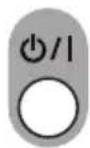
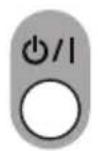
① ⏻/I (Power)
(page 14)
② BLUETOOTH, CD, USB, TUNER, AUDIO IN, DIGITAL IN
(pages 16, 19, 23, 26, 30)
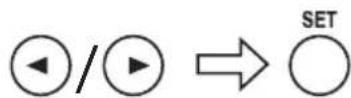
③
(pages 16, 19, 24, 26)
④ PROGRAM / TUNER MODE
(pages 20, 26)
⑤ RANDOM
(pages 17, 21)
⑥ REPEAT / MEMORY
(pages 17, 22, 27)
⑦ CANCEL/PTY
(pages 27, 29)
⑧ HBS
(page 33)
⑨ SOUND MODE
(page 33)
⑩ SURROUND
(page 33)
⑪ DIMMER / CONTRAST
(page 34)
⑫ PAIRING
(page 23)
⑬ DISPLAY
(pages 28, 35)
⑭ ▶/||
(pages 16, 19, 24)
15
(page 19)
⑯ VOLUME +/-
(page 14)
⑰ MUTING
(page 15)
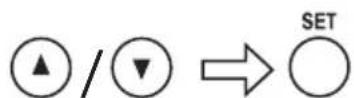
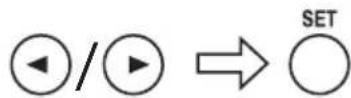
⑱ ▲/▼/◄/►/SET
(pages 14, 17, 27, 30, 31, 34)
⑲ FOLDER/PRESET
(pages 19, 27)
⑳ SLEEP
(page 31)
②1 TIMER ON/OFF
(page 32)
⑳ CLOCK/TIMER
(pages 14, 31)
②3 Number buttons
(pages 19, 27)
Top of the main unit / Front
① Remote control sensor
② Standby indicator
Lights up in red when the power of the System is off. The light goes off when the power is on.
Lights up in orange when the daily timer is activated.
③ ⏻/I (Power) button
(page 14)
④ |◀◀/▶▶| button
(pages 16, 19, 24, 26)
⑤ ■ button
(page 19)
⑥ (PAIRING) ▶/|| button
(pages 16, 19, 23)
⑦ SOURCE button
(pages 16, 19, 23, 26, 30)
⑧ VOLUME -/+ button
(page 14)
⑨ ▲ (Ejecting CD) button
(page 18)
⑩ Display
Pressing [DIMMER / CONTRAST] changes the brightness of the display and downlight. (page 34)
⑪ CD slot
(page 18)
⑫ Downlight
Lights up in white when the power is on. (page 34)
Side
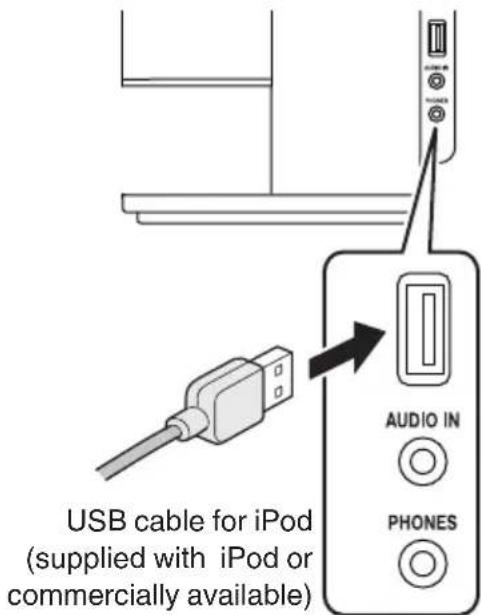
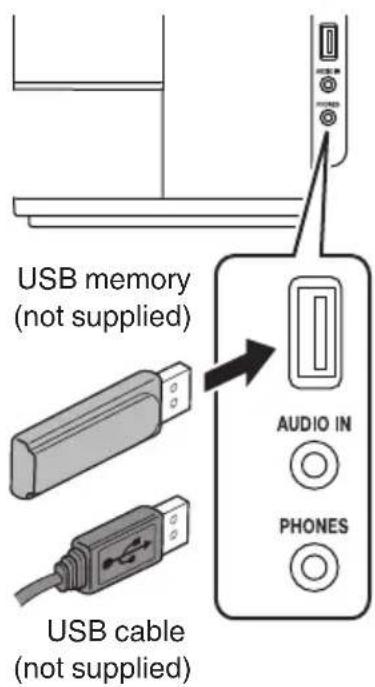
① USB terminal
Connect iPod/iPhone or a USB device.
(pages 16, 18)
② AUDIO IN jack
Connect an external device.
(page 30)
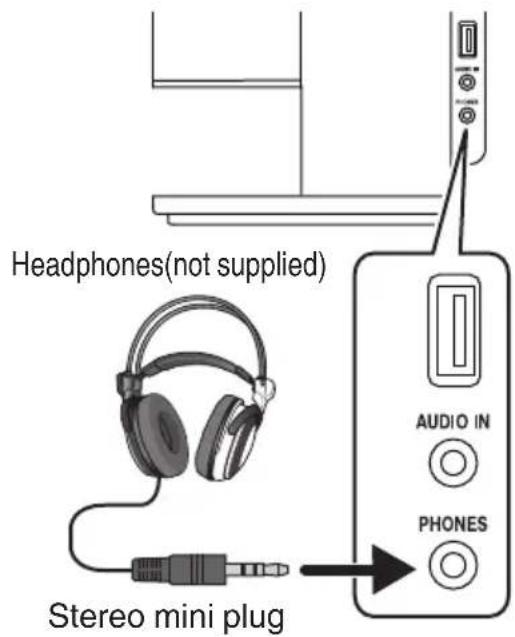
③ PHONES jack
Connect headphones.
(page 13)
Rear
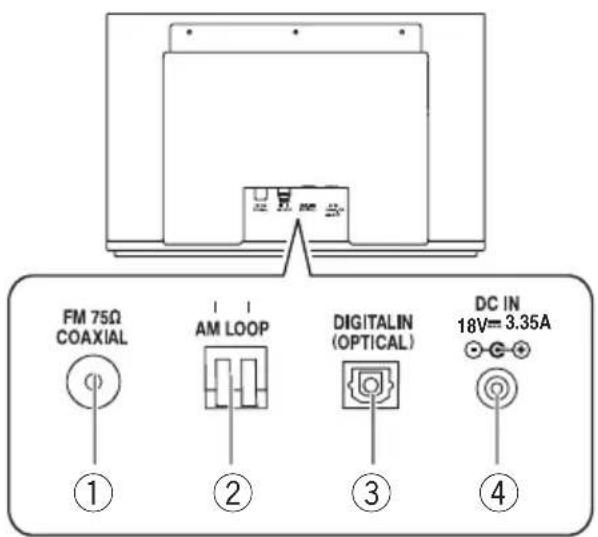
① FM 75Ω COAXIAL antenna terminal (page 11)
② AM LOOP antenna terminal (page 12)
③ DIGITAL IN (OPTICAL) terminal (page 30)
④ DC IN jack (page 13)
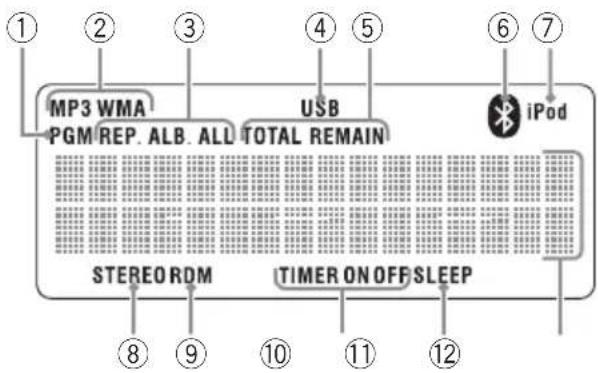
Display

① PGM (program) indicator
(page 20)
Lights up during program playback. ("CD", "USB")
② File indicator
Lights up when an audio files are played back.
③ Repeat mode icon
(page 22)
REP. : Lights up when one track is repeated. ("CD", "USB")
REP.ALB*: Lights up when the current folder is repeated. ("CD", "USB")
REP. ALL : Lights up when all tracks are repeated. ("CD", "USB")
* MP3/WMA only
④ USB icon
(page 18)
Lights up when the USB device is connected to the System.
⑤ Display switching icon
TOTAL : Lights up when the playback time of whole disc is displayed while the disc is played back.
REMAIN : Lights up when the remaining playback time of whole disc is displayed while the disc is played back.
⑥ BLUETOOTH icon
(page 23)
Lights up when BLUETOOTH device is connected to the System.
⑦ iPod icon
(page 16)
Lights up when iPod is connected to the System.
⑧ STEREO icon
(page 26)
Lights up when receiving an stereo broadcast.
⑨ RDM icon
(page 21)
Lights up during random playback. ("CD", "USB")
⑩ Timer icon
(pages 31, 32)
TIMER : Lights up when the timer has been set. Flashes while the timer is functioning.
TIMER ON : Flashes when setting the starting time of daily timer.
TIMER OFF : Flashes when setting the ending time of daily timer.
⑪ SLEEP icon
(page 31)
Lights up when setting the sleep timer.
⑫ Main display
Shows the text information of each source.
Connections
Connect the AC power cord to the wall outlet after all other connections have been made.
Connecting antennas
Make sure to connect the antenna before listening to radio broadcast.
Generally, installing the antenna near a window helps to improve reception.
Included FM antenna
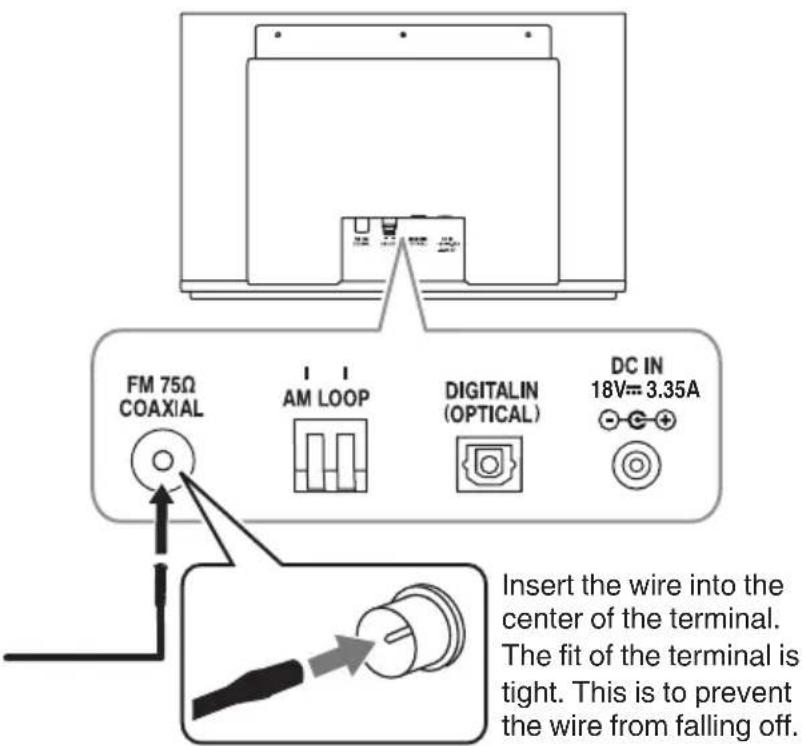
After you untied the bundled string, extend the FM aerial when connecting so that you can obtain the best reception.
Included AM loop antenna
- Place the AM loop antenna as near as possible to the window to obtain the best reception.
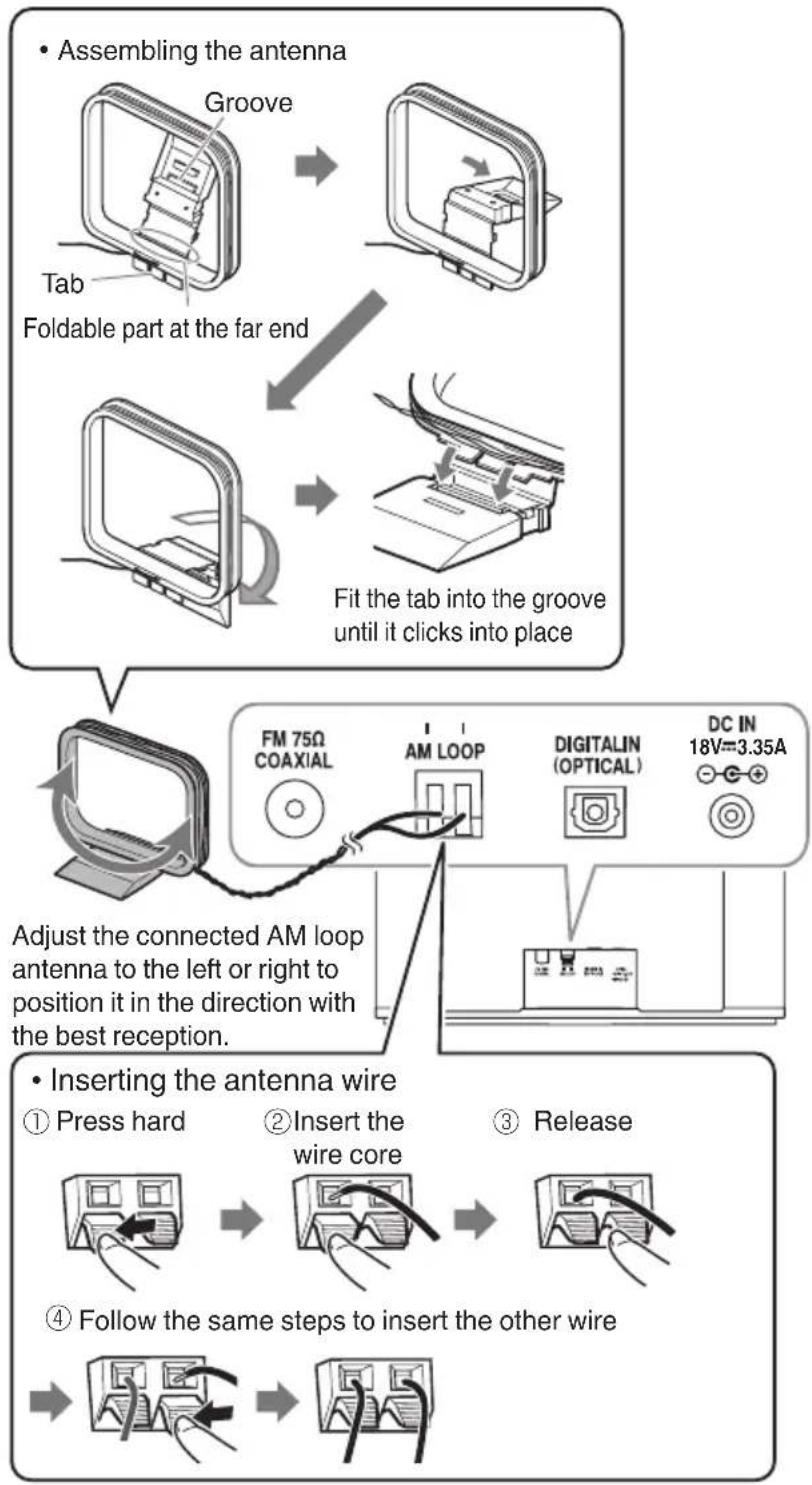
flowchart
graph TD
    A["Assembling the antenna"] --> B["Groove"]
    B --> C["Tab"]
    C --> D["Foldable part at the far end"]
    D --> E["Fit the tab into the groove until it clicks into place"]
    E --> F["Adjusting connected AM loop antenna to the left or right to position it in the direction with the best reception."]
    F --> G["Inserting the antenna wire"]
    G --> H["Press hard"]
    G --> I["Insert the wire core"]
    G --> J["Release"]
    G --> K["Follow the same steps to insert the other wire"]
CAUTION
- Use the AM loop antenna with the antenna wire wound around the frame. Removing the wire from the frame deteriorates the sensitivity of the antenna.
• Make sure that the antenna conductor is not in contact with other terminals or cables. Position the antenna away from other cables. Reception may be interfered if they are placed too close to the antenna.
Connecting an AC adapter
Connect the supplied AC adapter to DC IN jack of the System. After connecting the supplied AC power cord to the AC adapter, plug the AC power cord into the wall outlet.
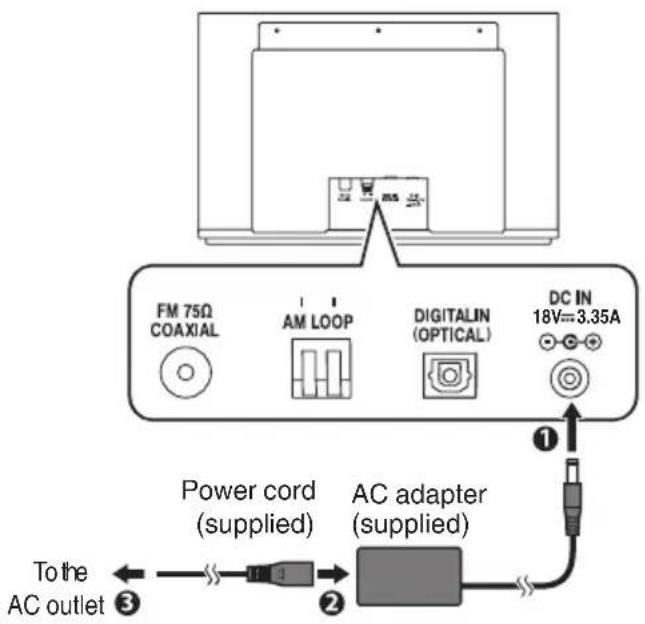
- Unplug the AC adapter from the wall outlet if the System will not be in use for a prolonged period of time.
CAUTION
• To avoid the risk of electric shock and fire
- Do not use any other adapters except the supplied AC adapter.
- Do not use the supplied AC adapter with any other products other than this System.
- Do not use any power cords except the supplied power cord.
- Do not use the supplied power cord with any other products other than this System.
About memory backup setting
Backup function can protect the various settings even if the AC power cord is disconnected. The protected settings are as follows.
- Switching the source
- Setting the volume
- Setting the sound quality
• The contents of timer setting - Setting the tuner
Connecting headphones
Be sure to turn down the volume before connecting or putting on the headphones.
NOTE
- Connecting the headphones deactivates the speakers.
- Use commercially available headphones with a standard 3-pin stereo mini plug.
Basic operations
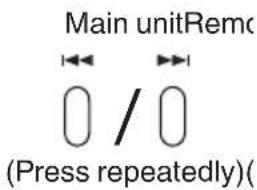
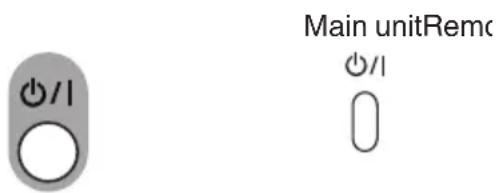
Turning on/off the System
Main unitRem

- You can also turn on the System by pressing the source buttons such as [CD] on the remote control.
Setting the clock
Set the clock to use the timer setting, etc.
1 Display the clock setting screen.

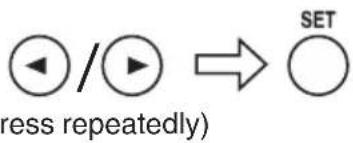
2 Select "CLOCK".
(Press repeatedly)
CLOCK
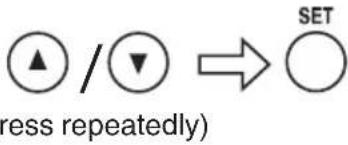
- If you have already set the clock, after pressing [CLOCK/TIMER], press [◀]/[▶] repeatedly to display "CLOCK", then press [SET].
3 Adjust the hour.
(Press repeatedly)
4 Repeat Step 3 to adjust the minute.
After adjusting the minute, "COMPLETE" is displayed and the setting is completed.
NOTE
- The clock may gain or lose 1 to 2 minutes per month. You may need to readjust the clock periodically.
- Set the clock again if the AC power cord is unplugged or the System is turned off due to the power failure.
Getting started
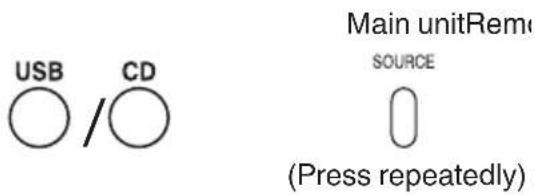
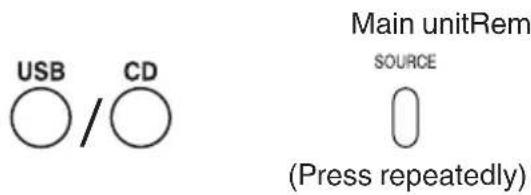
1 Select a source.
Remote control

Main unit
SOURCE

(Press repeatedly)
2 Adjust the volume.
Remote control

(Press repeatedly)
Main unit

(Press repeatedly)
VOL
07
- Adjustable range: MIN (0) to MAX (40)
To mute the sound temporarily

MUTE
To restore the sound, press the button again or [VOLUME+].
Activating/deactivating the Auto Power Save (A.P.S.)
This function turns off the System automatically if no operation is performed for 15 minutes.
1 Display the timer setting screen.

2 Select "A.P.S".
(Press repeatedly)
3 Set the item.

(Press repeatedly)

flowchart
graph LR
    A["A.P.S. ON"] --> B["A.P.S. OFF(Cancel)"]
The setting is completed when "COMPLETE" is displayed after performing the setting.
A.P.S ON:
If no operation is performed for 15 minutes in the following situations, the System turns off automatically.
- The volume level is set to "MIN" or Muting is activated.
- "USB" or "BLUETOOTH" is selected as the source, and no device is connected.
- "USB" or "CD" is selected as the source, and playback is stopped.
- "AUDIO IN" or "DIGITAL IN" is selected as the source, and there is no sound input
A.P.S OFF:
Auto Power Save is set to Off.
- Approximately 1 minute before the power is turned off, "A.P.S." starts to blink.
- The 15-minute countdown restarts when you operate any buttons.
• The initial setting is "A.P.S. ON".
Listening to iPod
- For compatible iPod, see page 36.
Connecting iPod
You can operate the iPod using the System by connecting it to the USB terminal of the System using an USB cable (supplied with iPod or commercially available).
- The "iPod" icon lights up after the cable is connected.
NOTE
- iPod will be able to charge when iPod is connected to the System.
CAUTION
- Stop playback before disconnecting the iPod. Disconnecting during playback may cause damage to the files or file system of the iPod.
- You cannot send any data to iPod from the System.
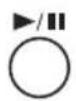
Playing back
1 Set the source to "USB".


2 Start playback.
Remote control

Main unit
iPod is turned on and starts playing.
To pause
Remote control

Main unit

To cancel pause, press the button again.
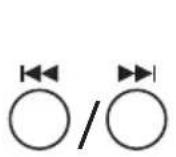
To select a track
Remote control
(Press repeatedly)
Main unit

(Press repeatedly)
- Press [▶▶▶] once to skip to the beginning of the next track.
- Press [I◄◄] to skip to the beginning of the track being played. Press twice to skip to the beginning of the previous track.
To fast reverse/forward
During playback...
• To fast reverse, press and hold [◀◀].
• To fast forward, press and hold [▶▶].
Shuffle playback

(Press repeatedly)
Each press switches the selection of iPod shuffle songs.
Repeat playback

(Press repeatedly)
Each press switches the selection of iPod repeat songs.
NOTE
- Depending on the type of iPod, iPod may operate differently.
- Sound distortion may occur when playing back audio sources with high recording levels. If distortion occurs, it is recommended to turn off the equalizer of iPod.
-
Operate iPhone or iPod touch itself in the following cases:
-
When operating the home button
- When selecting application icons on the home screen
- When dragging the slider
- For information on operating iPod, see the instruction manual for iPod.
iPod menu operation
1 Display the menu.

2 Select a menu item.
To return to the previous menu
Press [MENU].
NOTE
- If iPod/iPhone is compatible with iOS 7.0.x, the above menu operations cannot be available on the System. Operate the menu on iPod/iPhone itself.
- Depending on the type of iPod, you can operate the menu only on the screen of iPod.
Listening to a USB device/CD
Preparing a USB device/CD
To connect a USB device
- The "USB" icon lights up after it is connected.
NOTE
• Power is supplied to the USB device and the device will be charged through the System when the USB device is connected to the System.
CAUTION
- Stop playback before disconnecting the USB device. Disconnecting the USB device during playback may cause damage to the files and file system of the USB device.
- You cannot send any data from the System to the USB device.
To insert a disc
1 Set the source to "CD".


2 Insert a disc.

natural_image
Line drawing of a computer monitor with a circular dial above it, showing no text or symbols on the device itself.Insert the CD with the label side facing the same direction as the front of the System.
- The CD will be inserted automatically when you insert it in partially.
- "READING" is displayed when the CD is being read. Wait until the display disappears.
To eject a disc
Main unit

Playing back
1 Set the source to "USB" or "CD".
- "READING" is displayed when the USB device is being read. Wait until the display disappears.
2 Start playback.
Remote control

Main unit

To stop

- For MP3/WMA files, resuming playback after stopping a file starts playback from the beginning of the track (resume function). Pressing [■] again when playback is stopped cancels the resume function.
- If other source is selected, the resume function is canceled.
To pause
Remote control

Main unit

• To cancel pause and start playback, press the button again.
To select a track
Remote control
(Press repeatedly)
Main unit

(Press repeatedly)
- Press [▶▶] once to skip to the beginning of the next track.
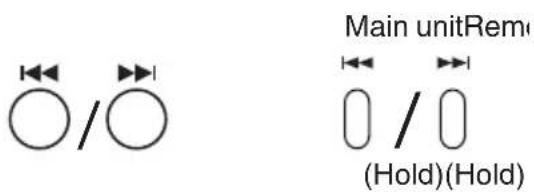
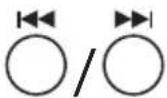
- Press [◀◀] to skip to the beginning of the track being played. Press twice to skip to the beginning of the previous track.
To select a track with the track number
Examples:
• To select track no. 3: ③
• To select track no. 17: ①⑦
• To select track no. 123: ① ② ③
To fast forward/reverse
During playback...
Remote control

(Hold)
Main unit
(Hold)
• To fast reverse, press and hold [◀◀].
• To fast forward, press and hold [▶▶▶].
To select a group (MP3/WMA only)

(Press repeatedly)
Program playback
You can program up to 30 tracks from a USB device or a disc in any desired order including the same tracks.
1 Stop playback of USB device or CD.
2 Display the program setting.
PROGRAM/TUNER MODE

- The "PGM" icon lights up.
- Pressing the button again deletes the programmed contents and program playback is canceled (to go back to normal playback).
3 Select a track to register to the program.

(Press repeatedly)
To select a track with the track number


- For operations to select the track, see "To select a track" on page 19.
4 Repeat step 3 to add other tracks to the program.
5 Start playback.
Remote control

Main unit
The tracks are played back in the programmed order.
To add tracks to a program
Select a track to add to the program. While in the stop mode

(Press repeatedly)
To select a track with the track number


NOTE
- "PGM FULL" is displayed when the 30th track is programmed, and more tracks cannot be programmed.
To delete tracks from the program
While in the stop mode
CANCEL/PTY

Each time you press the button, the last track in the program is erased.
To cancel program playback
While in the stop mode
PROGRAM/TUNER MODE

Programmed contents are deleted.
• The "PGM" icon disappears.
- In the following cases, programmed contents are deleted and program playback is canceled.
- When the power is turned off
- When the audio source is changed
- When the USB device is removed
- When the disc is ejected
NOTE
• Program playback can also be repeated.
Random playback
1 Set the source to "USB" or "CD".
2 Play back the USB device/CD.
Remote control

Main unit

3 Start random playback.

You can play back the tracks in random order.
- The "RDM" icon lights up during random playback.
- All tracks are played in random order instead of random playback within a group.
- During random playback, pressing [◀◀] does not bring you back to the previous track.
To cancel random playback
During random playback
RANDOM

The "RDM" indicator goes off.
- Random playback is also canceled in the following cases:
- When the power is turned off
- When the audio source is changed
- When the USB device is removed
- When the disc is ejected
- When playback is stopped
Repeat playback
1 Select the type of repeat mode. While in the play or stop mode

(Press repeatedly)
Each time you press the button, the setting changes as follows:
REP.: Repeats the current track.
REP.ALB* : Repeats the tracks in the current group.
REP. ALL : Repeats all the tracks on the disc or USB device.
* MP3/WMA only
2 Start playback (when playback is stopped).
Remote control

Main unit

To cancel repeat playback
Turn off the "REP" icon.

(Press repeatedly)
- Repeat playback is also canceled in the following cases.
- When the power is turned off
- When the audio source is changed
- When the USB device is removed
- When the disc is ejected
Listening to a BLUETOOTH device
You can listen to music from your BLUETOOTH device, such as portable audio player through the System.
When you connect your device for the first time, it is necessary to register (pair) your BLUETOOTH device and the System.
Connecting a BLUETOOTH device
1 Set the source to "BLUETOOTH".

"CONNECTING" flashes, and the System will reconnect automatically to the BLUETOOTH device that was last connected.
"CONNECTED" is displayed and "💡" icon (BLUETOOTH icon) lights up.
CONNECTED
- The pairing operation is necessary when you connect the BLUETOOTH device for the first time, or connect the System to the new BLUETOOTH device.
- When “icon (BLUETOOTH icon) lights up, cancel the connection once by pressing and holding the [BLUETOOTH] on the remote control or [(PAIRING) ▶/■] on the System.
“DISCONNECTED” is displayed then the display disappears.
2 Set the System to pairing standby.
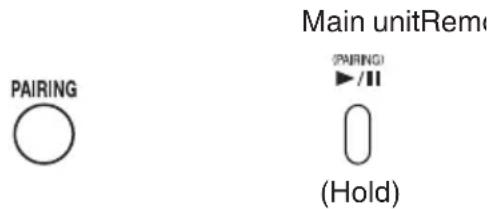
3 Turn on the BLUETOOTH function on the BLUETOOTH device.
- Select "Bluetooth" from "Settings" on the iPod touch/iPhone and Android device.
- Refer to the instruction manual of your device for further details.
4 Select "NX-W5" from the list of device.
The pairing is completed and the BLUETOOTH device is connected to the System automatically.
- When the target device requests for password during pairing, enter "0000".
5 Start playback on the BLUETOOTH device.
The sound from the BLUETOOTH device is emitted from the System.
NOTE
- Up to 9 BLUETOOTH devices can be registered. When the 10th BLUETOOTH device is registered, registration of the device with the oldest connection history is deleted.
- Some BLUETOOTH devices may not be available to the System.
Playing back
You can connect to and play back from the BLUETOOTH device that was last connected to the System.
Remote control

Main unit

To pause
Remote control
Main unit

• To cancel pause and start playback, press the button again.
To select a track
- Press [▶▶] once to skip to the beginning of the next track.
- Press [◀◀] to skip to the beginning of the track being played. Press twice to skip to the beginning of the previous track.
To fast forward/reverse
During playback...
• To fast reverse, press and hold [◀◀].
• To fast forward, press and hold [▶▶▶].
• To resume normal playback, release the button.
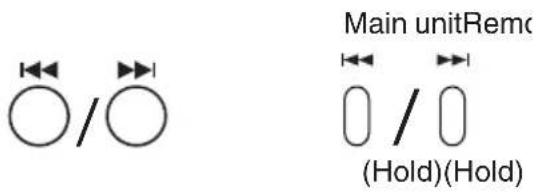
Canceling the connection
BLUETOOTH

Main unitRem


(Hold)(Hold)
DISCONNECTED
NOTE
The connection is canceled automatically in the following cases.
- Connection is canceled on the BLUETOOTH device, or BLUETOOTH function is set to OFF.
- When the System or the BLUETOOTH device is turned off.
- When the source is changed to another audio sources.
CAUTION
• To connect the device to this System, the device must be compatible with the BLUETOOTH A2DP and AVRCP profiles.
- The maximum distance for a possible BLUETOOTH connection is 10 m. The distance may be shorter depending on the usage environment.
- When the iPhone or smartphone is connected to the System via BLUETOOTH, ring alert of phone calls and mails can also be heard from the speakers of the System.
- This System is not equipped with a microphone feature. To make a call, cancel the connection with the System or use the microphone on the iPhone or smartphone.
Listening to the radio
You can listen to FM and AM broadcasting stations.
NOTE
- Connect the antenna before listening to radio broadcast. (page 11)
Searching for stations
1 Select "FM" or "AM".

Alternates between "AM" and "FM" each time you press the button.
2 Select a station.

A long press on the button activates auto tuning, and tuning will stop when it receives a broadcast station.
- To stop the search manually, press the buttons again.
- Pressing the button repeatedly changes the reception frequency in steps of 0.1 MHz for FM broadcast and in steps of 9 kHz for AM broadcast.
- "STEREO" icon lights up when stereo broadcast signal is received.
CAUTION
- No sound is heard during station tuning.
To improve the FM reception
When an FM stereo broadcast is hard to receive or noisy, select the monaural reception mode.

Each time you press the button, the setting changes.
"STEREO" icon lights up : Stereo auto
reception
"STEREO" icon goes off : Monaural reception
NOTE
- Monaural reception improves the reception but the stereo effect is lost.
Presetting stations
Up to 30 FM stations or up to 10 AM stations can be stored in the memory.
1 Tune in to a station you want to preset.
2 Display the preset setting screen.

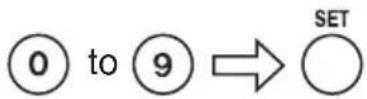
3 Select a preset number to store information.

(Press repeatedly)
• You can also select by specifying the number using the number buttons.
Examples:
• To select track no. 3: ③
• To select track no. 17: ①⑦
- If a preset number that has been registered with a station is selected, the old registered station is overwritten.
4 Store the station.

To tune in to a preset station

(Press repeatedly)
- You can also select by specifying the number using the number buttons.

Examples:
• To select track no. 3: ③
• To select track no. 17: ①⑦
CAUTION
• Depending on the signal condition, you may have reception problems even for the preset stations.
To erase the preset memory
1 Select the preset number you want to erase.
2 Erase the preset station.
While “CLEAR?” is displayed, press [SET]. The selected station is erased. The subsequent preset numbers of the stations are moved forward.
- Empty preset numbers are automatically stored as 87.50 MHz for FM and 522 kHz for AM.
Using Radio Data System
Radio Data System is a system that transmits useful information (in the form of digital data) for FM broadcasts along with the broadcast signal. Audio devices designed for Radio Data System reception can extract the information from the broadcast signal for use with various functions, such as automatic display of the station name.
Radio Data System have the following functions.
• PTY(Program TYPE Identification) Search
Automatically tunes to a station that is currently broadcasting the specified program type (genre).
• PS (Program Service Name) Display
Automatically displays the station name transmitted by the Radio Data System station.
- Radio Text function
Displays the radio text data transmitted by some Radio Data System stations when you press the [DISPLAY]. "NO TEXT" is displayed if no text data is transmitted.
NOTE
- Some functions and function names may differ in certain countries and areas.
To change the Radio Data System display information
Change the contents of the display while receiving a Radio Data System station.
During receiving a Radio Data System station

(Press repeatedly)
Each time you press the button, the setting changes as follows:
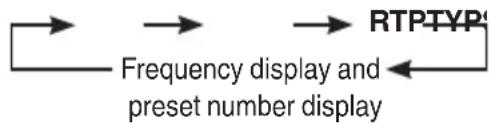
flowchart
graph LR
    A["→"] --> B["→"]
    B --> C["RTPTYP"]
    C --> D["←"]
    D --> E["Frequency display and preset number display"]
PS : Program Service name
PTY : Program TYpe
RT : Radio Text
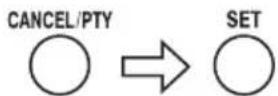
To tune by Program Type (PTY search)
This function allows you to set the System to automatically search for the stations which are currently broadcasting the type of program (genre) you want to listen to.
1 Select "FM".

2 Display the PTY code setting screen.
CANCEL/PTY

- If the current station is with Radio Data System, the program type of the station is displayed.
3 Select the program type you want to listen to.

(Press repeatedly)
- For the program type, refer to "Program type table".
4 Start searching the station.
CANCEL/PTY

NOTE
• Under certain receiving conditions, it may take more than 1 minute to complete the search.
- If the desired program type cannot be found, "NO PROGRAM" is displayed, then after several seconds the display returns to the original display.
Program type table
| Program Type Name Display | |
| News “NEWS” | |
| Current Affairs “AFFAIRS” | |
| Information “INFO” | |
| Sport “SPORT” | |
| Education “EDUCATE” | |
| Drama “DRAMA” | |
| Culture “CULTURE” | |
| Science “SCIENCE” | |
| Varied Speech “VARIED” | |
| Pop Music “POP M” | |
| Rock Music | “ROCK M” |
| Easy Music | “EASY M” |
| Light Classical Music | “LIGHT M” |
| Serious Classical Music | “CLASSICS” |
| Other Music | “OTHER M” |
| Weather | “WEATHER” |
| Finance “FINANCE” | |
| Children’s Program | “CHILDREN” |
| Social Affairs | “SOCIAL” |
| Religion “RELIGION” | |
| Phone In | “PHONE IN” |
| Travel | “TRAVEL” |
| Leisure | “LEISURE” |
| Jazz Music | “JAZZ” |
| Country Music “COUNTRY” | |
| National Music “NATION M” | |
| Oldies Music | “OLDIES” |
| Folk Music | “FOLK M” |
| Documentary | “DOCUMENT” |
Listening to an external device
Refer also to the instruction manual for the external device.
Connecting an external device
1 Set the volume level of the System to minimum.
To connect the analog terminal
2 Connect an external device to the AUDIO IN jack.

To connect the digital terminal
2 Connect an external device to the DIGITAL IN (OPTICAL) terminal.
NOTE
- When the device is connected to the digital input terminal, set the digital audio output setting for the connected device (TV, BD recorder, etc.) to "PCM".
Listening to an external device
1 Select "AUDIO IN" or "DIGITAL IN".
AUDIO IN
2 Start playback of the external device.
- Do not disconnect the digital audio player during playback. It may cause malfunction.
3 Adjust the volume.
To adjust the audio input level
Adjust the audio input level when there is a contrast between the volume of the external device connected to the AUDIO IN jack and that of other sources.

(Press repeatedly)
Press repeatedly to change the setting
LEVEL 1 : Standard audio input level
LEVEL 2 : Higher level than LEVEL 1
LEVEL 3 : Higher level than LEVEL 2
Using the timer
This System is equipped with sleep timer and playback timer (the daily timer). (Timer recording is not available with this System.)
Setting the sleep timer
The power of the System automatically turns off after the shut-off time you set has elapsed.
You can set the timer up to 90 minutes in 10-minute interval.

(Press repeatedly)
SLEEP 10
Each time you press the button, the shut-off time changes.
- While the sleep timer is set, "SLEEP" icon lights up.
- To cancel the sleep timer, select "SLEEP OFF".
To check the remaining time until the System shuts off
Press the [SLEEP] button once.
Example: the remaining time is 12 minutes
SLEEP 12
The remaining time is displayed for 5 seconds.
Setting the daily timer
Using the daily timer, you can wake up with your favorite music.
- Set the clock in advance. (page 14)
- Tune into a station, load a disc, or connect a USB device/iPod to the System, and make sure that the source works properly beforehand.
- Preset the desired station before setting the daily timer.
1 Display the timer setting screen.

2 Select and confirm on "TIMER".
(Press repeatedly)
3 Set and confirm the timer contents.
(Press repeatedly)
You can set the following items:
- Press [◀]/[▶] to select the next or previous item.
The “hour” and “minute” of the starting and ending time
- During the setting, the "TIMER ON" icon (starting time) and "TIMER OFF" icon (ending time) flashes.
Playback source
Select the source from "CD", "USB", "FM", "AM".
- When the selected source is "AM" or "FM", select the preset number.
Playback volume
The setting is completed when "COMPLETE" is displayed after performing the setting.
Continue on the next page
4 Turn off the System.
Main unitRemc

Standby indicator lights up in orange.
- The System turns on automatically and starts playback about 30 seconds before the starting time of the daily timer.
- The daily timer works only when the System is on standby.
- While the daily timer is set, "TIMER" icon lights up.
- While the daily timer is functioning, "TIMER" icon flashes.
• Once set, the daily timer works every day.
• You can not set the same time for the starting time and ending time.
To cancel the daily timer
While the System is turned on

The "TIMER" icon disappears.
To set the daily timer with the same settings again after canceling
While the System is turned on

The "TIMER" icon lights up.
Other functions
Adjusting the sound quality
Using the sound mode
Sound modes can be selected to enhance the type of music being played.
SOUND MODE

(Press repeatedly)
Example:
ROCK
Each time you press the button, the setting is changed.


To set the surround

(Press repeatedly)
Each time you press the button, the surround effect is turned on or off.
- The initial setting is "SURROUND OFF".
To increase the bass sound

(Press repeatedly)
Each time you press the button, the bass sound effect is turned on or off.
HBS OFF HBS ON
- The initial setting is "HBS OFF".
NOTE
- The sound mode, surround and bass sound (HBS) also take effects on the sounds from the headphones.
- When the sound mode is enabled, the surround or the bass sound (HBS) is canceled.
- When the surround is enabled, the sound mode is canceled.
- When the bass sound (HBS) is enabled, the sound mode is canceled.
Adjusting the display/downlight
Adjust according to your preferences or the surrounding conditions.
To turn on/off and set the brightness

(Press repeatedly)
Each time you press the button, the display and downlight turn on/off, or the brightness changes.
DIMMER OFF : Display: Bright, Downlight: Bright
DIMMER 1 : Display: Slightly dark, Downlight: Dark
DIMMER 2 : Display: Dark, Downlight: Off
- The brightness of the display and downlight changes at the same time.
- The setting will be memorized even if the System is turned off.
- The initial setting is "DIMMER OFF".
To adjust the color depth (CONTRAST) of the display window
1 Display the color depth setting screen.

"CONTRAST SET1" will be displayed.
2 Adjust the color depth (CONTRAST).
flowchart
graph LR
    A["←"] --> B["→"]
    C["(ress repeatedly)"] --> D["○"]
    E["SET"] --> F["○"]
Each time you press [◀] / [▶], the color depth (CONTRAST) of the display window changes in five levels ("CONTRAST SET1" to "CONTRAST SET5").
The setting is completed when "COMPLETE" is displayed after performing the setting.
- The display returns to the original display after about 3 seconds.
- To return to the original display while setting, press [DIMMER / CONTRAST].
- The initial setting is "CONTRAST SET3".
Changing the display information
During playback...

(Press repeatedly)
Each time you press the button, the display information changes to other information.
- The information shown on the display differs depending on the source.
- The System can display ID3 TAG VERSION1,2 (song title, artist name and album name), file name and folder name (some characters cannot be displayed. These characters may not be displayed correctly, or “*” is displayed).
- iPod cannot show the Tag data of MP3/WMA.
For audio CD
T01
0:46
: The elapsed time of the playing track
REMAIN
: The remaining time of the playing track
TOTAL
: The elapsed time of the whole CD
TOTAL REMAIN
: The remaining time of the whole CD
For MP3/WMA files
T001
0:46
: The elapsed time of the playing track
FOLDER.. FILE..
: Folder name/ file name
TAG information
: Tag information
F001 T0003
: Folder number/ file number
Compatible iPod
| Made for Version* | |
| iPod nano (7th generation) 1.0.2 | |
| iPod nano (6th generation) 1.2 | |
| iPod nano (5th generation) 1.0.2 | |
| iPod nano (4th generation) 1.0.4 | |
| iPod nano (3rd generation) 1.1.3 | |
| iPod nano (2nd generation) 1.1.3 | |
| iPod touch (5th generation) 6.1.3 | |
| iPod touch (4th generation) 6.1.3 | |
| iPod touch (3rd generation) 5.1.1 | |
| iPod touch (2nd generation) 4.2.1 | |
| iPod touch 3.1.3 | |
| iPhone 5 6.1.4 | |
| iPhone 4S 6.1.3 | |
| iPhone 4 6.1.3 | |
| iPhone 3GS 6.1.3 | |
| iPhone 3G 4.2.1 |
* Software version at the time of operation confirmation
- Reset your iPod/iPhone if your iPod/iPhone is not playing back correctly. (Please visit Apple's homepage for information about resetting your iPod/iPhone.)
- For details on the iPod/iPhone, check Apple's web site. http://www.apple.com
- To check the latest supporting status of the iPod/iPhone, refer to the product information on our home page.
playable BLUETOOTH devices
- To connect the device to this System via BLUETOOTH, the device must be compatible with the A2DP and the AVRCP profiles.
playable discs/files
- We do not guarantee the operation and sound quality of CDs that are not compliant with the CD-DA standard
Before playing a CD, look for a "CD logo mark", and read through the precautions on the package to check whether it complies with the CD standard. - Playback of a CD on the System may fail due to the CD's characteristics, recording condition, scratches or dirt on it, or when there is dirt or condensation on the lens of the player.
- Read through the precautions on the use of the CD carefully.
- The System does not support the display of CD texts.
| Discs CDs | with any of the following marks are playable.   |
| Files | CD-R or CD-RW in the audio CD formatCD-R/CD-RW or the MP3/WMA files of USB devices |
Important for USB mass storage class devices
- It is recommended that you use a USB device with a capacity of 16 GB or smaller.
- The more files there are in a USB device, the longer it takes for the System to load them.
- Deactivate the security function of the USB device before connecting.
- When connecting with a USB cable, use a USB 2.0 cable less than 1 m in length.
- You cannot connect a computer to the USB MEMORY terminal of the System.
- Do not use a USB hub.
- If the USB device is divided into multiple partitions, the System recognizes only the first partition.
- Power is supplied to the USB device and the device will be charged through the System when the USB device is connected to the System.
- Electrostatic shock at connecting a USB device may cause abnormal playback of the device. In this case, disconnect the USB device then reset this System and the USB device.
- JVC bears no responsibility for any loss of data on the USB mass storage class device while using this System.
- Some USB devices may not be recognized or may not operate properly.
- For information on operating the USB device, see the instruction manual for the USB device.
Precautions on CD-R/CD-RW
For CD-Rs/CD-RWs edited by the user, only finalized CDs can be played back on the System.
- To create a CD-R/CD-RW disc, set the format to "ISO 9660 Level 1". Do not use discs that are packet-written (UDF format).
- For CD-RW that have been recorded in the format other than CD-DA format or MP3/WMA files, erase all tracks before listening to. If the disc is used before erasing, the loud sound is output suddenly, it might cause the failure such as damage the speaker.
- For CD-Rs/CD-RWs that contain MP3/WMA files, it may take a longer time to read the disc compared to normal audio discs. (The amount of reading time needed varies with the configuration of the folders and files.)
- If CD-R/CD-RW that is printable on the label side is used, the disc may not be ejected from the System due to the label side is sticked to the System. Using such discs may cause malfunction, do not use them.
Precautions on MP3/WMA files
- Playable MP3/WMA files are files with the extension of <.mp3> or <.wma> .
- The System can play back MP3/WMA files recorded with the following sampling frequency and bitrate.
Sampling frequency: 32/44.1/48 kHz
Bitrate: 32 kbps to 320 kbps
- This System can recognize up to 255 folders and 3,000 files on a USB device.
- DRM (Digital Rights Management) files cannot be played back.
- The System cannot play back files larger than 2 GB.
- Some MP3/WMA files may not be playable due to the condition or method of recording. The System will skip the playback of these files.
-
Playing order of MP3/WMA files (Folders without MP3/WMA files are ignored.)
-
Groups are played in creation order. In a group, tracks are played in created order.
- The playing order may be changed if you change a folder name (group name) or file name (track name) on the PC.
- The maximum number of displayable characters in the System is as follows.
- Folder name: 16 characters
- File name: 64 characters (including the extension)
- Tag display (track title/artist/album title): MP3 ID3 tag/WMA contents property: 64 characters (compatible with ID3 v1.0/ 1.1/ 2.2/ 2.3/2.4)
- Some characters cannot be displayed. These characters may not be displayed correctly, or “*” is displayed.
Maintenance
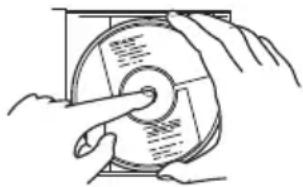
Care of compact discs
To take out from the case
natural_image
Illustration of hands operating a CD or DVD disc with a pointer (no text or symbols visible)To place back to the case
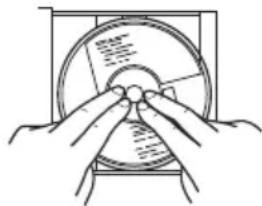
natural_image
Illustration of hands holding a circular object with internal components, no text or symbols present- Do not write on either side of the disc, particularly the non-label side from which signals are read. Do not mark this surface.
- Do not bend the disc.
- Do not play discs of special shapes (heart, flower, etc). It may cause malfunctions.
- If a CD is dusty, clean it with a soft, dry cloth and remove dirt or fingerprints.
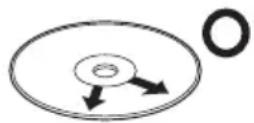
Straight out from the centre, along the radius
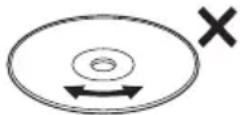
Consecutive scratches can cause noise or mistracking.
- Do not wipe it with thinner or benzine.
Trademarks
- “Made for iPod” and “Made for iPhone” mean that an electronic accessory has been designed to connect specifically to iPod or iPhone, respectively, and has been certified by the developer to meet Apple performance standards. Apple is not responsible for the operation of this device or its compliance with safety and regulatory standards. Please note that the use of this accessory with iPod or iPhone may affect wireless performance.
- iPhone, iPod, iPod classic, iPod nano and iPod touch are trademarks of Apple Inc., registered in the U.S. and other countries.
- Microsoft and Windows Media are either registered trademarks or trademarks of Microsoft Corporation in the United States and/or other countries.
- The Bluetooth® word mark and logos are registered trademarks owned by Bluetooth SIG, Inc. and any use of such marks by JVC KENWOOD Corporation is under license.
• Android is a trademark of Google Inc..
Troubleshooting
If you are having a problem with your System, check this list for a possible solution before calling for service.
If the following measures do not resolve the problems:
The System works using a built-in microprocessor. If buttons are not operative, disconnect the AC power cord from the wall outlet, wait for a while, then connect the cord again.
General
Power does not come on.
→ Connect the AC adapter correctly.
The System turns off automatically.
→ Auto power save function is functioning. (page 15)
The buttons do not function.
→ Reset the System. (page 41)
Adjustments or settings are suddenly canceled before you finish.
→ There is a time limit. Repeat the procedure.
Unable to operate the System from the remote control.
→ The path between the remote control and the remote sensor on the System is blocked.
→ Batteries of the remote control are exhausted. Change the batteries.
No sound is heard.
→ Adjust the volume.
→ Cancel muting.
→ Disconnect the headphones.
"0:00" blinks on the display.
→ Set the clock again. (page 14)
No audio output from the digital input terminal (DIGITAL IN).
→ Connect the devices correctly.
→ Check to ensure that the digital audio output setting of the connected device is set to "PCM".
iPod operations
iPod does not play.
→ Connect the USB cable correctly.
→ Check the compatibility of your iPod. (page 36)
→ Battery of iPod are exhausted. Charge the battery of iPod.
→ Reset your iPod after disconnecting it from the System, unplug the power cord of the System, and plug it in again. (For details on resetting your iPod, please visit Apple's official website.)
USB device/CD
Unable to eject a disc.
→ Press [▲] until "EJECT" is displayed.
→ If CD-R/CD-RW that is printable on the label side is used, the disc may not be ejected from the System due to the label side is sticked to the System.
The disc/USB device does not play.
→ Connect the USB devices correctly.
→ Turn on the power of the USB audio player.
→ Try using a different USB flash memory device.
→ Insert the disc with the label side facing you.
→ The disc or lens is scratched or dirty. Clean the disc or lens.
→ Playback is not possible if an audio file is corrupted.
→ Check whether the audio file format is supported by the System.
The disc is recorded using “packet writing (UDF file unit)” and cannot be played back.
MP3/WMA groups and tracks are not played back as you expect.
→ The playback order is determined by the writing software used for recording the groups and tracks.
The sound from the USB device or disc is choppy.
→ The disc is dirty or scratched. Clean or replace the disc.
→ Play MP3/WMA files that are properly written.
→ Turn off the System, disconnect and reconnect the USB device.
Tag information is not displayed correctly
→ Check whether the tag information can be displayed on the System. (page 35)
Tuner operations
No broadcast is heard.
→ Connect the antenna correctly. (page 11)
For AM broadcast, place the AM loop antenna as near as possible to the window and adjust the antenna direction until you obtain the best reception.
When a FM antenna is used, extend and secure the wire to the position where you obtain the best reception.
→ Adjust the frequency to the station you want to listen to.
Hard to listen to broadcasts because of noise.
→ Adjust the antenna.
→ Turn off and on the System.
→ Place the System away from the television.
BLUETOOTH device
Unable to pair.
→ Set the System in pairing standby, and perform pairing from the target device, such as a smartphone. (page 23)
Unable to connect to BLUETOOTH device.
→ Check that the BLUETOOTH function is set to ON.
→ Check to ensure that the BLUETOOTH device supports the BLUETOOTH A2DP profile.
Unable to operate the BLUETOOTH device.
→ Check to ensure that the BLUETOOTH device supports the BLUETOOTH AVRCP profile.
The sound is choppy. Noise is generated.
The System is out of the BLUETOOTH range limitation, or there may be an equipment interfering with the radio waves between the System and the BLUETOOTH device. Try placing the BLUETOOTH device nearer to the System, or change location.
Timer operations
Unable to set the sleep timer
→ The daily timer is functioning. While the daily timer is functioning, sleep timer does not work.
The daily timer does not work.
The clock needs to be set. Clock setting is canceled when the AC power cord is unplugged from the AC outlet, causing the daily timer to stop functioning.
→ The System is turned on. The daily timer functions only when the System is turned off.
Resetting the System
If the System cannot be oprated or the display window is shown incorrectly, reset the System using the following procedures.
After resetting, the contents of the settings will be restored to the factory default.
1 Turn off the System.
2 Resetting the System.

Press and hold the two buttons at the same time until "FACTORY RESET" is dsiplayed.
3 When "RESET FINISHED" is displayed, unplug the AC power cord from the wall socket.
The System have been reset.
4 Plug the AC power cord of the System into the outlet.
Amplifier
Maximum useful output: 20 W + 20 W (1 kHz, 10% THD, 8Ω)
CD player
playable files: Audio CD, MP3, WMA
Tuner
AM tuning range: 522 kHz - 1 629 kHz
FM tuning range: 87.50 MHz - 108.00 MHz
Antenna: Wire antenna
Input/output terminals
USB: Output power:
DC 5 V 1 A
Specifications: Compatible with USB 2.0 Full Speed
Compatible devices: Mass storage class
Compatible file systems: FAT16, FAT32
playable files: MP3, WMA
DIGITAL IN: OPTICAL x 1
AUDIO IN: Stereo mini (ø 3.5 mm) x 1
LEVEL 1: 1 V/30 kΩ
LEVEL 2: 500 mV/30 kΩ
LEVEL 3: 250 mV/30 kΩ
Version: BLUETOOTH Ver. 3.0
Output power: Class 2
Maximum service area: About 10 m
(Communication range may vary depending on the environmental conditions.)
Frequency band: 2.4 GHz range
Compatible A2DP (Advanced Audio Distribution Profile)
BLUETOOTH profile: AVRCP (Audio/Video Remote Control Profile)
General
Supplied AC adapter Input: AC 100 V - 240 V \~,50 Hz/60 Hz,1.5 A - 0.5 A
(AA-R1809):
Output: DC 18 V 3.35 A
Power consumption: 18 W (during operation)
1.00 W and below (during standby)
Dimensions: 325 mm × 211 mm × 150 mm (W x H x D)
Weight: Approx. 3.8 kg
Speakers
System: Full range Bass-Reflex type
Speakers unit: 7 cm cone speaker
Impedance: 8 Ω
Maximum input: 20 W
Specifications and appearance of this unit are subject to change without prior notice for improvement.
JVC
KOMPAKT-KOMPONENTEN-SYSTEM
NX-W5W/NX-W5B
natural_image
Line drawing of a desktop computer with monitor and keyboard (no text or symbols)Made for

iPod

iPhone


Bluetooth®
MP3/WMA Radio Data System
BEDIENUNGSANLEITUNG
natural_image
Front view of a smartphone with blank screen (no visible text or symbols)Seite 16
natural_image
Illustration of a laptop with musical notes on top (no text or symbols)natural_image
Illustration of a transmission tower with two stars above it (no text or symbols)Seite 26
Einleitung
natural_image
Front view of a JVC remote control with circular keypad and indicator lights (no text or symbols on the device itself)Netzkabel (1)
Wechselstromadapter AA-R1809 (1)
natural_image
Line drawing of a rectangular device connected to a coiled cable with a terminal connector (no text or symbols)HINWEIS
② BLUETOOTH, CD, USB, TUNER, AUDIO IN, DIGITAL IN
(Seiten 16, 19, 23, 26, 30)
③
(Seiten 16, 19, 23, 26, 30)
⑧ VOLUME -/+ Taste
(Seite 14)
① FM 75Ω COAXIAL Antennenanschluss
(Seite 11)
② AM LOOP Antennenanschluss
(Seite 12)
③ DIGITAL IN (OPTICAL)-Anschluss
(Seite 30)
④ DC IN-Buchse
(Seite 13)
Anzeige

flowchart
graph LR
    A["A.P.S. ON"] --> B["A.P.S. OFF(Abbrechen)"]
natural_image
Line drawing of a computer monitor with a circular dial above it, showing no text or symbols on the device itself.natural_image
Illustration of hands operating a CD or DVD disc with a knob (no text or symbols visible)natural_image
Illustration of hands holding a circular object with internal components, no text or symbols presentDIGITAL IN: OPTICAL x 1
AUDIO IN: Stereo-Ministecker (ø 3,5 mm) x 1
STUFE 1: 1 V/30 kΩ
STUFE 2: 500 mV/30 kΩ
STUFE 3: 250 mV/30 kΩ
PHONES: Stereo-Ministecker (ø 3,5 mm) x 1
BLUETOOTH
Version: BLUETOOTH Ver. 3.0
natural_image
Line drawing of a portable electronic device with a control panel and JVC remote (no text or symbols)Made for

iPod

iPhone


Bluetooth®
MP3/WMA
Radio Data System
MANUEL D'INSTRUCTIONS
natural_image
Illustration of a multi-tiered electronic device with musical notes and a control panel (no text or symbols)natural_image
Illustration of a transmission tower with two stars above it (no text or symbols)Page 26
Introduction
Fonction Auto Power Save (APS)
Activation/désactivation du Auto Power Save (A.P.S.) 15
Écoute de iPod 16
natural_image
Line drawing of a rectangular device connected to a coiled cable with a terminal connector (no text or symbols)REMARQUE
③ ⏻/I Touche (alimentation)
(page 14)
④ Touche ◀◀◀ / ▶▶▶
(pages 16, 19, 24, 26)
⑤ Touche ■
(page 19)
⑥ Touche (PAIRING) ▶/II
(pages 16, 19, 23)
⑦ Touche SOURCE
(pages 16, 19, 23, 26, 30)
⑧ Touche VOLUME -/+
(page 14)
① FM 75Ω COAXIAL borne d'antenne
(page 11)
② AM LOOP borne d'antenne
(page 12)
③ Borne DIGITAL IN (OPTICAL)
(page 30)
④ Prise DC IN
(page 13)
Affichage
⑫ Affichage principal
Activation/désactivation du Auto Power Save (A.P.S.)
flowchart
graph LR
    A["A.P.S. ON"] --> B["A.P.S. OFF(Annuler)"]
natural_image
Line drawing of a computer monitor with a circular dial above it, showing no text or symbols on the device itself.natural_image
Illustration of hands operating a circular disc with a pointer (no text or symbols visible)
natural_image
Illustration of hands holding a circular object with a pointer, no text or symbols presentProfile BLUETOOTH A2DP (Advanced Audio Distribution Profile)
natural_image
Line drawing of a portable electronic device with a JVC remote control (no text or symbols on the device itself)Made for

iPod

iPhone


Bluetooth®
MP3/WMA
Radio Data System
GEBRUIKSAANWIJZING
natural_image
Simple line drawing of a handheld device with a screen and control buttons (no text or symbols)Pagina 23
natural_image
Illustration of a piano with musical notes on top, no text or symbols presentnatural_image
Illustration of a CD and a USB flash drive (no text or symbols)Pagina 18
natural_image
Illustration of a transmission tower with power lines above (no text or symbols)Pagina 26
Introductie
natural_image
Front view of a JVC remote control with circular keypad and indicator lights (no text or symbols on the device itself)Netsnoer (1)
AC-adapter
AA-R1809 (1)

natural_image
Line drawing of a rectangular device connected to a coiled cable with a terminal connector (no text or symbols)AM-raamantenne (1)FM-ai
OPMERKING
② BLUETOOTH, CD, USB, TUNER, AUDIO IN, DIGITAL IN
(pagina's 16, 19, 23, 26, 30)
③
(pagina's 16, 19, 24, 26)
④ PROGRAM / TUNER MODE
(pagina's 20, 26)
⑤ RANDOM
(pagina's 17, 21)
⑥ REPEAT / MEMORY
(pagina's 17, 22, 27)
⑦ CANCEL/PTY
(pagina's 27, 29)
⑧ HBS
(pagina 33)
⑨ SOUND MODE
(pagina 33)
⑩ SURROUND
(pagina 33)
⑪ DIMMER / CONTRAST
(pagina 34)
⑫ PAIRING
(pagina 23)
⑬ DISPLAY
(pagina's 28, 35)
⑭ ▶ / ||
(pagina's 16, 19, 24)
15
(pagina 19)
⑯ VOLUME +/-
(pagina 14)
⑰ MUTING
(pagina 15)
⑱ ▲/▼/◄/►/SET
(pagina's 14, 17, 27, 30, 31, 34)
⑲ FOLDER/PRESET
(pagina's 19, 27)
⑳ SLEEP
(pagina 31)
②1 TIMER ON/OFF
(pagina 32)
⑳ CLOCK/TIMER
(pagina's 14, 31)
②3 Cijfertoetsen
(pagina's 19, 27)
(pagina's 16, 19, 24, 26)
⑤ ■-toets
(pagina 19)
⑥ (PAIRING) ▶/■-toets
(pagina's 16, 19, 23)
⑦ SOURCE-toets
(pagina's 16, 19, 23, 26, 30)
⑧ Toets VOLUME -/+
(pagina 14)
① FM 75Ω COAXIAL antenne-aansluiting (pagina 11)
② AM LOOP antenne-aansluiting (pagina 12)
③ DIGITAL IN (OPTICAL)-aansluiting (pagina 30)
④ DC IN-stekker
(pagina 13)
Display

① PGM (programma) indicator
(pagina 20)
2 Selecteer "CLOCK".

2 Selecteer "A.P.S".

flowchart
graph LR
    A["A.P.S. ON"] --> B["A.P.S. OFF(Annuleren)"]
natural_image
Line drawing of a computer monitor with a circular dial above it, showing no text or symbols on the device itself.1 Stel de bron op "USB" of "CD" in.

1 Stel de bron op "USB" of "CD" in.

1 Selecteer "FM" of "AM".

1 Selecteer "AUDIO IN" of "DIGITAL IN".
natural_image
Illustration of hands inserting a circular component into a disc (no text or symbols visible)
natural_image
Illustration of hands holding a circular object with internal components, no text or symbols present- “Made for iPod” and “Made for iPhone” mean that an electronic accessory has been designed to connect specifically to iPod or iPhone, respectively, and has been certified by the developer to meet Apple performance standards. Apple is not responsible for the operation of this device or its compliance with safety and regulatory standards. Please note that the use of this accessory with iPod or iPhone may affect wireless performance.
- iPhone, iPod, iPod classic, iPod nano and iPod touch are trademarks of Apple Inc., registered in the U.S. and other countries.
- Microsoft en Windows Media zijn gedeponeerde handelsmerken of handelsmerken van Microsoft Corporation in de Verenigde Staten en/of andere landen.
- Het Bluetooth®-woordmerk en logo's zijn geregistreerde handelsmerken en eigendom van Bluetooth SIG, Inc. en elk gebruik van dergelijke merken door JVC KENWOOD Corporation is onder licentie.
- Android is een handelsmerk van Google Inc..
Probleemoplossing
Maximale nuttige output: 20 W + 20 W (1 kHz, 10% THD, 8 Ω)
Cd-speler
Afspeelbare bestanden: Audio CD, MP3, WMA
Tuner
AM-afstembereik: 522 kHz - 1.629 kHz
FM-afstembereik: 87,50 MHz – 108,00 MHz
Antenne: Draadantenne
DIGITAL IN: OPTICAL x 1
natural_image
Line drawing of a desktop computer with monitor and keyboard (no text or symbols)Made for

iPod

iPhone


Bluetooth®
MP3/WMA
Radio Data System
ISTRUZIONI
natural_image
Illustration of a piano with musical notes on top (no text or symbols)natural_image
Illustration of a CD and a rectangular electronic device (no text or symbols)Pagina 18
natural_image
Illustration of a tall electricity pylon with grid windows and two lightning bolts above (no text or symbols)Pagina 26
Introduzione
natural_image
Front view of a JVC remote control with circular keypad and indicator lights (no text or symbols on the device itself)natural_image
Line drawing of a rectangular device connected to a coiled cable with a terminal connector (no text or symbols)Antenna loop AM (1) Anter

NOTA
② BLUETOOTH, CD, USB, TUNER, AUDIO IN, DIGITAL IN
(page 16, 19, 23, 26, 30)
③
(page 16, 19, 24, 26)
④ PROGRAM / TUNER MODE
(page 20, 26)
⑤ RANDOM
(page 17, 21)
⑥ REPEAT / MÉMORY
(page 17, 22, 27)
⑦ CANCEL/PTY
(page 27, 29)
⑧ HBS
(pagina 33)
⑨ SOUND MODE
(pagina 33)
⑩ SURROUND
(pagina 33)
⑪ DIMMER / CONTRAST
(pagina 34)
⑫ PAIRING
(pagina 23)
⑬ DISPLAY
(page 28, 35)
⑭ ▶ / ||
(page 16, 19, 24)
15
(pagina 19)
⑯ VOLUME +/-
(pagina 14)
⑰ MUTING
(pagina 15)
⑱ ▲/▼/◄/►/SET
(page 14, 17, 27, 30, 31, 34)
⑲ FOLDER/PRESET
(page 19, 27)
⑳ SLEEP
(pagina 31)
②1 TIMER ON/OFF
(pagina 32)
⑳ CLOCK/TIMER
(page 14, 31)
(page 16, 19, 24, 26)
⑤ Pulsante ■
(pagina 19)
⑥ Pulsante (PAIRING) ▶/II
(page 16, 19, 23)
⑦ Pulsante SOURCE
(pagine 16, 19, 23, 26, 30)
⑧ Pulsante VOLUME -/+
(pagina 14)
⑨ ▲ pulsante (Espulsione CD)
(pagina 18)
⑩ Display
① FM 75Ω COAXIAL Terminale antenna (pagina 11)
② AM LOOP terminale antenna
(pagina 12)
③ Terminale DIGITAL IN (OPTICAL) (pagina 30)
④ Presa jack DC IN (pagina 13)
Display

Antenna loop AM inclusa
flowchart
graph LR
    A["A.P.S. ON"] --> B["A.P.S. OFF(Annulla)"]
natural_image
Line drawing of a computer monitor with a circular dial above it, showing no text or symbols on the device itself.flowchart
graph TD
    A["0"] --> B["a"]
    C["9"] --> D["SET"]
- Display PS (Program Service Name)
natural_image
Illustration of hands using a rotary tool to press a circular component (no text or symbols visible)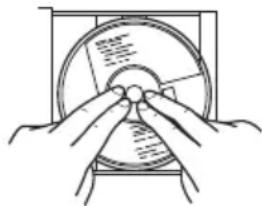
natural_image
Illustration of hands holding a circular object with a pointer, no text or symbols presentDIGITAL IN: OPTICAL x 1
AUDIO IN: Mini stereo (ø 3,5 mm) x 1
LIVELLO 1: 1 V/30 kΩ
LIVELLO 2: 500 mV/30
kΩ
LIVELLO 3: 250 mV/30
kΩ
PHONES: Mini stereo (ø 3,5 mm) x 1