KM 34 - Coffee machine Petra Electric - Free user manual and instructions
Find the device manual for free KM 34 Petra Electric in PDF.
User questions about KM 34 Petra Electric
0 question about this device. Answer the ones you know or ask your own.
Ask a new question about this device
Download the instructions for your Coffee machine in PDF format for free! Find your manual KM 34 - Petra Electric and take your electronic device back in hand. On this page are published all the documents necessary for the use of your device. KM 34 by Petra Electric.
USER MANUAL KM 34 Petra Electric
.....Optional accessories. 15
Powder cartridge PK 30 15
Safety information 15
Prior to first use 16
..Indicators 16
... Placement 16
....Start-up 16
Coffee 17
.....Coffee soft pads. 17
...Pad cartridge 17
Brewing 18
....Adjusting the coffee quantity 18
Notes on the programming mode. 18
Resetting to the factory-set state 18
Energy-saving functions 19
.....Eco-brewing mode 19
...Sleep mode 19
.....Automatic shut-down 19
More functions 19
Rinsing process 19
Decalcification indicator 19
....Setting the water hardness 20
Decalcification 20
Decalcifier 20
Decalcification programme 20
Cleaning and service 21
.....Pad cartridge 21
....Outlet cassette with filter insert 21
Help with problems 22
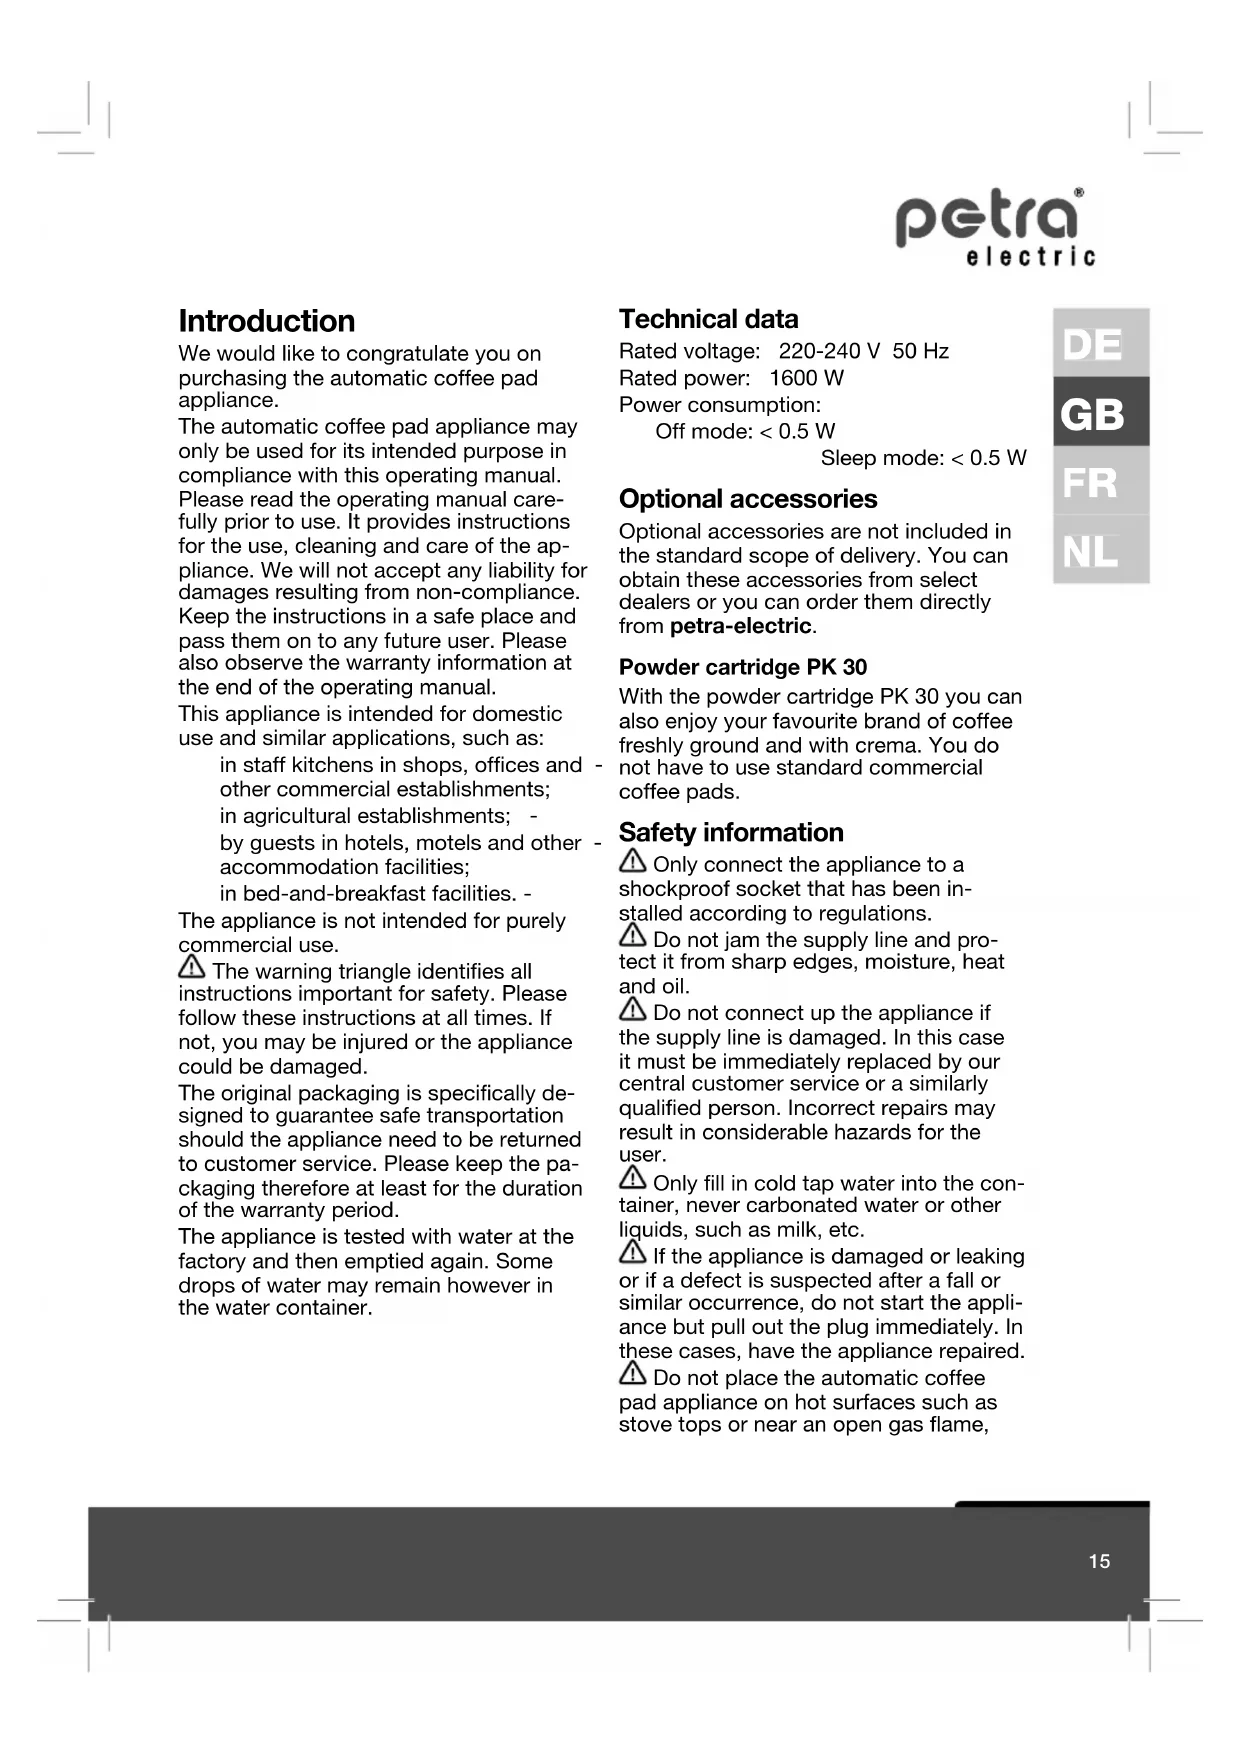
Introduction
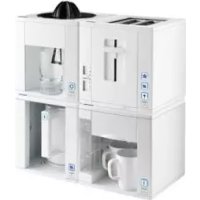
We would like to congratulate you on purchasing the automatic coffee pad appliance.
The automatic coffee pad appliance may only be used for its intended purpose in compliance with this operating manual. Please read the operating manual carefully prior to use. It provides instructions for the use, cleaning and care of the appliance. We will not accept any liability for damages resulting from non-compliance. Keep the instructions in a safe place and pass them on to any future user. Please also observe the warranty information at the end of the operating manual.
This appliance is intended for domestic use and similar applications, such as:
in staff kitchens in shops, offices and other commercial establishments; in agricultural establishments; by guests in hotels, motels and other accommodation facilities; in bed-and-breakfast facilities.
The appliance is not intended for purely commercial use.
The warning triangle identifies all instructions important for safety. Please follow these instructions at all times. If not, you may be injured or the appliance could be damaged.
The original packaging is specifically designed to guarantee safe transportation should the appliance need to be returned to customer service. Please keep the packaging therefore at least for the duration of the warranty period.
The appliance is tested with water at the factory and then emptied again. Some drops of water may remain however in the water container.
Technical data
Rated voltage: 220-240 V 50 Hz
Rated power: 1600 W
Power consumption:
Off mode: < 0.5 W
Sleep mode: < 0.5 W
Optional accessories
Optional accessories are not included in the standard scope of delivery. You can obtain these accessories from select dealers or you can order them directly from Petra-electric.
Powder cartridge PK 30
With the powder cartridge PK 30 you can also enjoy your favourite brand of coffee freshly ground and with crema. You do not have to use standard commercial coffee pads.
Safety information
Only connect the appliance to a shockproof socket that has been installed according to regulations.
Do not jam the supply line and protect it from sharp edges, moisture, heat and oil.
Do not connect up the appliance if the supply line is damaged. In this case it must be immediately replaced by our central customer service or a similarly qualified person. Incorrect repairs may result in considerable hazards for the user.
Only fill in cold tap water into the container, never carbonated water or other liquids, such as milk, etc.
If the appliance is damaged or leaking or if a defect is suspected after a fall or similar occurrence, do not start the appliance but pull out the plug immediately. In these cases, have the appliance repaired.
Do not place the automatic coffee pad appliance on hot surfaces such as stove tops or near an open gas flame,
as this may cause the housing to melt. Watersensitive surfaces are unsuitable as standing areas, as they may be damaged by water spray.
This appliance is not intended to be used by persons (including children) with limited physical, sensory or intellectual faculties or who lack experience and/or knowledge, unless they are supervised by a person responsible for their safety or have received instructions on how to use the appliance.
Please make sure that children do not have an opportunity to play with the appliance.
Pull the power plug if you do not intend using the appliance for an extended period.
Risk of scalding due to hot water and steam. Please observe the information in this operating manual when using the appliance.
Risk of freezing! After this appliance has been vented, i.e. filled with water for the first time, it may only be used and stored in frostfree areas. The appliance could otherwise be damaged. Damage caused by freezing is not covered by the warranty.
Prior to first use
Indicators
Low water indicator
Flashing yellow
Fill the water container (5)
Ready to brew indicator
Flashing green
- Start venting or rinsing
- Programming mode active
Flashing green
- Ready to brew
- Brewing or rinsing function active Flashing red
- Appliance is heating up
Flashing red
Energy-saving mode active
Decalcification indicator
Flashing yellow
- Decalcification required
Flashing yellow
- Decalcification programme active
Yellow lightning symbol
- Water hardness setting
Placement
Wind up and store the section of the 1. power cable not in use on the underside of the appliance.
Stand the appliance on a solid surface 2. that is not sensitive to water.
The appliance may not be operated in locations that are higher than 1500 m above sea level.
Connect the power plug to a shock-3. proof socket.
Start-up
Switch on the appliance by pressing 1. the ON/OFF button (8). As the water container (5) is still empty, the low water indicator (10) flashes yellow.
Fill the water container with cold tap 2. water up the its max mark.
Never fill warm, carbonated water or other liquids, such as milk, etc. into the container.
Place the water container (5) onto the 3. appliance. Within a short period the ready to brew indicator flashes green.
Ensure that the empty pad cartridge (4) 4. is inserted and turn the control knob (7) to the position .
Note: You can only turn the control knob (7) to this position if the pad cartridge is inserted (4).
Place two large cups next to each other 5. onto the grate (1).
Press one of the two start buttons (9) or (13) to activate the venting function. During start-up, the number of rinsing cycles required is established electronically. If several rinsing cycles are necessary, each cycle is interrupted after 45 seconds and the ready to brew indicator (11) flashes green again. If necessary, empty the collecting ves-7. Sel and press one of the two start buttons (9) or (B) again.
As soon as the appliance is sufficient-8. ly rinsed, the ready to brew indicator (11) lights up red and the water is heated. Turn the control knob (7) to its home position O.
Do not interrupt the rinsing cycles. Do not remove the water container (5) and do not pull out the power plug; otherwise you will need to restart the start-up process.
Coffee
Coffee soft pads
You can use all conventional coffee soft pads with an outer diameter of 7 cm (coffee quantity of approx. 7 g). Coffee pads with a smaller diameter do not deliver the best coffee. Hard pads offered for espresso machines and pads with additives for cappuccino and such cannot be used.
Never fill damaged pads, loose coffee powder or instant coffee into the pad cartridge (4), as it will clog and block the control knob (7) so that the pad cartridge (4) can no longer be removed. Should this happen nevertheless, please read the instructions in the section "Help with problems".
The quantity of coffee powder in a pad is optimised for one cup of 125ml . The appliance is set at the factory for the following quantities:
Start button (9) approx. 125 ml ideal for 1 pad
Start button (13) approx. 250 ml ideal for 2 pads
You can change the strength of the coffee by varying the filling quantity per cup according to your personal taste and requirements. You will find the detailed instructions for this in the section "Programming mode".
Pad cartridge
Turn the control knob (7) to position and directly back to home position O. The will cause the pad cartridge (4) to be pushed slightly out of the brewing chamber, making it easier to remove. The pad cartridge (4) can be used from both sides. The side marked with is intended for one coffee pad and the side marked with ② is for two coffee pads.
The more carefully you insert the coffee pads, the better the coffee will be. Therefore we recommend that you adhere to the following instructions:
Before inserting the coffee pad, distri-bute the powder in the pad evenly up to the edge.
- Making coffee with one coffee pad: Insert the coffee pad and tap it lightly into place with your finger tips so that a small indentation develops in its centre. Ensure that the paper edge of the coffee pad lies flat in the recess of the pad cartridge (4) without projecting outwards or folding inwards.
- Making coffee with two coffee pads: Press the bottom pad tightly into the recess in the pad cartridge (4), causing its paper edge to fold upwards. Then add the second coffee pad following the procedure described above for one coffee pad.
- When pushing the pad cartridge (4) into the appliance, make sure that the pad does not shift, otherwise the seal will not work reliably.
Brewing
Push the pad cartridge (4) into the bre-1. wing chamber as described above and turn the control knob (7) as far as possible to the right towards
Place one cup in centre position, or 2. two cups next to each other, onto the grate (1).
Wait until the ready to brew indicator (11) lights up green.
Depending on whether you have pre-4.
pared the appliance for one or two
cups, press the start button (9) or
(13). The ready to brew indicator (11) lights up green during brewing.
Pre-brew function: Initially only a small amount of water is pumped through for prebrewing. The brewing cycle proceeds after a short break during which the coffee powder is allowed to soak. This generates an especially intensive aroma.
If you want to cancel the brewing pro-5. cess prematurely, press the start button again.
Turn the control knob (7) back to home 6. position O as soon as the coffee has been let out.

Advice
- Stir the coffee prior to consumption. This will produce coffee of uniform strength throughout the cup.
Remove used coffee pads from the pad - cartridge (4) as soon as possible for hygienic reasons.
Carefully close the pad package to pre-vent loss of aroma.
Fill in fresh tap water every day. Briefly rinse the water container (5) first. Then start a rinsing cycle.
Adjusting the coffee quantity
The automatic coffee pad appliance features a convenient function for programming the required quantity of coffee in
dividually for each start button (9) or (13) independently of each other. This enables you to change the strength of the coffee according to your personal taste and requirements.
Insert the pad as described above and 1. turn the control knob (7) as far as possible to the right towards . Then wait until the ready to brew indicator (11) lights up green.
2. Keep the start button you want to programme, (9) or (13), pressed for 3 to 4 seconds until the ready to brew indicator (11) flashes green. The programming mode is now active during brewing. Observe the cup being filled. When the required quantity is obtained, press the same start button again. The brewing will stop and the brewing time (ON period of the pump) is programmed. Every further brewing with this start button will now be carried out with the programmed brewing time. The quantity of brewed coffee may deviate slightly according to the quality of the coffee powder used.
Notes on the programming mode
The programming mode is activated for approx. 30 seconds after pressing start button , or 60 seconds after pressing start button . If you do not press the relevant start button before the brewing cycle is ended automatically the maximum possible filling quantity will be programmed.
Resetting to the factory-set state
To reset the filling quantity to the factory-set state, proceed as follows:
- Switch off the appliance.
- Keep both start buttons (9) and (13) pressed for 3 to 4 seconds until all indicators light up briefly.
Energy-saving functions
Your automatic coffee pad appliance is equipped with several energy-saving functions.
Eco-brewing mode
If you intend to switch off the appliance after one brewing cycle, you can optionally select the eco-brewing mode. This will prevent the appliance from heating up again unnecessarily.
To activate the eco-brewing mode, briefly press both the start button and the ON/OFF button (8) simultaneously. The ready to brew indicator (11) lights up green during brewing as usual, however it will then flash red to indicate that the appliance will be switched off subsequently.
Sleep mode
If the appliance is not used for longer than approx. 5 minutes, the sleep mode is automatically activated. The ready to brew indicator (11) flashes red. To restore the ready to brew mode, press one of the start buttons.
Automatic shut-down
If the appliance is not used for approx. 30 minutes, it will shut down automatically. The power consumption will then be less than 0.5 watts.
The appliance therefore complies with the more stringent demands of European Directive 2005/32/EC concerning the specification of eco-design requirements for electrical household appliances.
More functions
Rinsing process
Clean the appliance if it has not been used for several days. The contents of the heating system will then be replaced by fresh water.

Advice
To save energy, always start the rising process directly after switching the appliance on, i.e. before it heats up.
Fill the water container (5) to the max 1. mark and reinsert it into the appliance. Ensure that the empty pad cartridge (4) 2. is inserted and turn the control knob (7) to position
Place two large cups next to each other 3. onto the grate (1).
Switch on the appliance by pressing 4. the ON/OFF button (8).
Press both start buttons 9 and (13) simultaneously to activate the rinsing process. The ready to brew indicator (11) lights up red during rinsing.
Turn the control knob (7) back to home 6. position O as soon as the coffee as been let out.
Decalcification indicator
Your appliance is equipped with an automatic decalcification indicator (12) which will indicate the need of decalcification by flashing yellow after 4 to 10 weeks. You can then continue to brew coffee with the appliance, but you should not delay due decalcification for too long so as to prevent damage to the appliance.
To protect the appliance from too much calcification, the appliance is set in the factory to run with very hard water. Details of the hardness of your tap water can be obtained from your water works or community administration. Adjust the setting if the hardness of your tap water is less than 21^ . You will then be prompted to decalcify the appliance less often.
Setting the water hardness
The appliance is switched off.1.
- Keep the start button for two cups (13) pressed for 3 to 4 seconds until the decalcification indicator (12) flashes.
The number of pulses indicates the current setting.
Press the start button 300 (13) repeatedly. The setting is changed with each press of the button.
Once the correct water hardness is set, press the ON/OFF button (8). Only then are your settings saved!
| Lightning symbol | Hard-ness | Ca- and Mg- lonen |
| 0 - 7° | H <1,3 mmol/l | |
| >7 - 14° | dH >1,3...2,5 mmol/l | |
| >14 - 21° | dH >2,6...3,8 mmol/l | |
| >21° | dH >3,8 mmol/l |
Note: When setting the water hardness, do not wait longer than 10 seconds between pressing the button. Otherwise the appliance will switch off automatically and retain the original value.
You can check the settings at any time by following steps 1 and 2.
Decalcification
Decalcifier
The automatic decalcification programme of your automatic coffee pad appliance is optimised for use with a portion (125 ml) of durgol® swiss espresso®. To decalcify your appliance use this product only in the amount indicated. Only this will guarantee complete decalcification within the short decalcification period and prevention of damage to materials. durgol® swiss espresso® was developed specially for automatic coffee and espresso appliances. The decalcifier is highly effective and guarantees reliable decalcification and therefore long service life of your automatic coffee pad appliance.
You can obtain durgop swiss espresso from select dealers or you can order them directly from petra-electric.
On no account use vinegar or vinegar essence, as the materials in the appliance
could be damaged.
Decalcification with citric acid is too slow. Complete decalcification can therefore not be guaranteed.
Warranty compensation does not exist for damage that occurs due to using an unsuitable decalcifier or non-compliance with the decalcification instructions.
Handle the decalcifying agent carefully to make sure that no damage is caused to furniture or clothing.
Decalcification programme
Your automatic coffee pad appliance has its own automatic decalcification programme. It takes approx. 15 to 20 minutes and is interrupted twice so that you can top up with water.
Note: Once the automatic decalcification programme is started, it cannot be interrupted by pressing a button. This ensures the safety of all users by preventing coffee being brewed as long as the decalcifying solution has not been rinsed out completely. You can pull the power plug if necessary. In this case you should then carry out two rinsing cycles as described in the section "Rinsing process".
Place a collecting vessel with at least 1. 1.2 litres capacity onto the grate (1).
-
Push the empty pad cartridge (4) into the brewing chamber and set the control knob (7) to .
-
Fill a portion (125 mm) of durgof swiss espresso® and then one litre of fresh water into the empty water container (5) and fit it onto the appliance.
- Switch on the appliance by pressing the ON/OFF button (8).
- Keep both start buttons (9) and (13) pressed for 3 to 4 seconds until the pump goes into operation. The decalcification indicator (12) will now light up yellow until the decalcification programme is completed.
After approx. 15 minutes the low water 6.
indicator 10) flashes yellow. Empty the collecting vessel and place it back under the coffee outlet (3). Fill the previously rinsed water container (5) with one litre of fresh water. The ready to brew indicator (11) flashes green.
Press any of the two start buttons, 70 (9) or (13) to continue with the first rinsing cycle.
After approx. 2 minutes the low water 8. indicator U (10) flashes yellow. Empty the collecting vessel and place it back under the coffee outlet (3). Fill the water container (5) with one litre of fresh water. The ready to brew indicator U (11) flashes green.
Press any of the two start buttons, 9 (9) or (13) to continue with the second rinsing cycle.
After a further approx. 2 minutes the 10. decalcification programme is completed and the appliance switches off automatically.
After decalcifying the appliance, we recommend to clean the pad cartridge (4) and the coffee outlet (3) together with the filter insert (6) in the dishwasher.
Cleaning and service
Pull the power plug before cleaning the appliance.
Never immerse the appliance in water.
Never leave the appliance to stand for long periods without the water container (5).
Wipe the outside of the appliance carefully with a damp cloth only. Do not use caustic or abrasive cleaning agents; these would damage the surface.
Empty the drip pan (2) regularly to prevent it from overflowing.
All removable parts can be cleaned in the dishwasher except the water container (5).
Clean the water container (5) with warm dishwashing water and rinse with clear water.
Pad cartridge
Check regularly that the centre opening of the pad cartridge (4) is unobstructed. For example, paper towel fibre may clog the opening.
Outlet cassette with filter insert
The quality of the crema is notably reduced by even small deposits in the filter insert (6). This could occur after only 100 cups in the case of calcium residues due to very hard tap water. For this reason, clean the filter insert at regular intervals. The two filters, which are located on top of each other, must not be pressed together.
Pull the outlet cassette downwards and 1. off and remove the filter insert.
Remove any coffee residue with a soft 2. brush and dishwashing water or clean the parts in the dishwasher
If the calcium deposits are not entirely 3. removed from the filter insert (6), place the filter in a decalcifying solution. Then rinse the filter insert (6) again.
After cleaning plug the filter insert (6) 4. back into the outlet cassette.
Reinsert the outlet cassette and press 5. until it locks into place.
Help with problems
The following information will help you with troubleshooting. If this proves unsuccessful, ship the appliance to our central customer service for repairs. Observe the warranty information.
| Problem Remedy | |
| The low water indicator U flashes although the water container is filled. | Check if the floating capsule in the water container is freely movable. Remove any foreign bodies or decalcify the water container. |
| The control knob jams far in advance of the icon. | Check that the pad is properly seated in the pad cartridge. When using 2 pads, the lower pad must be firmly pressed into the recess. Tap the pad lightly so that a small indentation develops in its centre. |
| The coffee is not strong enough. | The more carefully you insert the pads, the better the coffee will be. You will receive stronger coffee, if you programme a smaller filling quantity. |
| The cups on the left and right fill unevenly. | Slight filling differences cannot be completely avoided. When the appliance has been in use for some time, the response will improve. Check that the appliance is standing on a level surface. |
| The filling level sinks gradually. | Always turn the control knob as far to the right towards as possi-ble. Check regularly that the centre opening of the pad cartridge is unob-structed to prevent clogging. Decalcify the appliance early enough. |
| No coffee is dischar-ged when brewing and the control knob cannot be turned. | If the centre opening of the pad cartridge is clogged, the control knob will block after the brewing and the pad cartridge cannot be removed. Pull the power plug and let the appliance stand for one hour to cool down. Should this not remove the blockage, you can use the emergen-cy opening: For this you need a straightened paper clip. Make sure that the end of the paper clip wire is smooth in order not to damage the appliance. Coffee - which may still be hot - will spray out of the appliance. For this rea-son, hold the wire with a paper towel. •Directly alongside the handle of the pad cartridge is a small opening on both sides of the housing. Insert the wire horizontally into the opening most easily accessible to you and press it slightly inwards. After appro-ximately 3 cm the pressure will suddenly be released and some coffee will escape. The control knob is then no longer blocked. Remove the pad cartridge and clean thoroughly. When using the appliance in the future check before each brewing if the centre opening of the pad cart-ridge is unobstructed and the pads are not damaged. |
| The quality of the crema is unsatisfactory. | With new appliances, the optimum crema quality will not be obtained until after the appliance has been in use for some time. Clean and decalcify the filter insert at regular intervals. The filters in the filter insert must not be pressed together. If this happens, the insert must be replaced. |
| The coffee outlet drips over a long period after use. | After brewing always set the control knob back to home position to prevent prolonged dripping. |
| The appliance switches off when heating up. | The appliance is not allowed to be operated in locations that are higher than 1,500 m above sea level. |
| The rinsing process does not start. | It is important that both buttons are pressed simultaneously. |
| The decalcification programme does not start | It is important that both buttons are pressed simultaneously. Try to activate the programme again and release the buttons only after the decalcification indicator comes on permanently and the pump is running. |
| Water escapes at the handle of the pad cartridge. | Check that the pad is properly seated in the pad cartridge. If the paper edge of the pad projects over the edge of the recess, sealing will be prevented during brewing. Water may escape suddenly even when the pad cartridge is clogged. |
| There is water under the appliance. | Empty the drip pan in good time. Do not fill the water container higher than the max mark. Never leave the appliance to stand for long periods without the water container. |
For UK use only
This product is supplied with a 13 A plug conforming to BS 1363 fitted to the mains lead. If the plug is unsuitable for your socket outlets or needs to be replaced, please note the following. If the plug is a non-rewireable one, cut it from the mains lead and immediately dispose of it. Never insert it into a socket outlet as there is a very great risk of an electric shock.
The replacement of the plug at the mains lead has to be done according to the following instructions:
Warning - This appliance must be earthed
Important: The wires in this mains lead are coloured in accordance with the following code:
green/yellow Earth
blue Neutral
brown Live
As the colours of the wires in the mains lead of this appliance may not correspond with the coloured markings identifying the terminals in your plug, proceed as follows:
the wire which is coloured green and yellow must be connected to the terminal which is marked with the letter E or by the earth symbol 12 or coloured green or green and yellow, the wire which is coloured blue must be connected to the terminal which is marked the letter N or coloured black,
- the wire which is coloured brown must be connected to the terminal which is marked with the letter L or coloured red.
CE
The appliance is compliant with European Directives 2006/95/EC, 2004/108/EC and 2005/32/EC.
This product may not be disposed of in normal household waste at the end of its service life, but must be delivered to a collecting point for recycling electrical and electronic ap
pliances.
The materials are reusable in accordance with their identification. You will make an important contribution to the protection of our environment by recycling used appliances.
Please ask about the responsible disposal point at your community offices.
Subject to change
Special durgol® swiss espresso® decalcifier
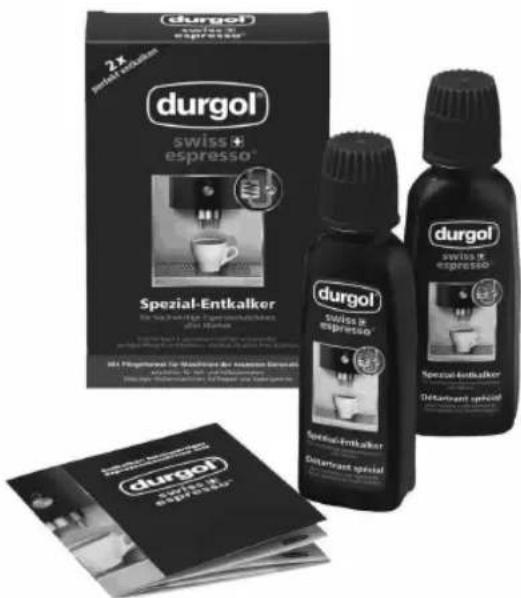
durgol swiss espresso is highly effective and easy and safe to use, thus guaranteeing trouble-free and quick decalcification without additional exposure time. Regular use ensures the optimum quality of your coffee and extends the lifespan of your automatic coffee pad appliance thanks to its special protection formula. durgol swiss espresso leaves no residues. When your appliance is rinsed after decalcification as described in the operating instructions, you can enjoy your coffee again without hesitation.
Please also observe the comprehensive information on decalcification with dur-gol® swiss espresso® as well as the warning notices, given in the booklet enclosed with the decalcifier.
You can obtain durgol® swiss espresso® from select dealers or you can order them directly from petra-electric. One package of DED 18 contains two 125 ml portions. One portion is sufficient for one complete decalcification.