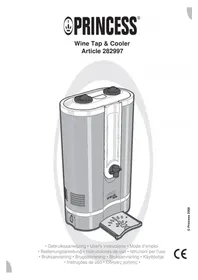
Vinesso Wine Tap & Cooler 282997 - Refrigerator PRINCESS - Free user manual and instructions
Find the device manual for free Vinesso Wine Tap & Cooler 282997 PRINCESS in PDF.


| Product type | Wine refrigerator with tap |
| Brand | Princess |
| Model | Vinesso Wine Tap & Cooler 282997 |
| Capacity | 1 to 2 standard wine bottles or 1 Bag-in-Box of 2 or 3 liters |
| Temperature range | 7 °C to 18 °C |
| Power supply | Mains adapter (supplied); mains voltage as per rating plate |
| Approximate dimensions | 30 x 20 x 30 cm (W x D x H) |
| Approximate weight | 3 kg |
| Materials | Plastic, stainless steel (drip tray) |
| Color | Black (not specified, common estimate) |
| Main functions | Chills and serves wine via a tap; compatible with Bag-in-Box and bottles |
| Included accessories | Power adapter, drip tray, bottle caps (2x) |
| Cleaning and maintenance | Wipe with a damp cloth and mild detergent; do not immerse |
| Safety | Do not expose to water, do not cover, unplug before cleaning |
| Repairability | Repairs by qualified technician only; no spare parts listed |
| Warranty | Standard manufacturer's warranty (not specified, estimated 2 years) |
| Ambient operating temperature | 15 °C to 35 °C |
| Indicator light | On/off indicator |
| Refrigeration type | Cooling element (likely Peltier effect) |
Frequently Asked Questions - Vinesso Wine Tap & Cooler 282997 PRINCESS
User questions about Vinesso Wine Tap & Cooler 282997 PRINCESS
0 question about this device. Answer the ones you know or ask your own.
Ask a new question about this device
Download the instructions for your Refrigerator in PDF format for free! Find your manual Vinesso Wine Tap & Cooler 282997 - PRINCESS and take your electronic device back in hand. On this page are published all the documents necessary for the use of your device. Vinesso Wine Tap & Cooler 282997 by PRINCESS.
USER MANUAL Vinesso Wine Tap & Cooler 282997 PRINCESS
- Gebruiksaanwijzing • User's instructions • Mode d'emploi
- Bedienungsanleitung • Instrucciones de uso • Istruzioni per l'uso
- Bruksanvisning • Brugsanvisning • Bruksanvisning • Käyttöohje
- Instruções de uso • Οδηγίες χρήσης •
Nederlands 1
English 5
Français 9
Deutsch 13
Español 17
Italiano 21
Svenska 25
Dansk 29
Norsk 33
Suomi 37
Português 41
Ελληνικά 45
4A
4B
Algemeen
This Wine Tap & Cooler is basically an insulated unit with a cooling element and a cavity for 2- or 3-liter Bag-in-Box (BIB) wine. The BIB's tap is used to dispense the wine. The tap of the BIB is elevated to facilitate wine glasses. The Wine Tap & Cooler can cool anywhere between 7 and 18 degrees Celsius, making it ideal for white, rosé and red wines.
Besides for the BIB's the Wine Tap & Cooler can also be used to cool one or two standard bottles of wine.
Operation and controls
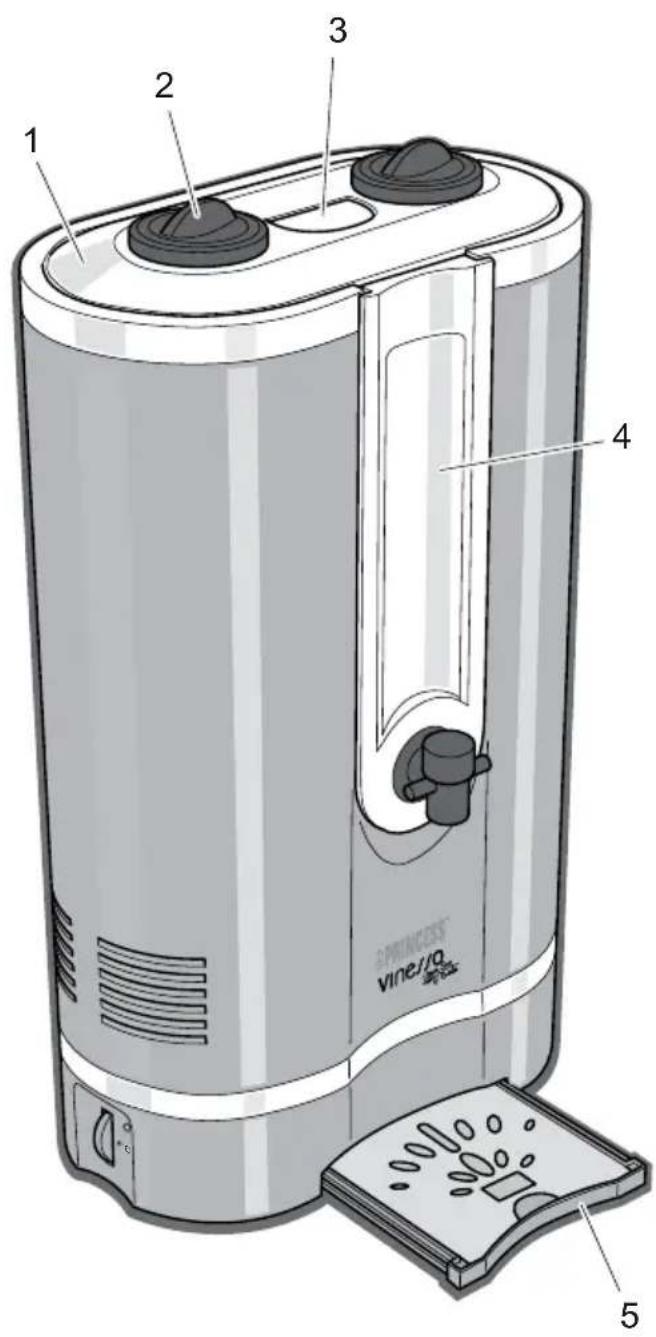
See Figure 1.
The appliance is equipped with the following features:
1 Main cover
2 Bottle openings with covers (2x)
3 Main cover grip
4 Tap cover
5 Drip tray
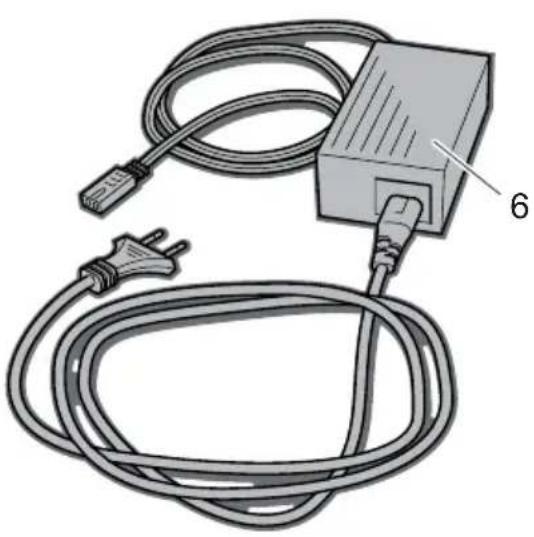
6 Power adapter
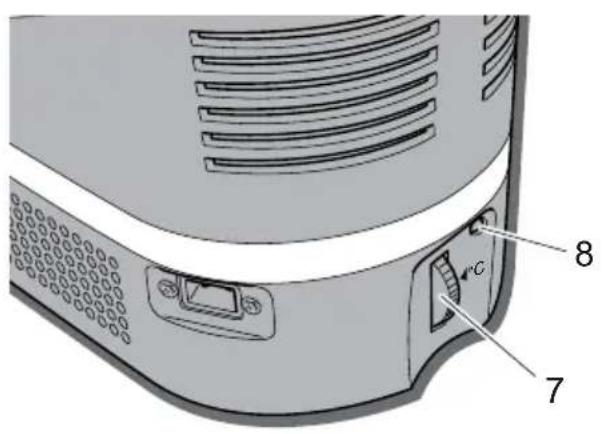
7 Temperature control wheel with main switch
8 Indicator LED
Before first use
1 Take the appliance out of the packaging.
2 Make sure that the mains voltage is the same as indicated on the type plate on the adapter.
3 Clean the appliance. See 'Maintenance and cleaning'.
Use
1 Place the appliance on a flat, stable surface where it cannot fall.
2 Connect the appliance with the power adapter and put the plug into the wall socket.
Use with 2- or 3-liter BIB's
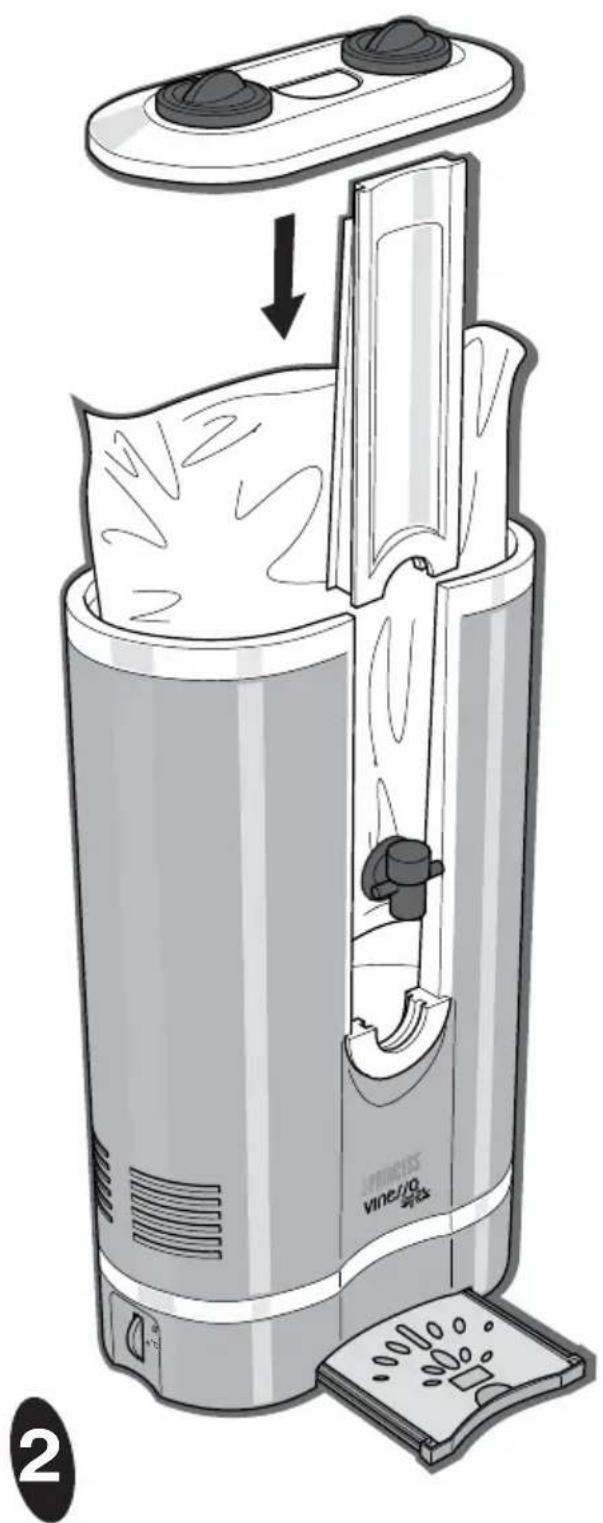
1 Remove the main cover from the appliance.
2 Slide the tap cover up and remove it from the appliance.
3 Position the BIB with the tap in the appliance with the tap in the opening in the front.
Make sure the tap slides completely down in the opening. See figure 2.
4 Slide the tap cover in the opening till it covers the BIB tap.
5 Make sure the two covers are closing the bottle openings in the main cover.
6 Place the main cover on top of the appliance.
7 Switch on the appliance with the temperature control wheel and adjust the temperature setting.
The LED indicator light shows that the cooler is switched on.
Give the appliance some time to bring the wine to the adjusted temperature.
8 Push against the drip tray and slide it out.
9 Place a glass on the drip tray below the tap.
10 Open the tap and let the wine flow in the glass.
11 Close the tap to stop the wine from flowing.
Use with one or two wine bottles
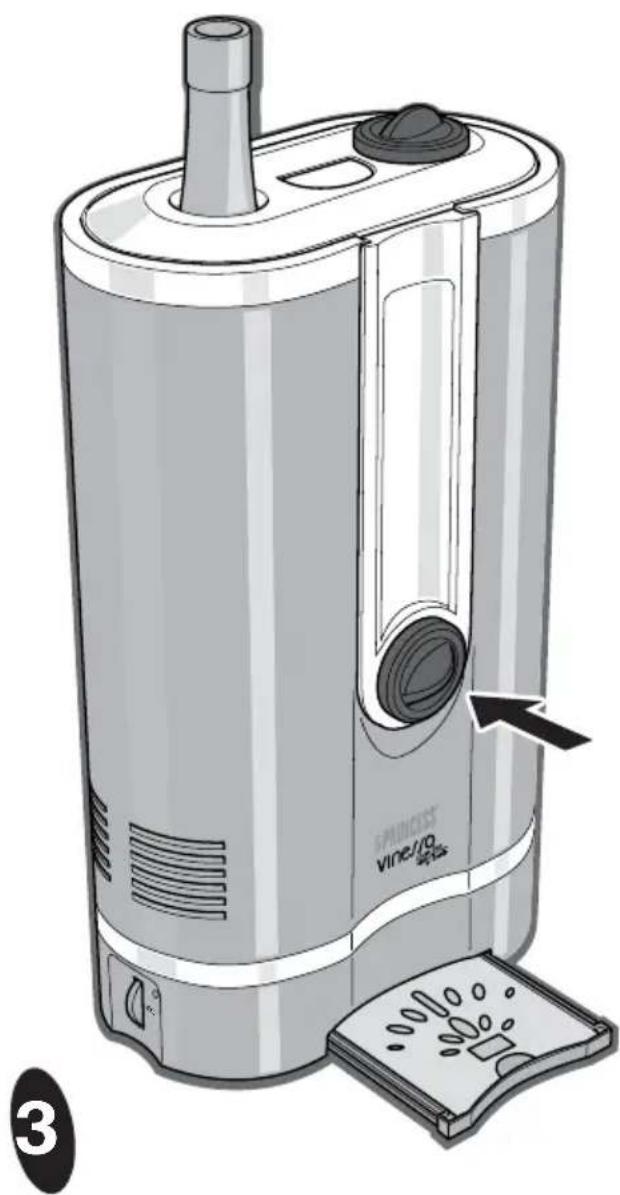
See Figure 3.
1 Remove the main cover from the appliance.
2 Position the wine bottle(s) in the appliance.
3 Remove the cover(s) from the bottle openings in the main cover.
4 Place the main cover on the appliance with the neck of the bottle(s) through the bottle opening(s).
Tip: Use one of the covers from the bottle openings in the main cover to close the opening below the tap cover.
When not used to close the other bottle opening (in case there are two bottles in the appliance) the other cover can be stored in the opening in the bottom of the main cover.
5 Switch on the appliance with the temperature control wheel and adjust the temperature setting.
The LED indicator light shows that the cooler is switched on.
Give the appliance some time to bring the wine to the adjusted temperature.
- The appliance may emit a little smoke and a characteristic smell when you switch it on for the first time. This is normal and will soon stop. Make sure the appliance has sufficient ventilation.
• Always check that the use-by date on the BIB has not expired before placing the BIB in the appliance. - The appliance's tap function is only suitable for 2- or 3-liter BIB's.
- Read and follow the instructions and warnings on the BIB before placing it in the appliance.
- Never allow the power cord to hang over the edge of the draining board, worktop or table.
- Use the appliance only at a temperature between 15°C and 35°C .
- Never expose the appliance to direct sunlight.
- Switch off the appliance and remove the plug from the wall socket in the event of a malfunction during use, before cleaning the appliance, before
fitting or removing an accessory and before storing the appliance after use.
- Store an opened BIB at the right temperature by leaving it in the appliance. Ensure that the appliance always has a power supply. If you are not going to use the appliance for a long period of time, remove the opened BIB from the appliance and store it. Read the instructions on the BIB for storing conditions.
- Do not use damaged BIB's in the appliance, because this may cause damage to the appliance. Always take a damaged BIB back to the shop where you bought it.
Maintenance and cleaning
1 Switch off the appliance with the temperature control wheel. The LED indicator will switch off.
2 Remove the plug of the adapter from the wall socket.
3 Disconnect the adapter from the appliance and store the adapter near the appliance.
4 Carefully clean the appliance with a soft, dam cloth and a few drops of washing-up liquid, and dry thoroughly.
- Clean the appliance regularly.
- Make sure no moisture comes into contact with the appliance's electrical parts.
- Never immerse the appliance, the adapter, the power cord or the plug in water or other liquids.
- Never use aggressive or abrasive cleaning products or sharp objects (such as a knife or a hard brush) to clean the appliance.
Storage
1 Clean the appliance and all accessories (see 'Maintenance and cleaning').
2 Push the drip tray in the bottom of the appliance.
3 Store the appliance in a dry, frost-free location.
Safety
General
- Read and follow these instructions carefully. Keep this manual for future reference.
- Use this appliance only in accordance with these instructions.
- This appliance is intended solely for domestic use.
- The use of this appliance by children or persons with a physical, sensory, mental or motor disability or who lack the necessary knowledge and experience may cause a hazard. Persons responsible for the safety of such people must give explicit instructions or supervise the use of the appliance.
- Keep the appliance out of the reach of children, and of persons who may not be able to operate it safely.
- Have the appliance repaired only by a qualified electrician. Never try to repair the appliance yourself.
- Only use accessories recommended by the supplier. The use of other accessories may result in damage to the appliance, thereby creating hazards for the user.
Electricity and heat
- The appliance is not intended to be operated by means of an external timer or separate remote control system.
• Always use the adapter supplied with this appliance. Never use an adapter from another appliance. - Always remove the plug from the socket when the appliance is not in use.
- Always remove the plug from the wall socket by pulling on the plug not the power cord.
- Never pull the power cord to move the appliance.
- The appliance must be able to dissipate its heat to avoid a risk of fire. Make sure that the appliance has sufficient space around it, and does not come into contact with flammable materials. The appliance must not be covered.
- Do not use the appliance if the appliance, the adapter or the power cord is damaged. Have a power cord replaced by a qualified electrician.
- Make sure that the appliance, the adapter, the power cord and the plug do not come into contact with sources of heat such as a hot hob or naked flame.
- Make sure that the appliance, the adapter, the power cord and plug do not come into contact with water, other fluids or chemicals.
- Do not pick up the appliance or the adapter if it falls into water. Immediately remove the plug from the wall socket. Do not use the appliance anymore.
U.K. WIRING INSTRUCTIONS
The wires in the mains lead are coloured in accordance with the following code:
As the colours of the wires in the mains lead of this appliance may not correspond with the colour markings identifying the terminals on your plug, proceed as follows:
- The BLUE wire must be connected to the terminal marked with the letter N or coloured black.
- The BROWN wire must be connected to the terminal marked with the letter L or coloured red.
WARNING: ON NO ACCOUNT SHOULD EITHER THE LIVE OR NEUTRAL WIRES BE CONNECTED TO THE EARTH TERMINAL
With this appliance, if a 13A plug is used a 3A fuse should be fitted. If any other type of plug is used, a 15A fuse must be fitted either in the plug or at the distribution board.
The Environment
Dispose of packaging material, such as plastic and boxes, in the appropriate waste containers.
If you wish to dispose of the appliance whilst it still works properly or can be easily repaired, then ensure that the appliance is recycled.
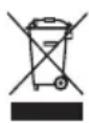
When the appliance reaches the end of its useful life, it should be disposed of in a responsible manner, thereby ensuring the reuse of the appliance or its parts. Do not dispose of the appliance with unsorted refuse; hand it in at the store, or take it to a recognized collection point. Contact your municipality for information about the reception and collection systems in your area.
CE Conformity
Applicable European guideline: 2002/95/EC 2002/96/EC
Généralités

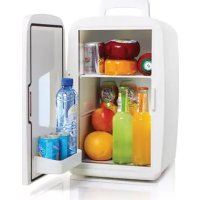
Brand : PRINCESS
Model : Vinesso Wine Tap & Cooler 282997
Category : Refrigerator