Azur 640T - Audio Receiver CAMBRIDGE - Free user manual and instructions
Find the device manual for free Azur 640T CAMBRIDGE in PDF.
| Product Type | DAB/FM Audio Receiver |
| Brand and Model | Cambridge Audio Azur 640T |
| Approximate Dimensions (W x H x D) | 430 x 85 x 350 mm |
| Approximate Weight | 5 kg |
| Power Supply | 220-240 V AC, 50 Hz or 110-120 V AC, 60 Hz depending on model |
| Maximum Power Consumption | 12 W |
| Standby Power Consumption | 7 W |
| FM Frequency Ranges | 87 MHz to 108 MHz (VHF band) |
| DAB Frequency Ranges | 174 MHz to 240 MHz (Band III) and 1452 MHz to 1491 MHz (L-Band) |
| Number of Presets | 10 stations (FM and DAB) |
| Main Features | Automatic and manual tuning, alarm, sleep timer, RDS display, loop through |
| Audio Outputs | 1 RCA analog output, 1 coaxial digital output, 1 optical digital output |
| Auxiliary Audio Input | 1 RCA input (Loop Through) |
| Supplied Antenna | F-type screw-on antenna |
| Remote Control | Azur system remote (compatible with Cambridge Audio amplifiers) |
| Chassis Material | High-quality aluminum |
| Finish | Black or silver |
| Maintenance and Cleaning | Wipe with a non-linting damp cloth. Do not use products containing alcohol, ammonia, or abrasives. |
| Safety | Do not open the device, do not expose to rain or humidity, unplug during storms, use only the indicated voltage. |
| Repairability and Spare Parts | Contact an authorized Cambridge Audio dealer. Any unauthorized repair voids the warranty. |
Frequently Asked Questions - Azur 640T CAMBRIDGE
User questions about Azur 640T CAMBRIDGE
0 question about this device. Answer the ones you know or ask your own.
Ask a new question about this device
Download the instructions for your Audio Receiver in PDF format for free! Find your manual Azur 640T - CAMBRIDGE and take your electronic device back in hand. On this page are published all the documents necessary for the use of your device. Azur 640T by CAMBRIDGE.
USER MANUAL Azur 640T CAMBRIDGE
Thank you for purchasing this Cambridge Audio 640T DAB/FM tuner. The 640T represents the coming together of two very successful areas of Cambridge Audio's product lines. The FM section of the 640T is the descendant of a long line of Cambridge Audio tuners dating back to the late 1960's, which recently included such award winning models as the T500. The Digital section has a shorter lineage but no less pedigree- our two previous digital tuners have both been multiple award-winning units.
About this unit
The 640T uses a combined DAB/FM module developed to offer high performance in both the digital and analogue bands. This ensures that you will be able to listen to all of your favourite radio stations irrespective of whether they have made the move to digital broadcasting. A full range of presets are available in both FM and DAB bands. The 640T also retains the input "loop through" feature that we fit to our other digital radios, that allows you to keep a high quality analogue tuner running alongside the 640T without using an additional input on your amplifier.
Externally the 640T has the same high quality aluminium casework as the rest of the Azur range and is available in the same black and silver finishes. A specific version of the Azur remote is provided, giving full remote control of the tuner functions in an attractive and easy to use handset. A full set of controls are also on the front panel.
The 640T can only be as good as the system it is connected to. Please do not compromise on your amplifier, speakers or cabling. We would, in particular, recommend amplification and cabling from the Cambridge Audio range with suitably revealing loudspeakers.
Now we invite you to sit back, relax and enjoy!

Matthew Bramble
Technical Director
CONTENTS
Introduction ....3
Safety precautions....4
Installation....5
Rear panel connections....6
Front panel controls....7
Operating instructions ....8
Using the remote....9
Troubleshooting....10
Specifications....10
Limited warranty....11
Cambridge Audio
SAFETY PRECAUTIONS
Checking the power supply rating
For your own safety please read the following instructions carefully before attempting to connect this unit to the mains.
Check that the rear of your unit indicates the correct supply voltage. If your mains supply voltage is different, consult your dealer.
This unit is designed to operate only on the supply voltage and type that is indicated on the rear panel of the unit. Connecting to other power sources may damage the unit.
This equipment must be switched off when not in use and must not be used unless correctly earthed. To reduce the risk of electric shock, do not remove the unit's cover (or back). There are no user serviceable parts inside. Refer servicing to qualified service personnel. If the power cord is fitted with a moulded mains plug the unit must not be used if the plastic fuse carrier is not in place. Should you lose the fuse carrier the correct part must be reordered from your Cambridge Audio dealer.
The lightning flash with the arrowhead symbol within an equilateral triangle is intended to alert the user to the presence of uninsulated 'dangerous voltage' within the product's enclosure that may be of sufficient magnitude to constitute a risk of electric shock to persons.


he exclamation point within an equilateral triangle is intended to alert the user to the presence of important operating and maintenance instructions in the service literature relevant to this appliance.
This product complies with European Low Voltage (73/23/EEC) and Electromagnetic Compatibility (89/336/EEC) Directives when used and installed according to this instruction manual. For continued compliance only Cambridge Audio accessories should be used with this product and servicing must be referred to qualified service personnel.

4 azur DAB/FM tuner
Plug fitting instructions (UK only)
The cord supplied with this appliance is factory fitted with a 13A mains plug fitted with a 3A fuse inside. If it is necessary to change the fuse, it is important that a 3A one is used. If the plug needs to be changed because it is not suitable for your socket, or becomes damaged, it should be cut off and an appropriate plug fitted following the wiring instructions below. The plug must then be disposed of safely, as insertion into a 13A socket is likely to cause an electrical hazard. Should it be necessary to fit a 3-pin BS mains plug to the power cord the wires should be fitted as shown in this diagram. The colours of the wires in the mains lead of this appliance may not correspond with the coloured markings identifying the terminals in your plug. Connect them as follows:
The wire which is coloured BLUE must be connected to the terminal which is marked with the letter 'N' or coloured BLACK.
The wire which is coloured BROWN must be connected to the terminal which is marked with the letter 'L' or coloured RED
The wire which is coloured GREEN/YELLOW must be connected to the terminal which is marked with the letter 'E' or coloured GREEN.
If your model does not have an earth wire, then disregard this instruction.

text_image
GREEN/ YELLOW E BLUE N FUSE L BROWN CORD GRIPIf a 13 Amp (BS 1363) plug is used, a 3 Amp fuse must be fitted, or if any other type of plug is used a 3 Amp or 5 Amp fuse must be fitted, either in the plug or adaptor, or on the distribution board.
IMPORTANT SAFETY INSTRUCTIONS
Please take a moment to read these notes before installing your Azur tuner, they will enable you to get the best performance and prolong the life of the product. We advise you follow all instructions, heed all warnings and keep the instructions for future reference.
This unit must be installed on a sturdy, level surface. Since the power transformers generate a magnetic hum-field of moderate strength, a turntable should not be located nearby.
Do not defeat the safety purpose of the polarized or grounding-type plug. A polarized plug has two blades with one wider than the other. A grounding type plug has two blades and a third grounding prong. The wide blade or the third prong are provided for your safety. If the provided plug does not fit into your outlet, consult an electrician for replacement of the obsolete outlet.
The unit must be installed in manner that makes disconnection of mains plug from the mains socket outlet (or appliance connector from the rear of the unit) possible.
Do not plug your 640T directly into a power amplifier unless it has a variable output level.
Do not route the power cable so that it can be walked upon or damaged by other items near it.
The unit requires ventilation. Do not situate it on a rug or other soft surface and do not obstruct any air inlets or outlet grilles.
Do not place in a sealed area such as a bookcase or in a cabinet. Any space open at the back (such as a dedicated equipment rack) is fine however.
Do not install near any heat sources such as radiators, heat registers, stoves, or other apparatus (including amplifiers) that produce heat.
When using for the first time it is advisable that it is left on, playing music, for at least 36 hours prior to critical listening. For subsequent use, a warm up period of 10-15 minutes is recommended for maximum enjoyment.
If you do not intend to use this unit for a long period, switch it to Standby and unplug it from the mains socket. Also unplug the unit during lightning storms.
WARNING - To reduce the risk of fire or electric shock, do not expose this unit to rain or moisture. This unit must not be exposed to dripping or splashing water or other liquids. No objects filled with liquid, such as vases, shall be placed on the unit. In the event of spillage, switch off immediately, disconnect from the mains supply and contact your dealer for advice.
To clean the unit, wipe its case with a moist, lint-free cloth. Do not use any cleaning fluids containing alcohol, ammonia or abrasives. Do not spray an aerosol at or near your 640T.
Ensure that small objects do not fall through any ventilation grille. If this happens, switch off immediately, disconnect from the mains supply and contact your dealer for advice.
Refer all servicing to qualified service personnel. Servicing is required when the unit has been damaged in any way, such as a damaged power-supply cord or plug, liquid has been spilled or objects have fallen into the unit, the unit has been exposed to rain or moisture, does not operate normally, or has been dropped.
If you have checked the Troubleshooting guide in the manual with no improvement, do not attempt to repair, dissassemble or reconstruct the unit. A serious electric shock could result if this precautionary measure is ignored.
Cambridge Audio
REAR PANEL CONNECTIONS

text_image
Cambridge Audio Natural Contour Technology * www.cambridge-audio.co.uk Manufactured in an ISO9002 approved facility Caudate Sofia/Temor/Colf/Thermost P100V DC 25V "Acute" DC "Load" R3000000000000000000000000000000000000000000000000000000000000000000000000000000 P144 Power Rating: 235V AC ~ 58Hz Max Power Consumption: 2.6W Caution Risk of electric shock On the spool Ava Eque de trine électrique No less costly Achung Voin Emission des gêtres Nonsinktor Zafion Cambridge Audio Designed and Engineered in London, England acur 640T Digital Tuner +/- 1 +/- 25V DC +/- 1 +/- 25V DC +/- 1 +/- 25V DC +/- 1 +/- 25V DC +/- 1 +/- 25V DC +/- 1 +/- 25V DC +/- 1 +/- 25V DC +/- 1 +/- 25V DC +/- 1 +/- -1 +/- -2 +/- -3 +/- -4 +/- -5 +/- -6 +/- -7 +/- -8 +/- -9 +/- -10 +/- -11 +/- -12 +/- -13 +/- -14 +/- -15 +/- -16 +/- -17 +/- -18 +/- -19 +/- -20 +/- -21 +/- -22 +/- -23 +/- -24 +/- -25 +/- -26 +/- -27 +/- -28 +/- -29 +/- -30 +/- -31 +/- -32 +/- -33 +/- -34 +/- -35 +/- -36 +/- -37 +/- -38 +/- -39 +/- -40 +/- -41 +/- -42 +/- -43 +/- -44 +/- -45 +/- -46 +/- -47 +/- -48 +/- -49 +/- -50 +/- -51 +/- -52 +/- -53 +/- -54 +/- -55 +/- -56 +/- -57 +/- -58 +/- -59 +/- -60 +/- -61 +/- -62 +/- -63 +/- -64 +/- -65 +/- -66 +/- -67 +/- -68 +/- -69 +/- -70 +/- -71 +/- -72 +/- -73 +/- -74 +/- -75 +/- -76 +/- -77 +/- -78 +/- -79 +/- -80 +/- -81 +/- -82 +/- -83 +/- -84 +/- -85 +/- -86 +/- -87 +/- -88 +/- -89 +/- -90 +/- -91 +/- -92 +/- -93 +/- -94 +/- -95 +/- -96 +/- -97 +/- -98 +/- -99 +/- -100AC power socket
Once all connections have been made, plug the AC Power Cable into an appropriate mains socket. Your 640T is now ready for use.
Natural Contour Technology
This switch is used to select two types of subtle tone settings, either Warm or Lively. The default position is off (flat frequency response).
Audio Input
Allows another unit (such as an analogue radio) to be connected through the 640T to your amplifier, saving an input on your amplifier. To listen to the unit connected, put the 640T into standby.
6 azur DAB/FM tuner
Audio O Output
Connect to your amplifier here using phono cables (2RCA-2RCA).
Digital Audio Outputs
Both S/P DIF Co-axial and Toslink Optical connectors are fitted for connection to a digital recorder e.g. Minidisc, CDR etc or an offboard digital to analogue convertor (DAB only).
Aerial
The 640T has an F-type screw connection aerial for both FM and DAB signals (supplied).
Extend the lead and attach it to a window frame or wall, or move around the room, where reception is best
In an area where signals are weak, it may be necessary to use a 75 ohm unbalanced-type outdoor antenna.
FRONT PANEL CONTROLS

text_image
Cambridge Audio azur 640T DAS/FM Tuner • Standby / On 2/8 2/7 3/8 4/9 5/10 6th DAS/FM Autoturn Info Select < > Digital Audio Modulation R-D-SStandby/On
Switches the 640T between Standby and On. When in Standby the front panel display shows the current time in hours, minutes and seconds.
Presets
The 640T can store up to 10 presets for both FM and DAB.
The Shift button alternates the five buttons between accessing presets 1-5 and 6-10. The display will show which choice has been made.
DAB/FM
This button switches between the DAB and FM bands. The display will show "Switching to ..."
Autotune
In DAB mode Autotune will scan the entire DAB band. The stations it has found will be displayed in alphabetical order, shown as 'A-Z'.
In FM mode a brief press will scan up through all available stations. Press and hold Autotune to scan down.
Info
Displays information such as time, date, music genre and programme type.
RDS information on the FM band is dependant on signal strength.
Select
In DAB mode press to listen to selected station.
If you do not press Select the 640T will revert to showing the information of the station playing before you started scanning through the station list.
In FM mode press to switch between auto (normally stereo) and mono transmission.
Step <>
In DAB mode, press to scroll through available stations alphabetically.
In FM mode the Step button moves the frequency in .05mhz steps up or down. Also used for Clock/Alarm/Sleep settings
Cambridge Audio
OPERATING INSTRUCTIONS
Tuning and listening to the 640T
Press the Standby/On button on the front panel.
For DAB stations, select DAB mode using the DAB/FM button.
Press the Autotune button. The 640T will search for all available DAB stations and display them in alphabetical order on the display.
Press the Step buttons to scroll through the list.
Press the Select button to listen to your chosen station.
For FM stations, select FM mode using the DAB/FM button.
Press the Autotune button. The 640T will scan up through the FM band and play the first station found (RDS may accompany a strong signal).
Press the Autotune button again to scan up to the next available station (to scan down the FM band press and hold the Autotune button).
DAB Manual fine tune
Hold the select button down until "Manual Tune" appears on the display. Frequency and name of the particular station will be displayed.
Use the Step buttons to adjust the frequency
Press Select again until DAB is displayed.
Setting PPresets
Select the station you wish to store and hold down the desired preset number (e.g. 3) until the display shows that the station has been stored.
To store the presets 6-10 press the Shift button first. You can store 10 stations for both FM and DAB.
Press chosen Preset button at any time to listen to the corresponding station
8 azur DAB/FM tuner
DAB System Reset
If the 640T is moved to another location where there are different stations then the old stations should be removed from the memory.
To do a system reset unplug the 640T then hold down the Select button whilst plugging back in.
Continue holding Select until "System Reset" appears on the display.
Alarm function
The Alarm function will turn on the 640T at a chosen time.
Press Alarm on your remote handset. 'Alarm' and 'Off' will appear.
Press Select. '00:00' will appear.
Press the < > keys to alter the time ('Alarm Setting' will be displayed).
Press Select again to set (press twice to turn off alarm function).
An asterisk will appear on the display when the 640T is in standby.
Sleep FFunction
The Sleep function will turn the 640T off after a set period.
Press the Alarm button twice when the unit is on.
Select number of minutes required (01 - 99).
Press Select again to activate.
It is necessary to reset the Sleep function before each use.
Natural Contour Technology
Experiment with the three available settings (switch on rear panel) to achieve the optimum tone from your 640T.
USING THE REMOTE HANDSET
The 640T is supplied with a system remote control that operates both this Tuner and the Cambridge Azur amplifiers.
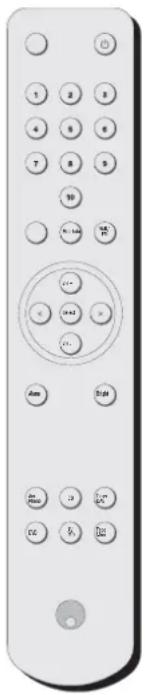
text_image
Image of a remote control with labeled buttons and numeric keypadPower
Switches the 640T between Standby mode and On mode. The Blue LED on the front panel of the 640T indicates that it is On when bright and in Standby when dim.
1 - 10 keys
These allow access to any stored presets you might have saved on the 640T.
Info
Displays information such as music genre and station provider. The information on the FM band is dependant on the strength of the signal.
DAB/FM
This button switches between the DAB and FM bands that the 640T is capable of receiving. The display will show "Switching to ...".
Select
Confirms DAB station, alarm and sleep Choices.
Step <>
For use with Manual Tuning, Alarm, Sleep, and Clock settings. Will also cycle through the alphabetical list of stations in the DAB band.
Alarm
This button is used to access the Alarm and Sleep menus as discussed in the Operation section.
Bright
Switches the display brightness between low and high.
Please note that the following buttons will only operate a matching Cambridge Azur Amplifier.
Mute
This button mutes the audio. The mute mode is indicated by the channel LED flashing.
Volume +/-
The volume buttons increase and decrease the Volume of the amplifier output.
Channel Select
The five channel select buttons and the Tape monitor select button are used to change the input source (CD, DVD etc).

Cambridge Audio
TROUBLESHOOTING SPECIFICATIONS
There is no power
Ensure the AC power cord is connected securely.
Ensure the plug is fully inserted into the wall socket and is switched on.
Check fuse in the mains plug or adaptor.
There is no sound
Ensure that the amplifier is set correctly.
Check that the interconnects are inserted correctly.
The sound is distorted or garbled
Check aerial connections and placements
There is a hum coming from the speaker
Ensure that all cable connections are secure.
There is unwanted background noise and interference
Move the tuner away from other electrical equipment that is likely to cause interference
The remote handset will not function
Check that the batteries have not expired.
Ensure that nothing is blocking the remote sensor.
Sample Rate 48kHz
Frequency Range VHF (87MHz to 108MHz) Band 2 DAB (174MHz to 240MHz) Band 3 DAB (1452MHz to 1491MHz) L-Band
Aerial input impedance 50 ohms
Sensitivity -97dBm typical
Signal to noise 105dB typical (DAB) 58dB typical (FM)
Frequency response 20-20KHz+0.1,-0.3 (NCT at Flat, DAB) 20-15KHz+0.1,-0.5 (NCT at Flat, FM)
Distortion <0.005%, 1KHz 2vrms o/p, DAB <0.15%, 1KHz 50KHz deviation, FM
Stereo Separation >60dB, 20Hz-20KHz, DAB
40dB, 1KHz, FM
Input Voltage 220-240V AC\~50Hz 110V-120V AC\~60Hz (depending on model)
Maximum Power Consumption 12W
Standby Power Consumption 7W
Dimensions (mm) (H x W x D) 70 x 430 x 305
Weight (kg) 3.9
LIMITED WARRANTY
Cambridge Audio warrants this product to be free from defects in materials and workmanship (subject to the terms set forth below). Cambridge Audio will repair or replace (at Cambridge Audio's option) this product or any defective parts in this product. Warranty periods may vary from country to country. If in doubt consult your dealer and ensure that you retain proof of purchase.
To obtain warranty service, please contact the Cambridge Audio authorised dealer from which you purchased this product. If your dealer is not equipped to perform the repair of your Cambridge Audio product, it can be returned by your dealer to Cambridge Audio or an authorised Cambridge Audio service agent. You will need to ship this product in either its original packaging or packaging affording an equal degree of protection.
Proof of purchase in the form of a bill of sale or receipted invoice, which is evidence that this product is within the warranty period, must be presented to obtain warranty service.
This Warranty is invalid if (a) the factory-applied serial number has been altered or removed from this product or (b) this product was not purchased from a Cambridge Audio authorised dealer. You may call Cambridge Audio or your local country Cambridge Audio distributor to confirm that you have an unaltered serial number and/or you purchased from a Cambridge Audio authorised dealer.
This Warranty does not cover cosmetic damage or damage due to acts of God, accident, misuse, abuse, negligence, commercial use, or modification of, or to any part of, the product. This Warranty does not cover damage due to improper operation, maintenance or installation, or attempted repair by anyone other than Cambridge Audio or a
Cambridge Audio dealer, or authorised service agent which is authorised to do Cambridge Audio warranty work. Any unauthorised repairs will void this Warranty. This Warranty does not cover products sold AS IS or WITH ALL FAULTS.
REPAIRS OR REPLACEMENTS AS PROVIDED UNDER THIS WARRANTY ARE THE EXCLUSIVE REMEDY OF THE CONSUMER. CAMBRIDGE AUDIO SHALL NOT BE LIABLE FOR ANY INCIDENTAL OR CONSEQUENTIAL DAMAGES FOR BREACH OF ANY EXPRESS OR IMPLIED WARRANTY IN THIS PRODUCT. EXCEPT TO THE EXTENT PROHIBITED BY LAW, THIS WARRANTY IS EXCLUSIVE AND IN LIEU OF ALL OTHER EXPRESS AND IMPLIED WARRANTIES WHATSOEVER INCLUDING, BUT NOT LIMITED TO, THE WARRANTY OF MERCHANTABILITY AND FITNESS FOR A PRACTICAL PURPOSE.
Some countries and US states do not allow the exclusion or limitation of incidental or consequential damages or implied warranties so the above exclusions may not apply to you. This Warranty gives you specific legal rights, and you may have other statutory rights, which vary from state to state or country to country.
Cambridge Audio
EINLEITUNG
natural_image
Front view of a classic remote control with keypad and buttons (no text or symbols visible)Natural Contour Technology (NCT)
Natural Contour Technology (NCT)
text_image
Image of a remote control with labeled buttons and numeric keypadRapport signal-bruit 105 dB (type) (DAB) 58 dB (type) (FM)
Dimensions (mm) (H x L x P) 70 x 430 x 305
Poids (kg) 3,9
GARANTIE LIMITÉE
text_image
Image of a remote control with labeled buttons and numeric keypadEncendido
natural_image
Front view of a classic remote control with keypad and buttons (no text or symbols visible)Pulsante "Power"
Natural Contour Technology
58 azur DAB/FM tuner
Natural Contour Technology
text_image
Image of a remote control with labeled buttons and numeric keypadPower
Natural Contour Technology
Natural Contour Technology
Prøv dig frem med de tre mulige indstillinger (på kontakten på bagpanelet) for at opnå den bedst mulige tonekvalitet fra tuneren.
ANVENDELSE AF FJERNBETJENINGEN
text_image
Image of a remote control with labeled buttons and numeric keypadPower
text_image
Image of a remote control with labeled buttons and numeric keypadПитание (Power)
natural_image
Blank white image with no visible content, text, or symbols
Cambridge Audio
azur 640T