DSA1XP - Hi-Fi System ONKYO - Free user manual and instructions
Find the device manual for free DSA1XP ONKYO in PDF.
| Product Type | RI Dock for iPod (Remote Interactive) |
| Brand | Onkyo |
| Model | DS-A1XP |
| Weight | 220 g |
| Power Supply | 5 V DC AC adapter (included) |
| Power consumption (iPod not inserted) | 0.5 W |
| Main Functions | Listen to iPod music on an Onkyo system; remote control via Onkyo remote; recharge iPod battery; RI functions (automatic power on/off, automatic source switching) |
| iPod Compatibility | iPod 5th generation, iPod photo, iPod 4th generation, iPod nano 1st and 2nd generation, iPod mini (except iPod 3rd generation) |
| Connectivity | Audio outputs L/R (RCA), RI input (3.5 mm jack), DC 5V input |
| Included Accessories | AC adapter (1.4 m), audio cable (1.5 m), RI cable (1.8 m), instruction manual |
| Maintenance and Cleaning | Wipe with a soft dry cloth; do not use chemical products |
| Safety | Do not expose to water or moisture; disconnect during thunderstorms; refer all repairs to qualified technician |
| Repairability Index | Not applicable (external accessory) |
Frequently Asked Questions - DSA1XP ONKYO
User questions about DSA1XP ONKYO
0 question about this device. Answer the ones you know or ask your own.
Ask a new question about this device
Download the instructions for your Hi-Fi System in PDF format for free! Find your manual DSA1XP - ONKYO and take your electronic device back in hand. On this page are published all the documents necessary for the use of your device. DSA1XP by ONKYO.
USER MANUAL DSA1XP ONKYO
Remote Interactive Dock
DS-A1XP
English
Français
Español
Italiano
Deutsch
Nederland
Svenska
Instruction Manual
Thank you for purchasing an Onkyo product. Please read this manual carefully before making any connections or using this product. By following these instructions, you'll get the best audio performance and the most listening pleasure from your Onkyo product. Keep this manual for future reference.
WARNING:
TO REDUCE THE RISK OF FIRE OR ELECTRIC SHOCK, DO NOT EXPOSE THIS APPARATUS TO RAIN OR MOISTURE.
CAUTION:
TO REDUCE THE RISK OF ELECTRIC SHOCK, DO NOT REMOVE COVER (OR BACK). NO USER-SERVICEABLE PARTS INSIDE. REFER SERVICING TO QUALIFIED SERVICE PERSONNEL.


The lightning flash with arrowhead symbol, within an equilateral triangle, is intended to alert the user to the presence of uninsulated "dangerous voltage" within the product's enclosure that may be of sufficient magnitude to constitute a risk of electric shock to persons.

The exclamation point within an equilateral triangle is intended to alert the user to the presence of important operating and maintenance (servicing) instructions in the literature accompanying the appliance.
Important Safety Instructions
- Read these instructions.
- Keep these instructions.
- Heed all warnings.
- Follow all instructions.
- Do not use this apparatus near water.
- Clean only with dry cloth.
- Do not block any ventilation openings. Install in accordance with the manufacturer's instructions.
- Do not install near any heat sources such as radiators, heat registers, stoves, or other apparatus (including amplifiers) that produce heat.
- Do not defeat the safety purpose of the polarized or grounding-type plug. A polarized plug has two blades with one wider than the other. A grounding type plug has two blades and a third grounding prong. The wide blade or the third prong are provided for your safety. If the provided plug does not fit into your outlet, consult an electrician for replacement of the obsolete outlet.
- Protect the power cord from being walked on or pinched particularly at plugs, convenience receptacles, and the point where they exit from the apparatus.
- Only use attachments/accessories specified by the manufacturer.
-
Unplug this apparatus during lightning storms or when unused for long periods of time.
-
Refer all servicing to qualified service personnel. Servicing is required when the apparatus has been damaged in any way, such as power-supply cord or plug is damaged, liquid has been spilled or objects have fallen into the apparatus, the apparatus has been exposed to rain or moisture, does not operate normally, or has been dropped.
-
Damage Requiring Service
Unplug the apparatus from the wall outlet and refer servicing to qualified service personnel under the following conditions:
A. When the power-supply cord or plug is damaged,
B. If liquid has been spilled, or objects have fallen into the apparatus,
C. If the apparatus has been exposed to rain or water,
D. If the apparatus does not operate normally by following the operating instructions. Adjust only those controls that are covered by the operating instructions as an improper adjustment of other controls may result in damage and will often require extensive work by a qualified technician to restore the apparatus to its normal operation,
E. If the apparatus has been dropped or damaged in any way, and
F. When the apparatus exhibits a distinct change in performance this indicates a need for service.
Precautions
- Recording Copyright—Unless it's for personal use only, recording copyrighted material is illegal without the permission of the copyright holder.
- Care—Occasionally you should dust the unit all over with a soft cloth. For stubborn stains, use a soft cloth dampened with a weak solution of mild detergent and water. Dry the unit immediately afterwards with a clean cloth. Don't use abrasive cloths, thinners, alcohol, or other chemical solvents, because they may damage the finish or remove the panel lettering.
- Never Touch this Unit with Wet Hands—Never handle this unit or its power cord while your hands are wet or damp. If water or any other liquid gets inside this unit, have it checked by your Onkyo dealer.
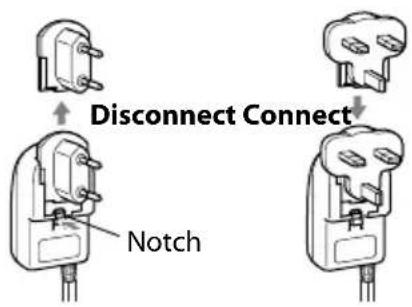
For some models
Before use, connect the appropriate AC plug adapter to the AC adapter.
The type of plug adapter depends on the place of purchase.
text_image
Disconnect Connect NotchFor European Models
Declaration of Conformity
We, ONKYO EUROPE ELECTRONICS GmbH LIEGNITZERSTRASSE 6, 82194 GROEBENZELL, GERMANY

declare in own responsibility, that the ONKYO product described in this instruction manual is in compliance with the corresponding technical standards such as EN60065, EN55013, EN55020 and EN61000-3-2, -3-3.
GROEBENZELL, GERMANY

ONKYO EUROPE ELECTRONICS GmbH
Contents
Important Safety Instructions ....2
Precautions ....3
Getting Started....4
About the RI Dock....4
Features....4
Package Contents ....4
Compatible iPod models....4
Getting to Know the RI Dock .... 5
Hooking Up the RI Dock....6
Using the RI Dock....7
Putting Your iPod in the RI Dock....7
Function Overview ...... 7
Using Your Amp's Remote Controller ..... 9
Troubleshooting....10
Specifications 11
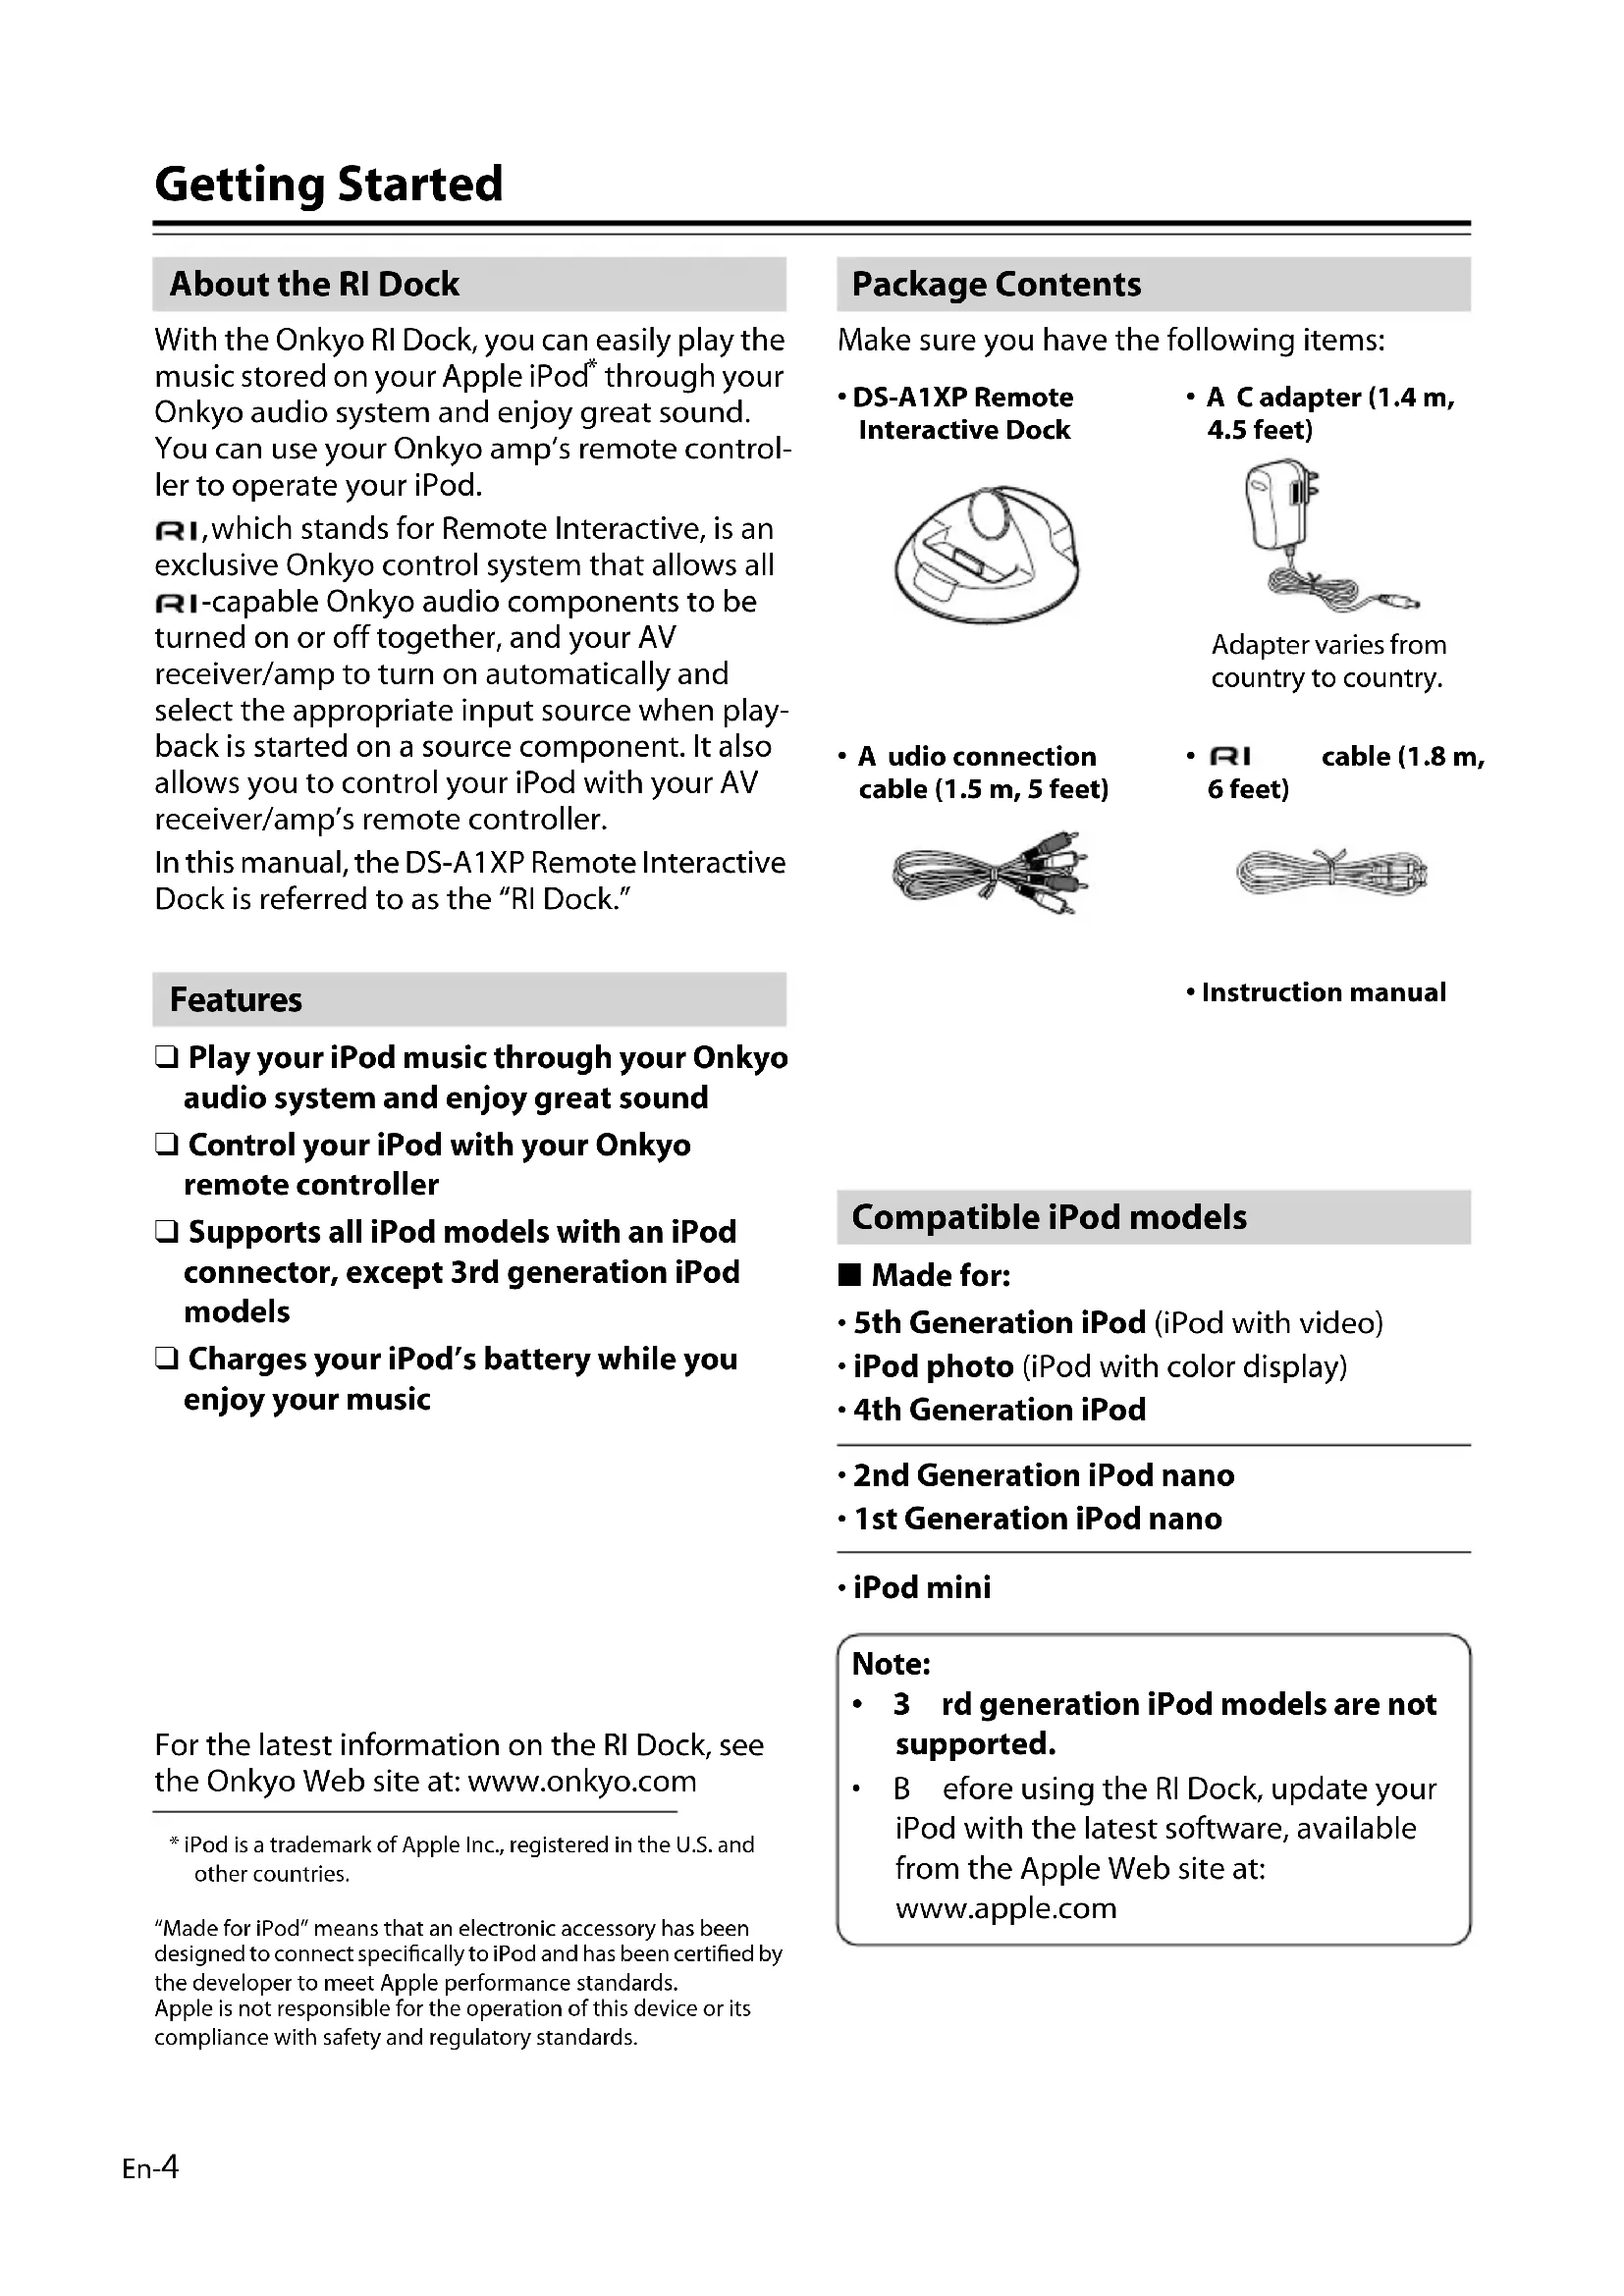
About the RI Dock
With the Onkyo RI Dock, you can easily play the music stored on your Apple iPod ^* through your Onkyo audio system and enjoy great sound. You can use your Onkyo amp's remote controller to operate your iPod.
RI, which stands for Remote Interactive, is an exclusive Onkyo control system that allows all
RI-capable Onkyo audio components to be turned on or off together, and your AV receiver/amp to turn on automatically and select the appropriate input source when play-back is started on a source component. It also allows you to control your iPod with your AV receiver/amp's remote controller.
In this manual, the DS-A1XP Remote Interactive Dock is referred to as the "RI Dock."
Features
☐ Play your iPod music through your Onkyo audio system and enjoy great sound
☐ Control your iPod with your Onkyo remote controller
□ Supports all iPod models with an iPod connector, except 3rd generation iPod models
- Charges your iPod's battery while you enjoy your music
For the latest information on the RI Dock, see the Onkyo Web site at: www.onkyo.com
* iPod is a trademark of Apple Inc., registered in the U.S. and other countries.
"Made for iPod" means that an electronic accessory has been designed to connect specifically to iPod and has been certified by the developer to meet Apple performance standards. Apple is not responsible for the operation of this device or its compliance with safety and regulatory standards.
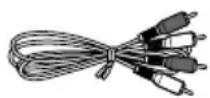
Package Contents
Make sure you have the following items:
• DS-A1XP Remote Interactive Dock

• A C adapter (1.4 m, 4.5 feet)
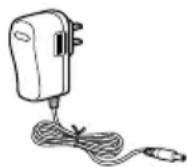
Adapter varies from country to country.
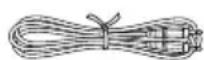
• A udio connection cable (1.5 m, 5 feet)
• RI cable (1.8 m, 6 feet)
- Instruction manual
Compatible iPod models
■ Made for:
- 5th Generation iPod (iPod with video)
- iPod photo (iPod with color display)
• 4th Generation iPod
• 2nd Generation iPod nano
• 1st Generation iPod nano
- iPod mini
Note:
- 3 rd generation iPod models are not supported.
- Before using the RI Dock, update your iPod with the latest software, available from the Apple Web site at: www.apple.com
Getting to Know the RI Dock
iPod adapter
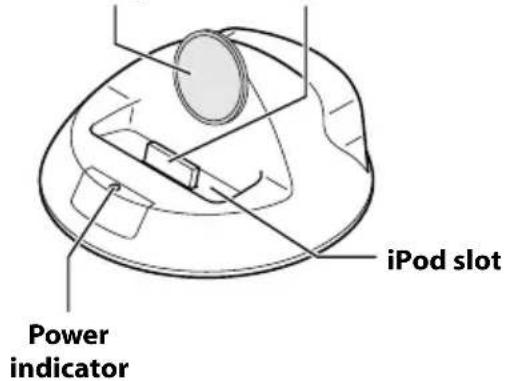
text_image
iPod slot Power indicatoriPod connector
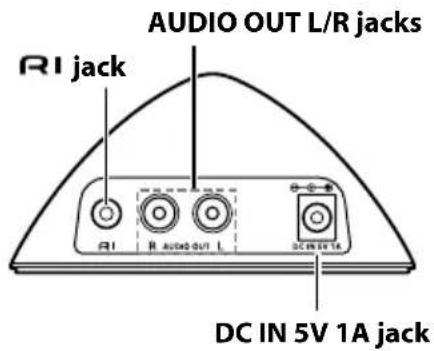
text_image
AUDIO OUT L/R jacks R1 jack R1 R audio OUT L DC IN 5V 1A DC IN 5V 1A jack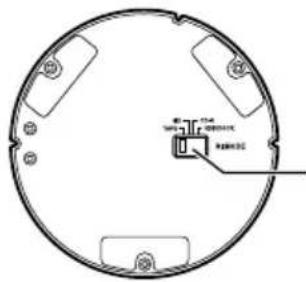
text_image
Technical diagram of a circular mechanical component with labeled parts and a small inset detail showing internal structure.RI MODE switch
Set it to match your AV receiver/amp's input display (see below).

AV receiver/Amp input display
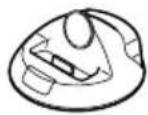
RI MODE switch


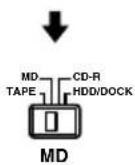

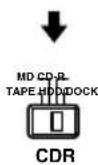

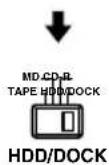
See your AV receiver/amp's instruction manual for details on changing the input display. On some amps, you press and hold the [TAPE] button to change the input display from TAPE to MD, CDR, HDD or Dock.
AV receiver/Amp remote controller's mode
To control your iPod with your AV receiver/amp's remote controller, select the matching remote control mode.
Hooking Up the RI Dock
Depending on the Onkyo AV receiver/amp that you're using, choose connection method A or B.
A: Connect the RI Dock's AUDIO OUT L/R jacks to an RI Dock-compatible input on your Onkyo AV receiver/amp. (You might need to change the input display to "HDD" or "DOCK.")
B: Connect the RI Dock's AUDIO OUT L/R jacks to the TAPE (MD, CDR) IN jacks on your Onkyo AV receiver/amp.
See your AV receiver/amp's instruction manual for details.
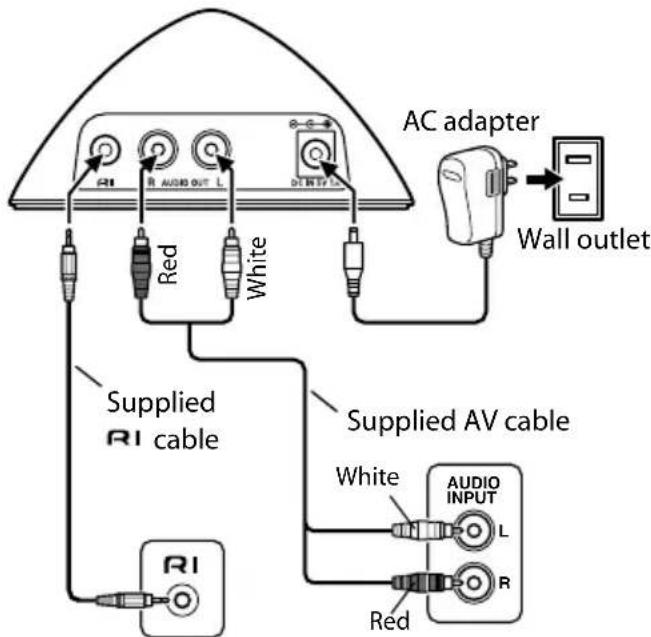
text_image
AC adapter Wall outlet Supplied AV cable White Audio INPUT L R R1 R AUDIO OUT L White Red Red R1 R1 R1RI-capable AV receiver/amp
- Using the supplied AV cable, connect the RI Dock's AUDIO OUT L/R jacks to a suitable audio input on your AV receiver/amp. The input you use depends on the type of Onkyo AV receiver/amp you have. See your AV receiver/amp's instruction manual for details.
- Using the supplied cable, connect the RI Dock's jack to an jack on one of the Onkyo components in your system.
- Connect the supplied AC adapter to the RI Dock's DC IN jack.
Note: When the AC adapter is unplugged or not connected to the RI Dock, the RI Dock will output no sound, functions will not work, and your iPod's battery will not be charged.
Caution: Connect the supplied RI cable to only jacks. Do not connect headphones to the jack, as it will damage your equipment.
■ What to do if you already have a component connected to your AV receiver/amp's TAPE input or RI Dock-compatible input
Connect the RI Dock to an unused AV input on your AV receiver/amp. However, you will not be able to use any of the functions.
Putting Your iPod in the RI Dock
- Plug in the AC adapter.
- Turn on your AV receiver/amp, and select the appropriate inputs on your AV receiver/amp.
- Align your iPod with the RI Dock's iPod slot, and carefully place your iPod in the slot, as shown.
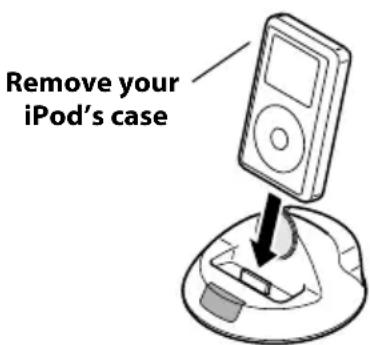
text_image
Remove your iPod's case■ Adjusting the iPod Adapter
The iPod adapter needs to be adjusted to match your particular iPod. If there's a gap between the back of your iPod and the adapter, turn the adapter counterclockwise to close the gap. Turning the adapter counterclockwise moves it forward. Turning it clockwise moves it backward.
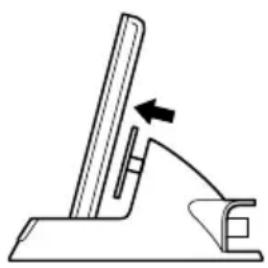
natural_image
Diagram of a mechanical lever mechanism with an arrow indicating motion (no text or symbols present)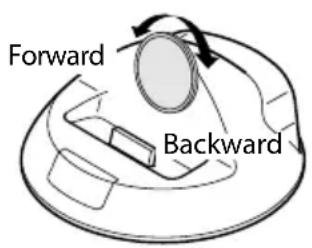
text_image
Forward BackwardNotes:
- To prevent iPod connector damage, don't twist your iPod when inserting or removing it, and be careful not to knock over the RI Dock while your iPod is inserted.
- D on't use the RI Dock with any other iPod accessories, such as FM transmitters and microphones, because they may cause a malfunction.
Function Overview
■ Basic Operation
Note:
- Y our AV receiver/amp may take several seconds to startup, so you might not hear the first few seconds of the first song.
- System On Function
When you turn on your AV receiver/amp, the iPod turns on as well. With some AV receivers/amps, you may need to press the [ON] button on your AV receiver/amp's remote controller's twice to turn on the other components in your system.
- System Off Function
When you turn off your AV receiver/amp, the iPod turns off as well.
• A uto Power On Function ^*1
If you start iPod playback while your AV receiver/amp is on Standby, your AV receiver/amp will automatically turn on and select your iPod as the input source. Then, your iPod will start playback.
- D irect Change Function ^1
If you start iPod playback while listening to another input source, your AV receiver/amp will automatically select your iPod as the input source.
- Timer Play
You can use your AV receiver/amp's Timer function to turn on your AV receiver/amp and iPod and start playback at a specified time.
- Linked Dimmer Operation
When you use your AV receiver/amp's Dimmer function to change its display's brightness, the brightness of the RI Dock's Power indicator will change as well.
- Using Your AV receiver/Amp's Remote Controller
You can use your AV receiver/amp's remote controller to control basic iPod functions (see page 9).
Operating Notes:
- T he RI Dock must be connected to your AV receiver/amp with both an reable and an audio cable to use the functions.
- If your AV receiver/amp doesn't support the System On, System Off, Auto Power On, and Direct Change functions, you'll need to turn your AV receiver/amp on and off and select the input source manually.
- Before you select another input source, stop iPod playback to prevent your AV receiver/amp from selecting the iPod input source by mistake.
- I f any accessories are connected to your iPod, your AV receiver/amp may not be able to select the input source properly.
- While your iPod is in the RI Dock, its volume control has no effect. If you adjust your iPod's volume control while it's in the RI Dock, make sure it's not set too high before you reconnect your headphones.
■ Charging Your iPod's Battery
The RI Dock charges your iPod's battery while your iPod is in the RI Dock.
Notes:
- T o charge your iPod battery, the AC adapter must be plugged into a suitable wall outlet and connected to the RI Dock's DC IN jack.
- See your iPod's instruction manual for more information on battery charging.
■ Using Your iPod's Alarm Clock
You can use your iPod's Alarm Clock function to automatically turn on your iPod and AV receiver/amp at a specified time. Your AV receiver/amp's input source will automatically be set to the input to which your iPod is connected.
Notes:
- To use this function, your iPod must be in the RI Dock, and the RI Dock must be connected to your AV receiver/amp with both an cable and an audio cable.
- When you use this function, be sure to set your AV receiver/amp's volume control to a suitable level.
- Y our AV receiver/amp may take several seconds to startup, so you might not hear the first few seconds of the first song.
Using Your Amp's Remote Controller
The following table shows which buttons on your amp's remote controller you can use to control your iPod while it's in the RI Dock. Be sure to select the appropriate remote mode first, and point your remote controller at your amp. Note that some buttons may be labelled differently, and some remote controllers may not have certain buttons.
| iPod function | Remote controller button to use | Description | ||
| TAPE mode | MD mode C | DR mode HDD mode | ||
| Turn on/off [STANDBY], [ON] — iPod is turned on and off. | ||||
| Play | Play [▶] | Starts playback on the iPod. If the iPod is not already on, it's turned on automatically. | ||
| Pause | Pause [■■], Stop [■] | Pause [■■] | Pauses iPod playback. | |
| Next song |  |  | Selects the next iPod song. | |
| Previous song |  |  | Restarts the current iPod song. Press it twice to select the previous song. | |
| Fast forward | — |  | Press and hold to fast forward the iPod. | |
| Rewind | — |  | Press and hold to rewind the iPod. | |
* To select the next or previous photo in an iPod photo slideshow, use the controls on your iPod photo.
The following functions can be used with some Onkyo amps.
| iPod function | Remote controller button to use | Description | |||
| TAPE mode | MD mode | CDR mode | HDD mode | ||
| Shuffle | [DOLBY MODE] | [RANDOM], [PLAYMODE], [SHUFFLE] | Sets the iPod's Shuffle function to: Songs, Albums, or Off. | ||
| Repeat | [REVERSE MODE] | [REPEAT] | Sets the iPod's Repeat function to: One, All, or Off. | ||
| Backlight | REC [●] | [DISPLAY], [SCROLL] | The iPod's backlight comes on for 30 seconds. | ||
| Playlist/Album mode | Reverse Play [◀] | [ENTER], [PROGRAM], [MEMORY] | — | To use the next four functions with modes other than HDD, first select Playlist/Album mode by using one of these buttons, and then press the listed button while the RI Dock's Power indicator is flashing (about 5 seconds). | |
| Next playlist | Fast Forward [▶▶] | [PLAYLIST UP] | Selects the next playlist on the iPod. Select Playlist/Album mode first (see above). | ||
| Previous playlist | Rewind [◀◀] | [PLAYLIST DOWN] | Selects the previous playlist on the iPod. Select Playlist/Album mode first (see above). | ||
| Next album | Next [▶▶] | [ALBUM UP] | Selects the next album on the iPod. Select Playlist/Album mode first (see above). | ||
| Previous album | Previous [◀◀] | [ALBUM DOWN] | Selects the previous album on the iPod. Select Playlist/Album mode first (see above). | ||
* D epending on your amp, some buttons may not work as expected.
There's no sound
• Make sure your iPod is actually playing.
- Make sure your iPod is inserted properly in the RI Dock.
- Make sure the RI Dock is connected to the correct input jacks on your AV receiver/amp. Do not connect it to any output jacks.
- Make sure your AV receiver/amp is turned on, the correct input source is selected, and the volume is turned up.
- Make sure the plugs are pushed in all the way.
- Make sure the AC adapter is connected to a suitable wall outlet and connected to the RI Dock.
• Try resetting your iPod.
- Your AV receiver/amp's remote controller doesn't control your iPod
• 3 rd generation iPod models are not supported.
- Make sure your iPod is properly inserted in the RI Dock. If your iPod is in a case, it may not connect properly to the RI Dock. Always remove your iPod from the case before inserting it into the RI Dock.
- T he iPod cannot be operated while it's displaying the Apple logo.
- If your AV receiver/amp's remote controller has remote mode buttons, make sure you've selected the right mode.
- C heck the RI Dock's RI MODE switch setting.
- When you use your AV receiver/amp's remote controller, point it toward your AV receiver/amp.
- The RI Dock must be connected to your AV receiver/amp with both an cable and an audio cable.
- The TAPE IN on some amps can be set to TAPE, MD, or CDR. Make sure the RI Dock's RI MODE switch setting and the remote control mode match this setting. See your amp's manual for more information.
If you still can't control your iPod, start playback by pressing your iPod's Play button. Remote operation should then be possible.
- Make sure your AV receiver/amp's remote controller is set to the correct remote control ID.
■ Your AV receiver/amp unexpectedly selects your iPod as the input source
- A lways pause iPod playback when listening to another component that's connected to your AV receiver/amp. If playback is not paused, the Direct Change function may select your iPod as the input source by mistake when one track ends and another starts playing.
Caution: If you use this product under direct sunlight, fluorescent light, or germicidal lamp, ultraviolet or another elements in the light may change the product exterior color.
Power supply: AC adapter (5 V DC)
Power consumption
(iPod not inserted): 0.5 W
Weight: 0.48 lbs. (220 g)
Dimensions (W x H x D): 4-7/16 x 2-3/8 x 4-7/16 inches
112 x 60 x 112 mm
Connectors: AUDIO OUT L/R,
RI jack
Specifications and features are subject to change without notice.
In catalogs and on packaging, the letter at the end of the product name indicates the color. Specifications and operation are the same regardless of color.
- T he operating instructions in this manual apply to the iPod as of June 2007, and may change with future upgrades to the iPod software.
- The AC adapter supplied with the DS-A1XP is designed exclusively for use with the DS-A1XP. Do not use it with another device. Likewise, do not use any other AC adapter with the DS-A1XP, including those supplied with other RI Dock models. Doing so may damage the RI Dock.
- If there's any noise when listening to an FM or AM radio station on your tuner or receiver, try moving its antenna away from the RI Dock, iPod, and AC adapter's cable. In addition, don't wrap the AC adapter's cable around any other cables.
text_image
Adaptateur secteur R1 AUDIO OUT L R1 R1 R1 R1 R1 R1 R1 R1 R1 R1 R1 R1 R1 R1 R1 R1 R1 R1 R1 R1 R1 R1 R1 Câble R1 fourni Câble AV fourni Blanc AUDIO INPUT L Blanc R R R1Ampli-tuner/amplificateur AV compatible RI
natural_image
Simple line drawing of a mechanical lever or support structure with an arrow indicating motion (no text or symbols)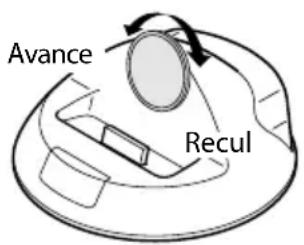
text_image
Avance ReculRemarques:
Dimensions (L x H x P): 112 x 60 x 112mm
Prises: AUDIO OUT L/R, prise
RI
text_image
Jack R1 Jacks AUDIO OUT L/R R1 R audio OUT L DC5001A Jack DC IN 5V 1A
text_image
Scollegate Collegate Taccatext_image
Jack RI Jack AUDIO OUT L/R RI R AUDIO OUT L DC/DC/TA Jack DC IN 5V 1A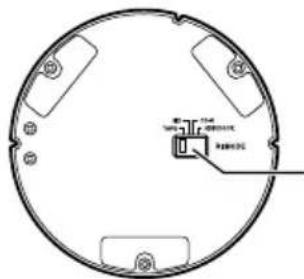
text_image
10mm 10mm 20mm 30mm 40mm 50mm 60mm 70mm 80mm 90mm 100mmnatural_image
Simple line drawing of a mechanical lever or support structure with an arrow indicating motion (no text or symbols)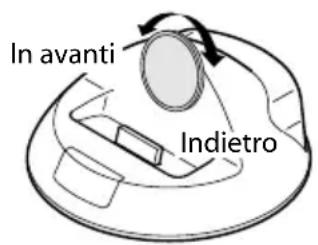
text_image
In avanti IndietroNote:
natural_image
Mechanical diagram showing a lever mechanism with an arrow indicating motion (no text or symbols present)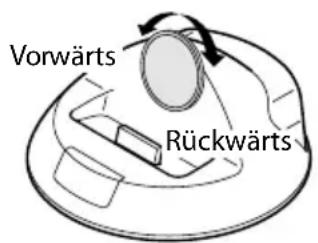
natural_image
Simple line drawing of a mechanical lever with an arrow indicating motion (no text or symbols)
18 Park Way, Upper Saddle River, N.J. 07458, U.S.A.
Tel: 201-785-2600 Fax: 201-785-2650 http://www.us.onkyo.com/
ONKYO EUROPE ELECTRONICS GmbH
Liegnitzerstrasse 6, 82194 Groebenzell, GERMANY
Tel: +49-8142-4401-0 Fax: +49-8142-4401-555 http://www.eu.onkyo.com/
ONKYO EUROPE UK Office
Suite 1, Gregories Court, Gregories Road, Beaconsfield, Buckinghamshire, HP9 1HQ
UNITED KINGDOM Tel: +44-(0)1494-681515 Fax: +44(0)-1494-680452
ONKYO CHINA LIMITED
Unit 1&12, 9/F, Ever Gain PlazaTower 1, 88, Container Port Road, Kwai Chung,
N.T., HONG KONG Tel: 852-2429-3118 Fax: 852-2428-9039
http://www.ch.onkyo.com/

http://www.onkyo.com/
10906-1