CR 117 DAB+ - Alarm clock radio SEG - Free user manual and instructions
Find the device manual for free CR 117 DAB+ SEG in PDF.
| Product type | Radio alarm clock |
| Brand | SEG |
| Model | CR 117 DAB+ |
| Power supply | Mains adapter 100-240 V AC / 5 V DC, 1 A |
| Output power | 0.6 W |
| DAB+ reception | Band III (174-240 MHz) |
| FM reception | 87.5 – 108 MHz |
| Headphone jack | 3.5 mm stereo jack |
| Antenna | Telescopic, adjustable |
| Number of alarms | 2 (independent) |
| Alarm repeat options | Once, daily, weekdays, weekend |
| Snooze function | Yes, repeats every 5 minutes for 1 hour |
| Auto standby | 5 to 90 minutes (in 5-minute steps) |
| DAB+/FM station presets | 10 stations each |
| Display | LCD screen with information (station name, time, date, etc.) |
| Dimensions (approx.) | 150 x 80 x 100 mm |
| Weight (approx.) | 400 g |
| Warranty | 2 years (conditions in manual) |
| Cleaning | Soft, slightly damp cloth, no chemicals |
| Safety | Do not open, avoid moisture, do not expose to heat |
| Package contents | Radio alarm clock, mains adapter, user manual |
Frequently Asked Questions - CR 117 DAB+ SEG
User questions about CR 117 DAB+ SEG
0 question about this device. Answer the ones you know or ask your own.
Ask a new question about this device
Download the instructions for your Alarm clock radio in PDF format for free! Find your manual CR 117 DAB+ - SEG and take your electronic device back in hand. On this page are published all the documents necessary for the use of your device. CR 117 DAB+ by SEG.
USER MANUAL CR 117 DAB+ SEG
natural_image
Line drawing of a rectangular electronic device with a blank screen (no text or symbols)Benutzerhandbuch
User Manual
text_image
13:44 D A YOLUTE P1text_image
FM 13:44 96.6 P1text_image
DAB 13:44 Y ALARM 1Safety Instructions and Important Information About Intended Use
Please read the following instructions and safety notes thoroughly before starting to use your product!
- Intended Use: this device has been designed for receiving and playing back radio broadcasts and to show time display. If the product is not used according to the instructions, the user's and other persons' safety is not guaranteed and the warranty will be void.
- User manual: please read this User Manual thoroughly and keep it for any future reference in a safe place. For your own safety and in order to familiarize yourself with the different functions of the product, please follow the instructions in this manual carefully. When passing this product to other persons, please also hand over this User Manual. Please also read the user manuals of all devices that you are going to connect to this device.
- Connecting to the Power Supply: do not use the device if the device, the power adaptor (Option) or its cables present visible damage. Connect the device only to the voltage indicated on the corresponding label on the product or power adaptor, resp. Never connect the device to a different voltage. Connect the device to grounded
power outlets that comply with the corresponding space on the back and sides).
safety standards only. Do not bend or squeeze the The device has anti-skid rubber feet. Over the long-cables. term, these feet can dissolve due to chemical
WARNING: Inside the device there is dangerous substances. It is recommended that you place the voltage. Never open the housing of the device: device on an anti-skid surface.
there is risk of personal injury by electric shock. WARNING: do not use this device outdoors!
In order to completely disconnect the device from
• Condensation: when bringing this device from a
the mains, the power plug must be pulled out from cold to a warm environment (e.g. after
the wall outlet. Make sure that you can remove the transportation) moisture can condensate inside the power plug at any time. Always pull the power cord device. In order to protect the device from damage from the plug and never from the cable itself, and failure wait at least 2 hours prior to using the
Electric storms may damage any electric device.
equipment; therefore disconnect the power plug
• Health injury: extremely high audio volumes can your hearing permanently. Therefore
from the wall outlet during a thunderstorm. It is also damage your recommended to disconnect the device from the mains and to remove any batteries when you are sound via head intending not to use the device for a longer time.
carefully adjust the volume, specially if you enjoy phones or earphones (option).
- Objects inside the device: make sure that no foreign objects or liquids enter the device via the ventilation holes or other openings. There is risk of electric shock, damage to the device and short-circuit. In case of any emergency, immediately pull the power plug and contact a qualified service technician.
Connect the headphones or earphones to the device (if available - option) prior to powering it on, as connecting it when already powered on can produce high sound levels causing damage to your hearing.
- Installation: place the device onto a flat and even surface. Never cover the ventilation holes of the device and make sure that the air can easily flow around the device (keep at least 10cm / 4 inch
• Children: Do not allow children to play with electrical devices. Children may not be able to comprehend the presence of potential risks.
• Batteries: Keep batteries away from children.
• Repairs: never open the device! Any repairs must
Always replace all the batteries at the same time be performed by authorized technicians or service
(never mix old and new batteries). Do not short-personnel. Any unauthorised opening or
circuit any batteries. Keep batteries away from any modification will void the warranty and also the
heat sources (direct sun radiation, fire etc.). There safety of the product may be altered.
is risk of explosion when misusing the batteries.
WARNING: Inside the device there is dangerous
• Do not place any objects on the device and never
voltage. Never open the housing of the device:
apply any pressure onto the housing or the display. there is risk of personal injury by electric shock.
Do not place any recipients containing liquids
(beverages, vases, etc.) onto or next to the device.
Do not place any fire sources (such as candles)
onto the device. This could damage the product.
- Environmental effects: Keep the device away from
any heat sources (heating equipment, ovens,
cooking places, candlelight, etc.), direct sun
radiation, dirt, dust, vibrations, strong magnetic
fields, moisture and rain.
- Cleaning: Clean the device with a soft, slightly
moistened cloth. Do not use any chemicals, alcohol
or solvents for cleaning. The finish of the device can
be damaged by using these substances.
Always make sure that no moisture enters the
device.
• Servicing: when using the device according to the
operating instructions, no special service or
maintenance is required. In case of any loss of
performance or other malfunction, contact a
qualified service technician.
Environment
Old batteries do not belong in with the domestic waste!

Consumers are obliged by law to return any old batteries and rechargeable batteries to the corresponding local and/or public collection centres or to return them to the retail shops. This ensures that batteries will be disposed of respecting the environment. Make sure to return any batteries and rechargeable batteries discharged.
Disposal of old electric and electronic devices:
The icon of a dashed-out waste bin means that a separate disposal of electric/electronic equipment is necessary.
According to the Legislation of the European Union, any electric and electronic devices may not be disposed of with domestic trash but must be returned to a special collection center enabled for the recycling of these devices. The local waste companies should have set up specific collecting centres for this purpose, allowing private consumers to return any old devices for free. Please contact your local authorities or the local waste company for the available disposal possibilities.
Please support us actively by protecting the environment and recycle this product accordingly by returning it to a specific collection centre. This will protect the environment, other people and yourself. Thank you very much!
Disposal of Packaging and Packaging Materials:
Packaging and any packaging materials do not belong in with the domestic waste! Your system consists of materials which can be recycled and reused if disassembled by a specialized company. Please observe the local regulations regarding the disposal of packaging materials.
IMPORTANT SAFETY INFORMATION

CAUTION! RISK OF ELECTRIC SHOCK DO NOT OPEN

TO REDUCE THE RISK OF ELECTRIC SHOCK DO NOT REMOVE COVER (OR BACK)

This symbol indicates that there are important operating and maintenance instructions in the literature accompanying this unit.
This symbol indicates that dangerous voltage constituting a risk of electric shock is present within this unit.
Read these instructions.
Keep these instructions.
Heed all warnings.
Follow all instructions.
Do not use this apparatus near water.
Clean only with a slightly damp cloth.
Do not block any ventilation openings.
Install in accordance with the manufacturer's instructions.
Do not install or operate near any heat sources such as radiators, stoves, or other apparatus that produce heat.
Unplug this apparatus during lightning storms or when unused for long periods of time.
Refer all servicing to qualified service personnel. Servicing is required when the apparatus has been damaged in any way, such as the power-supply cord or plug is damaged, liquid has been spilled or objects have fallen into the apparatus, the apparatus has been exposed to rain or moisture, does not operate normally, or has been dropped.
Warning: To reduce the risk of fire or electrical shock, do not expose this product to rain or moisture. The product must not be exposed to dripping and splashing and no object filled with liquids such as a vase of flowers should be placed on the product.
No naked flame sources such as candles should be placed on the product.
Caution: Changes or modifications not expressly approved by the manufacturer could void the user's authority to operate this device.
Caution: Usage of controls or adjustments or performance of procedures other than those specified herein may result in hazardous exposure.
IMPORTANT
This equipment generates, uses and can radiate radio frequency energy and, if not installed and used in accordance with the instructions,
may cause harmful interference to radio communication. However, this is no guarantee that interference will not occur in a particular installation. If this equipment does cause harmful interference to radio or television reception, which can be determined by turning the equipment off and on, the user is encouraged to try to correct the interference by one of the following measures:
- Reorient or relocate the receiving antenna.
- Increase the separation between the equipment and receiver.
- Connect the equipment into an outlet on a circuit different from that to which the receiver is connected.
- Consult the dealer or an experienced radio/TV technician for help.
ELECTRICAL INFORMATION
Mains Supply: The mains operating voltage of this unit is marked on a rating plate on the rear of the unit.
The means of disconnecting this appliance from the mains supply is the mains plug. This should be unobstructed and readily operable at all times.
PRELIMINARIES TOP VIEW
UNPACKING
Carefully unpack the unit. If it is damaged, please return it to your nearest Tesco store for replacement.
If
you pass the unit on to a third party make sure you pass on the handbook. We suggest you retain the packaging. If you dispose of it, do so having regard to any recycling regulations in your area.
CONTENTS
The carton should contain:
The CR 117 DAB+ clock radio
Operating Manual
Mains Adaptor
Retain the packaging.
If you dispose of it, do so having regard to any recycling regulations in your area.
LOCATION
Place the unit on dry stable surface away from heat and damp and where it is unlikely to fall or be knocked over.
text_image
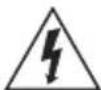
5 6 7 8 4 3 2 1 9 10 11 12 13 S N O O Z E / Sleep ALARM- Snooze/Sleep button
- / Select button
- Tuning - button
- Tuning + button
-
DC power socket
-
Antenna
- Earphone socket
- Speakers
- INFO/MENU button
-
Vol - button
-
Vol + button
12 Alarm button - Display
1 Extend the antenna as far as it will go.
NOTE: The quality of the DAB/FM reception will be influenced by the positioning of the pigtail antenna.
2 Connect the mains adaptor to the DC power socket on the rear of the radio.
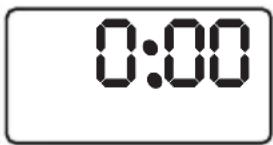
3 The unit will display the word WELCOME for a few seconds then display 0:00. After a few seconds the time will be auto detected from the DAB reception.
4 Press the ⏻/SELECT button (2) to switch on the unit (if not already on). The display will show the word SCANNING followed by arrows indicating the scan progress.
5 When stations are found, the radio will automatically revert to the DAB function and play the first station found.
6 The unit will default to the last mode and station used when powered Off and then On again.
text_image
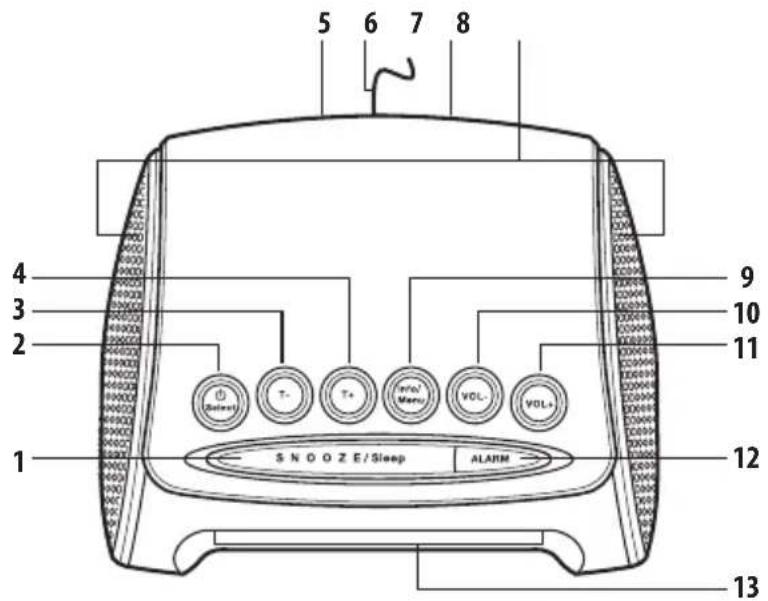
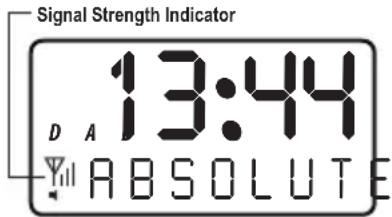
0:007 If no signal is found during the scan OFF AIR will appear on the display and you will need to relocate the radio and perform another scan. Use the signal strength indicator to determine if there is a signal available. See diagram below.
text_image
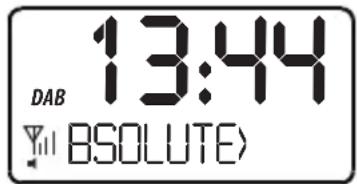
Signal Strength Indicator 13:44 D A ABSOLUTENOTE: If no signal can be found you may have a weak DAB signal in your area. Repositioning the antenna may improve the signal strength.
DAB INTRODUCTION
DAB (Digital Audio Broadcasting) technology allows many more radio stations compared to FM. DAB transmissions do away with problems of hiss and fade that plague AM and FM broadcasts and are less likely to be affected by adverse weather conditions or other sources of interference. In addition to speech and music DAB
transmissions carry high levels of data - far greater than the limited RDS information available on FM stations. Unlike FM, DAB is broadcast on many frequencies. Many countries in Europe, including the UK use Band III (174-240 MHz); others, France for example, use the L-Band (1452-1492 MHz). Germany uses both bands. Your radio can tune Band III. Countries in Europe that use Band III include: Belgium, Denmark, Holland, Italy, Norway, Portugal, Spain, Sweden, Switzerland. Your radio will tune stations in all these countries. Your radio cannot receive French or German stations broadcasting in the L-Band though FM services are available all over Europe. Being digital, DAB transmissions can have a wider frequency range and greater dynamics than that available with FM technology.
Check how many statiosn you can get in your area: www.digitalradio.de.
1 The default mode is DAB but should the unit be in FM mode press and hold the INFO/MENU button until you see the display flash.
2 Use the T+/T- buttons to cycle through the menu options until you see TO DAB when displayed press the ⏻/SELECT button to activate.
3 To select a station from the list (found during the initial scan pt1 getting started) use the T+/T- buttons to cycle through.
4 When the station you wish to listen to is found, press the ⏻/SELECT button.
5 The display will show TUNING for a second and then activate the station.
6 Adjust the volume level to the required setting.
NOTE: If no signal is found when activating the station OFF AIR will appear on the display and you will need to relocate the radio and perform another scan (see page 4 for manual tuning).
7 To enter standby mode press and hold the Ⓗ/SELECT button. To resume playback press the Ⓗ/ SELECT button quickly.
ON
Preset Memory
Ten preset stations can be stored in memory for DAB. To store a station follow the below steps.
1 Press and hold the INFO/MENU button until you see the display flash.
2 Use the T+/T- buttons to cycle through the menu options until you see STORE when displayed press the Ⓤ/ SELECT button to activate the preset store function.
hand side to indicate slot one of ten storage locations. Select from 1-10 preset locations using the T+/T- buttons to cycle through 1-10.
4 Press the ⏻/SELECT button to store the current station on the selected preset location.
3 Pre dis the bottom right

text_image
13:44 D A OLUTE P1Recalling The Preset Memory
To recall a preset station follow the below steps.
1 Press and hold the INFO/MENU button until you see the display flash.
2 Use the T+/T- buttons to cycle through the menu options until you see RECALL when displayed press the ⏻/SELECT button to activate the preset recall function.
hand side to indicate slot one of ten storage locations. Select from 1-10 preset locations using the T+/T- buttons to cycle through 1-10.
NOTE: You can only recall stations from presets that have been stored already.
4 Press the ⏻/SELECT button to recall the station from the selected preset location.
3 P1e dis the bottom right
Finding New Stations
From time to time new radio stations may become available. Or you wish to use the unit in a different location. In this case you will need to perform a manual scan to update the station list.
DAB OPERATION
1 With the radio on and in DAB mode press and hold the INFO/MENU button until you see the display flash.
2 Use the T+/T- buttons to cycle through the menu options until you see AUTOSCAN when displayed press the ⏻/SELECT button to activate the scan function.
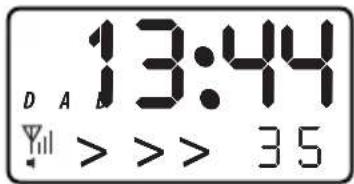
3 You will see SCANNING appear on the display for a second followed by arrows indicating the scan progress.
text_image
13:44 D A B Y > > > 354 Once complete any new stations will be added to the list and any stations no longer available will be removed.
Manual Tuning
As well as auto tune, you can manually tune the receiver. This can help you when aligning the
aerial or when adding stations that were missed while auto tuning.
1 With the radio on and in DAB mode press and hold the INFO/MENU button until you see the display flash.
2 Use the T+/T- buttons to cycle through the menu options until you see MANUAL when displayed press the ⏻/SELECT button to activate the manual tune function.
3 Use the T+/T- buttons to select a DAB channel. Press the ⏻/SELECT button to activate the selected frequency. If a signal is found the display will show the signal strength of the found channel.
4 Press the ⏻/SELECT button once more to return to the standard DAB tuning mode.
Display Modes
Press the INFO/MENU button, and the bottom section of the display will show a sub text menu with various information about the current station. Every press of the INFO/MENU button changes the information displayed.
This can be better explained in a diagram showing the order of sequence. NOTE: once you reach the last info setting the next press will return you to the first setting.
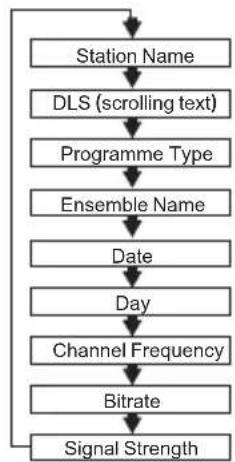
flowchart
graph TD
    A["Station Name"] --> B["DLS (scrolling text)"]
    B --> C["Programme Type"]
    C --> D["Ensemble Name"]
    D --> E["Date"]
    E --> F["Day"]
    F --> G["Channel Frequency"]
    G --> H["Bitrate"]
    H --> I["Signal Strength"]
Station Name Displays the name of the current station.
DLS (Dynamic Label Segment)
Dynamic label segment is a scrolling message that the broadcaster may include with their transmissions. This message usually includes information, such as program detail etc.
DAB OPERATION
Program type This describes the "Style" or
"genre" of music that is being broadcast e.g. "Rock" or "Classical".
Multiplex (Group name) A multiplex/ensemble is a collection of radio stations that are bundled and transmitted on one frequency. There are national and local multiplexes. Local ones contain stations that are specific to that area e.g. MXR West.
NOTE: DAB – unlike normal radio, groups
together several radio stations and transmits them on one frequency.
Date & Day
The time & date is set automatically from the DAB broadcast or can be set manually.
Channel Frequency Displays frequency and channel number for the current station.
Bitrate Displays the audio bit rate for the current station.
Signal Strength Displays the signal strength for the current station.
NOTE: only station name and DLS will remain on screen the other options will time out.
Secondary Services
Some radio stations operate a secondary service. Which means a second temporary broadcast can be output.
1 If you see a > symbol at the end of the station info / description then a secondary service is available.
text_image
13:44 DAB BSOLUTE2 Press the Ⓧ SELECT button to activate the service.
3 You will notice that once tuned to the secondary service the “>” symbol now appears in front of the info / description. Press the ⏻/ SELECT button again to resume the original broadcast.
FM OPERATION
1 To switch from any mode to FM press and hold the INFO/MENU button until you see the display flash.
2 Use the T+/T- buttons to cycle through the menu options until you see "TO FM" when displayed press the/ SELECT button to activate.
3The first time the radio is used or after a factory reset (see page 9), the default frequency will be
87.5(lowest frequency). To find a radio station you can either press the T+/T- buttons quickly to scan up or down the range in 0.05 MHz increments or press and hold either button for at least a second. This will scan up or down the frequency range until a strong signal is found.
4 Any station found will begin to play automatically and RDS data (if the signal is strong enough will scroll along the bottom of the display).
5 Adjust the volume level to the required setting.
FM OPERATION
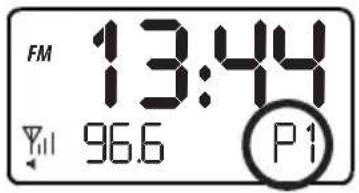
Preset Memory
Ten preset stations can be stored in memory for FM. To store a station follow the below steps.
1 Press and hold the INFO/MENU button until you see the display flash.
2 Use the T+/T-buttons to cycle through the menu options until you see "STORE" when displayed press the SELECT button to activate the preset store function.
3 P1" on the bottom right
hand side to indicate slot one of ten storage locations. Select from 1-10 preset locations using the T+/T-buttons to cycle through 1-10.
4 Press the SELECT button to store the current station on the selected preset location.
text_image
FM 13:44 96.6 P1Recalling The Preset Memory
To recall a preset station follow the below steps.
1 Press and hold the INFO/MENU button until you see the display flash.
2 Use the T+/T-buttons to cycle through the menu options until you see "RECALL" when displayed press the / SELECT button to activate the preset recall function.
3TP4" on the bottom right
hand side to indicate slot one of five storage locations. Select from 1-10 preset locations using the T+/T-buttons to cycle through 1-10.
NOTE: You can only recall stations from presets that have been stored already.
4 Press the ⏻ / SELECT button to recall the station from the selected preset location.
Display Modes
Press the INFO/MENU button, and the bottom section of the display will show a sub text menu with various information about the current station. Every press of the INFO/MENU button changes the information displayed.
This can be better explained in a diagram showing the order of sequence. NOTE: once you reach the last info setting the next press will return you to the first setting.
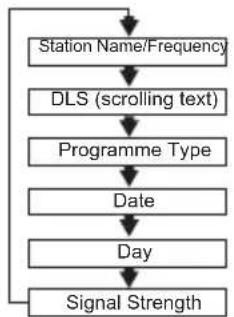
flowchart
graph TD
    A["Station Name/Frequency"] --> B["DLS (scrolling text)"]
    B --> C["Programme Type"]
    C --> D["Date"]
    D --> E["Day"]
    E --> F["Signal Strength"]
    F --> A
DLS (Dynamic Label Segment)
Dynamic label segment is a scrolling message that the broadcaster may include with their transmissions. This message usually includes information, such as program detail etc.
FM OPERATION
Program type This describes the "Style" or
"genre" of music that is being broadcast e.g. "Rock" or "Classical".
Date & Day
The time & date is set automatically from the DAB broadcast or can be set manually.
Signal Strength Displays the signal strength for the current station.
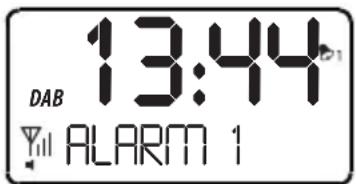
ALARM OPERATION
Setting the Alarm
The clock radio has two alarm settings.
1 Press the ALARM button (12) the display will show "ALARM 1", press either of the T+/T-buttons to cycle between ALARM 1 or 2.
text_image
13:44 DAB Y ALARM 12 After selecting ALARM 1 or 2 press the
/ SELECT button and immediately afterwards press either of the T+ / T- buttons to cycle between ON or OFF for that alarm. SelectON and press the SELECT button once more to begin programming the alarm.
3 First you will need to set the time for the alarm. Use the T+/T- buttons to set the hour (24 hour format), press the / SELECT button to proceed to setting the minutes using the same process as above to set the minutes. Press the / SELECT button to set the On Time and proceed.
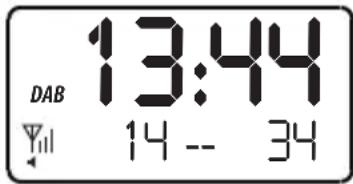
text_image
DAB 13:44 14 -- 344 Press the T+/T- buttons to cycle through the alarm repeat options: ONCE, DAILY, WEEKDAYS
& WEEKENDS. Press the Ⓧ / SELECT button to proceed to the next step.
5 If "ONCE" was selected in the previous step you will need to complete 2 more stages editing the
Year, Month & Day in the same manner as the hours & minutes. Once complete press the
/ SELECT button.
6 The next step is to select the alarm type. Use the T+/T-buttons to cycle between BUZZER,
DAB or FM. Press the ⏻ / SELECT button to proceed.
7 The last setting is the alarm volume setting. Use the T+/T- buttons to set the volume and then press the SELECT button to save the alarm.
NOTE: Ensure the alarm volume is high enough that you will hear the alarm.
ALARM OPERATION
8 You will now see an alarm icon appear on the display stating ALARM 1 or 2.
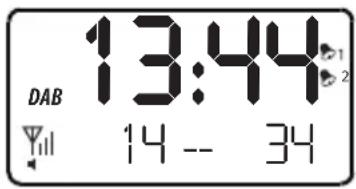
text_image
DAB 13:44 14 -- 349 To cancel an alarm setting press the ALARM button, use the T+/T- buttons to select ALARM 1 or 2 and press the ⏻/ SELECT button to enter the options. Here you can use the T+/T- buttons to select ON or OFF.
10 Once you have selected the ON/OFF mode press the Ⓧ SELECT button to store the setting.
NOTE: When the alarm is set to DAB or FM the last station listened to will be the station played during the alarm.
NOTE 2: Should you need to step back to the previous settings you can press the ALARM button (12) repeatedly until you reach the setting required.
Reviewing the Alarm Settings
Follow the below procedure to check the settings for ALARM 1 & 2.
1 Press the ALARM button (12) the display will show "ALARM 1", press either of the T+/T-buttons to cycle between ALARM 1 or 2.
2 After selecting ALARM 1 or 2 press the ⏻ / SELECT button.
3 Continue to press the Ⓧ SELECT button to review the settings
4 Should you wish to alter any settings use the T+ / T- buttons & the ⏻/ SELECT button to store.
Cancelling the Alarm
To cancel the alarm while sounding press the ALARM button (12).
SNOOZE OPERATION
1 When the radio or buzzer alarm sounds, pressing the SNOOZE button (1) will silence the alarm for five minutes.
2 The SNOOZE button can be pressed again when the alarm sounds to add another five minutes to the snooze period.
NOTE: The snooze button can be pressed every five minutes up to one hour, after the hour the alarm is switched OFF.
SLEEP TIMER
Your clock radio can be set to turn off after a preset period of time.
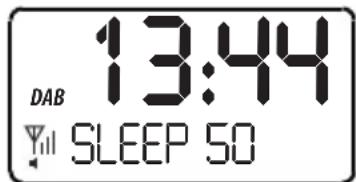
text_image
13:44 DAB SLEEP 501 Ensure the unit is on.
2 Press the SNOOZE/SLEEP button (1) to initiate the snooze setting menu.
SLEEP TIMER
3 Use the T+/T- buttons to cycle through the timer options from OFF through to 90 minutes in 5 minute increments.
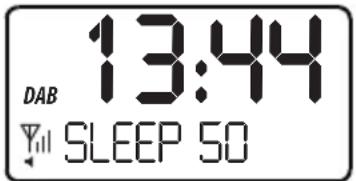
text_image
DAB 13:44 SLEEP 504 Press the ⏻/ SELECT button to store the setting.
HEADPHONE OUTPUT
There is a headphone output socket on the back panel of the radio (7). If headphones are connected to this socket for private listening, the speakers will cut out automatically.
Always keep the volume within reasonable limits to avoid damaging your hearing.
WARNING! Excessive sound pressure can cause hearing loss. With continued use at high volume, your ears may become accustomed to the sound level, which may result in permanent damage to your hearing.
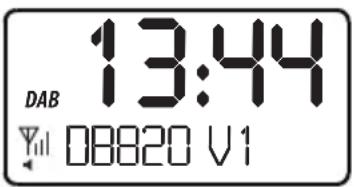
SOFTWARE VERSION
If at any time you need to review the software revision number follow the below steps.
1 Press and hold the INFO/MENU button until you see the display flash.
2 Use the T+/T-buttons to cycle through the menu options until you see "VERSION" when displayed press the SELECT button to display the details.
text_image
DAB 13:44 Yll 08820 V1- Set to Standby.
- Switch the unit off at the mains and unplug it if you are leaving it unattended for a long period (holidays etc).
CARE AND CLEANING
All care and cleaning operations should be carried out with the unit unplugged from the mains power.
Occasionally wipe the cabinet with a lint free duster. Never clean the unit with liquids or solvents.
NTYSPECIFICATION

Supply Voltage: 5V DC
Mains power adaptor: 100-240 V AC to 5 V 1A DC
Output Power: 0.6W
DAB:.....BAND III 174 -240 MHz
FM:87.5-108 MHz
Headphone Output:..... 3.5mm stereo jack
Your Tesco appliance is covered by a warranty for 12 months from the date of purchase. If a fault develops during this period, please contact the TESCO electrical help line on 0845 456 6767.
Please have your original purchase receipt with you when you call. This warranty in no way affects your consumer rights.

UK: Waste electrical products should not be disposed of with household waste. Separate disposal facilities exist, for your nearest facilities.
See www.recyclemore.co.uk or in-store for details.
ROI: Produced after 13th August 2005.
Waste electrical products should not be disposed of with household waste.
Please recycle where facilities exist. Check with your Local Authority or retailer for recycling advice.

This appliance complies with European Safety and Electrical directives. It fulfills the following EU regulations:
EN55013: 2001 +A1: 2003 +A2: 2006
EN55020: 2007
EN61000-3-2:2006 +A1: 2009 +A2: 2009
EN61000-3-3: 2008
RISQUE D'ÉLECTROCUTION - NE PAS OUVRIR

AFIN DE RÉDUIRE LES RISQUES D'ÉLECTROCUTION, NE RETIREZ PAS LE COUVERCLE (NI LE PANNEAU ARRIÈRE) DE L'APPAREIL

text_image
13:44 D A YOLUTE P1DLS (Dynamic Label Segment)
text_image
FM 13:44 96.6 P1DLS (Dynamic Label Segment)
text_image
DAB 13:44 YIL ALARM 1text_image
DAB 13:44 Yill SLEEP 50text_image
13:44 D A O L U T E P1DLS (Dynamic Label Segment)
text_image
FM 13:44 Yll 96.6 P1DLS (Dynamic Label Segment)
text_image
DAB 13:44 Y ALARM 1service@schmid-electronics.de
service@schmid-electronics.de