
SB 1200 - Digital decoder SEG - Free user manual and instructions
Find the device manual for free SB 1200 SEG in PDF.


| Product Type | Digital Satellite Receiver (Digital Decoder) |
| Brand | SEG |
| Model | SB 1200 |
| Weight (Net) | Approx. 2.0 kg |
| Power Supply | 90-240 V AC, 50/60 Hz |
| Power Consumption | Max. 25 W |
| Tuner Frequency Range | 950 MHz to 2150 MHz |
| Demodulation | QPSK |
| Symbol Rate | 1-45 Ms/s (SCPC, MCPC) |
| LNB Power | 13/18 V, Max 500 mA with overload protection |
| DiSEqC Control | Version 1.0/1.2 compatible, USALS |
| Video Decoding | MPEG-2 MP@ML, PAL/NTSC conversion |
| Aspect Ratio | 4:3, 16:9 |
| Audio Decoding | MPEG-1 Layer I & II, stereo |
| Channel Storage | Up to 6000 channels |
| Connector Types | LNB IN (F-type), TV SCART, COAXIAL digital audio output |
| Accessories Included | Remote control, batteries, user manual |
| Additional Features | Multi-language OSD, EPG, teletext, parental lock, favorite channels, timer |
| Cleaning Instructions | Unplug, use soft damp cloth; no liquid cleaners |
| Safety Compliance | CE, EN60065, EN55013, EN55020, EN61000-3-2 |
Frequently Asked Questions - SB 1200 SEG
User questions about SB 1200 SEG
0 question about this device. Answer the ones you know or ask your own.
Ask a new question about this device
Download the instructions for your Digital decoder in PDF format for free! Find your manual SB 1200 - SEG and take your electronic device back in hand. On this page are published all the documents necessary for the use of your device. SB 1200 by SEG.
USER MANUAL SB 1200 SEG
natural_image
Black SEG wireless device with power and digital satellite receiver ports (no visible text or symbols beyond branding)Inhalt
1. Referenz ....5
natural_image
Front view of a black remote control with standard buttons and a 'SEC' logo (no readable text beyond branding)Fernbedienung
Figure 4. Remote Control
11. FAV:

PID (Packet Identifier)
QPSK (Quaternary Phase Shift Keying)
natural_image
Symbol of a trash bin crossed with two diagonal lines, representing no waste or discharge (no text or labels)natural_image
Symbol of a trash bin with crossed x- and y-axes, no text or numbers present. Safety Precaution ....2
1. Reference ....4
1.1 General Features ....4
1.2 Accessories ....5
2. Basic Functions....6
2.1 Front Panel ....6
2.2 Rear Panel ....7
2.3 Remote Control Unit (RCU) 8
3. Installation and Connection ....10
3.1 Connecting to TV....10
3.2 Connecting to Dish LNB....11
4. Installation and Operation....14
4.1 Menu Guide ....14
4.1.1 Installation....15
4.1.2 Service Organizing....21
4.1.3 STB Setting....23
4.1.4 STB Status....26
4.2 Other Useful Information....26
5. Additional Information....31
5.1 Problem Shooting....31
5.2 Technical Specification Tuner & Demodulator....32
5.3 Menu Screen Structure....33
5.4 Glossary ....34

Safety Precaution
This STB has been designed and manufactured to satisfy the international safety standards. Please read the following safety precautions carefully before operating this receiver.
Before installing your digital satellite receiver, all security and operating instructions should be read carefully. The User's Manual should be retained for future reference.
All operating and using instructions should be followed.
Never allow children to operate this electrical device without supervisor.

Main Supply:
Before operating, please check the units operating voltage is 100\~240V AC 50/60Hz. If the device or the power socket or its electrical connection is damaged, immediately unplug the product from the mains supply socket. Do not try to open or repair the receiver on your own! Service must be carried out only by experts at a proper service centre.
If replacement parts are required, only original components are allowed to use. The use of unauthorised components may result in risk of fire and electric shock.
Image interfaces by programmes with a frequency of approx. 12480 MHz (DSF etc.) can possibly be caused by cellular phones, which are located near the receiver or the antenna cable. If so the distance between receiver and telephone should be enlarged until the problems stop to emerge.

Overload:
Do not overload a wall outlet, extension cord or adapter, neither use damaged power cord or touch it with wet hand as this may result in electric shock.

Liquid:
The receiver shall not be exposed to dripping or splashing water, and that no objects filled with liquids, such as base, shall be placed on the apparatus.

Environment:
Protect the receiver against humidity, heat and cold. Allow 10cm space around the receiver
for sufficient ventilation. Do not cover the receiver's ventilation openings with items like newspapers, tablecloths, curtains, etc..
Do not place any objects filled with liquids, such as vases, on the satellite-receiver.
Take care that no foreign bodies or liquids are getting into the device.
Do not expose the set-top-box (receiver) to dripping or splashing liquids.
Ventilation:
Keep the slots on top of the receiver uncover to allow sufficient airflow to the unit. Do not put the receiver on soft furnishings or carpets. Do not expose the receiver to direct light or do not place it near a heater or in humid conditions. Do not stack other electronic equipments on top of the receiver.
Cleaning:
Plug out the receiver from the wall outlet before cleaning. Clean the receiver by a soft, damp cloth; do not use any washing-up liquids that affect the casing; do not spray any cleaner towards the receiver.
Connection:
Disconnect the receiver from the mains when you connect it to satellite LNB or disconnect it from LNB. Failure would possibly cause damage to the LNB.
Location:
Put the receiver indoor in order to avoid lightening, raining or sunlight.
In touch with certain furniture surfaces it may happen that the receiver's feet may rub off.
You should place the device on a proper underground that is stable and not easily inflammatory. Otherwise the receiver may fall and cause serious injury to people and serious damages to the device.
Do not use this product near water (e.g. bath tube, wash bowl, ...).
Image interference at programmes with a frequency of approx. 12480 MHz may be caused by cellular phones, which are located close to the receiver or the antenna cable. If so the distance between receiver and telephone should be enlarged until the problems disappear.
Uncover:
Do not remove the cover, to reduce the risk of electric shock. Contact qualified and licensed service personnel to repair the receiver, or contact your dealer.
1. Reference
1.1 General Features
MPEG-2 & Fully DVB Compliant
MPEG-2 Video (MP@ML), MPEG-1 Audio Layer1, Layer2
Multi LNB Control by DiSEqC 1.0, USALS
LNB Power 13/18V Max 300mA
SCPC/MCPC Receivable from C / Ku-Band Satellites
Digital Tuner
PAL/NTSC Conversion
Variable Aspect Ratio (4:3, 16:9) for TV
User-friendly OSD Menu with Full Function
256 Colors Graphic User Interface
Multi Language Menu (German / English / Italian / French / Spanish)
Daily and weekly EPG (Electronic Program Guide) available for On-Screen Channel Information
Multi-picture
Super Fast 800 Pages OSD Teletext Supported and VBI Teletext Inserted
Favorite Channel and Parental Lock Function
Storing 6000 Channels.
5 Kinds of Sort Function
1.2 Accessories
- User's Manual
- Remote Control Unit
- Batteries
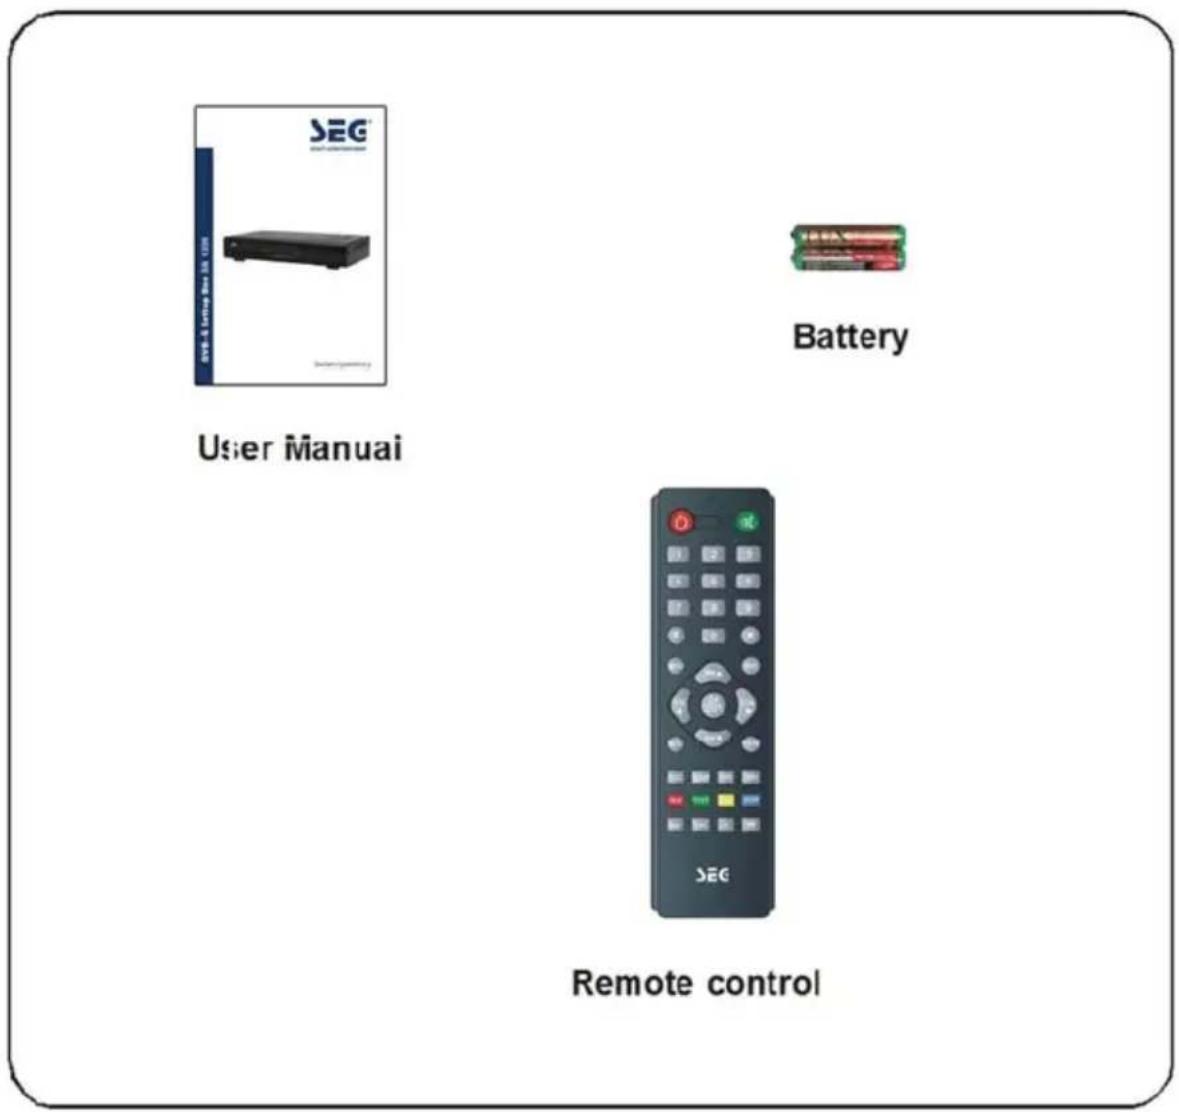
Figure 1. Accessories
2. Basic Functions
2.1 Front Panel

Figure 2. Front Panel
1. Power LED
Power indicator.
2.2 Rear Panel

Figure 3. Rear Panel
- LNB IN: Connect to the Satellite Dish LNB.
- TV SCART: Connect to TV set with Scart cable.
- COAXIAL: Digital Audio output.
- ON/Off : Power on/Off.
2.3 Remote Control Unit (RCU)
You can control this receiver by this remote controller with full function.
1. POWER:

Switch the receiver on or set it to standby mode.
-
MUTE: Turn the sound On/Off.
-
NUMERIC KEY (0\~9):
Change program or input number.
- TV/R:
Switch between TV and RADIO.
- SAT:
Show the scanned satellite list.
- EPG (Electronic Program Guide):
Show the TV/Radio program guide.
- MENU:
Activate main menu or exit to live channel.
- PR▲/▼:
Change program.
- VOL◄/►:
Change volume in viewing mode.
- OK:
Confirm the highlighted menu item.
Open the program list.
- FAV:
To get favorite channel list you set before.
- EXIT:
Exit current menu step by step.
- AUDIO:
Select or change the Audio.
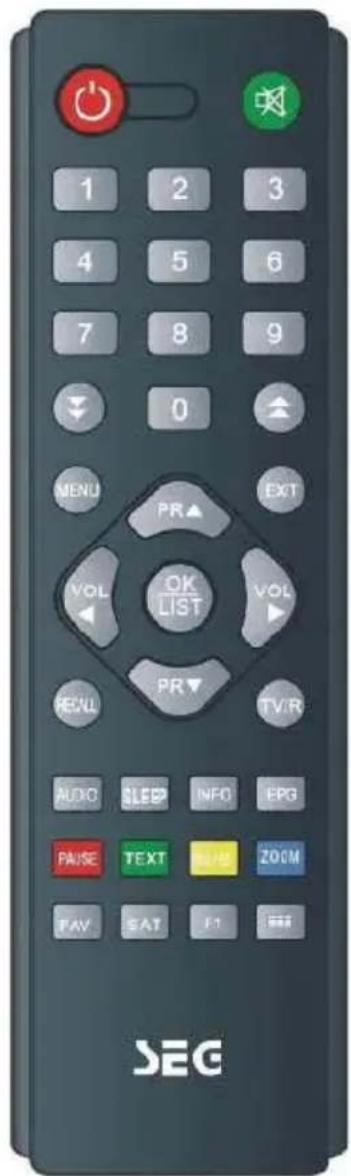
Figure 4. Remote Control
14. INFO:
Show the information of the current channel.
Press EXIT button to exit this menu.
- ↓ /↑
Page up/down on menu.
16. RECALL:
Move to the last channel.
17. ZOOM:
Picture Zooming function.
18. PAUSE:
Freeze the picture.
19. Sleep:
Setting the time for turning off the receiver
20. SUB:
Showing Subtitle information if the channels contains.
- :
Activate Multi-picture menu and select picture
22. TEXT:
Show the teletext content if teletext is transmitted.
23. F1: 23. F1:
Not in use
3. Installation and Connection
The following diagram shows you the right connections among receiver, TV, LNB and other equipments, please read this first if you are not sure about the connection, and it will guide you to the correct connection.
3.1 Connecting to TV
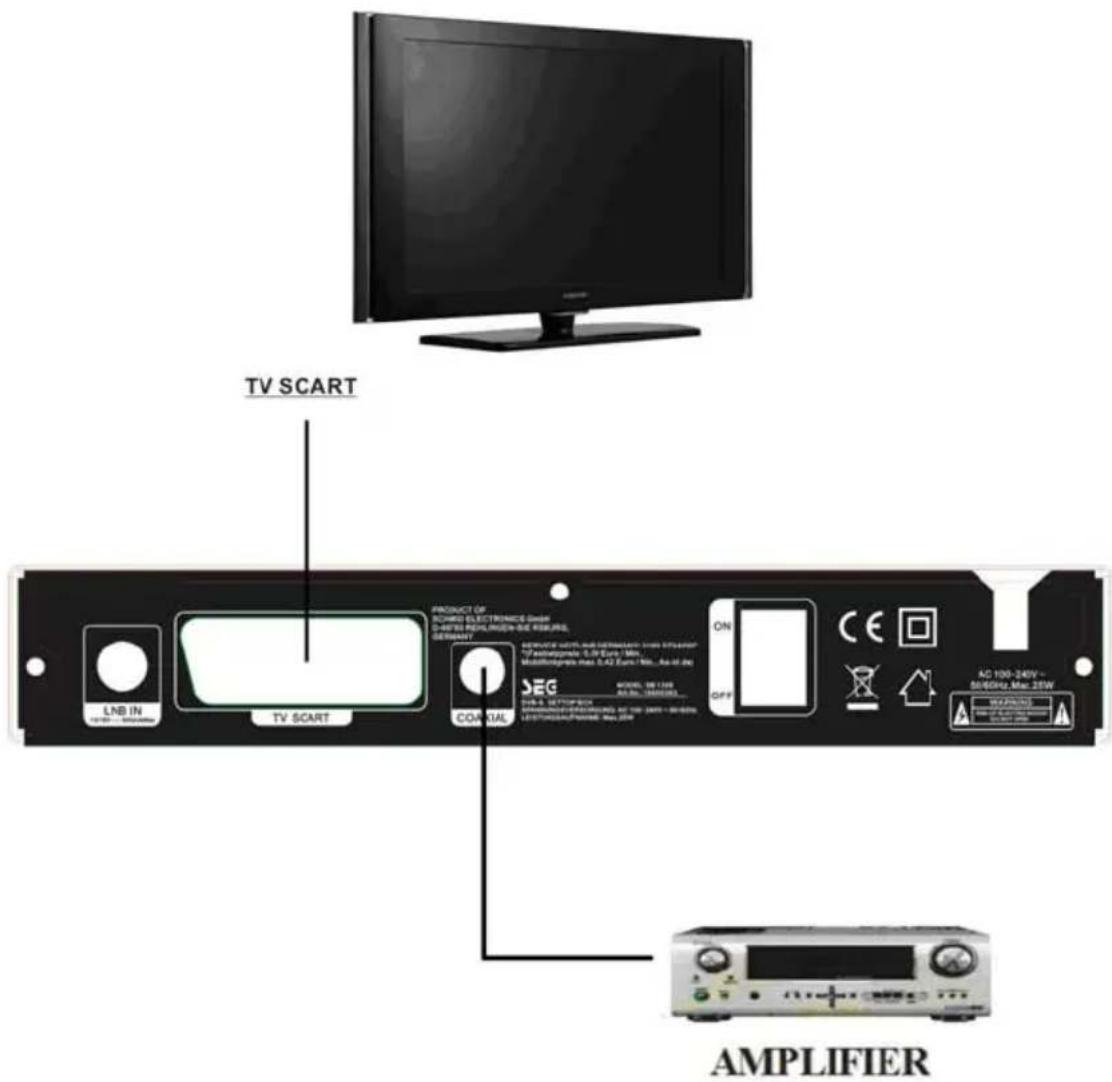
Figure 5. Connecting to TV
3.2 Connecting to Dish LNB
You can connect one fixed dish directly to the LNB IN connector, or connect at least two dishes by using DiSEqC Switch, you can also connect to HH mount dish.
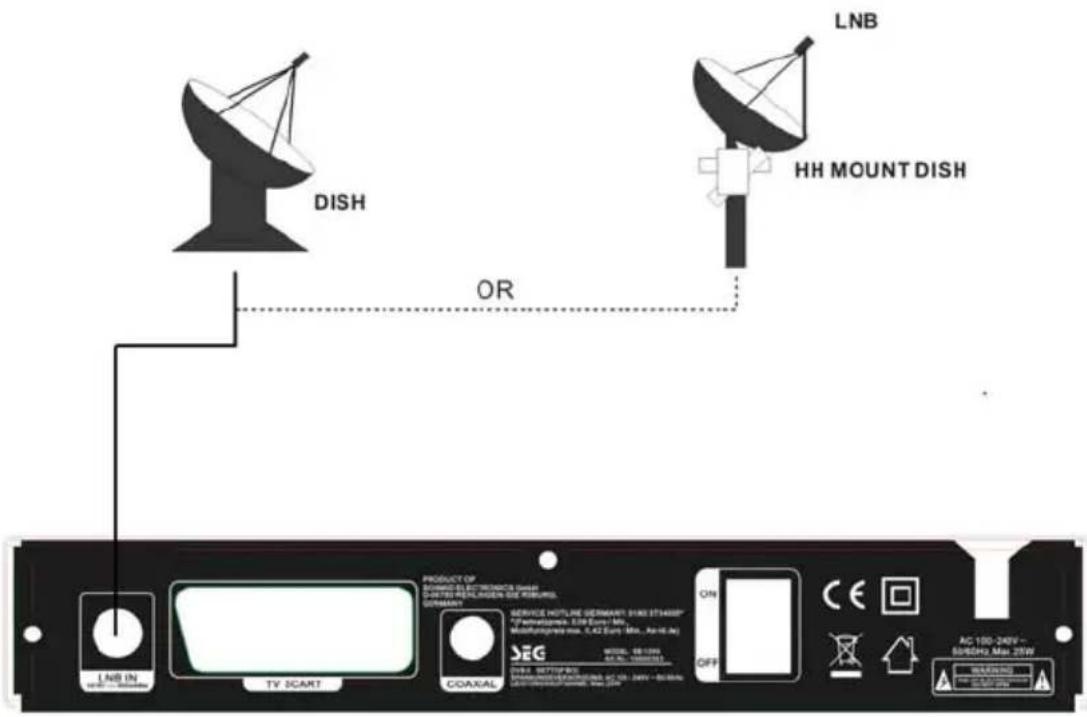
Figure 6. Connecting to Dish LNB

flowchart
graph TD
    A["LNB 1"] --> C["DiSEqC"]
    B["LNB 2"] --> C
    D["LNB 3"] --> C
    E["LNB 4"] --> C
    F["DISH"] --> C
    G["DISH"] --> C
    H["LNB IN"] --> I["TV SCART"]
    J["COAXIAL"] --> K["PRODUCT OF SCINEMA ELECTRICAL SWITCH"]
    L["SEG"] --> M["MODEL: GB-1000, AC-10000000000000000000000000000000000000000000000000000000000000000000000000000000000000000000000000000"]
    N["AC-168-248V~SCINEMA MAX.25W"] --> O["OK"]
    P["OFF"] --> Q["CE"]
    R["REDACTED OUT"] --> S["PROFESSIONAL SWITCH"]
    T["TRANSLABORATE MAX. 5.42 (Sum: Max., Ax-1.4x)"] --> U["TRANSLABORATE MAX. 5.42 (Sum: Max., Ax-1.4x)"]
    V["TRANSLABORATE MAX. 5.42 (Sum: Max., Ax-1.4x)"] --> W["TRANSLABORATE MAX. 5.42 (Sum: Max., Ax-1.4x)"]
    X["TRANSLABORATE MAX. 5.42 (Sum: Max., Ax-1.4x)"] --> Y["TRANSLABORATE MAX. 5.42 (Sum: Max., Ax-1.4x)"]
    Z["TRANSLABORATE MAX. 5.42 (Sum: Max., Ax-1.4x)"] --> AA["TRANSLABORATE MAX. 5.42 (Sum: Max., Ax-1.4x)"]
    AB["TRANSLABORATE MAX. 5.42 (Sum: Max., Ax-1.4x)"] --> AC["TRANSLABORATE MAX. 5.42 (Sum: Max., Ax-1.4x)"]
    AD["TRANSLABORATE MAX. 5.42 (Sum: Max., Ax-1.4x)"] --> AE["TRANSLABORATE MAX. 5.42 (Sum: Max., Ax-1.4x)"]
    AF["TRANSLABORATE MAX. 5.42 (Sum: Max., Ax-1.4x)"] --> AG["TRANSLABORATE MAX. 5.42 (Sum: Max., Ax-1.4x)"]
    AH["TRANSLABORATE MAX. 5.42 (Sum: Max., Ax-1.4x)"] --> AI["TRANSLABORATE MAX. 5.42 (Sum: Max., Ax-1.4x)"]
    AJ["TRANSLABORATE MAX. 5.42 (Sum: Max., Ax-1.4x)"] --> AK["TRANSLABORATE MAX. 5.42 (Sum: Max., Ax-1.4x)"]
    AL["TRANSLABORATE MAX. 5.42 (Sum: Max., Ax-1.4x)"] --> AM["TRANSLABORATE MAX. 5.42 (Sum: Max., Ax-1.4x)"]
    AN["TRANSLABORATE MAX. 5.42 (Sum: Max., Ax-1.4x)"] --> AO["TRANSLABORATE MAX. 5.42 (Sum: Max., Ax-1.4x)"]
    AP["DISH"] --> AQ["DISH"]
    AR["DISH"] --> AS["DISH"]
    AT["DISH"] --> AU["DISH"]
    AV["DISH"] --> AW["DISH"]
    AX["DISH"] --> AY["DISH"]
    AZ["DISH"] --> BA["DISH"]
    BB["DISH"] --> BC["DISH"]
    BD["DISH"] --> BE["DISH"]
    BF["DISH"] --> BG["DISH"]
    BH["DISH"] --> BI["DISH"]
    BJ["DISH"] --> BK["DISH"]
    BL["DISH"] --> BL["DISH"]
    BN["DISH"] --> BO["DISH"]
    BP["DISH"] --> BP["DISH"]
    BPD["DISH"] --> BPD
    BPQ["DISH"] --> BPQ
    BPQD["DISH"] --> BPQ
    BPQF["DISH"] --> BPQF
    BPQG["DISH"] --> BPQG
    BPQH["DISH"] --> BPQH
    BPQI["DISH"] --> BPQI
    BPQJ["DISH"] --> BPQJ
    BPQK["DISH"] --> BPQK
    BPQL["DISH"] --> BPQL
    BPQM["DISH"] --> BPQM
    BPQN["DISH"] --> BPQN
    BPQO["DISH"] --> BPQO
    BPQP["DISH"] --> BPQP
    BPQQ["DISH"] --> BPQQ
    BPQR["DISH"] --> BPQR
    BPQS["DISH"] --> BPQS
    BPQU["DISH"] --> BPQU
    BPQV["DISH"] --> BPQV
    BPQW["DISH"] --> BPQW
    BPQX["DISH"] --> BPQX
    BPQY["DISH"] --> BPQY
    BPQZ["DISH"] --> BPQZ
    BPQXG["DISH"] --> BPQXG
    BPQYG["DISH"] --> BPQYG
    BPQZG["DISH"] --> BPQZG
    BPQXH["DISH"] --> BPQXH
    BPQYH["DISH"] --> BPQYH
    BPQZH["DISH"] --> BPQZH
    BPQYH["DISH"] --> BPQYH
    BPQZH["DISH"] --> BPQZH
    BND["GND"] --> BNDG
    BNDG --> BNDG
    BNDG --> BNDG
    BNDG --> BNDG
    BNDG --> BNDG
    BNDG --> BNDG
    BNDG --> BNDG
    BNDG --> BNDG
    BNDG --> BNDG
    BNDG --> BNDG
    BNDG --> BNDG
Figure 7. Connecting to Dish LNB
Before connecting to the power supply the receiver must be cabled completely.
Attention: The total current consumption of all devices (LNB, multiswitch, ...) connected to the LNB-Input must not exceed 400mA. The connected antenna must be grounded correctly. Please note the VDE prescriptions.
Warning: If, after connecting the receiver to the mains, the message "short circuit or antenna input overload!" is displayed on the screen, then there is a short circuit in
the LNB cable or the LNB. In this case the receiver must be disconnected from the mains immediately until the short circuit has been dealt with.
4. Installation and Operation
After connecting the receiver to other required equipment, turn on the receiver, there should be no channel information available at the first startup; you need to follow the procedure to set up your receiver to search the channel.

4.1 Menu Guide
During the installation there is short information showed at the bottom of the menu screen which will guide you to set up, after finishing installation, you can enjoy watching TV or listening to Radio.
--Main Menu--Installation Main Menu
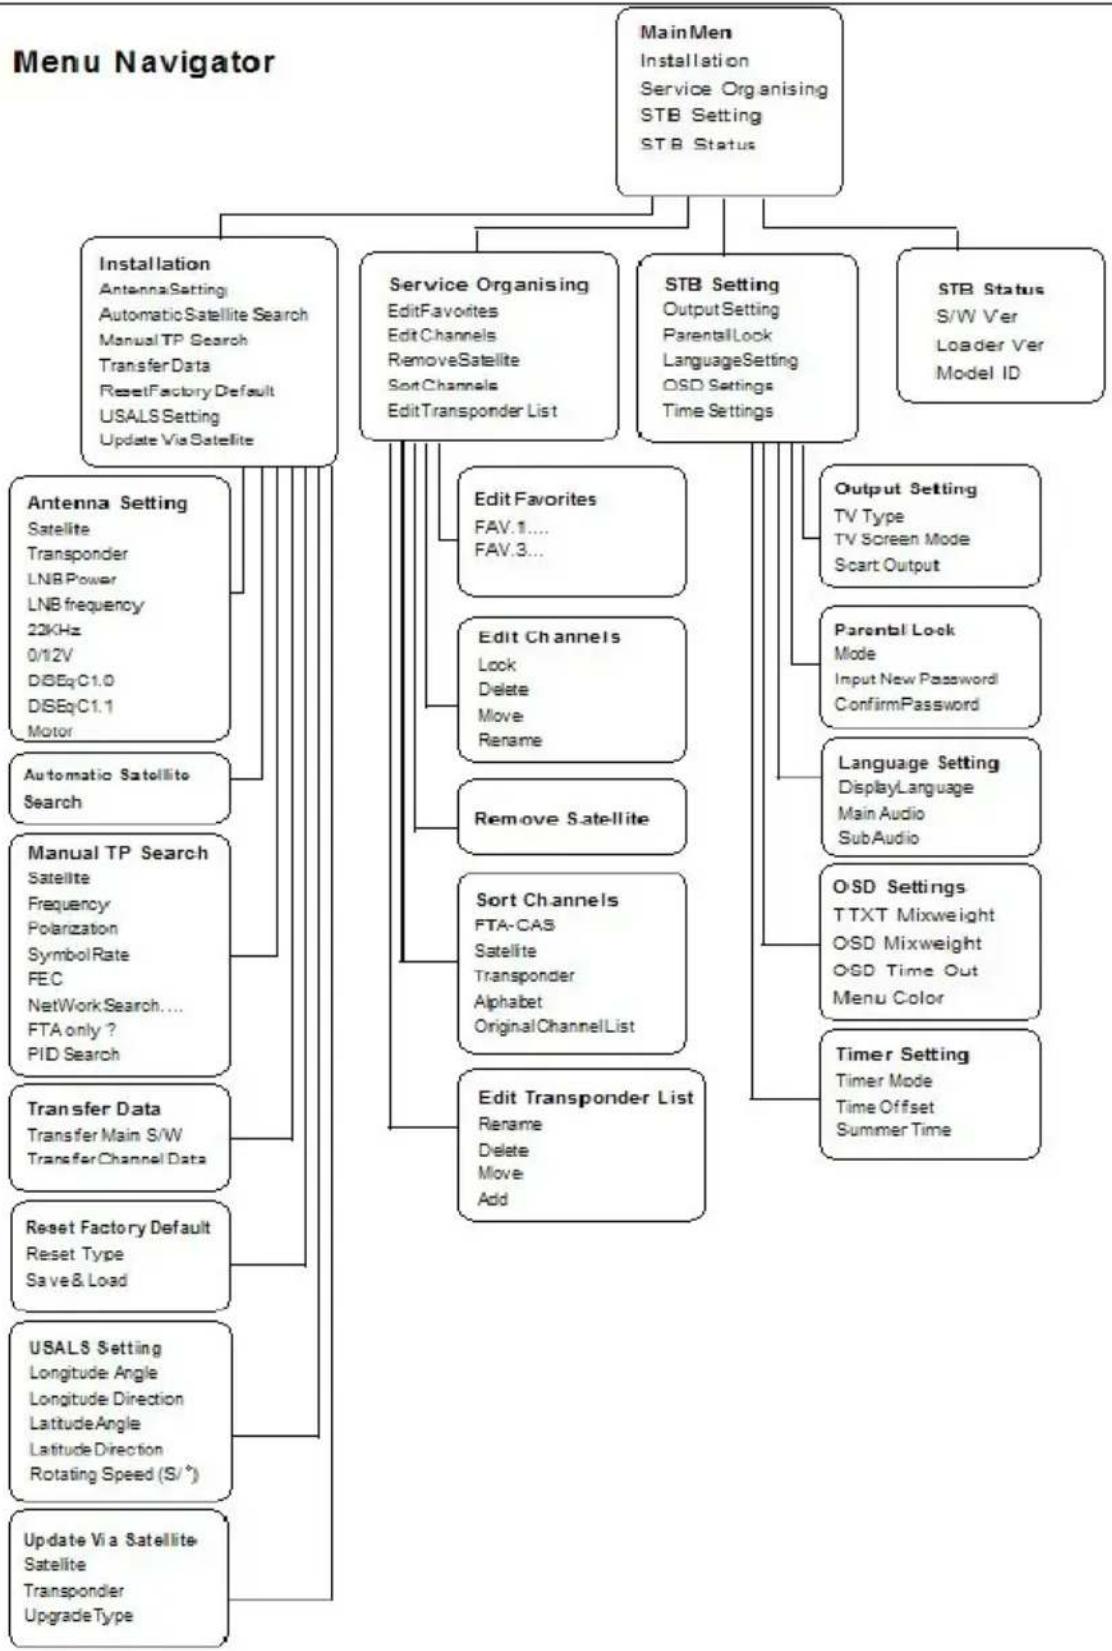
Press MENU button to activate main menu, main menu consists of Installation, Service Organizing, STB Setting and STB Status.
Use UP/DOWN button to select your subject and press OK to confirm your selection and enter that sub menu, press EXIT button you can return to the previous menu.
4.1.1 Installation
Select Installation, press OK button to activate Installation menu, the Installation window will be displayed.

Antenna setting

Satellite list
This window shows the pre-stored satellite list, you can change satellite by ◀/▶ press OK to select the satellite you want. Here you can also use Blind Search by pressing the red button.


Transponder
If you change the satellite, the transponder will be changed automatically. You will find the transponder list of the selected satellite here.
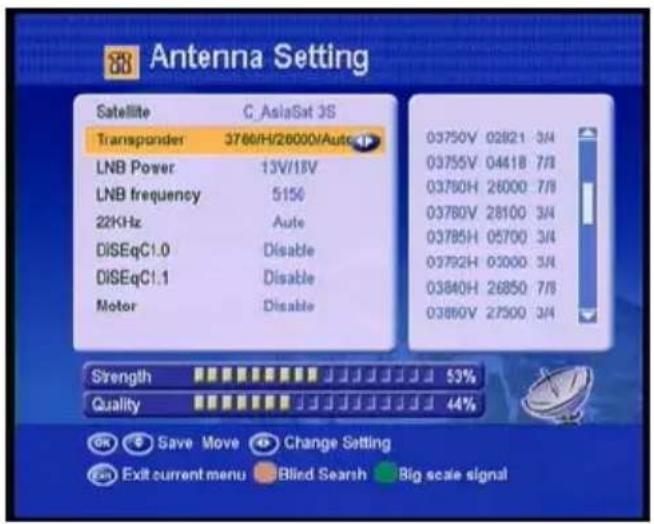

DiSEqC Setting
If you connect antenna to DiSEqC Switch, you need to specify the DiSEqC input to which your selected satellite have been configured.


Motor
When you enable this option, you will get this window to show you how to align the dish.

Position Auto [W/E]
Press ◀ /▶ button, the dish will be motorized to East/West continuously,
it will stop until it find the best signal.
![SEG SB 1200 - Position Auto [W/E] - 1](/content/2026/05/1025245/images/9d5b61c264748c86ad5d598c890aed7b532b2e50a01a3dc46e8c667a8c497e0a.jpg)
Move Dish
Press ◀ /▶ button, the dish will be motorized to East/West step by step until you find the best signal showed on the signal bar.

Fine Tuning
Set the moving step

Move Step
Move East or West step by step

Limit Set
Disable or enable West limit or East limit

Store Position
Automatic Satellites Search
Save the current position you searched.

Go to Position
Press OK button to move the dish to the stored position.

Go to Reference
Press OK button to move the dish to 0 position.
Press EXIT after setup, and you can search channel now.

Automatic Satellites Search
Select one satellite, and press OK to mark. You can select more satellites at one time, but make sure they are all configured to your DiSEqC Switch. Then choose Scan All Channel, Scan Free Channel and Blind Scan to start the channel searching. During the searching, TV
Channels and Radio Channels will pop up automatically on the screen in two separate lists.
Manual TP Search
Press OK button to enter the Manual TP Search Menu, here you have to set up all data
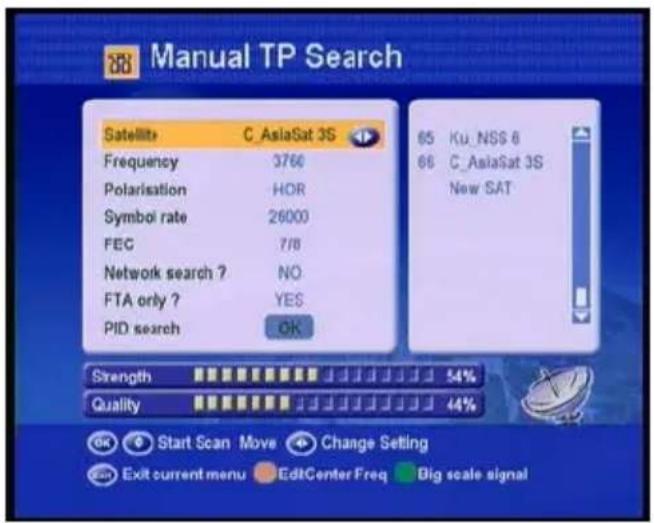
manually step by step. Firstly you need to select one satellite with which your dish is aligned, then select the frequency. Next step, you need to set up the Polarization of that selected transponder, symbol rate, FEC, Network search (if the transponder contains this function), if you know the PID figure for that channel, you can input and search by this way.
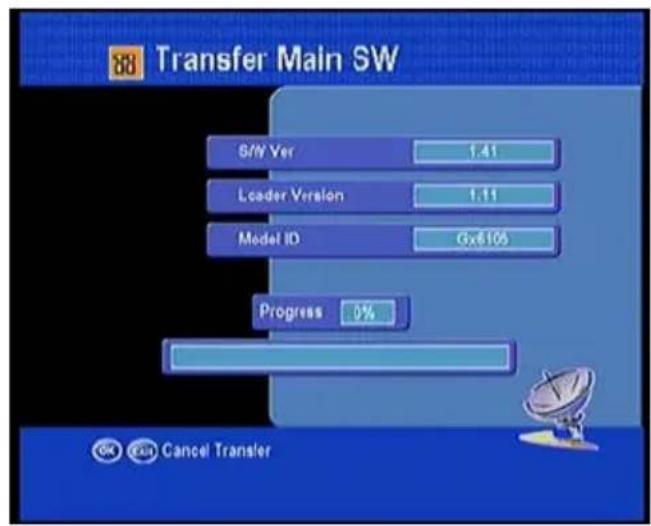
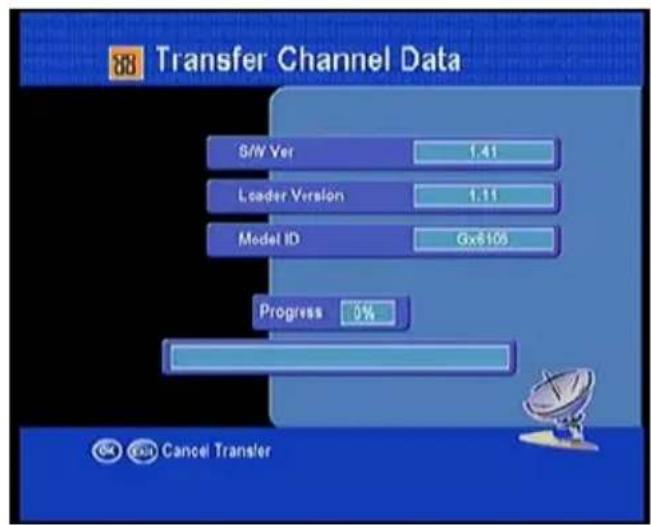
Transfer Data
Here you can transfer Main Software or Channel Data from PC to STB by Uart Cable
PLEASE NOTE: This function is only for authorised service partner!
Reset Factory Default
You can erase all the channels and settings you made by selecting RESET ALL, or you can erase Channel List/ Radio List/ Scramble Channel separately by choosing the right option.. You also can save or load channels unde

USALS Setting
You can set up the Dish to align with the satellite you want to search, you need to check the detailed information from internet and input the accurate parameters according to your current location.
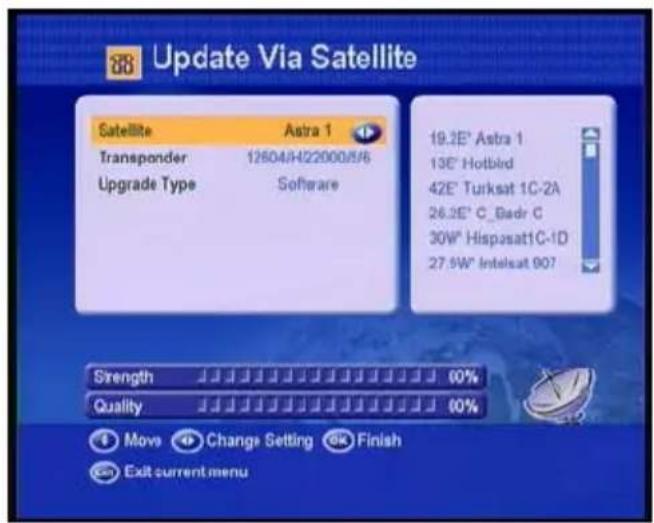
Update Via Satellite
The software on this receiver can be updated by OTA. Choose the right satellite and transponder to get the update software from satellite

4.1.2 Service Organizing
Under this menu, you can set up your favorite channels, edit channels and transponders, remove satellites and sort channels.

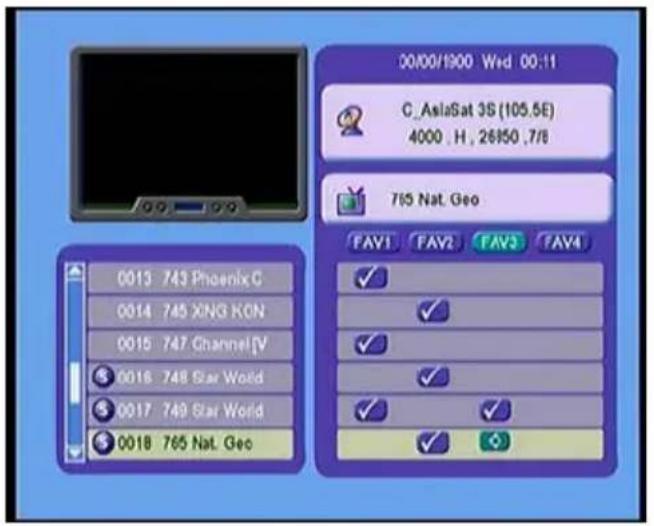
Edit Favorites
Here you can select your favorite channels and divide them into 8 FAV groups, Press the FAV button, you can classify the favorites by renaming the categories, e.g. Music or Sport.
Edit Channels
You can lock, delete, move and rename the selected channels.
Remove Satellite
Select the satellite you want to remove from your satellite list by pressing the OK button, then exit from this menu, a window pops up asking you to confirm whether to delete the satellite or not. If you choose YES, this satellite together with its channels will be deleted.


Sort Channels
You can choose to use the Original Channel List or to sort the channels by Satellite/ Transponder/ Alphabet. Press the OK button to confirm your option.
Edit Transponder list
The left side of this page is the Satellite List, you can Rename/ Delete/ Move/ Add the satellite here. While the right side is the Transponder List, any selected transponder can be deleted/ edited/ added to your wish.

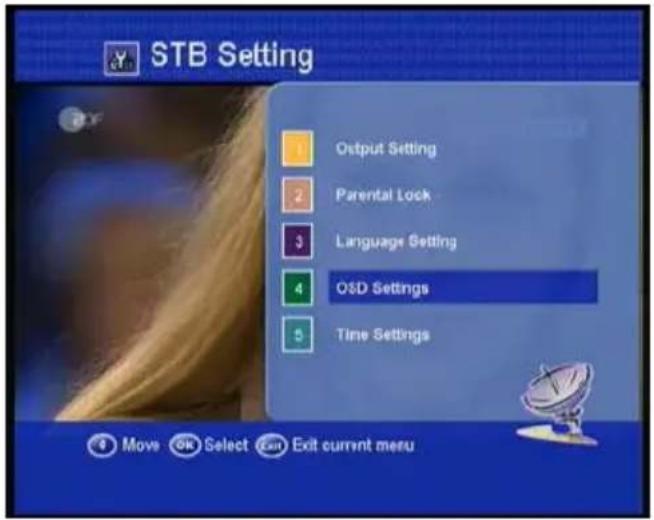
4.1.3 STB Setting
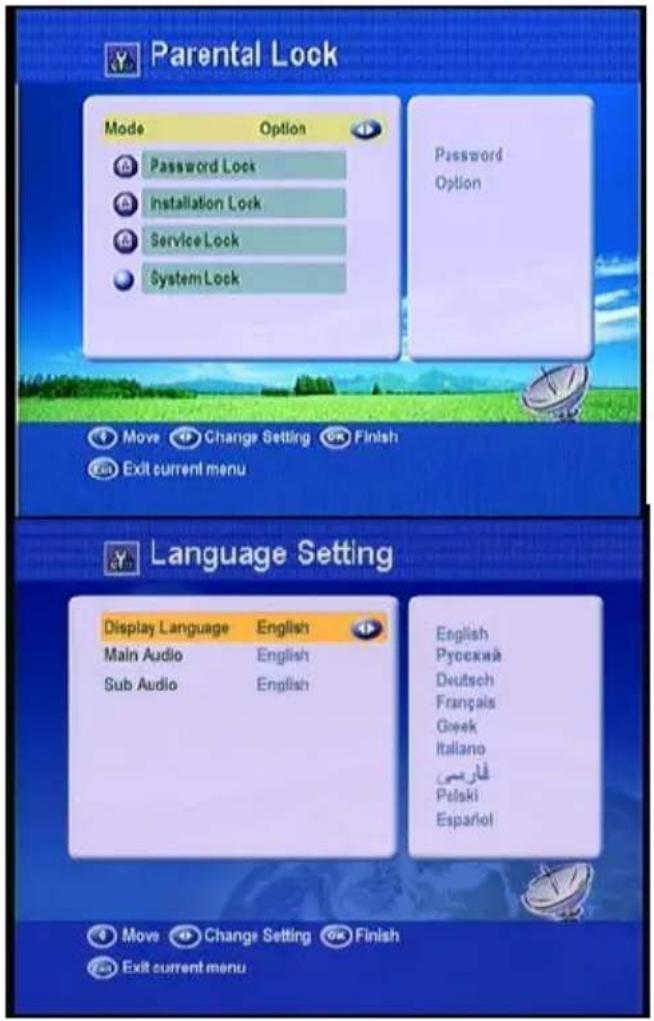
This is the menu guide for setting up Language, TV Output, Parental Lock, OSD and Time/Timer.
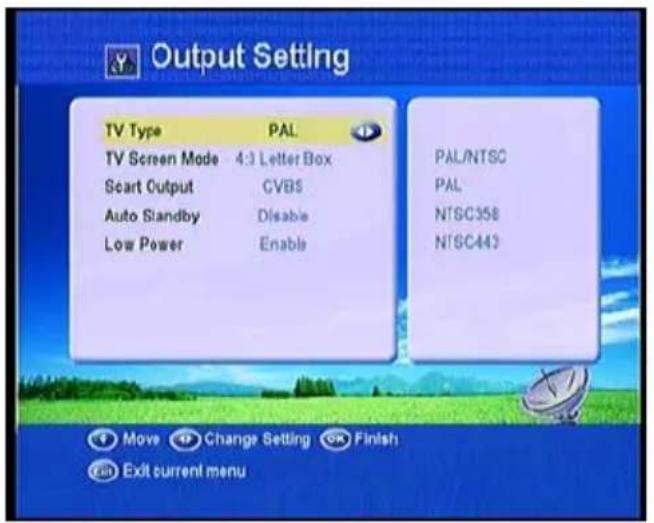
Output Setting
You can set up TV output \Video output\ Auto Standby and Low power for the STB
Parental Lock
The default password for this receiver is 0000. You can reset the password as your wish. Meanwhile, you can enable or disable the password for Installation/ System.
Language Setting
You can set up the Display Language, Audio Language and Subtitle Language under this menu, and select the right one according to your needs.
OSD Setting
TTXT&OSD Mix weight (Low/Middle /High), OSD Time Out and Menu Color can be set up here.

Time Setting
Here you can set up the local Time for your receiver. Event Timer and Sleep Timer functions are also available.
Time Setting
The default time can be changed by manual inputting. You can select the right GMT time zone to define where you are and you will get the correct local time which is based on TDT (Time and Data Table) in the stream of the current channel service.
![Time Setting Timer Mode Auto Time Offset GMT + 01:00 Summer Time Off 02:35 28/01/2010 [ Tue ] Berlin Move Change Setting Finish Exit current menu](/content/2026/05/1025245/images/8925807133f01defc8c2645aabf91943caa8f1f051c573d983034d644fcd5f29.jpg)
Event Timer
Press the green button to add an event. Choose the channel and set the Date/Start Time/Stop Time/ Repeat Times for your event. The TV/Radio program will start to broadcast at the specific time you set. And you can add, edit and delete the event you set.

4.1.4 STB Status
Here are the information about the software version and hardware version, when you need service from the dealer you need to submit this information in order to get the correct and fast after-sales service
4.2 Other Useful Information
This will guide you on how to use general info while watching TV programs or listening to Radio programs.
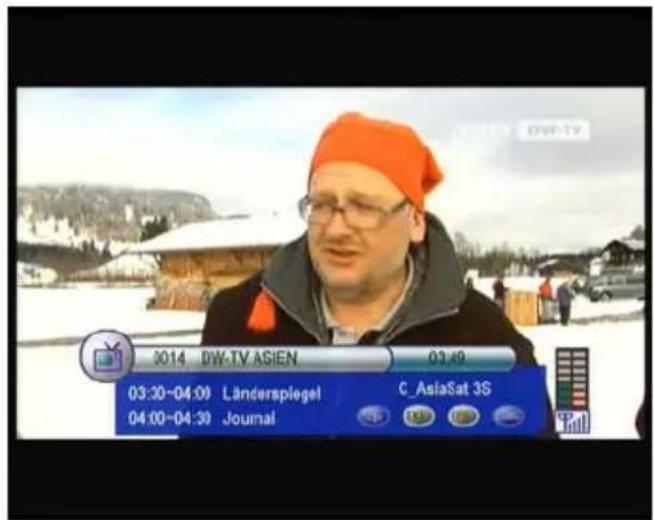
General Information
When under the watching mode, press INFO button to view the detailed program information. Press again, more detailed information will be showed on the screen.


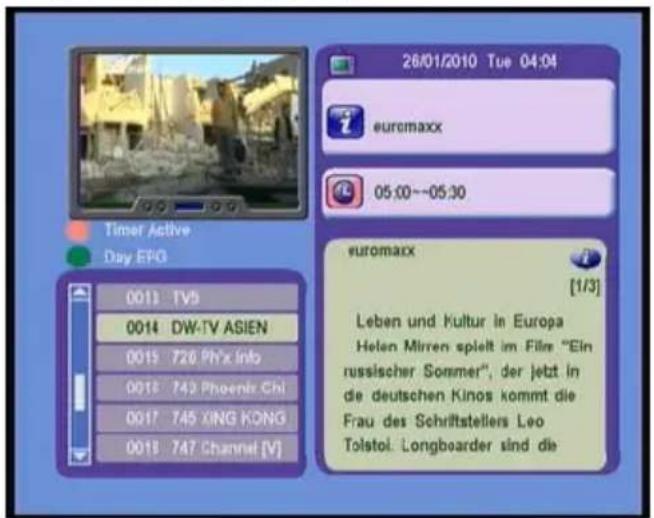
Press EPG button on the remote controller, you can get the electronic program guide if available. You can get the detailed information about that program by pressing INFO button. Press RED key to go to Timer Active, Timer Active's operation similar to the above Event Timer's functions.

You can Switch Day EPG and Weekly EPG by Pressing Green Key. In this menu, press Right/Left button, you can view the different time EPG of one day. In the end, you can get the detailed information about that program by pressing INFO Key.
In viewing mode, you can get the favorite channel group by pressing FAV, press ◀/▶ to change category. Press RED Key you can move the channels. Press
![0001 743 Phoenix Chine 0002 747 Channel [V] Ch 0003 749 Star World 0004 766 Channel [V] Int' 0005 771 Movies Int'l Move Rename Favourite](/content/2026/05/1025245/images/3a62c82cfded17f69a03c0c59a62e90caef50a6ebd7615860b89047442a28934.jpg)
GREEN key you can rename favorites.
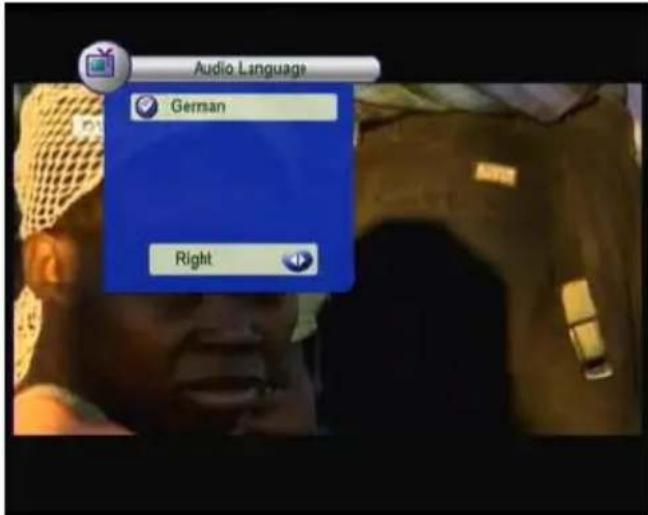
AUDIO
In viewing mode press
AUDIO button and you will get this window. You can set the Audio mode here.(stereo, left, right).
SAT
Press SAT button on the remote control, you will get this menu which contains the satellites you searched and stored, press ▲/▼ to switch between the available satellites you have, press OK, all channels will be listed under that satellite you selected.
Press ◀/▶ view channels

Channel List-OK
In viewing mode, press OK button and you can find the Channel List.
![C_AsiaSat 3S (105.5E) 0012 Supreme Master T 0013 TV5 0014 D/W-TV ASIEN 0015 726 Ph'x info 0016 743 Phoenix Chine 0017 745 XING KONG 0018 747 Channel [V] Ch 0019 Unname 0020 Lotus 0021 Test-1 0022 I-Horizon Genre list C_AsiaSat 3S 3760, H, 26000, 7/8](/content/2026/05/1025245/images/a293ddf7daeb5c4865d2335319ce6a8e509f53a08e86caee00fcf8821462f57f.jpg)
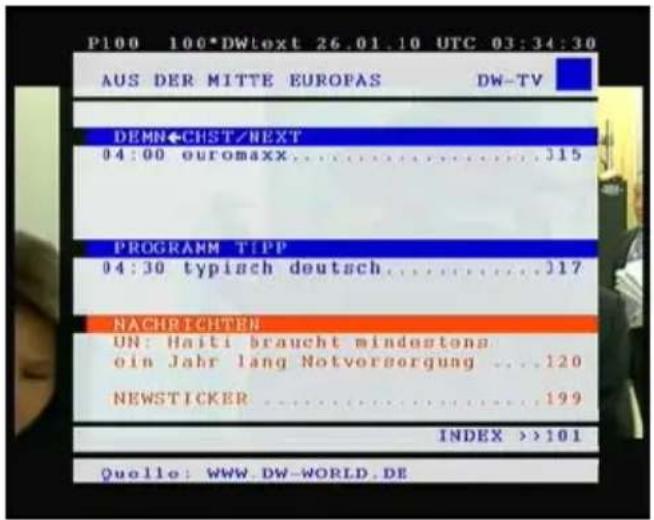
TXT
Press TXT button and you will get a window to view the teletext contents if the teletext is transmitted in the channel. The teletext content is watch able by OSD even your TV does not support the Teletext.
PAUSE
Press PAUSE button to freeze the video

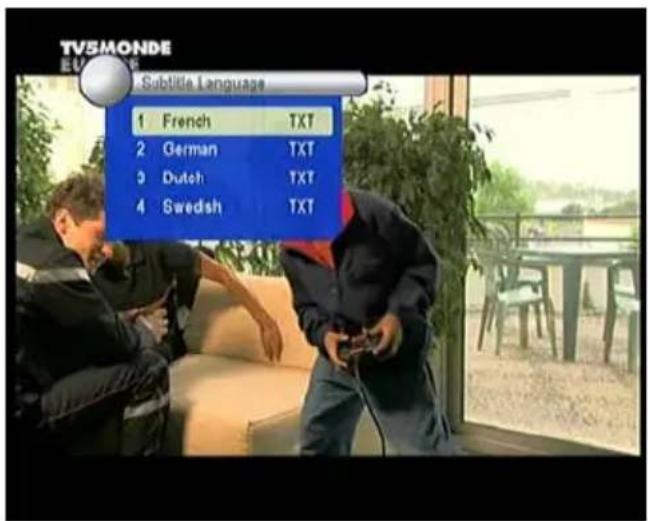
Subtitle
Press SUB/YELLOW button to show subtitle. If there is nothing show up, then this program does not have subtitle information.
Multi-Picture Display
Press 📋 button to select how many pictures you want to show. Then press OK button to show. Here you press OK button, this window will display.

5. Additional Information
5.1 Problem Shooting
You might meet abnormal working for various reasons, check the following which may help you.
| Problem | Possible causes | What to do |
| LED on the front panel fail to light up/is not lit. | Mains supply cable is not connected. | Check if the mains supply cable is plugged into the power socket. |
| No picture or sound. Satellite dish is | not aiming to satellite accurately. No signal or weak signal. The LNB is faulty. The cable is faulty. | Adjust the dish. Check the signal strength indicator in one of the channel search submenus. Check the cable connections, LNB and other equipment connected to LNB & receiver, or adjust dish. Replace the LNB. Replace the cable. |
| Bad picture/blocking error. Satellite | dish is not aiming to the satellite accurately Signal too strong. Satellite dish is too small. LNB noise factor too high. The LNB is faulty. | Adjust the dish. Connect a attenuator to LNB input. Change to a larger dish. Change LNB with lower noise factor. Replace the LNB. |
| No startup menu on screen after turning on STB for the first time. | The system is connected by SCART cables and the TV is not in AV/EXT mode. | Switch the TV to the appropriate AV input. |
| The remote control is not working. | Battery exhausted. Remote control is not aimed correctly STB is in standby mode. | Change the batteries (both). Aim the remote control at the STB. Check that nothing blocks the front panel. Check if LED indicator on the front panel is showing the time, press the power button to switch off standby mode. |
| You have forgotten your password. | Contact the dealer or Service Provider. They will help you set it up again. | |
| Poor picture quality or Less channels in scanning. | Low LNB power or signal loss in cable. Change the LNB power to 14V/19V in Antenna setup menu. | |
5.2 Technical Specification Tuner & Demodulator
| Frequency Range 950 MHz to 2150 MHz | |
| Input Connector F-type, IEC 169-24, Female | |
| Signal Level -25 to -65 dBm | |
| RF Impedance 75 Ω , unbalanced | |
| IF Band width 55 MHz/8Hz(Per 5Msps) | |
| LNB Power & Vertical : +13 V, 14V +/-5% | |
| Polarization | Horizontal : +18 V, 19V+/-5% Current : 500 mA Max. Overload Protection |
| LNB Tone Switch 22KHz+/-2KHz, 0.6Vpp+/-0.2V | |
| DiSEqC Control | Version 1.0/1.2 Compatible, Tone burst A/B |
| Demodulation QPSK | |
| Symbol Rate 1~45Ms/s/SCPC,MCPC | |
| FEC Decode Convolution | Code Rate 1/2, 2/3, 3/4, 5/6 and 7/8 with Constraint Length K=7 |
MPEG
| Transport Stream | MPEG-2 ISO/IEC 13818Transport stream specification |
| Profile Level MPEG-2 MP@ML | |
| Input Rate 15 Mbit/s Max | |
| Aspect Ratio 4:3, 16:9 | |
| Video Resolution 720 x 576(PAL), 720*480(NTSC) | |
| Audio Decoding MPEG/Musical Layer I & II | |
| Audio Mode Single channel/Dual channel/Joint stereo/Stereo | |
| Sampling | 32, 44.1 and 48 KHz |
A/V and Data In/Out Connector
| TV SCART | RGB, CVBS, L, R out |
| LNB IF Input F type, IEC | 169-24 Female |
Power Supply
| Input Voltage | 90 - 240V AC, 50/60 Hz |
| Power Consumption | Max. 25 W |
| Protection | Separate internal fuse. Input shall have lightening Protection |
Physical Specification
| Weight (Net) | Around 2.0 kg |
| Operating Temp | 0^ + 40^ |
| Storage Temp | -40^ to +65^ |
5.3 Menu Screen Structure
flowchart
graph TD
    A["MainMen\nInstallation\nService Organising\nSTB Setting\nSTB Status"] --> B["Installation\nAntennaSetting\nAutomatic Satellite Search\nManual TP Search\nTransferData\nResetFactory Default\nUSALS Setting\nUpdate Via Satellite"]
    A --> C["Service Organising\nEditFavorites\nEditChannels\nRemoveSatellite\nSortChannels\nEditTransponder List"]
    A --> D["STB Setting\nOutputSetting\nParentalLock\nLanguageSetting\nOSD Settings\nTime Settings"]
    A --> E["STB Status\nS/W Ver\nLoader Ver\nModel ID"]

    B --> F["Antenna Setting\nSatellite\nTransponder\nLNB Power\nLNB frequency\n22KHz\n0/12V\nDISEqC1.0\nDISEqC1.1\nMotor"]
    B --> G["Automatic Satellite Search"]
    B --> H["Manual TP Search\nSatellite\nFrequency\nPolarization\nSymbolRate\nFEC\nNetworkSearch...\nFTA only ?\nPID Search"]
    B --> I["Transfer Data\nTransfer Main S/W\nTransferChannel Data"]
    B --> J["Reset Factory Default\nReset Type\nSave & Load"]
    B --> K["USALS Setting\nLongitude Angle\nLongitude Direction\nLatitudeAngle\nLatitudeDirection\nRotating Speed (S/°)"]
    B --> L["Update Via Satellite\nSatellite\nTransponder\nUpgradeType"]

    C --> M["Edit Favorites\nFAV.1...\nFAV.3..."]
    C --> N["Edit Channels\nLock\nDelete\nMove\nRename"]
    C --> O["Remove Satellite"]
    C --> P["Sort Channels\nFTA-CAS\nSatellite\nTransponder\nAlphabet\nOriginalChannelList"]
    C --> Q["Edit Transponder List\nRename\nDelete\nMove\nAdd"]

    D --> R["Output Setting\nTV Type\nTV Screen Mode\nScart Output"]
    D --> S["Parental Lock\nMode\nInput New Password\nConfirmPassword"]
    D --> T["Language Setting\nDisplayLanguage\nMain Audio\nSubAudio"]
    D --> U["OSD Settings\nTTXT Mixweight\nOSD Mixweight\nOSD Time Out\nMenu Color"]
    D --> V["Timer Setting\nTimer Mode\ntime Offset\ndsummer Time"]
5.4 Glossary

Antenna
A device that collects and radiates electromagnetic waves. Includes a satellite dish and broadband antenna.

DiSEqC
DiSEqC(Digital Satellite Equipment Control) system, it is a communication bus between satellite receivers and peripheral equipment using only the existing coaxial cable.

DVB
The Digital Video Broadcast group was created to establish a technical framework for the introduction of digital video broadcasting systems.

LNB (low-noise block converter) or LNB
An electronic unit mounted on the satellite dish. It receives the signals reflected by the dish and converts them to signals that can be used by the digital satellite receiver.

GHz
The prefix giga means milliard, and Hertz means cycles per second. Signals in the GHz range are often called microwaves.

MHz
The prefix mega means million, and Hertz means cycles per second.

MPEG
Moving Picture Experts Group. Established by the International Standards Organization to provide the basis for a picture coding and compression system.
Forward Error Correction(FEC)
A system of error control for data transmission.
PID(Packet Identifier)
A set of numbers that identifies transport stream packets containing data from a single data stream.
Polarization
Polarization allows several programmers to be fit into the same frequency band. The signals from a satellite are transmitted either with linear (vertical or horizontal) polarization or circular (right or left) polarization.
QPSK(Quaternary Phase Shift Keying)
Phase-shift keying in which four different phase angles are used.
Transponder
An automatic device that receives, amplifies and retransmits a signal on a different frequency.
Symbol rate
Speed of the digital transmission
Scrambled TV program
Some TV programmers are transmitted in scrambled form.
Environment
Old batteries do not belong in with the domestic waste!

natural_image
Symbol of a trash bin with crossed x and y lines, no text or numbers presentConsumers are obliged by law to return any old batteries and rechargeable batteries to the corresponding local and/or public collection centres or to return them to the retail shops. This ensures that batteries will be disposed of respecting the environment.
Make sure to return any batteries and rechargeable batteries discharged.
Disposal of old electric and electronic devices:
natural_image
Symbol of a trash bin with crossed x- and y-axes, no text or numbers presentThe icon of a dashed-out waste bin means that a separate disposal of electric/electronic equipment is necessary. According to the Legislation of the European Union, any electric and electronic devices may not be disposed of with domestic trash but must be returned to a special collection center enabled for the recycling of these devices. The local waste companies should have set up specific collecting centres for this purpose, allowing private consumers to return any old devices for free. Please contact your local authorities or the local waste company for the available disposal possibilities.
Please support us actively by protecting the environment and recycle this product accordingly by returning it to a specific collection centre. This will protect the environment, other people and yourself. Thank you very much!
Disposal of Packaging and Packaging Materials:
Packaging and any packaging materials do not belong in with the domestic waste! Your system consists of materials which can be recycled and reused if disassembled by a specialized company. Please observe the local regulations regarding the disposal of packaging materials.
CE This appliance complies with European Safety and Electrical directives. It fulfills the following EU regulations:
EN60065:200 2+A1:2006+A11:2008
EN 55013:2001+A1:2003+A2:2006
EN 55020:2007
EN 61000-3-2:2006
Herstellergarantie
service@schmid-electronics.de
service@schmid-electronics.de



- Inhalt
- Referenz ....5
- FAV:
- PID (Packet Identifier)
- QPSK (Quaternary Phase Shift Keying)
- Safety Precaution ....2
- Reference ....4
- Basic Functions....6
- Installation and Connection ....10
- Installation and Operation....14
- Additional Information....31
- Safety Precaution
- Main Supply:
- Overload:
- Liquid:
- Environment:
- Ventilation:
- Cleaning:
- Connection:
- Location:
- Uncover:
- Reference
- General Features
- Accessories
- Basic Functions
- Front Panel
- Power LED
- Rear Panel
- Remote Control Unit (RCU)
- POWER:
- INFO:
- RECALL:
- ZOOM:
- PAUSE:
- Sleep:
- SUB:
- TEXT:
- F1: 23. F1:
- Installation and Connection
- Connecting to TV
- Connecting to Dish LNB
- Installation and Operation
- Menu Guide
- --Main Menu--Installation Main Menu
- Installation
- Antenna setting
- Satellite list
- Transponder
- DiSEqC Setting
- Motor
- Position Auto [W/E]
- Move Dish
- Fine Tuning
- Move Step
- Limit Set
- Store Position
- Automatic Satellites Search
- Go to Position
- Go to Reference
- Manual TP Search
- Transfer Data
- Reset Factory Default
- USALS Setting
- Update Via Satellite
- Service Organizing
- Edit Favorites
- Edit Channels
- Remove Satellite
- Sort Channels
- Edit Transponder list
- STB Setting
- Output Setting
- Parental Lock
- Language Setting
- OSD Setting
- Time Setting
- Event Timer
- STB Status
- Other Useful Information
- General Information
- AUDIO
- SAT
- Channel List-OK
- TXT
- PAUSE
- Subtitle
- Multi-Picture Display
- Additional Information
- Problem Shooting
- Technical Specification Tuner & Demodulator
- Menu Screen Structure
- Glossary
- Antenna
- DiSEqC
- DVB
- LNB (low-noise block converter) or LNB
- GHz
- MHz
- MPEG
- Forward Error Correction(FEC)
- PID(Packet Identifier)
- Polarization
- QPSK(Quaternary Phase Shift Keying)
- Symbol rate
- Scrambled TV program
- Environment
- Old batteries do not belong in with the domestic waste!
- Disposal of old electric and electronic devices:
- Disposal of Packaging and Packaging Materials:
- Herstellergarantie
Brand : SEG
Model : SB 1200
Category : Digital decoder