PAC F16E - Air Conditioning DELONGHI - Free user manual and instructions
Find the device manual for free PAC F16E DELONGHI in PDF.
User questions about PAC F16E DELONGHI
0 question about this device. Answer the ones you know or ask your own.
Ask a new question about this device
Download the instructions for your Air Conditioning in PDF format for free! Find your manual PAC F16E - DELONGHI and take your electronic device back in hand. On this page are published all the documents necessary for the use of your device. PAC F16E by DELONGHI.
USER MANUAL PAC F16E DELONGHI
Thank you for having purchased an appliance made by De' Longhi, the international leader in portable air conditioning units. Thanks to our years of experience all around the world we are constantly improving the quality and performance of Pinguino. We are confident that you will be satisfied with your purchase and enjoy the cool comfort created by the Pinguino for many years to come. You should spend some time reading this instruction manual and keep it handy to refer to in order to use your Pinguino in conditions of maximum efficiency and peace of mind.

here Cliente, Cher Client,
PROBLEMI CAUSE RIMEDI
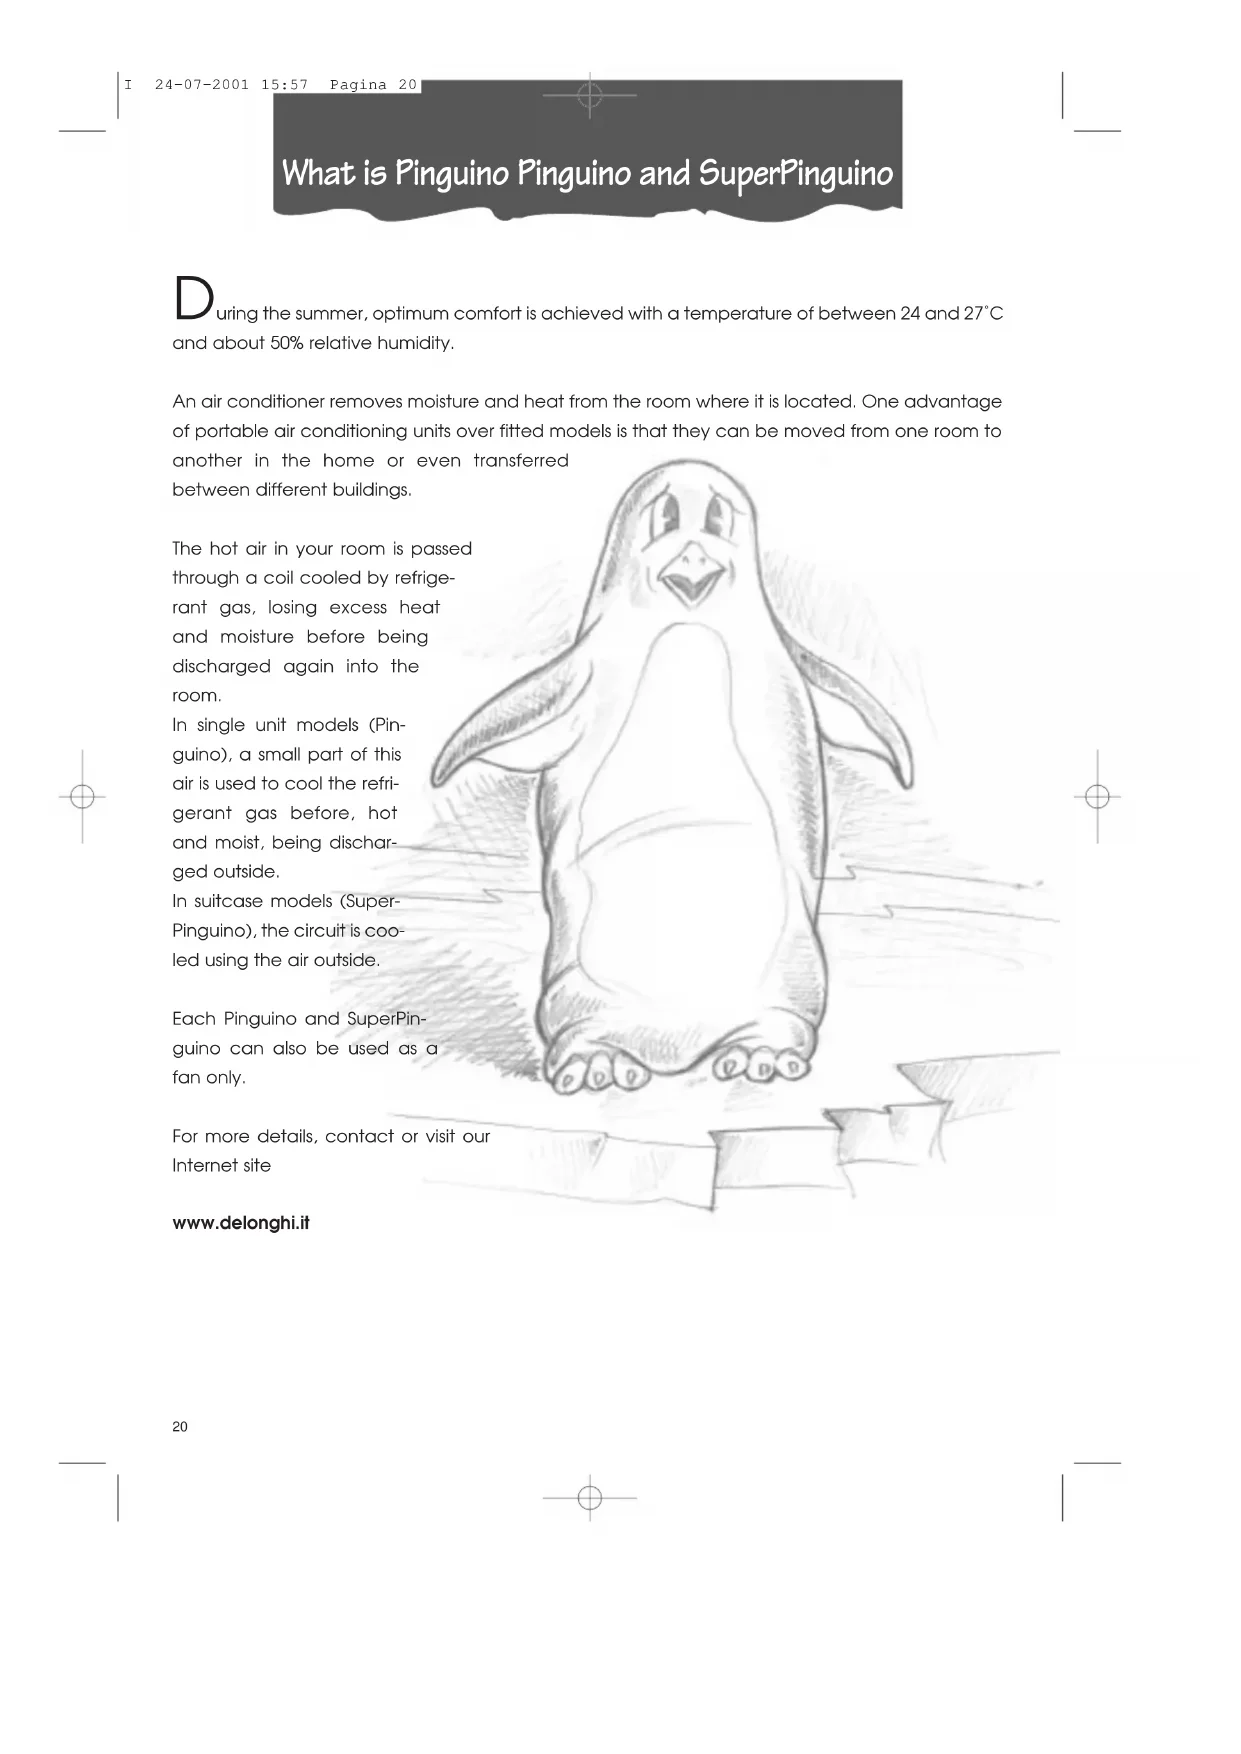
What is Pinguino Pinguino and SuperPinguino
During the summer, optimum comfort is achieved with a temperature of between 24 and 27^ and about 50% relative humidity.
An air conditioner removes moisture and heat from the room where it is located. One advantage of portable air conditioning units over fitted models is that they can be moved from one room to another in the home or even transferred between different buildings.
The hot air in your room is passed through a coil cooled by refrigerant gas, losing excess heat and moisture before being discharged again into the room.
In single unit models (Pinguino), a small part of this air is used to cool the refrigerant gas before, hot and moist, being discharged outside.
In suitcase models (SuperPinguino), the circuit is cooled using the air outside.
Each Pinguino and SuperPinguino can also be used as a fan only.
For more details, contact or visit our Internet site
www.delonghi.it
Important Safe-guards
- This appliance has been manufactured to cool and de-humidify domestic environments and should not be used for other purposes.
It is dangerous to alter or modify the unit's characteristics in any way.
The appliance must be installed in conformity with the relevant national legislation. - Should repairs be necessary, contact the nearest authorised Repair Service Centre. Unauthorised servicing can be dangerous.
- This appliance is to be used by adults only; keep children away from it.
Always ground the appliance. Have the electrical system checked by a qualified electrician. - Avoid using extension leads with the unit.
- Before cleaning or maintenance operations, always unplug the unit from the socket.
- Do not pull on or place strain on the power cable when moving the appliance.
- In the case that the power cable becomes damaged, this must be substituted only by specialised personnel authorised by the manufacturer.
The appliance should not be installed where the atmosphere may contain combustible gases, oil or sulphur, or near heat sources.
After turning off the conditioner, always wait at least three minutes before turning it on again. - Do not rest hot or heavy objects onto the appliance.
Clean the anti-bacterial filters at least once a week. - Avoid using heaters near the unit.
If it is not possible to transport the appliance in an upright position, then either lay it on its side. - Before transporting the unit drain the condensation collecting-fray and basin. After transportation, wait at least 1 hour before switching on the unit.
- The packaging materials can be recycled. You are therefore recommended to place them in the special containers for differentiated waste collection.
Setting up
The following instructions will help you set up your air conditioning unit as efficiently as possible.
AIR CONDITIONING WITHOUT INSTALLATION
With just a few simple operations, Pinguino will restore comfortable conditions in your room:
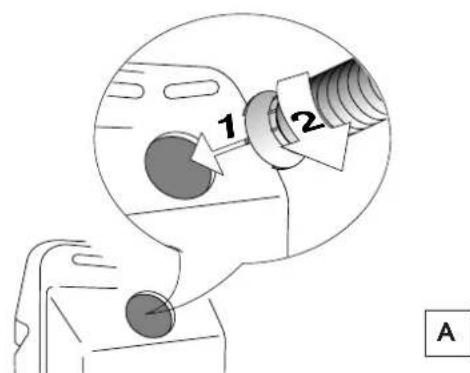
Fix the air outlet tube he coupling 5 on the back of the unit as shown in figure A.
With a double casement window, use the suckers 18vided to hold the two halves of the window together (fig. C).
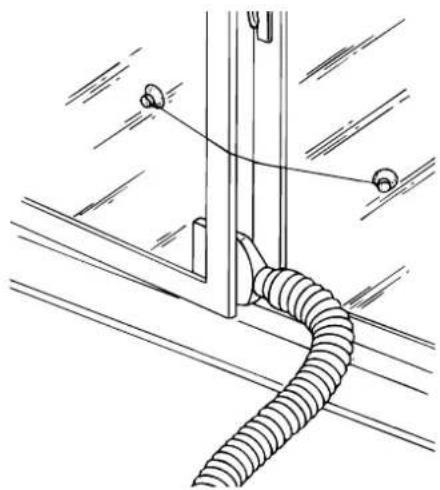
Fix the window attachment to the end of the tube 18
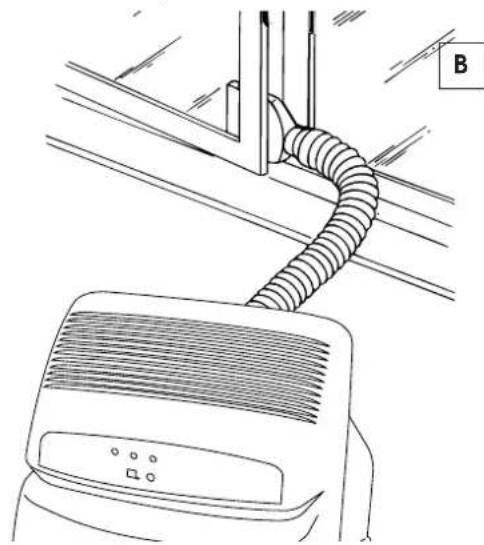
- Place the unit near a window or a French window.
- Open the window or French window slightly and place the window attachment as shown in figure B.
Setting up
AIR CONDITIONING WITH INSTALLATION
Pinguino can also be semi-permanently installed

To install, proceed as follows:
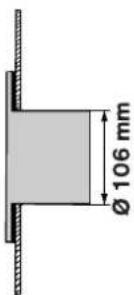
Make a hole in a wall communicating with the outside or through the pane of a window. Respect the height and dimensions given in figure D
in a window pane
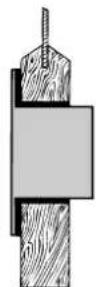
in the wood sill of a window
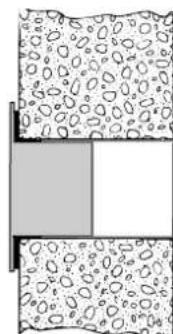
in the wall: for optimum results, insulate the section of the wall with suitable insulating material.

- Fit the flange splied to the hole.
Fix the tube the coupling on the back of the unit (figure A). - Attach the end of the tube to 17 flange shown in the figure E.
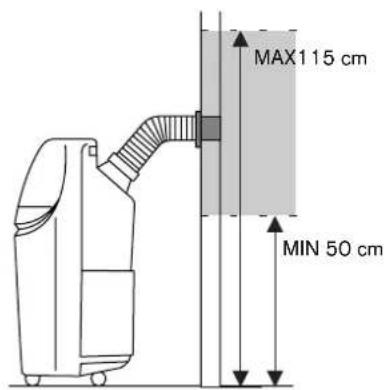
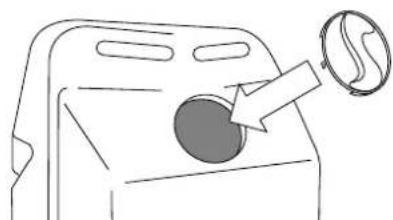
When the tube is not attached, close the hole with the bung on the flange 16
NOTE:
When the unit is installed semi-permanently, we recommend leaving a door slightly open (1 cm is enough) to ensure an adequate exchange of air.
DEHUMIDIFICATION
Position the appliance in the room without inserting the tube; in this way the dehumidified air will exhaust directly into the room.
HEATING
Position the appliance in the room, inserting the plug place of the tube. 17
Description of the remote control/ Electrical connection
THE DISPLAY
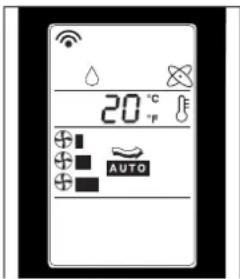
Once the air-conditioner is turned on, all the symbols will be shown.
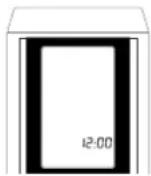
When the appliance is turned off, only the clock will remain visible.
A. Beep
Display of beef and start of the air-conditioner; it also activates every time an operation is carried out.
B. Symbols
Air-conditioning, dehumidifying, ventilation, heating, Full Auto.
C. Room temperature
Shows the room temperature.
D. Fan speed
Shows the various speeds: minimum, medium, maximum, automatic and silent.
E. On/Off Timer
Shows the times programmed for turning the appliance on and off.
F. Sleep/Silent Timer
Shows the desired operating time, only with the fan in the Silent setting.
G. Battery-replacement indicator
H. Air purification
The symbol remains on permanently because when appliance is on, air is continuously filtered of impurities.
- Set temperature
Shows the temperature set.
J. Clock
Shows the time.
BUTTONS
K. On / Off
L. MODE: Function selecting
This button selects the various functions: air-conditioning, dehumidifying, Ventilation/Purification, Heating and Full Auto
M. Room thermostat
These two buttons select the desired room temperature.
N. Room temperature display
Gives you the current room temperature. After about four (4) seconds, the display will show the temperature set previously.
O. Fan speed
Determines fan speed: minimum, medium, maximum, automatic and silent.
P. SET: Clock and timer verification
Confirms the setting of the clock and the ON/OFF timer.
Cancels the setting on the ON/OFF timer.
S. RESET
T.ON/OFF:Timerprogramming
These buttons program the turning on and off of the air-conditioner.
U. Sleep
This button controls the night-time operations.
ELECTRICAL CONNECTION
Before plugging in check that:
- the mains supply corresponds to the value shown in the specifications table;
- the socket and the mains lead correspond to the power requirements of the appliance;
- the socket is suited to the plug, otherwise have the socket replaced;
- the socket is properly grounded. The manufactures cannot be held responsible for any damages due to failure in following normal safety procedures.
Replacement of the power cable must be carried out by qualified personnel.
If when selecting the air-conditioning function while concurrently there would be a decrease in the voltage of the electrical current, a security device could intervene. This blocks the functioning of the refrigerator circuit, in a way that the appliance operates as if it were in the ventilation/purification mode. In order to restore the air-conditioning function, you must turn off the appliance and remove the plug from the outlet for at least thirty seconds. Then plug it back in.
Warning lights/ Forced operations
THE LEDs
Led displays come on depending on the selected function or as warning of possible anomalies.
| FUNZIONE | RED LIGHT 11 | YELLOW LIGHT 12 | GREEN LIGHT 13 |
| OFF | - | - | - |
| AIR-CONDITIONING | - | - | on |
| DEHUMIDIFYING | on - on | ||
| PURIFYING | - on - | ||
| HEATING | on - | - | |
| FULL AUTO | As soon as this function is selected, all LED displays will remain on for some seconds until the control unit selects which mode to function in (whether air-conditioning, dehumidifier, fan or heater). | ||
| TIMER | All 3 LEDs remain on when machine is off, if at least one TIMER function is selected. | ||
| ANOMALY | RED LIGHT 11 | YELLOW LIGHT 12 | GREEN LIGHT 13 |
| DIRTY FILTERS (1) | - blinking - | ||
| ALARM | blinking blinking | blinking |
(1) A flashing LED indicator means that the anti-bacterial filters need cleaning. To switch off the LED indicator, after having cleaned the filters, press the manual function button until a beep followed by a double-beep is heard. This procedure can be carried out also while the unit is operating.
FORCED OPERATIONS
This is a way of operating to be selected if there are problems with the remote control (broken or lost, or the batteries run-down).
Push the button 14 start the unit and then press it again to get the sequence of the different operational procedures (air-conditioning, dehumidifying, ventilation, full auto, turn off) with an automatic setting.
Description of the remote control
REMOTE CONTROL
Inserting the batteries
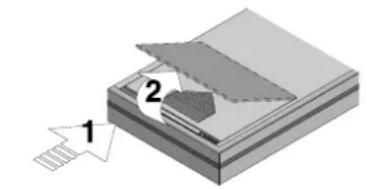
- Push down and forward on the case's pebbled cover. The cover will lift up automatically.
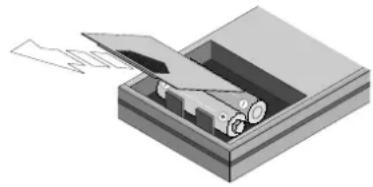
- Insert two new non-rechargeable batteries, being careful to place them in the correct positions (+) and (-).
- Put the cover back on, letting it slide into its original position.
- The Display will show all of the remote control's symbols for several seconds.
At this point the clock on the display will start to blink showing 12:00 o'clock; at this point set the correct time.
Note: WE SUGGEST USING ALKALINE BATTERIES.
If the remote control is to be replaced or thrown away, the batteries must be removed and disposed of in accordance with the current laws as it represents an environmental hazard.
SETTING THE CLOCK
- If the time is not set within two minutes of the reset or of battery replacement, the remote control will automatically read 12:00.
- To programme the hour, push the keys to move ahead or back. The segments are of one minute. If you hold the buttons down, the minute designations will run more quickly.
- The clock will continue to blink. Push the SET button to confirm the time set: the clock will then stop blinking.
- If you have to adjust the time, you must push the RESET button and then enter the correct time. (There is no other way to do this).
PROPER USE
- Point the remote control toward the air-conditioner's signal receiver.
Maximum distance: about seven (7) metres (without any obstacle between remote control and receiver). - The remote control must be handled with great care: do not drop it, expose it to direct sunlight, or leave it close to heat sources.


Selecting functions
AIR-CONDITIONING FUNCTION
This operation is ideal on especially hot days.
- First press the ① button to turn the appliance on. A beep will indicate that the air-conditioner has turned on, and the symbol will begin to blink.
- Now press the MODE button until the air-conditioning symbol appears on the display.
- At this point, set the temperature: to lower it, press the button.
To select the fan speed, simply press the button repeatedly until you obtain the speed desired (minimum, medium, maximum, automatic and silent).
Note:
In air conditioning mode, the appliance automatically removes excess humidity from the atmosphere.
It is a good idea to activate this operation when there is high humidity.
- First press the ① button to turn the appliance on. A beep will indicate that the air-conditioner has turned on and the symbol will begin to blink.
- Now press the MODE button until the dehumidifying symbol appears on the display.
Note:
It is important to set the temperature so that it is lower than the room temperature: use the button until you get a temperature 4^ lower than that in the room.
When that takes place, the air-conditioning function will switch on. If the temperature difference between the room and that set up is already 4^ or less, the dehumidifying operation alone will immediately switch on.
To select the fan speed, simply press the button until you get the desired speed.
Note:
When operating in dehumidification only mode, it is normal for the appliance to come on and go off at intervals.

H
Selecting functions
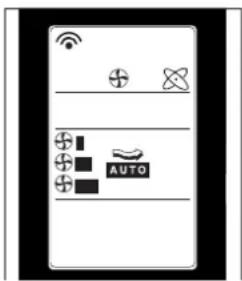
VENTILATION FUNCTION/PURIFICATION
On humid but not particularly hot days, it may be sufficient to operate the appliance in ventilation/purification mode.
- Press the button. A beep will indicate that the air-conditioner has turned on, and the symbol will begin to blink.
- Now press the MODE button until the ventilation symbol appears on the display.
- Once the ventilation has been activated, press the button repeatedly until you get the desired fan speed.
It should be pointed out that when the automatic ventilation functions are activated, the appliance itself will choose the proper speed.
HEATING FUNCTION
- Press the button. A beep will indicate that the air-conditioner has turned on, and the symbol will begin to blink.
- Then select the MODE switch until the display shows the heating-function symbol.
- At this point the desired temperature should be set: to reduce temperature press the button.
The fan speed, in the heating mode, cannot be regulated manually, only automatically.

FULL AUTO FUNCTION
FULL AUTO automatically activates the air-conditioner, including the temperature, fan speed thus assuring the best possible conditions for the room.
- Press the button. A beep will indicate that the air-conditioner has turned on, and the symbol will begin to blink.
- Now use the MODE button until the FULL AUTO symbol appears on the display.
The appliance will automatically establish the optimum mode (air conditioning, dehumidification, ventilation) and speed.

Selecting functions
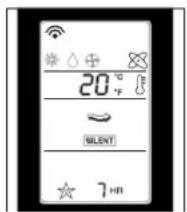
AUTOMATIC SLEEP FUNCTION
Ideal for those wanting a peaceful night's sleep in a perfectly air-conditioned room.
- Press the button to start the appliance.
- A beep will indicate that the air-conditioner has turned on, and the symbol will begin to blink.
- Now use the MODE button until you get the symbol for the function you want.
- Next select the desired temperature by pushing the buttons.
- Now press the to set up the night-time function: the symbol will appear. By pushing the button repeatedly until you get the number of hours you want (from 1 to 7), you will set the time for the appliance to switch off.
In this function, the fan functions automatically.
N.B: The night-time function makes it possible to keep a room at a perfect temperature, thus preventing an excessive rise or a drop in temperature while the silent operation is in effect. The air-flow will decrease, while the room temperature will vary gradually to provide the ideal condition: during the air-conditioning stage, the temperature will increase by 1^ . after 30 minutes and by 2^ . after one hour.
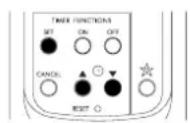
PROGRAMMING THE TIMER
Programming the ON function
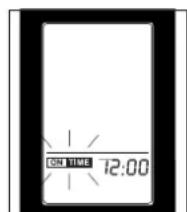
With the air-conditioner already running, press the ON button: the ON TIME symbol will start blinking and the clock will read 12:00.
Remember that the timer turns the air-conditioner on, thereby resetting all the functions and procedures operating before the appliance was last turned off.
- If the programming is the one you want, simply press the button.
- The increase or decrease will be in ten-minute (10-minute) segments for each press of the button, whereas if you hold the button down the time will change more quickly.
- The ON TIME marking will continue to blink. By pressing down on the SET button again, you will get confirmation of the time set for the appliance to turn on.
- To cancel the programming, push the ON button: the ON TIME marking will blink while showing the turn-on time.
- At this point, use the CANCEL button: the clock will show the correct time at that moment.
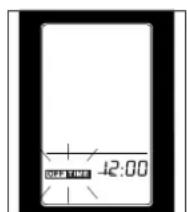
Programming the turn-off function
The procedure for programming the turn-off and cancellation operations is similar to the one just described: the only difference is that you must push the OFF instead of the ON button.


Recommendations
Follow these recommendations to achieve maximum efficiency from your air conditioning unit:
-
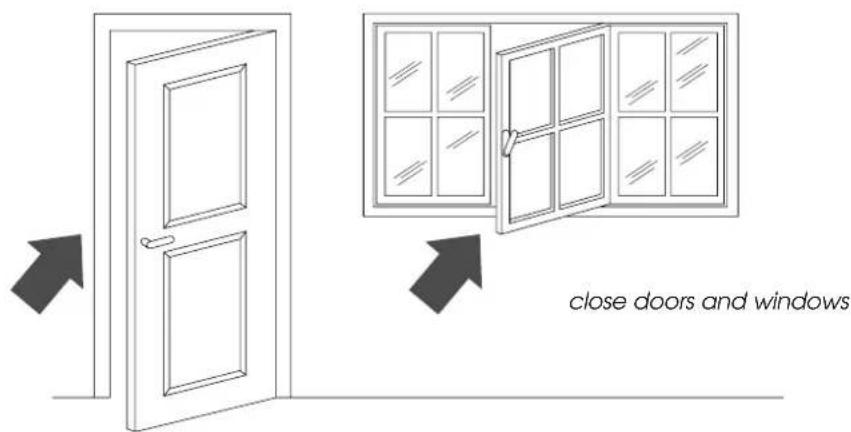
Close the doors and windows in the room where the unit is functioning. The only exception is in the case of installation through a hole in the wall. In this case, you are recommended to allow a small amount of air to enter through a door or window to guarantee an adequate exchange of air.
-
Do not install the heater in humid environments.
- Do not use the appliance outdoors.
- Keep the appliance a safe distance from combustible surfaces
- Protect the room from direct exposure to the sun's rays by drawing the curtains and/or partially lowering the blinds so as to maximise energy savings.
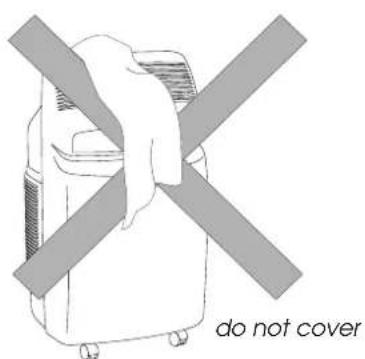
- Do not rest objects on the air conditioning unit.
- Do not obstruct the air intake or outlet.
Make sure there are no heat sources in the room.

lower the blinds or draw the curtains
Make sure the unit is located on a level floor. If necessary, place the two blocking devices under the front wheels.
Cleaning
Before cleaning or maintenance, always turn the unit off by placing the selector in the "O" position and unplug from the mains.
CLEANING THE EXTERNAL UNIT
We recommend cleaning the unit with a slightly damp cloth then drying with a dry cloth. For safety reasons, do not wash the air conditioner with water.
Precautions
Never clean with benzene, alcohol or solvents. Never spray liquid insecticide or similar.
CLEANING THE AIR FILTERS.
To maintain the air conditioning unit at peak efficiency, you are recommended to:
- Clean the anti-bacteria filter weekly.
- Replace the FILTRETE™ filter at the end of each season or when spent (follow the instructions on the unit near the filter).
The air purification filters are located behind the two intake grilles. The grilles in fact house the filters themselves.
To clean the filters:
- Remove the intake grilles by rotating them outwards.

2.Remove the first FILTRETE™ filter (white).
3.Remove the filter holder holding the antibacteria filter by unhooking it from the external grille.

To remove dust deposited on the anti-bacteria filter, use a vacuum cleaner. If very dirty, rinse repeatedly in warm water at a temperature of not more than 40^ .
After washing, dry the filter. To replace, put the filters back into the filter holder, then hook the latter to the unit.
Do not clean the FILTRETE™ filter as this would reduce its filtering capacity.
END OF SEASON OPERATIONS
Take out the condensation basin located in the rear of the unit and empty it.
Empty the residual water by removing the bung in the drainage tube.
After replacing the bung, put the condensation basin back.
Clean the anti-bacteria filters and dry well before replacing.
Protect the unit from dust by covering with a plastic bag.
BEGIN OF SEASON CHECKS
Check that the power cable and socket are undamaged and that the earth installation is efficient.
Troubleshooting
PROBLEMS CAUSES SOLUTIONS
| The air conditioner doesn't work | • the power is off • the plug is not inserted into the electrical outlet • the fan is blocked • the security float was triggered | • wait • plug in the appliance • call the Service Centre • empty the basin |
| The air conditioner works for a short time only | • the exhaust tube is twisted • the exhaust tube is blocked • the drain tube is bent | • position exhaust tube correctly • check if there are obstacles blocking the exhaust of air out of the appliance • unbend the tube |
| The air conditioner works but doesn't cool the room | • a window is open • in the room there is some source of heat (lamp, burner, etc.) or there are many people in the room • the exhaust tube has come out of place • the air filter is dirty • the air conditioner has a capacity not adequate for the conditions or the Idimensions of the room | • close the open window • remove the heat source • reinsert the tube into its place • clean the filter or replace |
| The air conditioner does not heat sufficiently | • the air filter is dirty • the temperature setting is incorrect • the grill openings are blocked • the room is too big | • clean the filter or replace it • reset the temperature • remove the blockage |
| Strange odour in the room | • air filters dirty | • clean the filter or replace it |
| Leaking condensation from the unit around of the conditioner | • condensation collection basin is full • incorrect installation of the appliance | • empty the basin and drain the water with the drainage tube found on the back side of the appliance • see page 22 to properly install the appliance |
| The air conditioner doesn't work for about 3 minutes from turning on the appliance | • the appliance's security system has intervened | • wait for 3 minutes |
| The 3 LED indicators are flashing | • Condensation collecting-basin is full • empty out the basin: If LEDs remain on, seek Qualified Service | |
| Remote control signals are weak or nonexistent | • Batteries run down • Batteries may be inserted incorrectly | • Change the batteries • Check the batteries' (+) and (-) poles |
Technical specification
RECOMMENDED OPERATING CONDITIONS
Room temperature 21÷ 32^
Outside temperature 21 ÷ 43^ C
TECHNICAL SPECIFICATION
Power supply see rating plate
Max. absorbed power in air conditioning
Max. absorbed power when dehumidifying
Max. absorbed power when heating (mod. F15)
Refrigerating capacity*
Number of fan speeds 2
Max. air flow, 310 m ^3/h
Dimensions of internal unit:
width 452 mm
height 800 mm
.
weight 33.5 kg
- Standard conditions: Room temperature 27°C
47% relative humidity Outside temperature 35°C
41% relative humidity
This appliance contains substances which, if liberated into the atmosphere, would damage the ozone layer. Care should therefore be taken not to perforate the refrigerant circuit. At the end of its working life, delivery the air conditioning unit to a special collection centre.
ELECTRICAL CONNECTION (U.K. ONLY)
A) If your appliance comes fitted with a plug, it will incorporate a 13 Amp fuse. If it does not fit your socket, the plug should be cut off from the mains lead, and on appropriate plug fitted, as below. warning: Very carefully dispose of the cut off plug after removing the fuse: do not insert in a 13 Amp socket elsewhere in the house as this could cause a shock hazard. With alternative plugs not incorporating a fuse, the circuit must be protected by a 15 Amp fuse. If the plug is a moulded-on type, the fuse cover must be re-fitted when changing the fuse using a 13 Amp Ast approved fuse to BS 1362. In the event of losing the fuse cover, the plug must NOT be used until a replacement fuse cover can be obtained from your nearest electrical dealer. The colour of the correct replacement fuse cover is that as marked on the base of the plug.
B) If your appliance is not fitted with a plug, please follow the instructins provided below:
WARNING - THIS APPLIANCE MUST BE EARTHED. IMPORTANT
The wires in the mains lead are coloured in accordance with the following code:
Green and yellow Earth Blue Neutr Brown Live

As the colours of the wires in the mains lead may not correspond with the coloured markings identifying the terminals in your plug, proceed as follows:
The green and yellow wire must be connected to the terminal in the plug marked with the letter E or the earth symbol
12 or coloured green or green and yellow. The blue wire must be connected to the terminal marked with the letter N or coloured black.
The brown wire must be connected to the terminal marked with the letter L or coloured red.
CLIMATISATION AVEC INSTALLATION
PROBLEMES CAUSES SOLUTIONS
CLIMATIZACAO SEM INSTALAÇAO
F. Timer sleep/silent
A tecla anula as programacoes do timer ON/OFF.