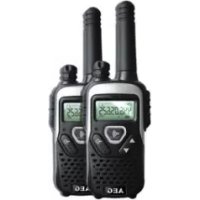
Voxtel R100 - Talkie Walkie AEG - Free user manual and instructions
Find the device manual for free Voxtel R100 AEG in PDF.
| Product Type | PMR Walkie-Talkie (Private Mobile Radio) |
| Brand | AEG |
| Model | Voxtel R100 |
| Power Supply | 3 AAA batteries (alkaline recommended) |
| Number of Channels | 8 PMR 446 channels |
| Typical Range | Up to 5 km in open field (depending on conditions) |
| Transmission Power | 500 mW maximum (PMR 446) |
| Display | LCD with channel number and icons |
| Main Functions | Hands-free transmission/reception (PTT), call tone, channel scanning, monitor function, key lock, power saving, battery gauge, Roger beep |
| Volume Control | 8 levels via ▲/▼ buttons |
| Low Battery Indicator | Flashing empty battery icon, then automatic shutdown after beep |
| Key Lock | Yes, hold the Menu button to activate/deactivate |
| Belt Clip | Removable and reversible |
| Operating Temperature | -10°C to +50°C (estimate) |
| Weight (with batteries) | Approximately 120 g |
| Dimensions (L x W x H) | Approximately 55 x 35 x 170 mm |
| Warranty | 24 months (excluding improper use) |
| Maintenance | Clean with a damp cloth; avoid solvents, heat, humidity |
| Recycling | Device and batteries to be taken to a collection point |
Frequently Asked Questions - Voxtel R100 AEG
User questions about Voxtel R100 AEG
0 question about this device. Answer the ones you know or ask your own.
Ask a new question about this device
Download the instructions for your Talkie Walkie in PDF format for free! Find your manual Voxtel R100 - AEG and take your electronic device back in hand. On this page are published all the documents necessary for the use of your device. Voxtel R100 by AEG.
USER MANUAL Voxtel R100 AEG
natural_image
Line drawing of a vehicle front panel with a black arrow pointing downward (no text or symbols)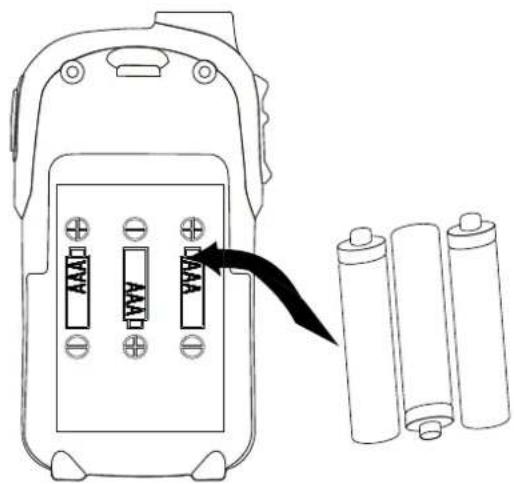
natural_image
Line drawing of a vehicle front panel with an upward arrow indicating motion (no text or symbols)1 BECAUSE WE CARE
Thank you for purchasing this product. This product has been designed and assembled with utmost care for you and the environment. This is why we supply this product with a quick installation guide to reduce the number of paper (pages) and therefore save trees to be cut for making this paper. Thank you for supporting us to protect our environment.
2 GETTING TO KNOW YOUR PMR
2.1 Handset overview (see P1)
| # Meaning | ||
| 1 | LCD screen• Displays the current channel selection and other radio symbols. | |
| 2 |  | Menu button• Press to program the PMR settings. |
| 3 |  | Power button• Press and hold to turn the PMR unit on or off. |
| 4 | Microphone | |
| 5 | Speaker | |
| 6 | [AWTS] | Call button• Press to send a ringing tone to other PMR units. |
| 7 |  | Up / down buttons• Press to change channels, volume and to select settings during programming. |
| 8 PTT | PTT (push to talk) button• Press and hold to transmit. | |
| 9 | Antenna | |
2.2 LCD screen (see P2)
| Meaning | |
 | Channel number.Changes from 1 to 8 as selected by the user. |
 | Displays when battery level goes low. |
 | Displays when the scan function is activated. |
 | Displayed when key lock function is activated. |
 | Displayed when transmitting a signal. |
| [3xGX] | Displayed when receiving a signal. |
| [6w8W] | Displayed the full volume level. |
3 INSTALLATION
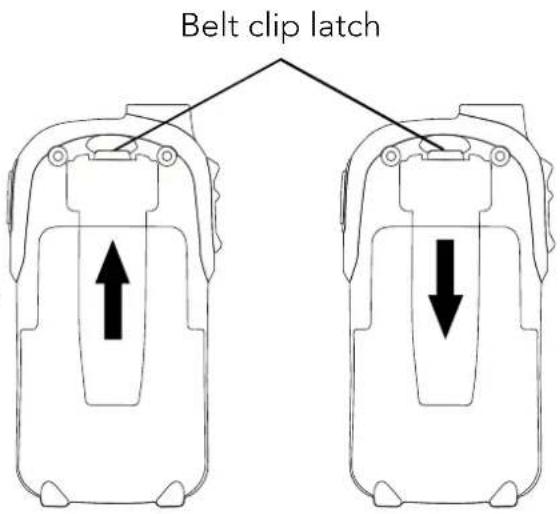
3.1 Removing the belt clip
- Pull the belt clip latch away from the PMR.
- While pulling the belt clip latch, push up the belt clip as shown.
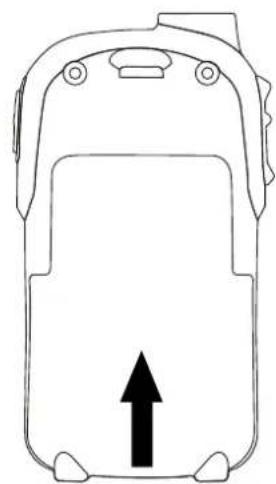
3.2 Installing the belt clip
- Slide the belt clip into the slot as shown.
A "click" indicates the belt clip is locked into its position.
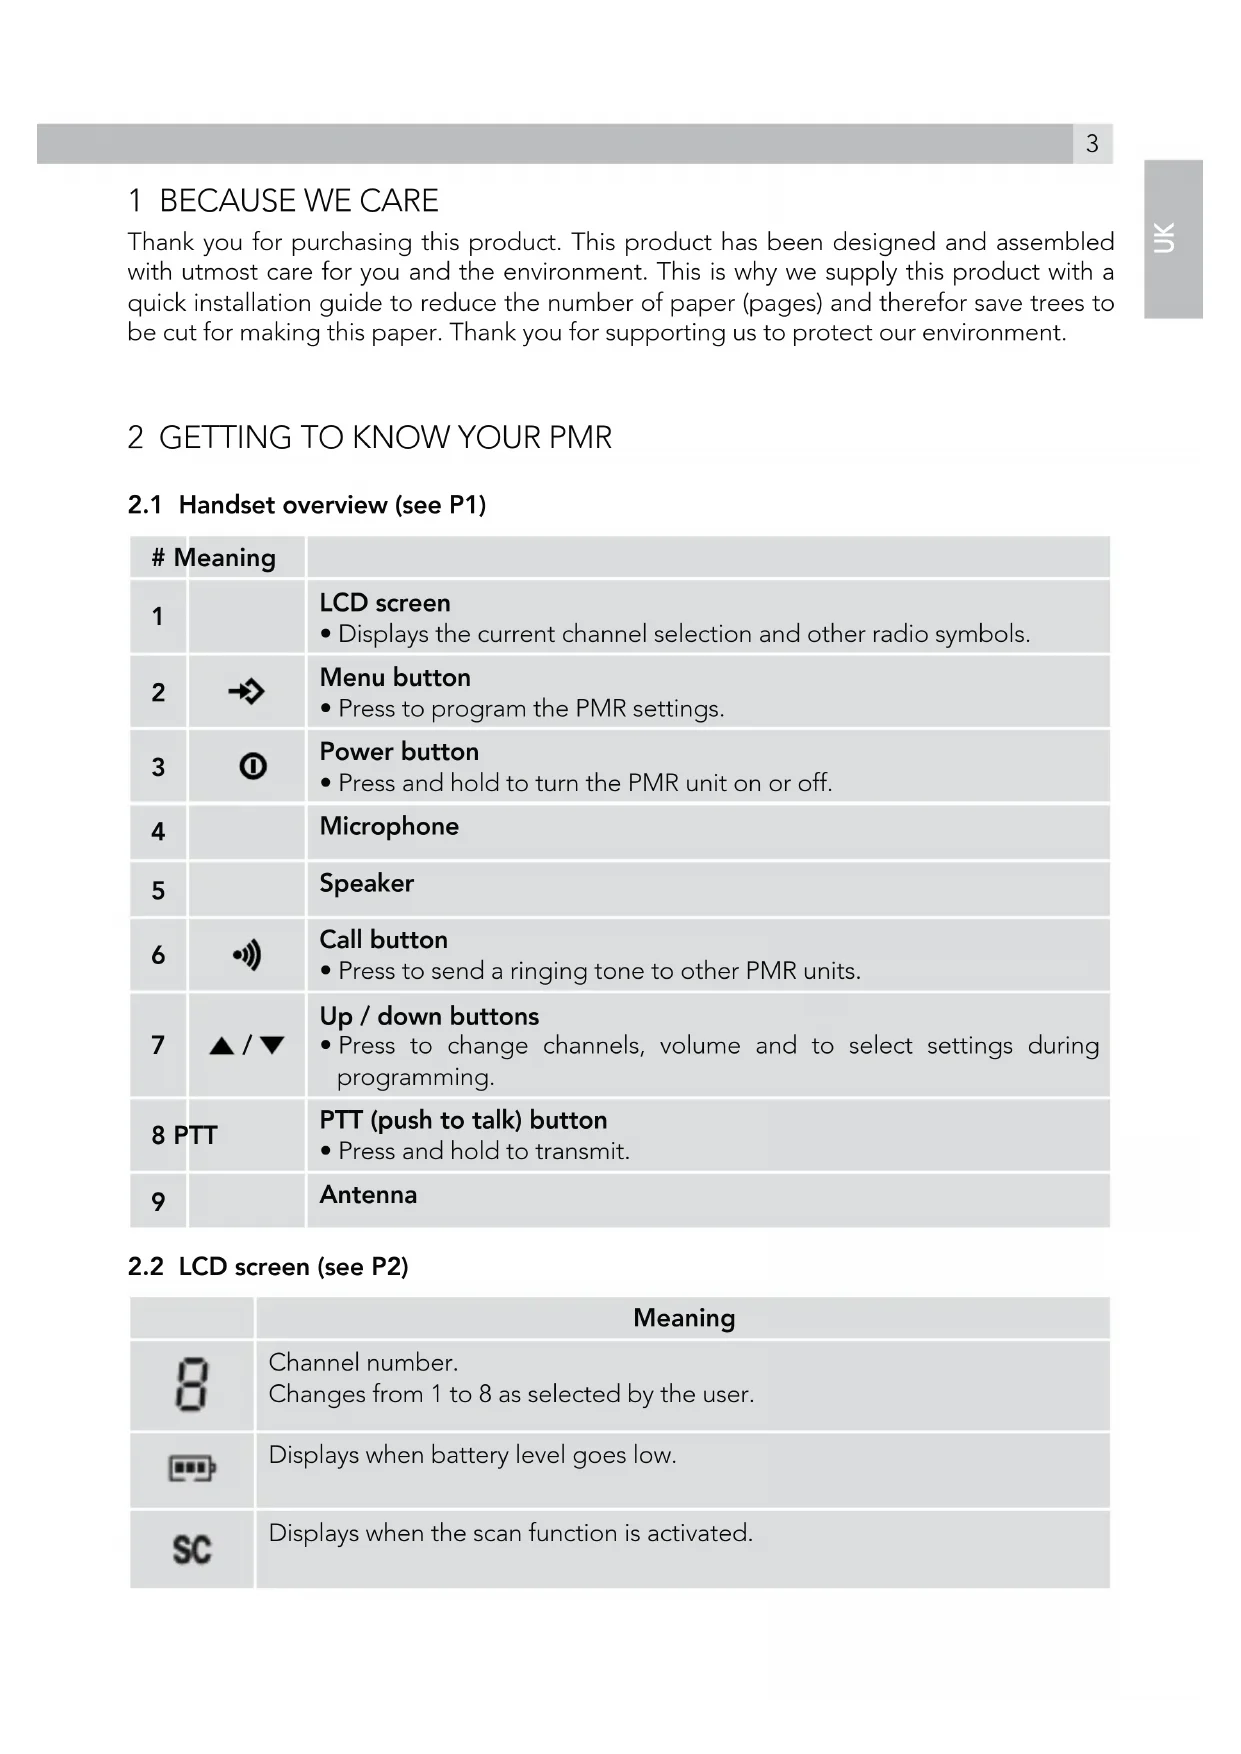
3.3 Installing the batteries (see P3)
- Slide down the battery compartment cover.
- Insert 3 x AAA batteries. Position the batteries according to the polarity marking on the battery compartment.
- Replace the battery cover.
Notes:
- The PMR units have a built-in power saver (PS) for maximum battery life, but when not in use, turn the units off to save battery power.
- Remove the batteries if the units will not be used for a long period of time.
- Do not mix battery types in the PMR unit.
- Disposed of used batteries safety at a recycling centre.
- Don't leave dead batteries in your PMR units. They might leak and cause damage for the unit and surroundings.
3.4 Battery level
The battery icon is located in the left corner of the LCD panel. This battery icon will displayed when low battery status. These indicate that the battery level reaches its minimum level, at this stage the unit will emit two beep tones and then it will automatically turn off the power.
4 OPERATION
4.1 Turning the unit on/off
To turn on:
- Press and hold the power button Ⓓ.
A special "beep" sound will be heard. The LCD screen will display the current channel.
To switch off:
- Press and hold the power button Ⓓ.
A special "beep" sound will be heard and the LCD screen will turn blank.
4.2 Adjusting the speaker volume
There are 8 volume levels, the current speaker volume level is displayed on the LCD screen.
To adjust the speaker volume level:
- Press the up button ▲ to increase or press down button ▼ to decrease.
The LCD screen will display the speaker volume icon bars ascending, or descending respectively.
4.3 Receiving a call
The unit is continuously in receive mode when the unit is turned on and not transmitting. When a signal is received on the current channel, the receive signal icon RX will be displayed on the LCD screen.
4.4 Transmitting (sending)
- Press and hold the PTT (Push to Talk) button to transmit your voice.
The transmit signal icon TX will display on the LCD screen.
- Hold the unit in a vertical position with the microphone 5 cm away from the mouth. While holding the PTT button, speak into the microphone in a normal tone of voice.
- Release the PTT button when you have finished transmitting.
Important:
- In order for other people to receive your transmission, they must also be on the same channel that you are currently using. Refer to the „4.6 Changing channels“ for more information.
- When the PTT and/or call buttons •••• are continuously pressed, your PMR cannot receive any transmissions.
4.5 Roger beep
The roger beep is a tone which is automatically transmitted whenever the PTT button is released. This alerts the receiving party that you have ended the transmission, and you are now in receive mode.
4.6 Changing channels
The PMR has 8 available channels. To change channels, in normal mode:
- Press the menu button →.
The channel icon "1" on the LCD screen will start blinking.
- While the channel icon is blinking, press ▲ or ▼ to select the desired channel.
The channel changes from 1 to 8, or vice versa.
- Press the menu button to confirm your setting and return to the standby mode.
4.7 Calling (paging) tone
You can use the call button ⬆ to send a tone to other users on the same channel. To activate this feature:
- With the PMR in normal mode, press and release the call button
The unit will transmit a 2-second page tone to the other unit(s) set with the same channel within transmitting range.
4.8 Channel scan
Your radio can scan the 8 channels to any activity. This allows to find other radios without having to change the channel.
To activate this feature:
- Press and hold the menu → and up ▲button at the same time and channel scanning will start immediately, with sc displayed on the screen and the channel number cycling through the channels.
When a signal is detected, the unit will pause on that channel, while receiving the signal and for a further 3 seconds.
- Press the PTT button to stop scanning and talk on that channel or press ▲ or ▼ to manually start the scanning.
- To stop scanning, press the menu button and return to standby mode.
4.9 Monitor feature
You can use the monitor feature to check for weaker signals in the current channel.
To activate this feature:
- Press and hold the menu and down button at the same time.
The receiving icons Rx appears on the display
Your handset will pick up any signals on the current channel.
- Press the menu button to stop the monitoring.
4.10 To lock/unock the buttons
With the buttons lock you can still transmit TX, or call the current channel, but you cannot change the volume. To activate this feature:
- In the standby mode, press and hold the menu button → until the icon appears on the LCD screen.
To unlock:
- Press and hold menu button → again until the icon disappears on the LCD screen.
5 AUXILIARY FEATURES
5.1 Power saving
Your PMR unit has special circuitry designed to extend the life of your battery. When the unit is not used for 4 seconds, it will automatically switch into a low power mode. The power saving feature does not affect the PMR ability to receive transmissions. When a signal is detected, it automatically returns to full power mode.
5.2 Low battery meter indicator
The PMR can detect the low battery level when battery voltage goes low. The battery icon will display the low battery status as follows. When battery voltage at low battery level. The empty battery symbol will appear at this stage and continue to blink. The battery icon will
continue to blink until it totally drain the battery voltage
Note:
To have good communication, once the battery reach in low battery level, replace the batteries into new ones.
6 SAFETY
| ! | Damaged antennaDo not use any PMR that has a damaged antenna. If a damaged antenna comes in contact with the skin, a minor burn may result. |
| ! | BatteriesAll batteries can cause property damage and/or bodily injury such as burns if conductive material such as jewelry, keys, or beaded chains touches exposed terminals. The material may complete an electrical circuit (short circuit) and become quite hot. Exercise care in handling any charged battery, particularly when placing it inside a pocket, purse, or other container with metal objects. |
| ! | Warning for vehicles with an air bagDo not place your unit in the area over an air bag or in the air bag deployment area. Air bags inflate with great force. If a unit is placed in the air bag deployment area and the air bag inflates, the device may be propelled with great force and cause serious injury to the occupants of the vehicle. |
| ! | Potentially explosive atmospheresTurn your unit off when in any area with a potentially explosive atmosphere, unless it is a type especially qualified for such use (for example, factory mutual approved). Sparks in such areas could cause an explosion or fire resulting in injury or even death. |
| ! | BatteriesDo not replace or charge batteries in a potentially explosive atmosphere. Contact sparking may occur while installing or removing batteries and cause an explosion. |
Blasting caps and areas
To avoid possible interference with blasting operations, turn your device off near electrical blasting caps or in a "blasting area" or in areas posted: "Turn off the two way radio." Obey all signs and instructions.
7 CE DECLARATION
This product is in compliance with the essential requirements and other relevant provisions of the R&TTE directive 1999/5/EC.
The Declaration of conformity can be found on: www.aegtelephones.eu
8 DISPOSAL OF THE DEVICE (ENVIRONMENT)

At the end of the product lifecycle, you should not throw this product into the normal household garbage but bring the product to a collection point for the recycling of electrical and electronic equipments. The symbol on the product, user guide and/or box indicate this. Some of the productmaterials can be re-used if you bring them to a recycling point. By reusing some parts or raw materials from used products you make an important contribution to the protection of the environment. Please contact your local authorities in case you need more information on the collection points in your area.
Batteries must be removed before disposing of the device. Dispose of the batteries in an environmental manner according to your country regulations.
9 CLEANING AND CARE
Do not clean any part of your unit with benzene, thinners or other solvent chemicals as this may cause permanent damage which is not covered by the Guarantee.
When necessary, clean it with a damp cloth.
Keep your unit away from hot, humid conditions or strong sunlight, and don't let it get wet.
10 GUARANTEE AND SERVICE
The unit is guaranteed for 24 months from the date of purchase shown on your sales receipt. This guarantee does not cover any faults or defects caused by accidents, misuse, fair wear and tear, neglect, tampering with the equipment, or any attempt at adjustment or repair other than through approved agents.
Please keep your sales (till) receipt this is your proof of guarantee.
10.1 While the unit is under Guarantee
- Pack up all parts of your unit, using the original package.
- Return the unit to the shop where you bought it, making sure you take your sales receipt.
- Remember to include the mains adapter. (if applicable)
10.2 After the Guarantee has expired
If the unit is no longer under Guarantee, contact us via www.aegtelephones.eu
4.4 Verzenden (transmit)
10 GWARANCJA I SERWIS
© 2012 Binatone Electronics International Limited
All rights reserved
Subject to availability. Rights of modification reserved.
AEG is a registered trademark used under license from AB Electrolux (publ)
www.aegtelephones.eu