
STM6600 - Mixer AEG - Free user manual and instructions
Find the device manual for free STM6600 AEG in PDF.
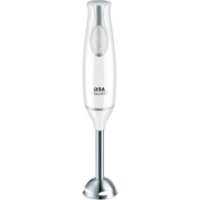
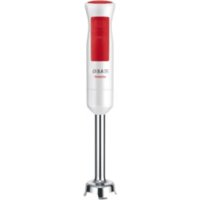
| Product type | Immersion blender / Hand mixer |
| Brand | AEG |
| Model | STM6600 |
| Dimensions (approx.) | 40 x 10 x 10 cm |
| Weight (approx.) | 1.2 kg |
| Power supply | 220-240 V ~ 50/60 Hz |
| Power | 700 W |
| Speeds | Variable + Turbo |
| Beaker capacity | 800 ml |
| Included accessories | Metal blender foot, mini chopper, double whisk, wall mount |
| Main functions | Blending, chopping, whisking, emulsifying |
| Care and cleaning | Wipe motor unit with damp cloth; accessories dishwasher-safe (except blender foot recommended hand wash) |
| Safety | Unlock for accessory change, automatic shut-off in case of overload, very sharp blade |
| Spare parts and repairability | Replace cord or motor unit only by a qualified professional |
| General information | Household use only; do not blend paint; max 60 seconds continuous use |
Frequently Asked Questions - STM6600 AEG
User questions about STM6600 AEG
0 question about this device. Answer the ones you know or ask your own.
Ask a new question about this device
Download the instructions for your Mixer in PDF format for free! Find your manual STM6600 - AEG and take your electronic device back in hand. On this page are published all the documents necessary for the use of your device. STM6600 by AEG.
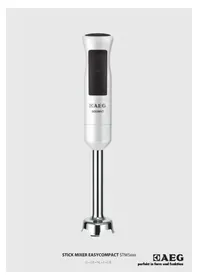
USER MANUAL STM6600 AEG
Before using the appliance for the first time, please read the safety advice on page 17.
DC
Teile
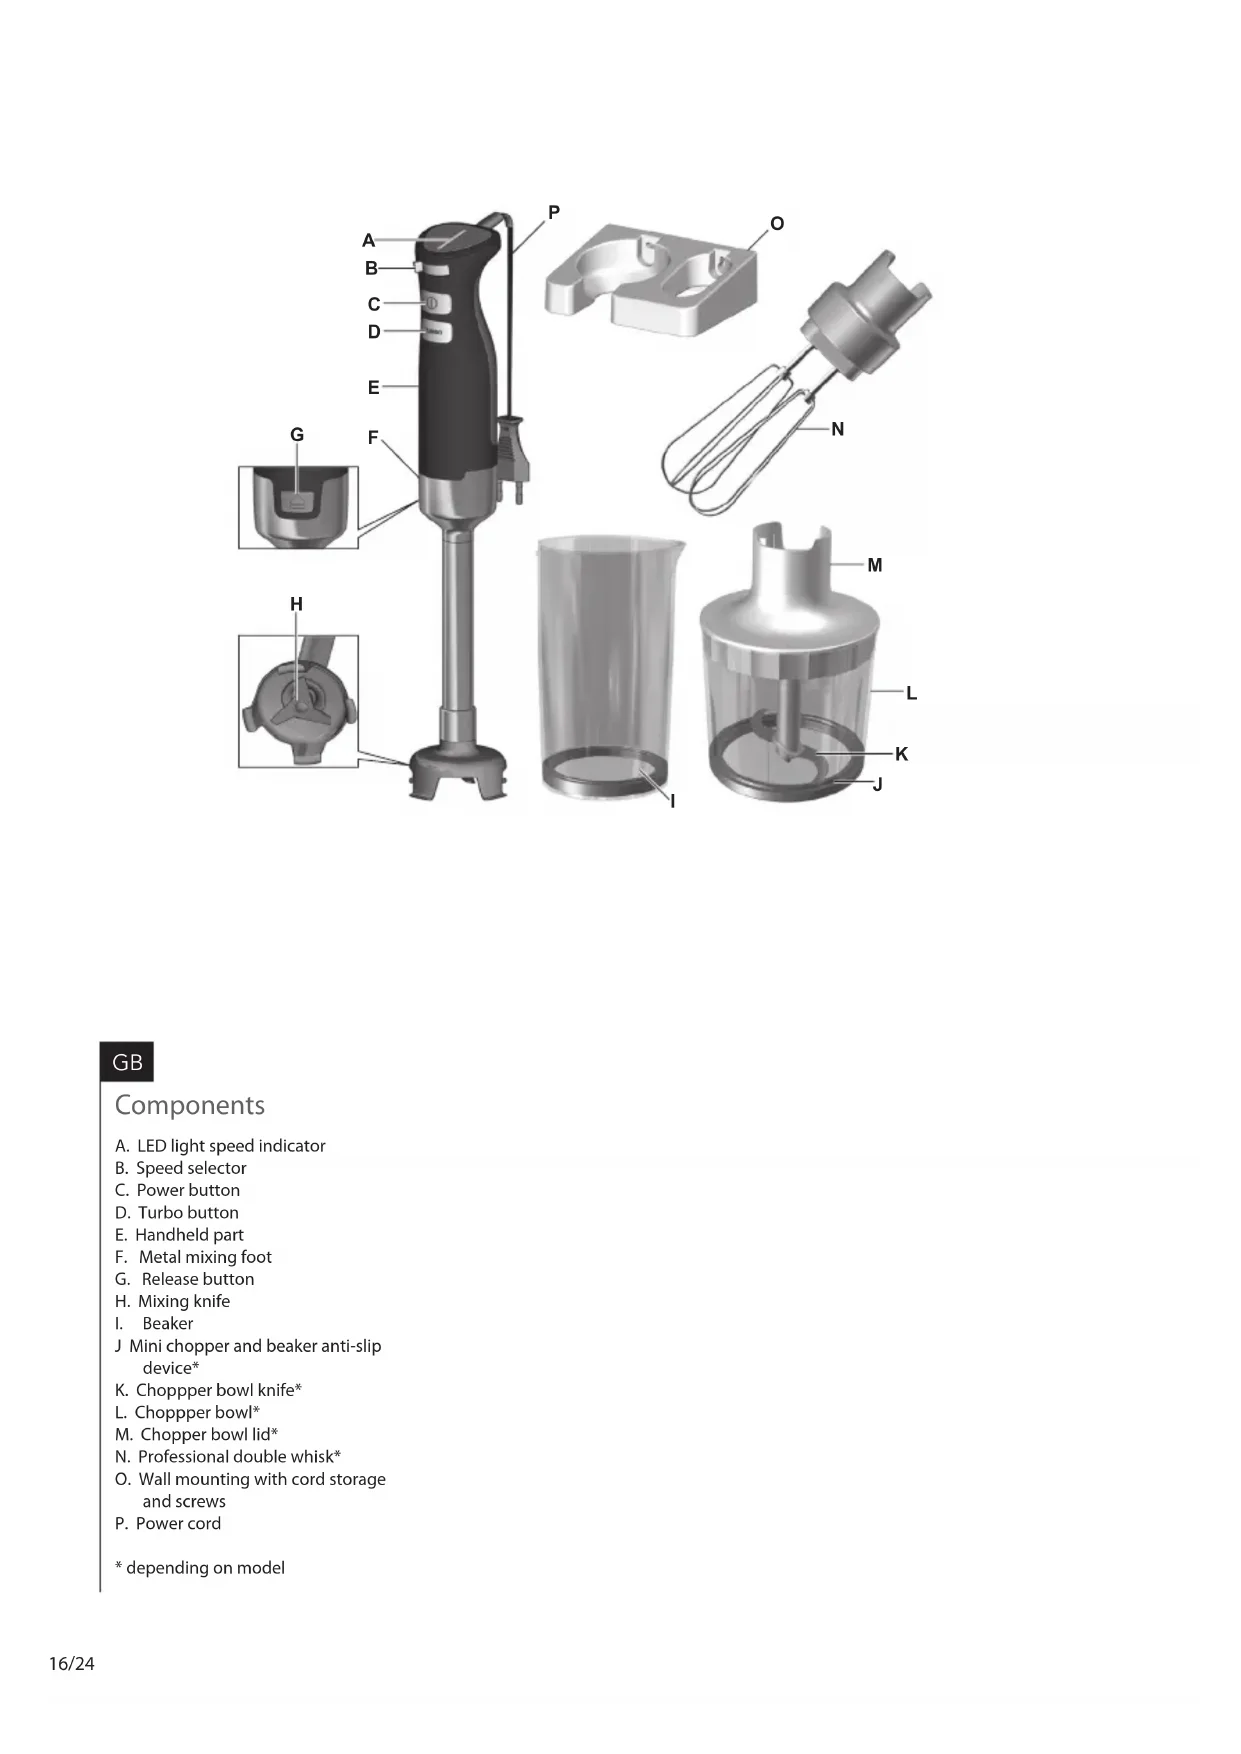
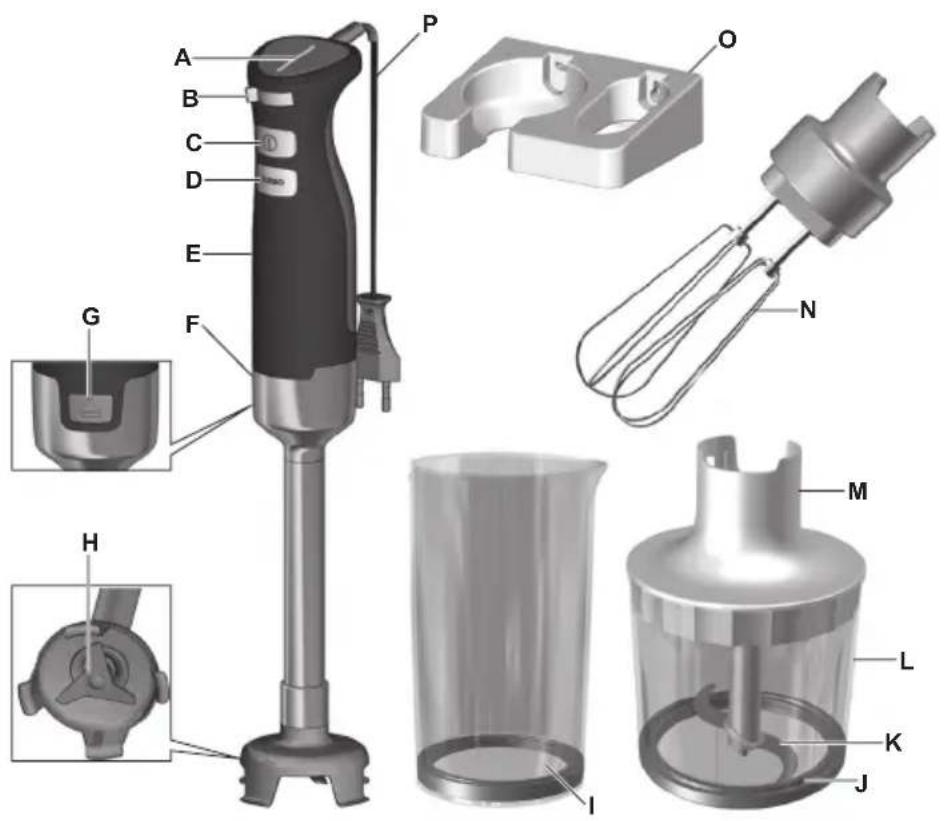
A. LED-
A. LED light speed indicator
B. Speed selector
C. Power button
D. Turbo button
E. Handheld part
F. Metal mixing foot
G. Release button
H. Mixing knife
I. Beaker
J Mini chopper and beaker anti-slip device
K. Chopperbowl knife
L. Chopperbowl
M. Chopper bowl lid
N. Professional double whisk
O. Wall mounting with cord storage and screws
P. Power cord
depending on model
GB
Read the following instruction carefully before using machine for the first time.
- This appliance is not intended for use by persons (including children) with reduced physical, sensory or mental capabilities, or lack of experience and knowledge, unless they have been given supervision or instruction concerning use of the appliance by a person responsible for their safety.
Children should be supervised to ensure that they do not play with the appliance. - Do not allow children to use the appliance without supervision.
The appliance may only be connected to a power supply whose voltage and frequency comply with the specifications on the rating plate! - Never use or pick up the appliance if
- the supply cord is damaged,
- the housing is damaged.
If the appliance or the supply cord is damaged, it must be replaced by the manufacturer, its service agent or similarly qualified person, in order to avoid hazard.
Always disconnect the appliance from the supply if it is left unattended and before assembling, disassembling or cleaning.
- Never touch the blades or inserts with your hand or any tools while the appliance is plugged in.
- The blades and inserts are very sharp! Danger of injury! Caution when assembling, disassembling after use or when cleaning! Ensure that the appliance is disconnected from the mains supply.
The appliance cannot be used for chopping ice or blending hard and dry substance, such as nut, candy; except with specific accessories provided with the appliance. Otherwise the blade could be blunt.
- Do not immerse the appliance in water or any other liquid.
- When processing heavy load, do not use the appliance continuously for more than 60 seconds. Allow to cool down before restarting.
- Do not use this appliance to stir paint. Danger, could result in an explosion!
- Never operate chopper accessory without lid.
This appliance is intended for domestic use only. The manufacturer cannot accept any liability for possible damage caused by improper or incorrect use.
If relevant add time and volume limitations for accessories.
Getting started

1. Before first use, be sure to clean mixing foot and let dry. Before inserting or removing mixing foot, remove plug from power outlet.
GB

4. Insert the stick mixer deep into the beaker, begin mixing by starting at normal speed. Make sure the beaker is no more than 2/3 full. If you do not use the beaker, do not immerse the mixing foot more than 2/3 of its length. Move stick mixer lightly up and down to ensure best processing of content. Release switch to stop.

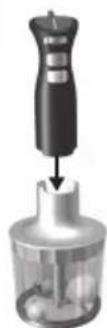
2. Insert the handheld part into mixing part and lock into position. To remove, press the release button and pull off the foot.

5. Using the mini chopper*. Place chopper bowl on a clean, level surface. Put stainless steel blade into place.

3. Select the speed by moving speed selector. Press power button to start mixing. Press Turbo button for the highest speed.
LED light will indicate the mixing speed.
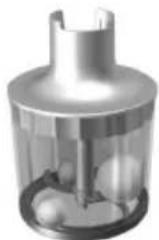
6. Place food into the chopper bowl*.
Amount of food to be chopped can not exceed 250g Close the lid.
First time use
GB
- Insert handheld part into the chopper lid and lock into position. Plug into power outlet, select the speed and press power button to start. Release to stop. Remove handheld part by pressing the release button.

- Working with the professional double whisk*. To assemble whisk with handheld part, connect them and lock into place. To disassemble press the release button and pull the whisks off.

- Storage - to fasten the wall mounting device, drill two holes into the wall, insert two plastic tubes and secure device with two screws.
Cleaning

- Before cleaning, always unplug the appliance. It is not recommended to wash the mixing foot in the dishwasher. If washed in the dishwasher, dry the mixing foot in an upright position (with the blades up) so that anytrapped water can run out.

- Beaker and whisks detached from the plastic holder can be washed in the dishwasher.

- Before cleaning, always unplug the appliance. Disassemble the handheld part. Wipe with a damp cloth and dry thoroughly. Never immerse in water due to risk of electric shock.
Blending quantities and Processing Times
| Accessory Metal mixing foot and Beaker | ||||
| Recipe Ingredients Quantity | Time Speed | |||
| Pineapple-apricots Smoothie | Pineapple in slices 250 g | 60 sec TurboDried Apricots 40 g | ||
| Yoghurt 300 g | ||||
| Raspberries Smoothie | Frozen raspberries 250 g | 60 sec Turbo | ||
| Banana 1/2 pcs | ||||
| Water 100 g | ||||
| Caster sugar 1 Tbs | ||||
| Yoghurt 300 g | ||||
Chopping quantities and Processing Times
| Accessory Mini Chopper | ||||||||
| Ingredients | Quantity | Quality | Time | Quality | Time | Quality | Time | Speed |
| Carrots | 100-200 g | Coarse | -- | Medium | 5-10 sec | Fine | 10-20 sec | Turbo |
| Onions | 100-200 g | 3-5 sec | 10-20 sec | Turbo | ||||
| Almonds | 100-200 g | 3-5 sec | 7-10 sec | 10-20 sec | Turbo | |||
| Meat | 100-200 g | -- | 5 sec | Turbo | ||||
| Ice | 100-200 g | -- | 5 Pulses ON for 3 sec,OFF for 2sec | 10 Pulses ON for 3 sec, OFF for 2 sec | Turbo | |||
Whisking/Whipping quantities and Processing Times
| Accessory Professional doubleisk | |||
| Ingredients Quantity | Time | Speed | |
| Cream | 500 g | 50-70 sec | Turbo |
| Egg whites | 4 units | 60 sec | Turbo |
| Note: it is possible to use the Professional Double Whisk for whipping cream in the Beaker, as long as the temperature of the cream is between 4 and 8 Degree Celcius. For whisking eggs, please use a 1,5 Litre bowl. | |||
Troubleshooting
| Problem | Possible cause Solution | |
| The mini chopper* does not work. | The chopper lid is not correctly fastened. | Make sure the lid and the chopper bowl are properly assembled. |
| The mixing foot/double whisk* does not work. | The mixing foot/double whisk* is not correctly assembled. | Make sure to lock the mixing foot double whisk* into position |
| * depending on model |
Disposal
Packaging materials
The packaging materials are environ-. mentally friendly and can be recycled. The plastic components are identified by markings, e.g. >PE<, >PS<, etc. Please dispose the packaging materials in the appropriate container at the community waste disposal facilities.
Old appliance
The symbol on the product or on its packaging indicates that this product may not be treated as household waste. Instead it shall be handed over to the applicable collection point for the recycling of electrical and electronic equipment. By ensuring this product is disposed of correctly, you will help prevent potential negative consequences for the environment and human health, which could otherwise be caused by
inappropriate waste handling of this product. For more detailed information about recycling of this product, please contact your local city office, your household waste disposal service or the shop where you purchased the product.
This page is left blank intentionally
This page is left blank intentionally


Brand : AEG
Model : STM6600
Category : Mixer