DF 300 - Deep fryer STEBA - Free user manual and instructions
Find the device manual for free DF 300 STEBA in PDF.
| Product type | Electric deep fryer |
| Brand | Steba |
| Model | DF 300 |
| Power supply | 230 V, 2000 W (estimated) |
| Dimensions (W x D x H) | Approximately 40 x 30 x 30 cm (estimated) |
| Weight | Approximately 5 kg (estimated) |
| Oil capacity | MIN and MAX level indicator in the tank |
| Temperature range | 160°C to 190°C |
| Timer | Adjustable up to 30 minutes, ON position for continuous operation |
| Baskets included | One large basket, two small baskets (for simultaneous frying) |
| Main functions | Frying with thermostat, timer, control window, splash-proof and odor-proof filter lid |
| Maintenance and cleaning | Tank and basket dishwasher-safe; electrical part wipe only |
| Safety | Overheating protection with Restart button, safety switch, hot surface indicator |
| Spare parts | Basket, tank, heating element, lid |
| Repairability | Repairs by an authorized after-sales service only |
| General information | Household use, do not use with an external timer or remote control |
| Warranty | Manufacturer's warranty, pickup possible in case of defect |
Frequently Asked Questions - DF 300 STEBA
User questions about DF 300 STEBA
0 question about this device. Answer the ones you know or ask your own.
Ask a new question about this device
Download the instructions for your Deep fryer in PDF format for free! Find your manual DF 300 - STEBA and take your electronic device back in hand. On this page are published all the documents necessary for the use of your device. DF 300 by STEBA.
USER MANUAL DF 300 STEBA
natural_image
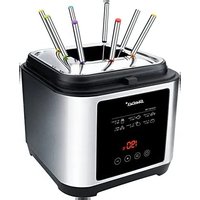
Exterior view of a silver electric stove with black handle and control panel (no visible text or symbols)230V\~; 50/60Hz; 3.000W; Standby: ≤ 0,5 W
Haushalt-Fritteuse
DF 300
Instructions for use 14
Mode d'emploi 25
www.stebalbud Brugsanvisning 37
Allgemein
natural_image
Metal mesh filter device with a black handle and white clip attached (no text or symbols visible)2)
natural_image
Close-up of a hand holding two metal tools with arrows indicating compression or dislocation (no text or symbols visible)3)
natural_image
Close-up of a hand holding a metal clip attached to a wire mesh fence, with no visible text or symbols.4)
natural_image
Close-up of a metal tool interacting with a mesh-patterned fabric or material surface, showing a curved edge and a black arrow indicating direction (no text or symbols present)5)
natural_image
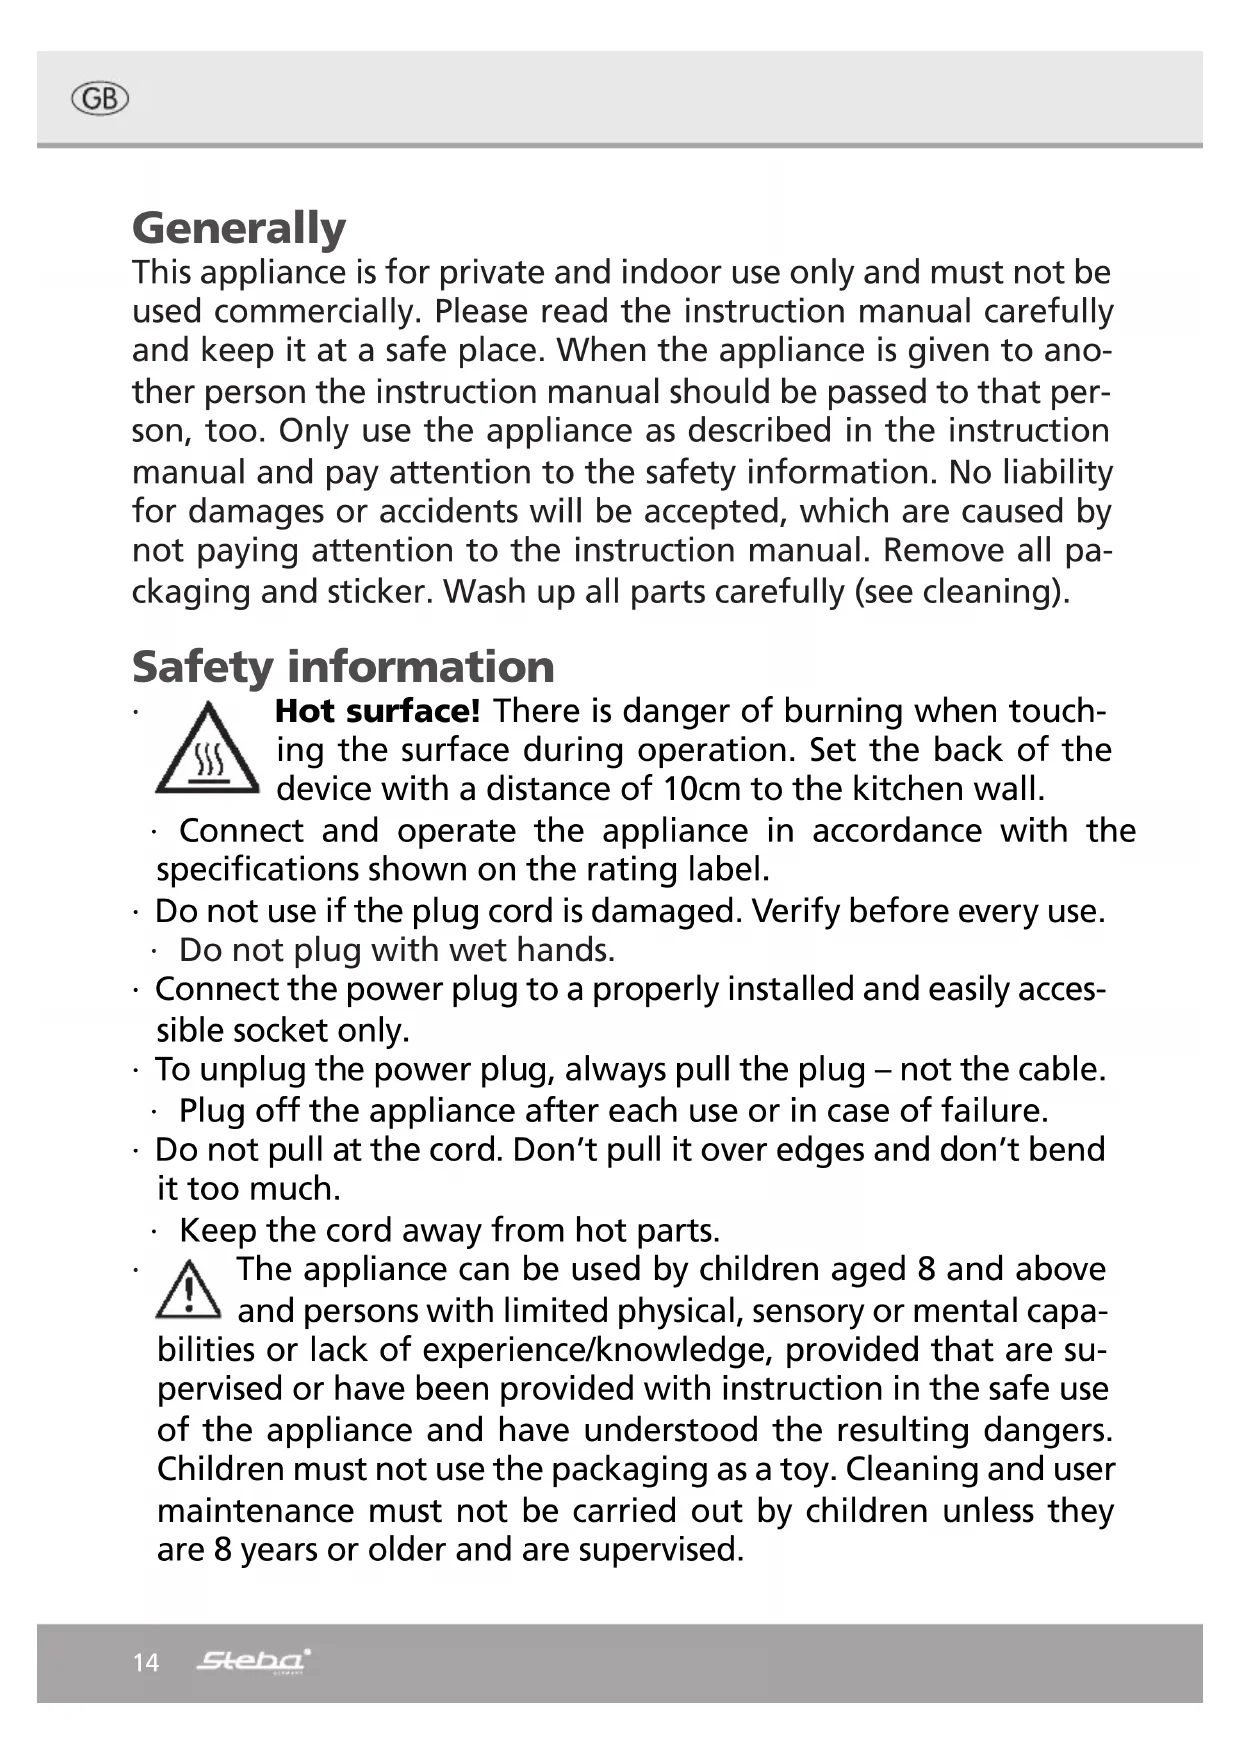
Close-up of a metal mesh filter with a black handle extending into the frame (no text or symbols visible)This appliance is for private and indoor use only and must not be used commercially. Please read the instruction manual carefully and keep it at a safe place. When the appliance is given to another person the instruction manual should be passed to that person, too. Only use the appliance as described in the instruction manual and pay attention to the safety information. No liability for damages or accidents will be accepted, which are caused by not paying attention to the instruction manual. Remove all packaging and sticker. Wash up all parts carefully (see cleaning).
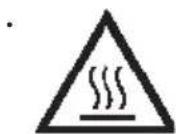
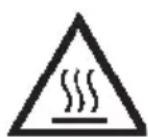
Safety information
Hot surface! There is danger of burning when touching the surface during operation. Set the back of the device with a distance of 10cm to the kitchen wall.
- Connect and operate the appliance in accordance with the specifications shown on the rating label.
- Do not use if the plug cord is damaged. Verify before every use.
- Do not plug with wet hands.
- Connect the power plug to a properly installed and easily accessible socket only.
- To unplug the power plug, always pull the plug – not the cable.
- Plug off the appliance after each use or in case of failure.
- Do not pull at the cord. Don't pull it over edges and don't bend it too much.
- Keep the cord away from hot parts.
The appliance can be used by children aged 8 and above and persons with limited physical, sensory or mental capabilities or lack of experience/knowledge, provided that are supervised or have been provided with instruction in the safe use of the appliance and have understood the resulting dangers. Children must not use the packaging as a toy. Cleaning and user maintenance must not be carried out by children unless they are 8 years or older and are supervised.
- Children under the age of 8 must be kept away from the appliance and the connecting cable.
- Children should be supervised to ensure that they do not play with the appliance or packaging material (e.g. Plastic Bags).
-
The appliance must not be operated using a timer or a separate remote system!
-
Never leave the appliance unattended when in use.
- Do not leave the appliance outdoors or in a damp area.
Never place anything on top of the device and do not cover the ventilation slots.
- Never immerse the unit in water.
- Leave a space of about 10cm around the device.
- Never use the device after a malfunction, e.g. if it felt down or has been damaged in any other manner.
- The manufacturer is not liable for damage which is occurring due to the usage of the appliance in a different way as described or a mistake in the handling has been made.
- To prevent injury, repairs such as replacing a damaged cord, should only be carried out by a customer service. Only original spare parts have to be used.
- The device gets hot, only transport if it cooled down.
- Only use the device as described in this manual.
- You must not put any materials such as paper, cardboard, plastic etc. into the appliance.
- This appliance is intended to be used in household and similar applications such as:
o staff kitchen areas in shops, offices and others working environments
o by clients in hotels, motels and other residential type environments
o bed and breakfast type environments.
Attention! Device gets hot. Danger of burns!
Touchable surfaces will be hot during operation! Place the device on a flat and insensitive surface with and keep a distance of at least 70cm to burnable materials.
- During operation steam emerge. Keep hands and face away. Watch out for steam during cooking and when you pull out the pot. Take appropriate distance to wall cupboards to avoid damage of the veneer.
- If an extension cable is used, it has to have a cross-section of 1,5mm^2
- If a GS-tested 16 A multi-pin extension is used, it may not be charged with more than 3680 watts due to fire hazard.
- Make sure that children do not tease the cable or that a trip hazard occurs.
- The device must always be disconnected from the power supply if it is not supervised and before assembling, disassembling or cleaning.
Hot steam may leave the louvers. Never place any wet food into the device, thaw frozen food slightly. - Hygiene: Please always clean the device to avoid bacteria and mold formation.

Workplace
Important:
Never place this device on or next to hot surfaces (e.g. hot stoves). Only use it on a even, stable and a heat resisting surface. It is important that no inflammable items are near to the device. Do not place the device on the edge of the table so that it cannot be touched by children or fall down when touched. Do not place directly under a kitchen hood.
Cleaning and care
• Each time you change the frying fat, the appliance should be cleaned thoroughly.
- Before cleaning always pull the power plug.
- Make the appliance cool down to room temperature.
- Do not plunge the electrical part into water.
- Remove the fryer basket.
- Lift the fryer pot from the appliance with caution and decant the fat into a pot. (see “Cleaning the fryer fat”)
- The fryer pot, the lid and the fryer basket can be washed in warm water with usual dishwashing detergents. Dry the parts well afterwards and make sure that there isn't any water in the lid.
- Do not use aggressive or abrasive cleaning agents.
- Warning: Keep away the heating element from water! Do not deform or damage the temperature sensors which are installed at the heating element. Wipe the heating element and the surface of the housing with a damp cloth.
- Put together the appliance after cleaning and make sure that the heating element is thoroughly clipped; otherwise the appliance does not work.
Before the first use:
The appliance should be wiped inside and outside with a damp cloth and dried. The frying basket should be cleaned carefully with some hot water and some mild detergent. Attention: Never immerse the appliance in any water! Only wipe the inside of the lid with a damp cloth and dry off.
Fat and oil:
Important: Deep frying fat must be heatable to a high temperature. The smoking point must be at about 220^ C.
The food must be put in at a temperature of between 170^ C and 190^ C.
Deep frying oil is suitable. Never switch deep fat fryer on when empty.
Pour oil into the unheated container.
Cold-pressed and non-hardened oil or fat such as olive oil, wheat oil, linseed oil, pork fat and butter are unsuitable.
Important: Never mix oil and fat because the deep fat fryer may foam over.
It is also dangerous to mix different kinds of oil or fat!
The filling level indicator is inside the container. The MAX filling level may not be exceeded, and the minimum filling level must not be undershot.
Risk of scalding!
Be extremely careful with hot fat, and keep children away.
Preparing for deep fat frying
Insert the heating element into both guide rails on the outer casing. Otherwise the deep fat fryer will be prevented from starting up by the safety switch.
Place deep fat fryer on table, not against the wall, in a corner or beneath an extractor hood.
Place oil that is suitable for deep fat frying into the deep fat fryer. If hard vegetable fat is being used, proceed as follows: Place the pieces onto the heating element. set the control knob to ⚙ (heat) and melt the fat. Close lid to speed up melting process. You can also place the hard fat in the inner pot and liquefy this fat on the stove at a low temperature. Then put the pan back into the deep fat fryer housing (caution: hot) and suspend the heating element properly. This will prevent the overheating protection from being activated. However if this is activated anyway,
switch off, press the "Restart" button on the back of the electrical part with a 5mm diameter pen (e.g. tip of a ballpoint pen). Then allow the heating element to cool for a while and remove it from the guide rail on the outer casing. The overheating protection activates if the amount of fat in the device is below the minimum or the fat has become contaminated with too much food (e.g. breadcrumbs).
Connect power cable to the power supply. Check filling level.
The MAX mark must not be exceeded, and filling level must not drop below the Min mark. The heating element on the bottom of the container must always be covered with oil or liquid fat.
Never operate the device without fat or with an insufficient amount of fat.
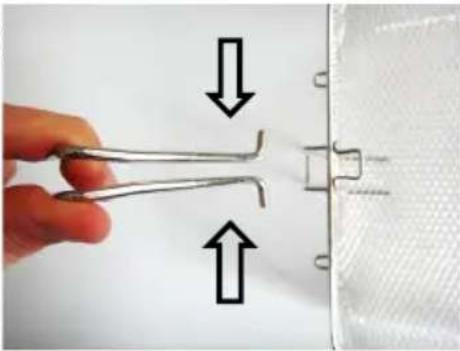
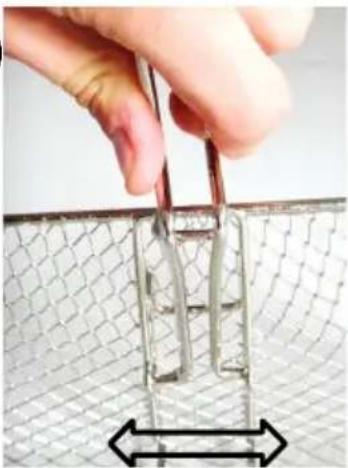
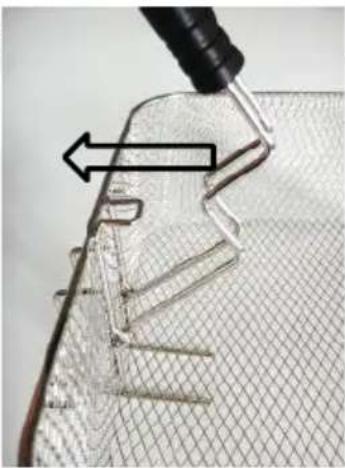
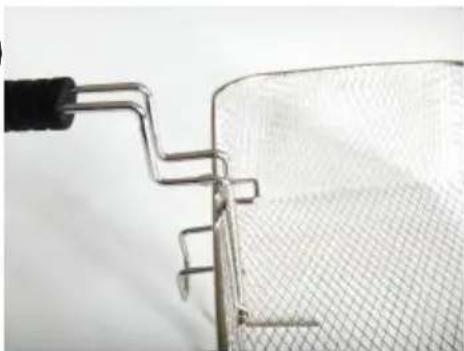
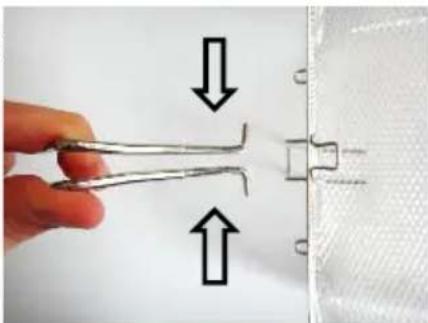
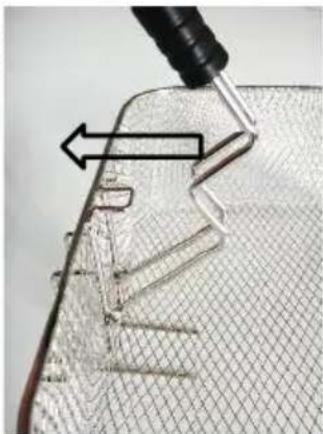
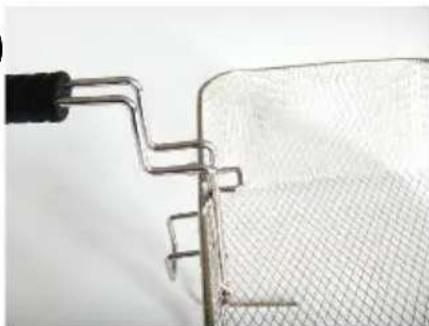
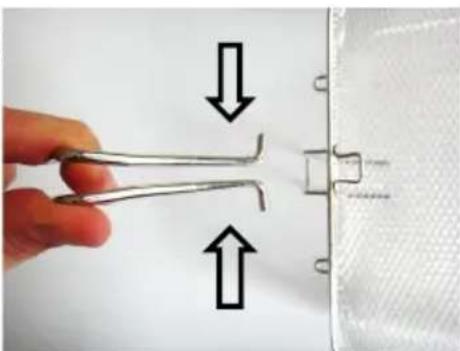
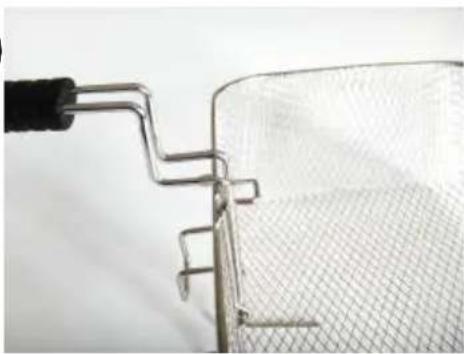
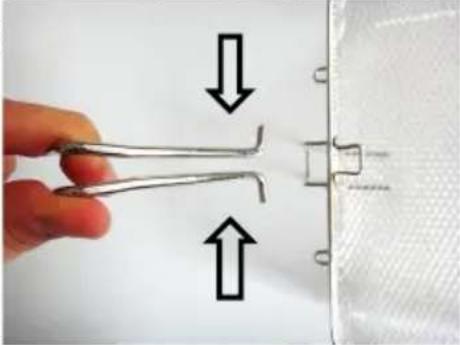
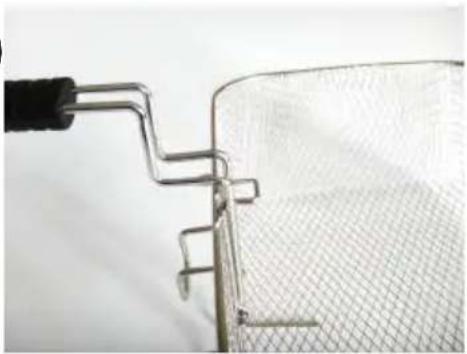
Assembly of the handle on the frying basket
1)

natural_image
Close-up of a mesh filter device with a black handle and white tool, no visible text or symbols2)
natural_image
Close-up of a hand holding a wire with two arrows pointing to a grid pattern (no text or symbols)3)

natural_image
Close-up of a hand holding a metal tool over a wire mesh, with a black double-headed arrow indicating a measurement or alignment (no text or symbols)4)
natural_image
Close-up of a sewing machine needle stitching a mesh fabric, with no visible text or symbols5)
natural_image
Close-up of a metal chain-link fence with a black handle and wire, no visible text or symbolsHeating up hardened fat in the deep fat fryer.
Risk of scalding!!!
Always proceed exactly as described in the following. Set control knob to ⚙ (heat) and melt slowly. The fat that has melted at the heating element is otherwise unable to penetrate the solid layer above it. If the overheating protection switches the device off, press the "Restart" button as described above.
Carefully make several holes in the fat using an object made from wood or plastic. Take care not to damage the heating element when doing this! Close the lid. Keep lid closed during the melting procedure in order to avoid spatter. No warranty will be given in the event of erroneous operation!
Timer
The appliance can only be set using the timer. Set this to 30 minutes and select the temperature. Once you have placed the food into the oil, you can set the required deep fat frying time. When the timer elapses the appliance turns itself off. If you wish to perform several deep fat frying procedures, you can set the clock to continuous operation "ON".

Make sure that there is enough fat in the appliance! Attention! Do not allow water to get into the oil!

radar
| Metric | Value | |--------|-------| | ON | 30 | | 0 | 0 | | 25 | 25 | | 5 | 5 | | 10 | 10 | | Target | 190 | | Target | 180 | | Target | 170 | | Target | 160 | | Target | 150 | | Target | 140 |Deep fat frying
Always use the basket for deep fat frying!
Switch in the device and set the timer. The red light comes on. Set regulator to required temperature depending on what is being fried. The fryer starts to heat up. The light illuminates in green until the set temperature is reached. When the set frying temperature is reached, the green light goes off.
Place the prepared food into the frying basket and distribute over the entire surface. Do not place too much food in the fryer. Then slowly immerse the food in the fat. Close the filter lid again. The filter lid provides protection from fat spatter and reduces the smell of fat.
Observe the procedure through the inspection window. If the fat foams up excessively, open lid and raise and lower the basket several times by raising and lowering the handle until the foaming subsides. Keep the fryer closed during frying, which will prevent spatter and the frying fumes that are generated can be absorbed by the filter in the lid.
Baskets
The long basket is for fish or schnitzels and larger quantities. The smaller position baskets can be used for various food items.
Monitoring the deep fat frying procedure
The frying procedure can be monitored through the inspection window in the lid. Lifting the basket a little may give you a better view.
When the food is cooked
- Open lid.
- Caution - lid may be hot!
- Lift frying basket and hook onto edge of pan.
- Once the fat has drained, remove frying basket and empty. Do not season the food over the fryer - this will protect the fat and the fryer.
- If no more frying is being carried out, turn down the temperature and disconnect plug from power supply.
Deep fat frying table:
| Temperature setting Food | Deep fat frying time in | minutes * |
| Approx. 160°C - 170°C Party | pastries | 2-4 |
| Potato crisps | 2-4 | |
| Shellfish | 2-4 | |
| Poultry | 5-10 | |
| Potato dishes | 3-5 | |
| French fries | 5-8 | |
| Beef | 5-10 | |
| Schnitzels | 5-10 | |
| Fish | 5-7 | |
| Approx. 180°C - 190°C Steaks | Kebabs | 1-3 |
| Deep frozen food | 2-3 | |
| in accordance with the information on the packing | ||
| * This information is approximate and depends on the size, the weight and the temperature of the food. | ||
Danger of splashes!
To avoid splashes or foaming of the fat only use food which is not too wet (dry the food with cloth, remove ice from the food etc.). Insert the food slowly into the fryer. If the fat is foaming excessively, lift the basket several times. Never carry the fryer when there is hot oil inside. Danger of burns! Always cool down the fryer before moving it. Parts of the appliance, e.g. the upper edge of the oil tank or the steam escaping from the fryer can be very hot. Take care that nobody can rip at the power cord and pull the appliance from the table (especially children). To avoid this attach the power cord, e.g. to the leg of the table.
Important Tips:
According the latest knowledge of researchers, following max. temperatures should be obeyed and all foods should be fried max to a gold colour:
170°C for all potatoes, breaded food and all other starch containing products
190°C for meat and poultry with no breading
In opposite to the tips on the packaging of frozen food we advise to defrost the food short before frying to avoid any ice inside the fryer.
After deep fat frying:
Clean the fat
Residue from the coating or the food should be removed from the frying fat or oil at regular intervals. Any contamination or water is deposited in the "Cool Zone" beneath the heating elements and will not combust.
- First allow the fat to cool after frying, then carefully pour the fat into a metal pan with handles.
- Coating residue and water in the oil must be removed.
- Clean the frying basket and the pan (see paragraph "Cleaning and care").
- Hook frying basket onto fryer (draining position, place kitchen paper in basket as a filter).
- Slowly pour the fat back into the fryer through the filter paper.
- Only use the paper fat filter once.
If the fat has taken on a little taste, this can be improved by setting the temperature to just below 150^ C and putting a handful of spinach leaves, parsley, lettuce leaves or 2 potatoes that have been peeled, sliced and well dried into the hot fat and leaving them to brown. Remove and throw away the vegetables.
Storing oil or fat
If the fryer is used at regular intervals, the fat can be kept in the fryer with the lid closed. If the fryer is stored in a cool, dry location, the fat can be kept in the fryer for for some weeks.
If you do not fry frequently, the filtered fat can be kept in a sealed container that is protected from the light.
The frying fat can be used for food such as fish or meat 5-10 times without problems.
The fat is not as contaminated by potato dishes such as French fries or pastries, and can be therefore used more frequently.
Caution! Used or contaminated fat or oil can self-ignite if overheated, which is why the oil should be replaced in good time. In the event of a fire, disconnect the plug form the power supply and extinguish burning fat by covering with the lid. Never extinguish using water!
Replace the frying fat if:
- It has turned brown
- It has an unpleasant smell
- Starts to smoke sooner than expected
Remove control panel with heater, remove container and pour the liquid oil that has not yet fully cooled down into a container with a closure. Used fat and oil should not be poured onto compost or down the drain. If large quantities are being produced, ask your local authority for the location of a collection point.
Practical tips for frying
Dry the food carefully before putting it into the fat, tap superfluous flour, press the breading firmly. Food containing much protein such as fish, poultry, meat and seafood can be fried in the raw if they are well dried. Food containing little protein such as vegetables and fruit should be coated with breadcrumbs or with batter, hereby the pores close quickly. The crust is also ideal for frying meat, poultry, fish and seafood.
Disposal:
Packaging disposal:
Do not throw away the package materials. Please put it in the recycling bin.

PS

PP

PE
Gift box: Paper, should be put to the old paper collection point. Plastic packaging material and foils should be collected in the special collection containers.
Correct Disposal of this product
This marking indicates that this product should not be disposed with other household wastes throughout the EU. To prevent possible harm to the environment or human health from uncontrolled waste disposal, recycle it responsibly to promote the sustainable reuse of material resources. To return your used device, please use the return and collection systems or contact the retailer where the product was purchased. They can take this product for environmental safe recycling.
Service and Repair:
If the appliance must be repaired, plaese get in touch with your trader or with the manufacturer:
natural_image
Top-down view of a mesh filter device with a black handle and plastic clip attached (no text or symbols visible)2)
natural_image
Close-up of a hand holding two metal tools with arrows indicating movement or force (no text or symbols visible)3)

natural_image
Close-up of a hand holding a metal wire clip against a mesh fence, with no visible text or symbols.4)

natural_image
Close-up of a metal mesh fence with a black tool inserted, showing a curved metal strip and an arrow indicating direction (no text or symbols)5)
natural_image
Close-up of a metal mesh filter with a black handle, no visible text or symbolsother
| Dimension | Value | | --------- | ----- | | Top Left | 30 | | Top Right | 190 | | Bottom Left | 180 | | Bottom Right | 170 | | Bottom Right | 160 | | Bottom Right | 150 | | Bottom Right | 140 | | Center | 15 | | Center | 10 | | Center | 5 | | Center | 25 | | Center | 20 | | Center | 15 | The chart includes a legend for 'Steba' with German text 'GERMANY'. The diagram contains labels such as 'ON', 'O', and 'I'.Friture
natural_image
Top-down view of a mesh filter device with a black handle and white cloth (no text or symbols visible)2)
natural_image
Close-up of a hand holding tweezers next to a meshed fabric component with arrows indicating direction (no text or symbols)3)

natural_image
Close-up of a hand holding a metal clip against a mesh fence, with no visible text or symbols.4)

natural_image
Close-up of a metal tool interacting with a mesh-patterned surface, showing a curved tool and directional arrow (no text or symbols)5)
natural_image
Close-up of a metal mesh filter with a black clip attached, no visible text or symbolsOpvarmning af hårdt fedt i frituren
Risiko for skoldning!