Sologic B921 - Phone TOPCOM - Free user manual and instructions
Find the device manual for free Sologic B921 TOPCOM in PDF.

User questions about Sologic B921 TOPCOM
0 question about this device. Answer the ones you know or ask your own.
Ask a new question about this device
Download the instructions for your Phone in PDF format for free! Find your manual Sologic B921 - TOPCOM and take your electronic device back in hand. On this page are published all the documents necessary for the use of your device. Sologic B921 by TOPCOM.
USER MANUAL Sologic B921 TOPCOM
text_image
TCPCOM HANDSET / R OK ESC/ INT 1 2 ABC 3 DEF 4 5 L 6 MZO 7 8 T V 9 WO * X 0 P # #SHORT USER GUIDE / BEKNOPTE HANDLEIDING / NOTICE D'UTILISATION KURZANLEITUNG / GUÍA DEL USUARIO ABREVIADA
KORT ANVÄNDARHANDBOK / BREVE GUIDA DELL'UTENTE
GUIA RESUMIDO DO UTILIZADOR / KRÓTKA INSTRUKCJA OBSŁUGI
V 1.0 - 05/12
CE
UK The features described in this manual are published with reservation to modifications.
UK To be connected to the public analogue telephone network.
Hereby, TRISTAR EUROPE BV., declares that this device is in compliance with the essential requirements and other relevant provisions of R&TTE directive 1999/5/EC. The Declaration of conformity can be found on: http://www.tristar.eu
Important
To use ‘Caller ID’ (display caller), this service has to be activated on your phone line. Normally you need a separate subscription from your telephone company to activate this function. If you don’t have the Caller ID function on your phone line, the incoming telephone numbers will NOT be shown on the display of your telephone.
Belangrijk
UK This product works with rechargeable batteries only. If you put non-rechargeable batteries in the handset and place it on the base, the handset will be damaged and this in NOT covered under the warranty conditions.
text_image
sologic 17 16 15Figure 4
1 Getting started
Thank you for purchasing this product. This product has been designed and assembled with utmost care for you and the environment. Because we at TRISTAR like to think of the future of our planet and our children, we aim to do our best to help saving the environment. This is why we decided to reduce the number of pages of our user guides and product manuals. If you keep in mind that it takes up to 24 trees to produce 1 ton of paper, publishing product manuals in 11 languages costs our planet a lot of trees. In this short manual provided with your device you can find a brief explanation of how to install and use your device.
If you would still like to discover all the features of your new device, please visit our website (www.tristar.eu) where you can download the complete user manual in your language. By doing this TRISTAR hopes to do its share to make our planet a better place, but we can only succeed with your help!
2 First steps
2.1 How to use this user guide
The following method is used in this user guide to clarify instructions:

Text ..... „Display“.
Text that appears on the telephone display
Key to be pressed
2.2 Installing the base station
Install the base station as follows (see figure 1 on the folding page):
1 Connect the mains adapter to the base station first and then to a socket.
2 Connect one end of the telephone cable to the telephone socket on the wall and the other to the connector on the back of the base station.
3The telephone and power cables should be connected as shown in figure 1.
2.3 Handset
1 Open the battery compartment as shown in figure 2 on the folding page.
2 Insert the rechargeable batteries. Make sure the polarity is correct (+ and -).
3 Close the battery compartment.
4 Place the handset in the charger and charge it for 16 hours. The charging LED is illuminated
2.4 Battery status display
The handset will emit a warning tone when the batteries are nearly flat during a call. Place the handset on the handset charger to recharge the batteries.

Charged batteries

Flat batteries
Keys/display (see figure 3 and 4)
Cordless handset
- Redial / up
- Phone book
- Mute / delete
- Hang up
- Alphanumeric keys
- Key lock
- Pause
- Ringer on/off
- Calls list / down
- Answer call / hands free / call button
11.INT / escape
12.Menu / OK / flash
13.Display
14.Red LED, flashes during a call
Base station
- Paging key
16.Handset charging LED
17.Ringer LED
2.5 Navigating through the menu
The Sologic B921 has an easy-to-use menu system. Every menu consists of a series of options.

1Press the menu/OK key to open the main menu.

2 Scroll to the required menu option.

ESC
3 Press the menu/OK key to open more options or to confirm the displayed setting.
4 Press the escape key to go back to the previous menu level
3 Operating the telephone
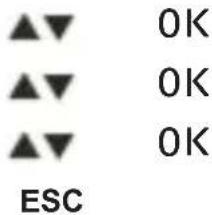
3.1 Changing the language

text_image
▲▼ 0K ▲▼ 0K ▲▼ 0K ESC1Press the menu/OK key.
2 Select "HANDSET" and confirm.
3 Select "LANGUAGE" and confirm.
4 Select the desired language and confirm.
5 Press the escape key to return to standby mode.
3.2 Outgoing calls
Making a call


1Press the call button.
2 Enter the telephone number.
3 Press the hang up key to end the call.
Redialling the last telephone number called


1Press the call button.
2 Press the redial button.
The last telephone number is automatically dialled.
3 Press the hang up key to end the call.
3.3 Incoming calls
When an incoming call is received, the handset and the base station ring and the visual call signal LED (see point 14 in figure 3 and point 17 in figure 4) flashes on the handset and base station.


1Press the answer call key to answer the call.
2 Press the hang up key to end the call.
3.4 Activating/deactivating hands free mode


1Press the hands free key to activate the function.
2 Press the hands free key again to switch the call back to the handset.
3.5 Mute

1Press the mute key.
The microphone is muted and "MUTED" is displayed.

2 Press the mute key again to reactivate the microphone.
3.6 Setting the earpiece/hands free volume
During a call:

1Press the down key.
2 Press the up and down keys.
You can set the volume to levels 1 to 5.
3.7 Selecting the ring tone and setting the volume Handset ring tone for internal/external calls

1Press the menu/OK key.

OK
2 Select "HANDSET" and confirm.

OK
3 Select "RING TONE" and confirm.

OK
4 Select "INTERNAL" or "EXTERNAL" and confirm.

OK
5 Now select a ring tone (1 to 9) and confirm.
Handset ring tone volume

1Press the menu/OK key.

OK
2 Select "HANDSET" and confirm.

OK
3 Select "RING TONE" and confirm.

OK
4 Select "VOLUME" and confirm.

OK
5 Select the required volume (Off, 1-5) and confirm.

Important You can switch the ring tone volume of any individual handset on or off by simply holding the ring tone on/off key in standby mode.
The symbol appears in the display and the key lock is activated.
3.8 Key lock

1Press and hold the key lock key.
The symbol appears in the display.

2 Press the key lock key again to deactivate key lock.

When key lock is activated, you can still answer incoming calls by pressing the answer call key. The keypad functions as usual during the call. Key lock is activated again after the call.
3.9 Phone book
You can store 50 entries in the phone book. Names may be up to 16 characters long and telephone numbers up to 24 digits long.
Adding a phone book entry

OK OK
4 5 6 0K
4 5 6 0K
1Press the phone book key.
2 Press the OK key twice.
3 Enter the name and confirm.
4 Enter the desired telephone number and confirm.
A confirmation tone is now sounded.
Dialling a phone book number


4 5 6


1Press the phone book key.
2 Scroll to the required name or enter the initial letters of the name.
3 Press the phone book key to display the telephone number.
4 Now press the call key.
The telephone number is automatically dialled.
5 Press the hang up key to end the call.