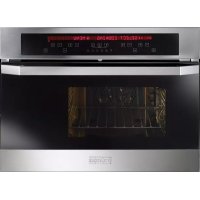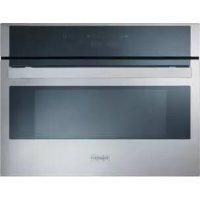
FPO 46 CS 9T XS - Four FRANKE - Free user manual and instructions
Find the device manual for free FPO 46 CS 9T XS FRANKE in PDF.
Download the instructions for your Four in PDF format for free! Find your manual FPO 46 CS 9T XS - FRANKE and take your electronic device back in hand. On this page are published all the documents necessary for the use of your device. FPO 46 CS 9T XS by FRANKE.
USER MANUAL FPO 46 CS 9T XS FRANKE
Wiederverwendung dieses Produkts zu erhalten.
This appliance is marked according to the European directive
2002/96/EC on Waste Electrical and Electronic Equipment (WEEE).
By ensuring this product is disposed of correctly, you will help prevent
potential negative consequences for the environment and human
alth, which could otherwise be caused by inappropriate waste
handling of this product.
The symbol on the product, or on the documents
accompanying the product, indicates that this appliance may not be
treated as household waste. Instead it shall be handed over to the
applicable collection point for the recycling of electrical and electronic
Disposal must be carried out in accordance with local environmental
regulations for waste disposal.
For more detailed information about treatment, recovery and
ecycling of this product, please contact your local city office, your
household waste disposal service or the shop where you purchased
002/96/EC, Waste Electrical and Electronic Equipment (WEEE).
. ON/OFFON/OFFON/OFFON/OFF STOP
• Oven cleaning and care 33
• Removing the oven door 34
• Replacing the light bulb 35
• Instructions for the installer 36
• Replacing the electrical cable 38
Product in compliance with EC directives
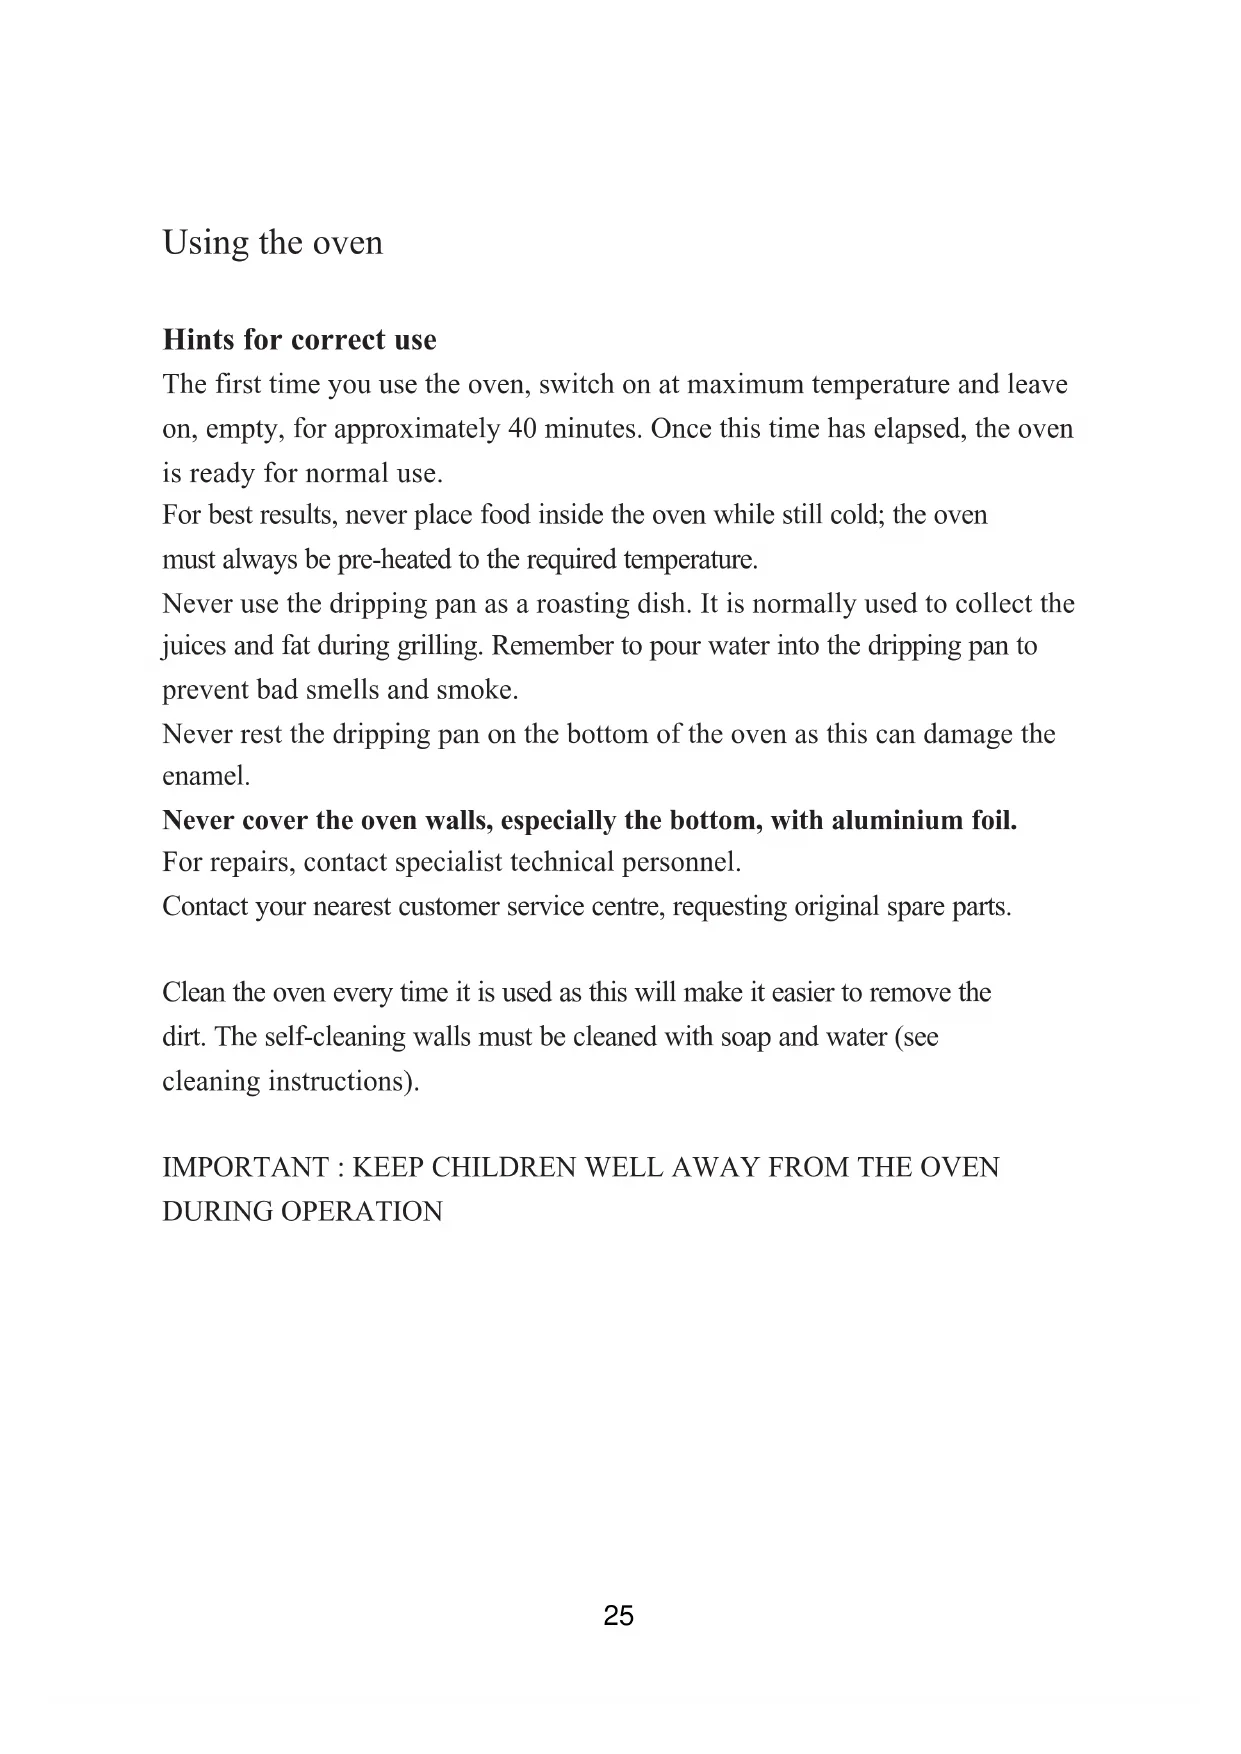
Hints for correct use
The first time you use the oven, switch on at maximum temperature and leave
on, empty, for approximately 40 minutes. Once this time has elapsed, the oven
is ready for normal use.
For best results, never place food inside the oven while still cold; the oven
must always be pre-heated to the required temperature.
Never use the dripping pan as a roasting dish. It is normally used to collect the
juices and fat during grilling. Remember to pour water into the dripping pan to
prevent bad smells and smoke.
Never rest the dripping pan on the bottom of the oven as this can damage the
Never cover the oven walls, especially the bottom, with aluminium foil.
For repairs, contact specialist technical personnel.
Contact your nearest customer service centre, requesting original spare parts.
Clean the oven every time it is used as this will make it easier to remove the
dirt. The self-cleaning walls must be cleaned with soap and water (see
cleaning instructions).
IMPORTANT : KEEP CHILDREN WELL AWAY FROM THE OVEN DURING OPERATION
25FUNCTION BUTTONS Decreases temperature
Increases temperature
ON/OFF and Controls Lock Function
OPERATION The timer flashes on the display when switched on for the first time or after a power cut, and the oven cannot be
operated; follow the “Setting the time” procedure to start it.
SETTING THE TIME Press buttons and simultaneously and then release them.
Use buttons and to set the exact time.
Note: this operation must be completed in 3 sec. time, while the 2 dots on the timer display keep flashing.
Once you have completed the time setting, wait for the 2 dots stop flashing.
SOUND SIGNAL The oven performs sound signals to show different functions, as for example the end of cooking.
There are 3 different sound levels, which can be modified:
When the oven is switched off, press the key, and with each pressure the oven performs the sound to a different
level; the last one performed will be automatically set.
SWITCHING ON THE OVEN Press and release the key, then you will hear a sound signal.
The timer display will show ON , the bulb symbol lights on and the internal oven light turns on. Now you can
proceed to set a cooking function.
MINUTE MINDER The minute minder is only a counter of time and it is totally independent from any cooking function.
It can be useful, for example, when set to remember to stop a cooking operation. It can be used also when the oven is switched off.
To set the minute minder, switch on the oven by pressing and releasing the key, then press the key:
The display reset to zero and the 2 dots start flashing. Now you have 3 seconds to set the desired time by using the
keys and up to 23h59m.
Once the set time has elapsed, you will hear a sound signal and the symbol flashes.
To stop the sound and the flashing symbol just press one of the following keys
MANUAL OPERATION FOR AN INDEFINITE PERIOD OF TIME Switch on the oven and select an available cooking function using the keys and :
The oven will suggest a preset temperature, which can be changed by using the keys and . The oven will
start working up to the preset temperature and the centigrade degree symbol ° starts blinking, which means the preheating
When the requested temperature is reached this symbol stops blinking and the oven beeps.
To switch off the oven, just press and release the key.
26COOKING TIME SEMIAUTOMATIC OPERATION It is recommended to set the duration of cooking
Switch on the oven by pressing and releasing the , then press and release the key.
appears. Set the desired time of cooking with the keys
and + up to 10h and 00m.
Then you will hear a sound signal and the timer will show the current hour: you can select
an available cooking function with the keys and
the timer display the symbol
The oven suggests a preset temperature for each function, which can be changed with the
keys and . The oven starts working for the set time; when this time has elapsed the
oven automatically stops cookin
g. You will hear a sound signal, while the temperature
To stop the sound and exit to the program, just press one of the fo
appears on the function display and then the oven light turns on.
Now the oven is ready to be programmed again; you can select a new cooking function or
switch the oven off by pressing and releasing the key .
END OF COOKING SEMIAUTOMATIC OPERATION It is recommended to set the end of cooking time
Switch on the oven by pressing and releasing the key, then press and release the key
On the timer display the symbol
appears. Set the desired end of cooking time wit
keys and up to 23h and 59m.
Then you will hear a sound signal and the timer will show the current hour: you can select
an available cooking function with the keys and
On the timer display the symbol
preset temperature for each function, which can be changed by using
The oven starts cooking and when fixed time has elapsed, it will automatically turn off.
At the end of the fixed cooking time, the oven beeps, the temperature dis
cooking function display turn off, the timer display shows the current hour and the 2
To stop the oven beep or to cancel the program just push one of the following keys:
appears on the function d
isplay and then the oven light turns on.
Now the oven is ready to be programmed again; you can select a new cooking function or
switch the oven off by pressing and releasing the . ON/OFF
+ ON/OFFON/OFFON/OFF STOP
27AUTOMATIC OPERATION It is recommended to set the duration and the
Switch on the oven by pressing and releasing the , then press and release the key
and set the duration of cooking with the and keys.
Then you will hear a sound signal and the timer will show the current hour. Press
and set the end of cooking with the and key.
Another sound signal will be heard and the 2 dots stop blinking: this means the time has
On the display you will see the set time, the temperature and function.
The oven light turns
Now select an available cooking function with the and
The oven suggests a preset temperature for each function, which can be changed by using
Once the 2 dots have stopped blinking, the oven begins the delayed start
automatically start for the requested duration and stop at the requested time.
When the oven is cooking, you see the selected temperature, the current hour and the
selected function on the corresponding displays. The internal oven light turns
However, both the temperature and the function can be changed by repeating the above
mentioned instructions.
At the end of the program, the oven beeps, the temperature display and the cooking function
display turn off, the timer display shows the current hour and the 2 symbols
To stop the soud signal or to cancel the program just push one of the following keys:
appears on the function display and then the oven light turns on.
Now the oven is ready to be programm
ed again; you can select a new cooking function or
switch the oven off by pressing and releasing the key .
AUTOMATIC AND SEMIAUTOMATIC COOKING RESTRICTIONS The preheating (PRH) and defrosting functions are not compatible with the above mentioned
utomatic and semiautomatic operation.
After setting the preheating or the defrosting function, it is not possible to set either the
duration or the end of cooking.
When programming the oven with the automatic operation, you cannot choose the
r the defrosting function. ON/OFFON/OFF -
28DISPLAY SYMBOLS Pot: when it lights up, it shows that a cooking function is on.
The pot does not light up when the oven light, preheating or defrosting function is activated.
When the pot is flashing, it shows the end of a cooking time. During the delayed start phase, the symbol is off and
lights up when the oven starts cooking.
A (automatic): when it lights up, it shows that a cooking time has been set; when flashing, it means the end of a
Bell: when it lights up, it means that the minute minder is on.
When flashing, it means the end of the minute count.
SELECTING THE COOKING TEMPERATURE With the oven switched on, the cooking temperature can be selected by using the and
keys : the temperatures increases between the low and high setting with 5 degrees increases, which are shown on
the temperature display.
Note: each cooking function has a preset temperature, which can be changed as described above.
SELECTING THE COOKING FUNCTION With the oven switched on, the cooking functions can be selected by using the and keys:
the cooking function icons sequentially light up.
COOKING FUNCTIONS OVEN LIGHT The internal oven light turns on by pressing and releasing the key. To turn it off press and release again the
When selecting a cooking function, the oven light turns on, and once the selected temperature is achieved, the
light remains on for another 3 minutes.
During a cooking operation or defrosting it is possible to turn on the oven light by pressing one of the following
The light remains on for 1 minute.
The light can also be turned on when the Controls Lock function is active by pressing
one of the following keys
PRH PREHEATING This function allows to preheat faster the oven, before choosing a cooking function.
When this function is operating, a moving symbol appears on the temperature display.
The preheating ends when its preset temperature is achieved by the oven; this temperature cannot be changed. At
this point, the oven beeps, the light symbol and the oven light turn on. Now you can choose an available cooking
function with the and keys.
TRADITIONAL COOKING This provides traditional cooking with heat from the top and bottom elements.
LOWER ELEMENT MODE This is for slow cooking or for warming up meals.
TOP ELEMENT MODE This is for gentle cooking, browning or keeping cooked dishes warm.
GRILL HEATING ELEMENT It is suggested for grilling food.
GRILL HEATING ELEMENT WITH FAN This function is suggested for a gently grilling of food.
29PIZZA FUNCTION This kind of cooking is ideal for pizza and vegetable dishes.
FAN OVEN MODE This provides even heating with the fan and allows different dishes to be cooked at the same time on different
DEFROST MODE This function allows to reduce the defrost time for frozen food.
The fan runs without any heating of the oven.
On the temperature display appears the message
dEF , which means this function is active.
OTHER FUNCTIONS OVEN OFF MODE When the oven is switched off, the temperature and program displays are off and the timer shows the current hour.
“CHILDREN CARE” - CONTROLS LOCK FUNCTION This function can be activated in any moment to prevent children to play with the oven.
In particular, if this function is activated with the oven turned off, it will not be possible to switch the oven on: to
operate with the oven it is necessary to remove the lock.
To activate the locking function, hold down the key until the display shows the symbol (about 5
sec.) followed by ON , then the display shows again the current hour.
Note: once you have done this operation, it cannot be set any program or cooking function, except for the setting
of the minute minder.
If the lock is activated after any program or cooking function, it will only be possible to set the minute minder or
switch off the oven by pressing and releasing the key.
By pressing any other key, the display
will remember you that the locking function is activated.
The automatic or manual switching off of the oven will not disable the locking function.
To disable the locking function hold down the key until the display (about 5 sec.) followed by OFF,
then the display shows again the current hour.
When the locking function is activated it is not possible to switch it on with the key,
but only to switch it off.
ON / OFF BUTTON When the oven is switched on, the key lets you to switch off the oven whatever function is selected and in any
moment. To switch off the oven, just press and release the key.
When switching off the oven, any cooking function or program is cancelled. To set a new cooking program,
follow the corresponding instructions from the beginning.
When the oven is switched on and the locking function is activated, you can switch off the oven just pressing and
releasing the key, but the locking function keeps active.
To disable the lock hold on the key for about 5 seconds until the display followed by OFF , then the
display will show the current hour.
“ ° “ SYMBOL This symbol appears on the temperature display and represents the centigrade degrees.
If the symbol is blinking it means the oven is heating up to reach the temperature that has been set.
If the symbol is permanently on it means that the set temperature has been reached.
TIMER RESET With the oven switched on, it is possible to reset the settings of the timer by pushing together the and keys.
Attention: the oven keeps switched on with the set function, and in manual operation.
It is possible to set again a cooking program, or also switch off the oven by pressing and releasing the key.
ON/OFF STOP ON/OFF ON/OFF ON/OFF ON/OFF ON/OFF ON/OFF ON/OFF ON/OFF ON/OFF
30PIROLITIC CLEANING Switch on the oven and select the self
cleaning set time of 1h 30m.
The 2 dots betwen 1 and 30 blink for a 4 secs. time, which means you can
set your favorite self
cleaning time or the ending time of that operation.
To do that, follow the previous instructions concerning the programming of
The maximum time which can be set is of 3 hours, the minimum is of 30
minutes; to set the time press the
key, then use the + e
Once the time is set, the symbol A enlights on the time display, which
means an automatic operation is on.
The door is locked and the Controls Lock Function is on, as you can see
the symbol on the display.
During the self-cleaning function it is possible to see the remaining time,
but you cannot neither change the remaining time nor change the ending
The oven light remains off during this operation.
s to clean the oven by increasing the
The ashes which can result at the end of the operation can be removed with
a soft cloth, once the oven has cooled down.
All the accessories and all the considerable food residuals must be removed
All types of meat, fish and vegetables can be cooked under the grill.
Red meat, cut into thin pieces and flat or sliced fish must be grilled very
quickly and as near as possible to the grill. White meat, ordinary fish and
vegetables must be kept farther away from the grill and in this case cooking
will take slightly longer. Take the meat out of the freezer a few hours before
grilling it. You are advised to rest the meat on sheets of absorbent paper: it
will have more flavour and there will be no risk of it remaining frozen inside.
Prepare and season the meat with pepper and spices before grilling but add
salt only after cooking, otherwise it will tend to be dry. Brush all food to be
cooked with a little oil preferably using a wide flat brush. Never prick the food
during cooking, even when turning it, as the juices will come out and the food
IMPORTANT: before beginning cooking, the grill must be hot.
32Table of cooking suggestions
33Oven cleaning and care
Before carrying out any cleaning operation, switch the oven off, unplug and
disconnect from the power supply via the master switch.
The stainless steel and enamel parts will stay new if cleaned with water or specific
products and thoroughly dried. Avoid using products that contain chlorine or
diluted solutions, caustic soda, abrasive detergents, hydrochloric acid, vinegar,
bleach or other products that can scratch. Stains on the bottom of the oven (sauce,
sugar, egg white or grease, for example) are always caused by spattering or
overflowing of food. Spattering occurs during roasting and is due to the temperature
being too high whereas overflowing occurs if the containers are too small or if
increases in volume during cooking have not been taken into account. These two
problems can be avoided by using containers with high sides or by using the
dripping pan provided with the oven. For cleaning the lower part of the oven you
are advised to remove any stains while the oven is warm – the longer you wait the
more difficult it will be to remove the stains.
Cleaning the oven door
Clean the oven door inside and outside, when the oven is cold, using hot water and
a soft cloth. Use hot water and non-abrasive detergents on the enamel parts and on
the part inside the oven.
NOTE: Before use, remove the special film protecting the components and
stainless steel parts.
34Removing the oven door - fig. 1
The oven door can be removed to
facilitate cleaning of the oven. The ovens
are provided with two hinges with
catches. The hinges A are provided with
If the catch B is raised, the hinge is
released from its housing. The door can
then be lifted up and taken out, sliding it
towards the outside. To perform this
operation, grip the door on the side near
the hinges. To re-fit, first insert the
hinges. Then, before closing the door,
remember to lower the two catches B
to connect the hinges.
35Cleaning the side rails -
The side rails are to be hooked onto the wall of the oven. Slide the racks and tray
provided into the side rails.
To remove the side rails press on part A as shown
ement of oven lamp - Fig. 3
Disconnect the oven from the electrical power supply.
Use a screwdriver to remove the light cover.
Put the light cover back
Restore the power supply
N.B. : use only lamps that are 25W 230V, type E
36Instructions for the installer
The oven must be installed by qualified authorised personnel in compliance
with current regulations.
Installation must be performed by specialist authorised persons only.
Characteristics of the unit
The components of the unit in which the oven is fitted (plastic and veneered
wood) must be secured with suitable adhesive able to withstand the heat
(max 150°C); inadequate materials and adhesives can warp or come unstuck.
The unit must permit free passage of the electrical connections and must be
solid enough to withstand the weight of the appliance.
The oven must be slotted securely into the recess provided. The oven can be
fitted inside a column unit or below the top of a modular unit if the latter
guarantees adequate ventilation. If the oven is fitted in a column unit, rear
ventilation ducts are necessary with diameter 55 mm throughout the width of
the unit in order to protect the appliance and the unit in the long term and
improve performance. To facilitate connection of the appliance to the mains
and help improve ventilation, you are advised not to fit the back panel.
37Electrical connection
- All maintenance and adjustment work on the appliance must be performed
with the power disconnected.
- The connection must be made in accordance with current regulations.
- The connection must be made only by a specialist authorised electrician.
- The appliance operates correctly with alternating current at 220/240 V~
single-phase 50/60 Hz.
- THE APPLIANCE MUST BE EARTHED. If the appliance is connected
directly to the mains, an omnipole switch must be fitted sized for the load of
the appliance with contact opening of at least 3 mm and in compliance with
current regulations.
- The earth cable must not be interrupted by the switch.
ALL MAINTENANCE AND ADJUSTMENT WORK ON THE APPLIANCE MUST BE PERFORMED WITH THE POWER DISCONNECTED.
-The appliance is provided with electrical cable without plug; it must be
connected to a plug sized for the load of the appliance, remembering that the
yellow-green cable must be connected to the plug earth connection. The
connection plug must be sized for the load of the appliance.
- After the connection, test the heating elements and operate them for approx.
5 minutes to remove the ambient humidity absorbed.
- The manufacturer accepts no civil or criminal liability if the connection is
not made in compliance with current regulations.
38CAUTION: The power supply cable must
comply with current regulations and have the
following characteristics: three-wire cable
with minimum section of 1.5 mm².
THE MANUFACTURER ACCEPTS NO CIVIL OR CRIMINAL LIABILITY IF THE CONNECTION IS NOT MADE IN COMPLIANCE WITH CURRENT REGULATIONS.
This appliance complies with the current EC
regulations 87/308; 73/23; 93/68 and 89/336.
- Disconnect the power supply.
- Open the terminal block cover (fig. A).
- Connect the power supply cable as shown in
the figure, remembering that the yellow-green
- The cable must always be secured by the
cable grip (fig. B) on the terminal block, so
that it cannot rotate or become detached; it
must not come into contact with temperatures
above 75°C at any point.
- The connection plug must comply with
regulations and be sized for the load of the
The cable is replaced as follows:
3050-3650 W Power of resistances:
W Technical specifications