HPV646 - Four FRANKE - Free user manual and instructions
Find the device manual for free HPV646 FRANKE in PDF.
Download the instructions for your Four in PDF format for free! Find your manual HPV646 - FRANKE and take your electronic device back in hand. On this page are published all the documents necessary for the use of your device. HPV646 by FRANKE.
USER MANUAL HPV646 FRANKE
Wiederverwendung dieses Produkts zu erhalten.
This appliance is marked according to the European directive
2002/96/EC on Waste Electrical and Electronic Equipment (WEEE).
By ensuring this product is disposed of correctly, you will help prevent
potential negative consequences for the environment and human
alth, which could otherwise be caused by inappropriate waste
handling of this product.
The symbol on the product, or on the documents
accompanying the product, indicates that this appliance may not be
treated as household waste. Instead it shall be handed over to the
applicable collection point for the recycling of electrical and electronic
Disposal must be carried out in accordance with local environmental
regulations for waste disposal.
For more detailed information about treatment, recovery and
ecycling of this product, please contact your local city office, your
household waste disposal service or the shop where you purchased
002/96/EC, Waste Electrical and Electronic Equipment (WEEE).
47This handbook is printed on recycled paper to protect the environment.
Connection to the mains power supply 54
Replacement of the power cord: 54
Oven preparation and pre-use 55
CLEANING AND MAINTENANCE OF OVEN AND ACCESSORIES 55
INSTRUCTIONS FOR CORRECT INSTALLATION 56
COOKING WITH THE FOOD PROBE 66
MENU STRUCTURE FLOW-CHART 71
HOW TO PERSONALIZE THE RECIPE LIST 7550
HOW TO LOAD YOUR OWN RECIPE 75
HOW TO DELETE YOUR OWN RECIPE 75
PRACTICAL COOKING SUGGESTIONS 77
Perforated drip pan 77
INSTRUCTIONS for boiler descaling process 82
Instruction for changing the light bulb: 88
Golden colour of the cooking chamber 90
CHECK THAT THERE IS WATER IN THE PITCHER 91
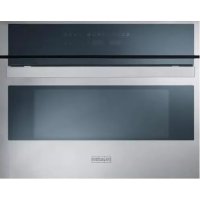
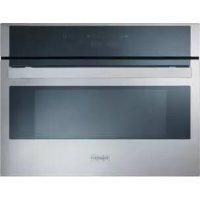
Oven: 92INTRODUCTION OVEN DESCRIPTION Combination oven suitable for cooking food in ordinary homes for non-professional purposes
combining, in a single product, traditional cooking with the advantages of steam to obtain excellent
results for each meat, fish, vegetable and dessert dish while at the same time retaining the taste,
freshness, aromas and above all the nutritional properties of the food. This oven is not suitable for
Install and use the appliance in rooms with temperatures that do not fall below 5°C.
x This appliance is designed to be used by adults who are familiar with these user instructions.
x Make sure that the power cord of the electrical appliances is not crushed by the oven door.
The electrical insulation could be damaged.
If the power cord has been damaged, it must be replaced by customer service to prevent
x Children are often unable to recognize the risks entailed in using the appliance. Please
supervise children properly and do not let them play with the appliance.
x Heat forms during cooking and the appliance door, can become very hot. Do not touch the
door and keep children away.
x Individuals who are disabled or not self-sufficient must be assisted by capable adults.
x During use, the accessible parts of the oven may become very hot. Keep children away from
the oven until the appliance has cooled.
x When opening the oven door during or upon completion of the cooking phase, be
careful of the flow of hot air and/or steam coming out of the cooking chamber. Step
back or to the side to avoid burns.
It is advisable to use distilled water in order to reduce the formation of scale.
x Install and use the appliance in rooms with temperatures that do not fall below 5°C.
x Do not use the oven to heat the room.
x Before closing the oven door, make sure there are no foreign objects or pets inside the oven.
x Do not store flammable materials or temperature-sensitive objects such as cleansers, sprays,
vacuum packed containers, canned food, etc. in the oven. This presents a fire / explosion
x Preserve this manual carefully and keep it handy so that you can consult it whenever
necessary. If you sell or give the appliance to another person, do not forget to attach this
manual to the appliance.
x As soon as an operating problem is discovered, the oven must be unplugged.
x Hot grease and fat catch fire easily. It is dangerous to heat oil in the oven to cook meat and
this should be avoided. Never try to put out a grease fire using water (there may be an
explosion). Suffocate the flames with wet cloths.
x The grill, plates and cooking containers become very hot. When inserting or removing them,
use oven gloves or pot holders which are completely dry.
52x When using or cleaning the oven, be careful not to place your fingers in the door hinges or
in the door itself in order to avoid crushing or injuries. Be especially careful of this when
children are present.
x Leave the oven door open in the supported position only.
x When the door is open, there is a risk of tripping or crushing fingers.
x Do not sit or lean on the oven door, and do not use it as a work surface.
x For maintenance, moving, installation and cleaning of the appliance, use suitable prevention
and protection equipment (gloves, etc.).
x Lifting and moving of appliances weighing more than 25 kg must be carried out using
proper equipment, or by two persons, in order to avoid risks or injuries.
x Any work on the appliance must be done with the appliance disconnected from the electrical
It is not permitted to modify, tamper with or attempt repairs on the appliance, especially
with tools (screwdrivers and the like), either inside or outside the appliance.
Repairs must only be carried out by authorized personnel, especially on the electrical parts.
Inappropriate repair work may cause serious accidents, damage the appliance and equipment
and lead to improper operation.
x Appliances repaired in technical service centres must undergo routine testing, especially
concerning the earth circuit continuity.
x Use only the food / temperature probe included in the oven accessories. If the food probe
breaks or becomes lost, contact your nearest Authorized Service Centre.
x The manufacturer shall not be held liable for damage to persons or
property due to poor or incorrect maintenance of the appliance.
x The manufacturing company declines all responsibility if the safety
standards are not observed.
x The manufacturer reserves the right to make any modifications to its
products which it feels are necessary or useful without any advance
53INSTALLATION Remove the appliance from the package and check that the product and power cord are NOT
Otherwise, contact the retailer before operating the appliance.
Do not lift the product by the door handle.
Packaging (e.g. paper, polystyrene) may be hazardous to children (danger of suffocation).
Keep packaging out of the reach of children.
The product must be installed and connected correctly to the mains power supply, following the
manufacturer's instructions and only by QUALIFIED PERSONNEL.
Before performing any type of work, it must be verified that the appliance is DISCONNECTED
from the mains power supply.
Connection to the mains power supply
x Make sure the voltage matches that indicated on the typeplate which can be viewed by opening
x Check whether there is an omnipolar switch available on the domestic line which is compliant
with current standards (3 mm minimum opening distance between contacts) and if it is able to support
the load of the appliance (see the typeplate). Otherwise place a device, easily reachable, between the
appliance and the electricity line with the described specifications.
x CAUTION: Check whether your electrical system is equipped with an efficient earth connection
according to current standards and legal provisions.
x N.B. The earth connection is required by law.
x The yellow/green earth cable must not be interrupted by the switch and must be 2-3 cm longer
than the other cables.
x Do not position the
x power cord near sources of heat or at temperatures more than 50° above the room temperature.
x If the appliance is lacking
the power cord, the oven must be connected to the mains power supply with a cable having a
minimum section of 1.5mm2.
x If a plug is to be used, it must be a standard plug suitable for the load and the power outlet.
Replacement of the power cord:
If the power cord needs to be replaced, use cables of the following type only:
H05 RR-F, H05V2V2-F(T-90)
The oven is equipped with a terminal box set up for operation with a single-phase 220-240 Vac 50 Hz
Attention: should it be necessary to replace the supply cord, connect the wire in accordance with
the following colours/codes:
YELLOW-GREEN - EARTH ( )
54Oven preparation and pre-use
N.B. Disconnect the oven from the mains power, or move the omnipolar switch to OFF, before
Before using the oven, thoroughly clean the inside using a soft cloth or non-abrasive sponge
dampened with warm water and washing-up liquid. Insert the grill and drip pan in their respective
Turn on the oven, see page 14 select the "Professional Cooking" function , see page 16 and set
the temperature to 230°C. Operate the oven empty for about 30 minutes in order to remove any
residues of manufacturing oil or grease which can produce unpleasant odours during cooking.
Air the room during this operation.
CLEANING AND MAINTENANCE OF OVEN AND ACCESSORIES
x To facilitate the cooking chamber cleaning operations, it is advisable to use the automatic
process described on page 35
x Then it is advised to disconnect the appliance from the mains power supply.
x Use a damp sponge to remove any residues from the chamber walls after each use.
x Do not use steam cleaners to clean the oven.
x Do not use coarse abrasive material such as scourers, metal scrapers or steel wool to clean
the glass of the oven door in order to avoid scratches that may cause the glass to shatter.
x DO NOT WASH THE FOOD PROBE IN THE DISHWASHER.
x The grill, pitcher and drip pan can be washed in the dishwasher.
x Empty the water pitcher after each use for hygiene reasons.
x After cooking, and when the oven has cooled sufficiently, use a soft cloth to dry any liquid
remaining on the bottom of the cooking chamber.
55INSTRUCTIONS FOR CORRECT INSTALLATION TECHNICAL DATA
x Water tray capacity: 1.2 L.
x Gross volume (cooking chamber): 31 L.
x Maximum pickup voltage: 2.2 KW.
57DESCRIPTION OF THE OVEN AND ACCESSORIES Preliminary operation to be done before switching on the oven, or before choosing a cooking cycle
Before switching on the oven check that the cap (15) is inserted on its place (14). In case of cooking cycles
with the probe, insert it (6).
The oven does not start cooking if any of the two accessories is not inserted.
Note: during the cooking time or at the end of it the cap is hot.
If you want to leave the cap to insert the probe, please wait the oven to cool down or use suitable prevention
equipment (e.g. gloves).
1 Control panel and data display 8 Drip pan
2 Pitcher compartment 9 Grill
4 Filter compartment 11 Door
5 Filter cap 12 Cooking chamber
6 Food or temperature probe 13 Side grills
7 Perforated drip pan 14 Food probe connector
15 Connector cap; to be inserted on the
connector (14) when not using the probe (6)
1. Keys for setting the cooking chamber temperature and display area for the temperature
( + to increase, - to decrease, min. 30°-max.230° * depending on the cycle selected, see
2. Keys for setting the food probe temperature and display area for the food probe temperature
( + to increase, - to decrease, min. 30°-max.90°)
3. Keys for programming timed events and display area for timing indication
4. Keys for programming the alarm or setting the clock and display area for clock / alarm
5. Cooking chamber light on / off key
6. Oven on / off key
7. Cooking function selection keys
59FIRST START-UP When the oven is connected to the mains power supply for the first time, a wait message ( WAIT )
and some product identification information appear on the display.
Do not touch the keypad during this brief period.
N.B. It is normal that the Tangential Fan turns on and then shuts off after a few moments.
When the following message appears: LANGUAGE ENGLISH
select the desired language by pressing one of the keys
Confirm the selection with key
Then set the clock using the keys
to reach the current time.
Confirm the setting by pressing key
HOW TO TURN THE OVEN ON Press the key
(6) for at least 1 sec.
The writing <<ON>> appears on the display, the oven light turns on and then the following
moSELECT COOKING MENU N.B. Deactivate the keypad lock if it is active.
the oven will turn off automatically, after 5 minutes, if no selection is made.
HOW TO TURN THE OVEN OFF Press the key (6).
The writing <<OFF>> appears on the display.
The oven will go into stand-by mode, see section oven off mode
STEAM COOKING During steam cooking, the steam coming from the boiler flows
into the cooking chamber.
The steam heats the cooking chamber and cooks the food.
This cooking mode is ideal for cooking any type of vegetables,
and it preserves the colour, taste and above all the organoleptic
properties of the food.
REGENERATION Steam and hot air contribute to heating the cooking chamber. The
heating of the food is thus quick and homogeneous, preventing it
The element that heats the air is the CIRCULAR heating element.
The radial fan distributes the heat uniformly.
This mode is suitable for heating previously cooked food
(leftovers), precooked food or frozen products.
PROFESSIONAL COOKING Cooking carried out in several phases.
When started, in the first phase, the food is steam cooked.
After an automatically determined period of time, the cooking
switches to the HOT AIR cooking mode.
This cooking system is ideal for rising any type of dough or for
cooking dough, bread or focaccia bread.
This type of cooking, however, cannot be performed several
times in a row, otherwise the results will be less than ideal.
The oven must be allowed to cool between two professional
cooking cycles. Only in this manner will the new steam phase be
carried out properly.
HOT AIR COOKING The air inside the cooking chamber is heated by the circular
heating element located behind the rear wall of the appliance.
The radial fan helps to move the air in a uniform manner. This
system, also known as ventilated cooking, cooks the food on
HOT AIR + STEAM This cooking mode is equivalent to the hot air cooking mode
described previously but also allows the possibility to produce
steam, at any time, in the cooking chamber by pressing the key
(8) . The production of steam in the cooking chamber is
automatically deactivated 10 minutes after its start, or it can be
deactivated even earlier, at any time, by pressing the key
Ideal for cooking roasts.
LOW TEMPERATURE Low-temperature cooking system for relatively long time
periods. Ideal for cooking meat, producing a tender and delicate
The air inside the cooking chamber is heated by the circular
heating element located behind the rear wall of the appliance and
distributed uniformly thanks to the ventilation produced by the
radial fan. The cooking must be carried out using the food probe
supplied with the oven.
61HOW TO SELECT A COOKING FUNCTION Press one of the two direction keys: (7) to select the desired cooking cycle. See
function explanation in the table above. (cooking cycles available)
N.B. If no selection is made within 5 minutes, the oven will turn off automatically. See section oven
USING A COOKING FUNCTION THAT INCLUDES STEAM
x Fill the water container (pitcher) with distilled water or, if this is unavailable, drinking
x Fill the container up to the mark ( 1.2 L.). N.B. NEVER fill the pitcher completely,
otherwise the water pumped back into the pitcher at the end of the cooking cycle may
x Insert the pitcher into its seat.
x Push the pitcher down completely to ensure a perfect seal between the tube located in the
pitcher and the hydraulic circuit inside the oven.
x Always insert the NON-perforated drip pan under the perforated drip pan to collect the
condensation, juices or parts of food that may fall.
USING A COOKING FUNCTION THAT DOES NOT INCLUDE STEAM When the oven is used with a cycle that does not include steam, the container may remain in its seat
without compromising the cooking result.
In order for the STEAM REGENERATION or PROFESSIONAL cooking modes to
be carried out successfully, the oven must be allowed to cool sufficiently if it was
previously used for a similar cooking process.
62HOW TO CHANGE THE COOKING CHAMBER TEMPERATURE Press one of the two keys
(1) to change, with steps of +/-5°C, the preset temperature.
The cooking chamber temperature is always displayed on the left side of the letter
N.B. The degree symbol
“°” flashes during the oven preheating period until the set temperature is
achieved. Otherwise, it is always on in all the other cases, such as for example: temperature control, when
the oven is maintaining the temperature already achieved, and cooling, when the oven must reach a set
temperature lower than the starting value.
HOW TO START THE COOKING The activation of the selected cooking function, with the settings shown on the display, occurs when
the selection is confirmed with key
The following message appears on the display: ACTIVATE CYCLEMENU
N.B. The oven turns off automatically after 5 minutes if the start of the cooking process is not
The phrase “COOKING IN PROGRESS MENU” will appear on the display when the cooking
(9) accesses a menu which allows the user to perform semiautomatic cooking
settings or store the data of the cooking in progress. See section HOW TO PROGRAM THE OVEN on page 18
HOW TO USE THE ALARM FUNCTION Press one of the two keys
(4) to activate the function.
begins to flash and the display shows the message:
ALARM and the digits 00.00 appear.
(4) individually to set the desired time.
The maximum time that can be set is 23 hours and 59 minutes.
After a few moments (5 sec.), the timer begins, the oven returns to displaying the current time and
the symbol remains constantly lit.
At the end of the set time period, a buzzer sounds and the following message is displayed:
ALARM 00.00 and the symbol
(the last two flashing).
Press any key to stop the buzzer.
Note: The buzzer is automatically deactivated after 5 minutes.
x The alarm function does NOT interact with the operation of the oven, and it is always
available regardless of the oven state.
63HOW TO DISPLAY OR CHANGE THE ALARM STATUS Press one of the two keys
(4) and the display immediately shows the information
regarding the time status of the alarm.
Press one of the two keys
(4) to set a new time for the alarm.
How to reset the alarm function
(4) simultaneously to reset the time previously programmed for this
HOW TO PROGRAM THE OVEN HOW TO SET OR CHANGE THE COOKING TIME Turn the oven on and select a cooking function.
(3) to set the cooking time.
The initial display of the time is set in mm.ss, then hh.mm.
(h=hours, m= minutes, s=seconds)
The maximum time that can be set is 10 hours.
Then activate the cooking, see section how to start the cooking
The time displayed begins to decrease, and when it reaches zero the oven will go into cooking
finished mode, see page 38
HOW TO CANCEL A COOKING TIME Press the keys (3) simultaneously to cancel the time previously programmed for this
The cooking time is set to zero.
64HOW TO PROGRAM THE START AND STOP OF THE OVEN Turn on the oven, select a cooking function and set the desired cooking temperature.
(3) to set the cooking time.
The maximum time that can be set is 10 hours.
set the END OF COOKING time, within the next 23 hours 59 minutes.
Confirm the setting with the key
The oven will go into delayed start mode. It will be automatically activated later for a set duration
and will stop at the programmed end of cooking time.
A clear message: “OVEN TO BE TURNED ON IN .. ..”
at 15 sec. intervals will be displayed to show the time remaining before the oven is turned on.
It is possible, however, to recall the information on the display at any time by pressing one of the
HOW TO CANCEL AN OVEN START/STOP PROGRAM Press the keys (3) simultaneously to cancel the oven start/stop program.
The oven will automatically activate and display the message: COOKING IN PROGRESS
MENU COOKING FINISHED MODE The oven turns off all the heating elements.
The display shows the message: “COOKING FINISHED” accompanied by a buzzer signal.
The buzzer signal can be turned off by pressing any key.
to turn off the oven or press one of the two keys (7) to select a new
N.B. In steam cooking cycles, two minutes before the cooking time ends the steam discharge vent
opens in order to discharge as much steam as possible form the cooking chamber.
65COOKING WITH THE FOOD PROBE The oven is supplied with a food and temperature probe, which is an accessory shaped like a large
pin inserted in a grip that ends with a cable and a plug. The food probe connected to the electronics
allows to measure the temperature inside the meat or other food that is being cooked.
This accessory simplifies the approach to the various cooking cycles for those with little experience
in the sector, obtaining consistent results over time.
The cooking finishes when the temperature inside the food,
measured by the probe, reaches the value set on the display.
How to use the food probe.
Connect the food probe on the appropriate connector located inside the oven, on top of the left wall
(see fig. A). Insert the metal pin of the probe horizontally into the food to be cooked, up to the
handle. The point, if possible, must be placed in the centre of the food and must not touch a bone or
be inserted in any fatty parts of the food. A correct measurement can be obtained only by following
Turn on the oven, select a cooking function, set the food probe temperature and set the cooking
chamber temperature.
66HOW TO CHANGE THE FOOD PROBE TEMPERATURE Press one of the two keys
(2) to change, with steps of +/-1°C, the food probe temperature.
Maximum temperature that can be set: 90°C Minimum temperature that can be set: 30°C The food probe temperature value is displayed with the following graphic symbol to the left:
x The chamber temperature must be higher than the food probe temperature. Otherwise, the
display of the chamber temperature will flash to indicate an incorrect setting.
x It is not possible to set a cooking time using the food probe or vice versa.
USING THE FOOD PROBE AS A THERMOMETER Press the two keys
(2) simultaneously and the probe temperature display will show the
instantaneous value measured by the probe.
The maximum and minimum temperature that can be measured is 250°C - 20°C.
HOW TO PROGRAM THE START OF THE OVEN USING THE FOOD PROBE Connect the food probe to the appropriate connector (see fig. A, page 20). Turn on the oven, select a
cooking function and set the desired cooking temperature.
(9) and select the item START COOKING with key (8).
When the message SET TIME appears, use the keys
set the START COOKING time, within the next 23 hours 59 minutes.
Confirm the setting with the key
The oven will go into delayed start mode. It will activate automatically at the programmed time and
stop at the end of cooking, i.e., when the food temperature reaches the value set for the probe
A clear message: “OVEN TO BE TURNED ON IN .. ..”
at 15 sec. intervals will be displayed to show the time remaining before the oven is turned on.
It is possible, however, to recall the information on the display at any time by pressing one of the
67SAVING A COOKING CYCLE The oven electronics offers the possibility to store your cooking settings in appropriate memory
areas. This information may be retrieved at a later time in order to cook with the same previous
settings, obtaining consistent and unfailing results.
The following can be stored in the memory:
x cooking chamber temperature
x food probe temperature or alternatively cooking time
It is not possible to store:
x Start cooking time
x End of cooking time
HOW TO SAVE A COOKING CYCLE After turning on the oven and carrying out all the necessary cooking settings, press key
(9) repeatedly until the following text appears: SAVE COOKING CYCLE Press key:
(8) to confirm that you would like to save the data.
Select one of the 10 available records using the scrolling keys:
Confirm the saving of the data in COOKING CYCLE NO. with key
When the data has been saved, the system responds with “DONE”
x It is advisable to write down the number of the cooking cycle along with the name of the
dish for which it is used in a notebook. This will help in the future when you would like to
call up the cooking cycle to be used for this particular dish.
x If the system does not display the writing "DONE", this means that all the available memory
records have been used. To save another cooking cycle, you must delete one or more
records. See section how to delete your own recipe
Recipes :. The system has a stored list of dishes (meat, bread/pizza, desserts, timbales, your own
recipes) that allows a quick setting of the oven (recommended parameters) based on the item
selected in order to obtain the correct cooking.
The following pages provide the tables and parameters of the food stored in the memory.
Settings: In this menu it is possible to carry out a series of settings that allow to personalize the
oven based on your own needs.
See the list on page 32
68HOW TO ADD STEAM IN THE HOT AIR + STEAM COOKING MODE The hot air + steam cooking cycle allows the user to add steam at any time during the cooking. In
this manner the right degree of humidity inside the cooking chamber is reached or maintained in
order to obtain a more tender dish.
Once the cycle has been selected and activated, the following message appears at regular intervals:
TO ADD STEAM Pressing the key (8) turns on the symbol: that indicates activation of the steam generator.
After a few moments, steam will begin to flow into the cooking chamber. The steam is introduced
into the chamber at constant intervals separated by brief pauses for a maximum period of about 15
min. at the end of which the steam generator and the indicator
The introduction of the steam can also be deactivated manually at any time with key
The message shown on the display PRESS
TO STOP STEAM preceded by a beep signal
reminds the user of this possibility.
69HOW TO MOVE AROUND INSIDE THE MENU Turn on the oven. When the following message is displayed:
moSELECT COOKING MENU
(9) to display the first item in the list: “RECIPES”
To view the menu structure:
(9) to scroll down the list
(9) to scroll up the list
(8) to select the item shown
EXIT allows to return at any time to the initial item displayed when the oven was turned on.
simultaneously allows to go back to the previous item one step at a
time. (go back function <<< )
70MENU STRUCTURE FLOW-CHART
71BREAD/PIZZA recipe list
The cooking modes listed have been determined for pieces of meat weigthing about 1 Kg.
The cooking times have been determined for average sized dishes.
Cooking times may vary depending on the size of the dish.
74DESSERTS recipe list
The settings listed in the tables (temperature, cooking time) may be changed to create personalized
cooking better suited to your needs. New data can be entered to overwrite the data stored in the
memory by following the instructions provided below.
HOW TO PERSONALIZE THE RECIPE LIST Select an item from the list and set the data according to your own needs. Remember that it is
possible to cook by time (cooking time) or with the food probe.
Activate the cooking, then press the key
(9) repeatedly until the following text appears: SAVE COOKING CYCLE Press key:
(8) to confirm and store the new settings.
The system displays DONE when the saving is finished.
HOW TO LOAD YOUR OWN RECIPE Select menu and select the recipes item, with key (8).
Scroll the items with key
(9) or key (9) until the text YOUR OWN RECIPES is displayed.
Confirm the selection with key
When the following message appears: LOAD COOKING CYCLE press key
The system displays the recipes that have been stored.
(9) or (9) to select the desired cooking cycle.
Confirm the selection by pressing key
N.B. If the memory area is empty because no personalized recipes have been stored, the system
HOW TO DELETE YOUR OWN RECIPE Select menu and select the recipes item, with key (8).
75Scroll the items with key (9) or key (9) until the text YOUR OWN RECIPES is displayed.
Confirm the selection with key
Use one of the two keys
(9) to scroll the items until the following text is displayed:
DELETE COOKING CYCLE.
(8) to enter the submenu.
Select the cooking cycle that you would like to delete, scrolling the items with one of the two keys
(9), and confirm the deletion with the key (8).
When the cooking cycle has been deleted, the system responds with DONE
76PRACTICAL COOKING SUGGESTIONS
x All cooking must be carried out with the door closed.
x Always use completely dry oven gloves or pot holders to remove the hot dishes from the
x Use containers able to withstand maximum temperatures of 250°C or higher.
x During or at the end of the cooking phase, be careful of the hot air that escapes from the oven
when the door is opened.
x Never rest the dishes directly in contact with the bottom of the oven. Use the appropriate
ACCESSORIES The accessories supplied with the oven increase
the number of cooking modes and possibilities.
The drip pan and grill accessories can be placed
on various levels of the slide guide located
inside the oven. This allows the user to set the
most suitable height (levels) depending on the
cooking to be carried out. See the recipe list on
Tray with raised edges used as a support surface for any single-level or bain-marie cooking
Container for collecting juices or drippings of fat during the cooking process, used together with the
main grill or the perforated drip pan. When cooking fatty dishes, it is recommended to place a bit of
water in the drip pan to prevent the fat from burning and
producing unpleasant odours or smoke.
Support surface for the food (biscuits, etc.)
Used mainly as a support surface.
Recommended position: level 2 / 3 / 4
Used mainly for steam cooking (fresh or frozen vegetables, fish).
Position the perforated drip pan on level 2 or 3 and immediately
insert the drip pan to collect the liquid released from the food.
If the food probe temperature display is flashing with the value of 30°C, this means that the dish
selected from those listed in the recipe list lacks an ideal probe temperature value. In this case, it is
recommended to disconnect the food probe and cook according to the set mode or set a food probe
temperature best suited to your expectations.
HOW TO PERSONALIZE YOUR OVEN Turn on the oven. When the following message is displayed:
moSELECT COOKING MENU
(9) to display the first item in the list: “RECIPES”.
(9) and confirm the selection “SETTINGS” with key (8)
Move around inside the SETTINGS submenu using the procedures described in section how to
move around inside the menu on page 24.
To change the type of setting, press one of the two keys
The new setting must, of course, be confirmed with the “enter” key
The message “DONE” is displayed as confirmation of the new selection.
Use the MENU STRUCTURE diagram to help you become familiar with the items.
LANGUAGE: allows to set the display of the messages in the language best suited to the user.
x SPANISH Use the keys
(4). to scroll the list items and key (8) to confirm the desired language.
SETTING THE CLOCK Move around in this submenu and select the item to be personalized using the procedures already
described. See section how to move around inside the menu how to move around inside the menu
The variable parameters are displayed in flashing mode and can be changed using the keys
78x SET TIME Allows to set the current time.
Keep one of the two keys mentioned previously pressed down to scroll faster.
x CLOCK DISPLAYED If NO is selected, the current time is not displayed when the oven is off.
x NIGHT MODE Default setting = NO If the setting is changed to YES, when the oven is off, during the time between 22.00 and 06.59.59
the clock digits are displayed with a low light intensity. During the remaining daytime hours, the
maximum intensity returns to ensure proper display in case of reflection.
SETTING KEYPAD LOCK:
This option allows to select the mode in which the keypad lock is set: manual or automatic. It is
recommended to select the automatic mode (YES), especially if there are children present.
AUTOMATIC KEYPAD LOCK YES The keys are locked automatically when the keypad remains inactive for 1 minute.
AUTOMATIC KEYPAD LOCK NO The keypad lock is activated by simultaneously pressing the key on the far left
In both cases, when the keypad lock is activated the display shows the message: KEYPAD LOCK ACTIVATED followed, if the oven is off, by the key symbol to remind the user that the
function is activated.
If the keypad lock is activated manually or automatically during a cooking process, the display,
after the message: “KEYPAD LOCK ACTIVATED”, returns to displaying the cooking
information. If someone attempts to perform new settings, the system responds to pressure on any
key with a message that reminds the user to deactivate the protection first.
See the next section.
HOW TO DEACTIVATE THE KEYPAD LOCK If the key symbol is shown on the display, or the following message appears:
The two arrows on the sides pointing downwards remind the user of the key combination
Press simultaneously the key on the far left and the key on the far right
The message : KEYPAD LOCK DEACTIVATED confirms that the appliance's normal control
functions have been restored.
79KEYPAD LOCK DETAILS The key allows to turn on / off the light in the cooking chamber regardless of the oven state.
allows to turn the oven off.
BUZZER Allows to select one of the 3 levels (low, medium, high) for the intensity of the buzzer that sounds
during a warning. Default setting: MEDIUM LIGHTING Allows to select the criteria for turning off the light once it has been turned on.
Select NO for the item: LIGHT OFF AUTOMATICALLY to use the manual mode. Once the light
has been turned on, it must always be turned off by pressing the appropriate key
The automatic function (YES) allows the electronics to turn the light off automatically 5 minutes
after it was turned on.
WATER HARDNESS The water hardness basically expresses the quantity of magnesium and calcium salts present in the
water. The hardness is generally expressed in French degrees (°fH).
The oven is equipped with an automatic system that determines the appropriate moment to perform
a boiler descaling cycle.
Remember that it is advisable to use distilled water in order to reduce the formation of scale.
There are three adjustment ranges for the water hardness.
French degrees ( °fH) / German degrees (°dH) equivalence table
WATER HARDNESS °fH WATER HARDNESS °dH
16-35° fH AVERAGE WATER 0-8° dH AVERAGE WATER
0-15° fH VERY SOFT WATER 9-20° dH VERY SOFT WATER
36-50° fH VERY HARD WATER 21-28° dH VERY HARD WATER The default system is positioned on the average value (line1 in the table).
To change the setting, see page 32 , select water hardness, press the confirmation key
To enter into the option and then use one of the two keys
Once the selection has been made, confirm with key
See also the section: BOILER DESCALING on page 35
80START CLEANING CYCLE Menu items:
COOKING CHAMBER BOILER DESCALING COOKING CHAMBER The purpose is to facilitate the removal of any residue of food, grease, etc. after a cooking process.
The oven fills the cooking chamber with a certain quantity of steam for a fixed period of time (10
Activate the cooking chamber cleaning cycle with key
(8) and follow the instructions provided
When the cycle is finished and the following message appears:
COOKING CHAMBER CLEANING CYCLE COMPLETE USE A CLOTH TO REMOVE DIRT
use a soft cloth or non-abrasive sponge dampened with water to clean the oven. Do not use
corrosive substances or liquids, do not use iron or pointed utensils.
BOILER DESCALING This is a particular cleaning cycle suitable for removing the scale inside the boiler.
Depending on the water hardness, a certain quantity of scale forms inside the boiler or steam
generator that increases with the hardness of the water. See the section WATER HARDNESS on
It is recommended that the descaling be performed as soon as the following warning message is
It is recommended that CITRIC ACID MONOHYDRATE be used, which can be found at any
Follow the safety and dosing instructions. Do not use vinegar or vinegar-based products.
81INSTRUCTIONS for boiler descaling process:
Dosing: fill the pitcher with water up to the 0.6 L mark , add 5 teaspoons of citric acid monohydrate
Insert the pitcher in the appropriate seat and start the descaling process with key
The appliance will display the time remaining until the end of the descaling process.
When finished, a boiler wash and rinsing process will be carried out. See the section Boiler wash
When finished, the system performs a boiler wash cycle and empties the dirty water into the pitcher.
It will then be necessary to assist the appliance which will guide you step by step through the
operations to be carried out.
In summary, the necessary operations will be to empty the contents of the pitcher, rinse and fill the
pitcher with clean water. This operation will have to be repeated several times.
Water may drip from the filter container. Dry and clean with a cloth or small sponge.
Pay attention to the white gaskets; make sure that they are present on the inner part of the filter
container, otherwise position them correctly as shown below.
Cap Filter 2 Gaskets
82RESET SETTINGS This function is used to reset the system in case of problems.
Caution: All the system variables are returned to the original values and your own recipes are
Select the item : “ RESET SETTINGS” with key
(8) and follow the instructions provided on
83OVEN OFF MODE All the heating elements are deactivated, including the fan inside the cooking chamber and the light.
The cooling fan and the fan located inside the cooking chamber deactivate a few minutes after the
oven is turned off in order to allow rapid cooling of the oven. (Maximum cooling time: 20 min.)
The keypad is deactivated except for the on/off key
and the ALARM function keys. (see page
COOKING FINISHED MODE The control unit sounds a buzzer and deactivates all the heating elements, including the fan inside
the cooking chamber and the light.
The display shows the message: COOKING FINISHED
x Press any key to stop the buzzer, cancel the message and return the system to the ON
x Or press the On/Off key to turn the oven off. (see oven off mode)
x Otherwise the oven will turn off automatically after 5 minutes.
84WHAT TO DO IN CASE OF AN ANOMALY PROBLEM SOLUTION The oven does not work. Check whether the omnipolar switch or any
residual-current circuit breaker (cut-out) of the
electrical system is off. In case of problems with the
electrical system, consult a qualified electrician. If
the oven still does not work after resetting the
omnipolar switch and/or residual-current circuit
breaker, contact an Authorized Service Centre.
The light inside the cooking chamber does
See the instructions on how to change the oven light
The display shows Err and a number. This combination indicates a failure.
See the error codes table on page 40
The system requires the time to be set. Probable electricity failure (Black-out). Set the
current time. See page 14 or page 32
The draining of the water from the boiler
occurs a long time after the end of a cooking
For safety reasons the water from the boiler is
pumped away only when the temperature has
The time necessary for the water to cool determines
the pause before the draining starts.
(this may last up to 20 min.)
During this time, another cooking process can be
Steam comes out of the oven during
Check whether the door is closed correctly.
Check whether the seal is damaged with cracks, etc.
In the second case, contact an Authorized Service
The system displays a food probe temperature
during operation without the food probe
Check the seal of the food probe connector cap
inside the cooking chamber. If the cap is unstable, it
Contact an Authorized Service Centre.
WHAT TO DO IN CASE OF A BLACK-OUT
x In the case of a black-out, when the electricity is restored it may be necessary to reset the
x The stored settings or recipes are not lost.
x If the black-out occurs during a cooking process, the process cannot continue.
x If a descaling or boiler cleaning process was in progress before the black-out, the process is
aborted. When the electricity is restored, it will be necessary to drain the solution of water
and citric acid monohydrate contained in the boiler. Follow the instructions shown on the
display of the appliance. See the section Boiler wash
85ERROR CODES TABLE The electronic system continually performs a series of diagnostic tests. If some parameters are
incorrect, the control unit deactivates the functions and displays an error code (Err followed by
three numerical digits); all the heating elements are turned off, including the fan inside the cooking
chamber. The cooling fan remains on.
Take note of the error code and contact an Authorized Service Centre, specifying the error code.
Error Code Cause SOLUTION Err 001
The causes of this alarm are:
The fill pump does not pour the water from
the pitcher to the boiler.
b – a leak in the hydraulic circuit
d – electronic failure in the power circuit
(relay or relay control)
Check that there is water in the
Turn the oven off and on again.
If the failure repeats, take note of
the error code and contact an
Authorized Service Centre,
specifying the error code.
Boiler protection alarm.
The system de-energizes the GEN. relay
in advance, and thus all the loads
- Replace the power card
Take note of the error code and
contact an Authorized Service
Centre, specifying the code.
Power card overheat: threshold value
Check whether the oven is
embedded in the furniture
according to the instructions in this
Check whether the tangential fan is
operating correctly.
PT1000 cooking chamber sensor
Cause: interruption or short circuit of the
- Replace the PT1000
Contact an Authorized Service
Cause: interruption or short circuit of the
- Check the electrical connections.
- Replace the food probe.
Contact an Authorized Service
circuit or short to earth.
- Replace the BOILER.
Contact an Authorized Service
Centre, specifying the code.
Cooking chamber steam presence
Contact an Authorized Service
Centre, specifying the code.
Cooking chamber overheat
- Replace the power card
Contact an Authorized Service
Centre, specifying the code.
Failure of the ntc sensor on the power
card Cause: open circuit or short.
- Replace the power card
Contact an Authorized Service
Centre, specifying the code.
86HOW TO DISASSEMBLE THE SIDE GRILLS
1. Unscrew (turning anti-clockwise) the front knurled nuts (D).
2. Extract, one at a time, the side grills (G).
HOW TO REASSEMBLE THE SIDE GRILLS Insert the support grills one at a time. (G)
Pay attention to the index on the grill. This must be inserted on the rear knurled nut inside the
Screw on the knurled nuts (D).
HOW TO CHANGE THE OVEN LIGHT BULB Disconnect the appliance from the power supply or place the omnipolar switch in the OFF position.
Check that the oven is at room temperature, otherwise wait for it to cool.
The oven light bulb must have the following characteristics:
x Supply voltage 220-240 V (50/60 Hz)
x Maximum operating temperature 300°C Instruction for changing the light bulb:
1. Unscrew the knurled nut of the left-side support
grill, see the previous page.
2. Extract the support grill.
3. Unscrew the 4 cross screws located on the
corners of the glass support (see drawing to the
4. Place the frame, with glass and seal to protect the lamp,
on a support surface.
5. Unscrew the burnt-out bulb.
6. Insert and screw in the new light bulb.
7. Reassemble the frame assembly with glass and
8. Screw in the 4 screws.
9. Reassemble the side grill.
10. Screw on the knurled nut of the side grill.
11. Reconnect power.
HOW TO CHANGE THE COOKING CHAMBER SEAL The seal located around the cooking chamber must be replaced if it has any cracks.
For safety reasons, the seal must be changed by an Authorized Service Centre technician.
88HOW TO DISASSEMBLE THE OVEN DOOR
1. Open the oven door completely.
2. Locate the hinges (C) , see the
drawing to the side:
3. Tip back the brackets (A) on the two
4. Grip the door on the two sides and close it slowly halfway, the brackets (A) will hook onto
the door of the appliance.
5. Lift the door upwards.
6. Extract the door by rotating the lower part backwards. The brackets must come out of their
seats. See the drawing below.
89HOW TO REASSEMBLE THE OVEN DOOR
1. Insert the two brackets into the appropriate openings,
keeping the door semi-closed.
2. Open the door completely.
3. Tip over the two hinges (C) moving them forward.
OVEN DETAILS Touch-Control Keypad
This is a particular type of keypad which is touch-sensitive. To give a command to the oven, it is
enough to indicate and apply light pressure on the point of the keypad where the symbol
corresponding to the instruction is located.
Keypad command inactivity
After 5 minutes without confirmation of a cooking cycle activation or without confirmation of an
option, the oven turns off automatically.
A brief acoustic signal is emitted every time a key is pressed.
The oven is equipped with a cooling fan to ensure proper operation and reduce the temperature of
the external surfaces of the oven.
The fan is always active during the cooking process, and it is possible to feel the jet of air that
comes out between the front panel and the door of the oven.
Golden colour of the cooking chamber
After a certain period of oven use, the cooking chamber takes on a golden colouring. This colouring
of the stainless steel, due to natural causes, has no effect at all on the cooking characteristics.
The meaning of some warning messages.
CHECK THAT THERE IS WATER IN THE PITCHER Generally 1L. of water in the pitcher is sufficient for a steam cooking process, nevertheless the
message in question may be displayed for two reasons:
x The water in the pitcher has finished.
x The pitcher is not inserted completely in its seat.
Open the oven door in both cases, being careful of any steam that may come out.
x Add max.1L. of distilled or drinking water, if necessary. (N.B. NEVER fill the pitcher
completely, otherwise the water pumped by the steam generator back into the pitcher, at the
end of the cooking cycle, may overflow from the container.)
x Insert the pitcher into its seat.
x Push the pitcher down completely to ensure a perfect seal between the tube located in the
pitcher and the hydraulic circuit inside the oven.
INSERT THE PITCHER This message is displayed when the system must drain the water contained inside the boiler but the
pitcher is not present in the appropriate seat.
CONNECT FOOD PROBE This message is displayed upon selection of the low temperature cooking cycle or a personalized
recipe which requires use of the food probe, and only if the latter is not already connected on the
appropriate connector.
DISCONNECT FOOD PROBE This message is displayed if the setting of the selected recipe does not require the food probe and
only if the latter is connected.
CLOSE THE DOOR This message is displayed to indicate that the selected process or the process previously in progress
can start only when the door is properly closed.
The door-open condition determines the interruption of a cooking process or steam controlled
BOILER EMPTYING WAIT…
This indication is used to ensure the user that certain processes are active, monitored and managed
automatically by the system even when the oven is turned off. Es. Boiler wash cycles.
Other indications will be displayed at the end of the process or the oven will turn off automatically.
91DISPOSAL Packaging
x The parts of the oven packaging (cardboard, EPS expanded polystyrene, PE plastic bags)
should be disposed of in compliance with environmental regulations and using appropriate
separated collection channels.
x Disconnect the oven from the outlet or, in case of fixed installations, contact an authorized
electrician to request uninstallation.
x Before scrapping the appliance, make it unusable by cutting the power cord.
This appliance is marked in compliance with European Directive 2002/96/EC, Waste Electrical and
Electronic Equipment (WEEE). By making sure that this product is properly disposed of, the user
contributes to preventing potential environmental and health damage.
on the product, or on the documentation that goes with it, indicates that this
product must not be considered as domestic waste. It must instead be turned over to suitable
collection centres for the recycling of electrical and electronic equipment.
Dispose of it in accordance with local standards for waste disposal.
For further information on the treatment, recovery and recycling of this product, contact the proper
local authority, the domestic waste collection service or the retailer where the product was