Elance GC3106 - Iron PHILIPS - Free user manual and instructions
Find the device manual for free Elance GC3106 PHILIPS in PDF.
User questions about Elance GC3106 PHILIPS
0 question about this device. Answer the ones you know or ask your own.
Ask a new question about this device
Download the instructions for your Iron in PDF format for free! Find your manual Elance GC3106 - PHILIPS and take your electronic device back in hand. On this page are published all the documents necessary for the use of your device. Elance GC3106 by PHILIPS.
USER MANUAL Elance GC3106 PHILIPS
GC3135, GC3130, GC3126, GC3125, GC3120, GC3117, GC3116,
GC3115, GC3111, GC3110, GC3106

ENGLISH 4
FRANÇAIS 12
ESPANOL 20
PORTUGUES 28
ITALIANO 36
TÜRKÇE 44
59
66
Important
Read these instructions for use carefully before using the appliance and save them for future reference.
Check if the voltage indicated on the type plate corresponds to the local mains voltage before you connect the appliance.
Only connect the appliance to an earthed wall socket.
Do not use the appliance if the plug, the cord or the appliance itself shows visible damage, or if the appliance has been dropped or is leaking.
Check the cord regularly for possible damage.
If the mains cord is damaged, it must be replaced by Philips, a service centre authorised by Philips or similarly qualified persons in order to avoid a hazard.
Never leave the appliance unattended when it is connected to the mains.
Never immerse the iron and the stand, if provided, in water.
- Keep the appliance out of the reach of children.
The soleplate of the iron can become extremely hot and may cause burns if touched.
Do not allow the cord to come into contact with the soleplate when it is hot.
- When you have finished ironing, when you clean the appliance, when you fill or empty the water tank and also when you leave the iron even for a short while: set the steam control to position O, put the iron on its heel and remove the mains plug from the wall socket.
Always place and use the iron and the stand, if provided, on a stable, level and horizontal surface.
- Do not put perfume, vinegar, starch, descaling agents, ironing aids or other chemicals in the water tank.
This appliance is intended for household use only.
Before first use
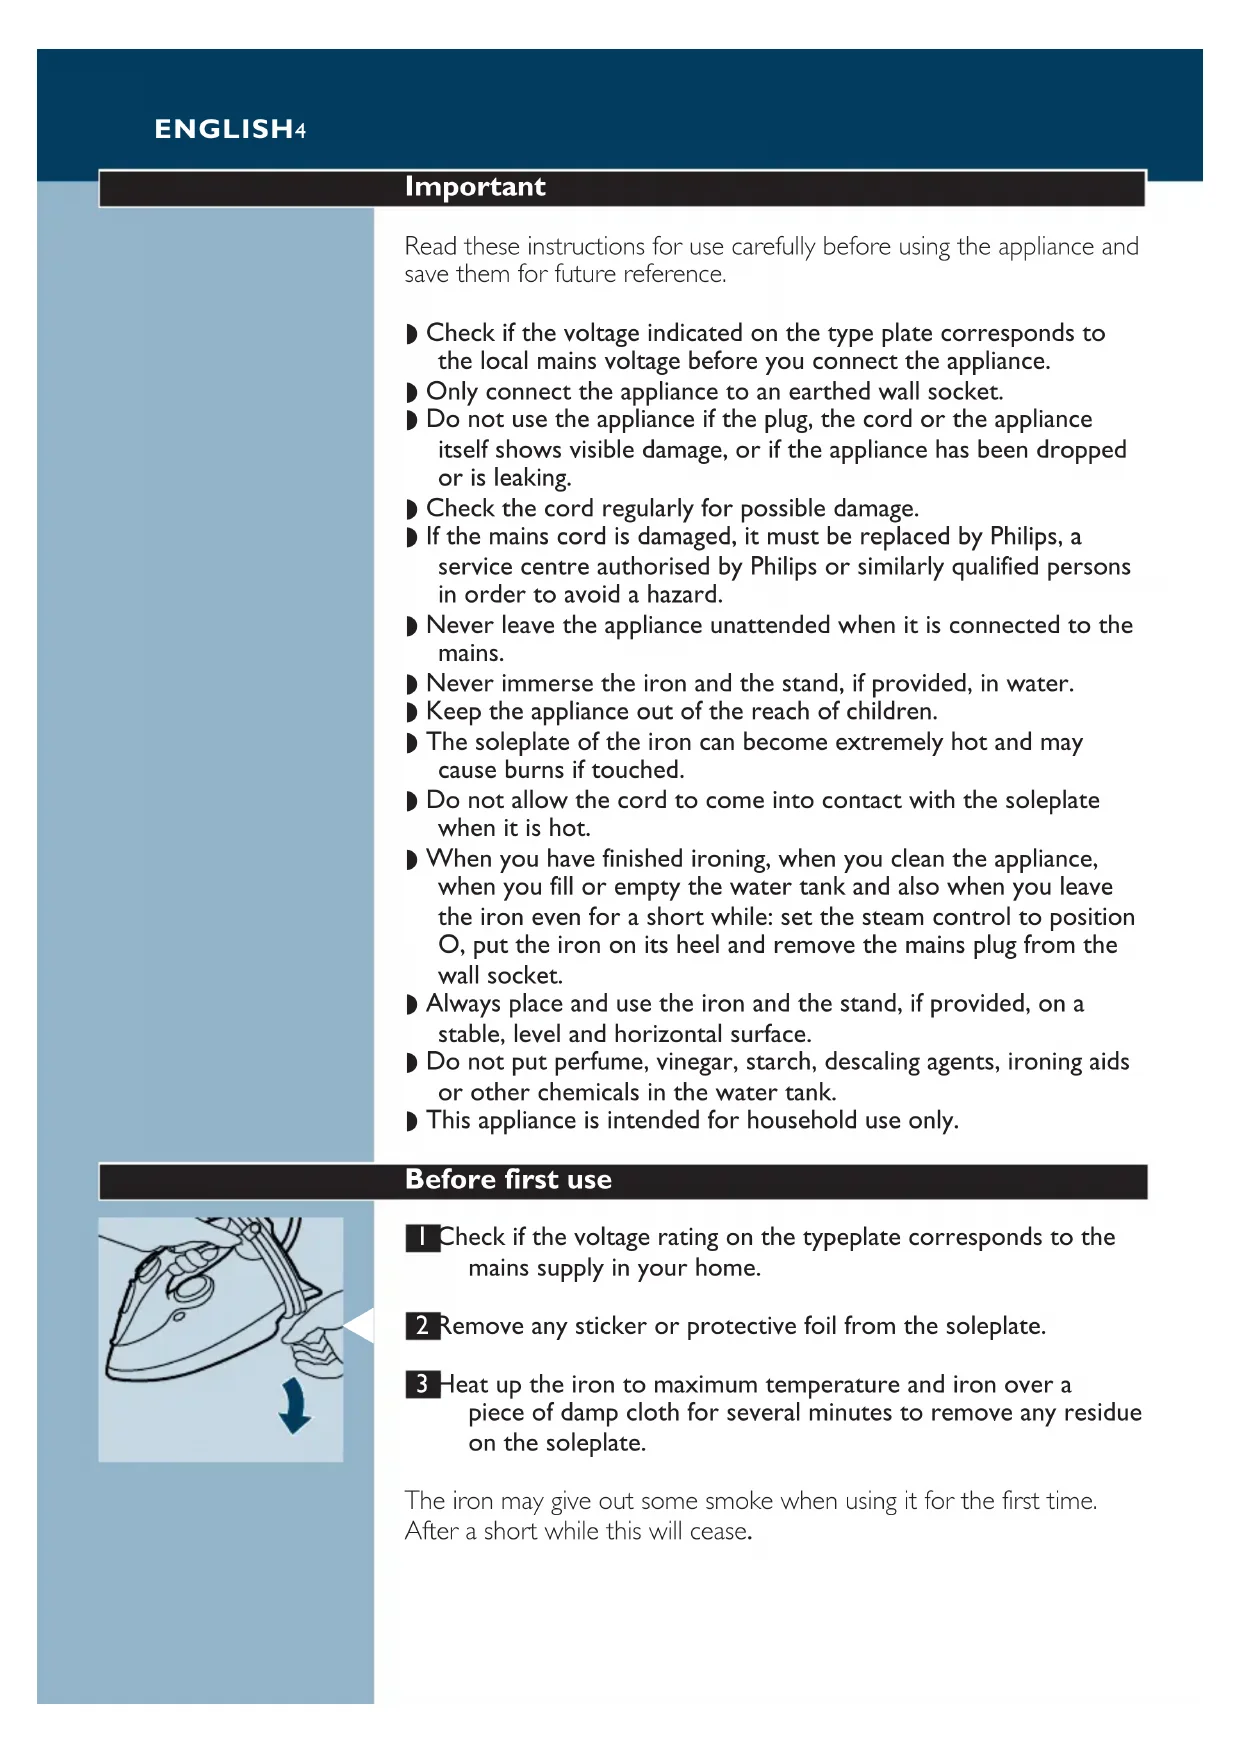
Check if the voltage rating on the typeplate corresponds to the mains supply in your home.
2 Remove any sticker or protective foil from the soleplate.
3 Heat up the iron to maximum temperature and iron over a piece of damp cloth for several minutes to remove any residue on the soleplate.
The iron may give out some smoke when using it for the first time.
After a short while this will cease.
Filling the water tank
Do not immerse the iron in water.
Remove the mains plug from the wall socket.
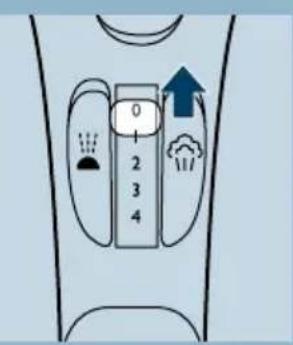
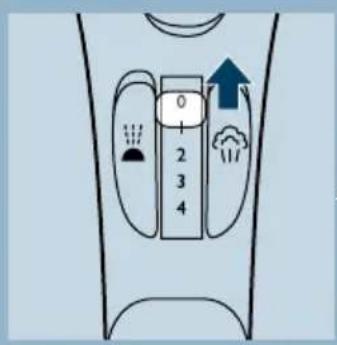
2 Set the steam control to position O ( = no steam).
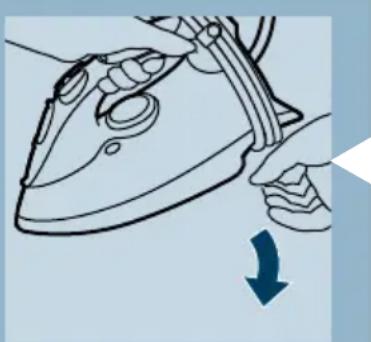
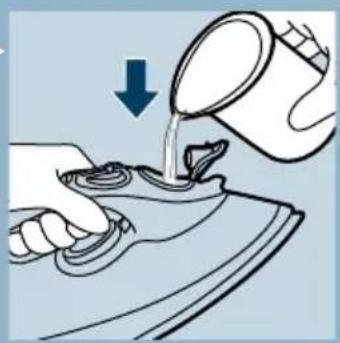
3 Open the filling cap.
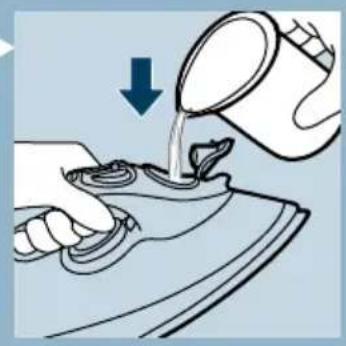
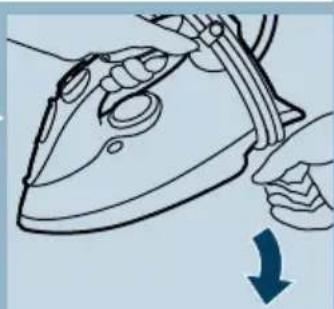
4 Hold the iron in a tilted position.
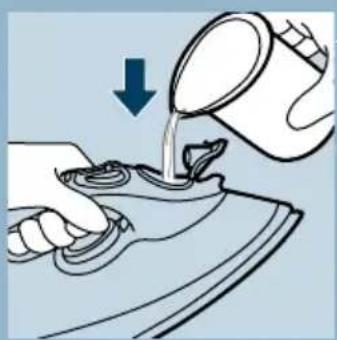
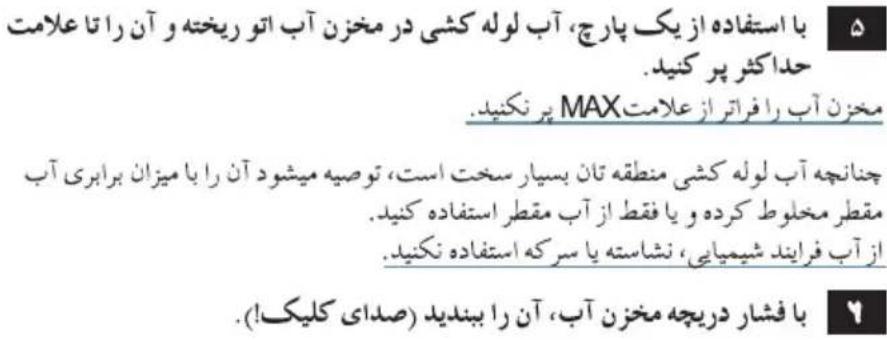
5 Pour tap water from the filling jug into the water tank up to the maximum level.
Do not fill the tank beyond the MAX indication.
If the tap water in your area is very hard, we advise you to mix it with an equal portion of distilled water, or to use distilled water only. Do not use vinegar, starch or chemically descaled water.
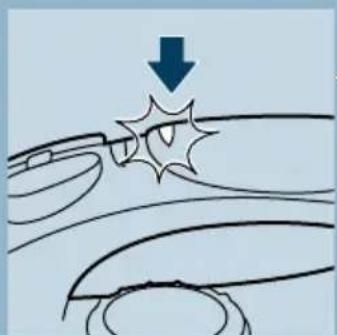
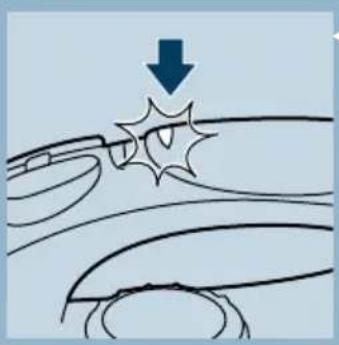
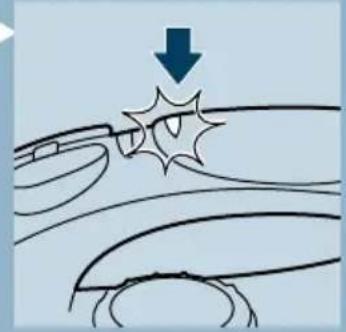
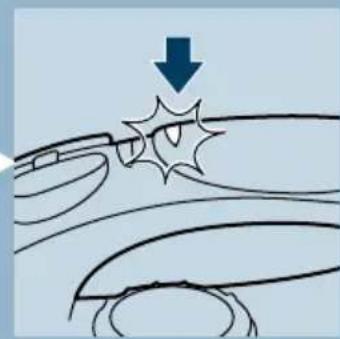
6 Press to close the filling cap (click!).
Setting the temperature

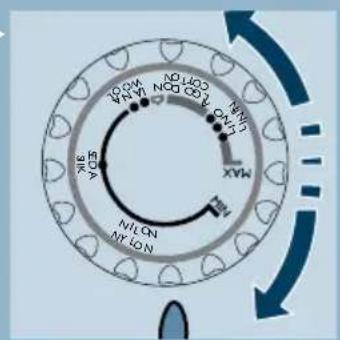
Put the iron on its heel.
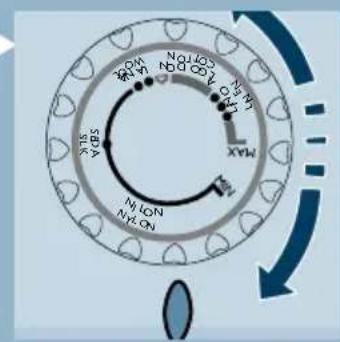
2 Set the temperature control to the required ironing temperature by turning it to the position of the temperature indicator.
-
Check the garment label for the required ironing temperature.
-
Synthetic fabrics (e.g. acrylic, viscose, polyamide, polyester)
-
●Silk
-
●Wool
-
-
- Cotton, linen
-
-
When you do not know what kind of fabric(s) the article is made of, try to iron on a spot which will be invisible when you wear it.
-
Silk, woolen and synthetic materials: iron the reverse side of the fabric to prevent shiny spots. To prevent stains, avoid using the spray function.
-
Start ironing the articles that require the lowest ironing temperature, such as those made of synthetic fibers.
3 Put the mains plug in an earthed wall socket.
4 When the amber temperature pilot light has first gone out, wait for a while before start ironing.
The amber pilot light will come on from time to time during ironing.
For Auto-shut-off versions (type GC3135 only)
If the Auto-shut-off is activated (red pilot light blinks), move the iron slightly to deactivate it (blinking stops).
Steam-ironing
Make sure that there is enough water in the water tank.
Set the temperature control to the recommended position. See section 'Setting the temperature'.
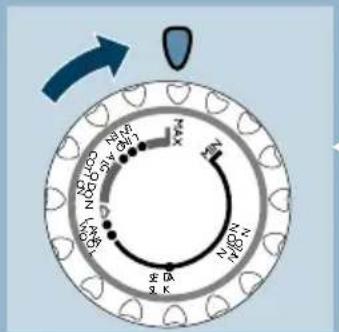
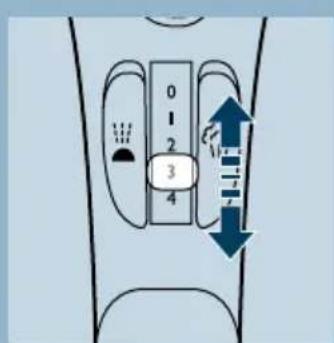
2 Set the steam control to the appropriate steam position.
- 1 - 2 for moderate steam (temperature settings ● ● to ● ● ●)
-
3 - 4 for maximum steam (temperature settings ●●●to MAX)
-
Steaming will start as soon as the set temperature has been reached.
If the selected ironing temperature is too low, water may drip from the soleplate. Types GC3135, GC3130, GC3126, GC3125, GC3120, GC3115 are equipped with a drip stop system (refer to 'Drip stop' further on).
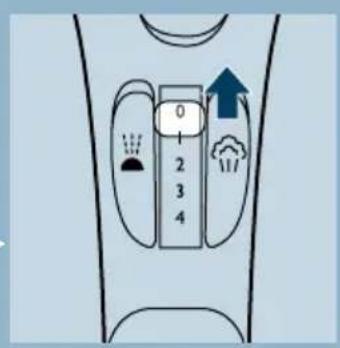
Ironing without steam
Set the steam control to position O (= no steam).
2 Set the temperature control to the recommended position. See section 'Setting the temperature'.
Other features
Spraying
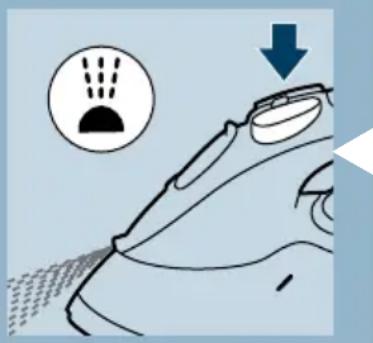
To remove stubborn creases at any temperature.
Make sure that there is enough water in the water tank.
Press the spray button a couple of times to moisten the laundry.
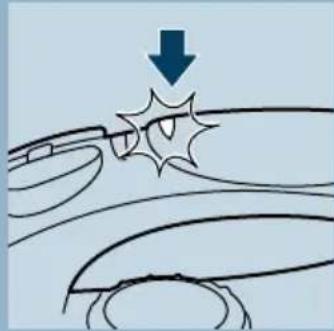
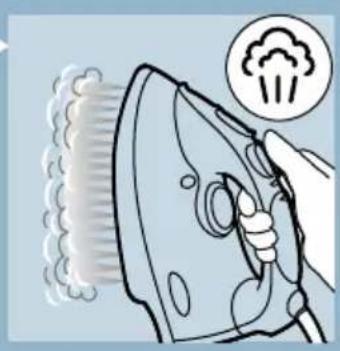
Shot of Steam
A powerful "shot" of steam helps remove stubborn creases. The Shot-of-Steam function can only be used at temperature settings between and MAX.
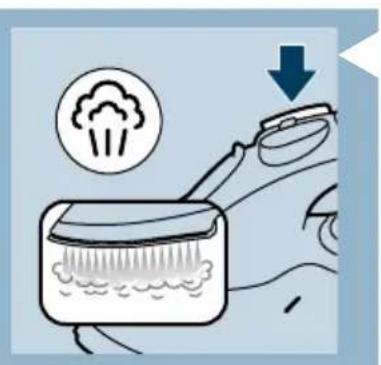
Press and release the Shot-of-Steam button.
Drip Stop (types GC3135, GC3130, GC3126, GC3125, GC3120, GC3115 only)
This iron features a "Drip Stop" steam shut-off facility: the iron automatically stops steaming at too low temperatures to prevent water from dripping out of the soleplate. When this happens you may hear a sound.
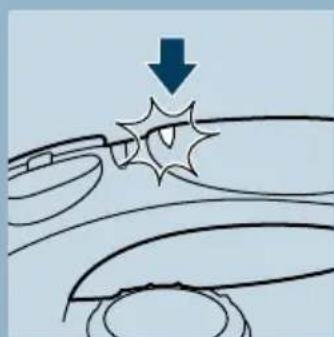
Vertical Shot of Steam (types GC3135, GC3130, GC3126, GC3125, GC3120, GC3117, GC3116, GC3115, GC3111, GC3110 only).
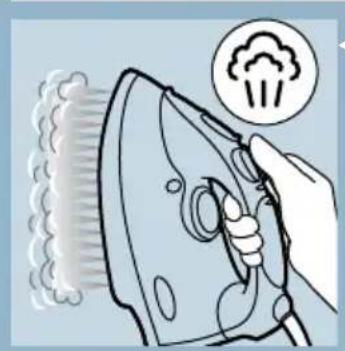
The Shot of Steam function can also be used when you hold the iron in vertical position.
Never direct the steam towards people.
Automatic Anti-Calc (types GC3135, GC3130, GC3126, GC3125, GC3120, GC3117, GC3116, only).
The built-in Automatic Anti-Calc system reduces deposit of scale and ensures a longer life of the iron.
Auto-shut-off (type GC3135 only)
An electronic safety device will automatically switch off the iron if it has not been moved for a while.
To indicate that the iron has been switched off, the red auto-off pilot light will start blinking.
To heat up the iron again:
-
Pick up the iron or move it slightly.
-
The red auto-off pilot light will go out. The amber temperature pilot light may come on, depending on the soleplate temperature.
- If the amber pilot light comes on after the iron is moved, wait for it to go out before start ironing.
- If the amber pilot light does not come on after the irom is moved, the iron is ready for use.
Cleaning and maintenance
Calc-Clean
This is a Calc-Cleaning function which removes scale and impurities. Use the Calc-Clean function once every two weeks. If the water in your area is very hard (when flakes coming out from the soleplate during ironing), the Calc-Clean function should be used more frequently.
Set the steam control to position O.
2 Fill the water tank to the maximum level. Do not use vinegar or other descaling agents.
3 Set the temperature control to MAX.
Put the plug in the wall socket.
5 Unplug the iron when the amber pilot light has gone out.
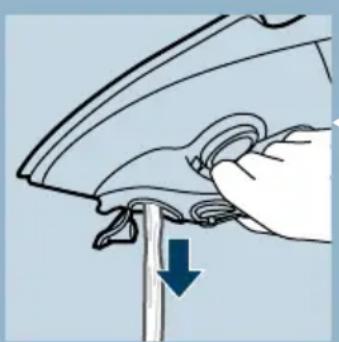
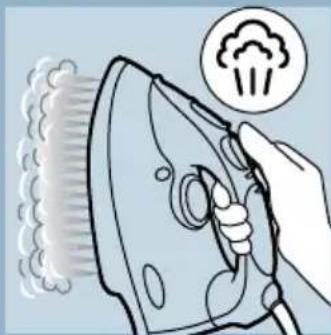
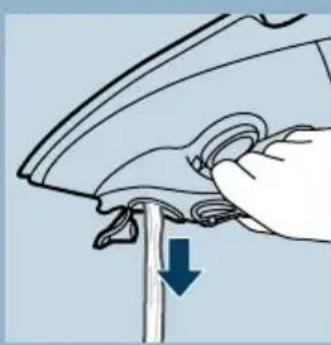
6 Hold the iron over the sink, press and hold the calc-clean button and gently shake the iron.
- Steam and boiling water will come out of the soleplate. Impurities and flakes (if any) will be flushed out.
7 Release the Calc-Clean button as soon as all the water in the tank has been used up.
Repeat the calc-cleaning process if the iron still contains a lot of impurities.
After calc-cleaning
- Plug in the iron to let the soleplate dry up.
- Unplug the iron when the amber pilot light has gone out.
- Move the hot iron gently over a piece of used cloth to remove any water stains that may have formed on the soleplate.
- Let the iron cool down before you store it.
After ironing
Remove the mains plug from the wall socket and let the iron cool down.
2 Wipe flakes and any other deposits off the soleplate with a damp cloth and a non-abrasive (liquid) cleaner.
Keep the soleplate smooth: avoid hard contact with metal objects.
3 Clean the upper part of the iron with a damp cloth.
4 Regularly rinse the water tank with water. Empty the water tank after cleaning.
Storage

Remove the mains plug from the wall socket and set the steam control to position 0.
2 Empty the water tank.
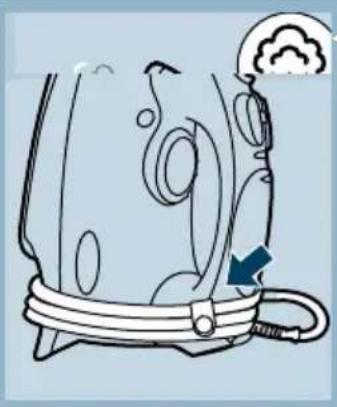
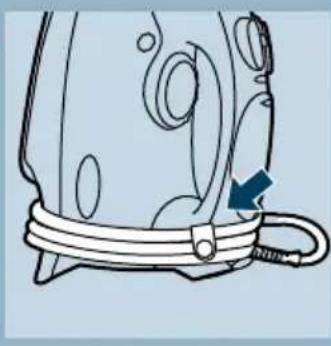
3 Let the iron cool down. Wind the mains cord around the cord storage facility and fix it with the cord clip.
4 Store the iron standing on its heel in a safe and dry place.
Environment
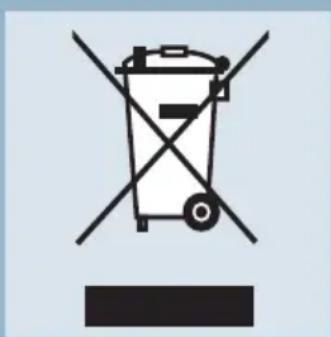
Do not throw the appliance away with the normal household waste at the end of its life, but hand it in at an official collection point for recycling. By doing this you will help to preserve the environment.
Guarantee & service
If you need information or if you have a problem, please visit the Philips Web site at www.philips.com or contact the Philips Customer Care Centre in your country (you will find its phone number in the worldwide guarantee leaflet). If there is no Customer Care Centre in your country, turn to your local Philips dealer or contact the Service Department of Philips Domestic Appliances and Personal Care BV.
Troubleshooting
This chapter summarizes the most common problems you could encounter with your iron. Please read the different sections for more details. If you are unable to solve the problem, please contact the nearest Philips Service Centre or one of its representatives. See the worldwide guarantee leaflet for telephone numbers of the Philips Helpdesk or visit our website at www.philipsonline.com.
| Problem | Possible cause(s) | Solution |
| The iron is plugged in but the soleplate is cold. | Connection problem. | Check the mains cord, the plug and the wall socket. |
| Temprature control set at MIN. | Set the iron to the appropriate temperature (see setting the temperature). | |
| No steam. | Not enough water in the water tank. | Fill the water tank (see Filling the water tank). |
| The steam control has been set to position O. | Set to steam position between 1-4 (see Steam ironing). | |
| The iron is not hot enough and/or Drip Stop is activated. | Set the temperature control to the steam area (●●to MAX). Put the iron on its heel and wait until the amber pilot light has gone out before you start ironing. | |
| No Shot of Steam or No Vertical Shot of Steam (GC3135, GC3130, GC3126, GC3125, GC3120, GC3117, GC3116 GC3115, GC3111, GC3110 only) | The (Vertical) Shot of Steam function has been used too often within a very short period. | Put the iron in horizontal position and wait for a while before using the (Vertical) Shot of Steam function again. |
| The iron is not hot enough. | Set the temperature control to the steam area (●●to MAX). Put the iron on its heel and wait until the amber pilot light has gone out before you start ironing. | |
| Water droplets on fabric. | The filling cap is not closed properly. | Press to close the filling cap tightly until you hear a click. |
| The iron is not hot enough. | Set the iron to the appropriate temperature (see Steam ironing). Types GC3117, GC3116, GC3111, GC3110, GC3106 do not use steam when using temperature lower than 2 dots (●●). | |
| Water drips from the soleplate after the iron has been stored or cooled down. | The iron is put in horizontal position with water still left in the water tank. | Empty the water tank before you store the iron. Set the steam control to position O and store the iron upright on its heel. |
| Flakes and impurities coming out from soleplate during ironing. | Hard water form flakes inside the soleplate. | Apply Calc-Clean a few times (see Calc-Clean). |
| Red pilot light blinks (type GC3135 only). | Auto-shut-off is activated. See "Auto-shut-off" section. | Shake the iron slightly to deactivate the Auto-shut-off, the lamp will stop blinking. |
Important
Anti-goutte (types GC3135, GC3130, GC3126, GC3125, GC3120, GC3115, uniqueness)
Repassage vertical (types GC3135, GC3130, GC3126, GC3125, GC3120, GC3117, GC3116, GC3115, GC3111, GC3110, uniquely).
J 1 J 1 J 1 J 1 J 1 J 1 J 1 J 1 J 1 J 1 J 1 J 1 J 1 J 1 J 1 J 1 J 1 J 1 J 1 J 1 J 1 J 1 J 1 J 1 J 1 J 1 J 1 J 1 J 1 J 1 J 1 J 1 J 1 J 1
Jg
E
#
.81sall yaiyaiyaiyaiyaiyaiyaiyaiyaiyaiyaiyaiyaiyaiyaiyaiyaiyaiyaiyaiyaiyaiyaiyaiyaiyaiyaiyaiyaiyaiyaiyaiyaiyaiyaiyaiyaiyaiyaiyaiyaiyaiyaiyaiyaiyaiyaiyaiyaiyaiyai
K
ab : 3l ≤ 1
1gJgJgJgJgJgJgJgJgJgJgJgJgJgJgJgJgJgJgJgJgJgJgJgJgJgJgJgJgJgJgJgJgJgJgJgJgJgJgJgJgJgJgJgJgJgJgJgJgJgJg
jg
(GC3135/3130/3126/3125/3120/3117/3116
Llaaal algll JlJgolal pI gio pl
sall jolb1racnogol sall jzlaa
(GC3135 jIb b)
aagaaalpdaanl aasnlaaiae 1g jgjgjj
.
gill 1y jglal y gai jraall Jalee
(j)
:81≤a|a|≥a|c
y_1( x) = 1x - 2x + 1 - 1x + 2 - ·s - 1x + 1 - 1x + 2 - 1x + 3 - ·s - 1x + 1 - 1x + 2 - ·s - 1x + 3 -
sJ. jaii jc s Jlogj1 gill jall jgall 6 bi
.8gall 8dLg Jra Jc Ilaic Jaa Jw gall aiey
1 1
SLL 1
aJgKd jgKd JgKd JgKd JgKd JgKd JgKd JgKd
Joo
AUTOMATIC ANTI CALC
Jaaal j 1
1j1. 11
Gc3135/3130/3126/3125/3120/3115
()L
L = ( x,y) . 若 l : y = - 12x + 3 l : y = - 12x + 4
aJyIgRjIgRjIgRjIg
()
G
中
100000000000000000000000000000000000000
L
14
1
aiee aee
●●
Max
s
aal 1
m = 311
11 11 11 11 11 11 11 11 11 11
(GC3135 j, j k + 2), (j k l l l l l l l l l l l l l l l l l l l l l l l l)
()()()()()()()()
#
()
13/14
aI11 a2g 1c jll p<ll c1i0 g () 1 1 1 1 1 1 1 1 1 1 1 1 1 1 1 1 1 1 1 1 1 1 1 1 1 1 1 1 1 1 1 1 1 1 1 1
aalall aagllgolll gog dlaIloc

all ij
令 = ( x1,y1) , = ( x2,y2)
blll jyLjyI I y
\
(20 ( , = ) O 1
aiee 1bc
Lgdyy
2
JzIyI yIyI yIyI yIyI yIyI yIyI yIyI yIyI yIyI yIyI yIyI yIyI yIyI yIyI yIyI yIyI yIyI yIyI yIyI yIyI yIyI yIyI yIyI yIyI yIyI yIyI
1 1
Max:
Jbdo Jlaoiuy buaa i jy wla liabio g cll lil 1j I y
()
。
J
LgS 1c sSall
JdI Jdx j 100000000000000000000000000000000000000000000
a
golilil gll lla jnrn no yllal aai jno s 1 (jssyll gll gll gllgllgllgllgllg
1511 1
i 1
yIa 1000
a 1111 1111 1111 1111 1111
1 2
aegnlll jio. 0jra jil jil cnil jill bll s
clll lloall
10 ≥ p ≤ 0
p: baiol jiei1 puiw Jue Jiau W u Ljwr o
J 1
Jlll lI jI IJI 1e I I JI I JI I JI JI
J 1
a
Jg j 11 11 11 11 11 11 11 11 11
a111 111 111 111
1
1
a
1
Lall jI JgJgLo Lgjjj 11, gJgSall
J1ab Jglio jIgJgJg
aJg jn JnJnJnJnJnJnJnJnJnJnJnJnJnJnJnJnJnJnJnJnJnJnJnJnJnJnJnJnJnJnJnJnJnJnJnJnJnJn
Lgjmo
aLw jgS;Loic gSall scl aayy
jz jz jz jz jz jz jz jz jz jz jz jz jz jz jz jz jz jz jz jz jz jz jz jz jz jz jz jz jz jz
JLLIJIILIJIIOI 10000000000000000000000000000000000000000
1 1
bi^l( 1 ai)
L 1 Lg j 10
2hwoog
a 1000
L
jiaai jiaiui jiaipao
JgX1 JgX2 X1 Jg
e
1
.
m = 311
a_i a a_i 的最小值为 k .
1000000000000000000000000000000
m = 311
1.5 1
m = 311
05 4.00135 pww waaee Caaee 2,201,91 3y 8

1230000000000000000000000000000
m = 311
[ \Leftrightarrow \frac{a - b}{b - c} = \frac{c - d}{d - e}]
1 1 1 1 1 1 1 1 1 1 1 1 1 1 1 1 1 1 1 1 1 1 1
![PHILIPS Elance GC3106 - [ \Leftrightarrow \frac{a - b}{b - c} = \frac{c - d}{d - e}] - 1](/content/2026/02/367753/images/c87e948b4baa0a494321a7b17639321177a09b3565b9b94458eeeac2a98612c6.jpg)
Claa
. liSua Jia 500 Sua jai, jia 1
S
120ai 2j
:y124000005p5c
a
()
212y1sfo 25 slo24
1 1
155 5 5 5 5 5 5 5 5 5 5 5 5 5 5 5 5 5 5 5 5 5 5
102510251g12gjyjC5j 1
AUTOMATIC ANTI CALC
| ### | |
| ### | |
| ### | |
| ### | |
| ### |
[\log \rho = \frac{b - a}{a}]
1
1 1
15 15
1
1
025 5 5 5 5 5 5 5 5 5 5 5 5 5 5 5 5 5 5 5 5 5 5 5
(GC3135Juaa)
()()()()
1
100 100
1
1.25 1000
#
Lg aui j Jai as
1
i
1
1.2j0s0g j0s0g s0jwsjwsj0
gai gai gai gai yai jao yai jao
Lds Jolal waii gai d gai
100000000000000000000000000000
0dawl
1
1
1 1
20 10 10 10 10 10 10 10 10
U
12 + 13 + ·s + 1n + 1 < 110 + 111 + ·s + 1n + 1 美国
1
1
S ACD = S COD + S BDO - S CDA
S OBC = S ABC + S_ BOC