
Thermo Lineo - Coffee machine WMF - Free user manual and instructions
Find the device manual for free Thermo Lineo WMF in PDF.
| Product type | Filter coffee machine |
| Brand | WMF |
| Model | Thermo Lineo |
| Mains voltage | 220-240 V ~ 50/60 Hz |
| Power | 960 W (glass carafe) / 900 W (insulated carafe) |
| Protection class | I |
| Maximum capacity | 10 cups (125 ml/cup) for glass model; 8 cups for insulated model |
| Filter type | Paper filter size 1×4 |
| Carafe material | Glass (standard model) or double-walled stainless steel (insulated model) |
| Functions | Automatic start, aroma function, pre-percolation (insulated model), keep warm (glass model), automatic shut-off |
| Anti-drip system | Yes, anti-drip valve |
| Water tank | Removable, capacity up to 10 cups |
| Display | LCD screen with clock and indicators |
| Keep warm function (glass model) | 20 or 40 minutes adjustable |
| Descaling indicator | Yes, CALC indicator |
| Water hardness setting | 4 levels (soft to very hard) |
| Dimensions (W×D×H) | Approx. 25 × 30 × 35 cm |
| Weight | Approx. 2.5 kg |
| Color | Stainless steel/Black (estimate) |
| Cleaning | Wipe with a damp cloth; do not immerse; carafe and filter washable under running water |
| Recommended descaling | Every 4 to 6 weeks with durgol® universal |
| Safety | Automatic shut-off (insulated model), overheating protection, non-detachable power cord |
| Warranty | 2 years (estimate) |
Frequently Asked Questions - Thermo Lineo WMF
User questions about Thermo Lineo WMF
0 question about this device. Answer the ones you know or ask your own.
Ask a new question about this device
Download the instructions for your Coffee machine in PDF format for free! Find your manual Thermo Lineo - WMF and take your electronic device back in hand. On this page are published all the documents necessary for the use of your device. Thermo Lineo by WMF.
USER MANUAL Thermo Lineo WMF
Important safety instructions
-
These devices can be used by children older than eight years old as well as by persons with limited physical, sensory or mental capabilities, persons lacking experience and/or lacking knowledge if they are supervised or have received instructions regarding how the device is to be used safely and have understood the resulting risks. Children must not play with the device. Children must not perform the cleaning and user maintenance, unless they are older than eight years old and are supervised.
-
Keep the device and its cable out of the reach of children under eight years old.
-
Do not immerse the device in water.
-
If the appliance's connection cable is damaged then it must be replaced by the manufacturer's central customer service department or by a similarly qualified person. Improper repairs may constitute a serious threat for users.
-
This device is meant to be used in the household and for similar applications, such as:
-
in kitchens for employees in shops, offices and other commercial areas;
on agricultural property, - from customers in hotels, motels and other residential facilities;
- in bed and breakfasts establishments;
The appliance is not designed for sole commercial use.
Prior to use
Congratulations on your purchase of your coffee machine.
The coffee machine may only be used for the intended purpose according to these operating instructions. Therefore, please read the operating instructions carefully prior to first use. It provides information regarding use, cleaning and maintenance of the device. We do not assume any liability for any damage if the instructions are not observed. Keep the operating instructions well preserved and pass them on to the subsequent user together with the device. Also note the warranty information at the end of the operating instructions.
No liability is assumed for glass breakage.
Observe the safety instructions during use.
Technical data
Rated voltage: 220 - 240V 50 / 60Hz
Power consumption: 960 W (version with glass pot)
Power consumption: 900 W (version with vacuum jug)
Protection class: I
Additional safety instructions
- Only connect the device to properly installed earthed sockets. The wire and plug must be dry.
- Do not pull the connecting cable over sharp edges or clamp it. Do not let it hang down and protect it from heat and oil.
- Only use extension cords that are in perfect condition.
- Never disconnect the mains plug from the socket by the cord or with wet hands.
- Do not carry the device by the cord.
- Do not place the coffee machine on hot surfaces, such as hot plates or similar, or near open flames. The housing could melt.
-
Do not place the device on water-sensitive surfaces. Water spray may damage them.
-
Do not switch on the device without water. Fill the fresh water tank with cold water only to the maximum possible number of cups at the most.
-
Do not put any water in the device if it is switched on or still hot. Prior to filling, switch the coffee machine off and allow to cool for five minutes.
- Caution, the device is hot. Risk of scalding from escaping steam. Never swing the filter out or open the cap during operation.
If the device will not be used for some time, disconnect the mains plug. - Stop using the appliance and/or connect it from the mains plug immediately if:
-
The appliance or mains cable is damaged
-
There is any suspicion of a fault after dropping the appliance or similar. In such cases, send the appliance to be repaired.
-
Only operate the device under supervision.
- Descale the device regularly.
The vacuum jug is not suitable for the microwave. - The glass pot is not suitable for the microwave.
- No liability is assumed for damages in cases of misuse, improper operation, nonobservance of the descaling instructions or unprofessional repairs. Claims under warranty are likewise excluded in such cases.
Start-up
Prior to first use and after the device was not used for a long period of time, run a cycle through with fresh water and no ground coffee. To do so, fill the tank to the 10-cup mark (version with glass pot) or to the 8-cup mark (version with vacuum jug), as otherwise the pot can overflow.
Setting the current time
After connecting the mains plug to a socket, the display shows the time and Set. Set the current time by pressing the h and min buttons. To advance the time quickly, you can hold down the h or min buttons. Confirm by pressing the Set button.
As long as you do not confirm the time by pressing Set, the set time will blink.
Note: You can also brew coffee immediately after connecting the mains plug to a socket by pressing the start / stop button briefly.
Note: After a power failure or the mains plug was pulled out, the time must be re-set.
You can always adjust the set time.
Press the Set button and hold this down for approximately 4 seconds until the time blinks.
Now set the desired time by pressing the h and min buttons and confirm this by pressing the Set button.
Setting the automatic switch-on time
The device's switch-on system starts the brewing process automatically at the desired time. The switch-on time can be set for up to 24 hours in advance.
Briefly press the Set button once. The display will show you Set and Set the switch-on time by pressing the h and min buttons and confirm the switch-on time by pressing the Set button.
As long as you do not confirm the switch-on time by pressing Set, the set switch-on time will blink. After approximately five seconds, the display switches back to the time without saving the switch-on time.
Note: After a power failure or the mains plug was pulled out, the switch-on time must be re-set.
Information about the stainless steel pot (version with vacuum jug only)
The pot is designed as a serving pot and best keeps coffee warm when filled to the maximum. The keep-warm time can be drastically reduced if only filled partially or with residual amounts. It is best if the pot is rinsed with hot water before preparation.
For technical reasons, the seal made by the drip-through lid is not 100 percent sealed so that it can still easily be opened after the coffee has cooled down. To close, lightly tighten the lid. Only use the filled pot in an upright position.
To open the pot, lightly turn the lid in a counter-clockwise direction. Ensure that the pour button is located over the handle once again after closing the lid.
The double-walled, stainless steel container is absolutely unbreakable. Nevertheless, it should be protected from mechanical stresses.
Rinse the pot regularly. If iron particles from water set on the stainless steel surface, it may lead to localised corrosion at that point. Therefore, remove these deposits immediately with a stainless steel cleanser.
Coffee preparation
You can remove the water tank for easy filling. Open the water tank by pressing on the lid. Only pour cold water into the tank. The water level display applies to the fresh water quantity that is needed to brew the desired number of 125ml cups of coffee.
Swing out the swing-out filter to fill with ground coffee. Place a 1 × 4 paper filter in the filter, but fold the edge before doing so. The paper filter should not extend over the edge of the filter, so it is therefore to be lightly pressed with your hand.
Fill with the required amount of ground coffee. Depending on personal test, figure approximately 5-7 g medium-fine ground coffee per person. If the coffee is ground too finely, the filter may overflow.
Close the swing-out filter until you hear an audible click.
Aroma function
You can activate the aroma function if you want to prepare a stronger, more aromatic coffee. It is particularly recommended for preparing small quantities. To do so, press the aroma button ② just before you start the brewing process with the start L stop button or before you activate the automatic switch-on system.
The symbol will be shown in the display until the preparation is complete.
Note: If you wait longer than approximately 5 seconds to start the brewing process or activate the automatic switch-on system, the aroma function is deactivated again.
Please note that the preparation time takes slightly longer.
Pre-brew function
(version with vacuum jug only)
In order to achieve a particularly intense flavour, you can activate the pre-brew function. Only a small amount of water is advanced at first for the pre-brew.
After a brief pause, during which the coffee powder can swell, the brewing continues. Press the button just before you start the brewing process with the start/stop button or before you activate the automatic switch-on system.
The _ symbol will be shown in the display until the preparation is complete.
Note: If you wait longer than approximately 5 seconds to start the brewing process or activate the automatic switch-on system, the pre-brew function is deactivated again.
Please note that the preparation time takes slightly longer.
Automatic switch-on
If the preparation should start automatically at a programmed switch-on time, briefly press the button and will appear in the display.
The illuminated ring of the start / stop button illuminates with reduced brightness.
The preparation begins automatically at the programmed switch-on time and the illuminated ring of the start / stop button illuminates with full brightness.
Note: As soon as the automatic switch-on time is confirmed, no other settings can be made. In order to make changes, you must press the button briefly to deactivate the automatic switch-on.
You can cancel the preparation at any time by pressing the start / stop button.
Immediate start
Press the start / stop button briefly to prepare coffee immediately. The illuminated ring illuminates with full brightness and the preparation begins.
You can cancel the preparation at any time by pressing the start / stop button.
Wait a few minutes until all of the coffee has run into the pot. Once the pot is removed, a drip-stop valve prevents coffee from dripping out.
Automatic shutoff
(version with vacuum jug only)
After being powered on, an automatic shutoff ensures that the device does not overheat. The device switches off only once all of the water has drained completely. It is possible to shut off the device earlier by pressing the start / stop button. This could be necessary if you accidentally switch on the unit without water. Before filling the hot device with water, it is necessary to wait a few minutes to allow the coffee machine to cool down.
Keep-warm function
(version with glass pot only)
Your device is equipped with a keep-warm function to keep the finish brewed coffee at serving temperature. The keep-warm time is set to 20 minutes by default. 山 appears in the display during the brewing process.
Before the brewing process starts, you can increase the keep-warm time to 40 minutes by repeatedly pressing the button or can deactivate the function by setting it to 0 minutes.
The selected keep-warm time is confirmed by pressing the button or the start / stop button.
Note: If you wait longer than approximately 5 seconds to confirm, it will return to the 20 minute default.
Note: The changed keep-warm time only applies for that brewing process.
Allow the device to cool for 5 minutes before preparing more coffee.
Scaling indicator
The automatic scaling indicator determines the time for the due descaling. Depending on the coffee consumption and the set water hardness, you will be prompted to descale after 4 to 6 weeks by the flashing CALC display during brewing.
After another approximately 50 cups of coffee, CALC appears permanently in the display and no more coffee can be brewed. A descaling must now take place.
Setting the water hardness
Your appliance has an automatic scaling display. To protect against too much lime scale, the appliance is pre-configured
for very hard water. Ask your local waterworks or local authorities about the water hardness of your tap water. Change the setting when the water hardness is less than 21^ . You will not be asked to descale as often as before.
To do so, hold the Set button approximately 7 seconds until Set CALC appears in the display. The CALC display and the current set degree of hardness, e.g. H4, now flash alternately. As long as the water hardness is flashing in the display, it can be changed to water hardness 1, 2, 3 or 4 by pressing the button.
Confirm the setting by pressing the Set button.
| Hardness range Hardness |
| 1 soft 0 - 7° dH |
| 2 medium >7 - 14° dH |
| 3 hard >14 - 21° dH |
| 4 very hard >21° dH |
1^ corresponds to approximately 0.18 mmol/l Ca and Mg ions
Dscaling
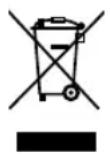
Limescale deposits lead to losses of energy and impair the service life of the device. We recommend using durgol® universal. It is highly effective and non-abrasive without additional reaction time.
You can find this where the device was purchased, in select speciality stores or you can order it directly from wmf consumer electric.
Insert paper filter and place the pot in the machine. Place one dose of (125 ml)
durgol® universal into the water tank and fill with tap water to the 10-cup mark (version with glass pot) or to the 8-cup mark (version with vacuum jug).
To start the descending, press the button and hold this down for approximately 4 seconds. CALC appears in the display, the descending program starts automatically and the illuminated ring for the start / stop button illuminates. The descending program ends automatically after approximately 40 minutes, the illuminated ring of the start / stop button turns off and the display shows the time again.
Note: The device switches on and off several times during the descaling process.
Important: Afterwards, fill the tank to the 10-cup mark (version with glass pot) or to the 8-cup mark (version with vacuum jug) with fresh tap water to rinse and run the cycle once through.
Using vinegar or vinegar concentrate could damage materials in the appliance.
When using descalers with citric acid bases, deposits could form during descending that seal the limescale layer or clog the lines in the device. In addition, descending with citric acids runs too slowly. A complete descending process can therefore not be guaranteed.
Attention: there is no claim under warranty for damages caused by not observing the descending instructions.
Cleaning
Unplug the mains plug and allow the appliance to cool down.
Do not immerse the device in water, but rather clean the outside with a damp cloth
with a little washing-up fluid and then wipe away.
Do not use any sharp and abrasive cleaning agents.
The filter, glass pot and vacuum jug can be cleaned under flowing water.
For UK use only
-
This product is supplied with a 13 A plug conforming to BS 1363 fitted to the mains lead. If the plug is unsuitable for your socket outlets or needs to be replaced, please note the following. If the plug is a non-rewireable one, cut it from the mains lead and immediately dispose of it. Never insert it into a socket outlet as there is a very great risk of an electric shock.
-
The replacement of the plug at the mains lead has to be done according to the following instructions:
Warning - This appliance must be earthed
Important: The wires in this mains lead are coloured in accordance with the following code:
green/yellow Earth
blue Neutral
brown Live
As the colours of the wires in the mains lead of this appliance may not correspond with the coloured markings identifying the terminals in your plug, proceed as follows:
the wire which is coloured green and yellow must be connected to the terminal which is marked with the letter E or by the earth symbol 12 , or coloured green or green and yellow,
-
the wire which is coloured blue must be connected to the terminal which is marked the letter N or coloured black,
-
the wire which is coloured brown must be connected to the terminal which is marked with the letter L or coloured red.
-
If a 13 A (BS 1363) plug is used it must be fitted with a 13 A fuse conforming to BS 1362 and be ASTA approved. If any other type of plug is used, the appliance must be protected by a 15 A fuse either in the plug or adapter or at the distribution board.
If in doubt - consult a qualified electrician.
- Never use the plug without closing the fuse cover.

The appliance complies with European directives 2006/95/EC, 2004/108/EC and 2009/125/EC.
At the end of its life, this product must not be disposed of in normal household waste but must instead be delivered to a collection point for recycling electric and electronic appliances.
The materials are recyclable in accordance with their labelling. The reuse, recycling and or other use of old appliances makes an important contribution to protecting our environment.
Please ask your local administration for the appropriate disposal point.
Subject to alterations
Universal rapid descaler durgol® universal
durgol® universal rapidly and easily frees all household items from limescale. Its formula stands for efficient and simultaneously non-abrasive, food-safe and environmentally friendly descaling.
durgol universal is available in select speciality stores or at wmf consumer electric in a 500 ml bottle.
Programming at tandingstider
Apparatet starter brygningen pa det onskede klokkeslaet. Taendingstiden kan forprogrammes op til 24 timer i forvejen.

- Important safety instructions
- Prior to use
- Technical data
- Additional safety instructions
- Start-up
- Setting the current time
- Setting the automatic switch-on time
- Information about the stainless steel pot (version with vacuum jug only)
- Coffee preparation
- Aroma function
- Pre-brew function
- (version with vacuum jug only)
- Automatic switch-on
- Immediate start
- Automatic shutoff
- Keep-warm function
- (version with glass pot only)
- Scaling indicator
- Setting the water hardness
- Dscaling
- Cleaning
- For UK use only
- Warning - This appliance must be earthed
- Universal rapid descaler durgol® universal
- Programming at tandingstider
Brand : WMF
Model : Thermo Lineo
Category : Coffee machine