
Microbar AD - Coffee machine NUOVA SIMONELLI - Free user manual and instructions
Find the device manual for free Microbar AD NUOVA SIMONELLI in PDF.
| Product Type | Automatic coffee machine with built-in grinder, microprocessor-controlled |
| Brand | Nuova Simonelli |
| Model | Microbar AD |
| Power supply | 230 V - 50 Hz (according to the rating plate on the back of the machine) |
| Power | Not specified in the manual, check on the plate |
| Dimensions (approx.) | Not specified in the manual, professional countertop machine |
| Weight (approx.) | Not specified, probably heavy (>30 kg) |
| Beverage types | Espresso, ristretto, lungo, café crème, café au lait, cappuccino, big cappuccino, milk foam, hot milk, hot water, steam, decaf coffee (powder), coffee with second grinder (optional) |
| Bean hopper | Two compartments: left and right (depending on version) |
| Grinders | One or two built-in coffee grinders with grind adjustment (3 mm hex screw) |
| Water supply | Tank version or direct connection to water supply (3/4 inch) |
| Display | LCD with display of messages and time |
| Keypad | 6 programmable buttons + Hot water and Steam buttons |
| Programming | Doses, grinding time, pre-infusion, tamping, language, ON/OFF timer, energy saving, alarms, etc. |
| Boiler capacity | Not specified, but coffee temperature adjustable up to 105 °C and steam up to 130 °C |
| Safety system | Pump stop after 1 min 30 s of continuous operation, mandatory omnipolar circuit breaker, automatic stop in case of empty tank or full coffee grounds drawer |
| Maintenance and cleaning | Daily cleaning of the group with detergent tablet, cleaning of the foam generator, drip tray, grid, water tank, steam wand, ground coffee conveyor; programmed descaling cycle |
| Spare parts and repairability | Use only original parts, repair by qualified technician, stepper motor, encoder, hydraulic components |
| Standards | Compliant with EEC directives 89/392, 89/336, 73/23, 89/109 and amendments |
Frequently Asked Questions - Microbar AD NUOVA SIMONELLI
User questions about Microbar AD NUOVA SIMONELLI
0 question about this device. Answer the ones you know or ask your own.
Ask a new question about this device
Download the instructions for your Coffee machine in PDF format for free! Find your manual Microbar AD - NUOVA SIMONELLI and take your electronic device back in hand. On this page are published all the documents necessary for the use of your device. Microbar AD by NUOVA SIMONELLI.
USER MANUAL Microbar AD NUOVA SIMONELLI
EC DECLARATION OF CONFORMITY


nuova simonelli
espresso coffee machines
Via M. D'Antegiano, 6 - 62031 Belforte del Chienti (MC)
declare under our responsibility that the product:
MACCHINE PER CAFFE' ESPRESSO
MODELLO: MICROBAR
ESPRESSO COFFEE MACHINES
MODELS:MICROBAR
to which this declaration relates, following the provisions of the Directives:
D.P.R.N.777-23/8/82
DIR.CEE N.30/778
EN60335-11994+A11+A12+A13+A14+A15
EN 60335-2-15; 1996 +A1; TRD 801/08.96
EN 55014:1987 A:1990; EN 55011
following the provisions of the Directives
L'Aministrale Delegation
(Ottavi Nando)
Complimenti,
upon the wise choice you have made by purchasing the MICROBAR model.
In fact, you are now the owner of not just a simple coffee dispenser, but a true espresso coffee-making machine which is fully automatic and completely controlled by a microprocessor. This means absolute reliability and simple to use.
We are certain that our MICROBAR model will increase your confidence in Nuova Simonelli and that you will undoubtedly recommend others to purchase this coffee-making machine, since the MICROBAR model has been chosen to increase the profitability of the coffee shop, thus fully optimising running costs.
This machine has been manufactured in compliance with the EEC directives 89/392, 89/336, 73/23, 89/109 and subsequent modifications.
With best wishes
- CLEANING AND MAINTENANCE 67
9.1 CLEANING THE OUTSIDE OF THE MACHINE 67
9.2 CLEANING THE DELIVERY UNIT AND THE MILK FOAMER 67
9.3 REINSTATING AN INTERRUPTED WASHING CYCLE 68
9.4 COFFEE HOLDER AND COFFEE DELIVERY UNIT CLEANING 68
9.5 CLEANING THE STEAM NOZZLE 69
9.6 CLEANING THE DROP COLLECTING TRAY GRID 69
9.7 CLEANING THE WATER COLLECTING TRAY 69
9.8 CLEANING THE WATER TANK 69
9.9 CLEANING THE GASKET 70
9.10 CLEANING THE MILK FOAMER 70
10. STANDARD SETTING TABLE....71
11. MACHINE FUNCTIONS
MESSAGE 72
12. MACHINE BLOCK ALARM MESSAGES 74
ELETTRICAL SYSTEM 77
1.DESCRIPTION
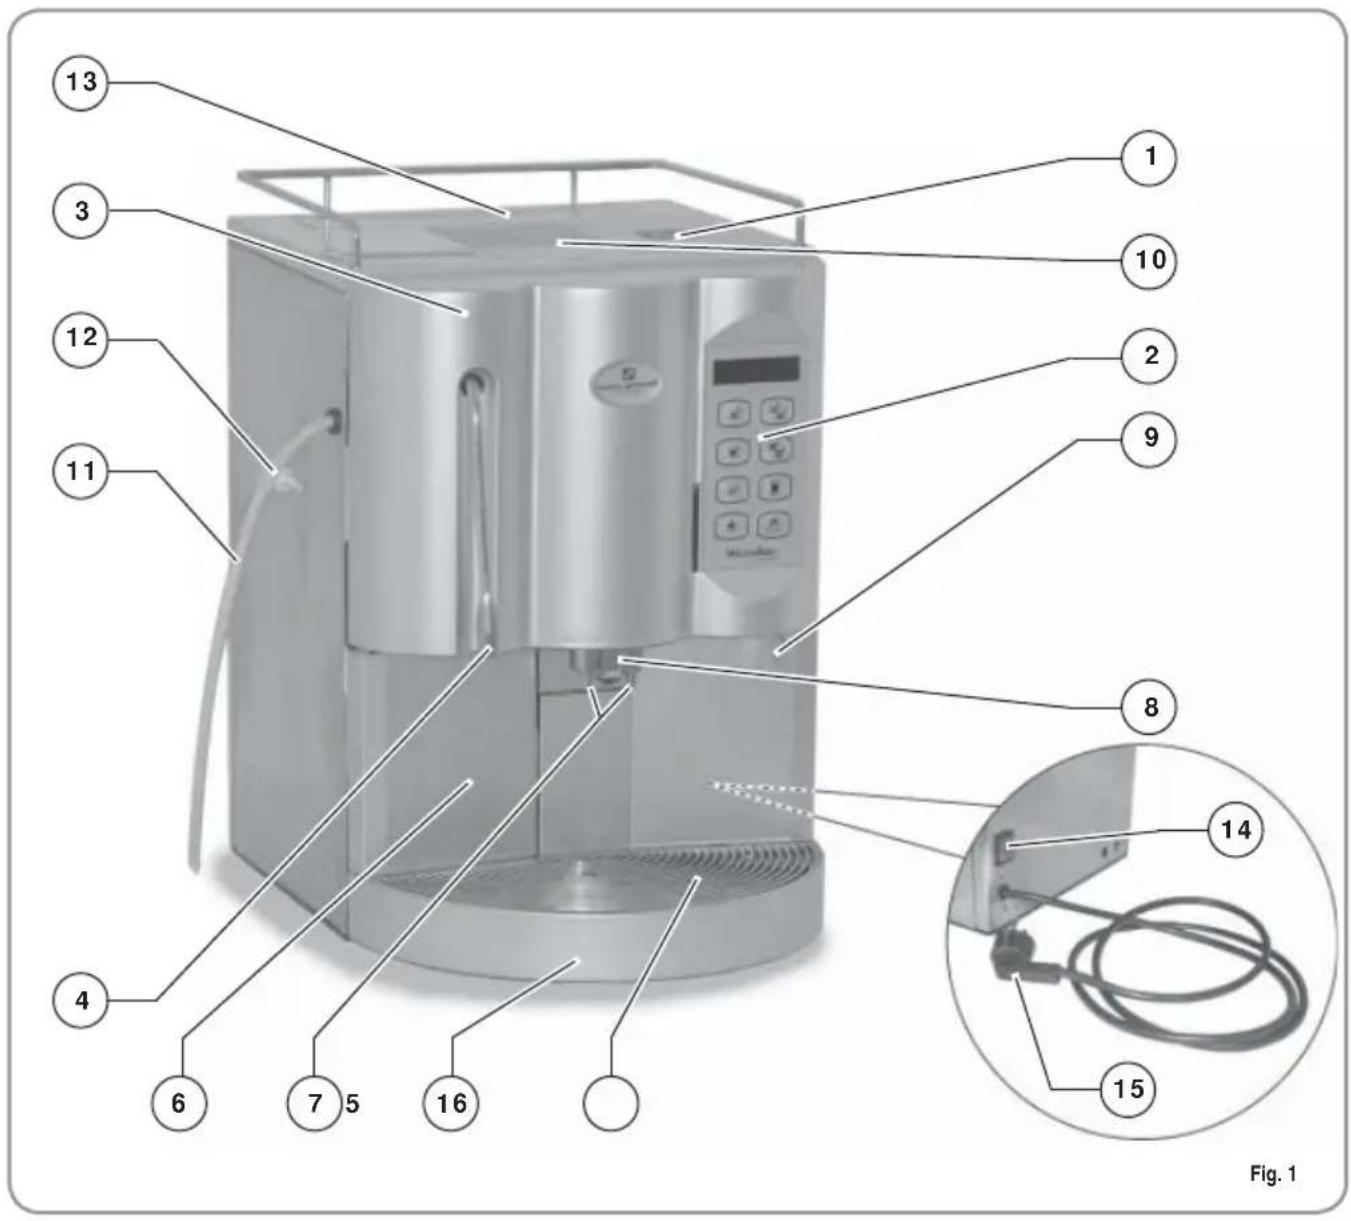
LEGENDA
1 Coffee bean holder cap
2 Control panel
3 Front door
4 Steam pipe / Hot water pipe
5 Drop collecting tray grid
6 Coffee grounds drawer
7 Coffee nozzles
8 Milk/Cappuccino nozzle
9 Control panel hatch opening / locking key
10 Ground coffee conveyor hatch
11 Milk suction tube
12 Milk flow adjusting tap
13 Water tank opening
14 Main switch (ON / OFF)
15 Mains connecting plug
16 Water collecting tray
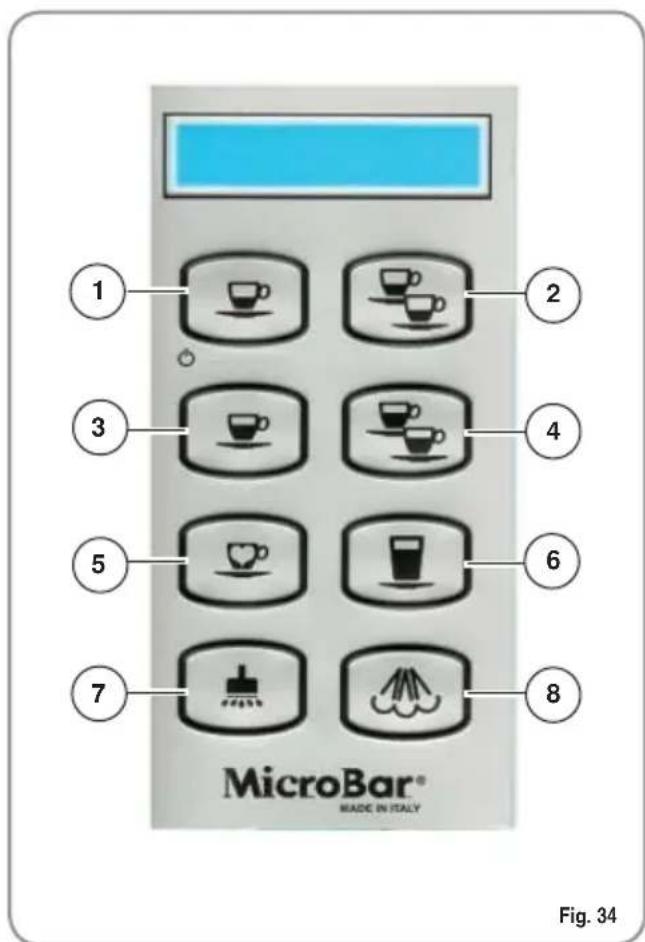
1.1 KEYBOARD DESCRIPTION (Standard configuration)
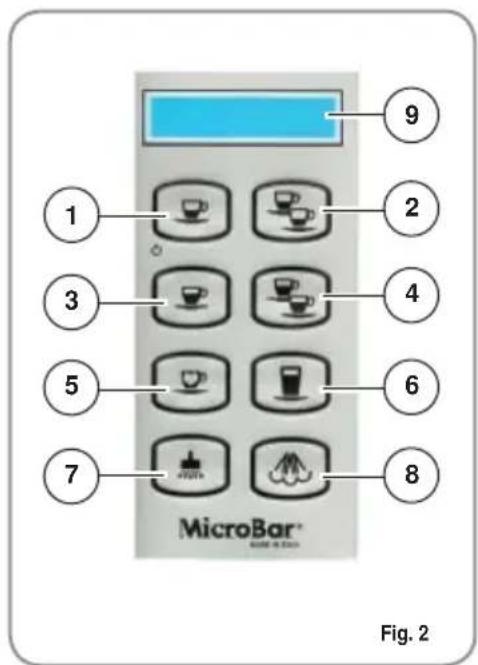
LEGENDA
1 1 Espresso key
2 2 Espressos key
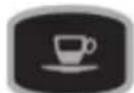
3 1 Coffee key
4 2 Coffees key
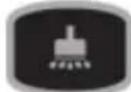
5 Second Grinding, Decaffeinated, Clean cycle key
6 Caffelatte key
7 Hot water key
8 Steam key
9 LCD display
1.2 MICROBAR INTERNAL DESCRIPTION
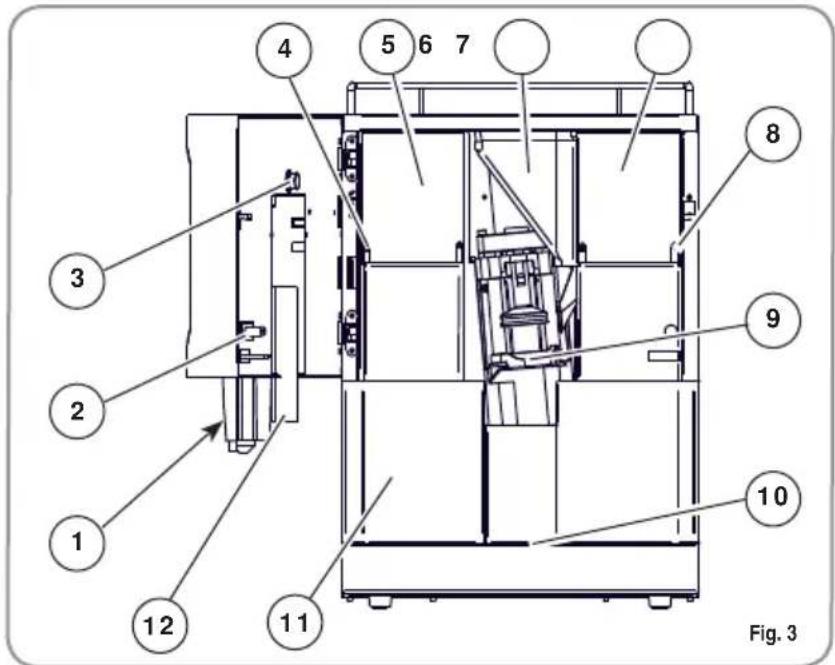
LEGENDA
1 Door Key
2 Door microswitch
3 Milk Foamer air regulator
4 Coffe grinder adjusting screw left-hand grinder
5 Coffe bean holder left-hand grinder
6 Ground coffee conveyor
7 Coffe bean holder right-hand grinder
8 Coffe grinder adjusting screw right-hand grinder
9 Delivery unit
10 Water collecting dray
11 Coffe grounds drawer
12 Milk Foamer
2. SAFETY INSTRUCTIONS

This book is an integral and essential part of the product and must be given to the user. Read this book carefully. It provides important information concerning safety of installation, use and maintenance. Save it carefully for future reference.

After unpacking, make sure the appliance is complete. In case of doubts, do not use the appliance, but consult a qualified technician. Packaging items which are potentially dangerous (plastic bags, polystyrene foam, nails, etc.) must be kept out of children's reach and must not be disposed of in the environment.

The machine is can be installed in staff kitchen areas in shops, offices and other working environments, farm houses by clients in hotels, motels and other residential type environments bed and breakfast type environments.

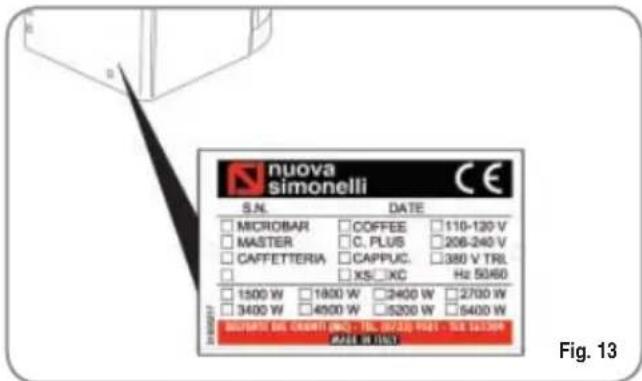
Before connecting the appliance make sure the rating plate data correspond with the mains. The nameplate is located on the back of the machine, on the left-hand side at the bottom. The appliance must be installed by qualified technicians in accordance with current standards and manufacturer's instructions.
The manufacturer is not liable for any damage caused due to failure to ground the system. For the electrical safety of the appliance, it is necessary to equip the
system with the proper grounding. This must be carried out by a qualified electrician who must ensure that the electric power of the system is sufficient to absorb the maximum power input stated on the plate.

Fig. 5
In particular you must ensure that the size of the wiring cables is sufficient to absorb power input.
The use of adapters, multiple sockets or extensions is strictly forbidden. If they prove necessary, call a fully qualified electrician.
When installing the device, it is necessary to use the parts and materials supplied with the device itself. Should it be necessary to use other parts, the installation engineer needs to check their suitability for use in contact with water for human consumption.
This machine must be installed according to the applicable federal, state, and local standards (codes) in force with regard to plumbing systems including backflow prevention devices.
For this reason, the plumbing connections must be carried out by a qualified technician.
The device needs to be supplied with water that is suitable for human consumption and compliant with the regulations in force in the place of installation. The installation engineer needs confirmation from the owner/manager of the system that the water complies with the requirements and standards stated above.
This appliance must only be used as described in this handbook. The manufacturer shall not be liable for any damage caused due to improper, incorrect and unreasonable use.

At the end of installation, the device is switched on and taken to rated operating conditions, leaving it in a state in which it is "ready for operation".
The device is then switched off and the whole hydraulic circuit is bled of the first lot of water in order to remove any initial impurities.
The device is then refilled and taken to rated operating conditions.
After reaching the "ready for operation" condition, the following dispensing operations are carried out:
- 100% of the coffee circuit through the coffee dispenser (for more than one dispenser, this is divided equally);
- 100% of the hot water circuit through the water dispenser (for more than one dispenser, this is divided equally);
- opening of each steam outlet for 1 minute.
At the end of installation, it is good practice to draw up a report of the operations.

Basic rules must be observed when using any electric appliance.
In particular:
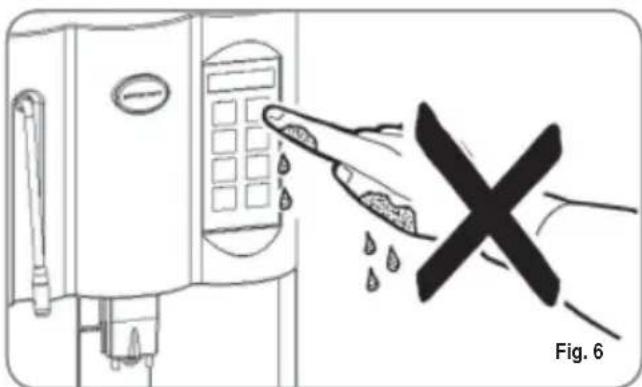
- do not touch the appliance when hands or feet are wet;

CAUTION
RISK OF ELECTRIC SHOCK
-
do not use the appliance when barefoot;
-
do not use extensions in bath or shower rooms;
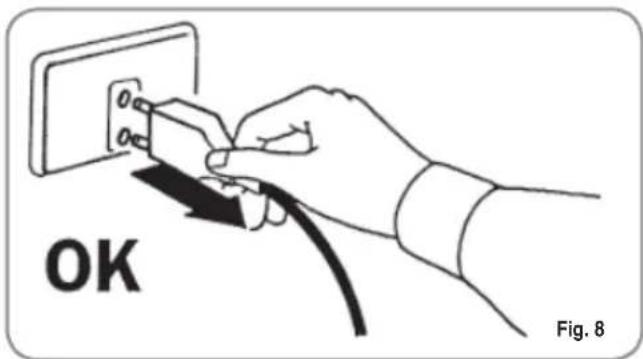
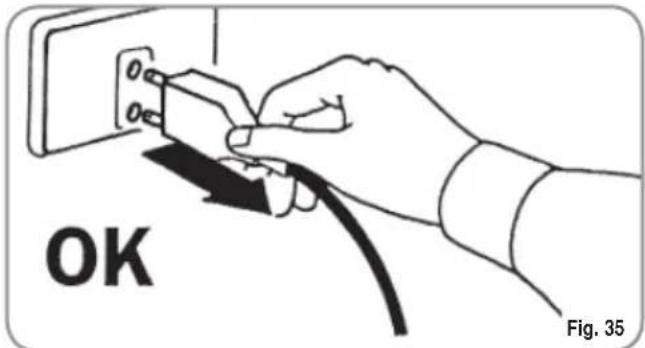
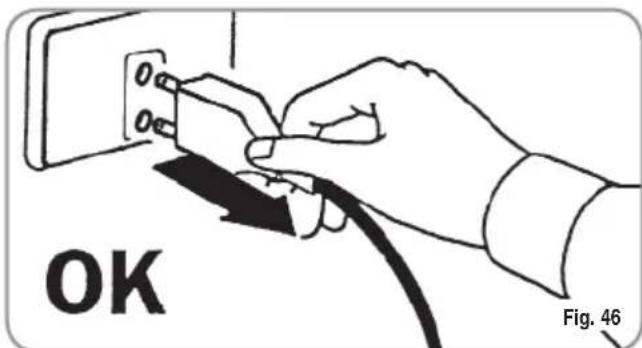
- do not pull the supply cord out of the socket to disconnect it from the mains;

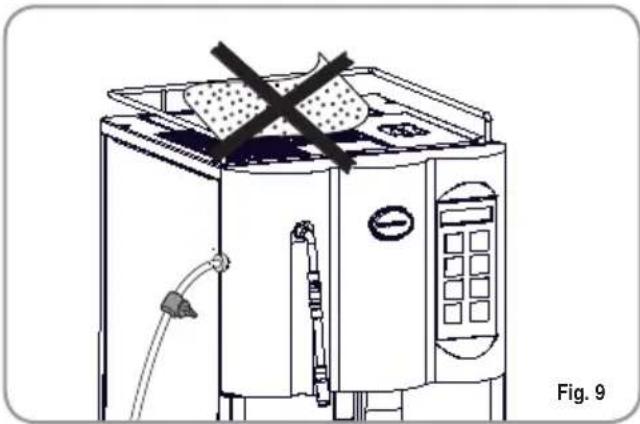
do not leave the appliance exposed to atmospheric agents (rain, sun, etc.);
- do not let the appliance be used by children, unauthorised staff or staff who have not read and fully understood the contents of this handbook.

Before servicing the appliance, the authorised technician must first switch off the appliance and remove the plug.

To clean the appliance, set the machine to the "0" energy level, that is, "WITH THE MACHINE SWITCHED OFF AND THE PLUG REMOVED FROM THE MAINS" and follow the instructions in this handbook.

If the appliance breaks down or fails to work properly, switch it off. Any intervention is strictly forbidden. Contact qualified experts only.
Repairs should only be made by the manufacturer or authorized service centres. Only original spare parts must be used. Failure to observe the above, could make the appliance unsafe.

For installation, the qualified electrician must fit an omnipolar switch in accordance with the safety regulations in force and with 3 (0,12) or more mm (in) between contacts.

To avoid dangerous overheating, make sure the supply cord is fully uncoiled.

Do not obstruct the extraction and/or dissipator grids, especially of the cup warmer.

The user must not replace the appliance supply cord. If the cord is damaged, switch off the appliance and have a qualified technician change the cord.

If no longer using the appliance, we recommend making it inoperative; after removing the plug from the mains electricity, cut the power supply cable.

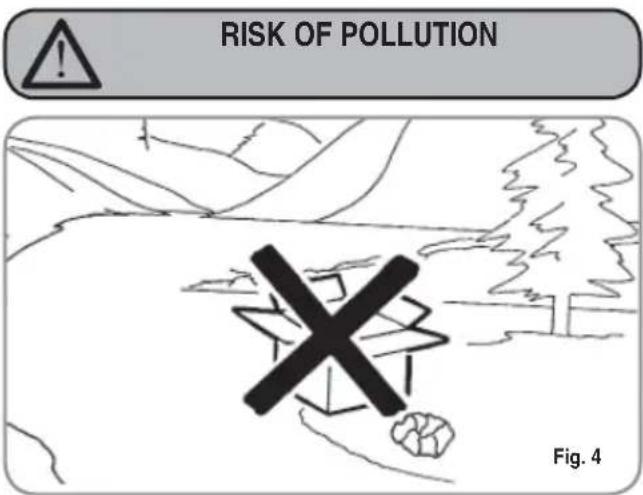
CAUTION RISK OF POLLUTION

Do not dispose of the machine in the environment: to dispose of the machine, use an authorised centre, or contact the manufacturer for relative information.


To ensure that the machine is properly ventilated, place it with the ventilation side at a distance of 15cm (5,9 in) from walls or other objects.

Once a machine wash cycle has been started, do not interrupt it, as detergent residues may then be left inside the delivery group.

CAUTION RISK OF INTOXICATION

Use the steam nozzle with care and never place hands below the jet of steam. Do not touch the nozzle immediately after use.


CAUTION RISK OF BURNS OR SCALDING

We remind you that before carrying out any installation, maintenance, unloading or adjustment operations, the qualified operator must put on work gloves and protective footwear.

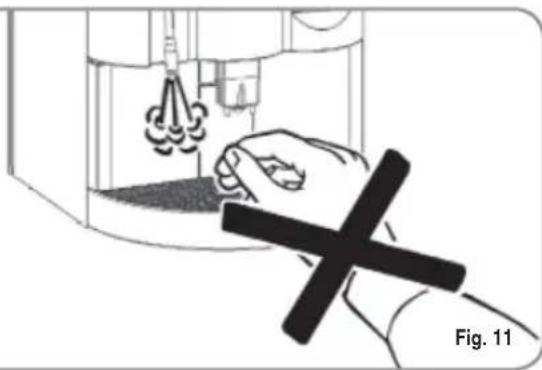
CAUTION RISK OF CUTTING

When adding coffee beans, the machine operator must not place his/her hands inside the container.

WARNING MECHANICAL HAZARD

Never press and/or pull the safety switch.
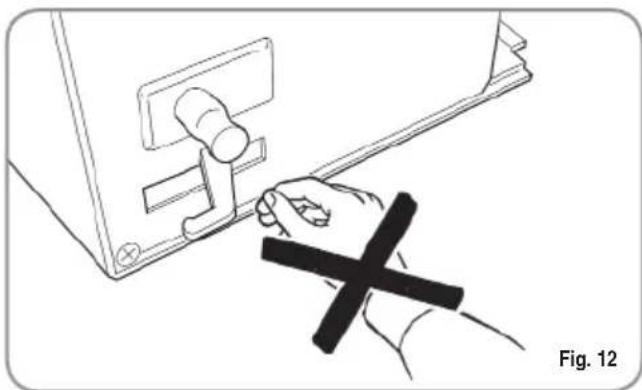
Fig. 12

CAUTION
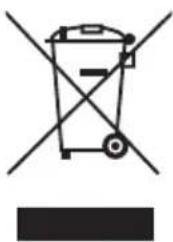
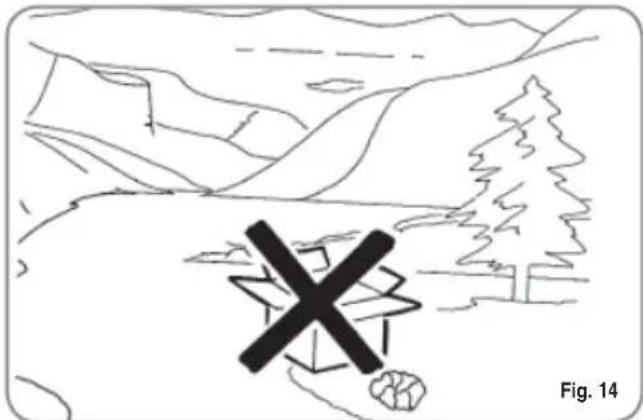
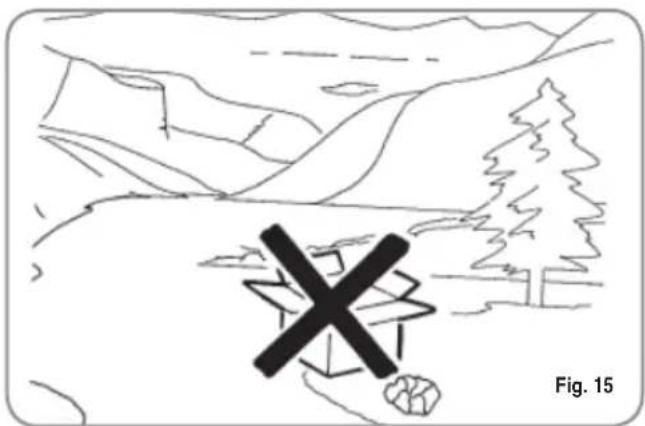
INFORMATION TO THE USERS Under the senses of art. 13 of Law Decree 25th July 2005, n. 151 "Implementation of the Directives/ Guidelines 2002/95/ CE, 2002/96/CE and 2003/108/CE, concerning the reduction of the use of dangerous substances in electric and electronic equip
ment, as well as the disposal of wastes".
The symbol of the crossed large rubbish container that is present on the machine points out that the product at the end of its life cycle must
be collected separately from the other wastes. The user for this reason will have to give the equipment that got to its life cycle to the suitable separate waste collection centres of electronic and electrotechnical wastes, or to give it back to the seller or dealer when buying a new equipment of equivalent type, in terms of one to one. The suitable separate waste collection for the following sending of the disused equipment to recycling, the dealing or handling and compatible environment disposal contributes to avoid possible negative effects on the environment and on the people's health and helps the recycling of the materials the machine is composed of. The user's illegal disposal of the product implies the application of administrative fines as stated in Law Decree n.22/1997" (article 50 and followings of the Law Decree n.22/1997).
3. TRANSPORT AND HANDLING
3.1 MACHINE IDENTIFICATION
Always quote the machine serial number in all communications to the manufacturer, Nuova Simonelli.
3.2 TRANSPORT
The machine is transported on pallets which also contain other machines - all boxed and secured to the pallet with supports.
Prior to carrying out any transport or handling operation, the operator must:
- put on work gloves and protective footwear, as well as a set of overalls which must be elasticated at the wrists and ankles.
The pallet must be transported using a suitable means for lifting (e.g., forklift).
3.3 HANDLING

CAUTION RISK OF IMPACT OR CRASHING
During all handling operations, the operator must ensure that there are no persons, objects or property in the handling area.
The pallet must be slowly raised to a height of 30~cm (11,8 in) and moved to the loading area. After first ensuring that there are no persons, objects or property, loading operations can be carried out.
Upon arrival at the destination and after ensuring that there are no persons, objects or property in the unloading area, the proper lifting equipment (e.g. forklift) should be used to lower the pallet to the ground and then to move it (at approx. 30cm 11,8 in) from ground level), to the storage area.

CAUTION RISK OF IMPACT OR CRASHING
Before carrying out the following operation, the load must be checked to ensure that it is in the correct position and that, when the supports are cut, it will not fall.
The operator, who must first put on work gloves and protective footwear, will proceed to cut the supports and to storing the product. To carry out this operation, the technical characteristics of the product must be consulted in order to know the weight of the machine and to store it accordingly.

CAUTION RISK OF POLLUTION
4. INSTALLATION AND PRELIMINARY OPERATIONS

Do not dispose of packaging in the environment
Before carrying out any installation and adjustment operations you must read and fully understand the SAFETY INSTRUCTIONS of this handbook. The company cannot be held responsible for damage to things or injury to persons caused by failure to comply with the safety instructions and installation and maintenance instructions contained in this handbook.

Place the machine on a flat, level surface to avoid any possible malfunctioning.

Never install the machine in areas where it could come into contact with jets of water.

The machine can be used with the following:
-
Coffee grains
-
Decaffeinated coffee powder
- Milk (not powdered)
The use of any other substance not listed here above may cause serious damage to the machine itself.

The machine is designed to operate at temperatures ranging from +5^ to +40^ (41^ - 104^) .

Before connecting the machine to the mains power supply, please check that the supply voltage corresponds to the machine voltage.
NOTE: At the start of the day's activities and in any case, if there are any pauses of more than 8 hours, then it is necessary to change 100% of the water in the circuits, using the relevant dispensers.
NOTE: In case of use where service is continuous, make the above changes at least once a week.
4.1 MACHINE INSTALLATION (VERSION WITH TANK)

Switch off the machine before filling or removing the water tank.
Once the machine has been withdrawn from the packaging, carry out the following instructions:
1 Position the unit on a horizontal surface.
2 Open the hatch.
3 Withdraw the water tank by pulling it upwards.
4 Particularly the first time, wash the tank with soapy water and then carefully rinse off all soap.
5 Fill the water tank with water.
6 Make sure that the outside of the water tank is dry.
7 Return the water tank to its site.
8 Close the hatch.

The water hardness must be less than 4^ - 6^ fr (french degree).
Otherwise the conditions of guarantee of the machine will expire.
4.2 MACHINE INSTALLATION (VERSION FOR DIRECT CONNECTION)
Once the machine has been withdrawn from the packaging, carry out the following instructions:
1 Position the unit on a horizontal surface.
2 Remove the pipe with 3/4 coupling from the hatch in the top of the machine.
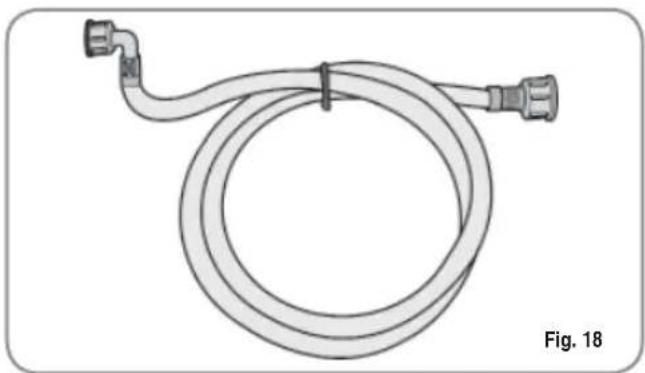
3 Connect one end of the pipe to the 3 / 4'' inlet on the back of the machine.

4 Connect the other end of the pipe to the water mains.

The water hardness must be less than 4^ - 6^ fr (french degree).
Otherwise the conditions of guarantee of the machine will expire.

The machine must be installed according to the local standards in force with regard to plumbing systems. For this reason, the plumbing connections must be carried out by a qualified technician.
4.3 FILLING THE COFFEE CONTAINER
1 Remove the cap to access the granulated coffee bean container.

WARNING
Pour ONLY toasted coffee beans into the coffee bean holder. any other kind of coffee, for example ground coffee, will damage the coffee grinder. Don't insert caramelized, sugar coated, or similarly coated coffee beans, or instant coffee or other sugary beverages because they will harm the appliance.
2 Don't fill to the brim but pour just enough toasted coffee beans into the coffee bean holder to ensure correct closure of the unit.
3 Close the cap.
4.4 SWITCHING ON
NOTE: in case the following procedure shouldn't take effect, see the chapter on "Problems and Solutions".
After the preliminary operations:
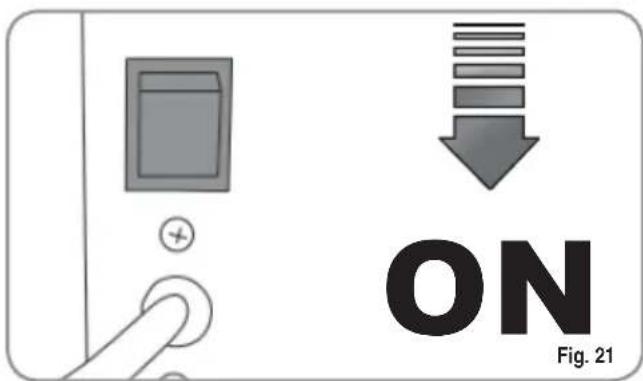
1 Press the machine's main switch and turn it to "ON".
The LCD will then light up and read as follows:

To switch the machine on definitively, press the "ENTER" key:

the machine automatically loads the heater with water and begins heating operations. When the desired temperature is reached the display will show the following message:

NOTE: the starting time is about 3 minutes.
NOTE: The appliance is endowed with a security system that will stop the machine after about 1.5 minutes of constant functioning of the pump (to avoid pump overheating). In this case, switch off the main switch of the machine and then turn it on again.
The machine is now ready to be used.

WHEN INSTALLING THE MACHINE FOR THE FIRST TIME OR AFTER WATER HEATER UNIT MAINTENANCE, PRESS THE BUTTON TO DISPENSE HOT WATER BEFORE DISPENSING ANY COFFEE.
REPEAT THIS OPERATION AS REQUIRED AND UNTIL THERE IS AN EVEN FLOW OF WATER FROM THE NOZZLE.
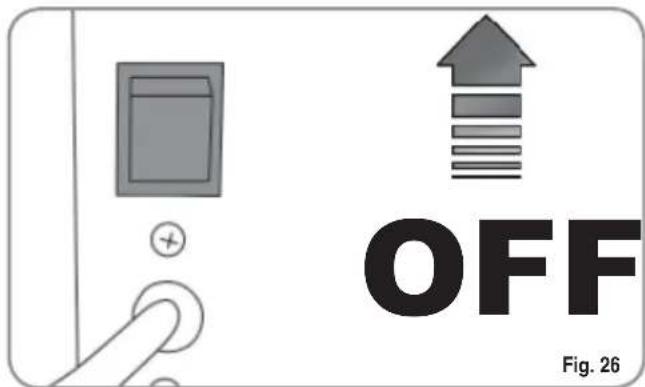
4.5 SWITCHING OFF
To switch off the machine, proceed as follows:
- Hold the "ENTER" key down for 5 seconds with the machine switched on:

The LCD will read as follows:

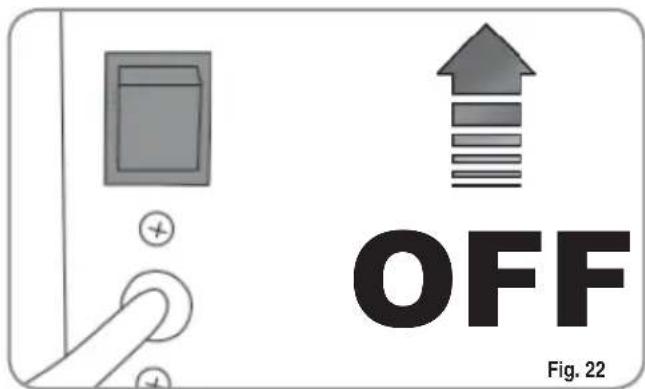
- To switch the machine off fully, press the main switch and turn it to the "OFF" position.
5. ADJUSTMENTS TO BE MADE BY A QUALIFIED TECHNICIAN ONLY

The adjustments listed here below may be performed by Specialist Technical Engineers ONLY. Nuova Simonelli cannot accept any liability for damage to people or property arising from failure to follow the safety regulations listed in this manual.
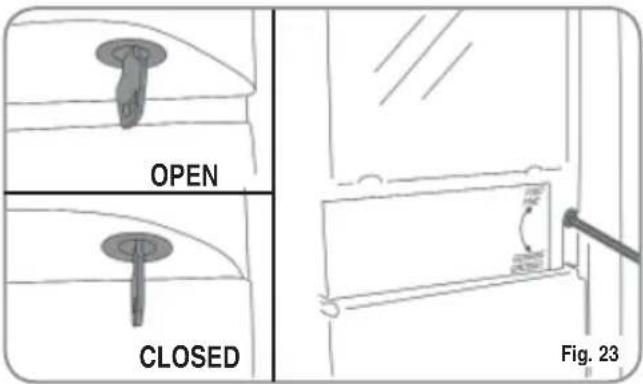
5.1 GRINDING ADJUSTMENT

Switch on the grinder to carry out the grinding adjustment procedures.
NOTE: The procedure is possible also with the appliance on.
- Put the key into its lock.
- Turn the control panel hatchdoor key counterclockwise.
- Open the hatchdoor, to gain access to the coffee grinder adjusting screw. Following the direction of the arrows and using a 3mm (0,12 in) allen wrench, grinding of the coffee beans can be adjusted to COARSER (counter-clockwise) or FINER (clockwise).
- Lock the hatchdoor.
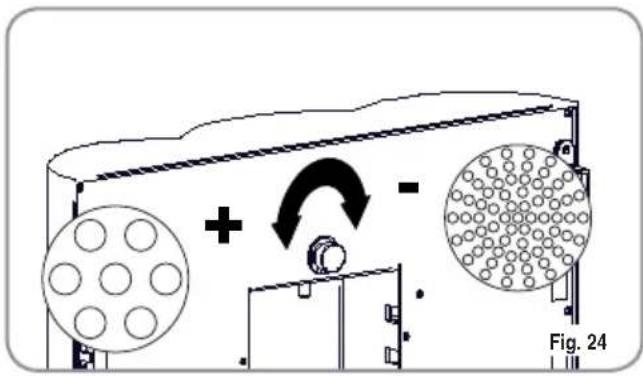
5.2 MILK FOAMER ADJUSTMENT
NOTE: The procedure is possible also with the appliance on.
- Put the key into its lock.
- Turn the control panel hatchdoor key counterclockwise.
- Open the hatchdoor, to gain access to the adjusting screw.
To change the amount of air to the milk foamer and therefore, to change the amount of foam, use the adjustment screw as illustrated in the figure so as to increase / reduce the air to the milk foamer.
5.3 MILK FLOW ADJUSTMENT (Temperature Regulation)
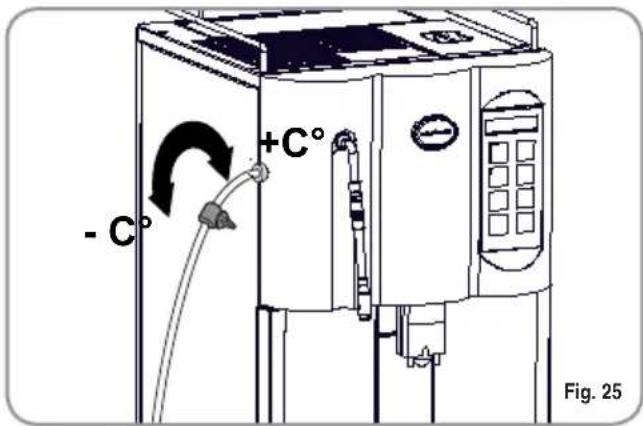
NOTE: The procedure is possible also with the appliance on.
To adjust both the flow and the temperature of the milk delivery, turn the adjusting tap as follows:
- Turn the milk suction tap CLOCK/COUNTER-CLOCKWISE to INCREASE/DECREASE the milk suction and then DECREASE/INCREASE the temperature.
- Turn the tap until the milk reaches the desired temperature.
6. USE
Before starting usage of the appliance, the operator must read and fully understand the safety instructions in this handbook.

If the self-diagnostic function indicates anomalies or failures, call the assistance centre. Operators must never intervene.
6.1 SWITCHING ON
NOTE: In case the following procedure shouldn't take effect, see the chapter on "Problems and Solutions".
- Press the main switch so that the LCD display turns on showing the message:
Machine Off Day Hour
- To switch the machine on definitively, press the "ENTER" key:
- The machine automatically loads the heater with water and begins heating operations. When the desired temperature is reached the display will show the following message:
Machine ready Day Hour
NOTE: The starting time is about 3 minutes.
NOTE: The appliance is endowed with a security system that will stop the machine after about 1.5 minutes of constant functioning of the pump (to avoid pump overheating). In this case, switch off the main switch of the machine and then turn it on again.
The machine is now ready to be used.
6.2 SWITCHING OFF
To switch off the machine, proceed as follows:
- Hold the "ENTER" key down for 5 seconds with the machine switched on:

The LCD will read as follows:

- To stop the machine completely, press the main switch and turn it to the "OFF" position.
6.3 STANDARD CONFIGURATION KEYS LEGENDA (Standard Configuration)
1 Espresso

2 Espressos

1 Coffee

2 Coffees

SecondGrinder Decaffeinated Clean Cycle

Caffelatte appuccino version)
Hot water

Steam
IMPORTANT: Keys 1-2-3-4-6 (see 'DISPLAY' description), can correspond to different drinks according to taste and local traditions (see PROGRAMMING and paragraph on SELECTIONS CONFIGURATION).
6.4 SELECTIONS CONFIGURATION
Set the desired function on keyboard keys n. 1-2-3-4-6 (see 'DISPLAY' chapter), by following the programming procedures (see Chapter on Programming). Keys 1-3 can correspond only to coffee beverages; keys 2-4-6 can correspond to all beverages. Then apply the corresponding label supplied.
KEYS LEGENDA
(Selection configurations)

Cappuccino

Macchiato


1 Ristretto
1 Coffee Creme


Big Cappuccino
Latte

2 Ristretto

2 Coffee Creme
6.5 HOW TO MAKE THE COFFEE'

The procedure for making espresso and long espresso is the same.
- Position a cup under the nozzles.
The beverages always flow from both nozzles.
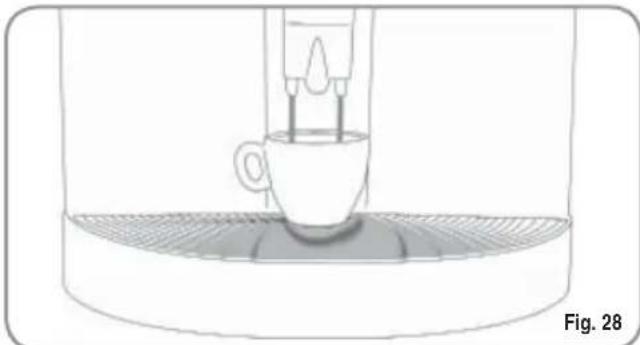
- Press the desired coffee delivery key once.


The coffee is being made.
- According to the kind of coffee selected the display will read.

Leave the cup beneath the nozzles until the messages on the display disappear.
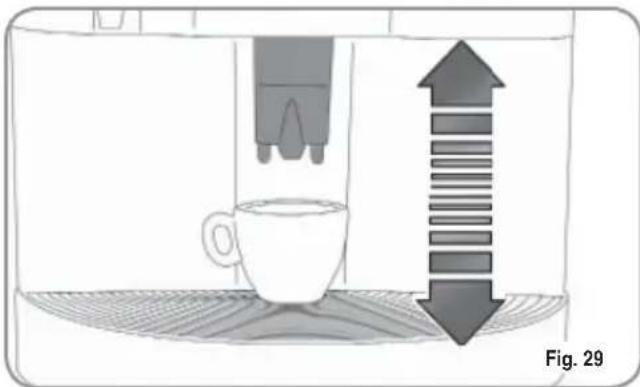
NOTE: The nozzles can be adjusted to fit all kinds of cups.
Position the nozzles carefully in such a way as to limit the space between cup and nozzles.
6.6 HOW TO MAKE TWO COFFEEES
- Position one cup under each nozzle.
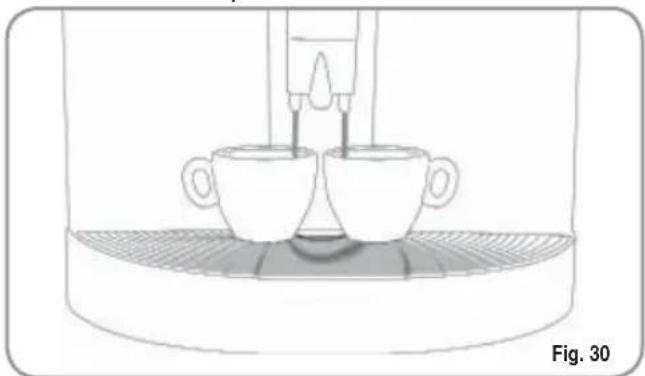
- Press the desired coffee delivery key once.

The coffee is being made.
- According to the kind of coffee selected the display will read.
2Espresso
2 Coffees
Leave the 2 cups beneath the nozzles until the messages on the display disappear.
6.7 HOW TO MAKE SHORT ESPRESSO AND CAFE CREME


To make these, proceed as for Espresso - Coffee (see the paragraph "HOW TO MAKE THE COFFEE").
6.8 HOW TO MAKE CAFFELATTE
- Position a milk container next to the machine.
- Insert the milk suctioning tube inside the milk container.
- Position the cup.
- Adjust the tap along the tube to regulate the amount of milk desired.
- Press the caffe latte delivery key once.

The caffe latte is being made.
The display will read as follows:
CaffeLatte
Leave the cup beneath the nozzles until the messages on the display disappear.
6.9 HOW TO MAKE
To make this, proceed as for CAFFELATTE (see CAFFELATTE paragraph).
6.10 MACCHIATO (three layers: milk/coffee/milk)

To make this, proceed as for CAFFELATTE (see CAFFELATTE paragraph).
6.11 HOT MILK

To make this, proceed as for CAFFELATTE (see CAFFELATTE paragraph).
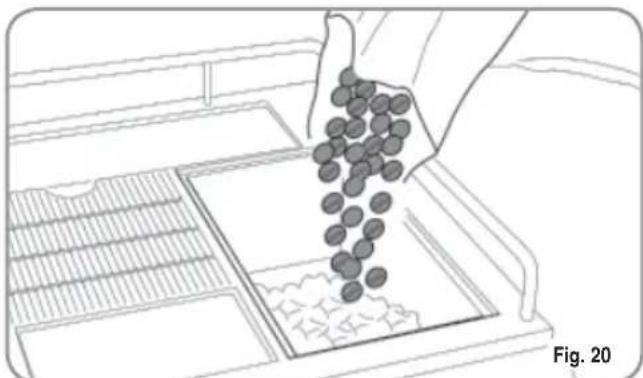
6.12 HOW TO MAKE DECAFFEINATED COFFEE USING GROUND COFFEE
- Open the ground coffee conveyor hatch.

WARNING
Pour only ground coffee into the coffee bean holder. Any other kind of coffee will damage the coffee grinder.
Don't put caramelized, sugar coated, or similarly coated coffee beans, or instant coffee or other sugary beverages because they will harm the appliance.
- Insert only 1 dose of decaffeinated ground coffee.

- Press the key once. (Press twice on version with second grinder).

The display will read:

- Press the key corresponding to the desired kind of coffee following the procedure of the paragraph "HOW TO MAKE THE COFFEE".
The coffee is being made.
The display will read:

Leave the cup beneath the nozzles until the message on the display disappears.
6.13 USING THE SECOND GRINDER
(Version with double grinder ONLY)

WARNING
Never add, for example, caramelised, sugar-coated coffee beans or similar products into the coffee bean holder and do not use instant coffee or other sugary beverages because they will damage the machine.
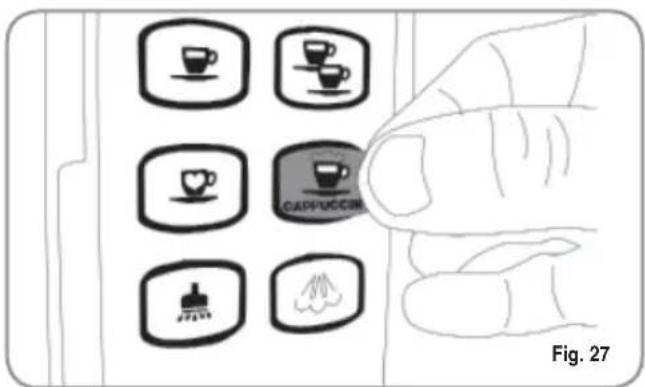
- Press the following key once:

The display will read:

- Press the key for the required beverage.
- For example, when the espresso key is pressed, the display will read as follows:

6.14 HOT WATER

WARNING
Before proceeding with the following operations, ensure that the water tank has water in it. If it hasn't, proceed to filling it with water.
This provides delivery of hot water for brewing tea, chamomile-tea or herb teas.
Position a suitable container (a cup) under the Steam pipe / Hot water pipe:
- Press the hot water delivery key once.
- Hot water will come out of the steam pipe.
The display will read the following message:
Machine Ready Tea
- When the desired amount of hot water has been delivered, press the hot water delivery key again to stop the delivery of hot water.
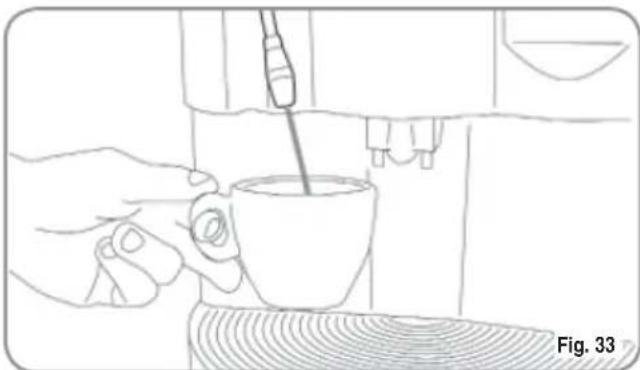
6.15 STEAM

WARNING
During steam delivery, never touch the steam pipe with any part of you body or place your hands underneath it. Keep the steam pipe inclined downwards on the grid where the cup is positioned.
This allows the delivery of steam to emulsify milk and to heat other liquids.
- Press the Steam delivery key once.

- Residual water will drip from the steam pipe and as soon as the steam starts being delivered, use it for the desired time.
- The display will read as follows (example):
Steam
- Press the STEAM delivery key once again to stop the delivery of steam.
IMPORTANT: At the end of every steam delivery, carefully clean the tube with a damp cloth.
NOTE: Before using the steam wand, always bleed out any condensation for at least 2 seconds or according to the manufacturer's instructions.
7.PROGRAMMING
7.1 LEGENDA
1 ENTER key: used to enter menus and/ or to confirm values and pass on to the next step.
2 CURSOR keys: used to scroll through the menus and to increase / decrease value settings.
3 RESET key: used to confirm and to return to the previous step.
LIST OF PROGRAMMABLE FUNCTIONS
Functions that can be accessed from the USER and TECHNICIAN modes.
- LANGUAGE
2.PRODUCT NAME - PROG. DOSES
- PROG.GRINDER1S
- PROG.GRINDER2S
(version with double grinder only)
- MILK DOSE
-
DATE/TIME
-
PROGRAM. ON/OFF
- ENERGY SAVING
Functions that can "ONLY" be accessed from the TECHNICIAN mode.

This operation may ONLY be performed by a Specialist Technician.
Adjustments made by Unqualified Technicians or other people may render the Guarantee null and void.
Additional functions that can be accessed from the TECHNICIAN mode are:
- PREINFUSION
- TAMPING
- GROUNDS NUMBER
- MILK CLEANWARN.
- CLEAN ALARM
- GROUP 1 ADJUSTMENT
- GROUP 2 ADJUSTMENT
- GRINDER SETTING
- COFFEE TEMP.
- STEAM TEMP.
- TOTAL COUNT 1
(only the version with a double grinder)
21 TOTAL COUNT 2

(only the version with a double grinder)
22 TOTAL COUNT
(all versions)
- PASSWORD
- SMART CARD
- WATER FILTER L
- DE-SCALE
7.2 PROGRAMMING
Entering the programming function gives access to all of the USER and TECHNICIAN mode functions.
For accessing the programming sites proceed as follows:
NOTE: Can be performed with machine on.
- Insert the key into the appropriate lock.
- Turn the control panel hatch key counter-clockwise.
- Open the control panel hatch; the display will read:

- Press the ENTER key, close the front panel, the display will read:
Please Wait Heating
- Once the ejection cycle is over, the unit will enter resting phase position and the display will show the first item on the programming menu:
LANGUAGE
KEY FUNCTIONS
: Scrolling function list Programmable and/or decreasing / increasing values.
ENTER: To enter menus/submenus and confirming data.
RESET: Moving back to preceding level. e confirming data
7.3 EXITING PROGRAMMING
To exit programming sites, proceed as follows:
NOTE: Can be performed with machine on and from any of the visualized functions.
- Insert the key into the appropriate lock.
- Turn the control panel hatch key counter-clockwise.
- Open the control panel hatch; the display will read:
Machine Off Front Panel Open
- Close the front panel and turn the key clockwise. The display will read:
Machine Off Day Hour
To switch the machine on definitively, press the "ENTER" key:

- Alternatively, scroll through all the functions using the key until the display reads:
Machine ready Day Hour
7.4 PROGRAMMING USER MODE
CYCLE
1. LANGUAGE
Press the ENTER key to access the submenu. This sets the language for operator-machine interface, as shown on the display.
Press the keys to select the required language. The possible languages are as follows:
Italian, English, Spanish, German, French, Dutch, Swedish, Danish, Finnish, Norwegian, Russian and Japanese.
Press the RESET key to quit the submenu and return to the main menu, confirming the new setting.guage.
2.PRODUCT NAME:
By pressing the ENTER key, the submenus can be accessed.
A beverage is assigned to each key. Example:
Product Name: 1 Espresso
In this case the beverage 'Espresso' is assigned to key number 1
The arrow keys scroll the names of the beverages on each key available in the agenda. The RESET key is for exiting the submenu.
The ENTER key confirms the type of beverage for the key number being taken into consideration, and then passes on to the beverage of the next key. The programmable keys are the following:
12346
Once the programming of the final key has been completed, you pass on to the next menu item.
NOTE: The keys

can be programmed for both milk-based and coffee drinks.
The
keys
can be programmed exclusively for coffee drinks.
NOTE: The function DISENABLE can be assigned to each key and in this case the key is disenable.
3. WATER VOLUME CC
By pressing the ENTER key the submenus can be accessed. The doses of water to be used for each single drink can be programmed.
1 Water volume cc Ristretto
2 Water volume cc 2 Ristretto
3 Water volume cc Espresso
4 Water volume cc 2 Espresso
5 Water volume cc Coffee
6 Water volume cc 2 Coffee
7 Water volume cc CoffeCreme
8 Water volume cc caffelatte
9 Water volume cc macchiato
10 Water volume cc Cappuccino
11 Water volume cc Big Cappuccino
12 Water volume sec Tea
13 Maximum steam time
The arrow keys increase/decrease the amount of water used to make the desired drink.
Press the RESET key to exit the submenu and go back to the main menu and to confirm the dose programming.
Press the ENTER key to scroll all the items on the submenu and see confirmation of the dose programmed.
4.PROG.GRINDER1S
Press the ENTER key to access the submenu. It is possible to set the grinding times for each beverage using the right-hand grinder (sec.).
1 Grind Time Ristretto
2 Grind Time 2 Ristretto
3 Grind Time Espresso
4 Grind Time 2 Epresso
5 Grind Time Coffee
6 Grind Time 2 Coffee
7 Grind Time CoffeCreme
8 Grind Time Caffellatte
9 Grind Time s. Macchiato
10 Grind Time s. Cappuccino
11 Grind Times. Big Cappuccino
The arrow keys allow you to increase/decrease the grinding time needed for making the selected drink.
Press the RESET key to exit the submenu and go back to the main menu and to confirm the grinding time set. Press the ENTER key to scroll all the items on the submenu and see confirmation of the set grinding time.
NOTE: For models with double grinder, setting this parameter to 0 will enable the grinder on the left.
5. PROG. GRINDER 2 S (version with double grinder only)
Press the ENTER key to access the submenu. It is possible to set the grinding times for each beverage using the left-hand grinder (sec.).
1 Grind Time Ristretto
2 Grind Time 2 Ristretto
3 Grind Time Espresso
4 Grind Time 2 Epresso
5 Grind Time Coffee
6 Grind Time 2 Coffee
7 Grind Time CoffeCreme
8 Grind Time Caffellatte
9 Grind Time s. Macchiato
10 Grind Time s. Cappuccino
11 Grind Times. Big Cappuccino
The arrow keys allow you to increase/decrease the grinding time needed for making the selected drink. Press the RESET key to exit the submenu and go back to the main menu and to confirm the grinding time set. Press the ENTER key to scroll all the items on the submenu and see confirmation of the set grinding time.
6. MILK TIME
Press the ENTER key to access the submenu. This allows you to program the milk delivery time.
1 Latte
2 Caffellatte
3 Macchiato
4 Cappuccino
5 Big Cappuccino
The arrow keys allow you to increase/decrease the delivery time and the dose of the milk to be used to make the selected drink.
Press the RESET key to exit the menu and go back to the main menu and to confirm the grinding time set. Press the ENTER key to scroll all the items on the menu and see confirmation of the set grinding time.
7. DATE/TIME
Press the ENTER key to access the submenu. This is used to set the date and time to be displayed on the machine.
1 Day
2 Hour
3 Minutes
The keys increase or decrease the values set for the relevant function.
The RESET key quits the submenu and returns to the main menu without confirming the new settings.
The ENTER key scrolls through each single item in the submenu and confirms the new setting.
Once the date has been set, the function returns to the main menu.
8. PROGRAM. ON/OFF
This is used to program the automatic switching ON/OFF for the machine, only with the machine switch in the ON position.
The default setting for the machine has all days of the week set to "STANDBY" and therefore, the main switch must be used to switch the machine on and off.
Press the ENTER key to access the submenu and the display will read as follows:
Sunday OH87:30 OFF23:38
Press the keys to view the settings for each day of the week.
Press RESET to set SUNDAY as the weekly day off, which will de-activate the automatic on and off function.
The display will read as follows:
Sunday Day Off
Press ENTER to reactivate the automatic on and off function.
To confirm the setting, press the key, which will then pass to the settings for the following day.
Press ENTER and the switch on timer will begin to flash; use the keys to increase / decrease the time setting.
Once the required time has been set, press ENTER to set the following day.
After SATURDAY, press the key to return to the previous menu.
9. ENERGY SAVING
This is used to set the time after which the machine enables the energy-saving device, while still keeping the water tank at working temperature.
Press the ENTER key to access the submenu.
1 Hours:Minutes
Use the keys to increase / decrease the time after which the ENERGY-SAVING function is enabled by 30-minute intervals. This function is deactivated if the timer is left at zero.
Press the RESET to quit the submenu and return to the main menu, confirming the new setting.
7.5 TECHNICIAN MODE PROGRAMMING CYCLE
To access the functions that can only be programmed using the TECHNICIAN MODE, scroll through all of the functions that can be accessed from the USER MODE until the display reads as follows:
Password
Enter the correct password to view the first item in the programming menu that can be accessed from the TECHNICIAN MODE.
NOTE: The standard password setting is:

Therefore, to access the functions reserved to technicians when entering this mode for the first time, or if the password has not yet been changed, it is necessary to press the key on the machine keyboard five times in succession.
If an incorrect password is entered, the machine will automatically quit the programming mode to enter the machine ready mode.
10. PREINFUSION
Press the ENTER key to access the submenu. This programmes the possibility of coffee tab preinfusion (YES or NO) for each single beverage.
Press the RESET key to quit the submenu and return to the main menu, confirming the setting.
Press the ENTER key to scroll through each single item in the submenu and confirm the settings.
11. TAMPING
Press the ENTER key to access the submenu. This allows you to program the coffee tamping for each drink (YES or NO).
1 Tamping Ristretto
2 Tamping 2 Ristretto
3 Tamping Espresso
4 Tamping 2 Espresso
5 Tamping Coffee
6 Tamping 2 Coffee
7 Tamping CoffeeCreme
8 Tamping caffelatte
9 Tamping Macchiato
10 Tamping Cappuccino
11 Tamping Big Cappuccino
The arrow keys cconfirm/disconfirm the tamping function for each drink.
Press the RESET key to exit the submenu and go back to the main menu and to confirm the tamping programmed.
Press the ENTER key to scroll all the items on the submenu and see confirmation of the tamping programmed.
12. GROUNDS NUMBER
Press the ENTER key to access the submenu. This allows you to program the GROUNDSD NUMBER. When the number has been reached, a message will be displayed instructing you to empty the coffee grounds drawer and the machine will stop working to allow the procedure to be done safely.
The arrow keys increase/decrease the grounds number to proceed to the emptying of the coffee grounds drawer. Press the RESET key to exit the submenu and go back to the main menu and to confirm the grounds number programmed.
The ENTER key is disabled.
13. MILK CLEANWARN.H
Press the ENTER key to access the submenu. This allows you to program after how many hours, following the last milk delivery, the milk foamer cleaning warning will be displayed.
The arrow keys increase/decrease the amount of hours for the display of the milk foamer cleaning warning message.
Press the RESET key to exit the submenu and go back to the main menu and to confirm the number of hours programmed. The ENTER key is disabled.
14. CLEAN WARNING
Press the ENTER key to access the submenu. This allows you to program the number of cycles after which the group clean warning will be displayed.
The arrow keys increase/decrease the amount of cycles for the display of the group clean warning message. Press the RESET key to exit the submenu and go back to the main menu and to confirm the number of cycles programmed.
The ENTER key is disabled.
15. GROUP 1 ADJUSTMENT
Pressing the ENTER key, the sub-menu can be entered.
The number of ENCODER impulses is programmed because the infusion chamber reaches the stand-by position.
The keys increase/decrease the number of ENCODER impulses.
The RESET key is used to exit from the sub-menu to return to the main menu with confirmation of the set value.
The ENTER key is disenable.
NOTE: It is recommended to vary the setting only in the case in which the original reduced gear is substituted for a different type.
16. GROUP 2 ADJUSTMENT
Pressing the ENTER key, the sub-menu can be entered.
The number of ENCODER impulses is programmed because the infusion chamber reaches the upper position (chamber closed).
The keys increase/decrease the number of ENCODER impulses.
The RESET key is used to exit from the sub-menu to return to the main menu with confirmation of the set value.
The ENTER key is disenable.
NOTE: It is recommended to vary the setting only in the case in which the original reduced gear is substituted for a different type.
17. GRINDER SETTING
Press the ENTER key to access the submenu. This allows you to program the choice of increasing grinding times by 0.1 seconds every 250-1000 deliveries.
By setting the program at 0, the function is disabled
The arrow keys increase/decrease the number of deliveries, after which there will be an increase in grinding time.
The available values are 0, 250,500, 750, 1000.
Press the RESET key to exit the submenu and go back to the main menu and to confirm the number of deliveries programmed.
The ENTER key is disabled
18. COFFEE TEMPERAT.
Press the ENTER key to access the submenu. This allows you to program the temperature of the coffee heater.
The arrow keys increase/decrease the temperature of the coffee heater.
La temperatura massima impostabile e 105^ (221^)
Press the RESET key to exit the submenu and go back to the main menu and to confirm the temperature programmed.
The ENTER key is disabled.
19. STEAM TEMPERAT.
Press the ENTER key to access the submenu. This allows you to program the temperature of the steam boiler.
The arrow keys increase/decrease the temperature of the steam boiler.
La temperatura massima impostabile è 130^ (266°F). Press the RESET key to exit the submenu and go back to the main menu and to confirm the temperature programmed.
The ENTER key is disabled.
20. TOTAL COUNT 1
(only in the version with a double grinder) Pressing the ENTER key, the sub-menu can be entered.
The number of cycles effectuated for each drink key is visualised, following the use of the right grinder.
The keys scroll up and down the various totals of cycles associated to each key used.
The RESET key is used to return to the preceding menu.
In the first position and keeping the key pressed, the absolute total of the doses produced by the machine using the right grinder is visualised.
E.G.
Pressing the 1Espresso key and the 2Espresso key once, the following can be read:

To zero the counting of the various cycles, simultaneously press the keys. The message "Counters Reset" is visualised on the display.
21. TOTAL COUNT 2 (only in the version with a double grinder)
Pressing the ENTER key, the sub-menu can be entered.
The number of cycles effectuated for each drink key is visualised, following the use of the left grinder.
The keys scroll up and down the various totals of cycles associated to each key used.
The RESET key is used to return to the preceding menu.
In the first position and keeping the key pressed, the absolute total of the doses produced by the machine using the left grinder is visualised.
To zero the counting of the various cycles, simultaneously press the keys. The message "Counters Reset" is visualised on the display.
22. TOTAL COUNT (All versions)
Pressing the ENTER key, the sub-menu can be entered. The following are visualised:
The number of cycles effectuated for each drink key, following the use of the left and right grinders.
- Decaffeinated total
- Washing cycle total
- Steam total
Hot water total
Total of litres of water
The keys scroll up and down the various totals. The RESET key is used to return to the preceding menu.
In the first position and keeping the key pressed, the absolute total of the doses produced by the machine.
To zero the counting of the various cycles and the decaffeinated, steam and hot water totals, simultaneously press the keys. The message "Counters Reset" is visualised on the display.
23. PASSWORD
Press the ENTER key to access the submenu. This programmes a new password to access the functions that can be programmed in the TECHNICIAN MODE.
Enter a combination of 5 keys (from the 8 keys available on the keyboard) and set the new required password.
Press the RESET key to quit the submenu and return to the main menu without confirming the setting. Press the ENTER key to confirm the setting.
24. SMART CARD
Press the ENTER key to access the submenu. This sets the SMART CARD reader to enabled. The function is enabled by setting the parameter to YES.
Press the keys to enable (YES) / deactivate (NO) the SMART CARD reader.
25. WATER FILTER L
Press the ENTER key to access the submenu. This allows you to program the number of litres of water to be delivered for the display of the message clean water filter.
The arrow keys increase/decrease the number of litres of water delivered for the display of the message clean water filter.
Press the RESET key to exit the submenu and go back to the main menu and to confirm the number of litres programmed.
The ENTER key is disabled.
26. DE-SCALING (Microbar version with Tank only)
Press the ENTER key to access the submenu. The first message to appear concerns the possibility to set water hardness:
Press the keys to enable (YES) / deactivate (NO) cleaning at the end of service.
Waterhardness°Fr
The keys can be used to select one of the following two functions:
Decalcification Start Cycle?
back to the main menu and to confirm the temperature programmed.
The ENTER key is disabled.
26.1 SETTING WATER HARDNESS
It is possible to set water hardness according to French degrees and therefore, an alarm for performance of the de-scaling cycle.
- When the machine displays this message:
Press the ENTER key to enter the function.
Waterhardness°Fr
The display will then read as follows:
Use the keys to set (increase/reduce) the water
Waterhardness°Fr 08
hardness parameter.
Press the ENTER key to return to the main menu and save the setting to memory.
Press the RESET key to return to the main menu without saving the setting to memory.
The following table shows the correspondence between the hardness setting and the number of litres of water consumed after which the "DE-SCALE" message appears.
| Water Hardness °Fr | Water litres (gal) |
| 1-7 1500 | |
| 8-30 1000 | |
| 31 | 500 |
| 00 | Alarm disabled |
NOTE:
The "DE-SCALE" alarm will not interrupt machine operation and it will be reset as soon as the descaling cycle has been completed, as will the litre counter.
If the set value is "00" the alarm will be disabled.
26.2 DE-SCALING CYCLE
An automatic de-scaling cycle is performed on the machine's boiler tanks.
Decalcification Start Cycle?
- When the message:
Appears, press the ENTER key to begin the descaling cycle.
OPERATION:
- Before starting the de-scaling cycle, fill the tank with a solution of water and de-scaling product.
NOTE: Use at least 2 (0.52 gal) litres of solution.
- When the following message appears:
Decalcification Start Cycle?
- Press the ENTER key;
- The machine will begin to suck up the solution from the tank and at the same time, to expel hot water from the nozzle.
The machine display will read as follows:
Decalcification Please Wait
Once it has sucked up the first litre of solution, the machine will stop for five minutes and then it will start to suck up another litre of solution.
- At the end of this cycle, the display will read as follows:
Decalcification RefillWaterTank
- Rinse out the tank and refill it with clean water (without switch off the machine).
NOTE: Use at least 4 litres (1.06 gal) of solution, otherwise it will be necessary to restart the cycle.
- Wait at least 5 minutes.
- At the end of this time, the display will read:
Rinse Press Enter
- Press the ENTER key and the machine will begin a rinse cycle, taking on board 2 litres (0,53 gal) of water from the container and then expelling it through the steam nozzle.
- During this stage, the machine display will read as follows:
Rinse Please wait
- When the machine has finished the 2 litres (0,53 gal) taken from the container, the display will again read:
Rinse Press Enter
Press the ENTER key again for the machine to start the second stage of the rinse cycle, taking a further 2 litres(0,53 gal) on board from the container. The machine display will then read:
Rinse Please wait
- At the end of the rinse cycle, the machine display will read as follows:
Heating Please wait
Leave the machine to heat up for a few minutes; at the end of this time, the machine will return to its ready status.

WARNING
We advise using the steam dispensing function for a few minutes at the end of each de-scaling cycle.

WARNING
You may notice drops of water and steam coming from the hot water nozzle during the heating stage.
8. SPECIAL MACHINE SCALING FUNCTIONS
8.1 RESETTING THE CLEANING FILTER LITRE COUNTER
This function allows you to reset the total amount of water used.
Proceed as follows:
- Release voltage by turning the main switch off (OFF).
- Reinstate voltage by turning the main switch on (ON) and pressing down on the key:

until the display reads
Reset H20 filter Please Wait
8.2 RESETTING WASHING CYCLES
This function makes it possible to reset the total number of washing cycles.
Proceed as follows:
- Release voltage by turning the main switch off (OFF).
- Reinstate voltage by turning the main switch on (ON) and pressing down on the key:

until the display reads
Reset Clean Please Wait
8.3 RESETTING MACHINE PARAMETERS
This function makes it possible to remove incorrect functioning data and to reinstate the Standard Programming settings (see PRESET SETTINGS chart).
Proceed as follows:
- Release voltage by turning the main switch off (OFF).
- Reinstate voltage by turning the main switch on (ON) and simultaneously pressing down on the keys
ENTER
and RESET
until the display reads:
Please Wait Preset Data
8.4 HANDLING MANUAL COFFEE DELIVERY GROUP
This function makes it possible to activate the motor manually forming the automation of the manual coffee delivery group. Proceed as follows:
- Release voltage by turning the main switch off (OFF).
- Reinstate voltage by turning the main switch on (ON) and simultaneously pressing down
on the arrow keys 2 and 4 until the display reads:
Movement Manual
IMPORTANT: When the machine is switched on, since the arrow key is used to access this site, the piston will automatically start to move downwards.
- Press the arrow key to move the piston DOWNWARD.
- Press the arrow key 2 to move the piston UPWARD.
- Release and reinstate voltage using the main switch to end the procedure.
9. CLEANING AND MAINTENANCE

NEVER use water jets to clean the machine.
During maintenance/repairs, the parts used must be able to guarantee compliance with the safety and hygiene requirements envisaged for the device.
Original replacement parts can offer this guarantee. After repairs to/replacement of a part that comes into contact with foods or water, it is necessary to carry out a washing procedure or to follow the steps indicated by the manufacturer.
9.1 CLEANING THE OUTSIDE OF THE MACHINE
Before carrying out any cleaning operations, set the machine to the "O" energy level, (machine switched off and plug removed from the mains).

Never use solvents, chlorine-based products, abrasives.
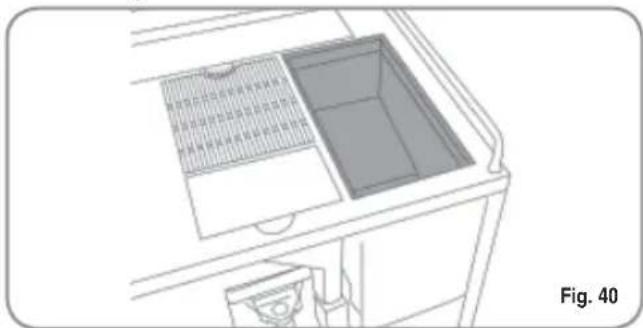
Cleaning the work area: remove the worktop, lifting it up from the front and sliding it out. Remove the water collection dish underneath and clean everything with hot water and cleansers.
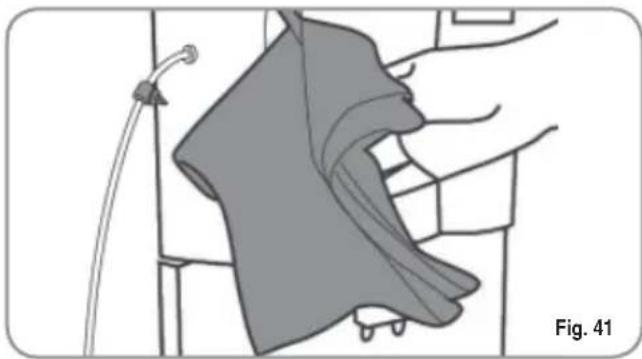
Cleaning the external surfaces: To clean the panels, use a soft, damp cloth.
9.2 CLEANING THE DELIVERY UNIT AND THE MILK FOAMER
NOTE: Follow the instructions on the label applied on the inside of the front door.
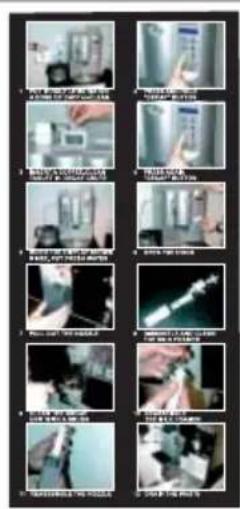
Fig. 36
NOTE: Before starting the washing cycle check and refill the level of water in the water tank.
The machine is equipped to wash the delivery unit with detergent tablets and the milk circuit with liquid cleansers.
The machine will begin a wash cycle that consists of hot water deliveries alternated with pauses. The whole cycle lasts approximately 4 minutes.
We recommend that you carry out a WASHING CYCLE at least once a day using special cleansers.

CAUTION RISK OF INTOXICATION.
We remind you not to interrupt a washing cycle using detergent tablets once started, otherwise detergent residues may remain inside the machine.
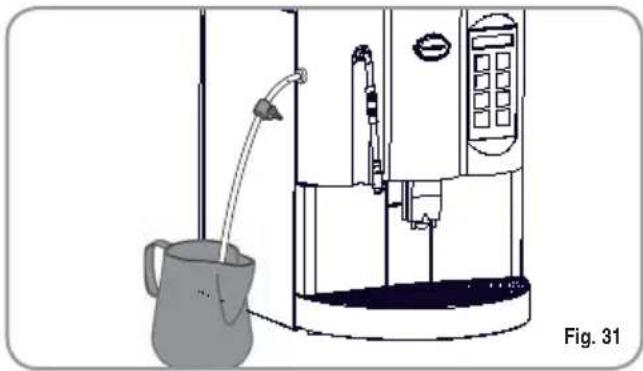
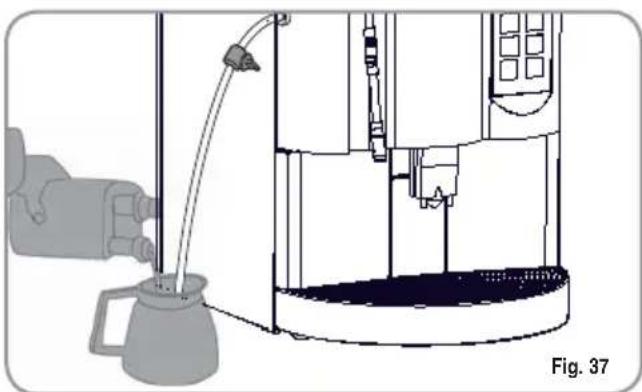
In order to execute the washing procedure proceed as follows:
- Position a container with water beside the machine.
- Put the suction tube inside it.
- Add the specific cleaning product (20 ml [0.005 Gal] of Puly Milk).
- Presssthel following key:

- Keep pressing down on the key for about 5 seconds until the display reads:
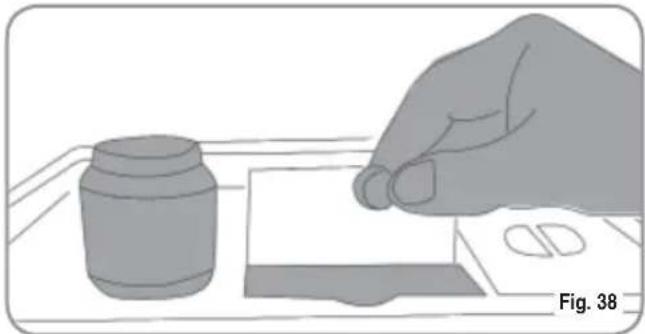
Clean Insert Cleanser
- Open the ground coffee conveyor hatch.
- Insert the cleanser tablet (puly Caff) and close the hatch
- Press the following key:

The display will read:
Clean

WARNING
If the DECAFFEINATED key is not pressed, after about 20 seconds the machine will automatically continue the washing cycle.
NOTE: During the washing cycle the dose keys are disabled.
- At the end of the washing cycle, the display will read:
Rinse Press ENTER
Position another container of just water and press the ENTER key; the machine will perform a rinse cycle and the display will read:
Rinse
NOTE: During the washing and rinsing cycles keeping a container under the delivery unit is advisable or empty the water collector once the wash and rinse cycles have been completed.
9.3 REINSTATING AN INTERRUPTED WASHING CYCLE
- Should the washing cycle be interrupted by electricity failure, when the appliance is next turned on the unit will be in rest position and the display will read:
Please Clean
- Press the DECAFFEINATED key again in order to repeat the procedure described above in the paragraph 'CLEANING THE DELIVERY UNIT AND Milk Foamer.'
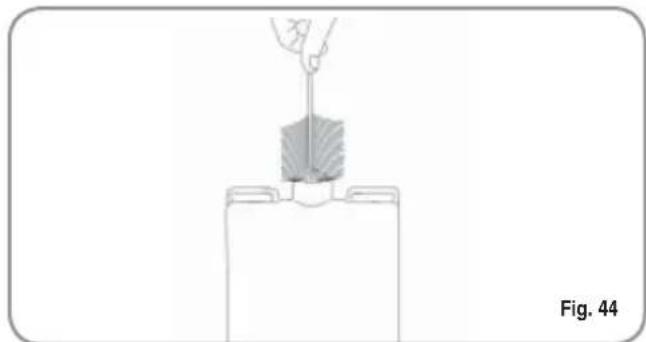
9.4 COFFEE HOLDER COFFEE DELIVERY UNIT CLEANING

CAUTION RISK OF BURNS OR SCALDING
- Set the machine to the "O" energy level.
- Insert the key in the lock.
- Turn the Front panel key counter-clockwise.
- Open the Front panel
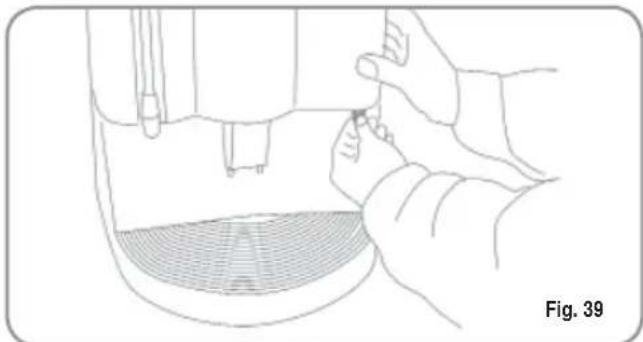
- Remove any coffee residues deposited on the delivery unit sides.
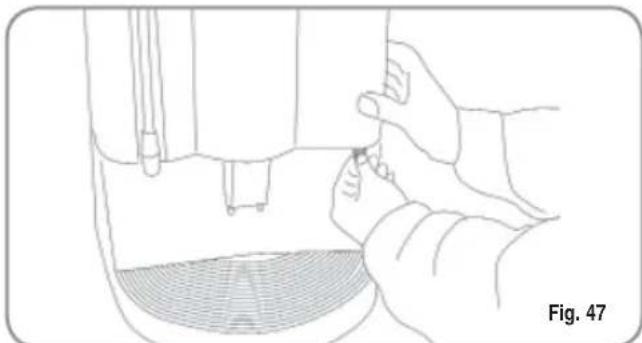
9.5 CLEANING THE STEAM NOZZLE
Clean the steam nozzle each time it is used to warm up drinks.

CAUTION RISK OF BURNS OR SCALDING
If cleaned when the nozzle is still hot, avoid touching it with bare hands.
Use a cloth dipped in hot water and/or a neutral cleanser.
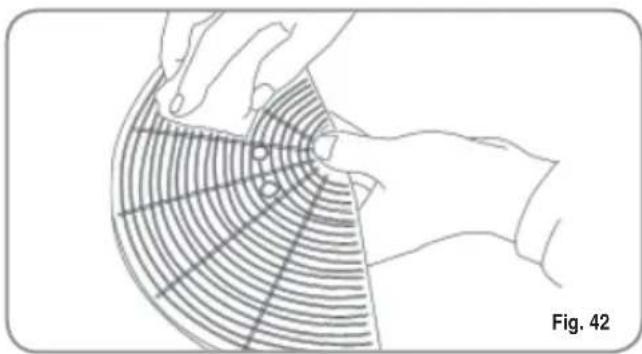
9.6 CLEANING THE DROP COLLECTING TRAY GRID
- Wash the grid clean with a brush and hot water and soap.
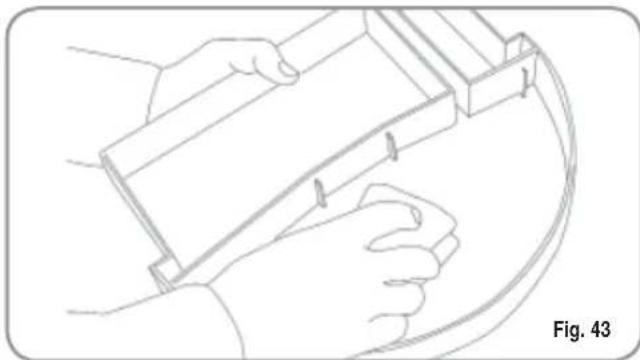
9.7 CLEANING THE WATER COLLECTING TRAY
- Clean the water collecting tray with hot water and soap, if necessary using a brush.
NOTE: The water collecting tray can be washed in the dishwasher.

CAUTION
Never use any sort of solvent.
9.8 CLEANING THE WATI TANK

CAUTION
Switch off the machine before filling or removing the tank.
- Clean the water tank with hot water and soap, if necessary using a swab
NOTE: rinse carefully so that undesirable residues aren't deposited on the bottom of the tank.
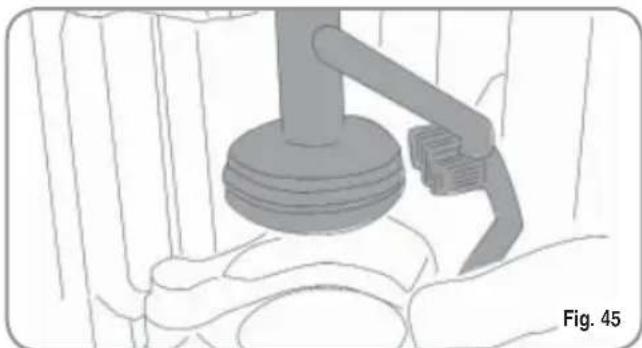
9.9 CLEANING THE GASKET
- Use a small brush to clean any deposits or coffee residues off the piston and the delivery unit site or any other areas soiled with coffee.
9.10 CLEANING THE MILK FOAMER
NOTA: Follow the instructions applied on the label on the inside of the front door too.
- Set the machine to the "O" energy level.
- Insert the key in the lock.
- Turn the Front panel opening key counterclockwise.
- Open the Front panel.
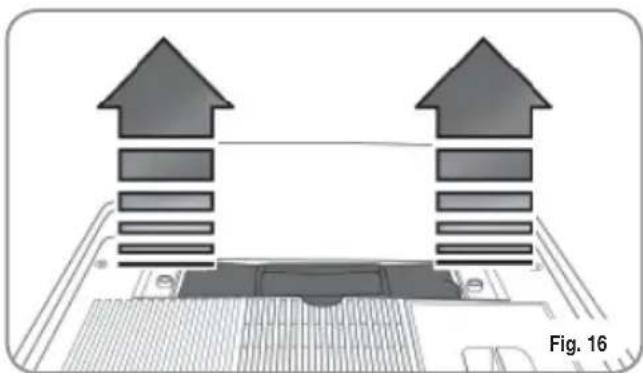
IMPORTANT: Proceed with caution
- Extract the whole delivery unit including the milk foamer, pulling it towards you.
- Extract the milk foamer from the delivery group by sliding it upwards.
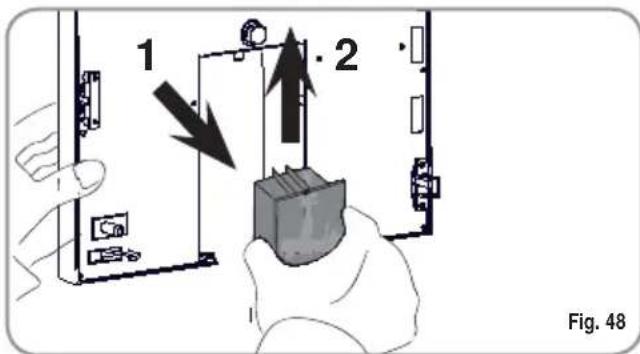
- Disconnect all the tubes attached to it.
- Disassemble the milk foamer and wash it carefully.
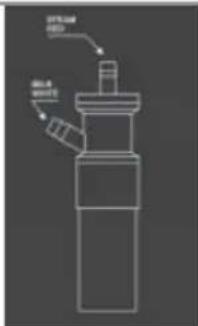
Fig. 48
Fig. 49
NOTE: If the pause between one cappuccino and another is over one hour long, it is advisable to wash the milk foamer by fishing the milk suction tube in hot water rather than in milk.
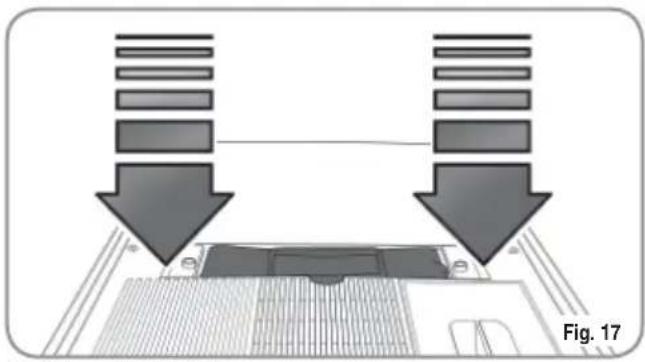
- To reassemble proceed inversely, attaching the milk foamer tubes properly.
NOTE: To make the reassembling procedure easier, an explanatory label has been attached to the front door.
- Clean the drop collector (see paragraph THE DROP COLLECTING TRAY GRID).
10. STANDARD SETTING TABLE
| BEVERAGE WATER | GRINDING MILK PRE- BREWING TAMPING NUMBER | |||||
| VOL (cc) | TIME (sec) | TIME (sec) | ||||
| Ristretto | 40 | 7 | No | yes | ||
| 2 Ristretto | 80 | 9 | No | No | ||
| Espresso | 50 | 7 | No | yes | ||
| 2 Espresso | 100 | 9 | No | No | ||
| Caffè | 60 | 7 | No | yes | ||
| 2 Caffè | 120 | 9 | No | No | ||
| Caffe Creme | 100 | 7 | No | No | ||
| 2 Caffe Creme | 200 | 9 | No | No | ||
| Cappuccino | 50 | 7 | 12 | No | yes | |
| Big Cappuccino | 60 | 7 | 15 | No | yes | |
| Macchiato | 50 | 7 | 12 | No | yes | |
| Caffellatte | 60 | 7 | 12 | No | yes | |
| Milk | 15 | |||||
| Hot Water | 20 | |||||
| Steam | 55 | |||||
| Grounds number | 20 | |||||
| Milk cleaning warning | 00 | |||||
| Clean warning | 00 | |||||
| Group 1 adjustment | 275 | |||||
| Group 2 adjustment | 540 | |||||
| Coffee temperature | 98 (°C) | |||||
| Steam temperature | 125 (°C) | |||||
| Water filter | 00 | |||||
| Grinder setting | 00 | |||||
| Shut down clean | No | |||||
| Password | ||||||
| Smart Card | No | |||||
| Energy Saving | 00 | |||||
| Water hardness*Fr | 00 | |||||
11. MACHINE FUNCTIONS MESSAGES
| DISPLAY | CAUSA | EFFECT | SOLUTION |
| GROUNDS DRAWER FULL Machine ready Drawer full | Grounds drawer full. The number of coffee ground- ds in the drawer has reached the number set during program- ming stage. | Keys delivering coffee based drinks are blo- cked. | Pull out the grounds drawer and empty it into a garbage bag. Put the drawer back into place, when the display reads: Machine ready Drawer out |
| GROUNDS DRAWER OUT OF PLACE Machine ready Drawer out | Grounds drawer out of place. | Keys delive- ring coffee based drinks are blocked. | Insert the grounds drawer into its special slot. Should this alarm turn on during the deli- ry of a coffee based drink: · up until brewing, the alarm is displayed but the drink will be delivered; · after brewing, the cycle in progress will be suspended. The coffee cycle will recom- mence only when the drawer has been put back in its place. Should this alarm turn on during the group movement phase: · the movement will be interrupted When the drawer is back in its place, the reset group will be repeated. |
| FRONT PANEL POSITION Machine Off Front Panel Open | Front panel open. | The machine functions are blocked. | Close the front panel. |
NO
| DISPLAY | CAUSA | EFFECT | SOLUTION |
| WASHING CYCLE IS NEEDEDGIO | The set number of cycles pro- grammed befo-re washing, has been exceeded. | The message will appear on the display but the machine will continue to deliver drinks. | Do a washing cycle (see para-graph WASHING THE DELIVERY UNIT AND MILK FOAMER) |
| Clean Warning | |||
| WASHING THE MILK CIRCUIT IS NEEDED | The set number of hours pro- grammed from time of last milk based drink before washing, has been exce-eded. | The message will appear on the display but the machine will continue to deli-zer drinks. | Perform a washing cycle for the milk foamer only. As in the case of a complete washing cycle, you must keep the key pres-sed down for 6 seconds without, however, inserting cleanser tablets for this group's washing. (See only points 1,2,3,4 of the para-graph 'WASHING THE DELIVERY UNIT AND MILK FOAMER') |
| MilkCleanWarning | |||
| SHUT DOWN CLEAN | An end of ser- vice wash was set for the deli- very unit during the program- ming stage. | An end of servi- ce wash must be performed before the machine is switched off. | Press the ENTER key as shown on the display. The machine will auto-matically perform an end of service wash, dispensing approx. 50cm3 (3.0512 cu in) of water and will then switch off. |
| Shutdown Clean Press Enter | |||
| NEED FOR DE-SCALING CYCLE | The number of litres after which a de-scaling cycle is required has been exceeded. | This message is displayed but the machine will con-tinue to dispense drinks | Carry out a de-scaling cycle (SEE the relevant section entitled "DE-SCALING CYCLE") |
| Please Decalcification |
NO1
12. MACHINE BLOCK ALARM MESSAGES
| DISPLAY | CAUSA | EFFECT | SOLUTION | |
| UPPER PISTON MOTOR GROUP ALARMORE | During the group handling phase, the upper piston exceeded maximum set time by 10 seconds before recognizing motor pickup. | The control unit will halt whatever cycle is on by turning off both the movement actuator and those for drink delivery; the operator will not be able to make selections on the keyboard. | Open and close the machine door. | If the alarm reappears after the second time of taying, call the Service Technician. |
| Xxxxxxx Group Error | ||||
| HEATER FILLING ALARM | The heater fil-ling stage has exceeded the 3 minute maximum time; the probe level is uncovered. | The machine will stop. | If the alarm reappears after the second time of taying, call the Service Technician. | |
| Boiler Filling | ||||
| TURBINE ALARM | The volume counter will not send any impulses to the control unit for 5 seconds. | The delivery will continue for up to 60 seconds or for as long as any of the coffee based drink keys are pressed. | Open and close the machine door. The control unit will repeat the machine starting up procedure. | In case the alarm persists, the machine can be used as a manual appliance. • Press the selected key to start the dosing; • Once the desired dose has been delivered in the cup, press the same key to halt the dose being delivered. Call the S service Technician. |
| Ad allarme rilevato l'unità di con-trello altema a display il mes-saggio relativo alla bevanda in corso con il messaggio di erre associat o una sua funzione. Ad esempio: | ||||
| Flowmeter Error |
NOT
| DISPLAY | CAUSA | EFFECT | SOLUTION |
| WATER TANK EMPTY ALARM | The water tank is empty. | not be delivered and the dosing will be halted while in pro-gress. | Fill the water tank. |
| RefillWaterTank | Use coffee hot Water key to eliminate any air bubbles. | ||
| CLEANING FILTER ALARM | The volume counter has reached the number of litres of deliverable water set during programming phase. | Coffee will not be delivered; the dose will not be halted or it is variable. | Regenerate cleaning filter salts. To erase the alarm see paragraph on 'RESETTING CLEANING FILTER LITRE COUNTER'. |
| Water Folter 1 20 | |||
| TEMPERATURE PROBE MALFUNCTION ALARM | One of the two temperature probes is broken. | Coffee will not be delivered. | Substitute the broken probe. |
| Alarm:CoffeeTemp | |||
| Alarm:SteamTemp | |||
| COFFEE QUANTITY ALARM | Too much coffe. | Coffee will not be delivered and an ejection cycle will be effected. | Reduce the quantity of coffee. |
| Too Much Coffee |
NO1
Nuova Distribution Centre LLC 6940Salashan PKWY BLDG A 98248 Ferdale, WA
Tel. +1.360.3662226
Fax +1.3603664015
videoconf.+1.360.3188595
MANUEL D'INSTRUCTIONS
GEBRAUCHANWEISUNGEN
EC DECLARATION OF CONFORMITY


nuova simonelli
espresso coffee machines
Via M. D'Antegiano, 6 - 62031 Belforte del Chienti (MC)
declare under our responsibility that the product:
MACCHINE PER CAFFE' ESPRESSO
MODELLO: MICROBAR
ESPRESSO COFFEE MACHINES
MODELS:MICROBAR
to which this declaration relates, following the provisions of the Directives:
D.P.R.N.777-23/8/82
DIR.CEE N.30/778
EN60335-11994+A11+A12+A13+A14+A15
EN 60335-2-15; 1996 +A1; TRD 801/08.96
EN 55014:1987 A:1990; EN 55011
following the provisions of the Directives
L'Aministrale Delegation
(Ottavi Nando)
Toutes nos félicitations,
3. TRANSPORT ET DEPLACEMENT .9
3.1 IDENTIFICATION DE LA MACHINE 9
3.2 TRANSPORT 9
3.3 DEPLACEMENT 9
4. INSTALLATION ET OPERATIONS PRELIMINAIRES 10
4.1 INSTALLATION MACHINE VERSION AVEC RESERVOIR
4.2 INSTALLATION MACHINE VERSION A BRANCHEMENT DIRECT 11
4.3 REMPLISSAGE RECIPIENT CAFE 11
4.4 MISE EN MARCHE 12
4.5 ARRET 12
3. TRANSPORT ET DEPLACEMENT
3.1 IDENTIFICATION DE LA MACHINE
4.3 REMPLISSAGE RECIPIENT CAFE
(Configuration standard)

1 Express

2 Express
1 Café

2 Cafés

Deuxieme moulin

Café au lait
(Configuration selections)

Cappuccino

Nuage de lait

1 Café serré

1 Café Crème

Big Cappuccino

Lait

2 Cafés serrés

2 Cafes Crème
6.5 PREPARATION CAFE


6.8 PREPARATION CAFE AU LAIT
- LANGUE
- NOM PRODUIT
- PROG. DOSES
4.PROG.MOULIN1S
5.PROG.MOULIN2S
Decalcification Reservoir
| BEBIDAS (cc) | DOSIS (CAGS) (seguendo) | TIEMPO MOLIENDA (segundos) | DOSIS LECHE | PRE-INFUSión LECHE | PRENADO | ||||||||
| Corto 2 Cortos Expresso 2 Exprés Café 2 Cafés Café Crema 2 Café Crema Capuchino Capuch.grande Manchado café con leche Leche Agua Caliente Vapor Número fondos Alarma lavado leche Alarma lavado Regulación Grupo Regulación Grupo 1 Regulación Grupo 2 Temperatura café Temperatura vapor Filtro agua Regulación molino Lavado fin de service Contraseña Smart Card Ahorro Energía Dureza del agua °Fr | 40 80 50 100 60 120 100 200 50 60 50 | 7 9 7 9 7 7 7 | No No No No No No No No No No No No No No No No No No No No No No No No No No No No No No No No No No No No No No No No No No No No No No No No No No No | Si No Si No No No No Si Si Si Si Si Si Si Si Si Si Si Si Si Si Si Si Si Si Si Si Si Si Si Si Si Si Si Si Si Si Si Si Si Si Si Si Si Si Si Si Si Si Si Si Si Si Si Si Si Si No No No No No No No No No No No No No No No No No No No No No No No No No No No No No No No No No No No No No No No No No No No No No No No No No NO No No No No No No No No No No No No No No No No No No No No No No No No No No No No No No No No No No No No No No No No No No No No No No No No No no no no no no no no no no no no no no no no no no no no no no no no no no no no no no no no no no no no no no no no no no no no no no no no no no no No No No No No No No No No No No No No No No No No No No No No No No No No No No No No No No No No No No No No No No No No No No No No No No No No No No No No No No No No No No No No No No No No No No No No No No No No No No No No No No No No No No No No No No No No No No No No No No No No No No Yes Yes Yes Yes Yes Yes Yes Yes Yes Yes Yes Yes Yes Yes Yes Yes Yes Yes Yes Yes Yes Yes Yes Yes Yes Yes Yes Yes Yes Yes Yes Yes Yes Yes Yes Yes Yes Yes Yes Yes Yes Yes Yes Yes Yes Yes Yes Yes Yes Yes No No No No No No No No No No No No No No No No No No No No No No No No No No No No No No No No No No No No No No No No No No No No No No No No No N No No No No No No No No No No No No No No No No No No No No No No No No No No No No No No No No No No No No No No No No No No No No No No No No No n/a n/a n/a n/a n/a n/a n/a n/a n/a n/a n/a n/a n/a n/a n/a n/a n/a n/a n/a n/a n/a n/a n/a n/a n/a n/a n/a n/a n/a n/a n/a n/a n/a n/a | 12 12 15 55 | No No No No No No No No No No No No No No No No No No No No No No No No No No No No No No No No No No No No No No No No No No No No No No No No No NO | Si No No No No No No Si Si Si Si Si Si Si Si Si Si Si Si Si Si Si Si Si Si Si Si Si Si Si Si Si Si Si Si Si Si Si Si Si Si Si Si Si Si Si Si Si Si Si Si Si S S S S S S S S S S S S S S S S S S S S S S S S S S S S S S S S S S S S S S S S S S S S S S S S S S s s s s s s s s s s s s s s s s s s s s s s s s s s s s s s s s s s s s s s s s s s s s s s s s s s S S S S S S S S S S S S S S S S S S S S S S S S S S S S S S S S S S S S S S S S S S S S S S S S S No No No No No No No No No No No No No No No No No No No No No No No No No No No No No No No No No No No No No No No No No No No No No No No No No S S S S S S S S S S S S S S S S S S S S S S S S S S S S S S S S S S S S S S S S S S S S S S S S S Tl m p l n t l l l l l l l l l l l l l l l l l l l l l l l l l l l l l l l l l l l l l l l l l l l l l l l l l l l l l l l l l l l l l l l l l l l l l l l l l l l l l l l l l l l l l l l l l l l l l l l l l l l l ll l l l l l l l l l l l l l l l l l l l l l l l l l l l l l l l l l l l l l l l l l l l l l l l l l l l l l l l l l l l l l l l l l l l l l l l l l l l l l l l l l l l l l l l l l l l l l l l l l l l I L I L I L I L I L I L I L I L I L I L I L I L I L I L I L I L I L I L I L I L I L I L I L I L I L I L I L I L I L I L I L I L I L I L I L I L I L I L I L I L I L I L I L I L I L I L I L I L I L I L I I L I L I L I L I L I L I L I L I L I L I L I L I L I L I L I L I L I L I L I L I L I L I L I L I L I L I L I L I L I L I L I L I L I L I L I L I L I L I L I L I L I L I L I L I L I L I L I L I L I E L I L I L I L I L I L I L I L I L I L I L I L I L I L I L I L I L I L I L I L I L I L I L I L I L I L I L I L I L I L I L I L I L I L I L I L I L I L I L I L I L I L I L I L I L I L I L I L I L I L L I L I L L I L L L L L L L L L L L L L L L L L L L L L L L L L L L L L L L L L L L L L L L L L L L L L L L L L L L L L L L L L L L L L L L L L L L L L L L L L L L L L L L L L L L L L L L L L L L L L L L L L L L L I L I L I L I L I L I L I L I L I L I L I L I L I L I L I L I L I L I L I L I L I L I L I L I L I L I L I L I L I L I L I L I L I L I L I L I L I L I L I L I L I L I L I L I L I L I L I L I L I L II L I L I L I L I L I L I L I L I L I L I L I L I L I L I L I L I L I L I L I L I L I L I L I L I L I L I L I L I L I L I L I L I L I L I L I L I L I L I L I L I L I L I L I L I L I L I L I L I L I L l l l l l l l l l l l l l l l l l l l l l l l l l l l l l l l l l l l l l l l l l l l l l l l l l l l l l l l l l l l l l l l l l l l l l l l l l l l l l l l l l l l l l l l l l l l l l l l l l l llll l l l l l l l l l l l l l l l l l l l l l l l l l l l l l l l l l l l l l l l l l l l l l l l l l l l l l l l l l l l l l l l l l l l l l l l l l l l l l l l l l l l l l l l l l l l l l l l l l l l r r r r r r r r r r r r r r r r r r r r r r r r r r r r r r r r r r r r r r r r r r r r r r r r r r r r r r r r r r r r r r r r r r r r r r r r r r r r r r r r r r r r r r r r r r r r r r r r r r r r. | ||||||
NUI
11. MENSAJES FUNCIONES MAQUINA
espresso coffee machines
Nuova Distribution Centre LLC 6940Salashan PKWY BLDG A 98248 Ferdale, WA
Tel. +1.360.3662226
Fax +1.3603664015
videoconf.+1.360.3188595
espresso coffee machines
Via M. d'Antegiano, 6
62020 Belforte del Chienti
Macerata Italy
Tel. +39.0733.9501
Fax +39.0733-950242