
A500 - Docking station RAPOO - Free user manual and instructions
Find the device manual for free A500 RAPOO in PDF.
| Product type | Ceramic glass hob |
| Brand | Rapoo |
| Model | A500 |
| Number of cooking zones | 4 zones |
| Control type | 11-position rotary knobs |
| Total power | 6000 W |
| Supply voltage | 230 V |
| Frequency | 50 Hz |
| Recess dimensions (W x D) | 560 x 490 mm |
| Cut-out dimensions | 560 x 490 mm |
| Minimum distance to wall | 40 mm |
| Minimum distance to hood | 650 mm |
| Residual heat indicator | Yes, for each zone |
| Power-on indicator | Yes, on the hob or control panel |
| Surface material | Ceramic glass |
| Recommended cleaning | Soapy water, glass scraper for residues |
| Recommended cleaning products | Collo Profi, Cerafix, Stahlfix |
| Safety | Fuse shutdown, disconnect before cleaning |
| Installation | By approved installer, connection via oven or control panel |
| Certification country | CE |
| Intended use | Household use, food cooking |
| Special instructions | Do not use without a container, avoid sliding pans |
Frequently Asked Questions - A500 RAPOO
User questions about A500 RAPOO
0 question about this device. Answer the ones you know or ask your own.
Ask a new question about this device
Download the instructions for your Docking station in PDF format for free! Find your manual A500 - RAPOO and take your electronic device back in hand. On this page are published all the documents necessary for the use of your device. A500 by RAPOO.
USER MANUAL A500 RAPOO
Zekering in meterkast defect.
natural_image
Technical diagram showing a circular cross-section with internal lines and a labeled point A, connected to a corner joint (no text or symbols beyond label)fig.6
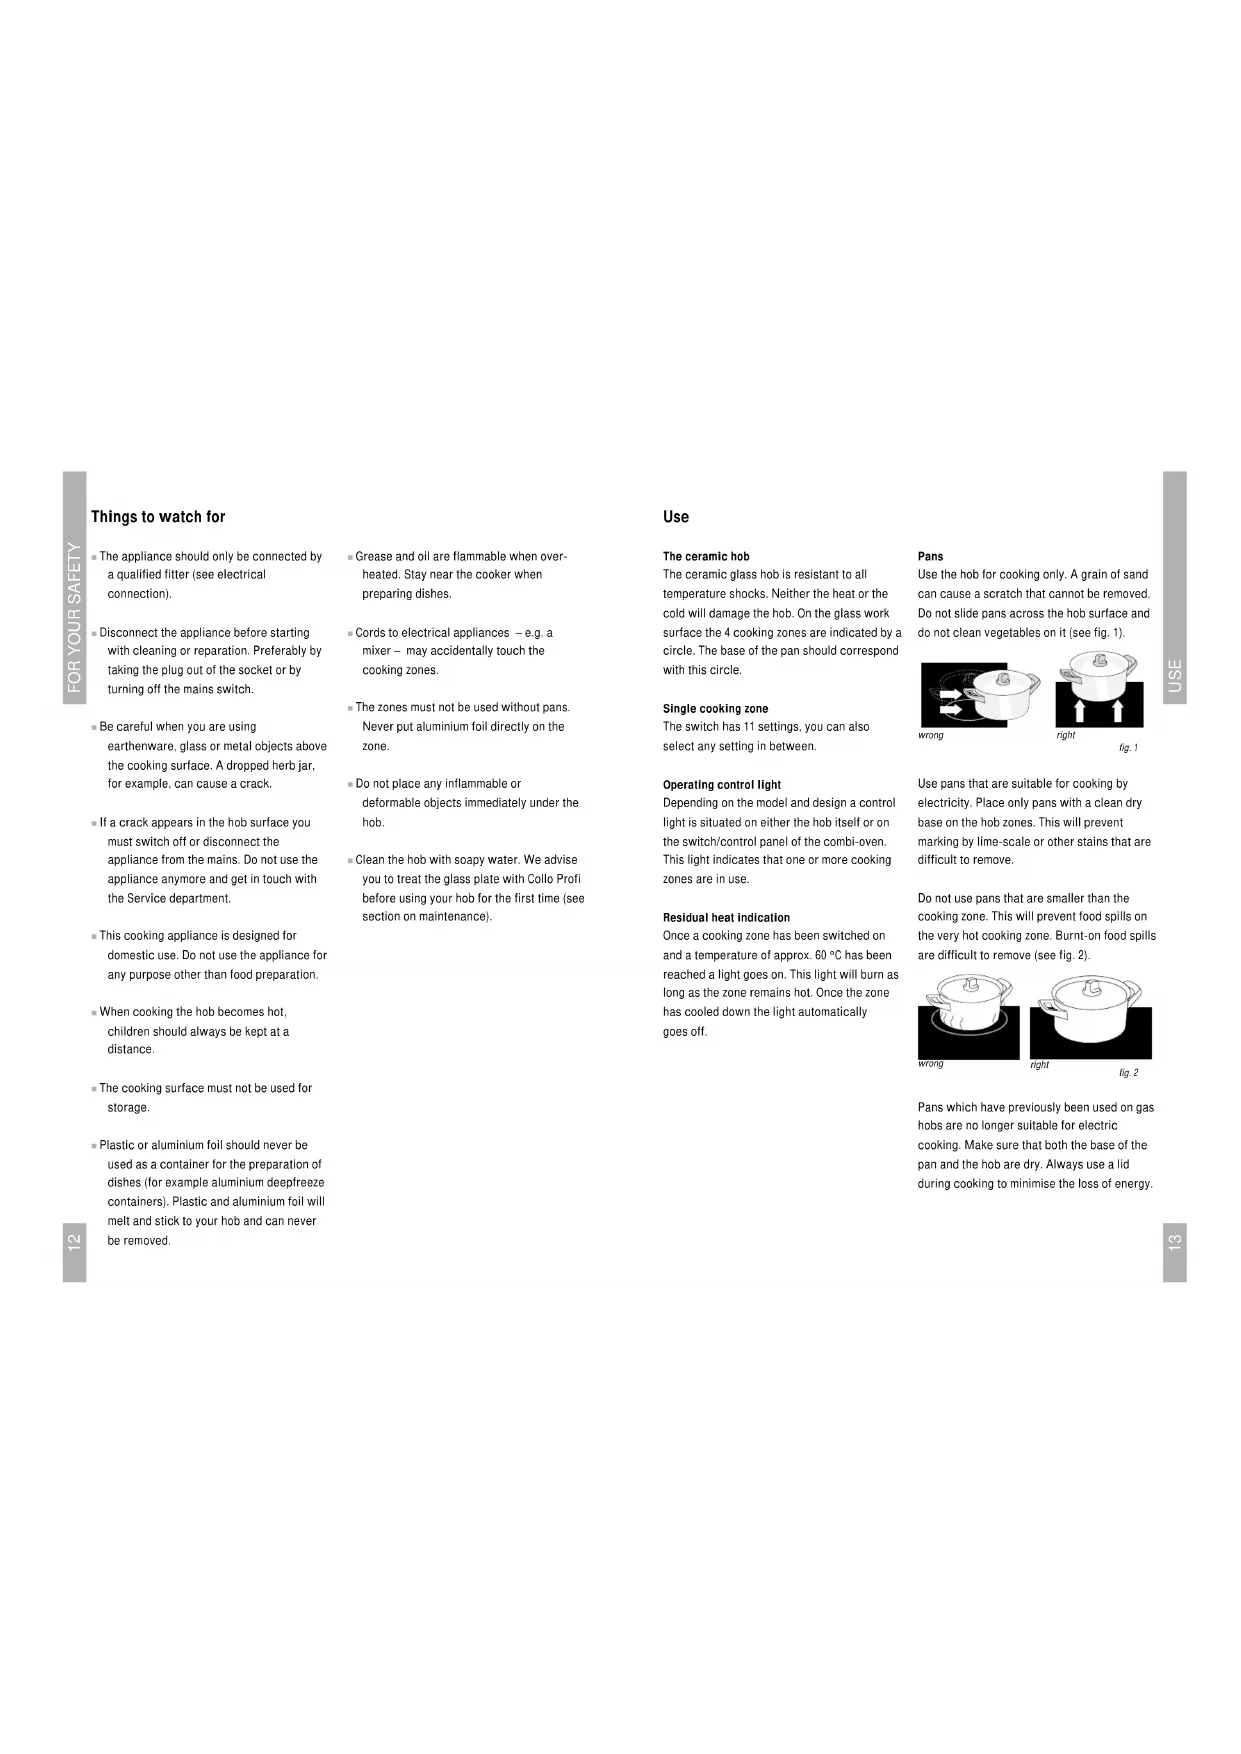
1 Control knob front left cooking zone
2 Control knob rear left cooking zone
3 Control knob rear right cooking zone
4 Control knob front right cooking zone
5 Residual heat indicator
text_image
2 3 1 4 5 1 2 3 4 1 2 3 4Introduction
When you have read these instructions for use, you will quickly be aware of all the facilities the appliance can offer you. You can read about safety and how you should look after the appliance. In addition you will find environmental tips and instructions that can help to save energy.
Keep the instructions for use and the installation instructions. Any later user of this appliance could benefit from them.
Table of contents
■ For your safety 12
Things to watch for....12
■ Use 13
■ Control 14
The 11 settings switch ..... 14
■ Faults 15
■ Maintenance .... 16
Cleaning 16
■ Installation....17
■ Disposal of packaging and appliance ... 19
Enjoy your cooking!
Things to watch for
■ The appliance should only be connected by a qualified fitter (see electrical connection).
- Disconnect the appliance before starting with cleaning or reparation. Preferably by taking the plug out of the socket or by turning off the mains switch.
■ Be careful when you are using earthenware, glass or metal objects above the cooking surface. A dropped herb jar, for example, can cause a crack.
If a crack appears in the hob surface you must switch off or disconnect the appliance from the mains. Do not use the appliance anymore and get in touch with the Service department.
■ This cooking appliance is designed for domestic use. Do not use the appliance for any purpose other than food preparation.
- When cooking the hob becomes hot, children should always be kept at a distance.
- The cooking surface must not be used for storage.
- Plastic or aluminium foil should never be used as a container for the preparation of dishes (for example aluminium deepfreeze containers). Plastic and aluminium foil will melt and stick to your hob and can never be removed.
■ Grease and oil are flammable when overheated. Stay near the cooker when preparing dishes.
- Cords to electrical appliances – e.g. a mixer – may accidentally touch the cooking zones.
■ The zones must not be used without pans. Never put aluminium foil directly on the zone.
- Do not place any inflammable or deformable objects immediately under the hob.
- Clean the hob with soapy water. We advise you to treat the glass plate with Collo Profi before using your hob for the first time (see section on maintenance).
Use
The ceramic hob
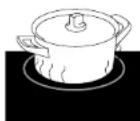
The ceramic glass hob is resistant to all temperature shocks. Neither the heat or the cold will damage the hob. On the glass work surface the 4 cooking zones are indicated by a circle. The base of the pan should correspond with this circle.
Single cooking zone
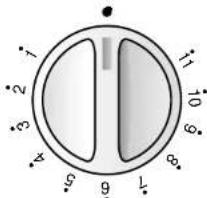
The switch has 11 settings, you can also select any setting in between.
Operating control light
Depending on the model and design a control light is situated on either the hob itself or on the switch/control panel of the combi-oven. This light indicates that one or more cooking zones are in use.
Residual heat indication
Once a cooking zone has been switched on and a temperature of approx. 60 °C has been reached a light goes on. This light will burn as long as the zone remains hot. Once the zone has cooled down the light automatically goes off.
Pans
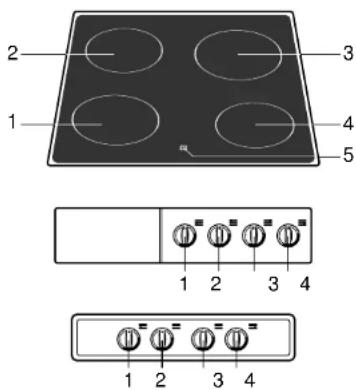
Use the hob for cooking only. A grain of sand can cause a scratch that cannot be removed. Do not slide pans across the hob surface and do not clean vegetables on it (see fig. 1).
wrong
night
fig. 1
Use pans that are suitable for cooking by electricity. Place only pans with a clean dry base on the hob zones. This will prevent marking by lime-scale or other stains that are difficult to remove.
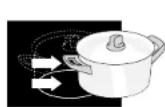
Do not use pans that are smaller than the cooking zone. This will prevent food spills on the very hot cooking zone. Burnt-on food spills are difficult to remove (see fig. 2).
wrong

night
fig. 2
Pans which have previously been used on gas hobs are no longer suitable for electric cooking. Make sure that both the base of the pan and the hob are dry. Always use a lid during cooking to minimise the loss of energy.
The 11 settings switch
text_image
1 2 3 4 5 6 7 8 9 10 11fig. 3
Level 11
Bringing all foods and liquids to the boil. Reducing leaf vegetables. Sealing meats. Frying steak, fish and potatoes.
Level 10 - 9
Frying crêpes, French toast. Deep frying.
Level 8 - 7
Frying (Scotch) pancakes.
Level 6 - 5
Frying fish and small cuts of meat. Braising large joints of meat, frying onions.
Level 4 - 3
Simmering vegetables with a cooking time of more than 10 minutes. Braising vegetables. Thawing frozen leaf vegetables.
Level 2 - 1
Making stock, stewing meats. Keeping dishes warm. Simmering small quantities.
Level 0
Simmering food with a cooking time shorter than 10 minutes, once it has first been brought to the boil at a higher setting.
Note
Each cooking zone on the hob is controlled by an 11 settings switch on the switch panel of the oven.
Trouble shooting
If your appliance does not operate as required, check first if you can solve the problem yourself by using the table below. The cause of the problem is often a simple one.
| Problem | Cause | Remedy |
| Cooking zones do not get hot. | The plug is not in the socket. | Put the plug in the socket. |
| Defective fuse in the fuse-box. | Change the fuse(s). | |
| Metal-like marks on the ceramic hob. | Incorrect cleaning material used. | Remove with a cleaning material like Stahlfix.Do not slide pans across the ceramic hob. |
| Scratches on the ceramic hob. | Sliding pans across the hob is the usual cause. | Do not slide pans across the ceramic hob. |
Cleaning
Daily
Clean the ceramic hob after use. You can use, for example, a little washing-up liquid in water. Never clean the ceramic hob with an abrasive cleaning material!
Weekly
Special maintenance products for ceramic hobs, such as Collo Profi or Cerafix give the ceramic hob a protective layer. Treat the hob with these products also when obstinate stains have been removed.
Stubborn stains
You can remove burnt-on stains, metal and lime scale stains from the ceramic hob with such special cleaning materials as Jif, Collo Luneta or Stahlfix.
Remove stubborn stains with a glass scraper.
Boiled-over food residues
Remove boiled-over food residues with a glass scraper. Molten plastic and sugar can also be removed with a glass scraper. Do not first allow the hob to cool completely.
Special maintenance products for ceramic hobs (e.g. Collo Luneta) form an antistatic layer on the hob so that it attracts dust less readily.
Installation
Electrical connection
6000W - 230 V - 50 Hz
The power supply to the hob is via the oven or the separate control panel. You can read how to connect the appliances to each other in the installation instructions for these appliances.
Assembly
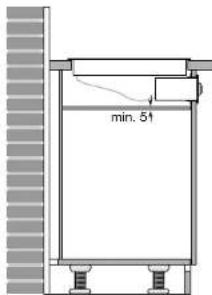
Fit a wooden plate to protect the hob if the hob is combined with a control panel (see fig. 4).
Please note:
Do not fit a hob next to a cupboard or wall made of flammable material above the worktop. (If there is no alternative then keep to a minimum distance of 40 mm between the outer edge of the hob and this wall.
Keep a distance of at least 650 mm between the hob and any extractor hood to be fitted.)
■ Mark out the cut out (560 x 490 mm) on the worktop (see fig. 5).

text_image
580 510 42 560 400fig. 5
text_image
min. 51fig. 4
This appliance complies with the CE directives.
- Connect the unit plug to the oven or operating panel.
- Stick the sealing strip supplied (A) onto the underside of the hob (see fig. 6).

natural_image
Technical diagram showing a pipe joint with a circular cross-section labeled 'A' (no text or symbols present)fig. 8
- Place the hob in the cut out and secure the fixing brackets (see fig. 7).

fig. 7
■ After fitting the hob check that the appliance operates correctly.
Disposal of packaging and appliances
The packaging of the appliance is recyclable. It is made up off:
- cardboard
- polyethylene
- CFC free polystyrene (PS rigid foam)
- polypropylene straps around the box
Please dispose of these materials in a responsible way in accordance with the regulations of your local authority.
Your local authority will also be able to give you information about disposing disused household appliances in a responsible way.
natural_image
Technical diagram showing a mechanical joint with labeled section A (no text or symbols beyond label)fig. 6