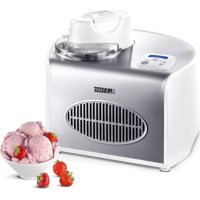
282601 - Ice machine PRINCESS - Free user manual and instructions
Find the device manual for free 282601 PRINCESS in PDF.


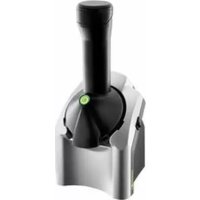
| Product Type | Ice Cream Maker (Sorbet Maker) |
| Brand | Princess |
| Model | 282601 |
| Dimensions (approx.) | 25 x 25 x 30 cm |
| Weight (approx.) | 3.5 kg |
| Power Supply | 220-240 V, 50-60 Hz |
| Power | 150 W |
| Removable Bowl Capacity | 1.5 L (max 80% i.e. 1.2 L of mixture) |
| Main Functions | Preparation of ice cream, sorbets, frozen yogurt and frozen desserts; automatic mixing and cooling; adjustable timer 10-50 minutes; extended cooling function |
| Display | Digital screen with countdown |
| Materials | Removable stainless steel bowl, plastic body |
| Included Accessories | Fixed bowl, removable bowl, mixing arm, bowl lid, lid cover, motor unit, seal ring, measuring cup, dosing spoon |
| Cleaning and Maintenance | Clean the appliance with a damp cloth; accessories washable with soapy water; do not immerse the base; dry completely before storage |
| Safety | Automatic shut-off at end of program; end signal; locked lid; extended cooling function without mixing |
| Spare Parts and Repairability | Removable bowl, mixing arm, lid, gasket, measuring cup, spoon available; repair by an authorized repairer mandatory |
| Usage | Place on a flat and stable surface; cold ingredients recommended; do not fill more than 80% |
| Warranty | 2 years (according to local legislation) |
Frequently Asked Questions - 282601 PRINCESS
User questions about 282601 PRINCESS
0 question about this device. Answer the ones you know or ask your own.
Ask a new question about this device
Download the instructions for your Ice machine in PDF format for free! Find your manual 282601 - PRINCESS and take your electronic device back in hand. On this page are published all the documents necessary for the use of your device. 282601 by PRINCESS.
USER MANUAL 282601 PRINCESS
natural_image
Line drawing of a kitchen electric oven with control panel and fan (no text or symbols)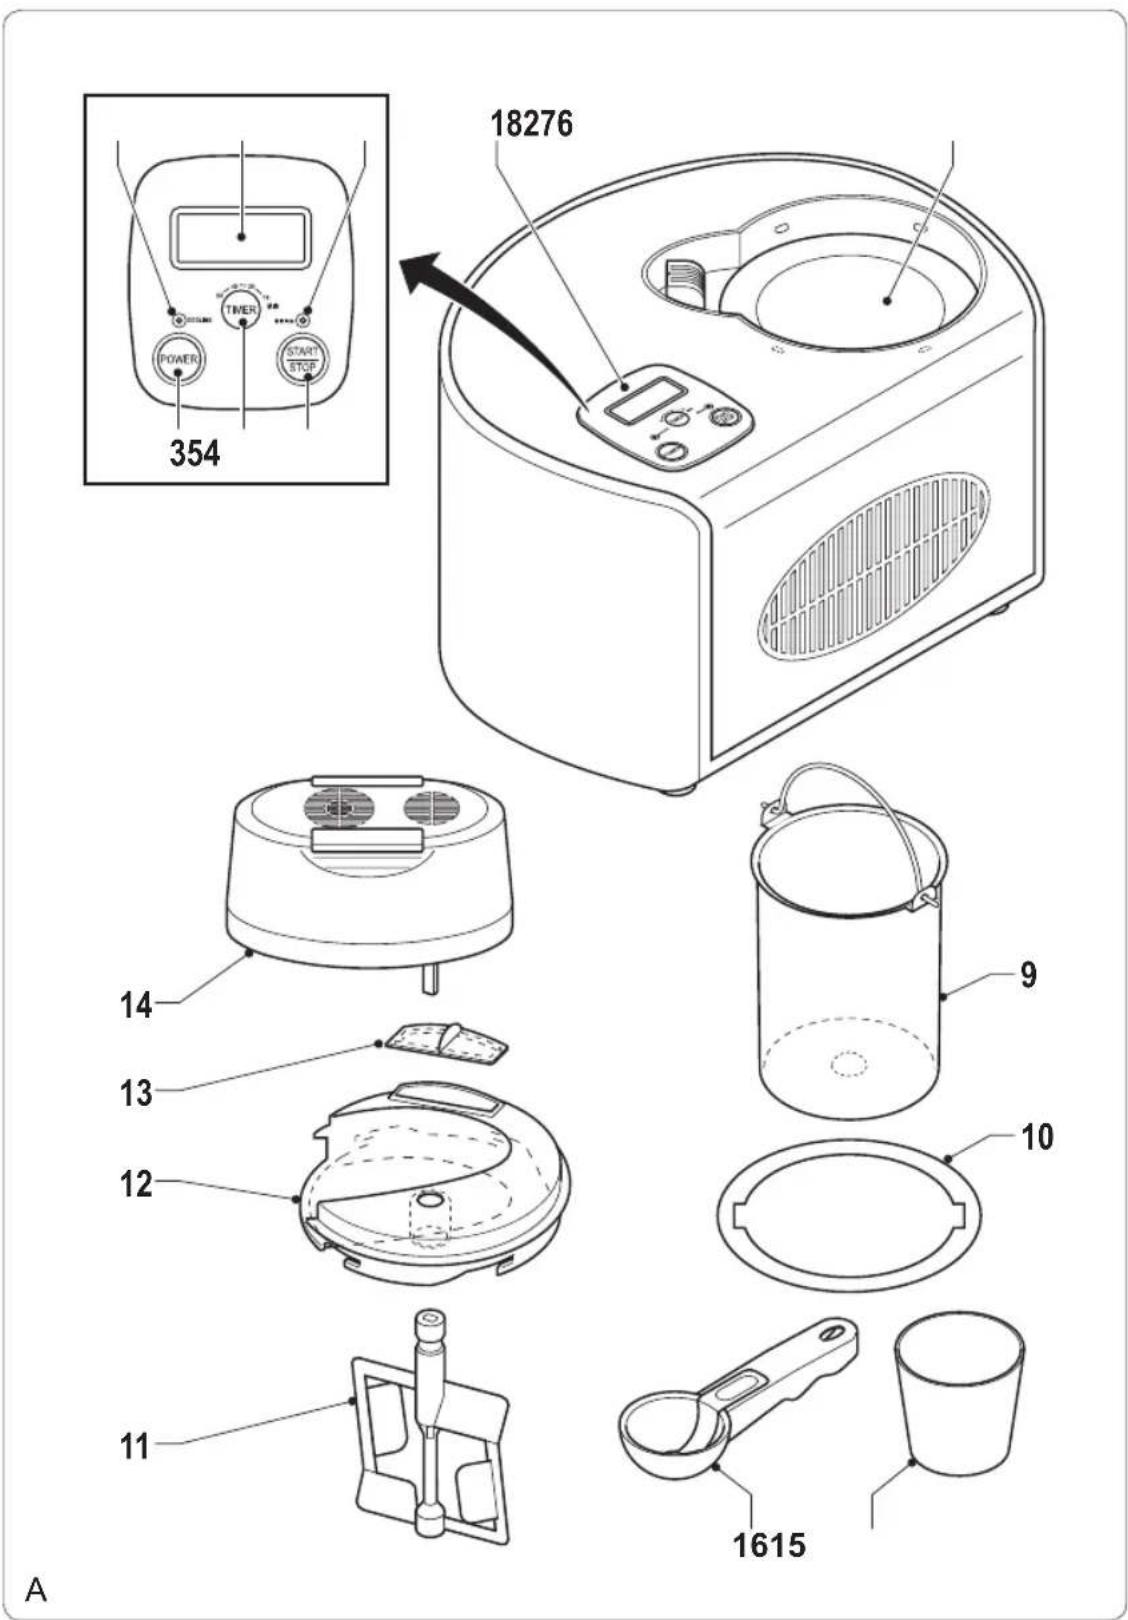

B

C
Gefeliciteerd!
Perzik (in sap) 400 g
You have purchased a Princess household appliance. Our aim is to provide quality products with a tasteful design and at an affordable price. We hope that you will enjoy this appliance for many years.
Instructions for use
The instructions for use have been collected in the corresponding section. Be familiar with the safety instructions when you consult the instructions for use.
Safety instructions
Warning!
When using mains-powered appliances, basic safety instructions must always be followed to reduce the risk of fire, electric shock and personal injury.
Do not use the appliance near bathtubs, • showers, basins or other vessels containing water.
Read the entire manual carefully before use. • The intended use is described in this manual
The use of any accessory or the performance of any operation with this appliance other than recommended can cause a risk of personal injury.
Keep this manual for future reference. Children should be supervised to ensure that they do not play with the appliance.
The use of this appliance by children or • persons with a physical, sensory, mental or motorial disability, or lack of experience and knowledge can give cause to hazards.
Persons responsible for their safety should give explicit instructions or supervise the use of the appliance.
Use
Always be careful when using the appliance.
- Beware of hot parts. The surface can become hot when the appliance is operating. Always protect the appliance from water • or excessive humidity.
- Do not operate the appliance if your hands are wet. Do not operate the appliance if you are barefoot.
Carefully guide the mains cable to make • sure that it does not hang over the edge of a worktop and cannot be caught accidentally or tripped over.
Never pull the mains cable to disconnect • the mains plug from the mains. Keep the mains cable away from heat, oil and sharp edges.
Do not remove any part or accessory when the mains plug is connected to the mains.
Always first disconnect the mains plug from the mains.
If the mains cable becomes damaged • during use, immediately disconnect the mains plug from the mains. Do not touch the mains cable before disconnecting the mains plug from the mains.
Disconnect the mains plug from the mains • when the appliance is not in use, before assembly or disassembly and before cleaning and maintenance.
Safety of others
Do not allow children or any person • unfamiliar with these instructions to use the appliance.
Do not allow children or animals to come • near the work area. Do not allow children or animals to touch the appliance or mains cable. Close supervision is necessary when the appliance is used near children.
After use
Disconnect the mains plug from the mains • and let the appliance cool down before leaving it unattended and before replacing, cleaning or inspecting any parts of the appliance.
Store the appliance in a dry place when not • in use. Make sure that children do not have access to stored appliances.
Inspection and repairs
Before use, check the appliance for • damaged or defective parts. Inspect the appliance for breakage of parts, damage to switches and other conditions that can affect the operation.
Do not use the appliance if any part is • damaged or defective.
Have any damaged or defective part repaired or replaced by an authorised repair agent.
Never attempt to remove or replace any part yourself.
Before use, check the mains cable for wear • or damage.
Do not use the appliance if the mains cable • or mains plug is damaged or defective.
If the mains cable or mains plug is damaged or defective, it must be replaced by the manufacturer or an authorised repair agent.
Keep the appliance away from heat sources.
Make sure that the appliance does not • come into contact with flammable material.
Do not disassemble the base to reduce • the risk of fire, electric shock and personal injury.
Do not move the appliance while it is • switched on.
Do not leave the appliance unattended during use.
Safety instructions for ice-cream makers
Before use, always check that the mains • voltage is the same as the voltage on the rating plate of the appliance.
- Connect the appliance to an earthed wall socket. If necessary, use an earthed extension cable of a suitable diameter (at least 3 × 1 mm^2 ).
- For additional protection, install a residual current device (RCD) with a rated residual operating current that does not exceed 30 mA.
- The appliance is not intended to be operated by means of an external timer or separate remote-control system.
- Make sure that water cannot enter the contact plugs of the mains cable and the extension cable.
Always fully unwind the mains cable and • the extension cable.
- Do not use the appliance outdoors.
- Do not operate the appliance without the bowl lid.
- Place the appliance on a stable and flat surface.
- Keep your hands away from the moving parts.
- Keep long hair and loose clothing away from the moving parts.
- Keep spatulas and other kitchen utensils away from the moving parts.
- Do not use sharp objects or kitchen utensils in the removable bowl.
- Only use a rubber spatula, a plastic scoop, or a wooden spoon in the removable bowl.
- Do not place the removable bowl on flames, hot plates or stoves.
U.K. Wiring instructions Class 1
The wires in the mains lead are coloured in accordance with the following code:
BLUE NEUTRAL
BROWN LIVE
GREEN/YELLOW EARTH
As the colours of the wire in the mains lead of this appliance may not correspond with the colour markings identifying the terminals on your plug, proceed as follows:
The wire which is coloured BLUE must be connected to the terminal which is marked with the letter N or coloured black.
The wire which is coloured BROWN must be connected to the terminal which is marked with the letter L or coloured red.
The wire which is coloured GREEN/YELLOW must be connected to the terminal which is
marked with the letter E or ⏚ and is coloured GREEN or GREEN/YELLOW.
If a 13Amp (BS1363) plug is used, a 3Amp (BS1362) fuse must be fitted, or if any other type of plug is used, a 13Amp fuse must be fitted, either in the plug or adaptor, or on the distribution board.
Warning! This appliance must be earthed.
Description (fig. A)
Your 282600/282601 Princess ice-cream maker has been designed for making ice cream and other frozen desserts. The appliance is suitable for domestic use only.
- Operation panel
-
Digital display
-
POWER button
- START/STOP button
- TIMER button
- Mixing indicator (green)
- Cooling indicator (red)
- Fixed bowl
- Removable bowl
- Seal ring
- Mixing arm
- Bowl lid
- Bowl lid cover
- Motor unit
- Measuring cup
- Measuring spoon
Package contents
Ice-cream maker•
Removable bowl•
Mixing arm•
Bowl lid·
- Bowl lid cover
- Motor unit
- Seal ring
- Measuring cup
- Measuring spoon
Initial use
Preparation
- Clean the appliance.
Refer to "Cleaning and maintenance". - Clean the accessories.
Refer to "Cleaning and maintenance".
Assembly
Warning!
- Before assembly, always switch off the appliance and remove the mains plug from the wall socket.
- Before mounting the removable bowl into the fixed bowl, make sure that the outside of the removable bowl and the inside of the fixed bowl are dry. The removable bowl and the fixed bowl can freeze together.
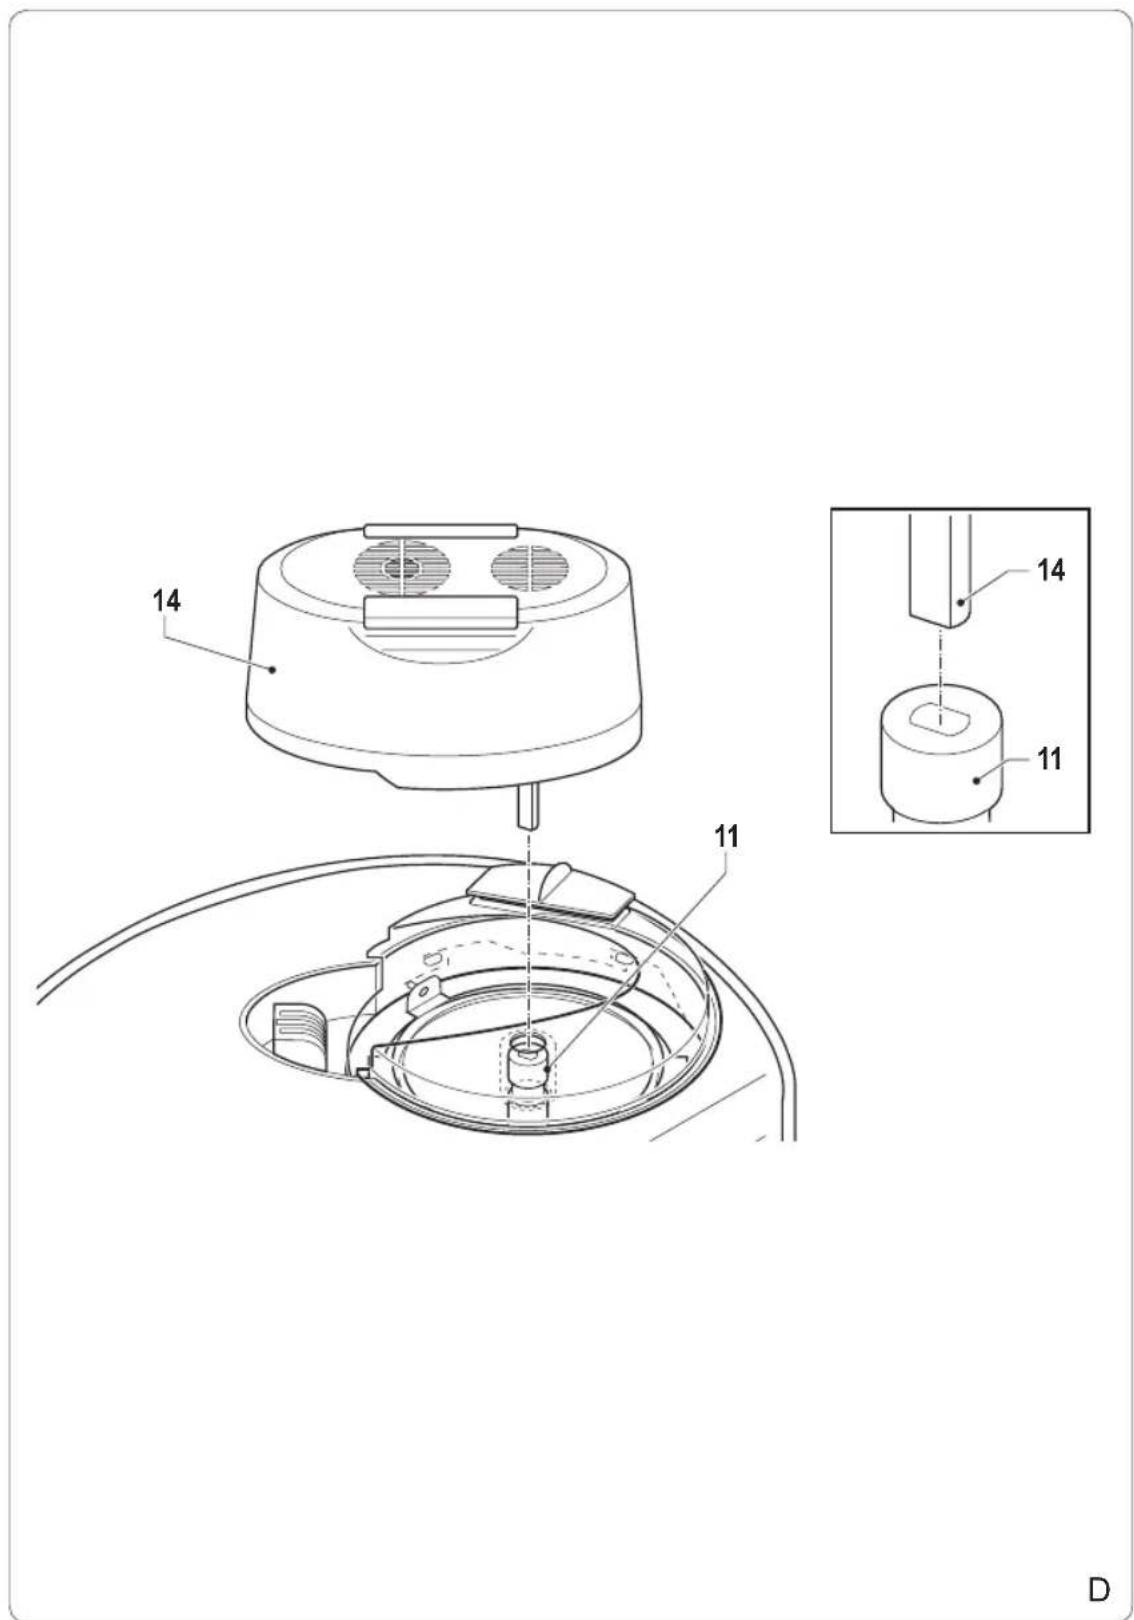
Assembling the appliance (fig. B - D)
- Place the seal ring (10) on top of the fixed bowl (8).
Mount the removable bowl (9) into the fixed • bowl (8).
Mount the mixing arm (11) into the • removable bowl (9). The bottom of the mixing arm (11) rests in the centre of the removable bowl (9).
Caution! The mixing arm (11) does not fit firmly into the removable bowl (9) automatically. The bowl lid (12) must first be mounted onto the removable bowl (9) with the mixing arm (11) fitted in the centre of the bowl lid (12).
Mount the bowl lid (12) onto the removable • bowl (9). Make sure that the top of the mixing arm (11) is fitted in the centre of the bowl lid (12). Tighten the bowl lid (12) by turning it clockwise.
Mount the bowl lid cover (13) onto the bowl • lid (12).
Mount the motor unit (14) onto the bowl lid • (12).
Caution! Make sure that the hole in the top of the mixing arm (11) aligns with the shape of the shaft of the motor unit (14) (fig. D).
Use
Switching on and off (fig. A)
Press the POWER button (3) to switch on the appliance. The digital display (2) shows "50:00".
Press the POWER button (3) again to switch off the appliance.
Setting the time (fig. A)
The required time can be set using the TIMER button (5). The default time is 50 minutes.
Press the TIMER button (5) 1x to set the • time to 40 minutes. The digital display (2) shows "40:00".
Press the TIMER button (5) 2x to set the • time to 30 minutes. The digital display (2) shows "30:00".
Press the TIMER button (5) 3x to set the • time to 10 minutes. The digital display (2) shows "10:00".
Press the TIMER button (5) 4x to set the • time to 50 minutes. The digital display (2) shows "50:00".
Starting and stopping the appliance (fig. A)
- If the time is set, press the START/STOP button (4) to start the mixing process. The mixing indicator (6) comes on. The digital display (2) counts down during the process.
• After 2 minutes, the cooling process will start automatically. The cooling indicator (7) comes on. - To interrupt the process, take one of the following actions:
- Press the START/STOP button (4) for 2 seconds.
- Press the POWER button (3).
- If the process is completed, a buzzer will sound 10 times to indicate the end of the process. The digital display (2) shows "00:00".
Adjusting the time (fig. A)
During use
If the appliance is operating, the time can be adjusted using the TIMER button (5).
The default time is 50 minutes.
- Press the TIMER button (5) 1x to increase the time by 5 minutes. Each time the TIMER button (5) is pressed, the time will be increased by 5 minutes.
After use
If the dessert is of insufficient quality after the process is completed, the appliance can be restarted using the START/STOP button (4).
- Press the START/STOP button (4) for 2 seconds.
- If necessary, press the TIMER button (5) to set the time
- Press the START/STOP button (4) to start the appliance.
Extended cooling function
The appliance is equipped with an extended cooling function. If the appliance is not switched off within 10 minutes after the process is completed, the extended cooling function will be activated automatically. The cooling function (without the mixing function) will first be activated for 10 minutes and subsequently deactivated for 10 minutes. After 60 minutes, the extended cooling function will be deactivated automatically.
Caution!
- If you want to use the extended cooling function after the process is completed, first remove the motor unit to prevent accelerated wear.
Hints for use (fig. B & C)
Caution!
- Do not remove the motor unit (14) during use.
- Keep the bowl lid (12) and the bowl lid cover (13) closed during use.
Prepare the ingredients.
Place the appliance on a stable and flat surface.
Put the ingredients into the removable bowl • (9).
Note! Make sure that the removable bowl (9) is not filled with ingredients for more than 80% of the capacity. The dessert expands during the process.
Place the seal ring (8).
Mount the removable bowl (9).•
Mount the mixing arm (11).
Mount the bowl lid (12).•
Mount the bowl lid cover (13).
Mount the motor unit (14).
Switch on the appliance.
If necessary, set the time for the process • for making desserts.
Start the process for making desserts.
Keep the bowl lid (12) and the bowl lid cover • (13) closed during the process as much as possible. Only open the bowl lid (12) and the bowl lid cover (13) to check whether the process is finished.
• After use, switch off the appliance and remove the mains plug from the wall socket.
Recipes
Vanilla ice cream
| Ingredients | Quantity |
| Fat milk (chilled) | 1 cup |
| Sugar | 3/4 cup |
| Whipped cream (chilled) | 2 cups |
| Vanilla extract (pure) | 1 - 2 tsp. |
- Use a stick blender (low speed) or a whisk to mix the milk and the sugar until the sugar is dissolved.
- Stir the whipped cream and the vanilla through the mixture.
Put the mixture into the removable bowl.
Start the process for making desserts.
Cooling time: The default cooling time is 50 minutes. The cooling time can be set according to your taste before use or adjusted during and after use.
Amount of servings (1/2 cup): 10.
Chocolate ice cream
Ingredients Quantity
Fat milk (chilled) 1 cup
Sugar 1/2 cup
Bittersweet / semi-sweet chocolate
(pieces) 225 g
Whipped cream (chilled) 2 cups
Vanilla extract (pure) 1 tsp.
• Heat the milk until it just begins to boil.
- Use a blender or a food processor (pulse mode) to mix the chocolate and the sugar until the chocolate is finely chopped.
- Stir the hot milk through the mixture until the mixture forms a smooth substance.
- Allow the mixture to cool down completely.
- Stir the whipped cream and the vanilla through the mixture.
Put the mixture into the removable bowl. Start the process for making desserts.
Cooling time: The default cooling time is 50 minutes. The cooling time can be set according to your taste before use or adjusted during and after use.
Amount of servings (1/2 cup): 10.
Strawberry ice cream
Ingredients Quantity
Fat milk (chilled) 1 cup
Sugar 1 cup
Strawberry (sliced) 400 g
Lemon juice (fresh) 3 tbsp.
Whipped cream (chilled) 2 cups
Vanilla extract (pure) 1 tsp.
- Use a whisk to mix the strawberries, the lemon juice, and 1/3 of the sugar.
- Allow the strawberries to macerate for 2 hours.
Use a stick blender (low speed) or a whisk • to mix the milk and the sugar until the sugar is dissolved.
Stir the whipped cream, the vanilla, and • the juice from the macerated strawberries through the mixture.
Put the mixture into the removable bowl.
Start the process for making desserts.
Add the strawberries 5 minutes before the end of the process.
Cooling time: The default cooling time is 50 minutes. The cooling time can be set according to your taste before use or adjusted during and after use.
Amount of servings (1/2 cup): 12.
Coffee ice cream
Ingredients Quantity
Fat milk (chilled) 1 cup
Sugar 3/4 cup
Instant coffee/espresso 2 tbsp.
Whipped cream (chilled) 2 cups
Vanilla extract (pure) 1 tsp.
Use a stick blender (low speed) or a whisk • to mix the milk, the sugar, and the instant coffee/espresso until the sugar and the instant coffee/espresso are dissolved.
- Stir the whipped cream and the vanilla through the mixture.
Put the mixture into the removable bowl.
Start the process for making desserts.
Cooling time: The default cooling time is 50 minutes. The cooling time can be set according to your taste before use or adjusted during and after use.
Amount of servings (1/2 cup): 10.
Lemon sorbet
Ingredients Quantity
Sugar 2 cups
Water 2 cups
Lemon juice (fresh) 1.5 cup
Lemon zest 1 tbsp.
- Put the water and the sugar in a saucepan.
-
Heat the mixture (medium heat) until it just begins to boil.
-
Allow the mixture to simmer (low heat) until the sugar is dissolved. (Do no stir the mixture.)
- Allow the mixture to cool down completely.
- Stir the lemon juice and the lemon zest through the mixture.
Put the mixture into the removable bowl. Start the process for making desserts.
Cooling time: The default cooling time is 50 minutes. The cooling time can be set according to your taste before use or adjusted during and after use.
• Amount of servings (1/2 cup): 8.
Strawberry sorbet
Ingredients Quantity
Sugar 1 cup
Water 1 cup
Corn syrup 1/4 cup
Strawberry (quartered) 200 g
Lemon/lime juice (fresh) 6 tbsp.
- Put the water and the sugar in a saucepan.
- Heat the mixture (medium heat) until it just begins to boil.
- Allow the mixture to simmer (low heat) until the sugar is dissolved. (Do no stir the mixture.)
- Allow the mixture to cool down completely.
- Use a blender or a food processor (pulse mode) to mix the strawberries and the lemon/lime juice until the mixture forms a smooth substance.
- Press the mixture through a fine sieve to remove the seeds.
- Stir the cooled sugar syrup and the corn syrup through the mixture.
- Allow the mixture to cool down completely. Put the mixture into the removable bowl.
- Start the process for making desserts.
Cooling time: The default cooling time is 50 minutes. The cooling time can be set according to your taste before use or adjusted during and after use.
Amount of servings (1/2 cup): 10.
Mango sorbet
Ingredients Quantity
Sugar 2/3 cup
Corn syrup 1/2 cup
Mango (cubed) 4
Lemon/lime juice (fresh) 6 tbsp.
Use a blender or a food processor (pulse • mode) to mix the mango and the lemon/lime juice until the mixture forms a smooth substance.
Put the mixture into the removable bowl. Start the process for making desserts.
Cooling time: The default cooling time is 50 minutes. The cooling time can be set according to your taste before use or adjusted during and after use.
Amount of servings (1/2 cup): 10.
Frozen chocolate yoghurt
Ingredients Quantity
Fat milk (chilled) 1 cup
Low-fat vanilla yoghurt 2 cups
Sugar 1/4 cup
Bittersweet / semi-sweet chocolate
(pieces) 170 g
Use a blender or a food processor (pulse • mode) to mix the milk and the chocolate until the mixture forms a smooth substance. Stir the vanilla yoghurt and the sugar • through the mixture until the sugar is dissolved.
Put the mixture into the removable bowl. Start the process for making desserts.
Cooling time: The default cooling time is 50 minutes. The cooling time can be set according to your taste before use or adjusted during and after use.
• Amount of servings (1/2 cup): 8.
Frozen berry yoghurt
Ingredients Quantity
Fat milk (chilled) 1/2 cup
Low-fat vanilla yoghurt 2 cups
Sugar 1/4 cup
Frozen mixed berries (pureed) 340 g
Use a stick blender (low speed) or a whisk to mix the vanilla yoghurt, the milk, and the sugar until the sugar is dissolved.
Stir the berry puree through the mixture.
Put the mixture into the removable bowl. Start the process for making desserts.
Cooling time: The default cooling time is 50 minutes. The cooling time can be set according to your taste before use or adjusted during and after use.
Amount of servings (1/2 cup): 8.
Frozen peach yoghurt
| Ingredients Quantity | |
| Low-fat vanilla yoghurt 2 cups | |
| Sugar | 1/3 cup |
| Peach (in juice) | 400 g |
- Drain the peaches. Keep a half cup of the peach juice.
- Use a blender or a food processor (pulse mode) to chop the peaches.
- Stir the vanilla yoghurt, the sugar, and the peach juice through the mixture until the sugar is dissolved.
Put the mixture into the removable bowl. • Start the process for making desserts. • Cooling time: The default cooling time is 50 minutes. The cooling time can be set according to your taste before use or adjusted during and after use.
Amount of servings (1/2 cup): 8.
Storing desserts
Warning!
- Do not store the desserts in the freezer for more than 2 weeks.
- Do not refreeze defrosted desserts.
- Do not consume defrosted desserts.
Caution!
- Do not use sharp or metal objects to remove desserts from the removable bowl.
- Do not store frozen desserts or drinks in the removable bowl.
- Remove the dessert from the removable bowl using a rubber spatula, a plastic scoop, or a wooden spoon.
- Put the dessert in an airtight plastic container.
Mark the plastic container with the actual • date and the type of dessert.
Place the plastic container into the freezer.
Cleaning and maintenance
The appliance must be cleaned after each use.
Warning!
- Before cleaning or maintenance, remove the mains plug from the wall socket and wait until the appliance has cooled down.
- Do not immerse the appliance in water or any other liquids for cleaning.
Caution!
- Do not use aggressive or abrasive cleaning agents to clean the appliance.
- Do not use sharp objects to clean the appliance.
Regularly check the appliance for possible damage.
Clean the appliance with a damp cloth. • Dry the appliance with a clean, dry cloth. Clean the accessories in soapy water. • Fully dry the accessories.
Store the appliance with the accessories • in a dry place, out of the reach of children.
Disclaimer
Subject to change; specifications can be changed without further notice.
Félicitations!
Vaniljeessens (ren9 1-2 teskjeer
Bruk en stavmikser (lav hastighet) eller en • visp til å blande melk og sukker til sukkeret er oppløst.
- Gefeliciteerd!
- Instructions for use
- Safety instructions
- Warning!
- Use
- Safety of others
- After use
- Inspection and repairs
- Safety instructions for ice-cream makers
- U.K. Wiring instructions Class 1
- BLUE NEUTRAL
- BROWN LIVE
- GREEN/YELLOW EARTH
- Description (fig. A)
- Package contents
- Initial use
- Preparation
- Assembly
- Assembling the appliance (fig. B - D)
- Switching on and off (fig. A)
- Setting the time (fig. A)
- Starting and stopping the appliance (fig. A)
- Adjusting the time (fig. A)
- Extended cooling function
- Caution!
- Hints for use (fig. B & C)
- Recipes
- Chocolate ice cream
- Ingredients Quantity
- Strawberry ice cream
- Coffee ice cream
- Lemon sorbet
- Strawberry sorbet
- Mango sorbet
- Frozen chocolate yoghurt
- Frozen berry yoghurt
- Storing desserts
- Cleaning and maintenance
- Disclaimer
- Félicitations!
Brand : PRINCESS
Model : 282601
Category : Ice machine