
KO6382DU - Cooker TRISTAR - Free user manual and instructions
Find the device manual for free KO6382DU TRISTAR in PDF.
| Brand | TriStar |
| Model | KO6382DU |
| Product type | Outdoor gas stove (cooker) |
| Power source | Butane or propane gas, low pressure (50 mbar) |
| Total power | 3 kW (218 g/h) |
| Compatible gas type | Butane / Propane |
| Injection nozzle diameter | 0.53 mm |
| Number of burners | 1 |
| Suitable pan diameter | 14 to 22 cm (flat bottoms) |
| Recommended gas cylinder | 5 to 15 kg with suitable regulator |
| Nominal gas pressure | 50 mbar |
| Usage | Outdoors only, stable non-combustible surface |
| Minimum safety distance | 50 cm on sides and rear, 1 m above |
| Safety device | Manual gas shut-off, leak check required |
| Ignition | Manual (match or lighter) |
| Materials | Enameled steel (body), metal grid |
| Dimensions (L x W x H) | Approximately 34 × 30 × 12 cm (estimate) |
| Weight | Approximately 2.5 kg (estimate) |
| Maintenance | Clean after each use with soapy water; burner cleanable |
| Warranty | 24 months (defective parts, excluding wear) |
Frequently Asked Questions - KO6382DU TRISTAR
User questions about KO6382DU TRISTAR
0 question about this device. Answer the ones you know or ask your own.
Ask a new question about this device
Download the instructions for your Cooker in PDF format for free! Find your manual KO6382DU - TRISTAR and take your electronic device back in hand. On this page are published all the documents necessary for the use of your device. KO6382DU by TRISTAR.
USER MANUAL KO6382DU TRISTAR
Congratulations and thank you for purchasing this high quality product. Please read the instruction manual carefully so that you will be able to make the best possible use of the appliance. This manual includes all the necessary instructions and advice for using, cleaning and maintaining the appliance. If you follow these instructions you will be guaranteed of an excellent result, it saves you time and will avoid problems. We hope you will have a great deal of pleasure from using this appliance.
SAFETY INSTRUCTIONS
- Please read the instruction manual carefully before using the device. Please keep these instructions, the guarantee certificate, the sales receipt and, if possible, the carton with the inner packaging.
- This appliance is not intended to be used by persons (including children) with reduced physical, sensory or mental capabilities, or lack of experience and knowledge, unless they have been given supervision or instructions concerning the use of the appliance by a person that is responsible for their safety.
- By ignoring the safety instructions the manufacturer can not be hold responsible for the damage.
The appliance must be placed on a stable, level surface. - Do not use when the appliance is fallen, if there are any signs of damage or when it leaks.
- Do not touch hot surfaces. Use handles or knobs.
- Never use the device unsupervised.
All repairs should be made by a competent qualified repair service*
Make sure that the appliance is stored in a dry environment. - The use of accessory that are not recommended by the manufacturer can cause injuries and will invalidate any warranty that you may have.
-
Allow the appliance to cool down before you clean or store it.
-
Do not use this appliance near direct heat sources.
- Allow the device to cool down before you are going to remove or replace spare parts.
- We advise to place a heat resistant coating between your table and the appliance (this way you don't get burns on your table or table cloth).
- Competent qualified repair service: after sales department of the producer or importer or any person who is qualified, approved and competent to perform this kind of repairs in order to avoid all danger. In any case you should return the appliance to this repair service.
IMPORTANT POINTS BEFORE USING YOUR GAS STOVE
This stove is designed for use outdoors, away from any flammable materials.
- The gas stove must not be moved while operating. The appliance must be completely cool before moving or transforming the stove into its transport form.
- Never operate the stove with the lid in the closed position (transport position) as this will damage the paint finish and affect the safe operation of the appliance.
- The gas stove must be used on a non-combustible hard standing. Damage may occur to combustible materials such as wooden table or plastic tables if the appliance is placed directly on the surface of the table.
- The appliance and the gas cylinder must be placed on a flat level hard surface when in use. If used on the ground in an area with long grass ensure that the grass is not long enough to enter under the appliance or at the sides as this could result in the grass catching fire and starting a more serious fire.
- The gas stove must be sited with at least a 500mm gap between both sides and the rear of the appliance and at least 1m from the cooking grid of the appliance and any combustible or non-combustible materials above the appliance.
- The appliance should be protected from direct draughts and shall be positioned or protected against direct penetration by any trickling water (e.g. rain).
- This gas stove is suitable for use with flat bottomed saucepans of diameters between 14cm and 22cm . Pans of larger or smaller diameters, rim based vessels and convex based vessels must not be used on this appliance.
- This gas stove should be leakage tested before initial use and whenever the cylinder has been reconnected after filling.
- Never site the cylinder right next the stove. Always place the cylinder at the rear of the gas stove. The cylinder should be sited as far away from the gas stove as possible without straining the hose.
- This appliance is only suitable for use with low-pressure butane or propane gas, fitted with the appropriate low-pressure regulator via a flexible hose. The hose should be safely secured to the regulator and the appliance.
- This appliance is designed to operate with 5kg till 15kg butane or propane gas bottles, with an adequate pressure reducing valve. See below schedule for gas and operating pressure:
| Tristar Europe B.V.Jules Verneweg 875015 BH Tilburg, The Netherlands | |
| Produit name / Produktionsmann / Name de produit / Produktionname / Numbre de produits / Nummader生产厂家 / Name duProduito / Name du produit / Name del produits / Produktionname: | Gss stover - Gasskontrollat - Richard a gaz - Gaschokter - Cocine de gas - Fagão a Gas - Kuchenka gazoua - Farnolle a gas - Gassip |
| Nummer / Antiklammaterie / Rét. modèle / Antilel Nummer / Referencie / Referência / Numperpays / Numéro d'arbuckle / Arkblemmuizen: | KO-6382D0 |
| Produit identifiérations / Numme / Produktion identifiérations / Numme / Identifiérations / Produits / Produktionaldifficultés / Numma / Numera de identificadora / Produite / Numero de identificação doproduito / Nr identificacao/nyrpani / Produtos / Produktiondoricharmentum / | 0063817009 |
| Appliabat category / Brand name / Typologie / Garo / Design / Caleul / Design / Design / Caleul / Design / Caleul / Design / Caleul / Design / Caleul / Design / Caleul / Design / Caleul / Design / Caleul / Design / Caleul / Design / Caleul / Design / Caleul / Design / Caleul / Design / Caleul / Design / Caleul / Design / Caleul / Design / Caleul / Design / Caleul / Design / Caleul / Design /Caleul / Design / Caleul / Design / Caleul / Design / Caleul / Design / Caleul / Design / Caleul / Design / Caleul / Design / Caleul / Design / Caleul / Design / Caleul / Design / Caleul / Design / Caleul / Design / Caleul / Design / Caleul / Design / Caleul / Design / Caleul / Design / Caleul /Design / Caleul / Design / Caleul / Design / Caleul / Design / Caleul / Design / Caleul / Design / Caleul / Design / Caleul / Design / Caleul / Design / Caleul / Design / Caleul / Design / Caleul / Design / Caleul / Design / Caleul / Design / Caleul / Design / Caleul / Design / Caleul / Design / Caleu / Design / Caleul / Design / Caleul / Design / Caleul / Design / Caleul / Design / Caleul / Design / Caleul / Design / Caleul / Design / Caleul / Design / Caleul / Design / Caleul / Design / Caleul / Design / Caleul / Design / Caleul / Design / Caleul / Design / Caleul / Design / Caleul / Design / CAleul / Design / CAleul / Design / CAleul / Design / CAleul / Design / CAleul / Design / CAleul / Design / CAleul / Design / CAleul / Design / CAleul / Design / CAleul / Design / CAleul / Design / CAleul / Design / CAleul / Design / CAleul / Design / CAleul / Design / CAleul / Design / CAleul / Design/CAleul / Design/CAleul / Design/CAleul / Design/CAleul / Design/CAleul / Design/CAleul / Design/CAleul / Design/CAleul / Design/CAleul / Design/CAleul / Design/CAleul / Design/CAleul / Design/CAleul / Design/CAleul / Design/CAleul / Design/CAleul / Design/CAleul /Design/CAleul / Design/CAleul / Design/CAleul / Design/CAleul / Design/CAleul / Design/CAleul / Design/CAleul / Design/CAleul / Design/CAleul / Design/CAleul / Design/CAleul / Design/CAleul / Design/CAleul / Design/CAleul / Design/CAleul / Design/CAleul / Design/CAleUL / Design/CAleUL / Design/CAleUL / Design/CAleUL / Design/CAleUL / Design/CAleUL / Design/CAleUL / Design/CAleUL / Design/CAleUL / Design/CAleUL / Design/CAleUL / Design/CAleUL / Design/CAleUL / Design/CAleUL / Design/CAleUL / Design/CAleUL / Design/CAleUL / Design/ CAleUL / Design/CAleUL / Design/CAleUL / Design/CAleUL / Design/CAleUL / Design/CAleUL / Design/CAleUL / Design/CAleUL / Design/CAleUL / Design/CAleUL / Design/CAleUL / Design/CAleUL / Design/CAleUL / Design/CAleUL / Design/CAleUL / Design/CAleUL / Design/CAleUL /Design/CAleUL / Design/CAleUL / Design/CAleUL / Design/CAleUL / Design/CAleUL / Design/CAleUL / Design/CAleUL / Design/CAleUL / Design/CAleUL / Design/CAleUL / Design/CAleUL / Design/CAleUL / Design/CAleUL / Design/CAleUL / Design/CAleUL / Design/CAleUL / Design/CAleUR / Design/CAleUR / Design/CAleUR / Design/CAleUR / Design/CAleUR / Design/CAleUR / Design/CAleUR / Design/CAleUR / Design/CAleUR / Design/CAleUR / Design/CAleUR / Design/CAleUR / Design/CAleUR / Design/CAleUR / Design/CAleUR / Design/CAleUR / Design/CAleUR / Design/ CAleUR / Design/CAleUR / Design/CAleUR / Design/CAleUR / Design/CAleUR / Design/CAleUR / Design/CAleUR / Design/CAleUR / Design/CAleUR / Design/CAleUR / Design/CAleUR / Design/CAleUR / Design/CAleUR / Design/CAleUR / Design/CAleUR / Design/CAleUR / Design/CAleUR /Design/CAleUR / Design/CAleUR / Design/CAleUR / Design/CAleUR / Design/CAleUR / Design/CAleUR / Design/CAleUR / Design/CAleUR / Design/CAleUR / Design/CAleUR / Design/CAleUR / Design/CAleUR / Design/CAleUR / Design/CAleUR / Design/CAleUR / Design/CAleUR / Design/CAleur / Design/CAleUR / Design/CAleUR / Design/CAleUR / Design/CAleUR / Design/CAleUR / Design/CAleUR / Design/CAleUR / Design/CAleUR / Design/CAleUR / Design/CAleUR / Design/CAleUR / Design/CAleUR / Design/CAleUR / Design/CAleUR / Design/CAleUR / Design/CAleUR / Design/CAAleUR / Design/CAleUR / Design/CAleUR / Design/CAleUR / Design/CAleUR / Design/CAleUR / Design/CAleUR / Design/CAleUR / Design/CAleUR / Design/CAleUR / Design/CAleUR / Design/CAleUR / Design/CAleUR / Design/CAleUR / Design/CAleUR / Design/CAleUR / Design/CAleUR /.Design/CAleUR /Design/CAleUR /Design/CAleUR /Design/CAleUR /Design/CAleUR /Design/CAleUR /Design/CAleUR /Design/CAleUR /Design/CAleUR /Design/CAleUR /Design/CAleUR /Design/CAleUR /Design/CAleUR /Design/CAleUR /Design/CAleUR /Design/CAleUR /Design/CAleUR /Design/CAleur /Design/CAleUR /Design/CAleUR /Design/CAleUR /Design/CAleUR /Design/CAleUR /Design/CAleUR /Design/CAleUR /Design/CAleUR /Design/CAleUR /Design/CAleUR /Design/CAleUR /Design/CAleUR /Design/CAleUR /Design/CAleUR /Design/CAleUR /Design/CAleUR /Design/ CAleUR /Design/CAleUR /Design/CAleUR /Design/CAleUR /Design/CAleUR /Design/CAleUR /Design/CAleUR /Design/CAleUR /Design/CAleUR /Design/CAleUR /Design/CAleUR /Design/CAleUR /Design/CAleUR /Design/CAleUR /Design/CAleUR /Design/CAleUR /Design/CAleUR / Design/CAleUR /Design/CAleUR /Design/CAleUR /Design/CAleUR /Design/CAleUR /Design/CAleUR /Design/CAleUR /Design/CAleUR /Design/CAleUR /Design/CAleUR /Design/CAleUR /Design/CAleUR /Design/CAleUR /Design/CAleUR /Design/CAleUR /Design/CAleUR /Design/CAleEUR /Design/CAleUR /Design/CAleUR /Design/CAleUR /Design/CAleUR /Design/CAleUR /Design/CAleUR /Design/CAleUR /Design/CAleUR /Design/CAleUR /Design/CAleUR /Design/CAleUR /Design/CAleUR /Design/CAleUR /Design/CAleUR /Design/CAleUR /Design/CAleUR /Design/CAAleUR /Design/CAleUR /Design/CAleUR /Design/CAleUR /Design/CAleUR /Design/CAleUR /Design/CAleUR /Design/CAleUR /Design/CAleUR /Design/CAleUR /Design/CAleUR /Design/CAleUR /Design/CAleUR /Design/CAleUR /Design/CAleUR /Design/CAleUR /Design/CAleUR /design/CAleUR /Design/CAleUR /Design/CAleUR /Design/CAleUR /Design/CAleUR /Design/CAleUR /Design/CAleUR /Design/CAleUR /Design/CAleUR /Design/CAleUR /Design/CAleUR /Design/CAleUR /Design/CAleUR /Design/CAleUR /Design/CAleUR /Design/CAleUR /Design/CAle UR /Design/CAleUR /Design/CAleUR /Design/CAleUR /Design/CAleUR /Design/CAleUR /Design/CAleUR /Design/CAleUR /Design/CAleUR /Design/CAleUR /Design/CAleUR /Design/CAleUR /Design/CAleUR /Design/CAleUR /Design/CAleUR /Design/CAleUR /Design/CAleUR /Design/ | |
- Use only regulators and hose approved for gas at the above pressures. The life expectancy of the regulator is estimated as 10 years. It is recommended that the regulator is changed within 10 years of the date of manufacture.
- The use of the wrong regulator or hose is unsafe; always check that you have the correct items before operating the stove
- For the connection of this gas stove you need an approved gas hose with a recommended length of 80~cm . It should be replaced if it appears to be damaged or cracked. You need to check on this frequently. The maximum length of the gas hose is 150~cm .
- The gas hose should be connected in such a way that it can't be twisted.
You are obliged to replace the gas hose if national circumstances require.
Always close the gas cylinder valve whenever the gas stove is not in use.
GAS CYLINDER
- The gas cylinder should not be dropped or handled roughly! If the appliance is not in use, the cylinder must be disconnected. Replace the protective cap on the cylinder after disconnecting the cylinder from the appliance.
- Cylinders must be stored outdoors in an upright position and out of the reach of children. The cylinder must never be stored where temperatures can reach over 50^ . Do not store the cylinder near flames, pilot lights or other sources of ignition.
CHANGING THE GAS CYLINDER
Precautions need to be taken when changing gas cylinder, which shall be carried out away from any source of ignition.
Gas cylinders must be replaced in a flame free environment.
- Do not smoke while changing the gas cylinder.
- Turn off the gas cylinder valve or regulator fully (clockwise) and take the empty cylinder of.
- Do not attempt to remove the regulator while the gas stove is still running.
Make sure that the gas stove is extinguished completely.
- Remove the regulator from the empty cylinder.
CONNECTION TO APPLIANCE
- Before connection, ensure that there is no debris caught in the head of the gas cylinder, regulator, burner and burner ports.
- Spiders and insects can nest within and clog the burner/venturi tube at the orifice. A clogged burner can lead to a fire in the appliance. Clean burner holes with a heavy-duty pipe cleaner
- The stove must be used in a well ventilated area. Do not obstruct the flow of combustion air to the burner when the stove is in use.
Only use this stove outdoors.
Before use check for leaks.
IMPORTANT TEST FOR LEAKAGE
- Make 2-3 fluid ounces of leak detecting solution by mixing one part washing up liquid with 3 parts water.
Ensure the control valve is "OFF". - Connect the regulator to the cylinder and ON/OFF valve to the burner, ensure the connections are secure then turn ON the gas.
Brush the soapy solution on to the hose and all joints. If bubbles appear you have a leak, which must be rectified before use. - Retest after fixing the fault.
- Turn OFF the gas at the cylinder after testing.
If leakage is detected and cannot be resolved. Do not attempt to repair leakage but consult your gas dealer.
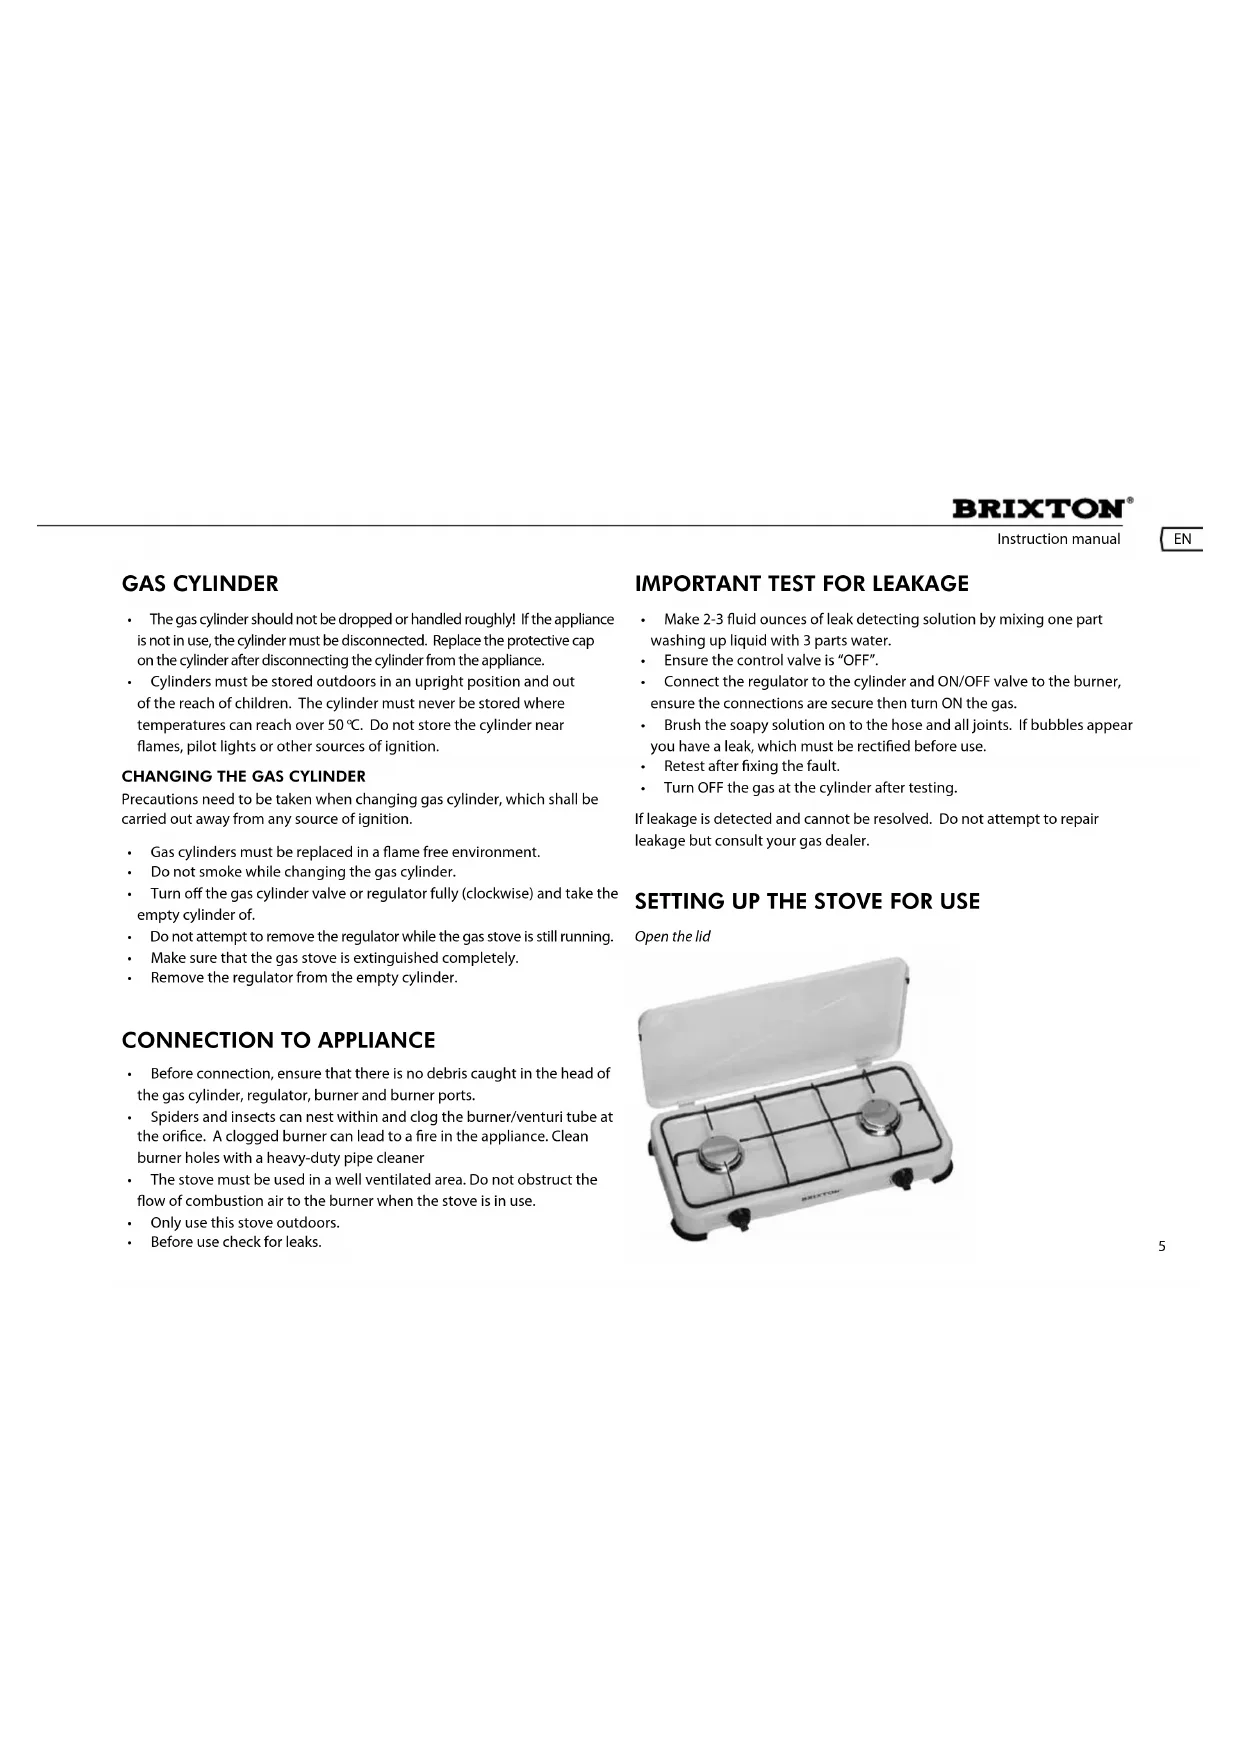
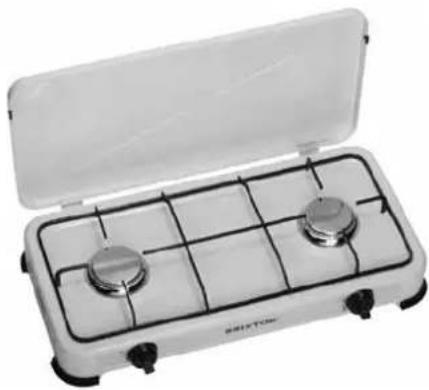
SETTING UP THE STOVE FOR USE
Open the lid
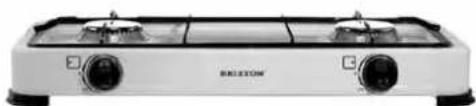
Tap markings
LIGHTING YOUR STOVE
LIGHTING INSTRUCTIONS:
- Turn the gas tap control knobs clockwise to "OFF" position.
- Connect the regulator to the gas bottle. Turn the gas supply "ON" at the cylinder. Check with the use of soapy water for any gas leakage between the bottle and the regulator and the appliance connection
- Open the lid fully before lighting the burners. Turn one of the control knobs turning anti-clockwise to the large flame symbol position, full rate position whilst holding a match to the burner to be lit, this will light the burner. If the burner does not light, repeat this process.
- If the burner has not lit after two attempts, turn off the gas tap, wait 5 minutes and then repeat step 3.
- When the burner is lit. The remaining burners may now be lit by following instructions 3 and 4 above precisely.
The taps can be adjusted to a low rate position marked with a small flame symbol or any rate between full and low rate. - To turn the stove 'OFF' turn the cylinder valve or regulator switch to the 'OFF' position and then turn all of the control knobs on the appliance clockwise to the 'OFF' position when the flame have extinguished.
- Warning: If the burner fails to ignite, turn the control knob off (clockwise) and also turn the cylinder valve off before attempting to relight with ignition sequence.
Before cooking for the first time, operate the stove for about 15 minutes with the gas turned on HIGH. This will "heat clean" the burners.
- Clean your stove after each USE. DO NOT use abrasive or flammable cleaners, as it will damage the parts of the product. Clean in warm soapy water.
WARNING: Accessible parts may be very hot. Keep young children away from the hot appliance at all times (even while cooling down!).
CLEANING AND CARE
CAUTION: All cleaning and maintenance should be carried out when the stove is cool and with the gas supply turned OFF at the gas cylinder.
CLEANING
OUTSIDE SURFACE
Use mild detergent or baking soda and hot water solution. Non-abrasive scouring powder can be used on stubborn stains, then rinse with water.
COOKING GRID
Use a mild soapy water solution. Non-abrasive scouring powder can be used on stubborn stains then rinse with water.
CLEANING THE BURNER ASSEMBLY
- Turn the gas OFF at the control knob and disconnect the cylinder.
- Remove pan support.
- Clean the burner with a soft brush or blow clean with compressed air and wipe with a cloth.
-
Clean any clogged ports with a pipe cleaner or stiff wire (such as an opened paper clip).
-
Inspect burner for any damage (cracks or holes). If damage is found, replace with a new burner. Reinstall the burner, check to ensure that the Gas valve orifices are correctly positioned and secured inside the burner inlet (venturi).
STORAGE OF APPLIANCE
Storage of an appliance for transport or indoors is only permissible if the cylinder is disconnected and removed from the appliance. When the appliance is not to be used for a period of time it should be stored in its original packaging and stored in a dry dust free environment.
GUARANTEE
Tristar is not liable for damages occurred through:
o In case the appliance has fallen.
o In case the appliance has been technically changed by the owner or another third party.
o In case of improper use of the appliance.
o In case of normal wear of the appliance.
-
By executing repairs the original warranty period of 2 years will not be extended, nor the right to a complied new warranty. This warranty is only legal on European soil. This warranty does not overrule the European directive 1944/44CE.
-
Always keep your receipt, without this receipt you can not claim any form of warranty whatsoever.
- Damage caused by not following the instruction manual will lead to a void of warranty, if this results in consequential damages Tristar will not be liable.
-
Tristar will not be liable for material damage or personal injury caused by improper use or if the safety instructions are not properly executed.
-
Cleaning, as mentioned in this manual, is the only necessary maintenance for this appliance.
- When the appliance should be repaired, make sure that this will be performed by an authorized company.
This appliance may not be amended or changed. - If problems arise during the 2 years from the date of purchase, which are covered by the factory warranty, you can go back to the point of purchase to replace it for a new one.
- For questions or compliances please contact your retailer "point of purchase."
- This appliance is covered with a 24 month guarantee starting on the date of purchase (receipt).
- Only material or manufacturing defects are included in this warranty.
If you wish to make a claim please return the entire machine in the original packaging to your dealer together with the receipt. - Damage to accessories does not mean automatic free replacement of the whole appliance. In such cases please contact our hotline. Broken glass or breakage of plastic parts are always subject to a charge.
- Defects to consumables or parts subject to wearing, as well as cleaning, maintenance or the replacement of these parts are not covered by the guarantee and hence are to be paid!
The guarantee lapses in case of unauthorized tampering.
After the expiry of the guarantee repairs can be carried by the competent dealer or repair service against the payment of the ensuing costs.
GUIDELINES FOR PROTECTION OF THE ENVIRONMENT
PACKAGING
The packaging is 100% recyclable, return the packaging separated.
Geachte klant,
WAZNY TEST SZCZELNOSCİ
ACCENSIONEL FORNELLO

- SAFETY INSTRUCTIONS
- IMPORTANT POINTS BEFORE USING YOUR GAS STOVE
- GAS CYLINDER
- CHANGING THE GAS CYLINDER
- CONNECTION TO APPLIANCE
- IMPORTANT TEST FOR LEAKAGE
- SETTING UP THE STOVE FOR USE
- LIGHTING YOUR STOVE
- LIGHTING INSTRUCTIONS:
- CLEANING AND CARE
- CLEANING
- OUTSIDE SURFACE
- COOKING GRID
- CLEANING THE BURNER ASSEMBLY
- STORAGE OF APPLIANCE
- GUARANTEE
- GUIDELINES FOR PROTECTION OF THE ENVIRONMENT
- PACKAGING
- WAZNY TEST SZCZELNOSCİ
- ACCENSIONEL FORNELLO
Brand : TRISTAR
Model : KO6382DU
Category : Cooker