
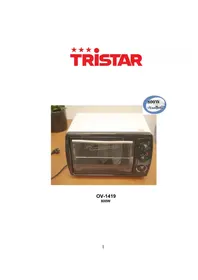
OV1411 - Electric oven TRISTAR - Free user manual and instructions
Find the device manual for free OV1411 TRISTAR in PDF.
| Product type | Electric oven |
| Brand | TriStar |
| Model | OV1411 |
| Power supply | 220-240 V ~ 50 Hz |
| Power consumption | 1380 W |
| Package dimensions | 495 x 363 x 346 mm |
| Net weight | 5.5 kg |
| Maximum temperature | 250 °C |
| Timer | 0-60 minutes with automatic shut-off and bell |
| Heating modes | Top, Bottom, Top and Bottom |
| Included accessories | Baking tray, wire rack, tray handle |
| Cleaning | Soft cloth or sponge with mild detergent, then clear water |
| Safety | Automatic shut-off, insulated tray handle, do not pour water on hot glass |
| Repairability | Repairs by an authorized service center only |
| Usage | Domestic use only, not for commercial or industrial use |
Frequently Asked Questions - OV1411 TRISTAR
User questions about OV1411 TRISTAR
0 question about this device. Answer the ones you know or ask your own.
Ask a new question about this device
Download the instructions for your Electric oven in PDF format for free! Find your manual OV1411 - TRISTAR and take your electronic device back in hand. On this page are published all the documents necessary for the use of your device. OV1411 by TRISTAR.
USER MANUAL OV1411 TRISTAR
We would particularly advise you to carefully read the operating instructions before attempting to operate the unit.
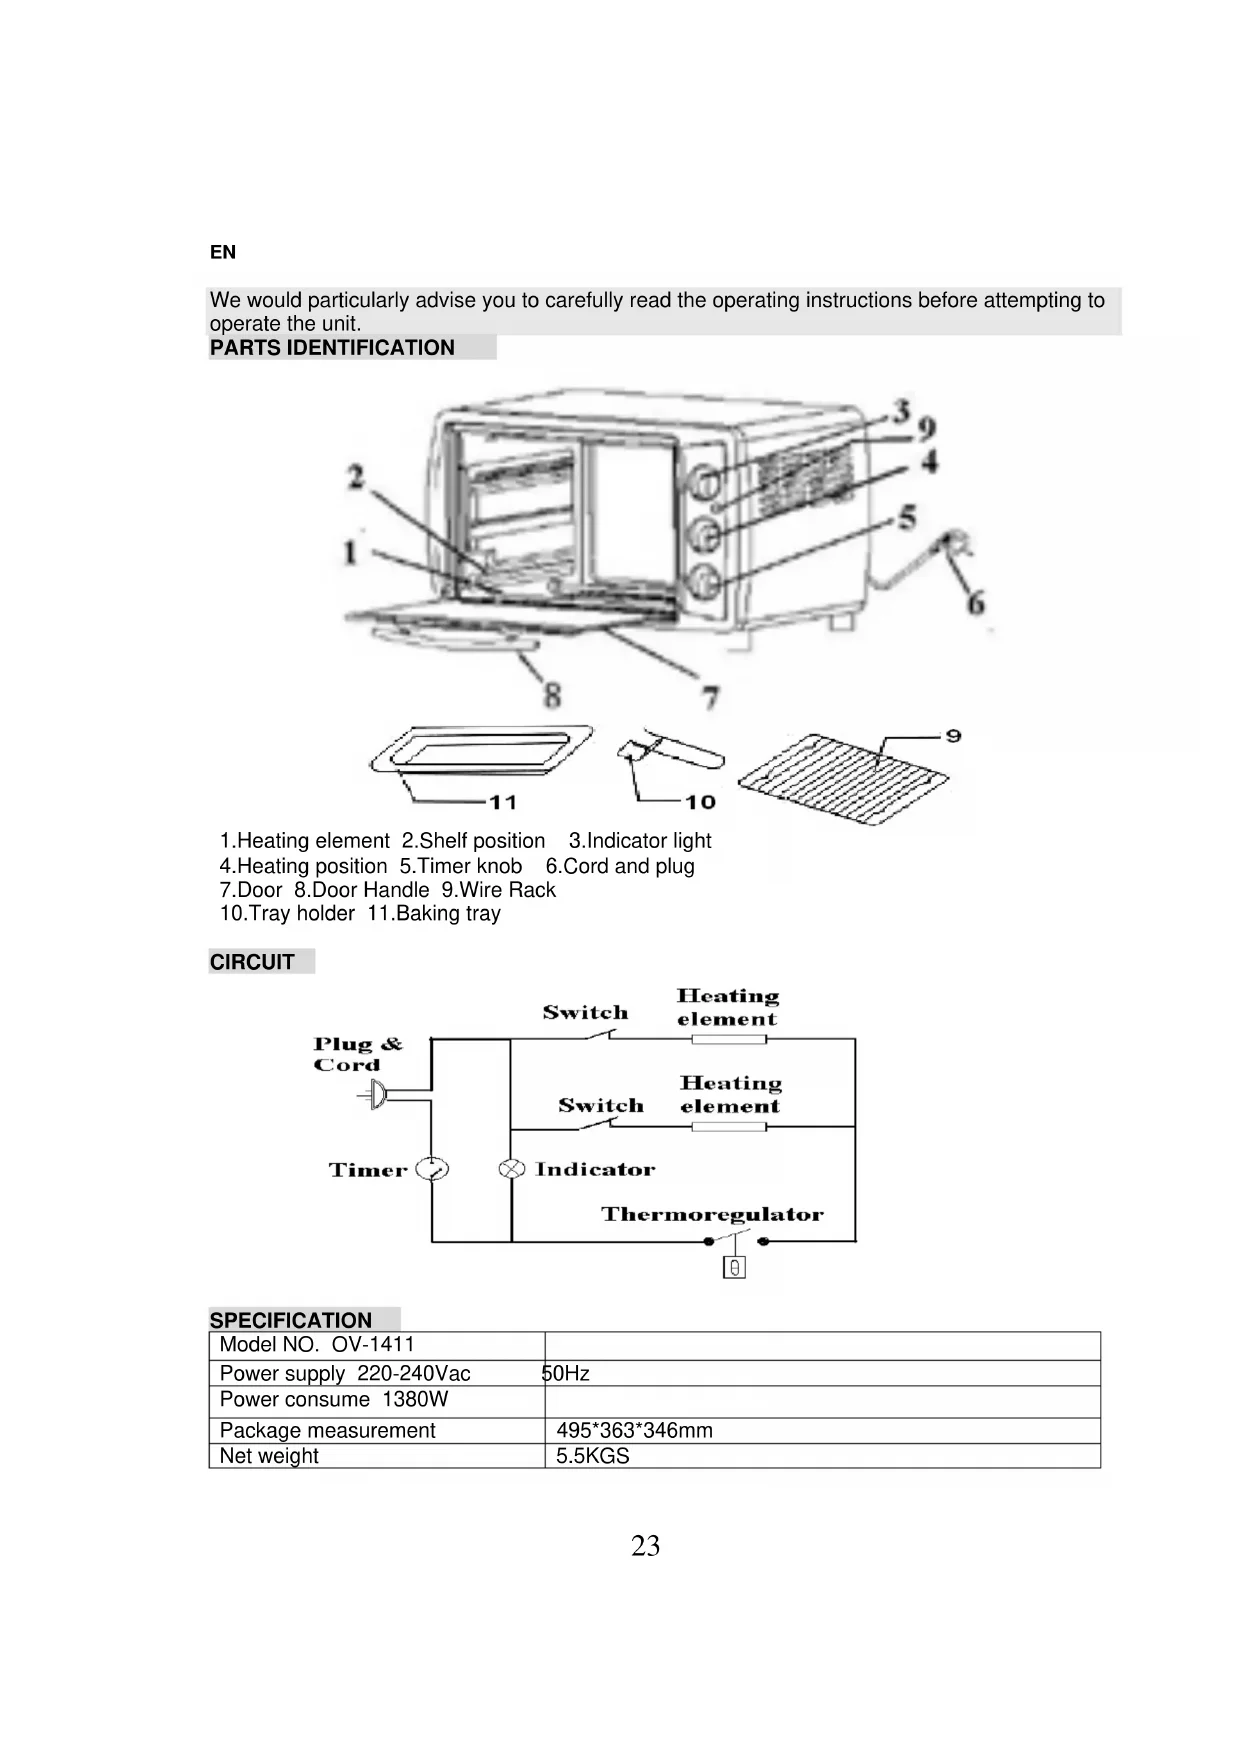
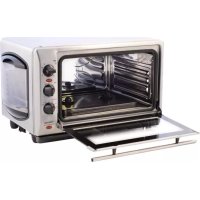
PARTS IDENTIFICATION
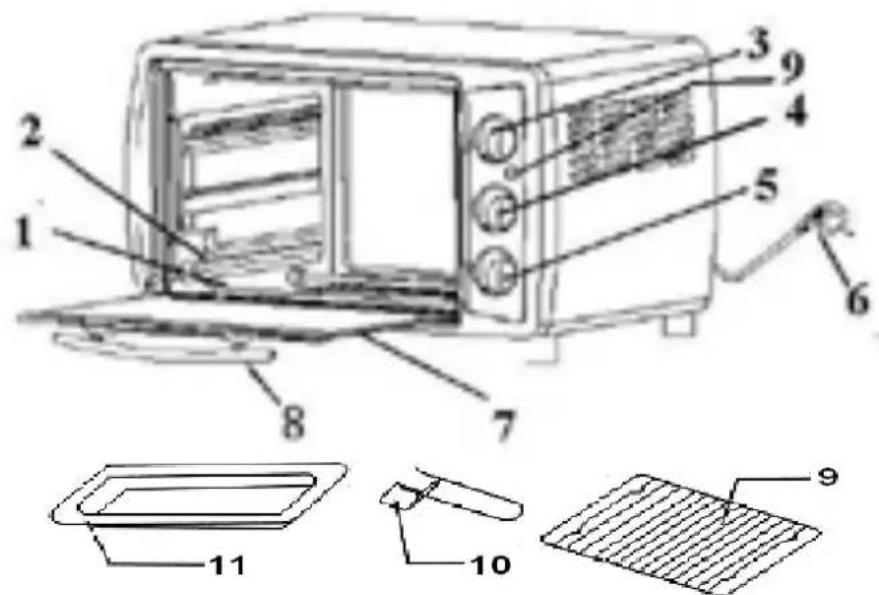
1.Heating element 2.Shelf position 3.Indicator light
4. Heating position 5. Timer knob 6. Cord and plug
7. Door 8. Door Handle 9. Wire Rack
10.Tray holder 11.Baking tray
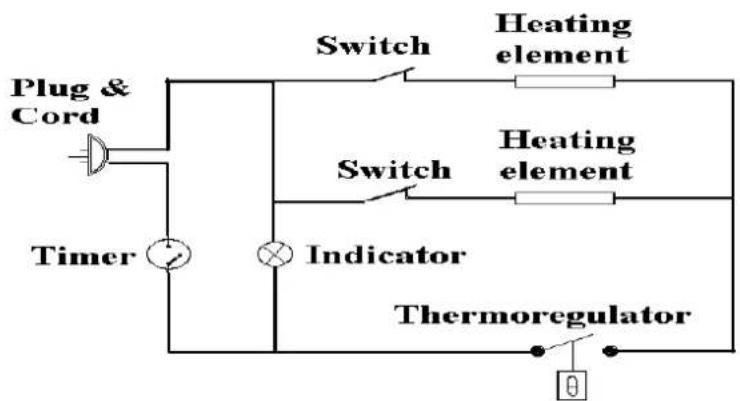
CIRCUIT
SPECIFICATION
| Model NO. OV-1411 | |
| Power supply 220-240Vac 50Hz | |
| Power consume 1380W | |
| Package measurement | 495*363*346mm |
| Net weight | 5.5KGS |
CAUTIONS
Special indication:
The accessory image varies from different models. Please refer to the actual model you buy.

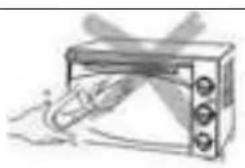
Always use the tray holder when inserting or removing the tray. Touching these will cause severe burns.
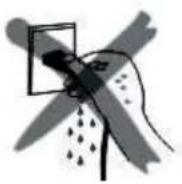
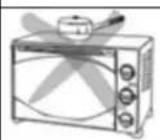
When hot, do not apply water to the glass window, it may cause the glass to break.
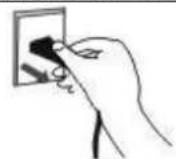
When unplugging the cord, always take hold of the plug itself. Never pull on the cord. Doing so could break the wires inside the cord.
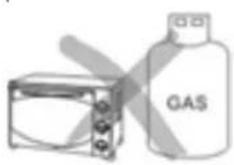
Do not position the unit close to a gas burner or other source of high temperature or do not direct an electric fan, etc, at the unit during use. Doing so could prevent correct temperature control.
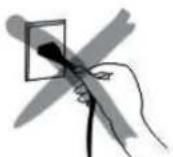
Do not wet the power cord nor handle the unit with wet hands. Always unplug the cord after use, or whenever the unit is to be left unattended. A malfunction while the plug is inserted into the outlet could cause a fire.
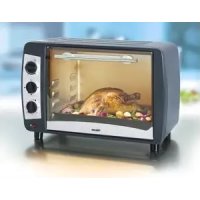
When cooking oil-splashing dishes such as roast chicken, it is recommended to put 2 sheets of aluminum foils on a tray in order to diminish oil splashing. Put one on a tray. Then oil will drip to a gap between foils.

USE INDICTION
Special indication: the parts and accessory varies from different models. Please refer the image to the real item you buy.
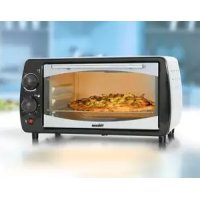
Baking tray and wire rack
| Baking tray How to use tray holder Roast Chicken, Hamburg steak, Gratin, Sponge cake, almost all other oven-cooked foods | |
| Wire rack Baked potatoes, Dry food | |
| Baking tray and Wire rack For food which will drip/boiled fish, etc |
The trays are not perfectly square.
Note:
Be careful when removing pudding and other hot liquids.
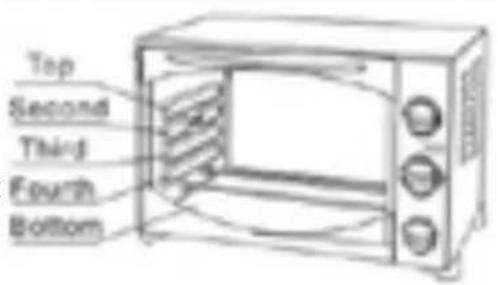
Rack Support
You can adjust the tray at 4 different positions according to the dishes you want to cook. For instance, when making macaroni gratin and you want to have the top part cooked the most, use the second or the second rack support. For roasting a chicken, use the fourth or the bottom rack support.
METHOD OF CLEANING
Take off the plug and cool down before cleaning.

When cleaning, wash the interior and exterior surface, tray, grid, and tray holder with soft cotton (or sponge) with neutral cleaner. Then wash with clean water. Do not use hard brush or any others to wash, so as not to scrape the interior surface of the oven, and to protect the tray, the net and the tray holder
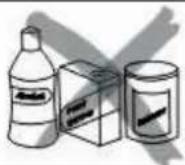
Do not use the toxic and abrasive cleaners such as gasoline, polishing powder, solvent.
BAKING REFERENCE OF COMMON FOOD
| TYP OF FOOD TEMPERATURE SITE(SHELF) TIME | |||
| Bread 180 3 | 9-13 | ||
| Cake 180 2 | 25-35 | ||
| Fish 250 2 | 10-15 | ||
| Chicken/Duck 220 | -250 2 30-45 | ||
| Pancake | 160 1 7-10 | ||
| Beef | 250 2 8-15 | ||
| Egg/Peanut | 125-150 2 6-10 | ||
| Hot Dog | 200 2 6-10 | ||
| Hamburger | 240 2 10-14 | ||
OPERATING INSTRUCTIONS
Before using the unit for the first time:
Heat the empty oven.
(1) Insert the tray and wire rack.
(2Set the heater operating switch to "UPPER & LOWER", set the temperature control dial to "250°C" and heat the empty oven for about 10 minutes.
Note:
There may be some smoke and a burning smell at first use, but this is not a malfunction.
Temperature control dial:
Set the Temperature Control Dial for the dishes which you are going to cook.
Heat Operating Switch:
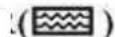
Select "upper" "Lower" or "Upper and Lower" according to the dishes you are going to cook. You can observe whether the heaters are working or not by observing the front Indicator light.
UPPER( 日 ),LOWER( 日 ), UPPER & LOWER(
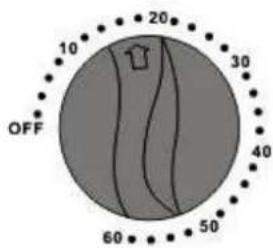
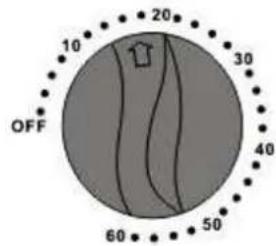
- Set the arrow on the timer knob to the number which indicates the cooking time(minutes) according to the dishes you are going to cook.
- Set the Timer by turning it clockwise.
The oven will turn off automatically at the end of the selected time and a bell will ring
- When setting the Timer to less than 5 min., turn it to more than 6 min. and then back to the selected time.
- The oven can be turned off manually during cooking by turning the Timer counter-clockwise to the "0FF" position.
Note:
If the inside of the oven is dirty, cooking may take slightly longer than usual.
CAUTIONS
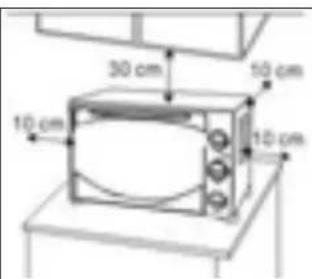
If the oven is positioned to close to a wall, the wall will be burned or stained. Be sure the curtain, etc., are not in contact with the body. Do not put anything between the bottom of the body and the surface on which it is set, an object so placed could be burned.
Do not put anything on the oven while using it, deformation, cracking, etc.
the heat could cause
| Any bottled or tinned food can not be heated directly as the bottle or tin would be broken out and scald the person. | |
| Be careful! Not to bum yourself during use or immediately after use. The meta parts and glass window of the door become extremely hot during use. careful not to touch them when opening and closing the door. | |
| AC power must be taken from a properly wired outlet. Insert the pl completely into the socket. if it is not, it could become abnormally hot. Do not use an electric light outlet. Never connect multiple plugs to the same outlet |
MAINTENANCE
- Other than cleaning mentioned in this instruction manual, no additional maintenance or serving of this appliance is required.
2.Repairs, when necessary, must be performed at an authorized service facility. - This appliance is intended for HOUSEHOLD USE ONLY and not for commercial or industrial use.
WARNING
If the supply cord or plug is damaged, the manufacturer or its service agent or a similarly qualified person in order to avoid a hazer must replace it. Check regularly for damages.
IT
Regulator temperature:
Postavite regulator temperature prema vrsti hrane koju cete pripretami.
Preklopka za izbor grijanja:
Odaberite "upper" (gornji), "Lower" (donji) ili "Upper and Lower" (gornji i donji) ovisno o pripremanom jelu.
Prednje signalno svjetlo vam govori rade li grijaci.
GORNJI

),DONJI

GORNJI DONJI
- Postavite strelicu na kotacicu tajmera na broj koji označava vrijeme kuhanja (u minutama) ovisno o vrsti priprepame hrane.
- Tajmer prilagodite okretanjem u smjeru kazaljke na satu. Pecnica ce se automatski isključiti nakon isteka odabranog vremena te ce se oglasiti zvonce
- Prilikom podesavanja tajmera na vrijeme manje od 5 minuta, okrenite ga prvo na vise od 6 minuta te ga nakon toga vratite na zejleno vrijeme.
- Pećnicu možete iskliguciti ručno za vrijeme kuhanja takdo akrenete tajmer u smjeru suprotnom od kazaljke na satu u položaj "OFF" (iskliguceno).
Napomena:
Ako je unutrasnjost pećnice uprjana, kuhanje moze potrajati malo duže nego inače.
MJERE OPREZA
| Ako se pećnica nalazi preblizu zida, zid ICE se spaliti ili umrljati. Pripazite da u dodiru s urežajem nisu zastori i sl. Ne postavlajte nikakve predmete izmeu dna i povrsine na kooj stoji pećnica jer ICE na tom mestreu biti spaljeni. | |
| Nemojte ništa stavljati na pećnicu za vrijeme njena korišenja, jer toplina mož izazvati deformaciju, lom itd. | |
| Hranu u boci ili konzervi ne moze se izravno kuhati jer bi se boca ili konzerva slomile i izrezale korisnika. | |
| Budite pažljivi! Pazite da se za vrijeme i odmah nakon uporabe pećnice ne opečete. Metalni dijelovi i stakleni prozor vratašca postaju vrlo vruci za vrijeme upotrebe. Pripazite da ih ne dodirujete prilikom otvaranja i zatvaranja vratašca. | |
| Izmjenić no mrežno napajanje mora se preuzimati samo preko prvilno instalirane zidne utićnice. Utikač gurnite do kraja u zidnu utićnicu. U protivnom mogao bi se prekomjerno zagrijati. Nemojte koristiti utićnicu koja je namijenjena za rasvjetu. Nikad nemojte u Jednu utićnicu utaknuti više utikača |
ODRZAVANJE
- Osim postupaka cisćenja navedenih u ovom korisničkom prisćniku, nje potrebno dodatno održavanje ili servisiranje uredaja.
- Popravke, kada su potrebni, mora izvesti ovlasteni serviser.
- Uredaj je namijenjen ISKLJUcivo ZA upotrebu U KUCANSTVU, a ne za komercijalnu ili industrijsku primjenu.
UPOZORENJE
Guidelines for protection of the environment
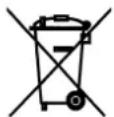
This appliance should not be put into the domestic garbage at the end of its useful life, but must be disposed of at a central point for recycling of electric and electronic domestic appliances. This symbol on appliance, instruction manual and packaging puts your attention to this important issue. The materials used in this appliance can be recycled. By recycling used domestic appliances you contribute an important push to the protection of our environment. Ask your local authorities for information regarding the point of recollection..


Brand : TRISTAR
Model : OV1411
Category : Electric oven