DO9075KR - Hand blender DOMO - Free user manual and instructions
Find the device manual for free DO9075KR DOMO in PDF.
| Product type | Multifunction immersion blender |
| Brand | DOMO |
| Model | DO9075KR |
| Power supply | 220-240 V ~ 50/60 Hz |
| Power | 1000 W |
| Speeds | 1-8 + off (OFF) |
| Mixing bowl capacity | 2 kg of dough |
| Bowl material | Stainless steel |
| Included accessories | Dough hook, beater, balloon whisk, mixing bowl |
| Optional accessories | Meat grinder, vegetable cutter, pasta set |
| Dimensions (approx.) | 30 x 20 x 30 cm |
| Weight (approx.) | 2 kg |
| Maintenance and cleaning | Clean accessories with soapy water; do not immerse the motor unit |
| Safety | Motor unit immersion-proof; automatic shut-off after 10 min of continuous use |
| Warranty | 2 years (subject to conditions) |
| Use | Household use only |
| Repairability | Repairs by the manufacturer or approved service center; spare parts available |
Frequently Asked Questions - DO9075KR DOMO
User questions about DO9075KR DOMO
0 question about this device. Answer the ones you know or ask your own.
Ask a new question about this device
Download the instructions for your Hand blender in PDF format for free! Find your manual DO9075KR - DOMO and take your electronic device back in hand. On this page are published all the documents necessary for the use of your device. DO9075KR by DOMO.
USER MANUAL DO9075KR DOMO
CONDITIONS DE GARANTIE
This appliance has a two year warranty period. During this period the manufacturer is responsible for any failures that are the direct result of construction failure. When these failures occur the appliance will be repaired or replaced if necessary. The warranty will not be valid when the damage to the appliance is caused by wrong use, not following the instructions or repairs executed by a third party. The warranty will only be valid if the warranty application has been completed by the dealer at the time of purchase. All parts, which are subject to wear, are excluded from the warranty.
CONDICIONES DE GARANTIA
RECYCLAGE-INFORMATIE
RECYCLING INFORMATIONEN
RECYCLING INFORMATION
This symbol on the product or on its packaging indicates that this product may not
be treated as household waste. Instead it must be brought to the applicable collection point for recycling of electrical and electronic equipment. By ensuring this product is disposed of correctly, you will help prevent potential negative consequences for the environment and human health, which could otherwise be caused by inappropriate waste handling of this product. For more detailed information about recycling of this product, please contact your local city office, your household waste disposal service or the shop where you purchased the product.
The packaging is recyclable. Please treat package ecologically.


If the supply cord is damaged, it must be replaced by the manufacturer, its service agent or a similarly qualified person in order to avoid a hazard.
This appliance may be used by children from the age of 8 and up, and also by persons with a physical or sensorly limitation, as well as mentally limited persons or persons with a lack of experience and knowledge. But only on the condition that these persons have received the necessary instructions on how to use this appliance in a safe way and that they know the dangers that can occur by using this appliance.
Children cannot be allowed to play with the appliance. Maintenance and cleaning of the appliance may not be done by children, unless they are older than 8 years old and are under supervision.
Keep the appliance out of reach of children younger than 8 years old.
This appliance is suitable to be used in a household environment and in similar surroundings such as:
- Kitchen for personnel of shops, offices or other similar professional surroundings
Farms - Hotel or motel rooms and other surroundings with a residential character
Guest rooms or similar
Attention: This appliance cannot be used with an external timer or a separate remote control.
- Carefully read the instructions before using your appliance.
- Switch off the appliance before fitting and removing the attachments.
- Keep your fingers away from moving parts and the opening of the attachment.
- Only use the appliance for its intended domestic use, the manufacturer will not accept any liability if the appliance is subject to improper use or failure to comply with these instructions.
- Never leave the appliance to run unsupervised, especially when young children or handicapped persons are present.
- Make sure that the voltage rating of the appliance does in fact match with that of your electrical system. Any connection error will nullify the guarantee.
- The appliance must be plugged into an earthed electrical socket.
- If you have to use an electrical extension lead, it must be earthed and placed in a way that no-one can trip over it.
- Unplug the appliance as soon as you have finished using it and before cleaning.
- Do not use your attachment and/or appliance if it has been damaged. You should contact an approved service centre.
-
Any work on the appliance other than normal care and cleaning by the customer must be carried out by an approved service centre.
-
Do not immerse the appliance, the power cord or the plug in water or any other liquid.
- Do not allow the power cord to hang within the reach of children, to come close to or into contact with the hot parts of your appliance, any other source of heat or any sharp edge.
- If the power cord or the plug is damaged, do not use your appliance. To avoid any risk, these must be replaced by an approved service centre.
- Do not put any accessories containing metal in a microwave oven.
- Switch off the appliance and disconnect from the power supply before changing accessories or approaching parts that move in use.
- Do not touch the whisk, mixer blade or kneading hook while the appliance is operating.
- Only use one attachment at a time.
- Do not operate the appliance for more than 10 minutes at one time. Allow 30 minutes rest before the next use.
- Do not use any other accessories than the ones delivered with the appliance or recommended by the manufacturer.
SPECIFICATIONS
220-240V\~50/60Hz1000W
Speeds: OFF
1 - 8: speed control (min - max)
COMPONENTS
- speed control
- release button for multifunctional head
- connection accessories lid
- release button for lid accessories
- connection for accessories (under lid)
- mixing bowl lid
- stainless steel mixing bowl
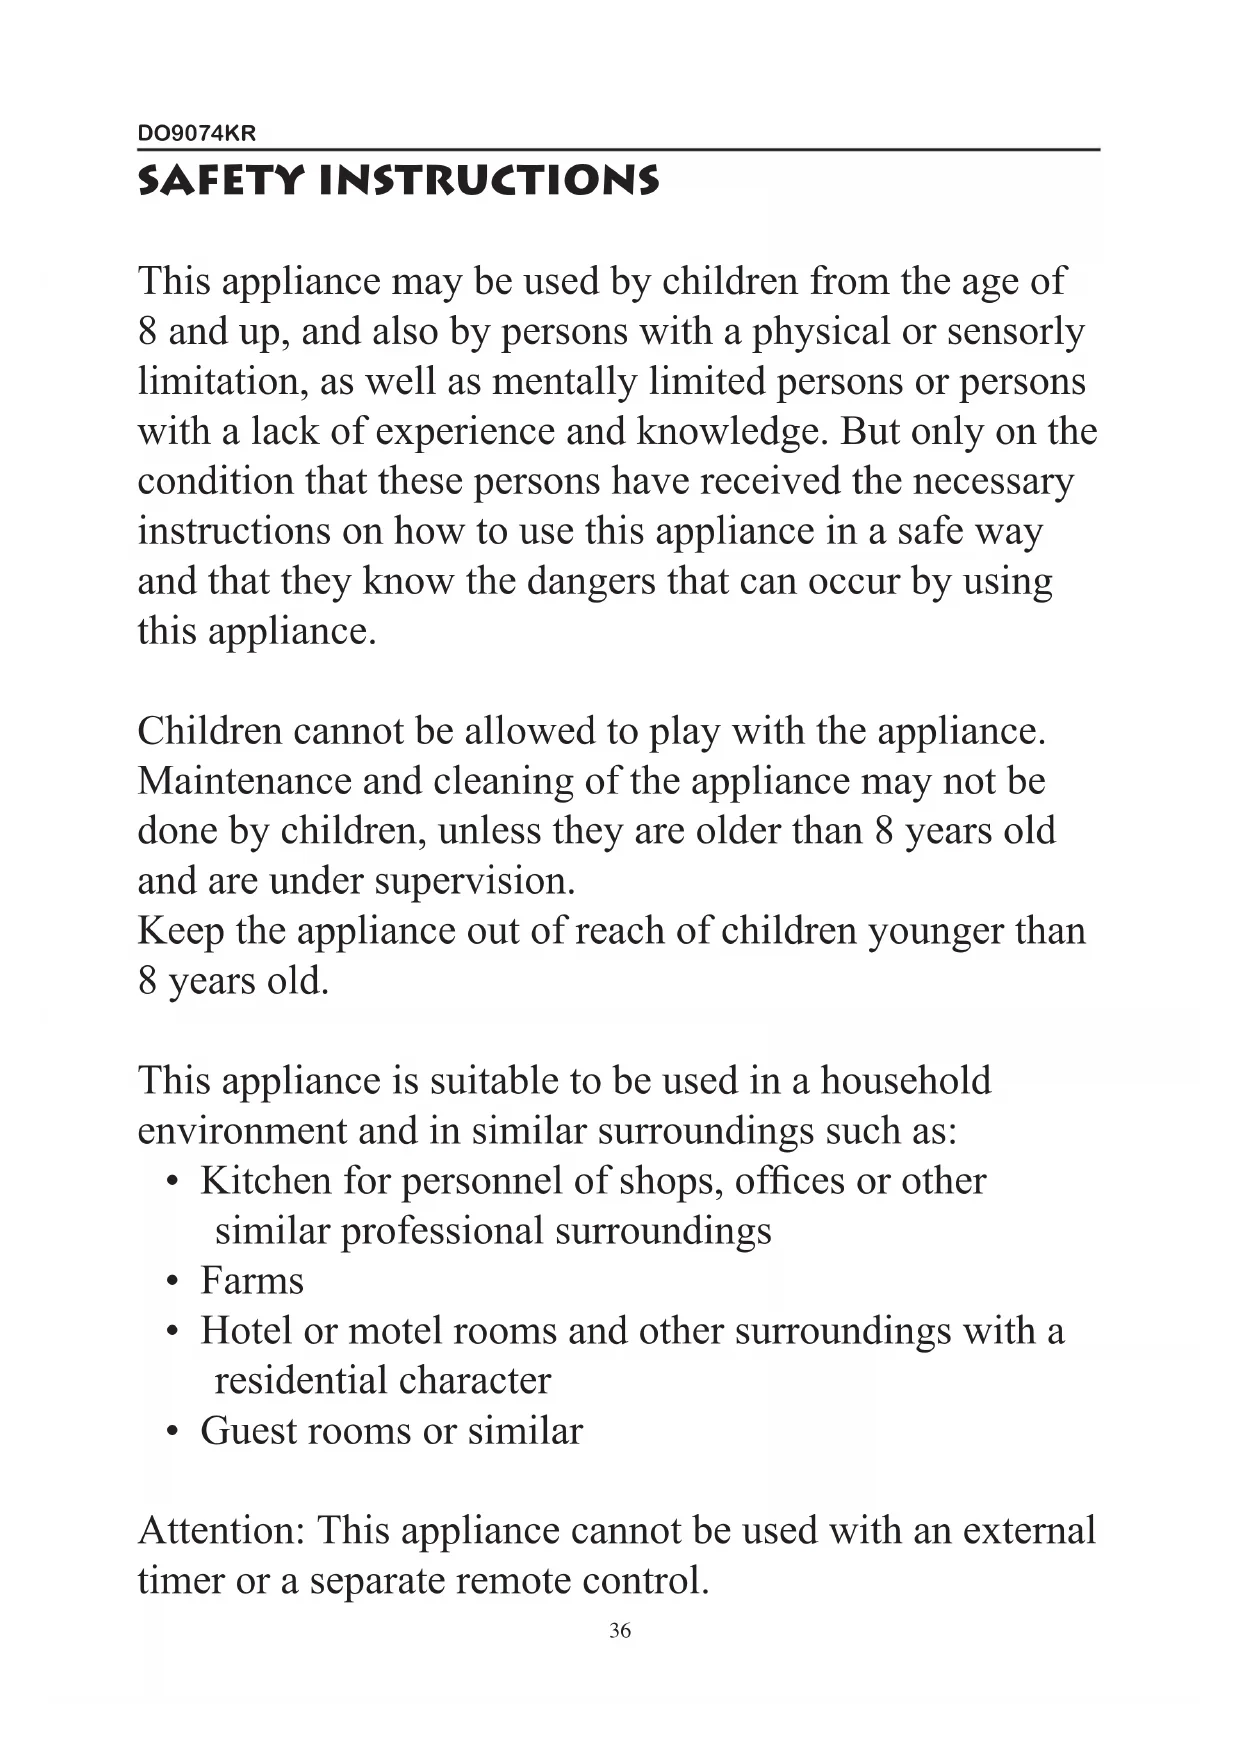
- multifunctional head
- dough hook
- beater
- whisk

OPTIONAL ACCESSORIES
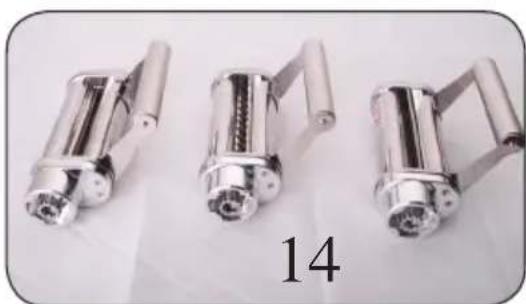
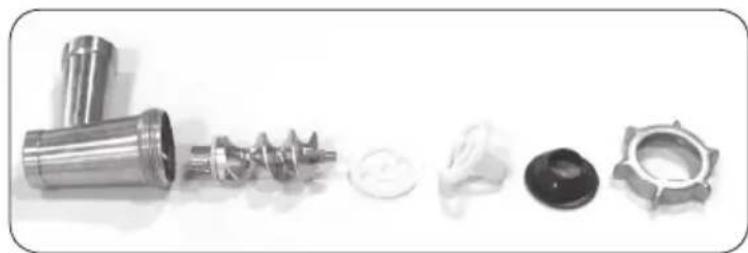
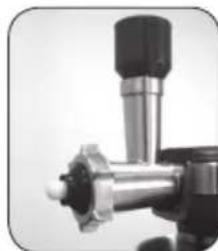
12.meat grinder with components
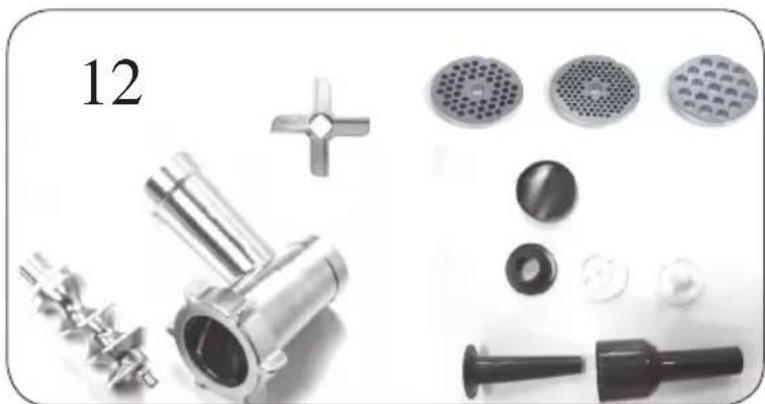
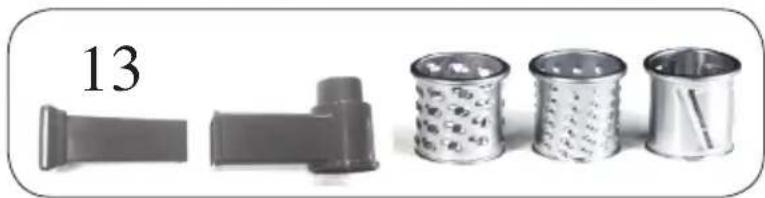
13. vegetable cutter with components
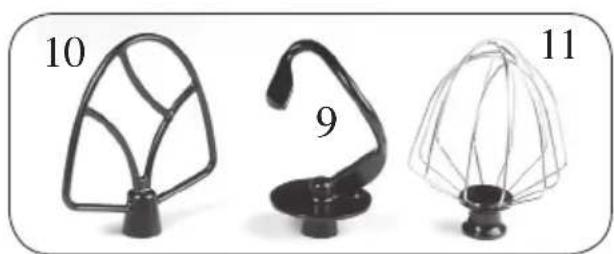
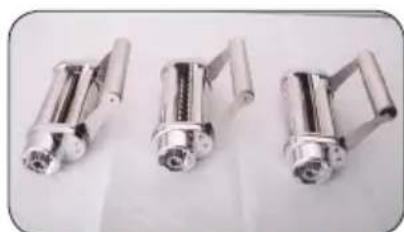
14. pasta set
FIRST USE INSTRUCTIONS
Remove the unit and accessories from the packaging.
Wash all components with soap in warm water and dry carefully. Never immerse the engine unit in water, in order to prevent electrocution.
INSTALLATION AND USAGE
Kneading / grinding / beating
Depending on the nature of the ingredients, the mixing bowl and lid allow for the making of 2kg of dough.
-
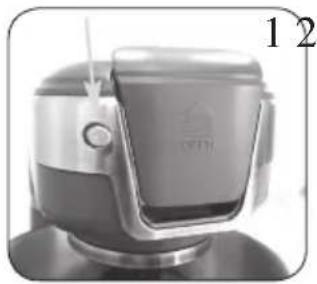
Make a quarter turn with the release button (2) to release the head, then push the head upward until you hear a click.
-
Put the bowl (7) on the base and turn it clockwise to tighten it. Place the ingredients in the bowl.
-
Select the preferred accessory: dough hook, beater or whisk.
a. Attach the hook to the head by moving it upward and sliding it around the shaft.
b. Turn the hook by a quarter in an anti-clockwise direction.
c. Position the hook so that it falls into the lock position.

- Turn back the release button (quarter turn) so that the head falls down. Push the head back into its original position until you hear a click.
- Put the lid on the bowl with the opening at the front of the unit.
- While it is operating, you can add ingredients through the opening in the lid.
- In order to make the device stop, you turn the speed control to OFF.
- Place the device on a clean and dry surface. Put the plug in the socket and select the desired speed by turning the speed control.
DISASSEMBLING
- Remove the plug from the socket.
- Remove the lid from the bowl.
- Make a quarter turn on the release button, then push the head upwards until you hear a click.
- Remove the hook from the lock position and turn it a quarter in a clockwise direction. Then slide the hook off the drive shaft and remove the hook. Remove the hook gently as accidents with sharp edges may occur.
-
Turn the bowl in an anti-clockwise direction from the lock position and remove the bowl.
-
Make a quarter turn backwards with the release button so that the head falls down. Then push the head back into its original position until you hear a click.
CLEANING
- Always remove the plug from the socket before cleaning the device.
- Never immerse the engine unit in a bowl of water or under running water. Clean the engine unit with a soft damp cloth.
- Disassemble all accessories according to the user instructions in the section "Disassembling".
- For quick cleaning, rinse the accessories under running water.
- For thorough cleaning, wash, rinse and dry the accessories.
OPTIONAL ACCESSORIES: FITTING VEGETABLE CUTTER
Turn the device off, and take the plug out of the socket before you add, remove or clean any accessories.
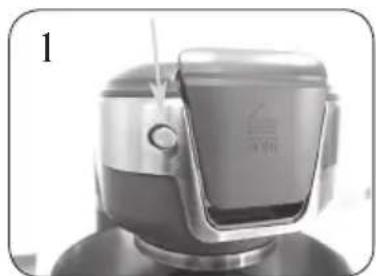
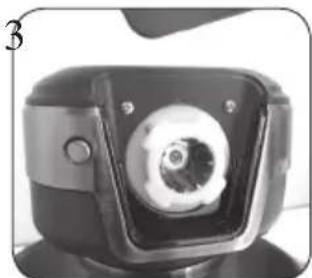
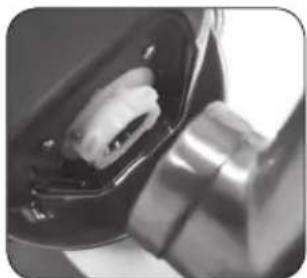
- Open the lid by pressing the release button and push it upwards.
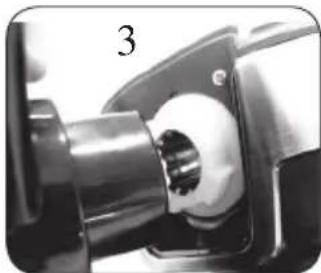
- The connecting point for accessories is now shown.
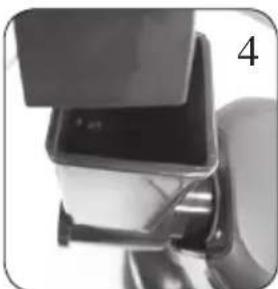
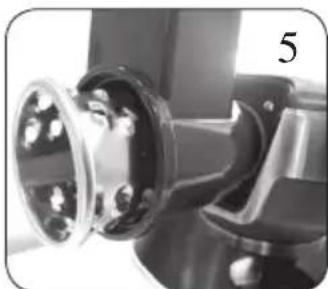
- Place the vegetable cutter at an angle of 25^ to the connection point and tighten it by making a quarter turn clockwise. You hear a click when it is securely fastened. Your vegetable cutter is now in a perfect vertical position.

- With the pushing rod you can safely place vegetables in the vegetable cutter.
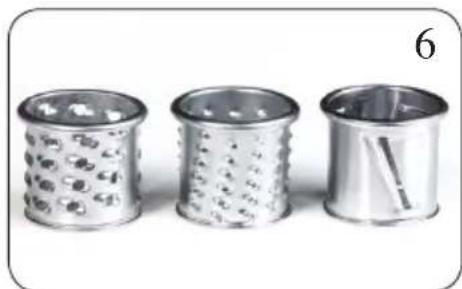
- Push the grater or slicer fully into the opening of the vegetable cutter.
- You can choose between a cutter and two types of graters.
To remove the vegetable cutter, press the release button. Make a quarter turn clockwise on the vegetable cutter. Clean all parts thoroughly and dry carefully before using them again.
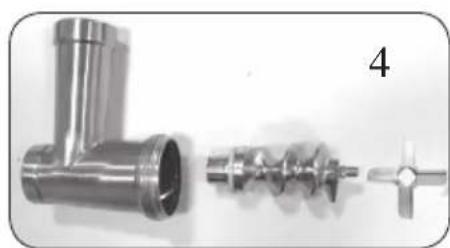
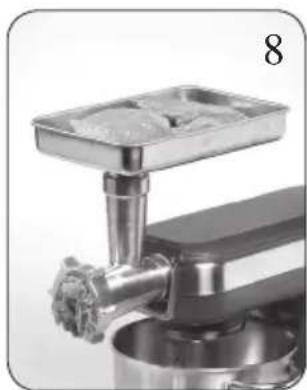
OPTIONAL ACCESSORIES: FITTING MEAT GRINDER
Turn off the device, and take the plug out of the socket before you add, remove or clean any accessories.
- Open the lid by pressing the release button and pushing the lid upwards.
- The connecting point for accessories is now shown.
- Place the meat grinder at an angle of 25^ to the connection point and tighten it by making a quarter turn clockwise. You hear a click when it is securely fastened. Your meat grinder is now in a perfect vertical position.
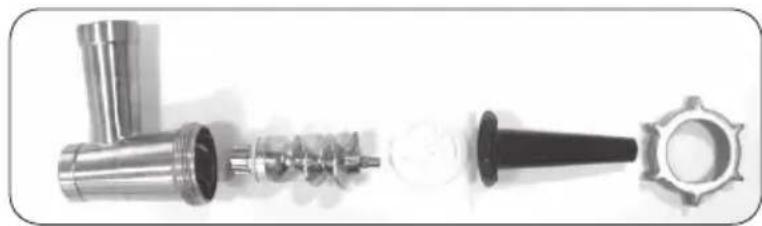
- For grinding meat insert in succession: the worm wheel and the cutting knife.

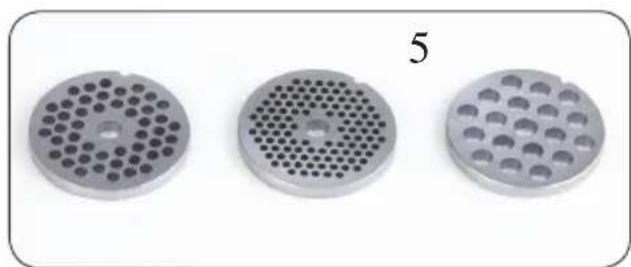
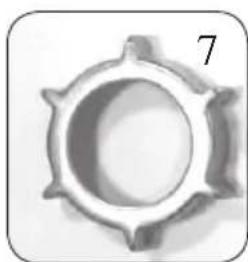
- Then make a selection from the grinding discs: fine, medium or coarse.
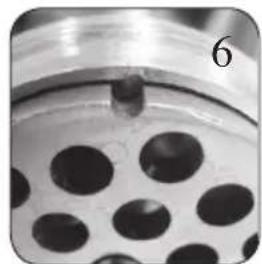
- Position the notch on the disc at the height of the projecting catch.
- Connect it altogether with the screw ring.
- Position the bowl in the best way possible so as to put your meat in it.
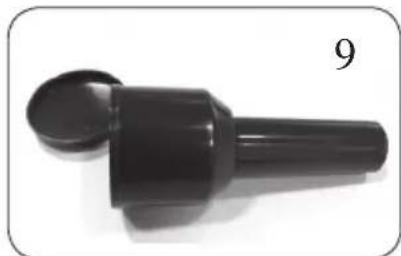
- You can use the pushing rod to press the meat firmly inside.
For sausage making, insert the following components:

For making stuffed meatballs, insert the following components:
To remove the meat grinder, press the release button. Make a quarter turn clockwise on the meat grinder. Clean all parts thoroughly and dry carefully before using them again.
OPTIONAL ACCESSORIES: PASTA
There are three accessories: a roller for lasagna, a tagliatelle cutter and spaghetti cutter.
To make spaghetti or tagliatelle, you must first use the lasagna roller to flatten sheets of pasta.

PREPARATION OF PASTA
Basic recipe
- 500 grams of flour
4 eggs - a pinch of salt
2,5ml oil - optionally water
For whole-wheat pasta replace the regular flour with whole-wheat flour.
For pasta rossa replace one egg with 75g tomato paste.
- Put the ingredients in the bowl.
- Mix with the dough hook n speed 1-2 for 2 to 3 minutes. Add water if the dough is too dry.
- Stop your food processor and knead the dough by hand until it is smooth.
- Let it rest in a kitchen towel for 15 minutes.
- Put the pasta roller into the connector for accessories.
- First, use the pasta roller to make flat sheets of pasta as for lasagna making.
- Enter these pasta sheets through the pasta cutter for spaghetti or tagliatelle.
- Fill a large pan full of water with a pinch of salt.
- Add some olive oil in order to prevent the pasta stick together
- Bring water to boil and add the pasta. Let simmer for 2 to 4 minutes depending on your personal preference.
CLEANING
Clean the pasta accessories with a damp cloth and wipe dry. Do not immerse in water or use the dishwasher for cleaning.