
AT 2214 - Toaster SEVERIN - Free user manual and instructions
Find the device manual for free AT 2214 SEVERIN in PDF.
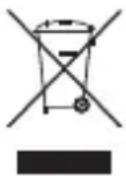
| Product Type | Automatic Toaster |
| Brand | Severin |
| Model | AT 2214 |
| Power Supply | 220-240 V, 50/60 Hz |
| Power | 850 W (approx.) |
| Dimensions (L x W x H) | Approx. 30 x 20 x 20 cm |
| Weight | Approx. 1.5 kg |
| Number of Slots | 2 |
| Maximum Bread Thickness | 14 mm |
| Browning Control | Variable, Continuous |
| Special Functions | Defrost, Reheat, Manual Stop |
| Included Accessories | Roll Rack, Crumb Tray |
| Safety | Automatic shut-off in case of jam, anti-jam lever |
| Cord Length | Approx. 85 cm |
| Cord Storage | Under the appliance |
| Cleaning | Removable crumb tray, dry cloth |
| Warranty | 2 years |
| Certification | CE |
Frequently Asked Questions - AT 2214 SEVERIN
User questions about AT 2214 SEVERIN
0 question about this device. Answer the ones you know or ask your own.
Ask a new question about this device
Download the instructions for your Toaster in PDF format for free! Find your manual AT 2214 - SEVERIN and take your electronic device back in hand. On this page are published all the documents necessary for the use of your device. AT 2214 by SEVERIN.
USER MANUAL AT 2214 SEVERIN
GB Instructions for use Automatic Toaster 9
Before using the appliance, please read the following instructions carefully and keep this manual for future reference. The appliance must only be used by persons familiar with these instructions.
Connection to the mains supply
The appliance should only be connected to an earthed socket installed in accordance with the regulations.
Make sure that the supply voltage corresponds to the voltage marked on the rating label.
This product complies with all binding CE labelling directives.
Familiarisation
- Toast slot
- Operating lever
- Defrost function with indicator lamp
- Warm-up function with indicator lamp
- Eject button with main indicator lamp
- Power cord with plug
- Infinitely adjustable browning control knob
- Power cord storage (on underside of appliance)
- Bread-roll warming top
- Rating label (on underside of appliance)
- Crumb tray
Important safety instructions
- Caution: There is always a danger that bread may catch fire. Therefore ensure that the appliance is not
positioned or operated in close proximity to curtains or any such infl ammable materials.
In order to avoid hazards, repairs to this electrical appliance or its power cord must be carried out by our customer service. If repairs are needed, please send the appliance to our customer service department (see appendix).
- The appliance is not intended to be operated by means of an external timer or separate remote-control system.
- Before cleaning the appliance, ensure it is disconnected from the power supply and has cooled down completely.
- To avoid the risk of electric shock, do not clean the appliance with water and do not immerse it in water.
To empty the crumb tray, pull it out sideways. Make sure to replace the tray before the toaster is used again.
- This appliance may be used by children (at least 8 years of age) and by persons with reduced physical, sensory or mental capabilities, or
lacking experience and knowledge, provided they have been given supervision or instruction concerning the use of the appliance and fully understand all dangers and safety precautions involved.
Children must not be permitted to play with the appliance.
Children must not be permitted to carry out any cleaning or maintenance work on the appliance unless they are supervised and at least 8 years of age.
The appliance and its power cord must be kept well away from children under 8 at all times.
- Caution: Keep any packaging materials well away from children – these are a potential source of danger, e.g. of suffocation.
Always position the appliance on a level heat-resistant surface.
In order to prevent damage to the housing, do not position the appliance on or near hot surfaces or open fl ames such as hot-plates or gas fl ames.
- Caution: the accessible housing surfaces become very hot during operation. Burns can occur from touching the hot parts.
Every time the appliance is used, the main body including the power cord as well as any attachment fitted should be checked thoroughly for any defects. Should the appliance, for instance, have
been dropped onto a hard surface, or if excessive force has been used to pull the power cord, it must no longer be used: even invisible damage may have adverse effects on the operational safety of the appliance.
- Do not allow the power cord to touch hot surfaces.
- Do not let the power cord hang free.
Do not leave the appliance unattended while in use. - Do not cover the toast slot during operation.
- Do not try to remove bread from the toaster with your fingers or insert any other objects (e.g. knives, forks) into the toast slot as the heating elements carry a live current.
Always remove the plug from the wall socket
-after use,
-in case of any malfunction,
-before cleaning the appliance.
- When removing the plug from the wall socket, never pull on the power cord; always grip the plug itself.
-
No responsibility will be accepted if damage results from improper use, or if these instructions are not complied with.
This appliance is intended for domestic or similar applications, such as -
in shops, offices and other similar working environments,
-in agricultural working environments,
-by customers in hotels, motels etc. and similar establishments,
-in bed-and breakfast type environments.
Operation
General information
Note: the operating lever locks down only when the plug is inserted.
- Do not use slices which are too thick or too big, as they may become stuck in the toaster. The thickness of the slices to be toasted should not exceed 14mm .
In case of problems or malfunctions during use, and before cleaning, always remove the plug from the wall socket.
- To remove a slice caught in the slot, use a blunt wooden implement (e.g. a brush handle). Never touch the metal heating elements.
Before using for the first time
- Clean the toaster thoroughly (see General care and cleaning).
- Switch on the toaster without any bread inserted and go through at least five toasting cycles at the maximum temperature setting.
- Allow the toaster to cool down between cycles.
- When switched on for the first time, the toaster may emit a slight smell and a little smoke. For that reason, adequate ventilation should be ensured by opening windows or balcony doors.
Automatic switch-off
This appliance comes with an automatic switch-off feature. If a bread slice should become stuck and cannot be ejected after the toasting cycle is complete, the toaster will automatically switch off. Should this occur, disconnect the appliance from the mains and remove the bread slice as described in the
section General information.
Adjusting the degree of browning
The desired degree of browning can be varied by turning the adjustable browning control knob.
Light: turn the control knob anti-clockwise.
Dark: turn the control knob clockwise.
In the case of sliced bread specifically intended for toasting, we recommend a browning control setting of 3 to 4.
Operation
- Insert the plug into the wall socket.
After adjusting the browning control, insert the bread into the toast slot and press the operating lever down. The indicator lamp will go on.
Once the desired degree of browning is reached, the toaster switches off automatically; the slices are ejected, and can be removed once the indicator lamp goes off.
To achieve regular browning when.
toasting several slices in succession,
allow the toaster to cool down for 60 - 90 seconds after each cycle. - Do not cover the toast slot during operation.
Defrost function
The defrost function may be used in addition to the normal action when toasting deep-frozen bread. This will extend the toasting process. This function is shown by the indicator lamp.
Warm-up function
The warm-up function is suitable for re-heating bread which has already been
toasted. Caution: do not warm up buttered bread.
After activating the toasting function, the warm-up function can be used in addition. This function is shown by the indicator lamp.
Interrupting the toasting cycle
If you want to interrupt the toasting cycle, press the eject button. The toaster will switch off and the slices are ejected.
Warming up rolls, buns etc
- To warm up buns, rolls or other bakery items, place the bread-roll warming top on the toaster in such a way that it is sitting to the left and right of the toast slot (see picture).
- Place the items to be warmed up on the top, adjust the browning control to a medium setting and then push down the operating lever to switch on the toaster.
- Once the browning cycle is complete and the appliance has automatically switched off, turn the roll or bread over and repeat the cycle.
- Allow the warming top sufficient time to cool down after use before it is taken off again.
- Do not place the items directly on the toast slot.
General Care and Cleaning
- Before cleaning the appliance, ensure it is disconnected from the power supply and has cooled down completely.
- To avoid the risk of electric shock, do not clean the toaster with water and do not immerse it in water.
- Do not use abrasives or harsh cleaning solutions.
The housing may be wiped with a dry or
slightly damp lint-free cloth.
Crumb tray
During use, any bread crumbs falling down are collected in the crumb tray. To empty the tray, pull it out sideways. Make sure to replace the crumb tray before the toaster is used again.
Power cord storage
Unwind the power cord completely before operation and make sure it is kept well away from the appliance.
Allow for a suffcient cooling-down period before winding up the power cord after use.
Disposal
Devices marked with this symbol must be disposed of separately from your household waste, as they contain valuable materials
which can be recycled. Proper disposal protects the environment and human health. Your local authority or retailer can provide information on the matter.
Guarantee
This product is guaranteed against defects in materials and workmanship for a period of two years from the date of purchase. Under this guarantee the manufacturer undertakes to repair or replace any parts found to be defective, providing the product is returned to one of our authorised service centres. This guarantee is only valid if the appliance has been used in accordance with the instructions, and provided that it has not been modified, repaired or interfered with by any unauthorised person, or damaged through misuse.
This guarantee naturally does not cover
wear and tear, nor breakables such as glass and ceramic items, bulbs etc. This guarantee does not affect your statutory rights, nor any legal rights you may have as a consumer under applicable national legislation governing the purchase of goods. If the product fails to operate and needs to be returned, pack it carefully, enclosing your name and address and the reason for return. If within the guarantee period, please also provide the guarantee card and proof of purchase.
FR
Chere cliente, Cher client,
daIte emy nONHOCTbIO OCTbITb.
Bo n36eXaHne npaxeHnna 3JIeKTPuYeCKIM TOKOM He MoIte yCTpOiCTBO BODOI HHe NOrpyXaITe erO B Body.
- UTO6bI ONOPOXHnTB NOIDOnДЯ
KPOWeK, BblBnHbTe erO HApJxU.
He 3a6yDbTe yCTaHOBnTB NOIDOn
Ha MeCTO Nepei IOBTOpHbIM
NcNoJIb3OBaHnEm Prn6opa.
- 3TOT npi6op moxet
ИСПОЛьЗOBaTBСЯ DeTbMn (He
Младше 8-лeTHero BO3pacta)
И Лицамс C OрразнчeHHbIMN
ФИЗЧЕCKIMN, CEHCOPHbIMN ИЛN
УМСТВЕНьIMN CПОСОБНOCТЯМN ИЛN
He OБlaДАЮШМN ДОCTАTOUHbIM
ОпытOM N UМЕнEM TOLьКО ПprN
УСЛOBИN, YTO OHI HAXODЯТСЯ
ПОД ПРИСМOTPOM ИЛN ПОЛУЧИПN
ИНСТРУКТAZ N OПьЗOBAHIO
ДаHHьIM Pnp60POM, ПОЛHOCTьЮ
OCO3HAIOT BCE ONaCHOCTN, KOTOpbIE
MOryT PprN 3TOM BO3HnKHyTb, И
ОЗнAKOMЛeHbI C COOTBETCTBYQUZIMN
Правламп ТExнки 6e3ОпaCHOCTN.
HnkOrda He donyckaTe K npbOpu I Kero shnpy nItaHna deteMnaIwe
8 neT.
He pa3peaaiTe DeTm nIgpaTb C np6opom.
- Детам можно разревать чinctу воблухиваиме пибopa только под писмотом и сени не me-hee 8.net.
- Празурждени. Деркnte
yanaKOBOчьie MaTePnAJIbI B
HeIOCTyHOM ДЯ DeTei MeCTe, TAK KaK
OHI npeDCTaBIAJOT ONaCHOCTb ydUsbY.
- UTo6bI He NOBpeDnTb KOpNyc npnbopa, He CTaBbTe erO Ha TaKne Tropyne IpeDMeTbI JIN NCTOuHNKn OTKpbITOro PIIaMeHn KaK KOHΦopKn 3JIeKTPnueckoJ INI Ra3OB0I NNITbI JIN PRAOM C HIMN.
Будыо ectopoxнbl!прnpabote npnbop harpeBaetcra,po3tomy npn npNKOCHOBEHm K TOpRyHm YaCTrM MOXHO NOJyHTb OXKOr.
Bcerda cTaBbTe npnbop Ha poBHyTOpeMocToKyuIO NOBepXHOCTb.
- Перед кады IM BKноченem
элькторпбopa седуET ybeДиТьСВ OTCYТСВИ NOВрждэн КаК Ha
ОCHOВHOM yCTpoIcTBe, BKПючЯ
И Шур ппань, ТAK И На ЛЮБOM
ДОПОЛНTEЛьHOM, ecIN OHO
Установлес.Еси Bbl рогалп prибор
Ha TBERdYIO NOBepxHOCt b ИПпprINaRaJI.
ЧpeЗМерhoe услпe ДЯ BBITЯВаня
шур ппань, 3ТOT prибор He
седуET boJbSe ИСоЛьЗOBaTb:
Доже HeВиДIMоE NOВрждэн
Может OTPицatelьно Сka3aTbСЯ Ha
эКСПлУаТAUsoHNo 6e3ОпaСHOCtN
прьoga.
Cleinte 3a tem, yto6bl shHyp nItaHnra
He copnkaacJc HarpeBaUoIeJcNOBepxHOCTbH np6opa.
He donyckaTe cbo6oHoro npOBucaHna Hhupa nHTaHn.
He octabJnTe BkIIOueHHbI np6op 6e3 npncMOtpa.
He hakpbBaIte npope3b IJRA TOCTOB BO BpeMa pa60TbI np60pa.
He n3BneKaIe XJIe6 n3 TocTepa naIbIaMn IJIIN BCTaBJIaR B npope3b dJIa TOcTOB TaKHe IpeDMeTbI, KaK HOxN, BUNKn I T.D. HarpeBaTeJIbHbIe 3JIeMeHTbl YBJIaHOTcra TKOBdUzIMN YaCTaMn.
Bcerda BbIHMaTe wTeNceIbHyIO BNKy n3 pO3eTKn:
- nocne nCnoJb3OBaHn;
-
npn IIO6oH enoJaKe;
-пешд чьков пибopa. -
Пи ИЗВЛеЧЕНМ ВИЛКИ ИЗ CTEHHOI РОЗТКИ НИКОДА He TЯнITE 3a WHUP, Берптесь Только 3a ВИЛКУ.
I3rTOBnteJIb He Hecet HnKaKoI OTBeTCTBeHHOCTn 3a NOBpeJdeHne, Bbl3BaHHoe HEnpaBnIbHOI 3KcIIyatauNei NIn HapUWeHnEM HaCTOaX yka3aHn. -
ΘтOT npиборnpeДна3наченДлЯ ИСПОЛБЗОВАнЯВ ДOMaшнIX ИЛ ПОДОБных успOBnIx, КА, Нарпмер:
-
B OΦиcax IJI N B ἀργιχ KOMMepuecknx NOMeüeHnX;
- B npednpnayTnx, paCNOJoxeHHbIX BCeJIbCKOJ MeCTHOCTN;
- NOCTOJIbIaMn B OTeJIaX, MOTeJIaX I T. D.IBdpyrIX NODObHbIX 3aBeDeEHnIX;
- B rOCTeBbIX DoMax C npeIOCTaBJIeHnEm HouJera n 3aBtpaka.
Испобзовные
067aHOpmaun
- Пимеанne. Рыаг Фнсupyетс.Toько пол eвлоченя Влки Bpo3eTKy.
He nCnoIb3yIte oyeHb TOnCTbIe IJIb 6oJIbWne JOMTN. OHN MOrYT 3aCTpIb B ToCTepe. ToJUHa XJe6a He DoJXHa 6bITb 6OJee 14 MM. - Пи BOЗнКHOВЕпИnpo6лeМ, В сIуае Heccpa6aTbIBaHЯ И пepeД чИСТКОI BCERДа BыИмаTe BUNKy ИЗ рОЗТКИ.
- UTO6bI ydaJIITb TocT, 3aCTPraBmIB npope3n TocTepa, NOJb3yIeTcB TyNbIMn DepeBraHHbIMn PpeDMeTaMn (Hanp.,pyukoN uETKn).HnkOrDa He npKacaiTeCb K MeTaJIInueCKIM HarpeBaTeJIbHbIM 3JIeMeHTam.
Ipeed nepBbIM nCnOJb3OBaHHeM
TuaTeIbHO OuNCTnTE TOCTep (CM. 06uuyxod u yucmka).
BknHouHTe TocTep 6e3 Xne6a n nporoHnTe eO He MeHee nTn pa3 npm MaKcImaJIbHoI Tempeatype.
- После каду nporoHa Toctepy HxHo DaTb OCTbITb.
- Пи вклюецни тостера впервьл pa3 может повпся слаби 3anax n HeбольшоДыIM.По зтОн ричиесуET obecneuHT coOTBETCTBYUOуBOBHTINJIaUNO,OTKpbIB OKHA INIДВepN 6aIKOHa.
ABTOMATNueckoe OTKJIIOUeHne
Даньи npбор nmeet yHKuHOBaTOMaTnueckOro OTKIIOUeHnE. EcNTOCT3aCTPraHET B TOCTepe N He 6yDet BbITOKHyTPOCNe 3aBepSeHnA ZKJa NOJXapNBaHn,TOCTep OTKJIIOHTcA bTOMaTnueckN.EcNIN
3TO npOn3OJTe, OTKJIouHnte np6Op OT cETn ydaIInTe XJIe6, KaK OINcAHO B pa3dJe
Ouua uHopmaua.
PerynpoBka cTepeHn noJXapNBaHna
CTepeHb PODJxapNBaHnM OMOHOperyIINPOBaTb N0 XeJIaHnO PyTeM NOBOPoTa pyuK:
Для умehьшени NOBepHnte npOTNB yacobov CTpeJKN.
Для уBEЛиЧЕнЯ NOВернITE NO YacOBОИ CTpeJIke.
B clyuae npimHeHn CneuaJIbHOro Xle6a IJRA TOCTOB Mbl peKOMeHdyem CTaBNTb pykypeRyIInpOBAHnCtepeHn IOJXapNBAHn B INoJoxHe 3 nnn 4.
3Kcnpnyatazaia
BcTaBbTe BnIky Bpo3eTKy.
- Послpeperynipobanra SteneHn obxapnbAHn, nOIOXHTe XJIe6 B OTBepCTne IJRA XJIe6a n CdBnHbTe pbiUar 3aRpy3Kn BHN3. ПocIe 3TORO 3aropaetcnyHdNKATOPHa JAmna.
- Пи достинжени 3аданно CTeпени obжариBaHЯ,TOCTep BbIKJIIOUcaETcA aBTOMaTnueCKN,XIe6 BbITaJIKNBaETcI N eTO MOxHO B3rTb IocJIe BbIKJIIOUeHЯ INHДИКaTOPHOJ lamNoQK.
ДяdoctиженяОднHaKOBOro
poJxapNBaHnI HeCKOJIbKInx TocTob
poJpyd octykaIte TocTeB TeueHne 60 -
90 cek noCne kaJdOro zHKJa.
He hakpbBaIte npope3b IJIa TOCTOB BO BpeMa pa60TbI np6opa.
Функциа pa3MopaxnBaHna
Pn nCNoJb3OBaHn TOCTepa MoXHo DOnOJIHnTeJbHO nCNoJb3OBaTb cyHKuIO pa3MOpaxKBaHnI dIy 3amOpoxeHHoro
xIe6a.3To npoJnT npocecc
noJXapuBaHnA. Pn BkJIoueHn 3Toi
fYHKcN 3aRopaetc HndKATOPHa
JaMNoUka.
Функця поорpeва
Функця поорpeBa слжnt Дп ПОВТOPHOrO HarpeBa yxe пожарEHORO хлоба. Внманe! He поорpeBaTe xлоб, HamazHHbI MacnOM.
Ipeed nepBbIM nCnoJb3OBAHnEm
NoJIHOCTbIO pa3MOTaIte shHyp NHTAHn
N y6eINTEcB, YTO OH hXoINTCra Ha
DOCTaTOUHOM ydaJIeHn OT npIBopa.
Ipeed Tem kAK cmOTaTb shHyp NHTAHn
NocLe pPImeHHeHn PnpBopa, y6eINTEcb,
YTO OH OCTblI.
YTNIN3aun
YCTPOIcTBA, NOMEueHHbIe 3TUM CIMBOJOM, DOJIKNbI YTNIN3NPOBaTbCRA OTDeJIbHO OT DOMaSHero Mycopa, TAK KAk OHI CODEpxat
HIOJIe3HbIe MaTePnAJIbI, KOToPbIE MOryT 6bITb HApPaBJIeHbI Ha nepepa60Ky. IpaBnJIbHaYtJIN3aUna OBeCneuNBAeT
3aHTy OKpykaOuSei CpeBbI 3OpOBbYeIOBeka. INΦopMaunIO NO 3TOMy BOpocBy Bbl MOxTe NOLyUHTb Y MeCTbIX BJaCTeINy npOdaBca yCTpOcTBa.
TapaHTnA
「rapaHTnHbI cPok Ha npnbOpbl fnpmbI „Severin" - 2 roda co dna nx npodaxn. B TeueHne 3TOrO BpeMeHN Mbl 6ecnPaTHo UcTpaHIM BCE DeΦeKtbl, BO3HKnUWe B pe3yIbTaTe npOn3BOdCTBeHHoro 6paka nII npimHeHnHa HeKaueCTBeHHbIX MaTePnaJIOB.「rapaHTnHa paCnpocTpaHraETcRa Ha DeΦeKtbl, BO3HKnUWe n3-3a HecO6JIouDeHnpykoBODCTBa nO ekCnIpyatau, rpy6oro 6paSeHnA C np6opom, a TaKke Ha 6bIoUncEca (CTekJIaHHbIe N KepamNueckne) qactn. DaHHa raPAHTnHa HapuShaET BaIINx 3akOHhbIX npab, a TAKKe IIO6bIX DpyRnx npab Notpe6nteJIy, yCTaHOBJIeHHbIX HaunOHaNbHbIM 3akOHODaTeJIbCTBOM, peryInpuyUoIm OTHOseHn, BO3HkaIOUme MeJx npTe6nteJIaMn I npOdaBcAmn ppi npOdaXe TOBapOB.「rapaHTnHa HhynlpyeTcA, ecnn np60ppeMOHTnpOBaIcH He BVka3aHHbIX Hamn NyHKtax cepBnCHOrO 06cIyXuBaHn. Bbl MoKte No NOyTe OTnpaBNTb np6op C nepeHem HencnpaBHOCTeN n PpINOKeHHbIM KaCCOBbIM YeKOM Ha NaIbXaIshn pyHKT cepBnCHOrO 06cIyXuBaHn. KaKne-JIb6 ODonOIHNTEbHbIe rapaHTn IpoDaBuza 3aBODm-H3rotOBtTeJEM He npHnMaOTcY.
Kuressaare: Toomas Teder FIE, Pikk 1B,
tel: 45 55 978
Kaina: Ilmar Pauk Elektroonika FIE, Mae2S,
tel:4636379,5187444
Espana
Severin Electrodom. España S.L.
Plaza de la Almazara Portal 4, 1^ E.
45200 ILLESCAS(Toledo)
Tel: 925 51 34 05
Fax: 925 54 19 40
eMail: severin@severin.es
http://www.severin.es
France
SEVERIN France Sarl
4, rue de Thal
B.P. 38
67211 OBERNAI CEDEX
Tel.: 03 88 47 62 08
Fax: 03 88 47 62 09
Greece
BERSON
C. Sarafi dis Bros. S.A.
Agamemnonos 47
176 75 Kallithea, Athens
Tel.: 0030-210 9478700
Philippines Business Center
Agias Anastasias & Laertou, Pilea
Service Post of Thermi
570 01 Thessaloniki, Greece
Tel.: 0030-2310954020
Iran
IRAN-SEVERIN KISH CO. LTD.
No.668,7th.Floor
Bahar Tower
Ave. South Bahar
TEHRAN - IRAN
Tel.:009821-77616767
Fax:009821-77616534
Info@iranseverin.com
www.iranseverin.com
Israel
Eatay Agencies
109 Herzel St.
Haifa
Phone: 050-5358648
Email: service@severin.co.il
Italia
via Dino Col 52r-54r-56r,
I-16149 Genova
Green Number: 800240279
Tel.: 010/6451102-010418609
Fax: 010/6425009
e-mail: videoelettronica@panet.it
Jordan
F.A. Kettaneh
P.O.Box 485
Amman, 11118, Jordan
Tel: 00962-6-4398642
e-mail: app@kettaneh.com.jo
Korea
Jung Shin Electronics co., Ltd.
501, Megaventuretower 77-9,
Moonrae-Dong 3ga, Yongdeungpo-Gu
Seoul, Korea
Tel: +82-22-637 3245~7
Fax: +82-22-637 3244
Service Hotline: 080-001-0190
Latvia
SERVO Ltd.
Mr. Janis Pivovarenoks
Tel: +371 7279892
servo@alp0lo.lv
Lebanon
Khoury Home
7th Floor, Cité Dora 3 Building, Dora
P.O.Box 70611
Antelias, Lebanon
Telephone 01 244200, Fax 01 253535
eMail: info@khouryhome.com
Internet: www.khouryhome.com
Luxembourg
Ser-Tec
Serbia and Montenegro
tel: +381-21-524-638
tel: +381-21-553-594
fax: +381-21-522-096
Slowak Republic
PREMT,s.r.o.
Skladova 1
917 01 Tmava
Tel:033/5447177
Finland
Oy Harry Marcell Ab
Rässitie 6, PL 63
01511 Vantaa
Tel.: 00358 / 207599860
Fax: 00358 / 207599803
Svenska
Rakspecialisten HS
Mollevangsgatan 34
214 20 Malmö
Tel.: 040/12 07 70
Fax: 040/6110335
Slovenia
SEVTIS d.o.o.
Smartinska 130
1000 Ljubljana
Tel: 00386 1542 1927
Fax: 00386 1542 1926
Stand: 03.2012


- Connection to the mains supply
- Familiarisation
- Important safety instructions
- Operation
- General information
- Before using for the first time
- Automatic switch-off
- Adjusting the degree of browning
- Defrost function
- Warm-up function
- Interrupting the toasting cycle
- Warming up rolls, buns etc
- General Care and Cleaning
- Crumb tray
- Power cord storage
- Disposal
- Guarantee
- FR
- Chere cliente, Cher client,
- Испобзовные
- 067aHOpmaun
- Ipeed nepBbIM nCnOJb3OBaHHeM
- ABTOMATNueckoe OTKJIIOUeHne
- Ouua uHopmaua.
- PerynpoBka cTepeHn noJXapNBaHna
- 3Kcnpnyatazaia
- Функциа pa3MopaxnBaHna
- Функця поорpeва
- YTNIN3aun
- TapaHTnA
- Korea
- Latvia
- Lebanon
- Luxembourg
- Slowak Republic
- Finland
- Svenska
- Slovenia
Brand : SEVERIN
Model : AT 2214
Category : Toaster