HRA250IPWH - Docking station ROADSTAR - Free user manual and instructions
Find the device manual for free HRA250IPWH ROADSTAR in PDF.
| Product type | Radio alarm clock with iPod/iPhone docking station and FM radio |
| Power supply | 230 V~50 Hz via external AC adapter (output 9 V DC) |
| Memory backup batteries | 2 UM3 (AA) batteries (not included) |
| Remote control battery | 1 CR-2032 battery (included) |
| Main functions | Clock, dual independent alarm, Snooze (9 min), Sleep (15/30/45/60 min), FM radio (87.5-108 MHz) with 20 presets, iPod/iPhone playback, AUX input, tone control (bass/treble), infrared remote control |
| Output power | 2 x 2 W |
| Connectors | iPod/iPhone connector (dock), AUX input (3.5 mm stereo jack), FM antenna |
| Display | LCD display |
| Maintenance and cleaning | Unplug the device before cleaning. Use a soft, dry cloth. Do not use abrasive products or solvents. |
| Safety | Do not expose to moisture or rain. Do not open the casing. Unplug when not in use for extended periods. Keep away from heat sources. |
| Spare parts and repairability | AC adapter, remote control, batteries. No user-serviceable parts. Contact a qualified technician for any repairs. |
| General information | Brand: Roadstar. Model: HRA250IPWH. Country of manufacture: not specified. Warranty: consult the retailer. |
Frequently Asked Questions - HRA250IPWH ROADSTAR
User questions about HRA250IPWH ROADSTAR
0 question about this device. Answer the ones you know or ask your own.
Ask a new question about this device
Download the instructions for your Docking station in PDF format for free! Find your manual HRA250IPWH - ROADSTAR and take your electronic device back in hand. On this page are published all the documents necessary for the use of your device. HRA250IPWH by ROADSTAR.
USER MANUAL HRA250IPWH ROADSTAR
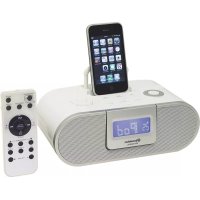
iPod / iPhone DOCKING STATION WITH PLL FM-BAND TUNER, ALARM CLOCK AND FULL FUNCTION REMOTE CONTROL.
HRA-250IP/WH
Instruction manual
Bedienungsanleitung
- Your new unit was manufactured and assembled under strict ROADSTAR quality control. Thank you for purchasing our product. Before operating the unit, please read this instruction manual carefully. Keep it also handy for further future references.
text_image
5 Top view 10 13 Front view 14 16 2 11 15 79 Rear view 17 8 12 9 6WARNINGS

The exclamation point within the triangle is a warning sign alerting the user of important instructions accompanying the product.

The lightening flash with arrowhead symbol within the triangle is a warning sign alerting the user of "dangerous voltage" inside the unit.

To reduce the risk of electric shock, do not remove the cover. No user serviceable parts inside the unit. Refer all servicing to qualified personnel.
230v\~
This unit operates on 230V \~ 50Hz. If the unit is not used for a long period of time, remove the plug from the AC mains.

This unit must not be exposed to moisture or rain.

The power switch in this unit is mounted on the secondary circuit and does not disconnect the whole unit from the mains in OFF position.

Ensure all connections are properly made before operating the unit.

This unit should be positioned so that it is properly ventilated. Avoid placing it, for example, close to curtains, on the carpet or in a built-in installation such as a bookcase.

Do not expose this unit to direct sunlight or heat radiating sources.

Make sure all batteries are inserted according to the proper polarity.

If the unit is not used for a long period of time (more than 1 month), remove all batteries from their compartment to avoid possible leaking.
Correct Disposal of This Product
(Waste Electrical & Electronic Equipment)

This marking shown on the product or its literature, indicates that it should not be disposed with other household wastes at the end of its working life. To prevent possible harm to the environment or human health from uncontrolled waste disposal, please separate this from other types of wastes and recycle it responsibly to promote the sustainable reuse of material resources. Household users should contact either the retailer where they purchased this product, or their local government office, for details of where and how they can take this item for environmentally safe recycling.
1
2
EnglishEng
HRA-250IP
iPod iPhone DOCKING STATION WITH FM-BAND TUNER AND FULL FUNCTION REMOTE CONTROL.
INSTRUCTION MANUAL
Please read this instruction manual carefully and familiarize yourself with your new HiFi System before using it for the first time. Please retain this manual for future reference.
LOCATION OF CONTROLS
- SPEAKER
- SNOOZE / DIMMER BUTTON
- iPod iPhone CONNECTOR
- FUNCTION BUTTON ( iPod, AUX or Radio)
- TIME SET BUTTON
- BATTERY BACK-UP MEMORY COMPARTMENT
- LCD DISPLAY
- AC ADAPTER 9V
- Speaker bass reflex output
- ON/OFF Button
- VOLUME DOWN
- AUX LINE-IN JACK
- ALARM SET BUTTON
- SKIP/SEARCH/TUNING DOWN BUTTON
- VOLUME UP BUTTON
- SKIP/SEARCH/TUNING UP BUTTON
- FM ANTENNA
- AUDIO BASS REFLEX
CONNECTING TO POWER
Before switching on make sure that the voltage of your electricity supply is the same as that indicated on the rating plate.
For your own safety read the following instructions carefully before attempting to connect this unit to the mains.
This unit is designed to operate on AC 230V 50Hz current only. Connecting the supplied 9V AC Adapter to power sources and connect the unit.
Caution
To prevent electric shock disconnect the AC Adapter from the mains before removing cover.

3
No user serviceable parts inside. Refer servicing to qualified service personnel.
Safety Precaution
Do not allow this unit to be exposed to rain or moisture.
Mains Supply (AC ADAPTER): AC230Volts / 50Hz - AC only

This symbol means that this unit is double insulated. An earth connection is not required.
POWERSUPPLY
Remove the stereo carefully from the box, retaining the packaging for future use.
Read these instructions carefully before use.
Connections
Connect the AC ADAPTER (8) to an AC outlet. Check that your mains supply is 230V, 50Hz. Extend the FM antenna on the rear of the unit (17).
Disconnect the AC power Adapter from the mains if the unit is not going to be used for some time.
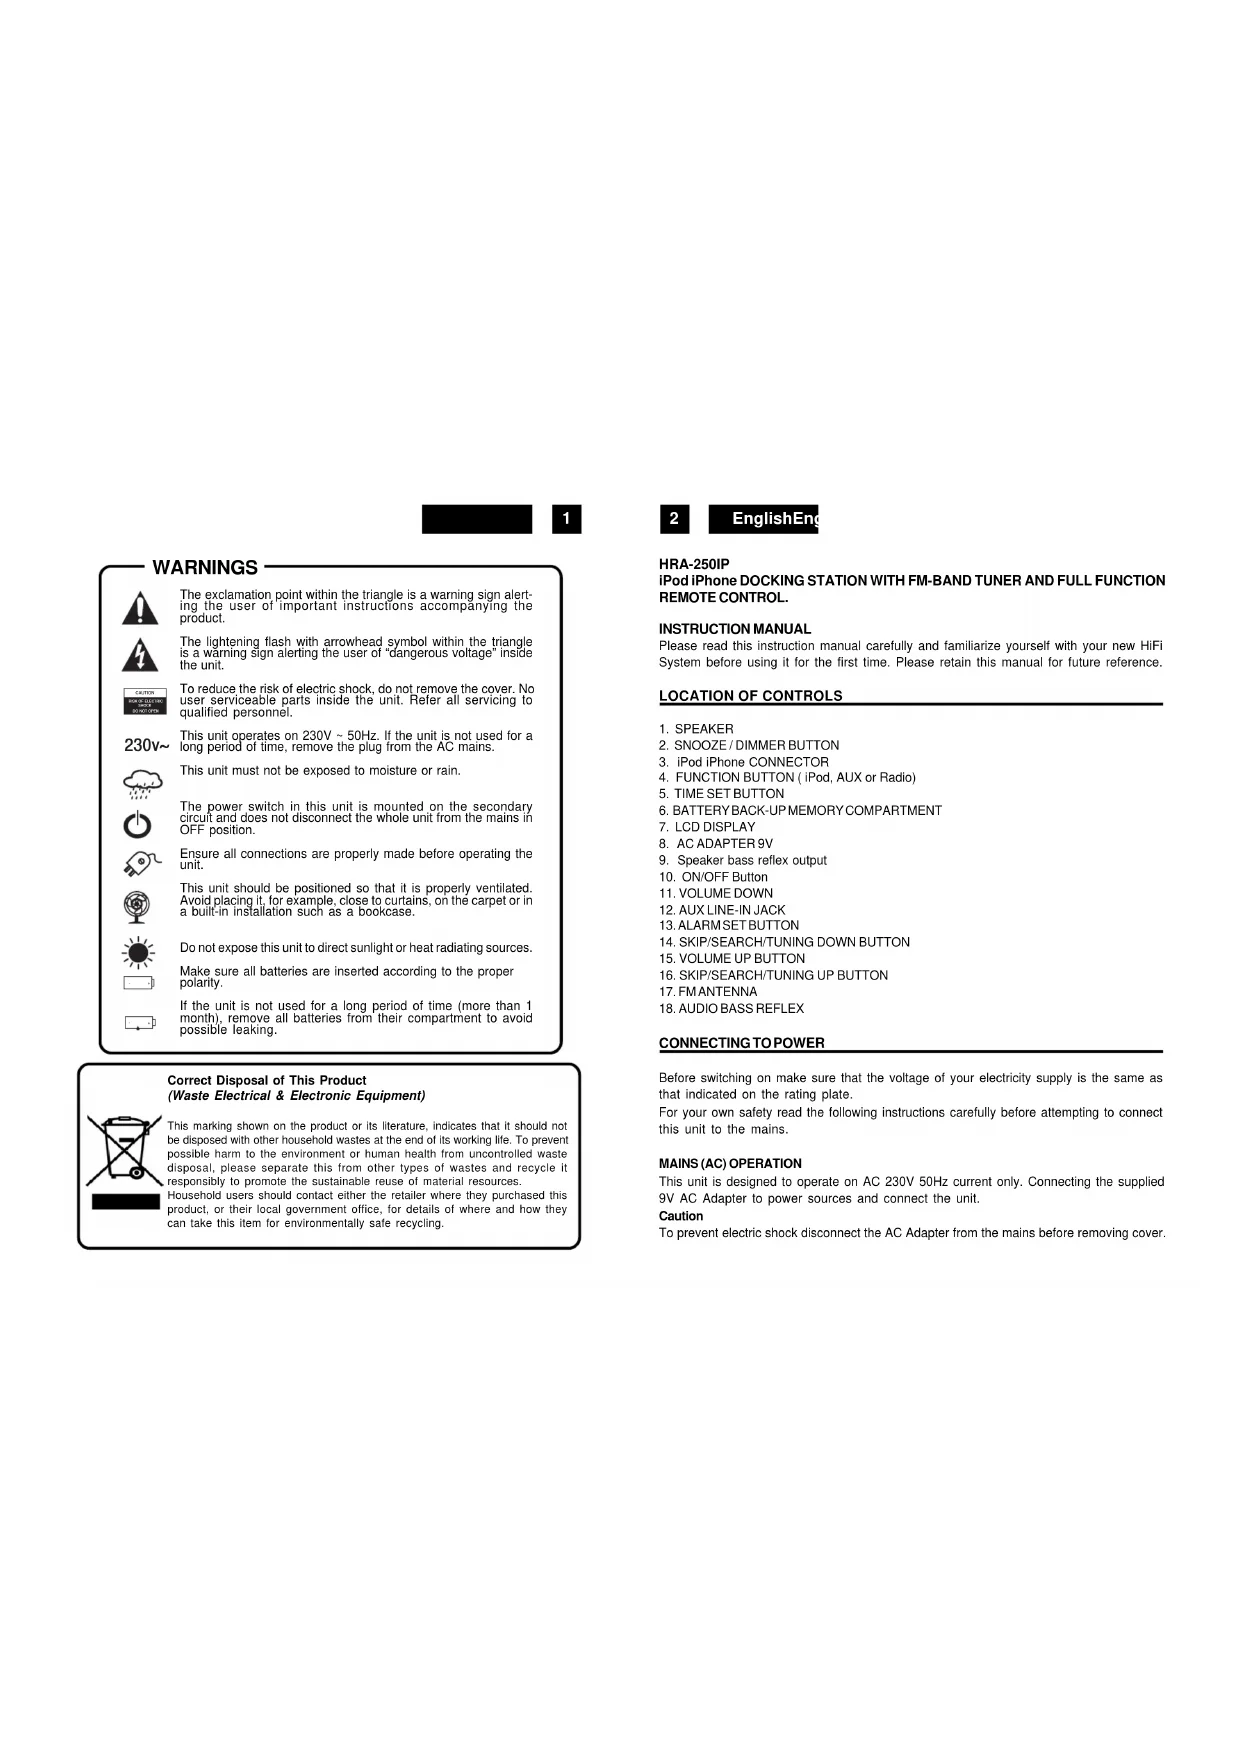
BATTERYINSTALLATION(REMOTECONTROL)
Insert one CR-2025 battery into the battery compartment of the remote controller and replace the cover.
BATTERYREPLACEMENT
When the batteries become too weak, the operating distance of the remote controller is greatly reduced and you will need to replace the batteries.
Notes: To maintain the accuracy and long life of the transmitter, do not press two or more Buttons simultaneously.
If the remote control is not to be used for a long time, remove the batteries to prevent possible damage through leaking batteries.
natural_image
Simple line drawing of a mechanical device with labeled points A and B, no text or symbols present.USING THEREMOTECONTROLLERCORRECTLY
Point the remote controller at the Remote Sensor in front of the unit.
The functions of the buttons on the remote control are the same as the corresponding controls on the main unit.
4
EnglishEng
When there is a strong ambient light source, the performance of the infrared Remote Sensor may be degraded, causing unreliable operation.
The maximum effective distance for remote control operation is about 5 metres (16.5 feet).
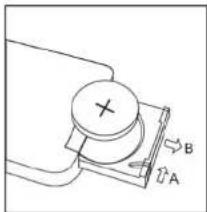
REMOTECONTROL
- STANDBY BUTTON
- MUTE BUTTON
- PRESET (Radio) UP / DOWN BUTTON
- SLEEP BUTTON
- BASS AUDIO CONTROL
- SKIP/TUNING/SEARCH DOWN BUTTON
- TREBLE AUDIO CONTROL
- VOLUME DOWN BUTTON
- SOURCE BUTTON
- SNOOZE / DIMMER BUTTON
- PRESET(Radio) BUTTON
- ALARM 1/2 BUTTON
- PLAY/PAUSE (only iPod) BUTTON
- SKIP/TUNING/SEARCH UP BUTTON
text_image
1 2 3 4 5 6 7 8 9 10 11 12 13 14 15 16 17 Switch Power Transit Control Small/IntenserBATTERYINSTALLATION(MEMORYBACK-UP)
Insert TWO UM-3 battery into the battery compartment on bottom side and replace the cover.
CLOCK SETTING
In the STANDBY mode:
- Press the TIME SET (5) button.

5
- Press the TUNE/CLK+ or TUNE/CLK- button (16,14) to adjust the hour digit.
- Press the TIME SET button (5), the HOUR digit will flash on the display, press the TUNE/CLK+ or TUNE/CLK- button (16,14) button to adjust MINUTE digit.

- Press the PLAY/PAUSE/FM button once more, the MINUTE digit will flash on the display, press the TUNE/CLK+ or TUNE/CLK- button (16,14) button to adjust MINUTE digit.
- Press the PLAY/PAUSE/FM button again to confirm the time.
- Each state as shown above will be cleared if the key is not pushed in 10 seconds.
ALARM SETTING
This unit provides two alarms setting that work independently from each other, thus allowing you to customize each one to your preference. You can set the alarm and the source of the alarm.
During in the STAND-BY OFF/ON mode.
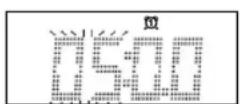
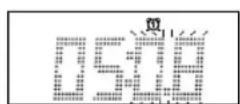
- After adjusting clock, press the ALARM SET button on the unit (13) and "①" or "②" appears on the display.
- Press the ALARM SET button again on the unit (20) for a few seconds, and the display digit of the HOUR flashes.
- Press the TUNE/CLK+ or TUNE/CLK- button (16,14) to adjust it.
- Press the ALARM SET button again, the MINUTE digit will start flashing, adjust it by pressing the TUNE/CLK+ or TUNE/CLK- button.
- Press the ALARM SET button once more to confirm and order ALARM time.
- After adjusting "TIMER-ON", the ALARM VOLUME LEVEL, "20" appears on the display. Adjust it by pressing the TUNE/CLK+ or TUNE/CLK- button.
When the Alarm Clock activates, the Volume will gradually increase from 0 to the volume level you set. - Press the Alarm Set again and you can select the wake up mode from iPOD,
iPOD,

6
EnglishEng

AUDIO or BEEP.
- Each enable state as shown above will be cleared if the button is not pushed in 7 seconds.
ACTIVATING THE ALARM WAKE UP MODE
- Press repeatedly the ALARM SET button to activate the alarm function and select the wake-up mode.
- The alarm mode and corresponding icon RADIO / IPOD / BEEP appear in sequence to the display.
NOTE: If Alarm wake-up with iPod mode, need to put the iPod in the docking station.
To wake up with RADIO, make sure that the FM Antenna is extended properly and select a preset station or tune the Radio to your preferred FM station.
To switch OFF the Alarm, press any button in the unit or remote control.
SNOOZE FUNCTION
During the alarm, press the SNOOZE/DIMMER button from unit or remote control will temporary switch OFF the alarm for 9 minutes and the snooze icon will be displayed. This is repeatable in the hour alarm duration.
BASS & TREBLE CONTROLS (FROM REMOTE CONTROL)
It is possible to modify the BASS and TREBLE sound tone.
When you press the Bass or Treble button, the sound tone can be changed.
SLEEP FUNCTION (BY REMOTE CONTROL)
- If you want to fall asleep to music, press the SLEEP button on Remote Control.
- You may select the TUNER, iPod or AUX mode in sleep function to play from 15, 30, 45 or 60 minutes of music before shutting itself off automatically.
FUNCTION SELECT
- Press repeatedly the FUNCTION button (4) on the unit or on the remote control (9) to select the desired. Display changes as: iPod - RADIO - AUX-IN.
7
FMRADIO OPERATION
Operation
- Press the POWER Button on the unit (10) or the remote control (1) to turn the unit on.
- Select the RADIO function with the SOURCE Button on the unit (4) or on the remote control (9).
- There are a number of ways that you can tune to radio stations. Follow the instructions in the sections below.
- Adjust the VOLUME to the desired level using the VOLUME -/+ buttons (11,15) or the VOLUME -/+ Buttons (8,17) on the remote control.
• To turn off the radio, press the POWER Button again.
Manual Tuning
Manual tuning is useful when you already know the frequency of the desired transmitter.
- To change the frequency, repeatedly press the ▲ TUNE/CLK+ or ▼ TUNE/CLK- from main unit until the precise frequency is reached.
- From the remote control, press the or Hutton until the precise frequency is reached.
Automatic Tuning
- Press and hold the ▲TUNE/CLK+ or ▼TUNE/CLK- Buttons for about 5 second. The radio will start automatically scanning for strong radio signals. The RADIO Display shows the frequency in MHz for Fm.
- The tuner will stop scanning when it finds a strong signal.
- Repeat this process until the desired station is found.
Notes: As automatic tuning depends on the signal strength of the transmitters, weak transmitters are sometimes skipped. In such a case, tune manually to find the weaker transmitters. On the other hand, with a very strong signal, the tuner may stop before it reaches the optimum setting. Tune manually for the best reception.
Storing Stations (from Remote Control only)
8
EnglishEng
This unit allows you to store the frequencies of up to 20 radio stations in the memory; First tune into the station you want to store using one of the methods above.
- Then press the Preset button on the remote control (11).
- Press playlist Buttons the remote control (3) to select the desired channel memory and press the Preset Menu button (11) within 5 seconds to store it.
To reprogram a preset station repeat the procedure above.
Selecting a preset station
To select a preset station, press the Jog/Mode button and turn the Volume/Tune knob on main unit or press the Playlist-UP ▲ or Playlist-DN ▼ Buttons on the remote control (3,4) until the desired preset program is displayed.
FM Antenna
For FM reception there is a wire antenna (17) at the rear of the unit. Extend it for best reception.
- Insert the iPod player in the iPod deck bracket on the top of the main unit fixedly.
- Power on the main unit, and then press the SOURCE button to the iPod mode, the iPod indicator will appear on the display of the main unit.
With unit in iPod mode:
- Press the PLAY/PAUSE ▶II-button once to start the iPod playing. Adjust the volume control by the VOLUME buttons. To stop the current playing, press the PLAY/PAUSE button once.
- Press the PLAY/PAUSE button once to pause the current track. To resume the playback, press the PLAY/PAUSE button once again.
- To skip forwards or backwards, press the TUNE/CLK+ or TUNE/CLK- button to select the desired track.
Charging the iPod Player battery through the main unit:
- The iPod Player has a internal non removable battery, the battery may need to be charged when it is not used for a while.
- You can charge the iPod Player through the main unit automatically under the STANDBY or POWER ON mode.

9
Note :
- The iPod Player's battery is 80% charged in about an hour, and fully charged in about a few hours. If you charge it while playing music, it may take longer.
- It is not better to charge under the RADIO mode. It may interfere the reception.
Note:
- In any time, you can control the iPod player on the main unit, remote control or iPod player itself while the unit in the "iPod".
- In any time, the iPod player must be fixed well under in the STANDBY mode to avoid the unit and iPod player were damaged.
AUX IN PLAY
The AUX input is located at the rear of the unit (12). Use a 3.5mm stereo jack cable to connect audio equipment through the LINE IN jack.
- To select the AUX input function, repeatedly press the FUNCTION button on the unit (or remote control) until AUX is indicated on the display.
- Press the VOLUME (UP or DOWN) button to adjust the sound output level.
Note: LINE in cable not included.
MUTE SETTING (ON THE REMOTE CONTROL)
- When you press the MUTE button (2) once on the remote control, the volume level will flash and the audio output will be temporarily terminated.
- Press the MUTE button again, the volume level and the audio output will return to normal.
DIMMER CONTROL
Press the Snooze / Dimmer button sequentially to select the desired intensity of backlight illumination.
10
EnglishEng
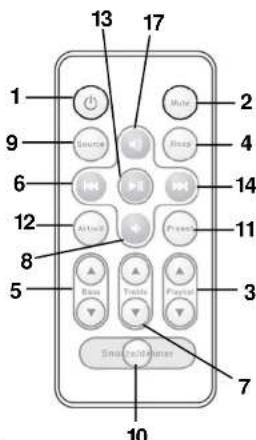
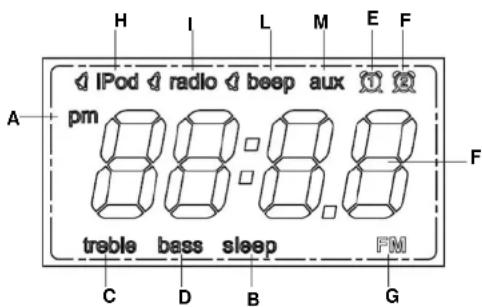
LCD DISPLAY WINDOW
text_image
H I L M E F IPod radio beep aux pm treble bass sleep FM A F C D B GA. AM/PM INDICATOR G. FM BAND INDICATOR
B. SLEEPINDICATOR H. iPOD iPhone INDICATOR
C. TREBLE INDICATOR I. RADIO INDICATOR
D. BASS INDICATOR L. BEEP INDICATOR
E. ALARM 1 INDICATOR M. AUX INDICATOR
F. ALARM 2 INDICATOR
TECHNICAL SPECIFICATIONS
Power Supply
AC:230V-50Hz (EXTERNAL ADAPTER)
DC: 9V 1000 mA
BATTERY:
1 x CR-2032 battery for Remote Control
2 X UM3 battery for memory back-up
Frequency Reception
FM: 87.5 - 108 MHZ
General
Aux-IN:
3.5 mm plug 8-32 Ohm
Output Power:
2 x 2 Watt
Specifications subject to change without prior notice.
SICHERHEITSHINWEISE

natural_image
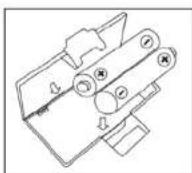
Simple line drawing of a mechanical component with labeled arrows A and B, no text or symbols present.ERSETZENDER BATTERIEN
text_image
H I L M E F IPod radio beep aux pm trable bass sleep FM C D B G20
DeutschDe
REPLACEMENT DESPILES
natural_image
Simple line drawing of a mechanical component with labeled points A and B, no text or symbols present.text_image
H I L M E F IPod radio beep aux pm treble bass sleep FM A F C D B GA. INDICATEUR AM/FMG. INDICATEUR BANDE FM
B. INDICATEUR SLEEP H. INDICATEUR IPOD / IPHONE
C. INDICATEUR HAUTE I. INDICATEUR RADIO
D. INDICATEUR BASSE L. INDICATEUR BEEP
E. INDICATEUR ALARME 1 M. INDICATEUR AUX-IN
F. INDICATEUR ALARME 2
CARACTERISTIQUES TECHNIQUES
ALIMENTATION ÉLECTRIQUE
CA: 230V - 50 Hz
natural_image
Pure mechanical diagram showing a circular component with cross and labeled arrows A and B, no text or symbols present.In modo STAND-BY OFF/ON:
text_image
H I L M E F IPod radio beep aux pm treble bass sleep FM A F C D B G40
Italianoltali
A. INDICATOREAM/PMG. INDICATOREBANDAFM
B. INDICATORE SLEEP H. INDICATORE IPOD / IPHONE
C. INDICATORE ALTI I. INDICATORE RADIO
D. INDICATORE BASSI L. INDICATORE BEEP
E. INDICATORE ALLARME 1 M. INDICATORE AUX-IN
F. INDICATORE ALLARME 2
SPECIFICHE TECNICHE
Fonte Alimentazione
AC: 230V-50Hz
natural_image
Simple line drawing of a mechanical component with labeled points A and B, no text or symbols present.SUSTITUCIÓN BATERÍA
text_image
Scanned image of a barcode or pattern recognition document with rows and columns of binary digits.
text_image
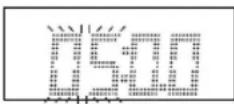
Scanned image of a barcode with rows of masked characters and vertical lines above, likely part of a document or form.AJUSTE DEL ALARME
text_image
H I L M E F IPod radio beep aux pm treble bass sleep FM A F C D B GiPod iPhone DOCKING STATION, RÁDIO DIGITAL FM E CONTROLO REMOTO.
natural_image
Simple line drawing of a mechanical component with labeled points A and B, no text or symbols present.TROCA DE PILHAS
text_image
Scanned image of a barcode or pattern recognition document with placeholder symbols and rows of text.
text_image
\\\\\\\\/1 / / /text_image
H I L M E F IPod radio beep aux pm treble bass sleep FM A F C D B G60
PortuguêsP
D. INDICADOR DE BAIXA L. BEEP INDICADOR
E. INDICADOR DE ALARME 1 M. INDICADOR AUX-IN
F. INDICADOR DE ALARME 2