
Bodygroom Series 3000 BG2026 - Electric mower PHILIPS - Free user manual and instructions
Find the device manual for free Bodygroom Series 3000 BG2026 PHILIPS in PDF.
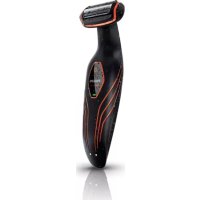



| Brand | Philips |
| Model | Bodygroom Series 3000 BG2026 |
| Product Type | Electric Trimmer |
| Runtime | Approximately 50 minutes |
| Charging Time | 8 hours |
| Power Supply | Mains adapter (mains voltage) |
| Usage | Body below the neck, dry or wet, shower/bath |
| Combs Included | 3 mm, 5 mm, 7 mm |
| Included Accessories | Cleaning brush, charging stand |
| Charge Indicator | Green LED (flashes during charging, steady when charged) |
| Spare Part Reference | Shaving unit BG2000 |
| Replacement Frequency | Every year (or if damaged) |
| Warranty | International (except shaving unit) |
| Operating Temperature | 5 °C to 35 °C |
| Compliance | International safety standards IEC |
| Cleaning | Brush or rinse under water |
| Weight | Approximately 200 g |
Frequently Asked Questions - Bodygroom Series 3000 BG2026 PHILIPS
User questions about Bodygroom Series 3000 BG2026 PHILIPS
0 question about this device. Answer the ones you know or ask your own.
Ask a new question about this device
Download the instructions for your Electric mower in PDF format for free! Find your manual Bodygroom Series 3000 BG2026 - PHILIPS and take your electronic device back in hand. On this page are published all the documents necessary for the use of your device. Bodygroom Series 3000 BG2026 by PHILIPS.
USER MANUAL Bodygroom Series 3000 BG2026 PHILIPS
Always here to help you
Register your product and get support at www.philips.com/welcome

BG2038
BG2036
BG2028
BG2026
BG2025
BG2024
User manual
PHILIPS
ENGLISH 4
DANSK 13
DEUTSCH 22
ΕΛΛΗΝΙΚΑ 32
SUOMI 42
FRENCH 51
DUTCH 61
SPANISH 71
ITALIAN 81
NORWEGIAN 91
PORTUGUESE 100
SWEDISH 110
TURKISH 119
Introduction
Congratulations on your purchase and welcome to Philips! To fully benefit from the support that Philips offers, register your product at www.philips.com/welcome. The Philips Bodygroom offers you a safe, gentle, quick and smooth shave and trim for every body part below the neckline. With this new rechargeable shaver and trimmer in one you can easily shorten and remove body hair wherever you like, wet or dry!
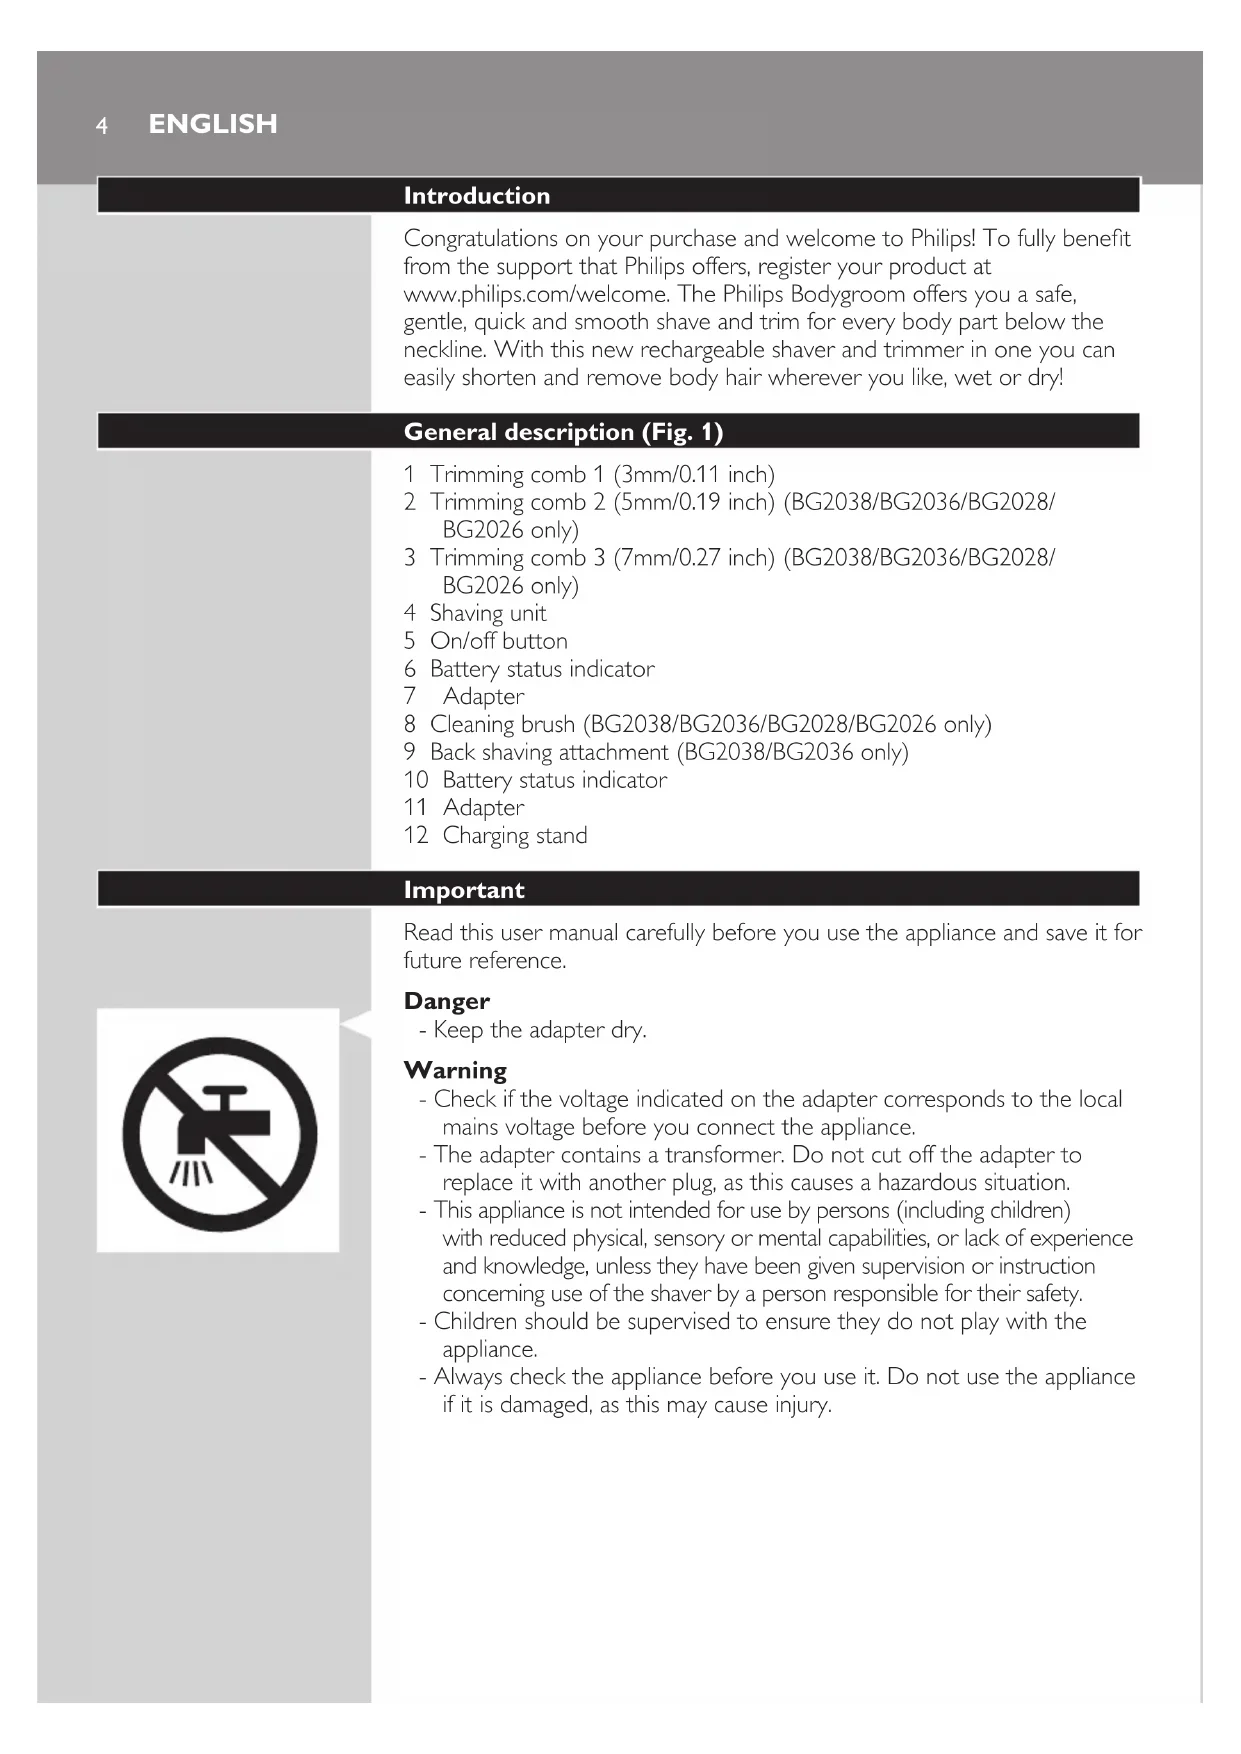
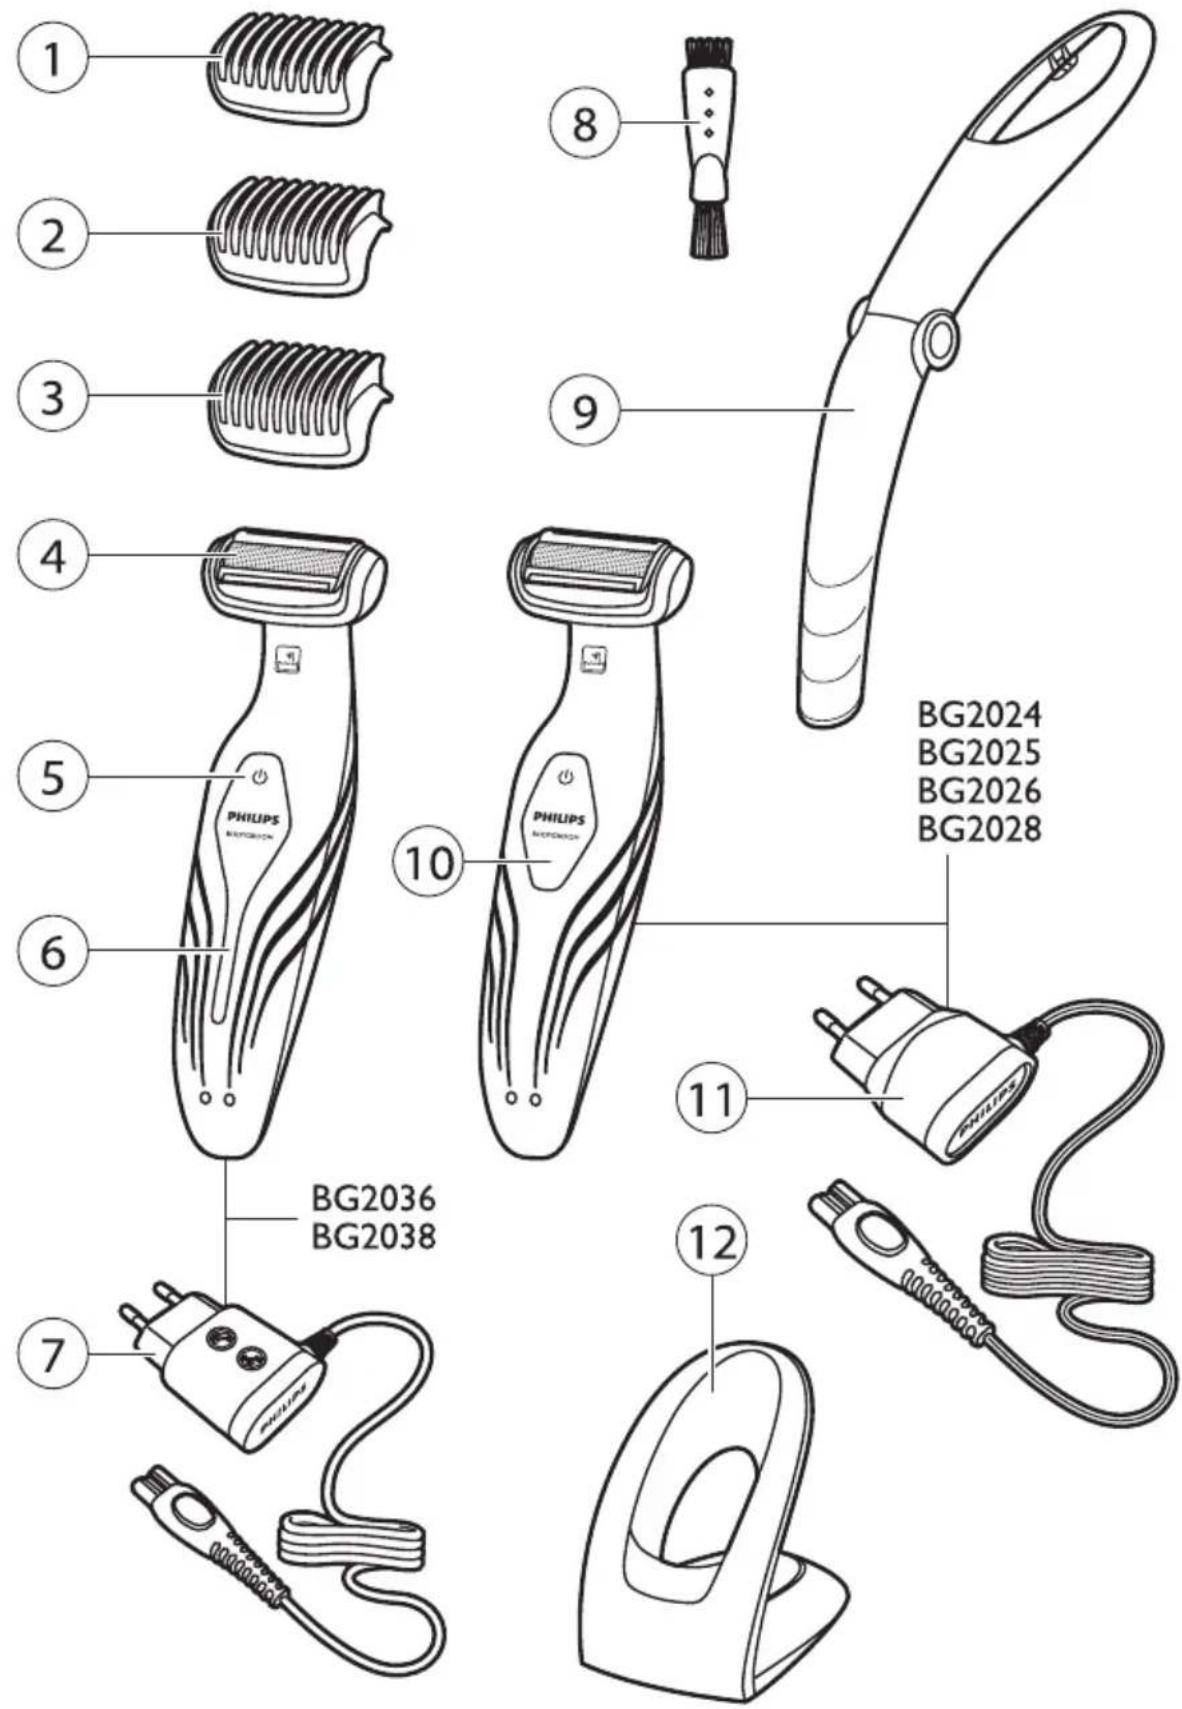
General description (Fig. 1)
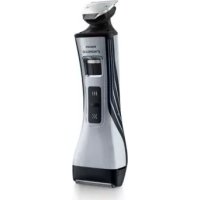
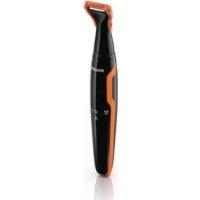
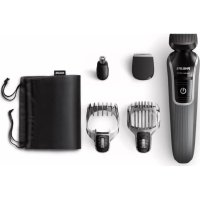
1 Trimming comb 1 (3mm/0.11 inch) 2 Trimming comb 2 (5mm/0.19 inch) (BG2038/BG2036/BG2028/BG2026 only) 3 Trimming comb 3 (7mm/0.27 inch) (BG2038/BG2036/BG2028/BG2026 only) 4 Shaving unit 5 On/off button 6 Battery status indicator 7 Adapter 8 Cleaning brush (BG2038/BG2036/BG2028/BG2026 only) 9 Back shaving attachment (BG2038/BG2036 only) 10 Battery status indicator 11 Adapter 12 Charging stand
Important
Read this user manual carefully before you use the appliance and save it for future reference.
Danger
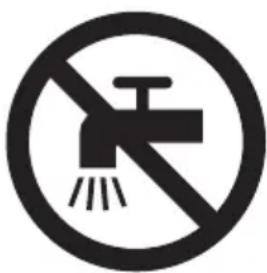
- Keep the adapter dry.
Warning
- Check if the voltage indicated on the adapter corresponds to the local mains voltage before you connect the appliance.
- The adapter contains a transformer. Do not cut off the adapter to replace it with another plug, as this causes a hazardous situation.
- This appliance is not intended for use by persons (including children) with reduced physical, sensory or mental capabilities, or lack of experience and knowledge, unless they have been given supervision or instruction concerning use of the shaver by a person responsible for their safety.
- Children should be supervised to ensure they do not play with the appliance.
- Always check the appliance before you use it. Do not use the appliance if it is damaged, as this may cause injury.
Caution
- Use, charge and store the appliance at a temperature between 5°C and 35°C.
- Only use the adapter and the charging stand supplied to charge the appliance.
- Never immerse the charging stand in water nor rinse it under the tap.
- If the appliance is subjected to a major change in temperature, pressure or humidity, let the appliance acclimatise for 30 minutes before you use it.
- If the adapter or charging stand is damaged, always have it replaced with one of the original type in order to avoid a hazard.
- Do not use the appliance if any of its parts is damaged or broken, as this may cause injury.
- This appliance is only intended for shaving and trimming body parts below the neckline. Do not use it to shave or trim facial or scalp hair.
Compliance with standards
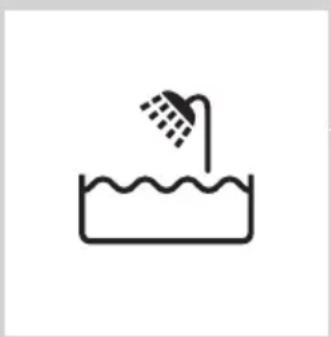
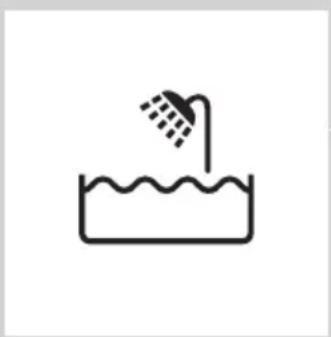
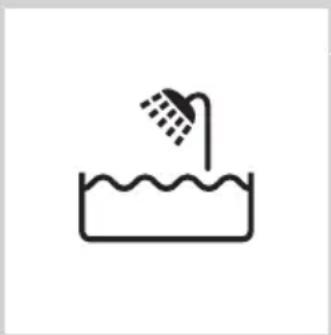
- The appliance complies with the internationally approved IEC safety regulations and can be safely used in the bath or shower.
- This Philips appliance complies with all standards regarding electromagnetic fields (EMF). If handled properly and according to the instructions in this user manual, the appliance is safe to use based on scientific evidence available today.
Charging
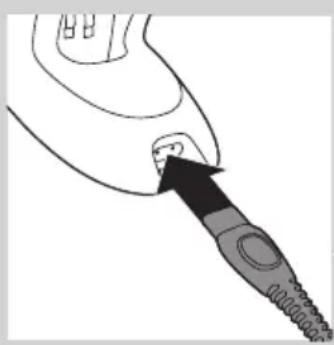
Charging takes 1 hour (BG2038/BG2036) or 8 hours
(BG2028/BG2026/BG2025/BG2024) depending on the model. When the appliance is fully charged, it has an operating time of up to 50 minutes.
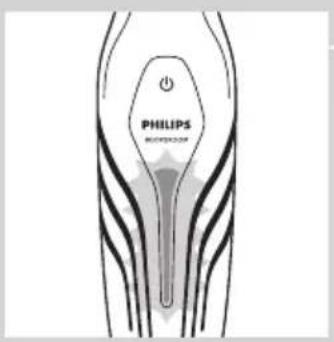
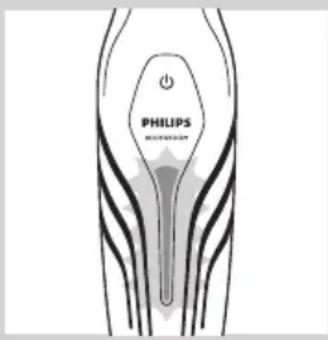
When the battery status indicator flashes red, the battery is running low (approx. 10 minutes of operating time left) and you need to recharge the appliance.
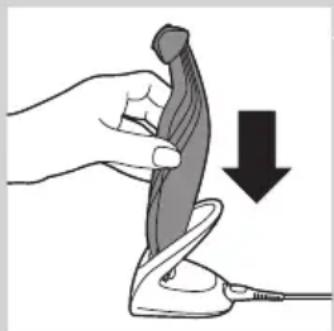
1 Insert the small plug into the charging stand.
2 Put the appliance in the charging stand.
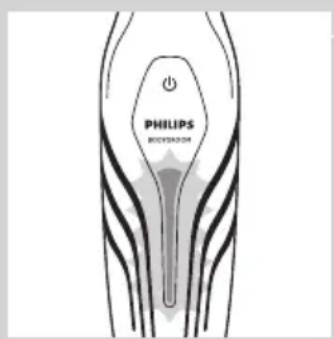
The battery status indicator flashes green to indicate that the appliance is charging.
Note: The battery status indicator of BG2028, BG2026, BG2025 and BG2024 looks different, but works in the same way.
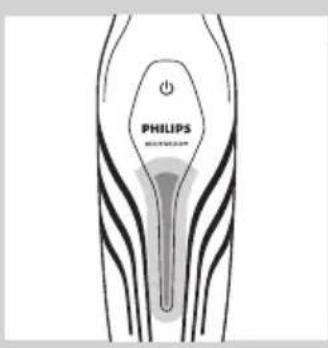
When the appliance is fully charged, the battery status indicator lights up green continuously.
Note: If the fully charged appliance is still in the plugged-in charging stand after 30 minutes, the battery status indicator goes out to save energy.
Using the appliance
Take your time when you first start to shave sensitive areas. You have to acquire practice with the appliance. Your skin also needs some time to adjust to the procedure. You can use the appliance wet or dry to shave or trim hair on all parts of the body below the neckline. Do not use this appliance to shave or trim facial hair or scalp hair.
Trimming
BG2025 and BG2024 come with trimming comb 1. BG2038, BG2036, BG2028 and BG2026 come with trimming combs 1, 2 and 3. A trimming comb allows you to cut hair to a specific length (see the table below). If your appliance comes with 3 combs, start trimming with trimming comb 3 to acquire practice with this appliance.
Trimming comb Hair length after trimming
1 3mm/0.11 inch
2 5mm/0.19 inch
3 7mm/0.27 inch
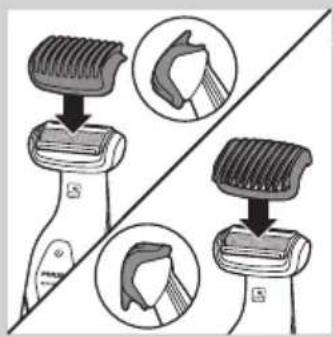
1 Snap the appropriate trimming comb onto the appliance. Make sure the teeth of the comb point in the direction in which you are going to move the appliance.
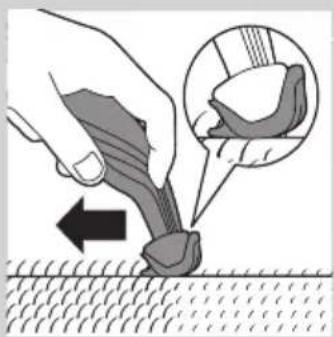
- When you move the appliance towards you, the teeth have to point towards you.
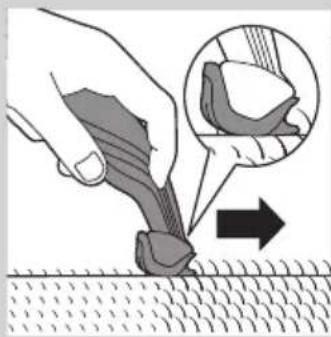
- When you move the appliance away from you, the teeth have to point away from you.
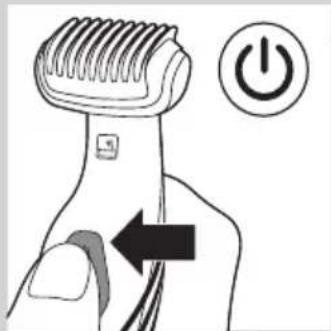
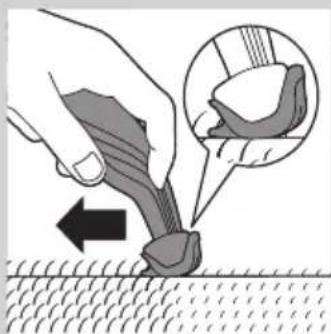
2 Press the on/off button to switch on the appliance. 3 Move the appliance against the direction of hair growth.
Note: Make sure that the flat part of the trimming comb is always fully in contact with the skin.
Shaving
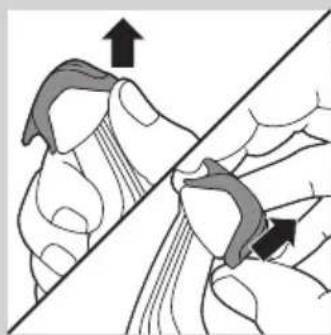
1 If a trimming comb is still attached, remove it.
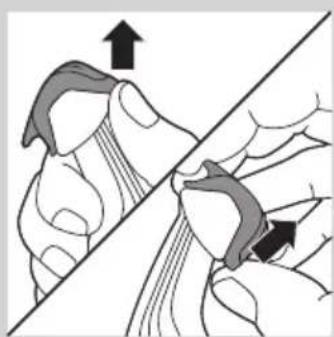
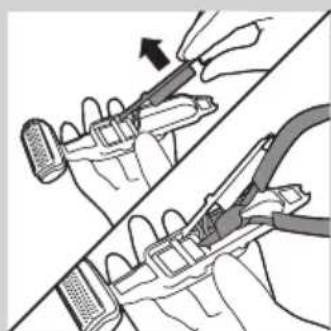
Note: You can either push the trimming comb off the appliance or pull it off, depending on how the comb is placed on the appliance.
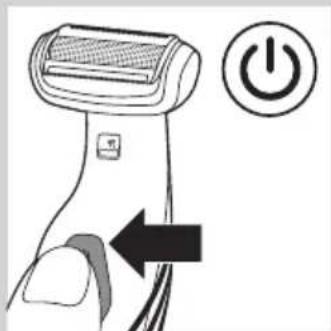
2 Press the on/off button once to switch on the appliance. 3 Place the shaving unit on the skin. 4 Move the appliance against the direction of hair growth with one hand, while you stretch the skin with the other hand.
Note: Make sure that the shaving unit is always fully in contact with the skin.
Trimming and shaving tips
- If the hairs are longer than 10mm, you can trim them first with trimming comb 1 to a length of 3mm to make shaving easier.
- You get the best trimming results when the skin and hair are dry.
- You can use the appliance to shave in the shower or bath. To ensure easier gliding, apply some shaving foam or shower gel to your skin.
Shaving with the back shaving attachment (BG2036/BG2038 only)
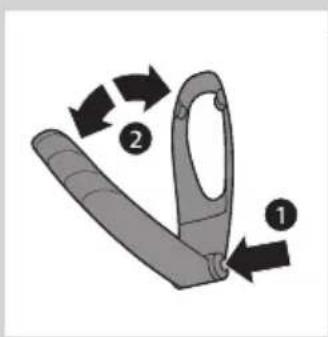
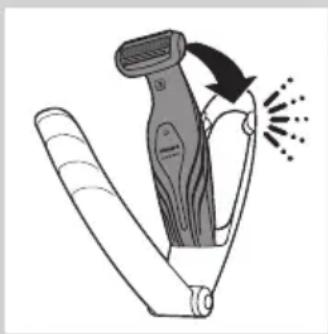
1 Press and hold the release button (1) and open the back shaving attachment (2).
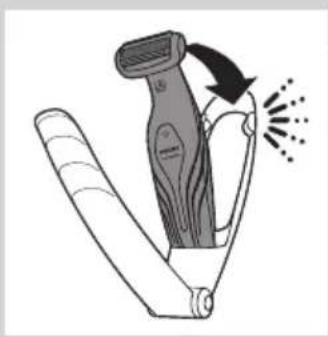
2 Place the bottom of the appliance in the lower part of the holder of the back shaving attachment. Then press the top against the top part of the holder until it locks into position with a click.
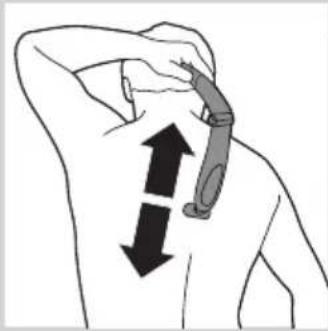
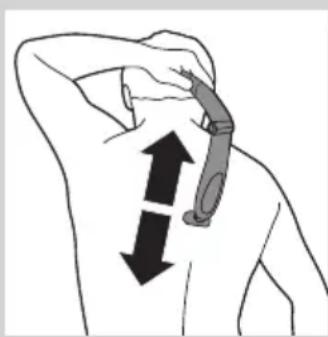
3 Shave your back by moving the back shaving attachment with the appliance up and down by its handle.
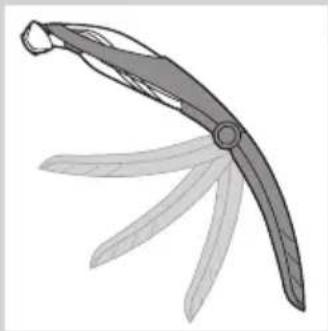
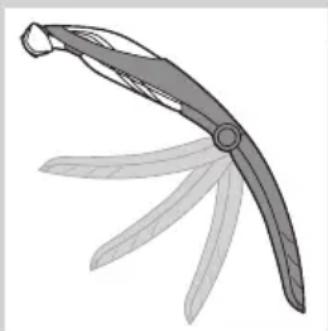
Note: For your convenience, the back shaving attachment can be folded to different angles.
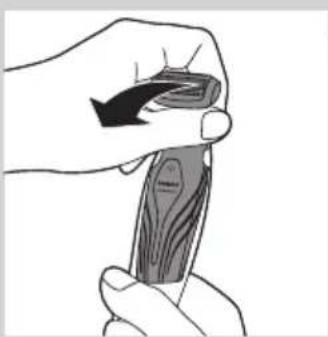
4 To remove the appliance from the back shaving attachment, pull the top of the appliance towards you until it unlocks from the holder.
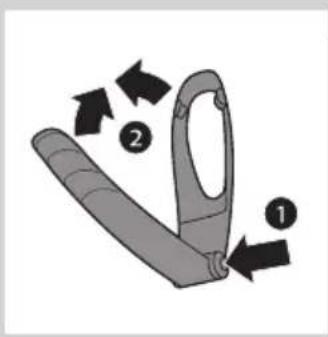
5 To close the back shaving attachment, press and hold the release button (1) and push the handle against the holder (2).
Cleaning
Clean the appliance after every use.
Never use compressed air, scouring pads, abrasive cleaning agents or aggressive liquids such as petrol or acetone to clean the appliance.
1 Switch off the appliance. 2 If a trimming comb is still attached, remove it.
Note: You can either push the trimming comb off the appliance or pull it off, depending on how the comb is placed on the appliance.
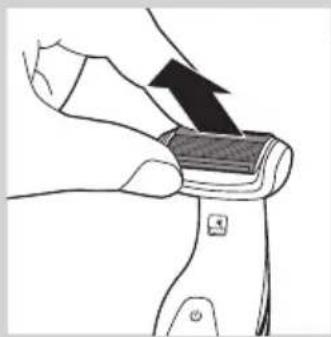
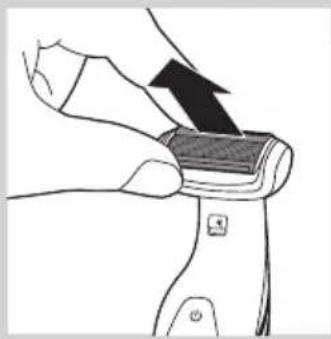
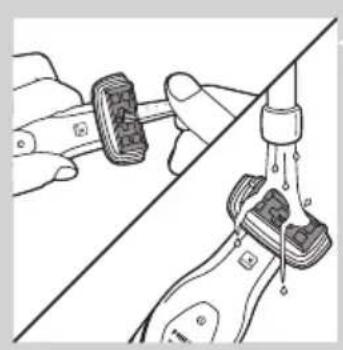
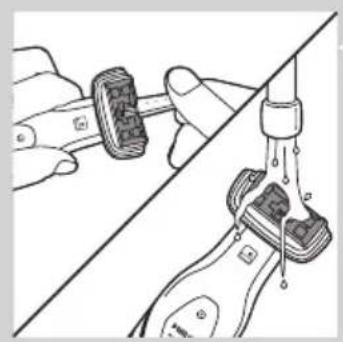
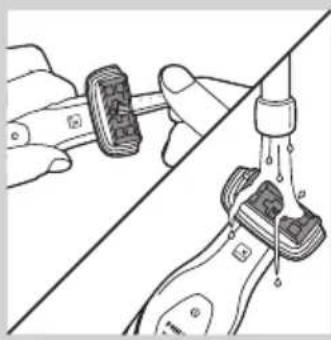
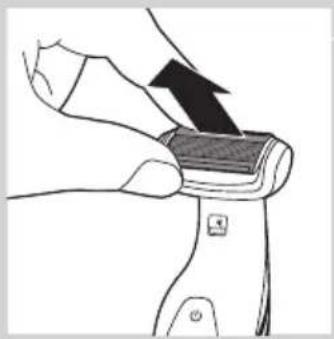
3 Pull the shaving unit out of the appliance.
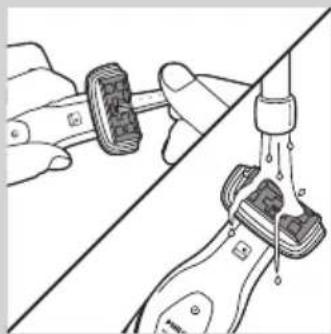
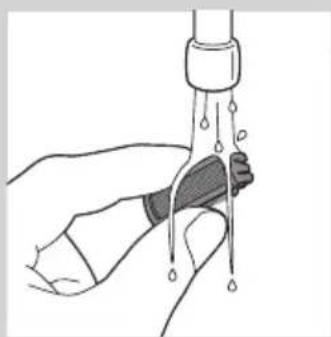
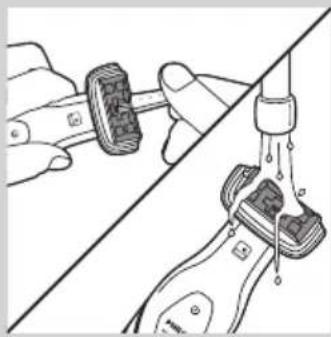
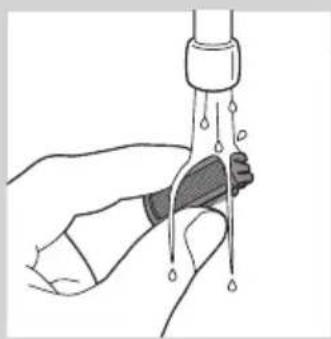
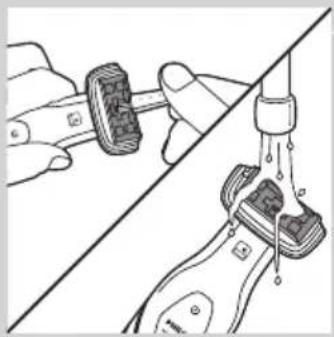
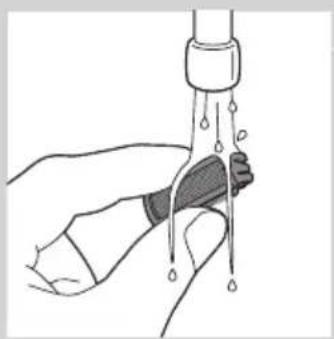
4 Use the cleaning brush supplied to clean the inside of the shaving head or rinse the inside under the tap. 5 Rinse the shaving unit under the tap.
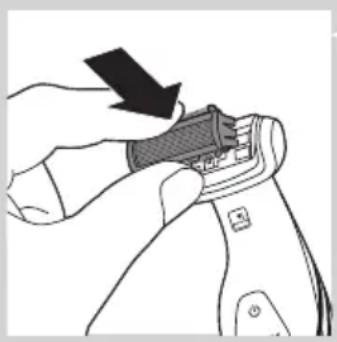
6 Shake off excess water and place the shaving unit back into the appliance. 7 Clean the back shaving attachment (BG2038/BG2036 only) with a moist cloth. Rinse it under the tap if you used it to shave your back with shower gel or shaving foam. 8 Clean the charging stand with a moist cloth.
Ordering accessories
To purchase accessories for this appliance, please visit our online shop at www.shop.philips.com/service. If the online shop is not available in your country, go to your Philips dealer or a Philips service centre.
If you have any difficulties obtaining accessories for your appliance, please contact the Philips Consumer Care Centre in your country. You find its contact details in the worldwide guarantee leaflet.
Shaving unit
If you use the appliance very frequently, replace the shaving unit (type number BG2000) every year. Replace a damaged shaving unit immediately.
Environment
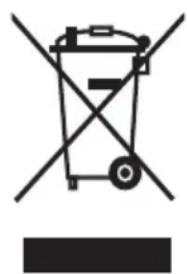
- Do not throw away the appliance with the normal household waste at the end of its life, but hand it in at an official collection point for recycling. By doing this, you help to preserve the environment.
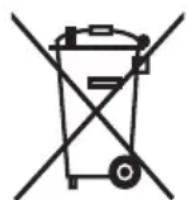
- The built-in rechargeable battery contains substances that may pollute the environment. Always remove the battery before you discard and hand in the appliance at an official collection point. Dispose of the battery at an official collection point for batteries. If you have trouble removing the battery, you can also take the appliance to a Philips service centre. The staff of this centre will remove the battery for you and will dispose of it in an environmentally safe way.
Removing the rechargeable battery
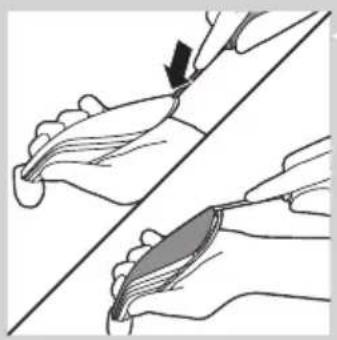
1 Take the appliance out of the charging stand and let the motor run until the battery is completely empty.
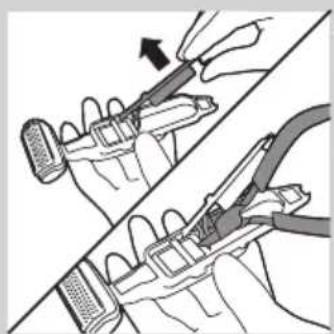
2 Insert a flathead screwdriver into the slot at the bottom of the handle and turn it to unlock the rear panel of the housing.
3 Remove the rear panel of the housing and then remove the side panels.
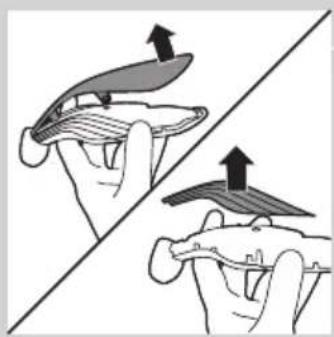
4 Undo the screws that connect the inner body of the appliance to the front panel of the housing and separate the inner body from the front panel.
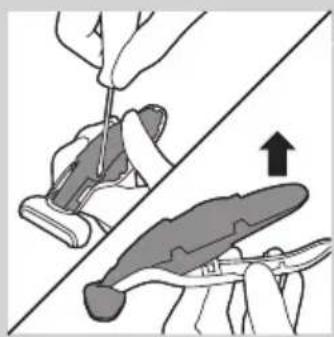
5 Turn over the inner body. Then detach the cover of the inner body with the control panel from the inner body.
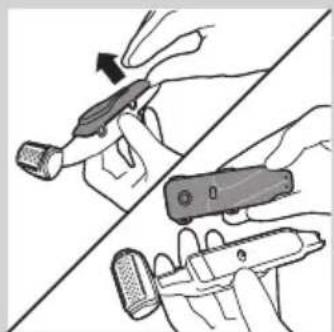
6 Lift the printed-circuit board out of the inner body, turn it over and cut the wires that connect the battery to the power unit.
Guarantee and service
If you need service or information or if you have a problem, please visit the Philips website at www.philips.com/support or contact the Philips Consumer Care Centre in your country. You find its phone number in the worldwide guarantee leaflet. If there is no Consumer Care Centre in your country, go to your local Philips dealer.
Guarantee restrictions
The shaving unit is not covered by the terms of the international guarantee because it is subject to wear.
Troubleshooting
This chapter summarises the most common problems you could encounter with the appliance. If you are unable to solve the problem with the information below, visit www.philips.com/support for a list of frequently asked questions or contact the Consumer Care Centre in your country.
Problem Possible cause Solution
| The appliance does not work. | The battery is empty and/or the appliance does not charge. | Recharge the battery (see chapter ‘Charging’) and check if you have followed all instructions in chapters ‘Important’ and ‘Charging’. |
| The appliance makes more noise and/or vibrates more strongly than usual. | One or more parts are broken, perhaps because you dropped the appliance. | Take the appliance to your dealer or to an authorised Philips service centre for examination or repair. |
| If this appliance is used professionally, it will reach the end of its life earlier | Do not use the appliance professionally. | |
| The shaving unit is dirty. Clean the shaving unit (see chapter ‘Cleaning’). | ||
| The shaving unit is worn. Replace the shaving unit. | ||
| The operating time on a full charge decreases. | The shaving unit is dirty. Clean the shaving unit (see chapter ‘Cleaning’). | |
| Reduced trimming and/ or shaving performance | You use the appliance in the wrong way. | Follow the instructions in chapter ‘Using the appliance’. |
| The shaving unit is dirty. Clean the shaving unit (see chapter ‘Cleaning’). | ||
| The battery is running low. Recharge the battery (see chapter ‘Charging’). | ||
| You have not attached the trimming comb properly. | Remove the trimming comb and reattach it. | |
| If you are trimming very curly hair, the trimming comb may not be able to straighten the hair properly. | Try straightening the hair with your hands during trimming. | |
Introduction
Caution
5 Close the inner cabinet. Then remove the cover of the inner cabinet with the control panel from the inner cabinet.


Caution
Warning
2 Place the appliance in the charging stand.
Warranty and service
Attention
Shaving
Note
1 Insert the small plug into the charger.
Caution

Attention

Caution
1 Insert the small plug into the charging stand.
2 Place the appliance in the charging stand.
The battery status indicator blinks green to show that the appliance is charging.
1 Attach the appropriate trimming comb to the appliance. Make sure the teeth on the tip of the comb point in the direction you intend to move the appliance.
Warranty and service
Care
1 Insert the small plug into the charging base. 2 Place the appliance on the charging base.
Ordering accessories

Warranty and service

Caution
1 Turn off the device.
- ALWAYS HERE TO HELP YOU
- INTRODUCTION
- GENERAL DESCRIPTION (FIG. 1)
- IMPORTANT
- DANGER
- WARNING
- CAUTION
- COMPLIANCE WITH STANDARDS
- CHARGING
- USING THE APPLIANCE
- TRIMMING
- TRIMMING COMB HAIR LENGTH AFTER TRIMMING
- SHAVING
- TRIMMING AND SHAVING TIPS
- SHAVING WITH THE BACK SHAVING ATTACHMENT (BG2036/BG2038 ONLY)
- CLEANING
- ORDERING ACCESSORIES
- SHAVING UNIT
- ENVIRONMENT
- REMOVING THE RECHARGEABLE BATTERY
- GUARANTEE AND SERVICE
- GUARANTEE RESTRICTIONS
- TROUBLESHOOTING
- WARRANTY AND SERVICE
- ATTENTION
- NOTE
- CARE
Brand : PHILIPS
Model : Bodygroom Series 3000 BG2026
Category : Electric mower