
DJ024DC - Camera LEXIBOOK - Free user manual and instructions
Find the device manual for free DJ024DC LEXIBOOK in PDF.
| Product type | Digital camera |
| Brand | Lexibook |
| Model | DJ024DC |
| Photo resolution | 640 x 480 pixels (high) / 320 x 240 pixels (low); software interpolation up to 1.3 megapixels |
| Video format | AVI |
| Shooting mode | Single shot, continuous shot (3 photos), self-timer (10s) |
| Flash | Auto, on, off |
| Webcam function | Yes, via USB cable and PCCam software |
| Connectivity | USB 2.0 |
| Memory | Internal (capacity not specified) |
| Power supply | 2 AAA batteries (not included) |
| Battery life | Auto power off after 30 seconds of inactivity |
| Included software | MAGIX Video easy SE, MAGIX Photo Manager 10 |
| Compatible operating system | Windows 2000, XP, Vista, 7 |
| Warranty | 2 years |
| Maintenance | Clean with a slightly damp cloth; avoid detergents |
| Safety | Do not disassemble, do not expose to moisture or heat source |
Frequently Asked Questions - DJ024DC LEXIBOOK
User questions about DJ024DC LEXIBOOK
0 question about this device. Answer the ones you know or ask your own.
Ask a new question about this device
Download the instructions for your Camera in PDF format for free! Find your manual DJ024DC - LEXIBOOK and take your electronic device back in hand. On this page are published all the documents necessary for the use of your device. DJ024DC by LEXIBOOK.
USER MANUAL DJ024DC LEXIBOOK
- Insert the CD Software (included) in your CD-ROM drive.
- In the main menu, click "Install MAGIX Video easy SE" and wait during the extraction.
- Follow the onscreen instructions and press "Install" to begin the installation.
- To launch "Magix Video easy SE" double clk on the shortcut.
System requirements: Intel® Pentium 4 or AMD® Athlon® 1 GHz and higher, 512 MB RAM, 400 MB free hard disk memory and a DVD drive for program installation, graphics card with a screen resolution of at least 1024 x 768, sound card.
INSTALLING THE PHOTO SOFTWARE (Magix Photo Manager 10)
- Insert the CD Software (included) into your CD-ROM drive.
- In the main menu, click "Install MAGIX Photo Manager 10" and wait during the extraction.
- Select your language and click "OK".
- "The MAGIX Photo Manager 10 configuration" window displays. Follow the onscreen instructions and press "Install" to begin the installation.
- Once you have finished installing, the "MAGIX Photo Manager 10" shortcut will appear on the desk of your computer.
- To start using "MAGIX Photo Manager 10", double click on the shortcut. The pictures taken with the camera automatically appear on the home screen.
System requirements (minimum configuration): Microsoft® Windows® 2000 XP I Vista® I 7. PC with Intel® Pentium® or AMD® Athlon® 700 MHz or higher, 256 MB RAM, 120 MB hard disk space for program files, SVGA graphics card with min. 4 MB RAM, (min. resolution 1024 x 600, 16-bit high-color), Microsoft® compatible mouse.
Note: To enjoy unlimited use of "MAGIX Photo Manager 10" and "MAGIX Video easy SE", you need to register first.
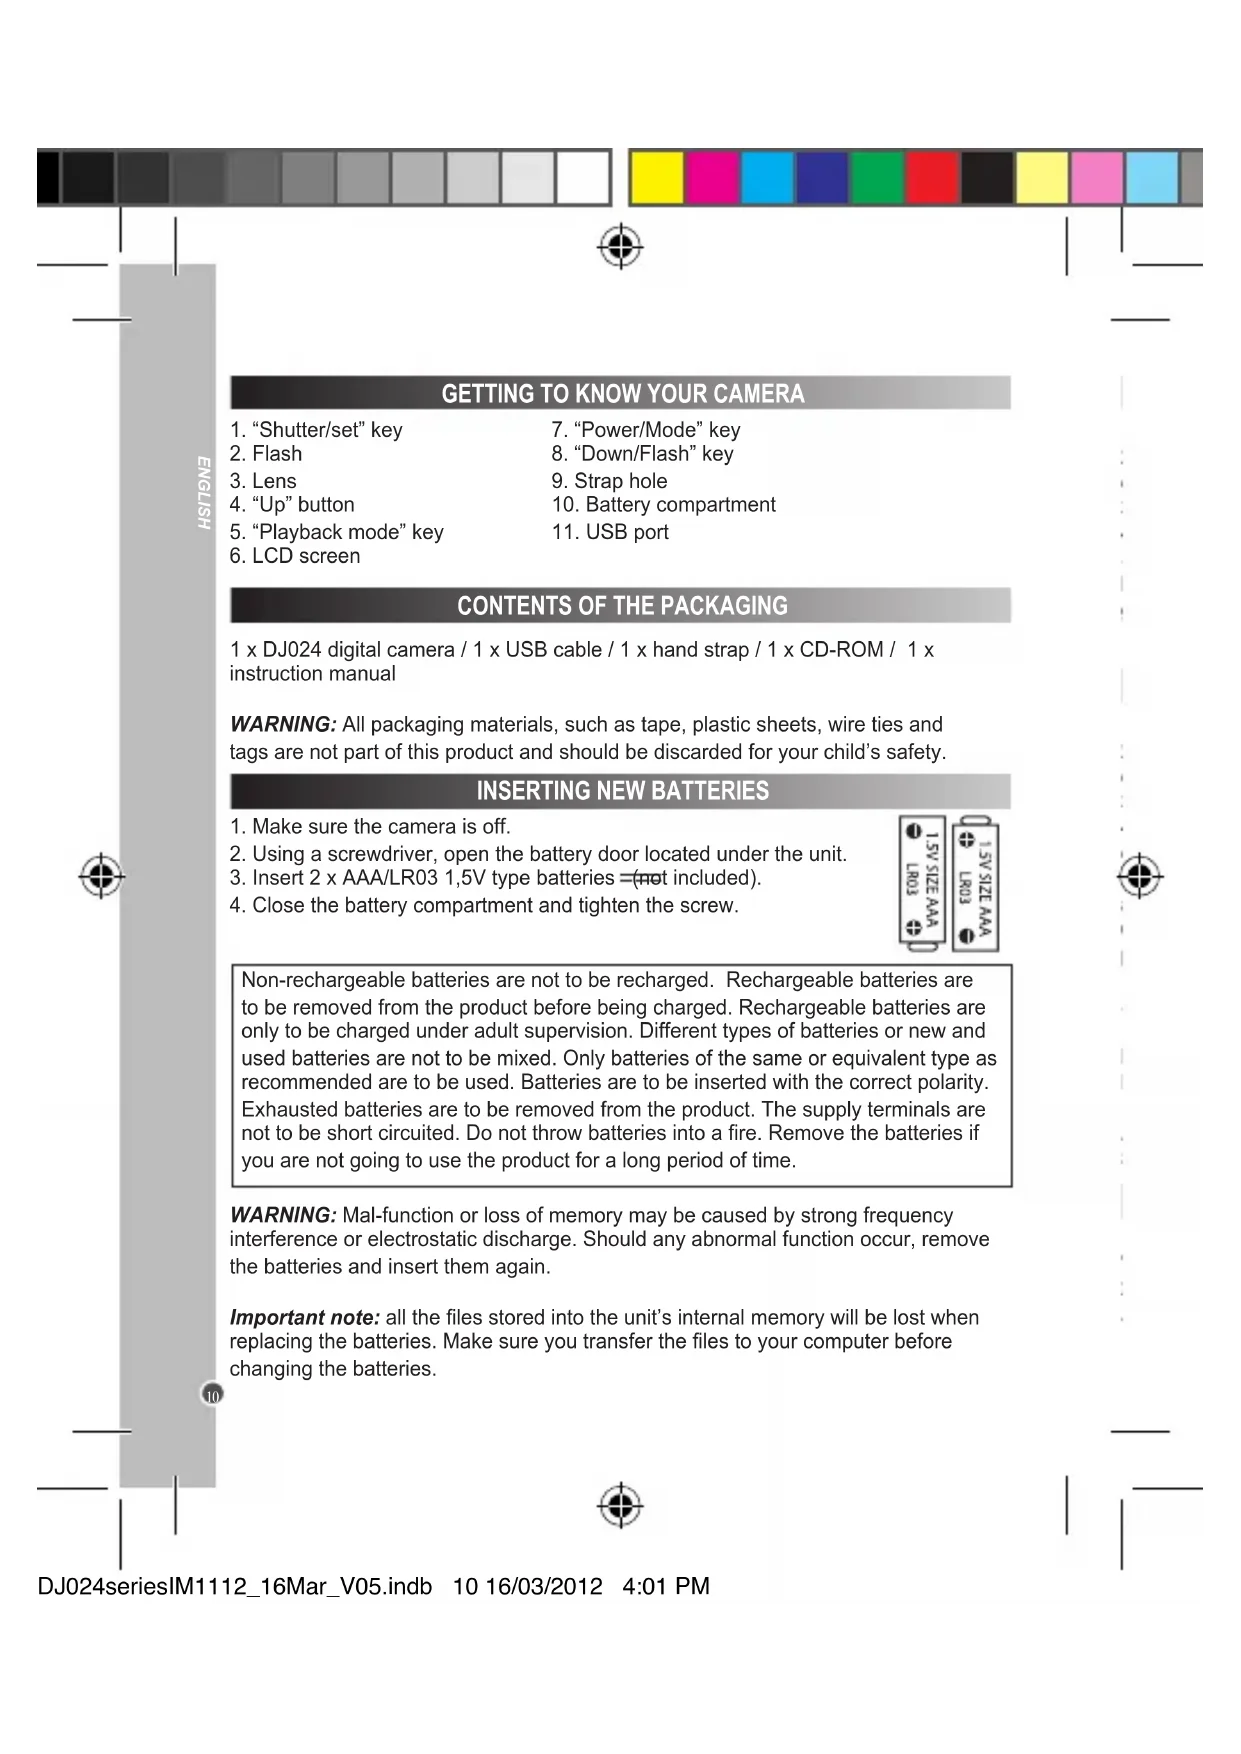
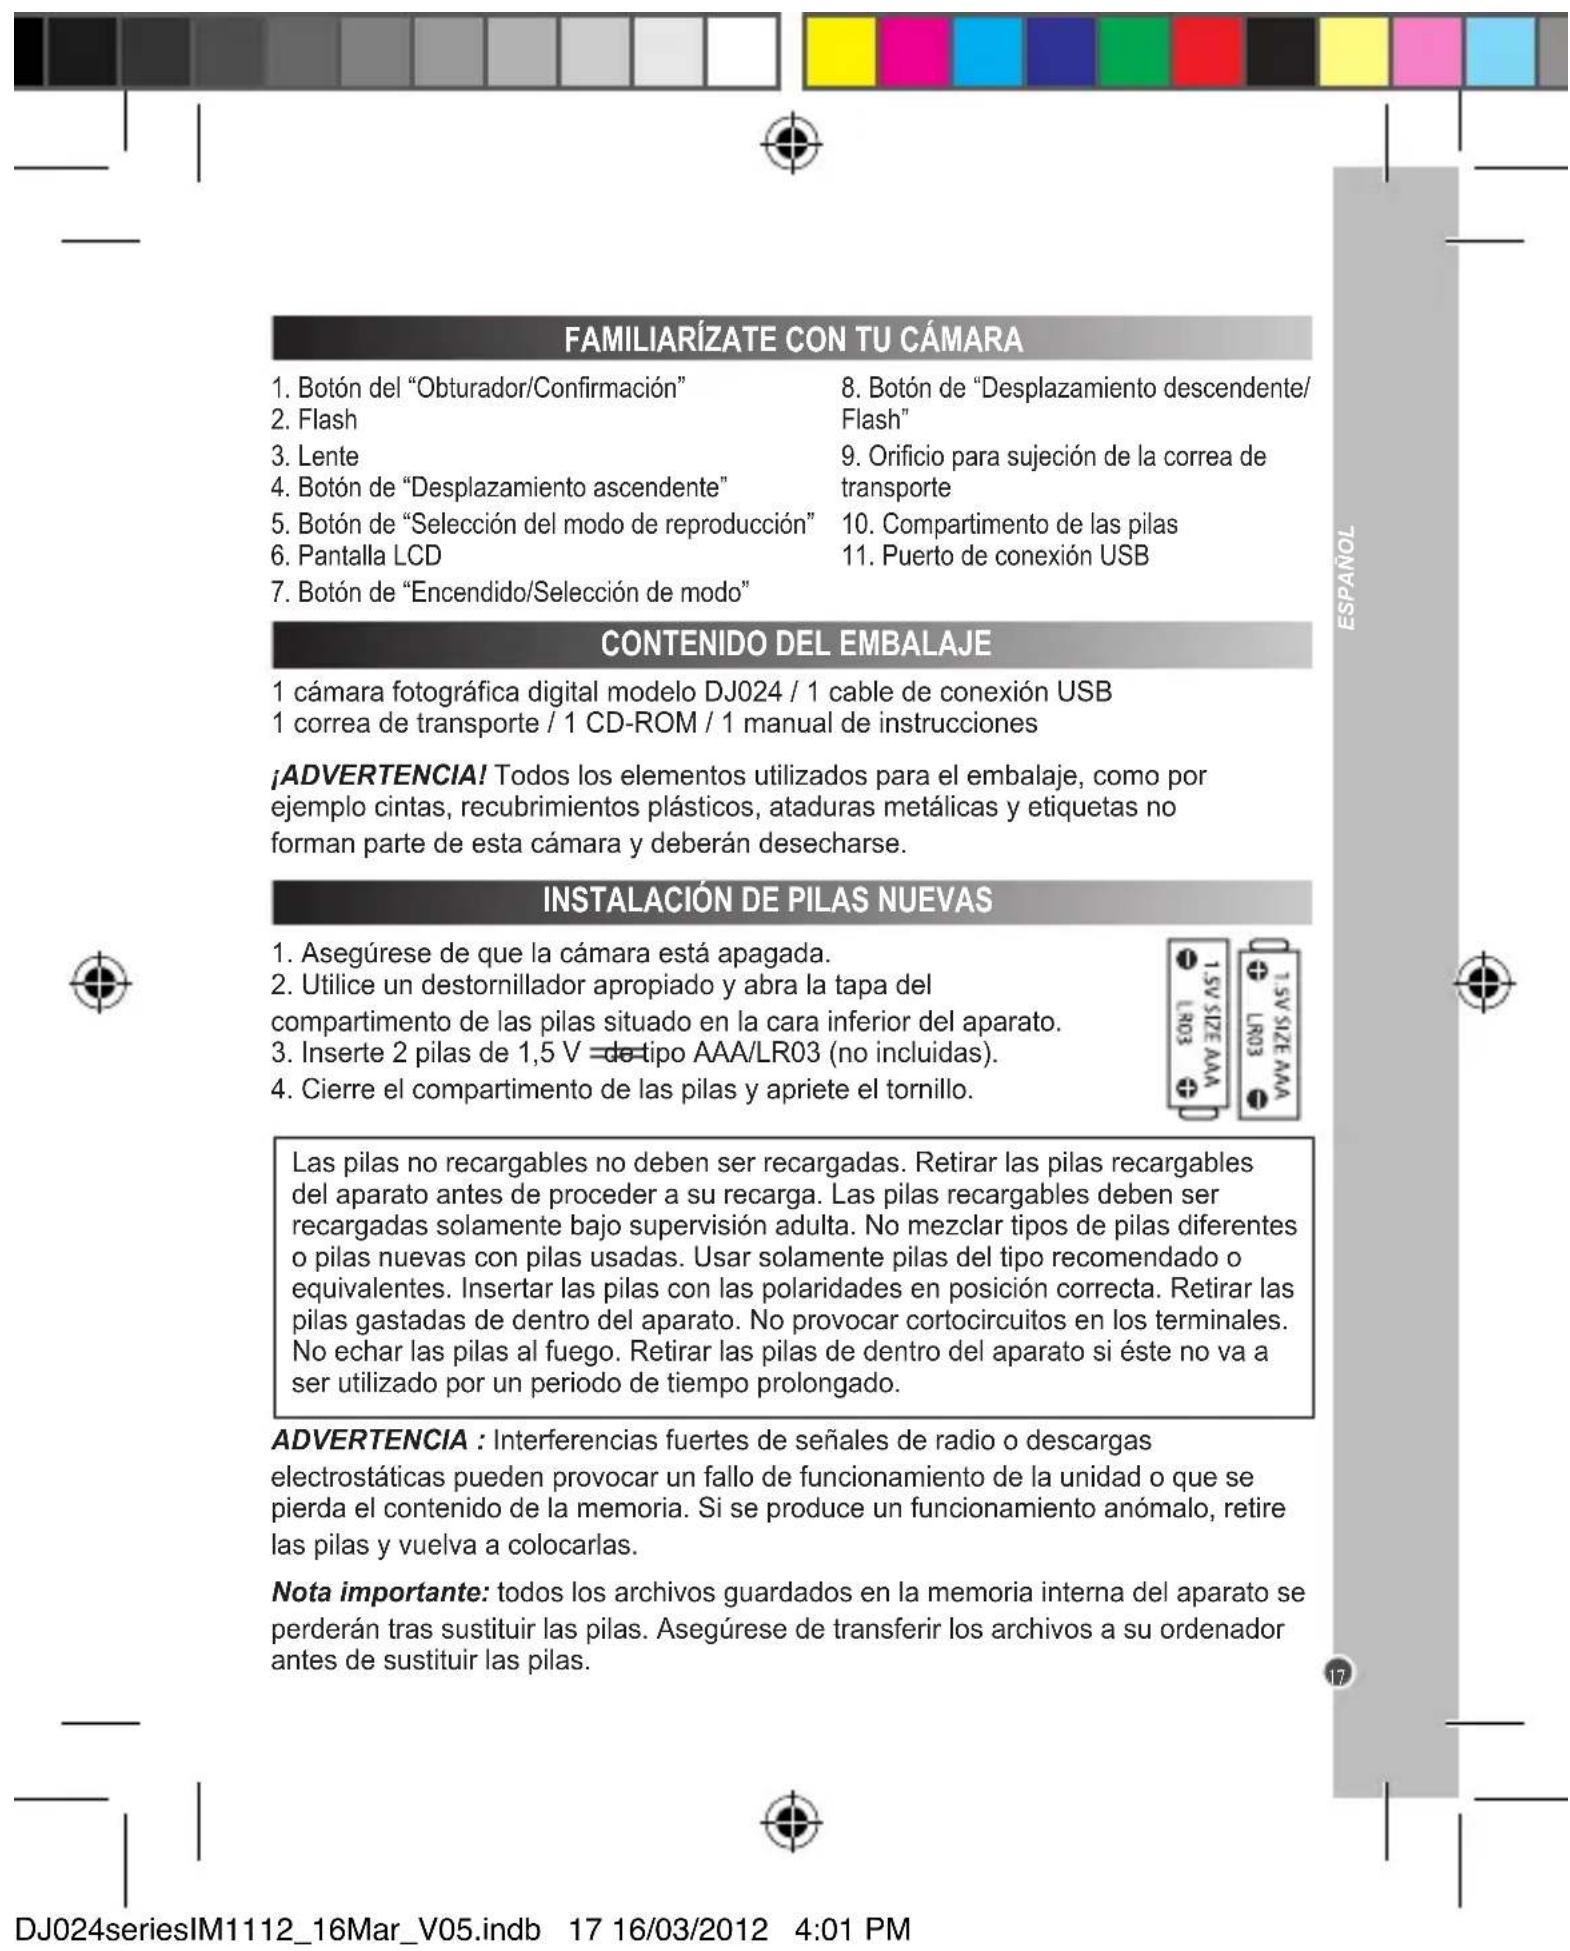
TURNING THE CAMERA ON AND OFF
- Press the "Power/Mode" key to turn the camera on. The camera will make a "beep" sound to confirm that it is ready for use.
- Press and hold the "Power/Mode" key for a few seconds again to turn it off.
Note: The camera will auto power off after 30 seconds of inactivity.
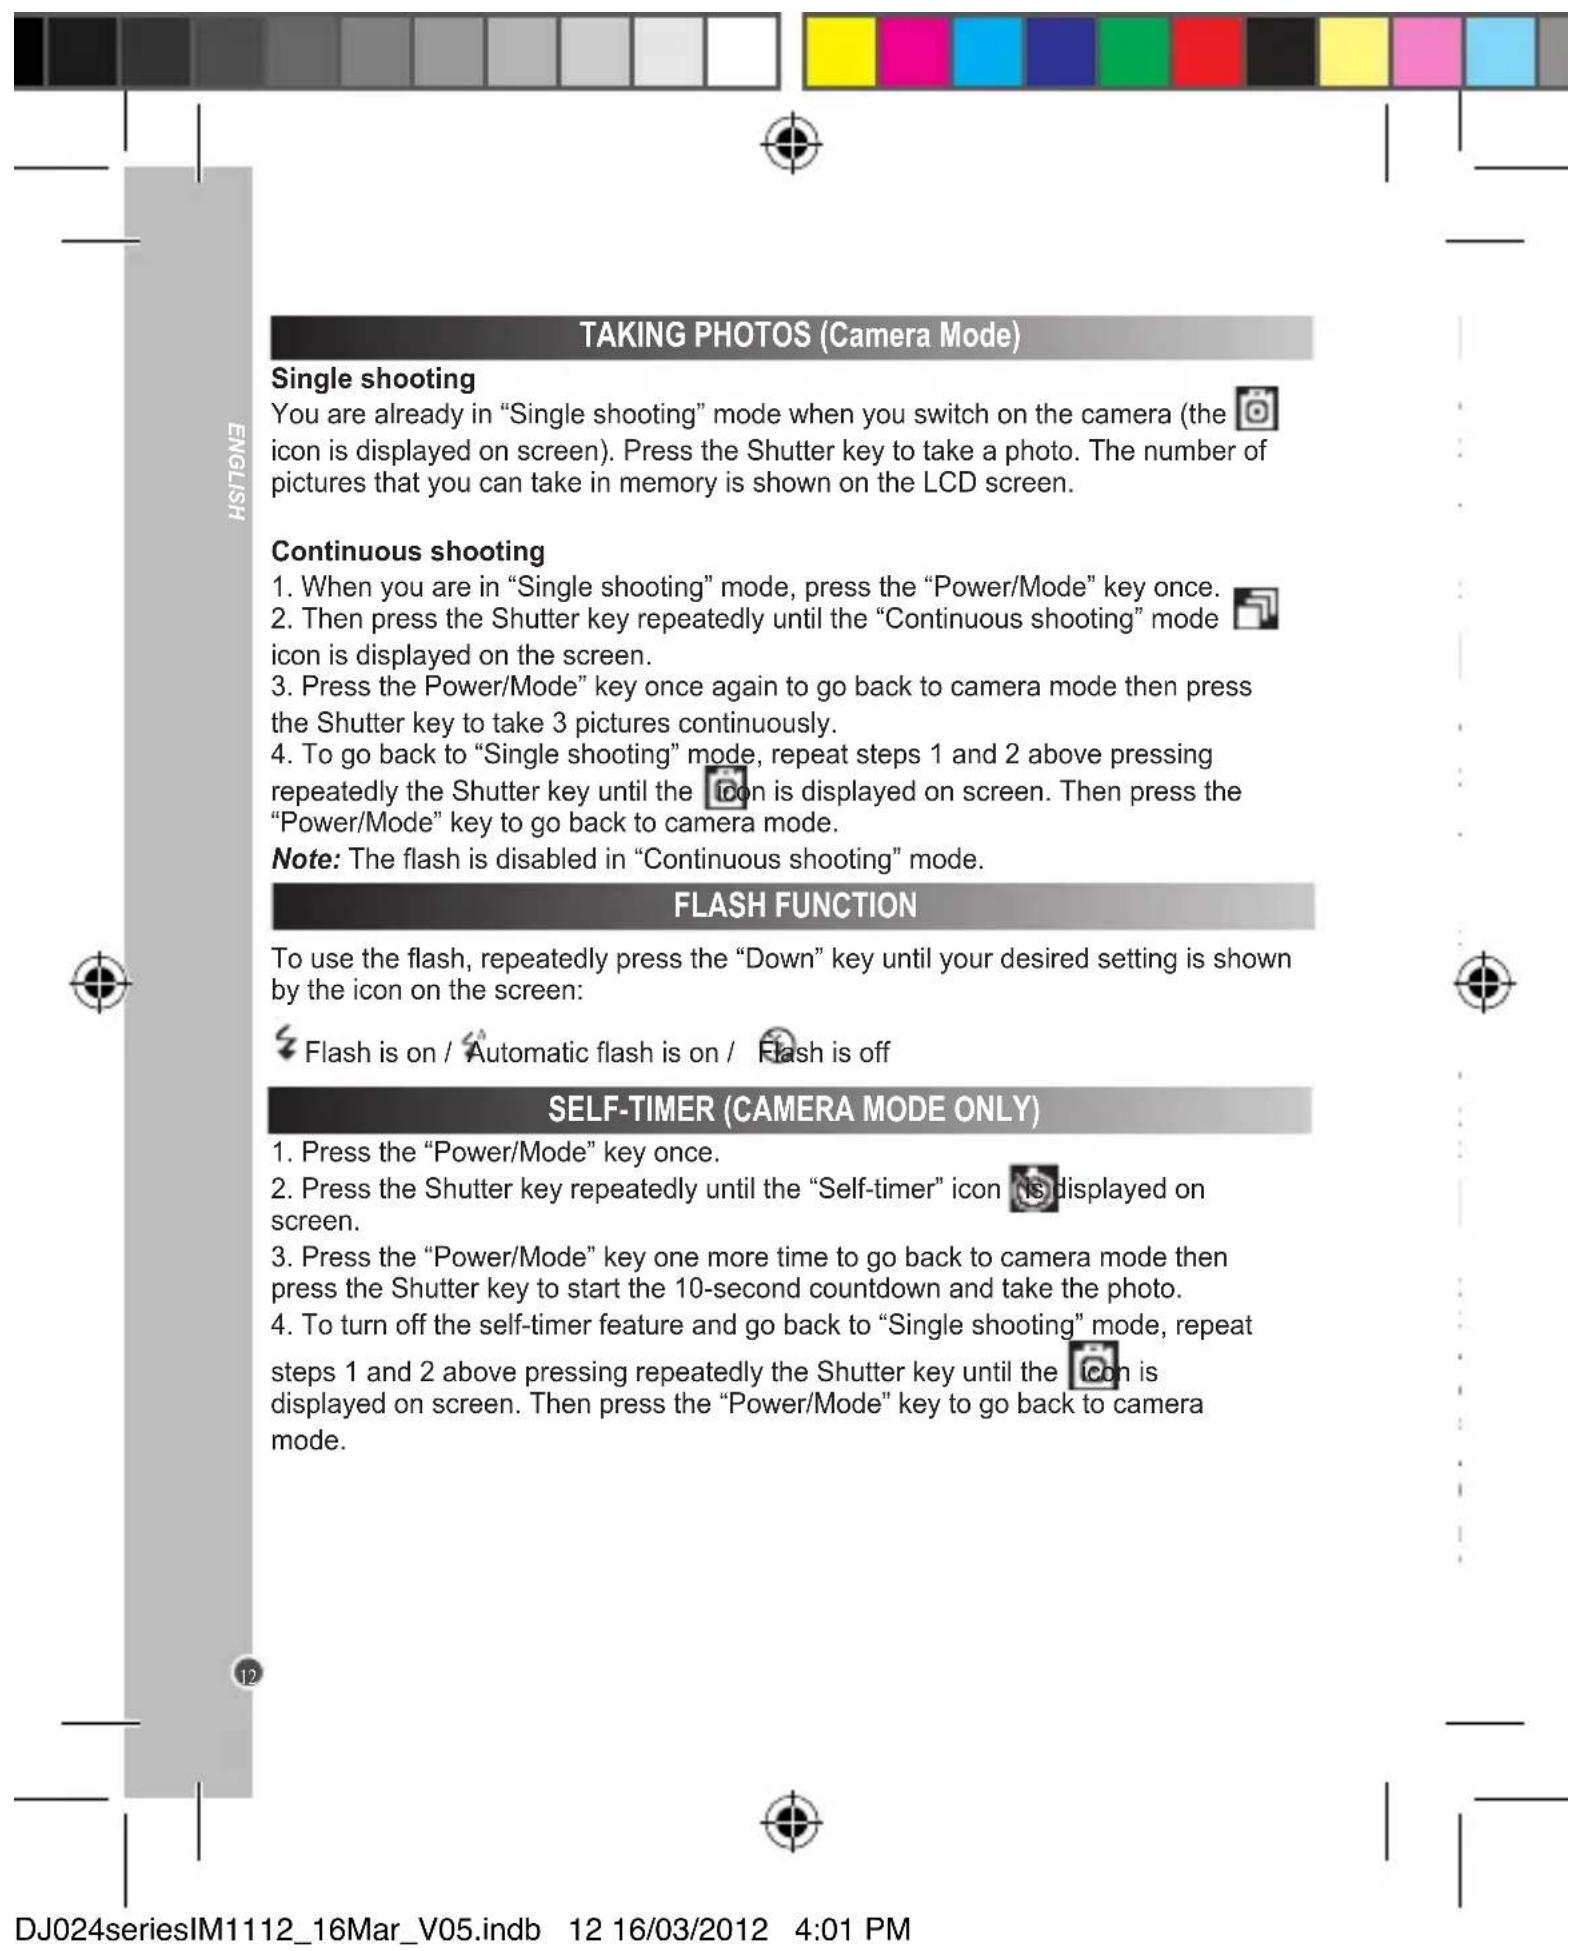
SELECTING THE PHOTO RESOLUTION
- Press the "Power/Mode" key once then use the "Up" and "Down" keys to select the "Resolution" icon
- Press the Shutter key repeatedly to select the desired resolution.
There are 2 resolution modes:
High resolution (640x480 pixels). / Low resolution (320x240 pixels).
- Press the "Power/Mode" key to go back to camera mode.
SELECTING THE IMAGE QUALITY
- Press the "Power/Mode" key once then use the "Up" and "Down" keys to select the "Image quality" icon
- Press the Shutter key repeatedly to select the desired image quality.
There are 2 levels of quality:
High quality. /low quality.
- Press the "Power/Mode" key to go back to camera mode.
SELECTING THE LIGHT SOURCE FREQUENCY
- Press the "Power/Mode" key once then use the "Up" and "Down" keys to select the "Frequency" icon
- Press the Shutter key repeatedly to select the desired frequency: "50HZ" or "60HZ".
- Press the "Power/Mode" key to go back to camera mode.
CAPTURINGVIDEOCLIPS(VideoMode)
- Press the "Power/Mode" key.
- Press the Shutter key repeatedly until the video icon is displayed on screen.
- Press the "Power/Mode" key one more time to go to video.
- Press the Shutter key to start shooting videos. The recording length is displayed on the LCD screen.
- Press the Shutter key again to stop recording and automatically save the video in AVI format.
- To go back to "Single shooting" mode, repeat steps 1 and 2 above pressing repeatedly the Shutter key until the icon is displayed on screen. Then press the "Power/Mode" key to go back to camera mode.
Note:
- The flash is disabled in video mode.
- You can use Media player and Quick time (not included on the software CD to play AVI files on your computer.
PLAYBACK MODE
Viewing your files
- Switch on the camera and press the "Playback mode" key.
- Use the "Up" and "Down" keys to browse through your photos and your videos (the icon is displayed on the upper-left corner of the screen).
- Press the Shutter key to start or stop a video.
- Press the "Playback mode" key at any time to go back to camera mode.
Note: "No Photo" appears when there are no stored photos or videos.
Deleting files
- In playback mode, use the "Up" and "Down" keys to display the desired photo or video, then press the "Power/Mode" key.
- Press the "Up" and "Down" keys to select "YES" and press the Shutter key to confirm and delete the photo or the video.
- If you want to delete all your pictures/videos when you are not in playback mode, press the "Power/Mode" key then use the "Up" or "Down" keys to select the "Delete all" icon.
- Press the Shutter key then use the "Up" and "Down" keys to select "YES". Press the Shutter key once more to confirm and delete all your photos/videos.
DOWNSLOADING YOUR PHOTOS
Using "MAGIX Photo Manager 10":
- Connect the supplied USB cable to the camera and the computer's USB port.
- Turn on the camera. "Mass storage" appears on the screen when connection to the computer has been successfully completed.
- Double click on the shortcut "MAGIX Photo Manager 10". The pictures taken with the camera automatically appear on the home screen.
- Press "Import" button on the main menu (up left).
- You can copy and paste the pictures into any directory you choose.
Publishing your photos on social networking sites:
- Using "Magix Photo Manager 10", select the photo that you wish to publish on Facebook or Flickr.
- The selected image appears in an orange frame.
- In the menu bar, click the "Online" tab and select "Upload media to other web services" and then either "Upload media to Flickr" or "Upload media to Facebook".
- The "Upload" window will be displayed on screen. Fill in the various fields (file name, description, key words, etc.).
- Click "Upload" to confirm.
- Depending on your upload destination, you will either open the Facebook or the Flickr home page.
- Next follow in the instructions displayed on the screen to finish uploading.
DOWNSLOADING AND EXTRAPOLATING YOUR PHOTOS
To increase the resolution of you photos, please follow the instructions below:
- Open the file "Dual Mode Camera" on your desktop, and then double click "My Dsc".
- Download your photos by clicking on , and then select the photo(s) that you wish to extrapolate.
- Click on, then tick the boxes "Increase resolution" and "High Quality Mode". Finally, click OK to end the operation.
- Your photos will automatically be saved in 1.3 Megapixels.
WEBCAM MODE
Connected to your PC, your camera can be used as a webcam.
Webcam mode
- Connect the video camera to your computer using the USB cable provided.
- Open the "Dual Mode Camera" folder on the desktop, then double-click the "PCCam" icon to view the real-time images taken by the webcam.
Instant messaging (chat)
You can use your camera as a webcam with your instant messaging client (Yahoo Messenger, MSN Messenger, Skype...).
INSTALACION DEL SOFTWARE PARA EDITAR VIDEOCLIPS (MAGIX Video easy SE)
© 2012 Lexibook®
© Disney / Pixar
© Disney
http://www.lexibook.com
Opmerking: De flits werkt nicht in de "Continuous shooting" ("Continuoto's maken") modus.
FLITSFUNCTIE
IM code: DJ024seriesIM1112


FANCE
2, avenue de Scandinavie 91953 Courtaboeuf Cedex
Mon vis compte
LEXIBOK S.A
Afranchir
ENONINIDNO
eeppeeppeeppeeppeeppeeppeeppeeppeeppeeppeeppeeppeeppeeppeeppeeppeeppeeppeeppeeppeeppeeppeeppeeppeeppeeppeeppeeppeeppeeppeeppeeppeeppeeppeeppeeppeeppeeppeeppeeppeeppeeppeeppeeppeeppeeppeeppeeppeeppeeppe
F
zordnnpneepnreepnreepnreepnreepnreepnreepnreepnreepnreepnreepnreepnreepnreepnreepnreepnreepnreep
Pnnpd np won/ npnpd o eaeN
n 1
:aiuuiPLADUON/auuBILSB7 : uuaHauuBULISHL
:ssseppy/sss.ppy
:|Bos apo/epo dZ
:
eepnneepnneepnneepnneepnneepnneepnneepnneepnneepnneepnneepnneepnneepnneepnneepnneepnneepnneepnneepnneepnneepnneepnneepnneepnneepnneepnneepnneepnneepnneepnneepnneepnneepnne
UeAnOWeBnA

sannnne nnnnne nnnnne nnnnne nnnnne nnnnne nnnnne nnnnne nnnnne nnnnne nnnnne nnnnne nnnnne nnnnne nnnnne nnnnne nnnnne nnnnne nnnnne nnnnne nnnnne nnnnne nnnnne nnnnne nnnnne nnnnne nennnne nnnnne nnnnne nnnnne nnnnne nnnnne nnnnne nnnnne nnnnne nnnnne nnnnne nnnnne nnnnne nnnnne nnnnne nnnnne nnnnne nnnnne nnnnne nnnnne nnnnne nnnnne nnnnne nnnnne nnnnne nannnee
P 1


- INSTALLING THE PHOTO SOFTWARE (Magix Photo Manager 10)
- TURNING THE CAMERA ON AND OFF
- SELECTING THE PHOTO RESOLUTION
- SELECTING THE IMAGE QUALITY
- SELECTING THE LIGHT SOURCE FREQUENCY
- CAPTURINGVIDEOCLIPS(VideoMode)
- Note:
- PLAYBACK MODE
- Viewing your files
- Deleting files
- DOWNSLOADING YOUR PHOTOS
- Using "MAGIX Photo Manager 10":
- DOWNSLOADING AND EXTRAPOLATING YOUR PHOTOS
- WEBCAM MODE
- Instant messaging (chat)
- INSTALACION DEL SOFTWARE PARA EDITAR VIDEOCLIPS (MAGIX Video easy SE)
- FLITSFUNCTIE
- ENONINIDNO
- zordnnpneepnreepnreepnreepnreepnreepnreepnreepnreepnreepnreepnreepnreepnreepnreepnreepnreepnreep
Brand : LEXIBOOK
Model : DJ024DC
Category : Camera