Eco Frit 180800 - Deep fryer NOVA - Free user manual and instructions
Find the device manual for free Eco Frit 180800 NOVA in PDF.



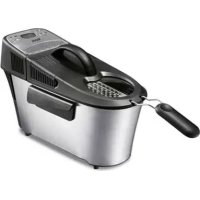
| Product Type | Electric deep fryer with oil pumping system |
| Brand | Nova |
| Model | Eco Frit 180800 |
| Oil capacity (eco mode) | 0.5 liter |
| Oil capacity (normal mode) | 3 liters |
| Temperature range | 150°C to 190°C |
| Temperature setting | In increments of 10°C, via button ⚡ |
| Timer | 1 to 45 minutes, in 1-minute increments |
| Main functions | Low-fat absorption frying, normal frying, pump self-cleaning |
| Oil pump | Integrated, for basting food in eco mode |
| Display | Digital (temperature and time) |
| Basket | With removable lid, dishwasher safe |
| Odor and grease filters | 2 replaceable filters (part no. 901.184000.020) |
| Filter replacement interval | Every 5 uses recommended |
| Oil replacement interval | Every 4 uses recommended |
| Maintenance | Water pump self-cleaning function; basket and basket lid dishwasher safe |
| Safety | RESET switch, lid micro switch, automatic shut-off at end of cooking |
| Reset | RESET switch on the back of the control unit |
| Compatible fat type | Oil or liquid fat only (no solid fats) |
| Included accessories | Electronic control unit, pump, basket with lid, removable cooking container, filters |
Frequently Asked Questions - Eco Frit 180800 NOVA
User questions about Eco Frit 180800 NOVA
0 question about this device. Answer the ones you know or ask your own.
Ask a new question about this device
Download the instructions for your Deep fryer in PDF format for free! Find your manual Eco Frit 180800 - NOVA and take your electronic device back in hand. On this page are published all the documents necessary for the use of your device. Eco Frit 180800 by NOVA.
USER MANUAL Eco Frit 180800 NOVA
This Nova Eco Frit functions with only 0.5 litres of oil or liquid fat. Because of the small volume of oil or liquid fat, the heating time is very short.
The oil/liquid fat temperature and the cooking time can easily be programmed. An electronic temperature control system heats the oil/liquid fat and consequently keeps the oil/liquid fat at the set temperature.
After the oil/liquid fat has reached the set temperature, a pump starts spraying the hot oil/liquid fat over the cover of the basket. The oil/liquid fat is divided over the whole surface of the basket cover and flows through the holes over the food. The frying process starts. When the set time has passed, the pump stops. Because the food is not immersed in oil/liquid fat, the frying process stops as well.
Because the food is not constantly immersed in the oil/liquid fat, the food will absorb less fat.
Besides this advanced function, you can also use this Nova Eco Frit as a regular fryer with maximum capacity of 3 litre. A self cleaning functionality helps you effortlessly to clean the oil pump.
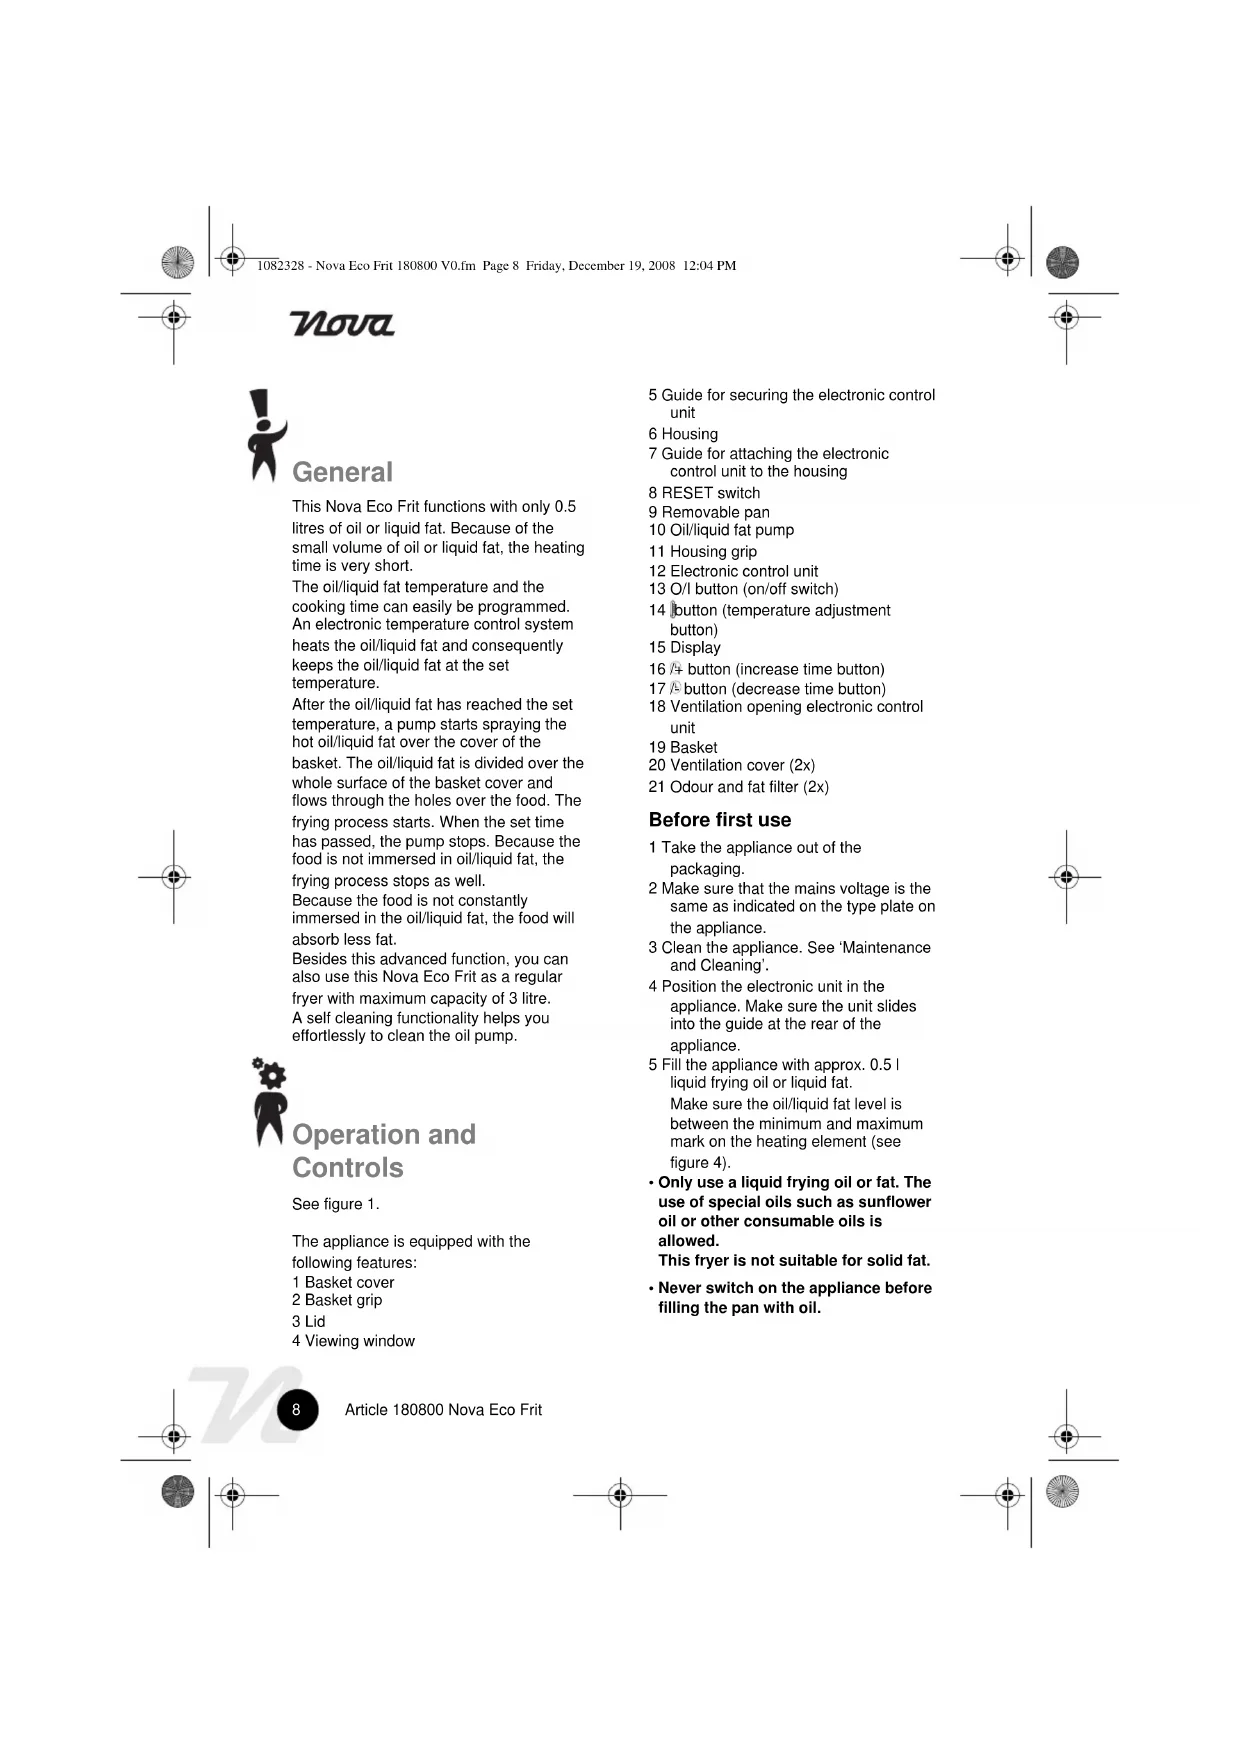
Operation and Controls
See figure 1.
The appliance is equipped with the following features:
1 Basket cover
2 Basket grip
3 Lid
4 Viewing window
5 Guide for securing the electronic control unit
6 Housing
7 Guide for attaching the electronic control unit to the housing
8 RESET switch
9 Removable pan
10 Oil/liquid fat pump
11 Housing grip
12 Electronic control unit
13 O/I button (on/off switch)
14 button (temperature adjustment button)
15 Display
16 4 button (increase time button)
17 button (decrease time button)
18 Ventilation opening electronic control unit
19 Basket
20 Ventilation cover (2x)
21 Odour and fat filter (2x)
Before first use
1 Take the appliance out of the packaging.
2 Make sure that the mains voltage is the same as indicated on the type plate on the appliance.
3 Clean the appliance. See 'Maintenance and Cleaning'.
4 Position the electronic unit in the appliance. Make sure the unit slides into the guide at the rear of the appliance.
5 Fill the appliance with approx. 0.5 l liquid frying oil or liquid fat.
Make sure the oil/liquid fat level is between the minimum and maximum mark on the heating element (see figure 4).
- Only use a liquid frying oil or fat. The use of special oils such as sunflower oil or other consumable oils is allowed.
This fryer is not suitable for solid fat.
- Never switch on the appliance before filling the pan with oil.
Nova
Use

- The temperature of accessible surfaces may be high when the appliance is operating.
1 Place the appliance on a flat, stable surface where it cannot fall.
2 Make sure the oil/liquid fat level is between the minimum and maximum mark on the heating element (see figure 4).
Replenish if necessary.
3 Insert the plug into the wall socket. The appliance will beep shortly and the display will alternately show the set temperature and the frying time.
4 Dry the food and/or remove ice from frozen food to avoid violent splashing of hot oil/liquid fat when ice and water enters.
5 Fill the basket with the food to be fried. Do not overfill the basket to avoid irregular and undesired results.
6 Close the cover of the basket and place the basket in the appliance.
7 Place the lid on the fryer. The lid has a small protrusion, which fits in an opening in the electronic control unit and which operates a microswitch. Also make sure that the basket grip fits in the openings of the lid. If the lid is not positioned correctly, the oil pump will not start functioning.
8 Press the button repeatedly until the display shows the desired oil temperature setting. The setting can be adjusted from 150°C to 190°C in steps of 10°C.
Consult the packaging of the food for the required temperature setting.
9 The display shows the set frying time in minutes. The setting can be adjusted from 1 to 45 minutes in steps of 1 minute.
Press the + button to increase, or press the - button to decrease the programmed frying time by 1 minute. Holding the + or the - button will change time settings more rapidly.
Consult the packaging of the fries and/or snacks for the required frying time.
Note: This time is the real frying time. The countdown starts when the pump starts running. The pump and with that the frying process starts after the oil/liquid fat has reached the required temperature.
10 Press the O/I button to start the process.
The countdown of the clock in the display will start after the oil/liquid fat has reached the required temperature and when the pump has started. When the heating process is started, the ☐ button, and the /+ and /-☐ buttons are disabled. It is not possible to adjust the time or temperature settings after the process started. If you want to adjust these settings: stop the appliance with the O/I button, change the settings and restart with the O/I button.
11 Half way through the frying process the appliance will sound 6 beeps. At this moment it is advised to shake the basket with the food to prevent the food from sticking.
Remove the lid from the fryer (the pump will stop as soon as the lid is removed) and shake the basket.
Place the basket in the fryer and after placing the lid, the pump will start again.
12 30 seconds before the set time has elapsed, the pump stops to allow the oil/liquid fat to flow back into the pan. When the food is ready to be taken out, the appliance sounds 10 beeps.
Take the basket out of the fryer.
13 Empty the basket onto a plate or a dish.
14 During frying regularly check that the oil level in the pan is between the minimum and maximum mark on the heating element (see figure 4).
Replenish if necessary.
15 Repeat steps 4 to 14 to deep fry more food.
Nova
16 When you have finished deep frying food, remove the plug from the wall socket.
Resetting
If the appliance is not functioning properly or when it generates an error, you can reset the electronic control unit by operating the RESET switch at the rear of the electronic control unit:
1 Move the switch on the left rear side of the electronic control unit up to reset the electronic control unit.
Frying time and temperatures
| Food Frying | time (min) | Temp. (°C) |
| Frozen fries 500 g. 8 190 | ||
| Frozen fries 400 g. 6 190 | ||
| Minced-meat hot dogs 6 190 | ||
| Croquettes 7 190 | ||
| White fish fillet portions in breadcrumbs or batter | 10-15 170 | |
| Fresh prawns in batter 3-5 190 | ||
| Chicken portions in breadcrumbs:small/medium sizelarge size | 15-20 17020-30 | 170170 |
| Fresh chicken drumsticks in breadcrumbs | 15 170 | |
| Frozen chicken nuggets | 6-8 190 | |
| Fruit fritters 2-3 pieces 3-5 190 | ||
| Vegetable fritters | 3-5 190 | |
| Frozen onion rings | 3-5 190 | |
| Fresh onions/mushrooms | 3-5 150 |
You may change the time and temperature settings according to your personal taste.
Use as a regular fryer
This Nova Eco Frit can also be used as a regular fryer. Use as follows:
1 Remove the lid from the fryer.
2 Remove the basket.
3 Take the electronic control unit out of the appliance and remove the pump from the unit by turning it anticlockwise (see figure 3).
4 Position the electronic unit in the appliance. Make sure the unit slides into the guide at the rear of the appliance.
5 Fill the appliance with min. 2.5 L till max. 3 L of oil/liquid fat till the level is between the minimum and maximum indicator in the removable pan (see figure 5).
6 Place the lid on the fryer.
7 Insert the plug into the wall socket. The appliance will beep shortly and the display will alternately show the set temperature and the frying time.
8 Press the button repeatedly until the display shows the desired oil temperature setting. The setting can be adjusted from 150°C to 190°C in steps of 10°C. Consult the packaging of the food for the required temperature setting.
9 Press the /+ button once to set the time to 1 minute.
10 Press the O/I button to start the heating process.
The countdown of the clock in the display will start after the oil/liquid fat has reached the set temperature. One minute after the set temperature is reached, the appliance switches off automatically.
Note: When the set temperature is reached, you will hear the electric motor, which normally drives the oil pump. This is normal operation.
11 Fill the basket with the food to be fried. Do not overfill the basket to avoid irregular and undesired results.
Nova
12 Close the cover of the basket and carefully place the basket in the appliance.
13 Place the lid on the fryer.
14 Press the + button to increase, or press the - button to decrease the programmed frying time by 1 minute. Holding the + or the - button will change time settings more rapidly. Consult the packaging of the fries and/or snacks for the required frying time.
15 Switch on the appliance by pressing the O/I button.
Half way through the frying process the appliance will sound 6 beeps. There is no action needed.
16 When the appliance beeps 10 times at the end of the frying process, remove the lid.
17 Take the basket out of the fryer and shake it to remove excessive oil/liquid fat from the fried food.
Empty the basket onto a plate or a dish.
18 During frying regularly check that the oil level in the pan is between the minimum and maximum mark in the removable pan (see figure 5). Replenish if necessary.
19 Repeat steps 11 to 18 to deep fry more food.
Note: The oil temperature and the frying time can only be set when the appliance is switched off with the O/I button.
20 When you have finished deep frying food, remove the plug from the wall socket.
- Never allow the power cord to hang over the edge of the draining board, worktop or table.
- Never move the appliance when it is switched on or is still hot. Before you move the appliance, switch it off and wait until it has cooled down.
- Use an earthed wall socket.
• The appliance must be able to dissipate its heat to avoid a risk of fire.

Make sure that the appliance has sufficient space around it, and does not come into contact with flammable materials. The appliance must not be covered when it is still hot.
• Always remove the plug from the wall socket after use.
- Dry the fries and/or shake off excessive ice from the fries and/or snacks before placing them in the basket.
• Make sure your hands are dry when you touch the appliance, the power cord or the plug.
- Switch off the appliance and/or remove the plug from the wall socket in the event of a malfunction during use, before cleaning the appliance, before fitting or removing an accessory and before storing the appliance after use.
- Never leave the appliance unattended when in use.
- Do not use the appliance near another heat source.
- Keep the appliance away from inflammable materials, such as curtains, towels or paper.
- The appliance's housing will become hot.
Maintenance and Cleaning
Cleaning the appliance
1 Remove the plug from the wall socket, and allow the appliance to cool down.
2 Put the oil/liquid fat in a container and dispose of it or keep it for re-use.
3 Make sure the oil pump is fitted on the electronic unit.
Article 180800 Nova Eco Frit

Nova
4 Fill the removable pan with 1 liter of clean water.
5 Place the lid on the fryer.
6 Insert the plug into the wall socket.
7 Simultaneously press the /+ and the /- button to start the self-cleaning function of the oil pump. The appliance will beep shortly. The pump starts running and the heating element starts to heat the water.
8 After 2 minutes the appliance will beep as a sign that the cleaning process is finished.
The heating element and the pump will both switch off.
9 Remove the plug from the wall socket, and allow the appliance to cool down.
10 Clean the basket in warm soapy water or in a dishwasher.
11 Clean the removable pan in warm soapy water.
12 If you also want to replace the odour and fat filters in the lid, see the section 'Replacing odour and fat filters'.
13 Carefully clean the appliance, the electronic unit, and the lid with a soft, damp cloth and a few drops of washing-up liquid, and dry thoroughly.
14 Make sure all parts are dry and re-assemble the appliance.
15 Store the appliance (see 'Storage').
Replacing odour and fat filters
Advised replacement interval: after every 5 uses.
See figure 2.
1 Take the lid off the appliance.
2 Press against the lip of the ventilation cover and remove the cover from the lid.
3 Remove the odour and fat filter.
4 Repeat steps 2 and 3 with the filter on the other side of the lid.
5 Clean the lid and the ventilation covers in warm soapy water.
6 Dry the lid and the ventilation covers.
7 Place new filters in the lid (part no. 901.184000.020).
8 Place the ventilation covers in the lid.
Refreshing oil/liquid fat
Advised replacement interval: after every 4 uses.
1 Remove the plug from the wall socket, and allow the appliance to cool down.
2 Respectively remove the lid, the basket and the electronic control unit from the appliance.
3 Take the removable pan out of the housing.
4 Put the old oil in a container and dispose of it.
5 Clean the removable pan in warm soapy water.
6 Dry the removable pan.
7 Reassemble the appliance in reverse order.
8 Fill the appliance with fresh oil or liquid fat just before you start using the appliance again.
9 Store the appliance (see 'Storage').

- Make sure no moisture comes into contact with the appliance's electrical parts.
- Never immerse the appliance, the power cord or the plug in water or other liquids.
- Never use aggressive or abrasive cleaning products or sharp objects (such as a knife or a hard brush) to clean the appliance.
- Only the basket with the cover may be cleaned in a dishwasher. The electronic unit, the housing, the removable pan and the cover may not be cleaned in the dishwasher.
- Make sure all parts are completely dry before use.
Nova
Storage
1 Allow the appliance to cool down.
2 Clean the appliance regularly (see 'Maintenance and Cleaning').
3 Place the basket in the appliance and place the lid on the appliance.
4 Store the appliance in a dry and frost-free place.
- Store the appliance out of reach of children.
Safety
General
- Read and follow these instructions carefully. Keep this manual for future reference.
- Use this appliance only in accordance with these instructions.
• This appliance is intended solely for domestic use.
• The use of this appliance by children or persons with a physical, sensory, mental or motor disability or who lack the necessary knowledge and experience may cause a hazard. Persons responsible for the safety of such people must give explicit instructions or supervise the use of the appliance. - Have the appliance repaired only by a qualified electrician. Never try to repair the appliance yourself.
- Only use accessories recommended by the supplier. The use of other accessories may result in damage to the appliance, thereby creating hazards for the user.
Electricity and heat
- The appliance is not intended to be operated by means of an external timer or separate remote control system.
• Always remove the plug from the socket when the appliance is not in use.
• Always remove the plug from the wall socket by pulling on the plug not the power cord. - Never pull the power cord to move the appliance.
- Do not use the appliance if the appliance or the power cord is damaged. Have a damaged power cord replaced by a qualified electrician.
• Make sure that the appliance, the power cord and the plug do not come into contact with sources of heat such as a hot hob or naked flame.
• Make sure that the appliance, the power cord and plug do not come into contact with water, other fluids or chemicals. - Do not pick up the appliance if it falls into water. Immediately remove the plug from the wall socket. Do not use the appliance anymore.
U.K. Wiring Instructions
The wires in the mains lead are coloured in accordance with the following code:
As the colours of the wires in the mains lead of this appliance may not correspond with the colour markings identifying the terminals on your plug, proceed as follows:
- The BLUE wire must be connected to the terminal marked with the letter N or coloured black.
- The BROWN wire must be connected to the terminal marked with the letter L or coloured red.
- The GREEN/YELLOW wire must be connected to the terminal marked with the letter E (or earth symbol) or coloured GREEN or GREEN/YELLOW
WARNING: THIS APPLIANCE MUST BE EARTHED
The Environment
Dispose of packaging material, such as plastic and boxes, in the appropriate waste containers.
If you wish to dispose of the appliance whilst it still works properly or can be easily repaired, then ensure that the appliance is recycled.
When the appliance reaches the end of its useful life, it should be disposed of in a responsible manner, thereby ensuring the reuse of the appliance or its parts. Do not dispose of the appliance with unsorted refuse; hand it in at the store, or take it to a recognized collection point. Contact your municipality for information about the reception and collection systems in your area.

With this appliance, if a 13A plug is used a 13A fuse should be fitted. If any other type of plug is used, a 15A fuse must be fitted either in the plug or at the distribution board.

CE Conformity
Applicable European guideline:
2002/95/EC
2002/96/EC