F 160 77 - Toaster KRUPS - Free user manual and instructions
Find the device manual for free F 160 77 KRUPS in PDF.
| Product type | Toaster |
| Brand | Krups |
| Model | F 160 77 |
| Number of slots | 2 |
| Dimensions (L x W x H) | 30 x 20 x 20 cm |
| Weight | 1.2 kg |
| Power supply | 220-240 V, 50-60 Hz |
| Power | 950 W |
| Browning levels | 6-7 positions |
| Special functions | Reheat, defrost, extra lift, stop (Stop) |
| Roll warmer | Removable, with handles |
| Cool walls | Yes, insulating |
| Crumb tray | Removable for easy cleaning |
| Cord storage | Under the appliance |
| Electronic sensor | No (specific models) |
| Maintenance | Clean the tray regularly; do not immerse; use a damp cloth |
| Safety | Automatic shut-off, cool walls, Stop button, unplug before cleaning |
| Available spare parts | Crumb tray, roll warmer |
| Repairability | Krups Authorized Service Center |
| Warranty | 2 years (parts and labor) |
Frequently Asked Questions - F 160 77 KRUPS
User questions about F 160 77 KRUPS
0 question about this device. Answer the ones you know or ask your own.
Ask a new question about this device
Download the instructions for your Toaster in PDF format for free! Find your manual F 160 77 - KRUPS and take your electronic device back in hand. On this page are published all the documents necessary for the use of your device. F 160 77 by KRUPS.
USER MANUAL F 160 77 KRUPS
natural_image
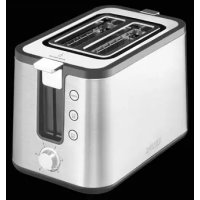
Exterior view of a KRUPS toaster with control knob (no text or symbols on device body)D Gebrauchsanweisung
GB Instructions for use
F Mode d'emploi
NL Gebruiksaanwijzing
① Instruzioni per l'uso
E Instrucciones de uso
P Instruções de utilização
DK Brugsanvisning
\$ Bruksanvisning
N Bruksanvisning
FIN Käyttöohje
Krups ToastControl
text_image
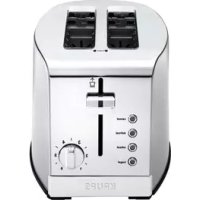
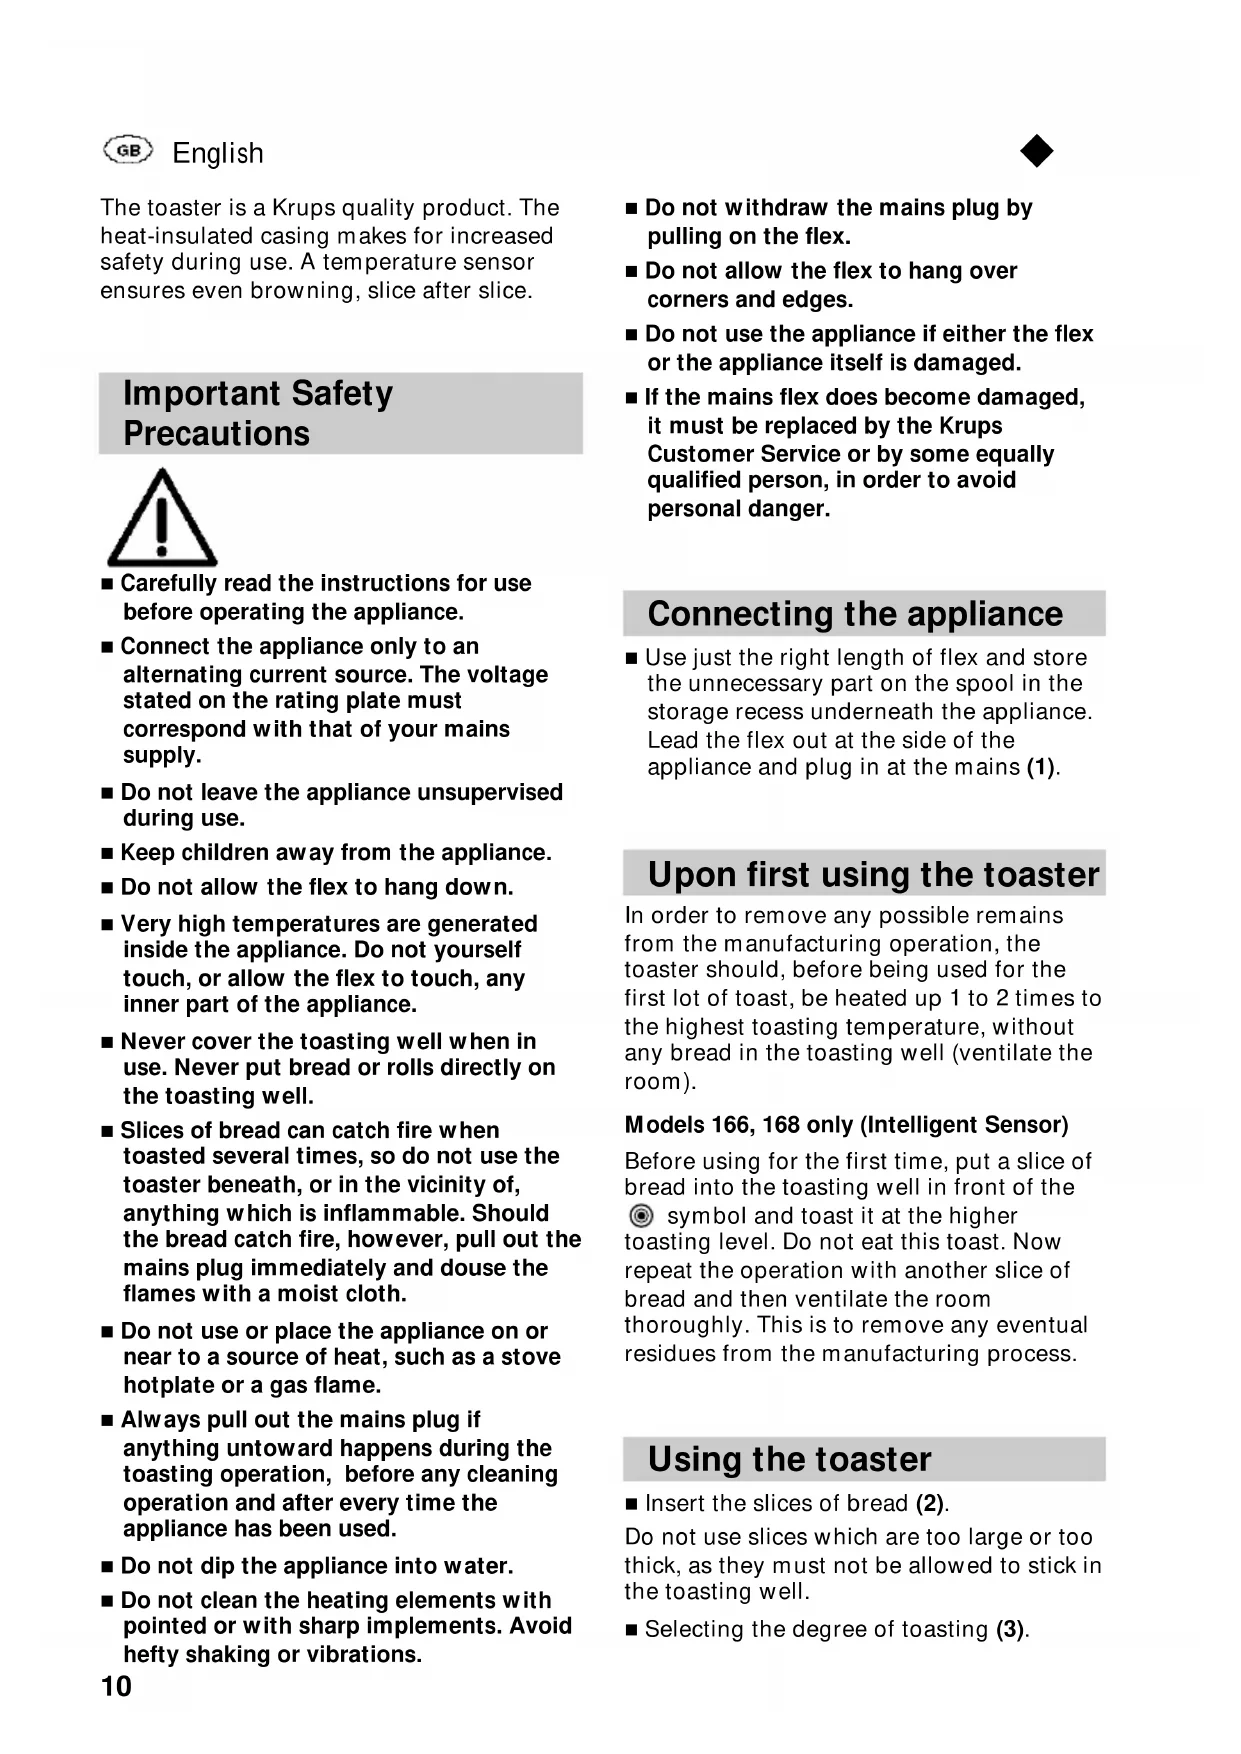
KRUPS a b c d e f g i
text_image
h i j k Intelligent Sensor
natural_image
Pure diagram of a horizontal beam with two side flanges and a labeled end (no text or symbols)D
a: Wärmeschutzmantel
b: Krümelschublade
c: Kabelaufwicklung
d: Absenktaste
a: Heat insulated casing
b: Crumb drawer
c: Flex storage spool
d: Lowering lever
e: High-lift facility
f: Toasting regulator
g: Cancel button
On the model
h: Support for bread rolls
i: Rewarming function
j: Defrosting function
k: Intelligent Sensor
I: Removable roll warmer
F
natural_image
Diagram of a device with a plug and cable, showing a component with a circular icon and an arrow indicating direction (no text or symbols)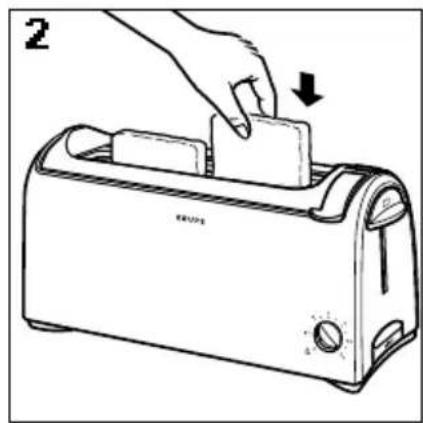
text_image
2 GRUPE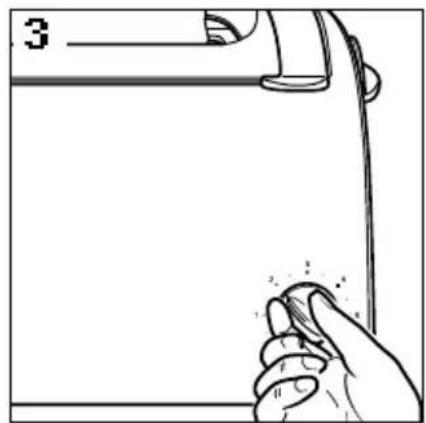
natural_image
Line drawing of a hand holding a tool near a device (no text or symbols)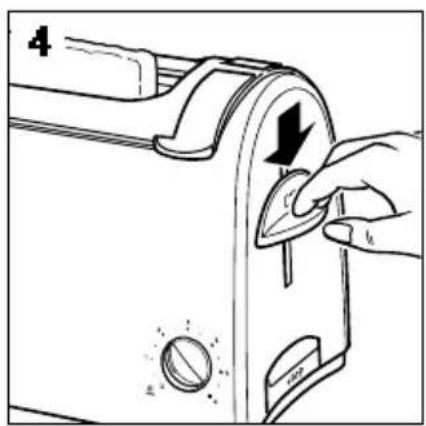
natural_image
Illustration of a hand pressing down on a toaster front panel with a black arrow indicating the press direction (no text or symbols present)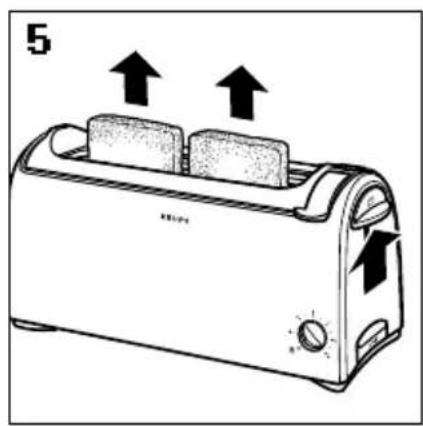
text_image
5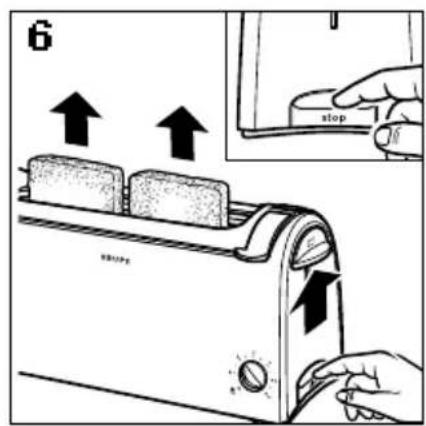
text_image
6 stop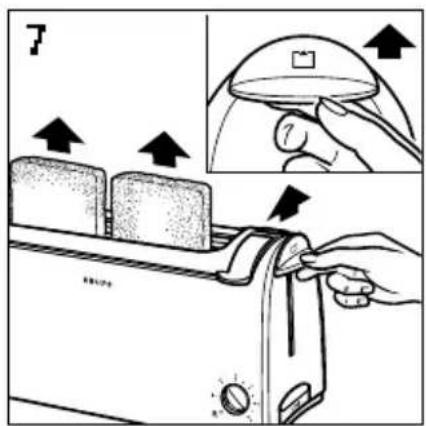
text_image
Diagram illustrating kitchen tool application with labeled steps and directional arrows indicating action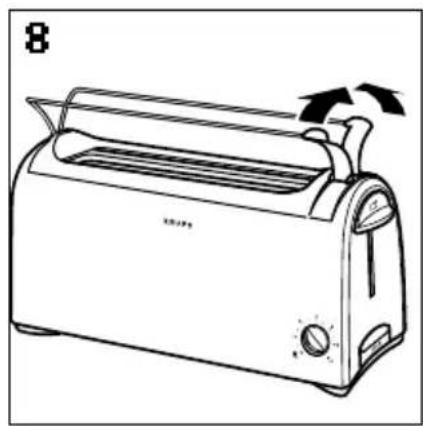
natural_image
Line drawing of a toaster with cooling fan and heat exchanger (no text or symbols)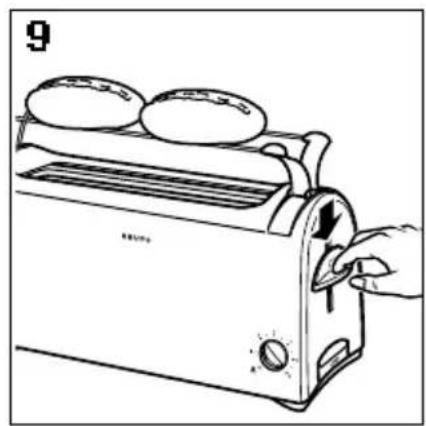
natural_image
Line drawing of a toaster with three round buns and a hand operating the blade (no text or symbols)
text_image
10 KRUPS 盘·○ 盘·○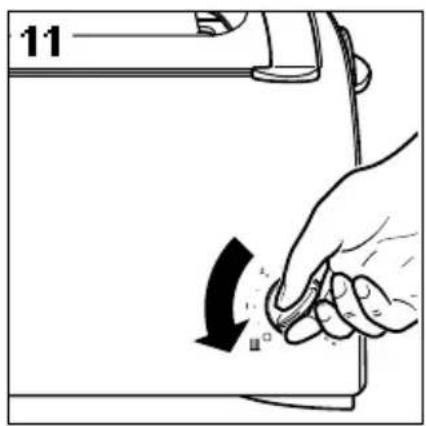
text_image
11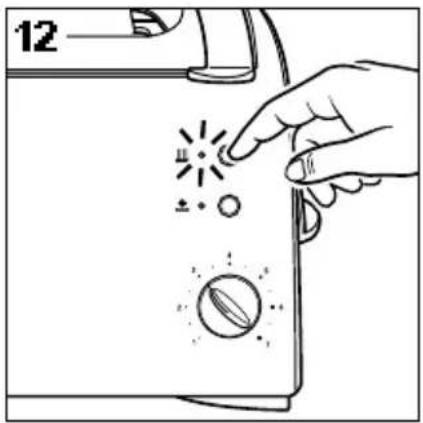
text_image
12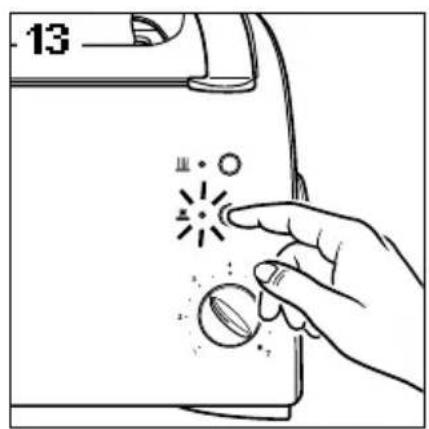
text_image
13 13
text_image
14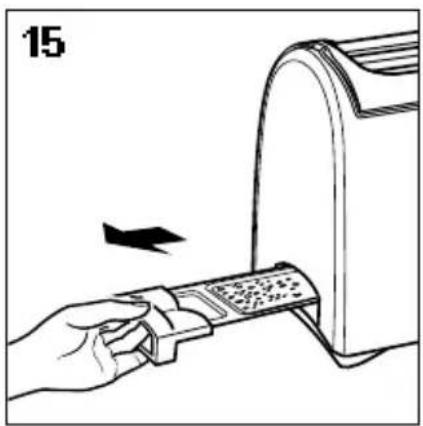
natural_image
Illustration of a hand inserting a device into a mailbox with an arrow indicating direction (no text or symbols)The toaster is a Krups quality product. The heat-insulated casing makes for increased safety during use. A temperature sensor ensures even browning, slice after slice.
Important Safety Precautions

■ Carefully read the instructions for use before operating the appliance.
■ Connect the appliance only to an alternating current source. The voltage stated on the rating plate must correspond with that of your mains supply.
■ Do not leave the appliance unsupervised during use.
- Keep children away from the appliance.
■ Do not allow the flex to hang down.
■ Very high temperatures are generated inside the appliance. Do not yourself touch, or allow the flex to touch, any inner part of the appliance.
■ Never cover the toasting well when in use. Never put bread or rolls directly on the toasting well.
■ Slices of bread can catch fire when toasted several times, so do not use the toaster beneath, or in the vicinity of, anything which is inflammable. Should the bread catch fire, however, pull out the mains plug immediately and douse the flames with a moist cloth.
■ Do not use or place the appliance on or near to a source of heat, such as a stove hotplate or a gas flame.
■ Always pull out the mains plug if anything untoward happens during the toasting operation, before any cleaning operation and after every time the appliance has been used.
■ Do not dip the appliance into water.
■ Do not clean the heating elements with pointed or with sharp implements. Avoid hefty shaking or vibrations.
■ Do not withdraw the mains plug by pulling on the flex.
■ Do not allow the flex to hang over corners and edges.
■ Do not use the appliance if either the flex or the appliance itself is damaged.
■ If the mains flex does become damaged, it must be replaced by the Krups Customer Service or by some equally qualified person, in order to avoid personal danger.
Connecting the appliance
■ Use just the right length of flex and store the unnecessary part on the spool in the storage recess underneath the appliance. Lead the flex out at the side of the appliance and plug in at the mains (1).
Upon first using the toaster
In order to remove any possible remains from the manufacturing operation, the toaster should, before being used for the first lot of toast, be heated up 1 to 2 times to the highest toasting temperature, without any bread in the toasting well (ventilate the room).
Models 166, 168 only (Intelligent Sensor)
Before using for the first time, put a slice of bread into the toasting well in front of the
symbol and toast it at the higher toasting level. Do not eat this toast. Now repeat the operation with another slice of bread and then ventilate the room thoroughly. This is to remove any eventual residues from the manufacturing process.
Using the toaster
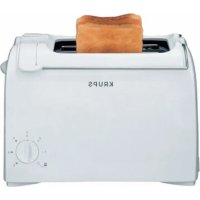
■ Insert the slices of bread (2).
Do not use slices which are too large or too thick, as they must not be allowed to stick in the toasting well.
■ Selecting the degree of toasting (3).
Choose between 6-7 different degrees of browning by setting the selector to the appropriate position:
Position 1 = lightly toasted
Position 6/7 = very well toasted
When first using, try out the toasting setting, as the result depends upon the type of bread and the degree of moisture. Generally speaking, a higher temperature is required for breads other than white.
Turn the toasting grade selector to a lower number if, for example, only one slice of bread is being toasted.
Caution:
Relatively dry slices of bread, or bread that has already been toasted once, will brown much more quickly and may under certain circumstances catch fire. Therefore set the heat control to a lower setting and do not leave the toaster unattended.
Toasting
■ Fully depress the lowering lever, which will then lock into position (4).
This then causes the appliance to switch on.
Taking out the toast
■ After completion of the toasting operation, the toast will automatically be raised and the appliance will switch itself off (5).
■ Take out the slices of toast.
Note: Should a slice of bread become trapped in the toasting well, pull out the mains plug, let the appliance cool down and then carefully free the toast without touching the heating elements.
Cancel button
■ If you wish to stop the toasting cycle, just press the cancel button and the toast will pop up immediately (6).
High-lift facility
The high-lift facility lever makes it easier to remove the toast.
■ When the toasting is done, press the lowering lever upwards and take out the slices of toast (7).
Additional accessories depending on the model
Roll support (Mod. 162, 164, 168)
■ Raise the roll support by swivelling the two lifter grips upwards (8).
■ Mod. 162, 164
Place the rolls on the support and select the toasting grade.
Switch on the appliance (9).
■ Mod. 168
Place the rolls on the support and switch on the appliance (9). The toasting time is preset and need not be selected.
To improve the results, turn the rolls over and repeat the toasting operation.
After use, lower the roll support by swivelling the two lifter grips downwards.
The roll support should not be used for longer than 10 minutes.
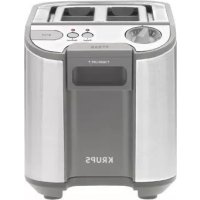
Removable roll warmer (Mod. 160, 170)
■ Locate the warmer on the toaster (10). Place the rolls on the support and select the toasting grade. Switch on the appliance.
To improve the results, turn the rolls over and repeat the toasting operation.
After use, allow the warmer to cool down before removing it, holding it by the handles.
The roll warmer should not be used for more than 10 minutes at a time.
Rewarming function
With this toaster, you have the possibility of rewarming toast which has already cooled down.
Models 161 and 162
■ Do this by setting the selector switch to the 1 position (11) and then switch on the appliance.
The toast will be raised automatically as soon as the rewarming operation is completed.
Models 160, 163, 164, 167, 170, 256
■ Fully depress the lowering lever, which then locks into position. Press the rewarming switch whereupon the rewarming indicator lamp will light up(12).
When the rewarming operation is completed, the toast will automatically be raised, the rewarming indicator lamp will be extinguished and the appliance will switch itself off.
Defrosting function
(Mod. 160, 163, 164, 167, 170, 256)
With this toaster, you can toast deep-frozen bread. The defrosting function first thaws out the bread and then switches automatically to the toasting function.
■ To effect this, first set the selector switch to the desired degree of toasting.
■ Now fully depress the lowering lever, which will lock into position. Then press the defrosting switch (13).
The defrosting indicator lamp will now light up. Upon completion of the defrosting operation, and the subsequent toasting operation, the toast will automatically be raised, the defrosting indicator lamp will be extinguished and the appliance will switch itself off.
„Intelligent Sensor“ (Mod. 166, 168)
This toaster is furnished with an „intelligent sensor“ which recognises the condition of the bread and automatically controls the toasting time accordingly.
Using the same toasting setting, you will always get the same degree of browning, irrespective of how many slices are toasted and whether the bread is fresh, dry or deep-frozen.
Apart from the toasting of fresh bread, the „intelligent sensor“ also enables the:
- automatic rewarming of cooled-down toast
- automatic defrosting of deep-frozen bread.
It is only necessary to put the bread to be rewarmed or defrosted into the toaster and to switch on the appliance, without any alteration to the grade setting. The sensor will automatically measure the temperature of the bread and determine the length of the toasting time.
This toaster can adjust the degree of toasting step by step to suit each person's individual taste. If the toast is too light, increase the setting dial by a further step, whereby the toaster will brown the toast just a little more, but will not recommence a full toasting cycle as classic toasters do.
■ Set the toasting grade selector to the required position and put the bread into the toasting well.
Important:
- It is essential for the slice of bread to be in front of the symbol, as the sensor which recognises the sort of bread is located there (14).
- When toasting bagels or baguettes which have been already cut, the cut surface must face the sensor symbol
If the slice of bread is not directly in front of the sensor, the toaster will not operate normally (the toasting time will be shorter). This is because there is an insufficient surface of bread available for the sensor to make a proper assessment.
■ Depress the lowering lever fully, until it engages properly.
Upon completion of the toasting operation, the toast will be raised automatically and the appliance will switch itself off.
Important:
If the toaster fails to function properly, even though the slice of bread is correctly positioned in the toasting well, the cause can be that crumbs of bread have become stuck in the vicinity of the “intelligent sensor”. Turn the toaster upside down and shake it, so that the crumbs can fall out.
Cleaning
Before commencing the cleaning operation, pull out the mains plug.
Do not dip the appliance into water.
Never use an abrasive sponge to clean the toaster. Clean it with a moist cloth and then dry it with a soft cloth to keep it bright.
Regularly remove crumbs and bits of toast.
Before pulling out the crumb drawer, allow the toaster to cool for at least ten minutes after completion of the preceding toasting operation.
■ Pull out the crumb drawer and shake out the crumbs (15).
Clean with a moist cloth and then replace the crumb drawer.
Never use the toaster without the crumb drawer in position.
Disposal

The packaging comprises exclusively environmentally-friendly materials which should be disposed of according to the local recycling arrangements.
Disposal methods for the appliance itself can be found by enquiry at the appropriate department of the local authority.
Position 1 = let ristet
Position 6/7 = hårdt ristet