610 100 361 - Coffee machine GAGGIA - Free user manual and instructions
Find the device manual for free 610 100 361 GAGGIA in PDF.
User questions about 610 100 361 GAGGIA
0 question about this device. Answer the ones you know or ask your own.
Ask a new question about this device
Download the instructions for your Coffee machine in PDF format for free! Find your manual 610 100 361 - GAGGIA and take your electronic device back in hand. On this page are published all the documents necessary for the use of your device. 610 100 361 by GAGGIA.
USER MANUAL 610 100 361 GAGGIA
Operation and maintenance manual
Before using the machine, please read the attached operating instructions. Carefully read the safety rules
Bedienungsanleitung
CUSTODIA DELLA MACCHINA
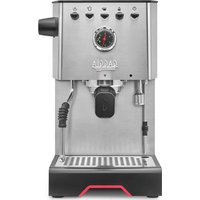
The Milk Island is an appliance that has been specifically designed for frothing milk and heating water in the simplest and fastest manner possible. The Milk Island should only be used for domestic use and is not suitable for continuous, professional operation.

Warning. No liability is assumed for any damage caused by:
- Incorrect use not in accordance with the intended uses;
- Repairs carried out by un-authorized customer service centres;
- Tampering with any part of the machine;
- The use of non-original spare parts and accessories;
- Storage at temperatures below 15^ (60^) and failure to maintain the machine;
- Heating tea directly in the jug.
In these cases, the warranty is not valid.

The warning triangle indicates all important instructions for the user's safety. Please follow these instructions carefully to avoid serious injury!

This symbol is used to highlight information that is particularly important for ensuring optimal use of the appliance.
Keep these operating instructions in a safe place and available to anyone who may use the appliance.
For further information or in case of problems, please refer to any authorized service centre.
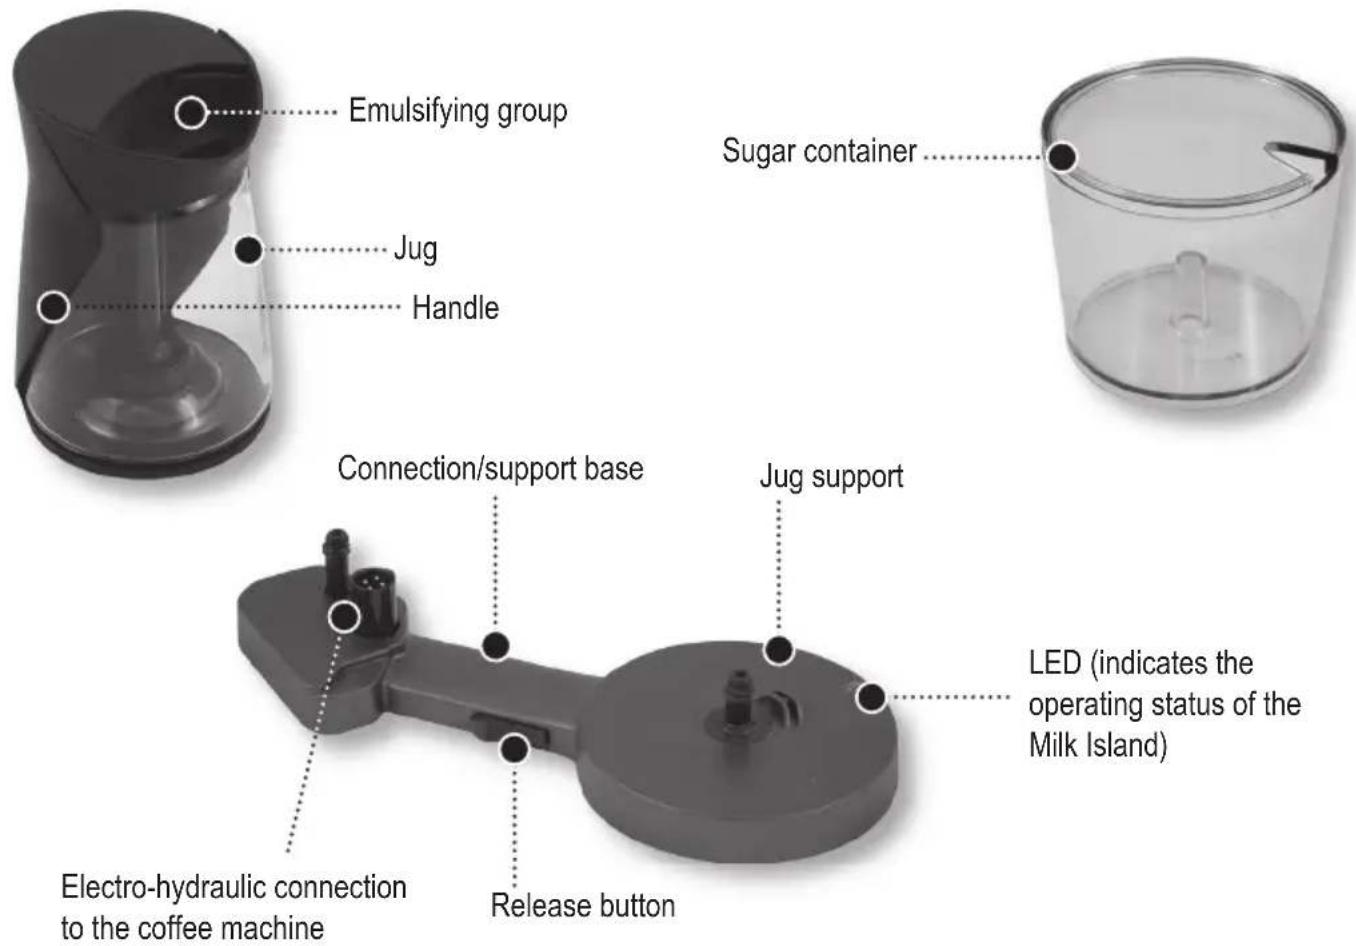
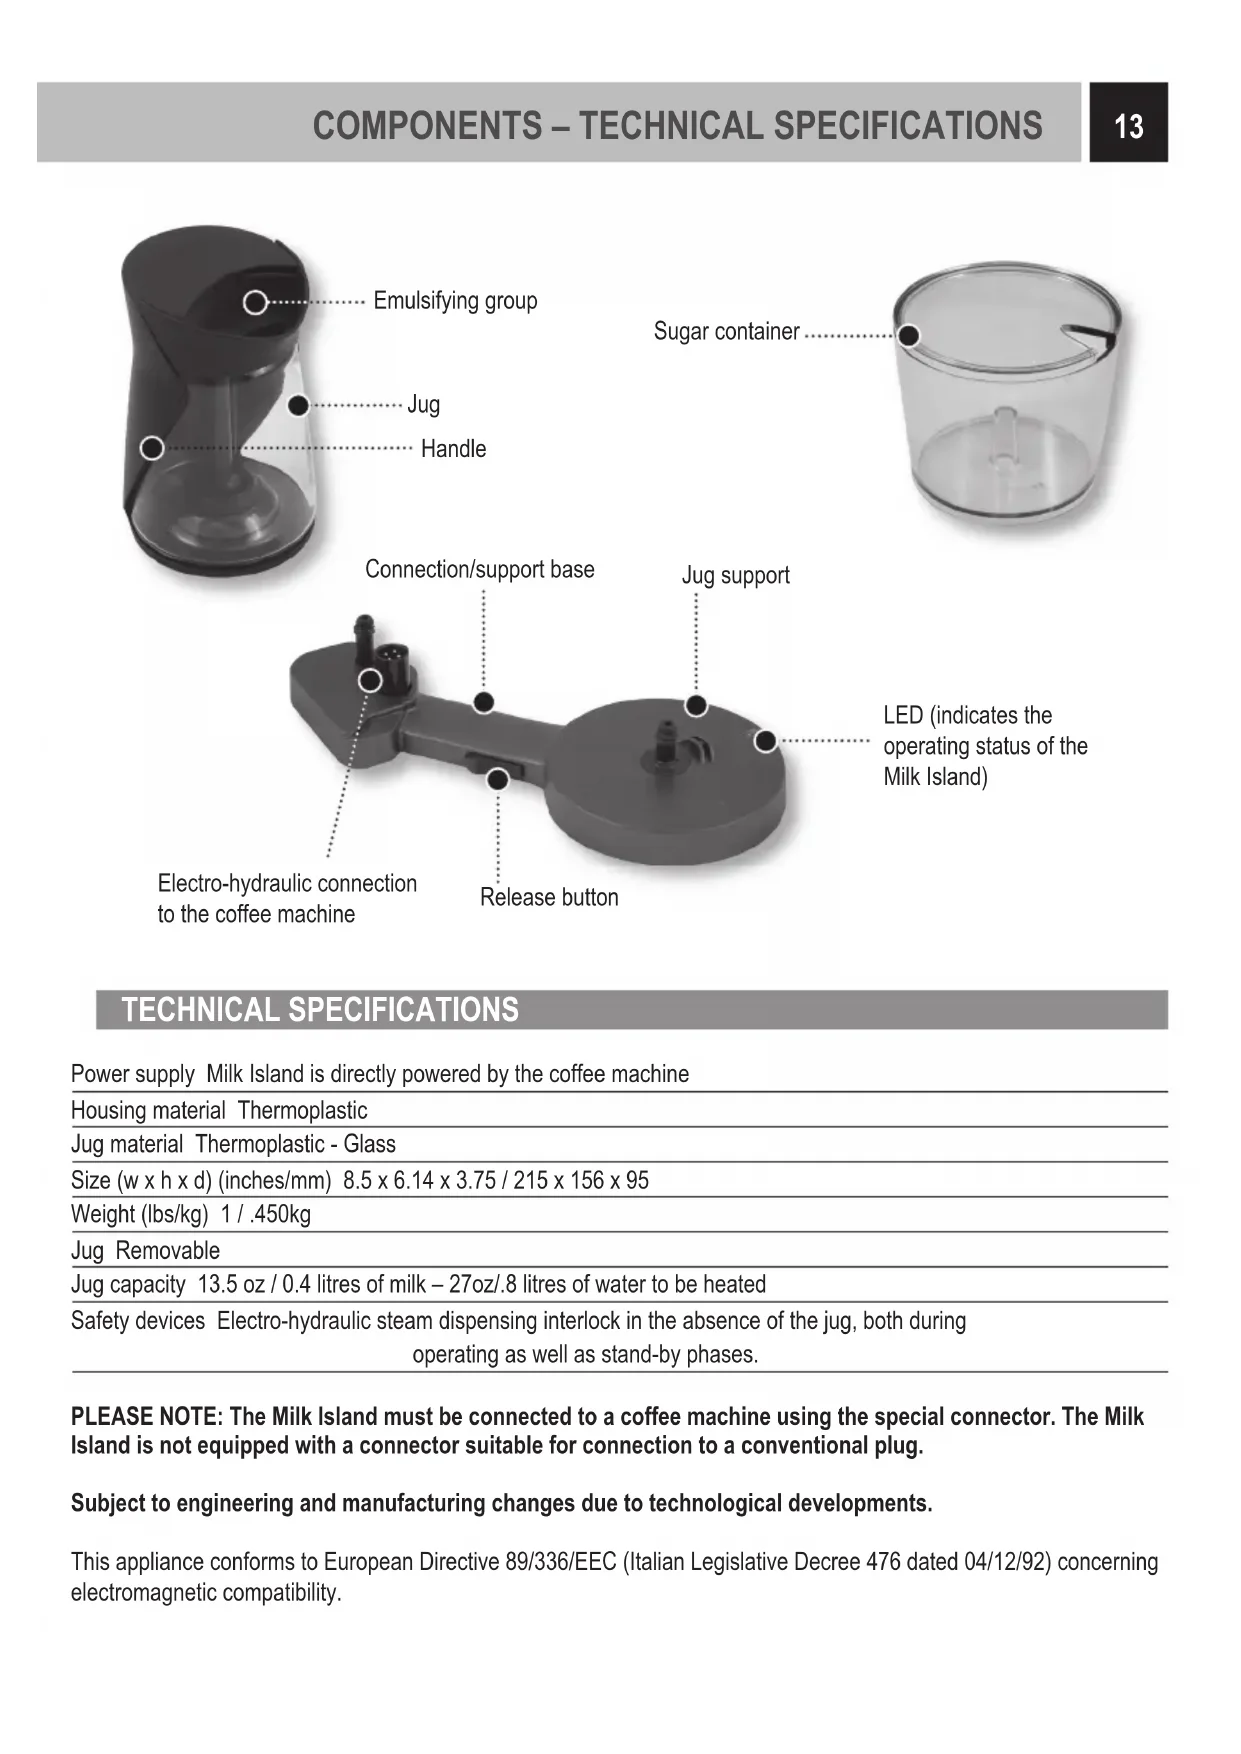
TECHNICAL SPECIFICATIONS
Power supply Milk Island is directly powered by the coffee machine
Housing material Thermoplastic
Jug material Thermoplastic - Glass
Size (w x h x d) (inches/mm) 8.5 x 6.14 x 3.75 / 215 x 156 x 95
Weight (Ibs/kg) 1 / .450kg
Jug Removable
Jug capacity 13.5 oz / 0.4 litres of milk - 27oz/.8 litres of water to be heated
Safety devices Electro-hydraulic steam dispensing interlock in the absence of the jug, both during operating as well as stand-by phases.
PLEASE NOTE: The Milk Island must be connected to a coffee machine using the special connector. The Milk Island is not equipped with a connector suitable for connection to a conventional plug.
Subject to engineering and manufacturing changes due to technological developments.
This appliance conforms to European Directive 89/336/EEC (Italian Legislative Decree 476 dated 04/12/92) concerning electromagnetic compatibility.
INSTALLING THE MILK ISLAND
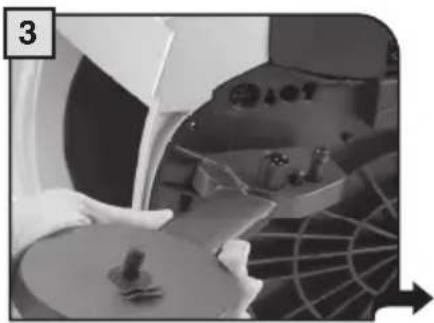
Warning: Before installing the Milk Island, remove the water tank, drip tray, dregs drawer and empty the coffee bean hopper of the espresso machine. To connect the Milk Island, place the machine on its side. Turn the coffee machine off and unplug the power cord from the socket.
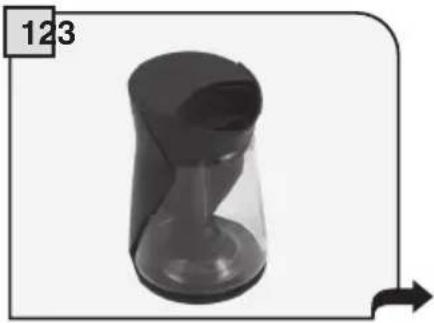
Remove the Milk Island from the packaging. Make sure that the jug is in tact.

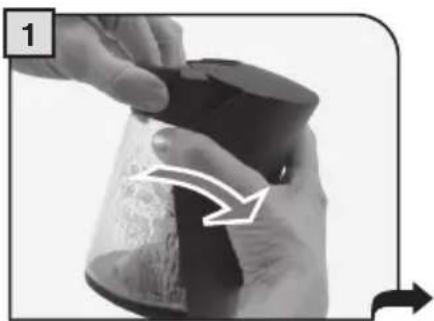
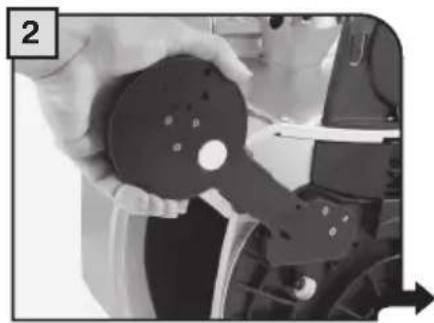
After removing the necessary items from the machine, gently turn the machine onto its right side, so the left side is up. Remove the protection cover. Using a coin, unlock the cover by turning it as shown in the figure.
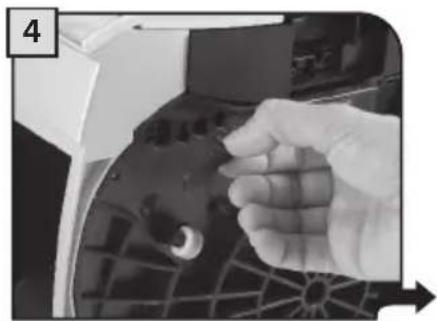
Remove the cover and keep it in a safe place.
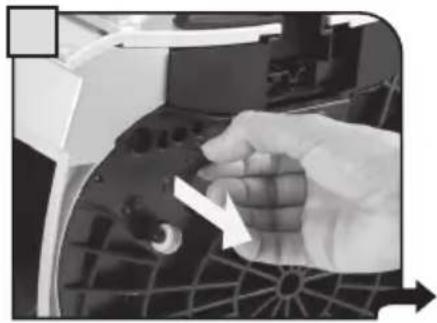
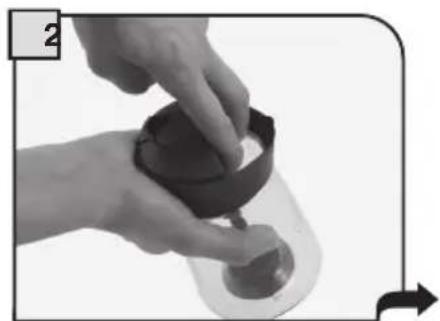
Push the release button in the direction indicated.
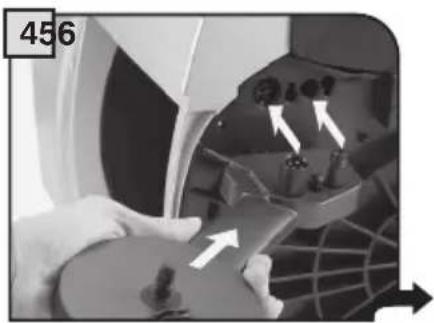
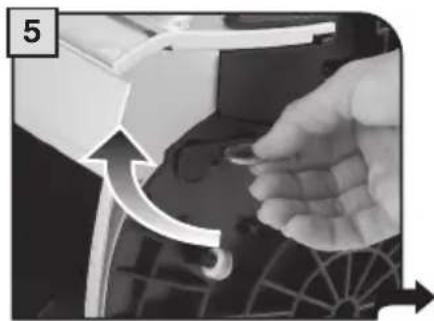
Hold the release button and connect the Milk Island to the coffee machine by inserting both connectors into the base of the coffee machine.
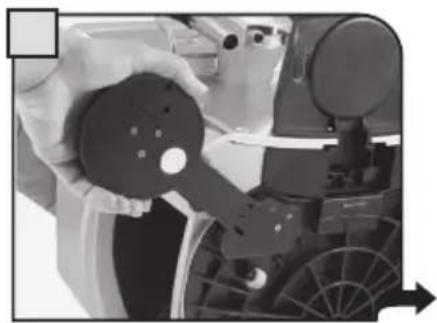
Release the button when the base has been completely inserted.
Ensure that the base is firmly connected to the machine.
Once the support base has been inserted properly, re-position the coffee machine to it's correct position and replace all of the removed containers/machine pieces.
Position the jug onto the base by slightly rotating. Check the LED on the base, if the light is green the Milk Island is operating correctly.
OPERATING THE MILK ISLAND
Warning: Before using the Milk Island, clean the milk jug and all components. Ensure that all the components have been installed properly. The glass of the milk jug can reach very high temperatures: danger of scalding! Only use the Milk Island with milk or water. DO NOT USE any other liquid (other than milk or water) or chemical compound in the Milk Island.
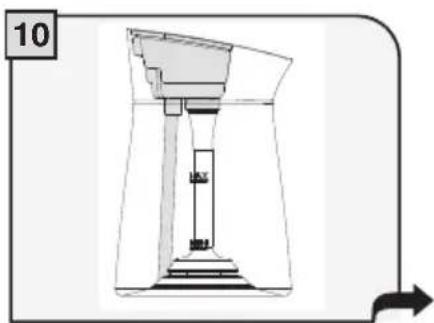
i Important note: The milk in the jug should never be below the "MIN" minimum level nor exceed the "MAX" maximum level. After using the Milk Island thoroughly clean all the components.
To guarantee better results when preparing cappuccino, we recommend using cold (0-8°C / 32-46°F), partially skimmed milk.
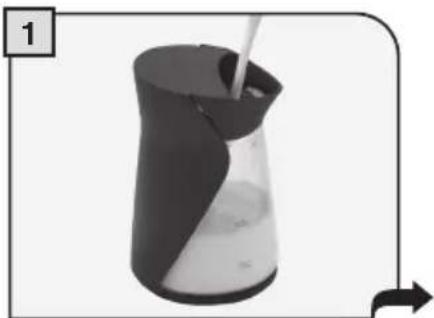
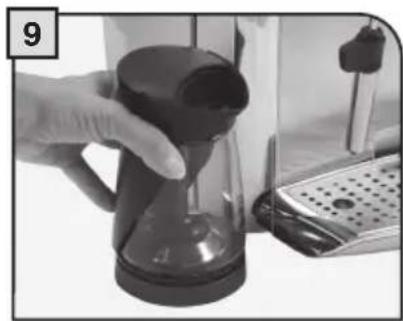
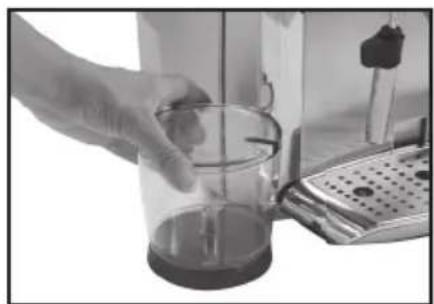
Fill the milk jug with the quantity of milk desired (between the min and max level).
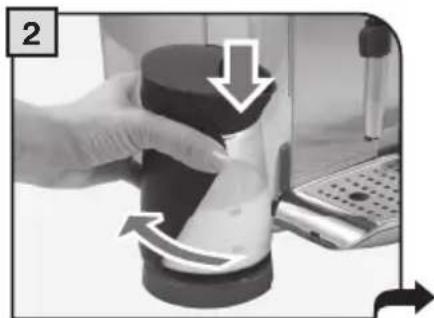
Press and turn so as to position the milk jug onto the base of the Milk Island. Check that the light on the base is green.

Turn the knob until it is in the position.

Wait for the milk to be frothed and the desired density is reached.

Turn the knob until it is in the rest position (4).
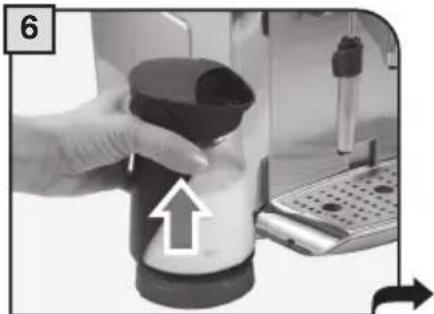
Once the milk is done frothing remove milk jug using the handle. Be sure to grip the plastic handle as the milk jug will be hot.
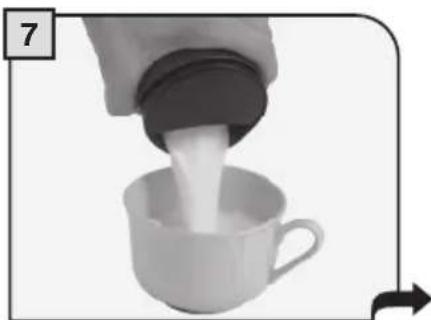
After having made slight circular movements of the jug, pour the milk into the cup.
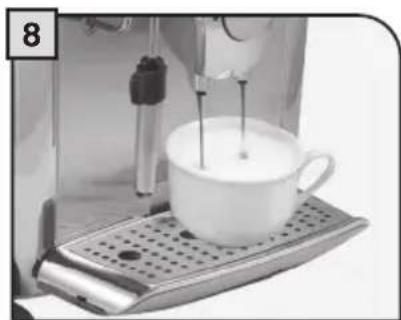
Position the cup with the frothed milk under the dispensing head. Then brew coffee into the cup. (see coffee machine operating instructions).
Note: when the milk jug is not being used, place the sugar container on the base.
CLEANING THE MILK ISLAND
Warning: Do not immerse the Milk Island base in any liquid. Maintenance and cleaning operations of the base can only be carried out when the machine is cold and disconnected from the power supply. All components described in this section may be washed in a dishwasher for home use.
Do not use sharp objects or harsh chemical products (solvents) for cleaning. Use a soft dry cloth to wipe the base. Do not dry the machine and/or its components using a microwave and/or conventional oven.
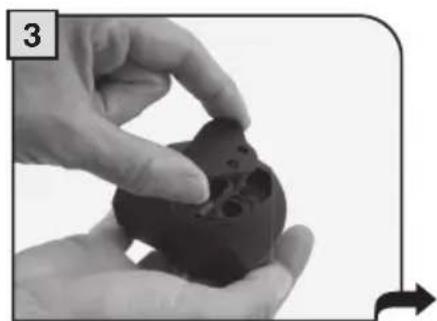
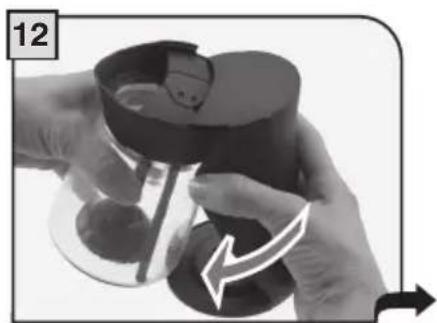
Remove the jug from the base. Remove the handle holding the milk jug by the spout.
Remove the emulsifying group from the jug.
Remove the valve from the emulsifying group.
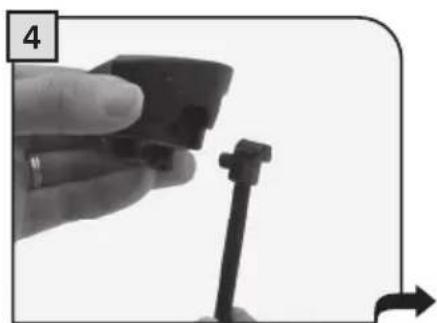
Remove the suction tube from the emulsifying group.
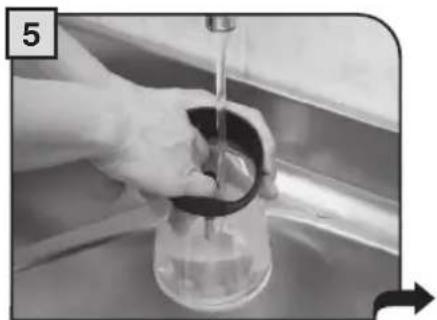
Wash the jug with hot water and mild dish soap.
Wash the emulsifying group with hot water and mild dish soap.
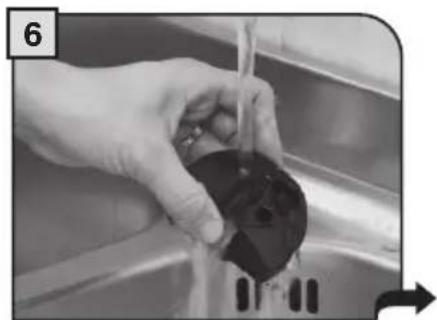
Carefully clean the valve with water.

Check if the valve is correctly cleaned by slightly squeezing it on the sides. It is advisable to use a clean and properly dry valve.
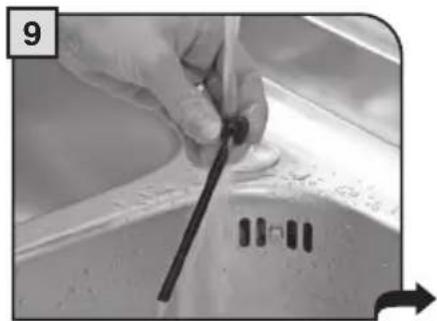
Wash the tube with hot water.
Re-assemble all the covered components. Replace the emulsifying group onto the jug. Warning: make sure that the cover is correctly inserted in the tube located inside the jug.
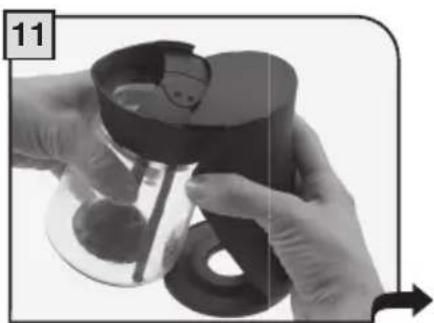
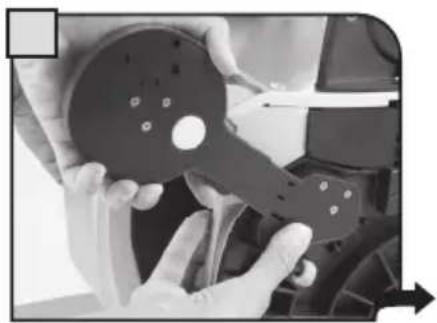
Assemble the handle. Place the upper part as shown in the figure.
Keep the upper part in contact and insert the lower part of the handle.
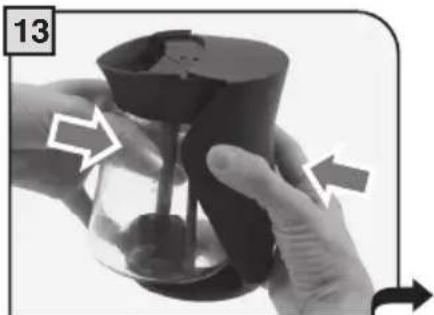
At this point, firmly press so as to join both parts.
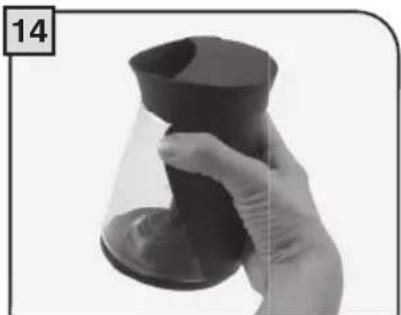
The milk jug is now assembled and ready for use.
Warning: only use the milk jug if intact and if all components are correctly installed.
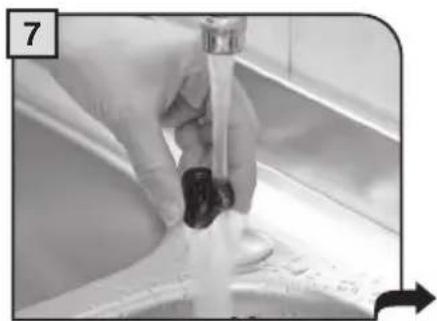
Clean the connector with a damp cloth. For thorough cleaning, fill the clean jug with water and dispense steam (follow the instructions from point 2 to point 6 at page 15). The jug and the emulsifying group's components may be washed in a dish-washer for home use.
REMOVING THE MILK ISLAND
Warning: Before removing the Milk Island remove the water tank, drip tray and dregs drawer and empty the coffee bean hopper. Turn the coffee machine off and unplug machine. To disconnect the Milk Island, gently position the coffee machine onto its right side, so the left side is up.
Turn the coffee machine off and unplug the power cord from the socket.

Remove the milk jug from the base.
After having emptied the containers, delicately turn the machine onto one side.
Keeping the button pushed, remove the base from the coffee machine.
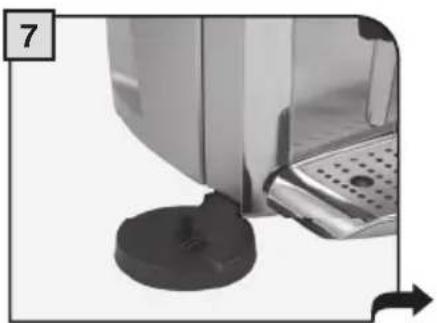
Insert the protection cover into its place.
Using a coin, lock the cover by turning it as shown in the figure.
7 Turn the coffee machine on and follow the start-up procedure as described in the machine's operating instructions.
Once removed from the coffee machine, wash the Milk Island components and place them in a safe place for future use. If possible we recommend using the original packaging for storage.
Problems Causes Solutions
| The machine does not froth milk. The valve located in the cover is dirty. Wash the valve. | |
| The LED in the base of Milk Island is red. Firmly push down on the milk jug. | |
| Cover components not installed correctly. Check cover assembly. | |
| The coffee machine is not ready to dispense steam. | Check machine operation. |
Please contact Gaggia customer service for problems not covered in the above trouble shooting section or when a problem cannot be resolved.
SAFETY RULES
Never place live parts in contact with water: danger of short circuit! Steam and hot water can cause scalding!
INTENDED USE
The Milk Island is exclusively intended for domestic use.
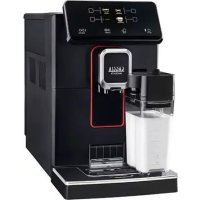
The Milk Island cannot be used alone but must be connected to a preset coffee machine.
Do not make any technical changes or use the machine for unlawful purposes since this would create serious hazards!
The Milk Island and the coffee machine must only be operated by adults.
POWER SUPPLY
The Milk Island is powered by low voltage from the coffee machine to which it is connected by a special electrohydraulic connector.
POWER CONNECTOR (ELECTRO-HYDRAULIC)
Never use the Milk Island if the electro-hydraulic power connector is faulty.
If damaged, the electro-hydraulic connector must be replaced by the manufacturer or its customer service department.
The connector must not come into contact with liquids, wet parts or other substances that could alter the effectiveness of the electrical contacts or cause a short circuit.
PROTECTING OTHERS
Be sure that no children operate the Milk Island.
Children are not aware of the risks linked with electrical appliances.
Do not leave the Milk Island packaging within the reach of children.
DANGER OF BURNING
Never direct the jet of hot steam and/or hot water towards yourself or others.
Always use the appropriate handgrip on the jug.
LOCATION
Place the Milk Island and the coffee machine in a safe place, where it cannot overturned or cause injury.
Hot water or steam may spill out: danger of scalding!
Do not use the Milk Island and the coffee machine outdoors.
Do not keep the machine at a temperature below 0^ (32^) ; freezing may damage the machine.
Do not place the machine or the Milk Island on hot surfaces or close to open flames to prevent the housing from melting or being damaged.
CLEANING
Never immerse the Milk Island base in water!
It is strictly forbidden to tamper inside the inside of the base of the Milk Island.
After having used the Milk Island, thoroughly clean the milk jug and the emulsifying group with hot water or in the dishwasher.
SPACE FOR USE AND MAINTENANCE
To ensure that the Milk Island and the coffee machine work properly and efficiently, we recommend the following:
Choose a level surface;
Select a location that is suffi cientsly well-lit, clean and near an easily reachable socket;
Allow for a minimum distance from the sides of the machine, as shown in the appropriate booklet.
STORING THE MACHINE
When the Milk Island remains inactive for a long period of time, disconnect it from the machine. Store it in a dry place out of the reach of children. Keep it protected from dust and dirt. After a long period of inactivation, wash the Milk Island before using it.
SERVICING / MAINTENANCE
In case of failure, faults or a suspected fault after a fall, immediately unplug the Milk Island from the machine (see removing the Milk Island). Never operate a faulty Milk Island. Repairs must only be carried out by an Authorized Service Centre. All liability for damages caused by works not carried out in a professional manner, is declined.
FIRE SAFETY
In the event of fire, use carbon dioxide extinguishers (CO_2) . Do not use water or dry-powder extinguishers.
DISPOSAL
This product complies with EU Directive 2002/96/EC.

The symbol on the product or on its packaging indicates that this product may not be treated as household waste. Instead it shall be handed over to the applicable collection point for the recycling of electrical and electronic equipment.
By ensuring this product is disposed of correctly, you will help prevent potential negative consequences for the environment and human health, which could otherwise be caused by inappropriate waste handling of this product. For more detailed information about recycling of this product, please contact your local city office, your household waste disposal service or the retailer where you purchased the product.
Das Milk Island would be the best way to get a feeling of the water. The water would be a good source for the children, and it would also be a good source for the children's food.

SCHUTZ ANDERER PERSONEN
ESPAÇO PARA O USO E A MANUTENÇAO
BESCHERMING VAN ANDERE PERSONEN
The manufacturer reserves the right to change the features of the product without prior notice.