CDB 3000 - Aspirateur NILFISK - Free user manual and instructions
Find the device manual for free CDB 3000 NILFISK in PDF.
Download the instructions for your Aspirateur in PDF format for free! Find your manual CDB 3000 - NILFISK and take your electronic device back in hand. On this page are published all the documents necessary for the use of your device. CDB 3000 by NILFISK.
USER MANUAL CDB 3000 NILFISK
WEEE (Waste of Electric and Electronic Equipment)
WEEE (Waste of Electric and Electronic Equipment)
The symbol on the product or on its packing indicates that this
product may not be treated as household waste. Instead it shall be han-
ded over to the applicable collection point for the recycling of electri-
cal and electronic equipment. By ensuring this product is disposed of
correctly, you will help prevent potential negative consequences for the
environment and human health, which could otherwise be caused by
inappropriate waste handling of this product.
For more detailed information about recycling of this product, please
contact your local city offi ce, your household waste disposal service or
the shop where you purchased the product.
Das Symbol auf dem Produkt bzw. auf der Produktverpackung
89/336/EØF, 73/23/EØF, 93/68/EØF.13
Udskiftning af udblæsningsfilter
(model CDF 2000, CDF 2010)
Bytte støvfilter (model CDF 2000, CDF 2010)
Kaikki oikeudet muutoksiin pidätetään.24
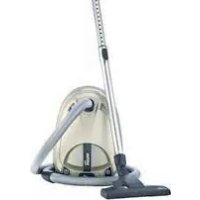
Instructions for use
Before using the vacuum cleaner make sure that the voltage shown
on the rating plate at the backside of the motor top of the vacuum
cleaner, corresponds with the mains voltage.
The vacuum cleaner is supplied with a paper dust bag already in
place. Never use the vacuum cleaner without a properly fitted dust
bag and main filter. The procedure for replacing the dust bag is
described under point 7.
1. This machine is not suitable for picking up health endangering
2. This machine is for dry use only and shall not be used or
stored outdoors in wet conditions. Store indoors between max.
40°C (degrees centigrade) and min. 0°C (degrees centigrade).
3. The machine for vacuum dry dust must not be used for the
suction of water or other liquids.
4. The machine must not be used for picking up combustible
or explosive materials, nor should it be used in an explo sive
5. Under no circumstances should the machine be used for picking
up hot material. In particular the machine must not be used for
cleaning open and closed fireplaces, ovens or similar that
contain warm or glowing ashes.
6. The machine must not be used if the electrical cord
shows any sign of damage. Regularly inspect the cord for
damage, in particular if it has been crushed, shut in a door or
7. The machine must not be used if it is faulty.
8. Do not unplug by pulling on cord. To unplug, grasp the plug,
9. When repairing or replacing the cord, the same type of cord as
originally supplied with the machine must be used. This cord
can be supplied by NILFISK.
10. The plug must always be removed from the socket outlet before
starting any service work of the machine or the cord.
11. Repair of the electrical unit with motor or the cord must
only be carried out by a skilled or instructed person after having
disconnected the main switch installed prior to the machine or
after having removed the plug from the current socket.
12. No changes or modifications to the mechanical or elec trical
safety devices should be made.
13. The maximum airborne noise (sound pressure level) is below 7
14. The appliance is not intended for use by young children
or infirm persons without supervision. Young children
should be supervised to ensure that they do not play with
This appliance conforms with EC Directive 89/336/EEC,
EEC, 73/23/EEC, 93/68/EEC.
1. Starting/stopping
Unwind all the cord and place the appliance plug into the wall
-On: Press button 1 to start the vacuum cleaner.
-Off: Press button 1 once more to stop the vacuum cleaner.
After cleaning grasp the plug and unplug the cord from the wall
socket. Roll up the cord loosely around the handle and park or store
Do not roll the cord tightly around the handle as this will place a
strain on the cord and considerably shorten its life.
Models with two speed regulation
The motor has two power settings - high power and low power.
The motor will start under whatever power setting was in effect the
last time the vacuum cleaner was in use.
You can cycle between high power and low power by repeatedly
2. Hose and tube connection
Insert the hose connection into the suction inlet and turn it clockwise
to lock it. Reverse this procedure to disconnect the hose.
Assemble the hose with the tube and nozzle by pressing the parts
Models with telescopic tube
The telescopic tube can be adjusted to suit your height. Hold with
one hand on the larger tube and push the button on it and with the
other hand pull or push the smaller tube to the wanted length.
3. Changing the dust bag /
The dust bag must be changed when the suction efficiency is falling.
1. Open the container by pushing the knob on the lock.
2. Remove the upper housing.
3. Release the hose connection from the suction inlet by twisting
it counter-clockwise and remove it. Remove the used dust bag
by pulling in the card board flap and seal it. Dispose it in a
4. Insert the new dust bag by guiding the cardboard into the hooks
inside the dust bag housing and push it down. Unfold the new
dust bag carefully. Insert the hose connection into the dust bag
housing and twist it counter-clockwise to lock it.
5. Replace the guide pin of the upper housing into the guide hole
of the dust bag housing and close the container parts.
The suction efficiency of the vacuum cleaner depends on the size
and quality of the dust bag. Use original Nilfisk bags only.
If any bags, other than original Nilfisk bags are used, the airflow
may be restricted, resulting in the motor overheating and subsequent
Damage resulting from use of the vacuum cleaner without or with
other than the original Nilfisk bags, is not covered by the guarantee.
Replacing the exhaust filter (model CDF 2000,
The exhaust filter placed under the handle cover attracts and retains
micro-particles efficiently. This filter should be replaced every time
you open a new box with five dust bags.
1. Push the button inside the handle upwards and twist the handle
counter-clockwise and remove it.
2. Remove the sound suppressor material with the exhaust filter
3. Replace with the new exhaust filter material and position the
sound suppressor material over it as shown.
(It must not crumple up)
4. Locate the handle into position and lock it by turning it
clockwise until it snaps.
• the motor will not start
– a fuse may have blown and needs replacing.
– the cable may be defective and needs checking.
• the suction power is reduced
– the dust bag may be full and needs replacing.
– the dust filters may be clogged and need replacing.
– the hose, tube or nozzle may be blocked and needs to be
• the vacuum cleaner stops
– the thermal cut-out has switched off the motor as a result of an
obstruction of the hose, tube or nozzle.
Remove the cause of the obstruction.
Always keep the cleaner in a dry place. The cleaner is designed for
continuous heavy work. Depending on the number of running hours
- the dust filters should be renewed.
Keep the container clean with a dry cloth, and a small amount of
For details of after sales service contact Nilfisk-Advance directly.
4. Changing the HEPA filter
Replacing the HEPA exhaust filter. In models with HEPA filter
placed under the handle cover:
1. Push the button inside the handle upwards and twist the handle
counter-clockwise and remove it.
2. Remove the HEPA filter.
3. Replace with the new HEPA filter and position it as shown.
4. Locate the handle into position and lock it by turning it
clockwise until it snaps.
Damage resulting from the use of filters other than original Nilfisk
filters is not covered by the guarantee.
5. Suction power regulation
1. The suction power of the nozzle can be regulated by the slide
valve on the curved tube.
Suction is most powerful when the valve is pushed forward to
2. For cleaning of e.g. Ioose covers and curtains, the suction power
can be reduced by sliding the valve backwards.
Models with two speed regulation
Suction is variable by changing the speed. See point 1.
6. Parking of the tube with nozzle
During and after cleaning you can park the hose with tube and
1. Press the parking clip on the nozzle inside the groove on the
back-side of the container
7. Main filter cleaning
The main filter can be cleaned with a dust bag in place, when the
suction efficiency is falling.
1. Open the container by pushing the knob on the lock.
2. Press the plastic flap inside the groove for the lock to release the
upper container from the main filter and remove the upper
3. Remove the main filter from the bottom housing.
4. Replace the upper housing on the bottom housing with a dust
5. Start the vacuum cleaner.
6. Clean the filter material with the vacuum cleaner
7. Replace the cleaned main filter
8. Replace the upper container on top of the main filter
9. Lock the plastic flap on the upper container on the main filter
Thermal cut-out protection
The vacuum cleaner is equipped with a thermal cut-out to protect
the motor and other vital machine parts from overheating. Should
the machine cut out, you will have to wait at least 5-10 minutes for
it to automatically reset. While you are waiting, switch the machine
off and unplug it, then check the hose, dust bag and filters to be sure
that nothing is blocking the flow of air through the machine.26
Important warnings (Electro Nozzle 2832)
Before using the appliance make sure that the voltage shown on the
rating plate corresponds with the mains voltage.
The appliance must not be used for picking up hazardous material
- i.e. toxic dust, combustible or explosive material, nor should it be
used in a explosive atmosphere.
Under no circumstances should the appliance be used for picking
up hot material. In particular the appliance must not be used for
cleaning open and closed fireplaces, ovens or similar that contains
warm or glowing ashes.
Avoid vacuuming hard, pointed objects, since they may damage
The appliance must not be used for the suction of water, liquids or
Carpets that have been shampooed should only be vacuumed when
they have completely dried out, since your appliance may otherwise
The appliance must not be used if the electrical cable or plug show
any sign of damage. Regularly inspect the cable and the plug for
damage. If it becomes damaged, it should be repaired only by
Nilfisk-Advance or an Authorised Nilfisk Service Dealer. Do not
handle the electrical cable or plug with wet hands. Do not unplug by
pulling on cable. To unplug, grasp the plug, not the cable.
The plug must always be removed from the socket outlet before
starting any service or repair work of the machine or the cable.
Avoid running over the flex with the appliance. Never touch
the brush with your fingers while it is running. No changes or
modifications to the mechanical, electrical or thermal safety devices
The maximum airborne noise (sound pressure level) is below 70
This appliance complies with the following EC Directives: 73/23/
EEC (including Amendment 93/68/EEC),
Low-Voltage Directive - 89/336/EEC (including Amendment 92/31/
EEC and 93/68/EEC), EMC Directive.
Instructions for use
Press the cable into the clamps and clip on to the suction head and
tube, running the flex under the handle.
Plug the appliance into the plug socked.
The cleaning head automatically swithces on when the vacuum
Remove larger debris, such as scraps of fabric, paper, etc. from the
floor to avoid the roller being clogged. The appliance is suitable for
carpets and hard floors.
Do not use this appliance on carpets with very long fringes or piles
deeper than 15 mm. The pivoted joint of the nozzle enables the
nozzle to be easily steered in every direction.
If the appliance stops:
If the motor of the appliance is overloaded, e.g. because the brush
roller is jammed by the intake of bulky foreign bodies or carpet
threads, the overheating trip will switch off the motor.
Switch off the vacuum cleaner, unplug it, allow the motor of the
appliance to cool down and clean the brush roller as described under
“Cleaning and care”, if necessary. The appliance can be switched on
again after about 2 minutes.
Switch off and unplug the appliance
Never immerse the appliance in water or other liquids while
Cleaning the roller:
Remove any hairs and threads that have accumulated around the
rollers simply by cutting them with scissors and pulling off (fig. 2).
Dismantling the cleaning roller:
Loosen the engagement hooks with a screwdriver (fig. 3). Lift the
Turn over the electric cleaning head and detach the housing cover
(fig. 5). Dismantle the cleaning head roller. Pull off and clean the
roller bearings. When assembling the cleaning head roller, make sure
that the tooth system of the toothed belt coincides with the pinions.
Fit the cover on the appliance and engage by uniform pressing from
Cleaning the rollers:
If the rollers start to seize up : Remove any hairs and threads that
have accumulated around the roller axles. The roller can be removed
for cleaning. The roller can be simply levered out of their location
using a firm object (e.g. a screwdriver) (please observe the arrow
Insert the screwdriver as illustrated (fig. 4) in the oblique location
and lever out the roller. Remove hairs and threads. Refit the roller,
making sure that the axles are engaged on both sides!
Place the flat of the hand over the roller when levering out. This
avoids the roller springing out.
If the nozzle is hard to slide:
Reduce the power of the appliance. The cleaning action is then not
electric cleaning head by pulling and twisting.
Specifications and details are subject to change without prior notice27
(model CDF 2000, CDF 2010)
(model CDF 2000, CDF 2010)
(modello CDF 2000, CDF 2010)
Doornveld/Sphere Business Park
31-39 Wo Tong Tsui Street
22, Woodlands Industrial Park E1
Nilfisk-Advance Ltd.
Taiwan Branch (H.K.)
1 F, No. 23, Lane 132, Sec. 2
700 22 68 - Fax 784 08 42
United Kingdom/Ireland
DATA Family “basic” Family “de luxe” Business “standard” Business “de luxe”
DATA Family “basic” Family “de luxe” Business “standard” Business “de luxe”
Rated power W Rated power with electric outlet W Max. power W Max. power with electric outlet W Protection grade (moist., dust) –
Protection class (electrical) –
Airflow with hose and tube l/sec
Suction power with hose and tube W Sound pressure level at 1.5 m (ISO 11203)
Exhaust filter, HEPA, surface area cm
Exhaust filter: diffusion
Dust bag capacity (new standard) l
Dust bag capacity (old standard) l
Weight, cleaner only kg
Family “basic” Family “de luxe” Business “standard” Business “de luxe”
CDF 2000, 2010 CDF 2040 CDB 3000, 3020 CDB 3050
Abluftfilter, HEPA, Fläche cm
Family “basic” Family “de luxe” Business “standard” Business “de luxe”
Family “basic” Family “de luxe” Business “standard” Business “de luxe”
DATA Family “basic” Family “de luxe” Business “standard” Business “de luxe”
Family “basic” Family “de luxe” Business “standard” Business “de luxe”
Family “basic” Family “de luxe” Business “standard” Business “de luxe”
Family “basic” Family “de luxe” Business “standard” Business “de luxe”