
SILVERTON OPTIMYST - SVT20 - Decorative fireplace DIMPLEX - Free user manual and instructions
Find the device manual for free SILVERTON OPTIMYST - SVT20 DIMPLEX in PDF.
| Product Type | Decorative Fireplace |
| Brand | Dimplex |
| Model | SILVERTON OPTIMYST - SVT20 |
| Power Supply | Provided power adapter; extra-low voltage conforming to markings |
| Flame Effect | Resin logs with LEDs + ultrasonic atomizer for realistic flame effect |
| Lighting Levels | 2 levels: logs only / logs + flame |
| Remote Control | Radio frequency, range 15 meters, 243 independent frequencies |
| Manual Controls | On/off switch and mode change button on the right side |
| Water Tank | Main tank + filling tank; filtered water mandatory |
| Routine Maintenance | Clean surfaces with a damp cloth; clean water components every two weeks |
| Safety Precautions | Do not block vents; keep 1 m from combustible materials; do not burn wood |
| Child Safety | Can be used by children 8+ under supervision; children aged 3-8 may only turn on/off |
| Warranty | 2 years from date of purchase |
| Repairability | Repair exclusively by a qualified technician |
| Available Spare Parts | Logs, transducer, remote control, tank, adapter |
| Patents | Protected by multiple patents (GB, US, EP, CN, etc.) |
Frequently Asked Questions - SILVERTON OPTIMYST - SVT20 DIMPLEX
User questions about SILVERTON OPTIMYST - SVT20 DIMPLEX
0 question about this device. Answer the ones you know or ask your own.
Ask a new question about this device
Download the instructions for your Decorative fireplace in PDF format for free! Find your manual SILVERTON OPTIMYST - SVT20 - DIMPLEX and take your electronic device back in hand. On this page are published all the documents necessary for the use of your device. SILVERTON OPTIMYST - SVT20 by DIMPLEX.
USER MANUAL SILVERTON OPTIMYST - SVT20 DIMPLEX
Welcome and Congratulations
Thank you and congratulations for choosing to purchase a Silverton from Dimplex.
Please carefully read and save these instructions.
Caution: Read all instructions and warnings carefully before starting installation. Failure to follow these instructions may result in a possible electric shock, fire hazard and will void the warranty
Please record your model and serial number below for future reference: model and serial number can be found on the Model and Serial Number Label located on the side of the Silverton
Model Number:
Serial Number:
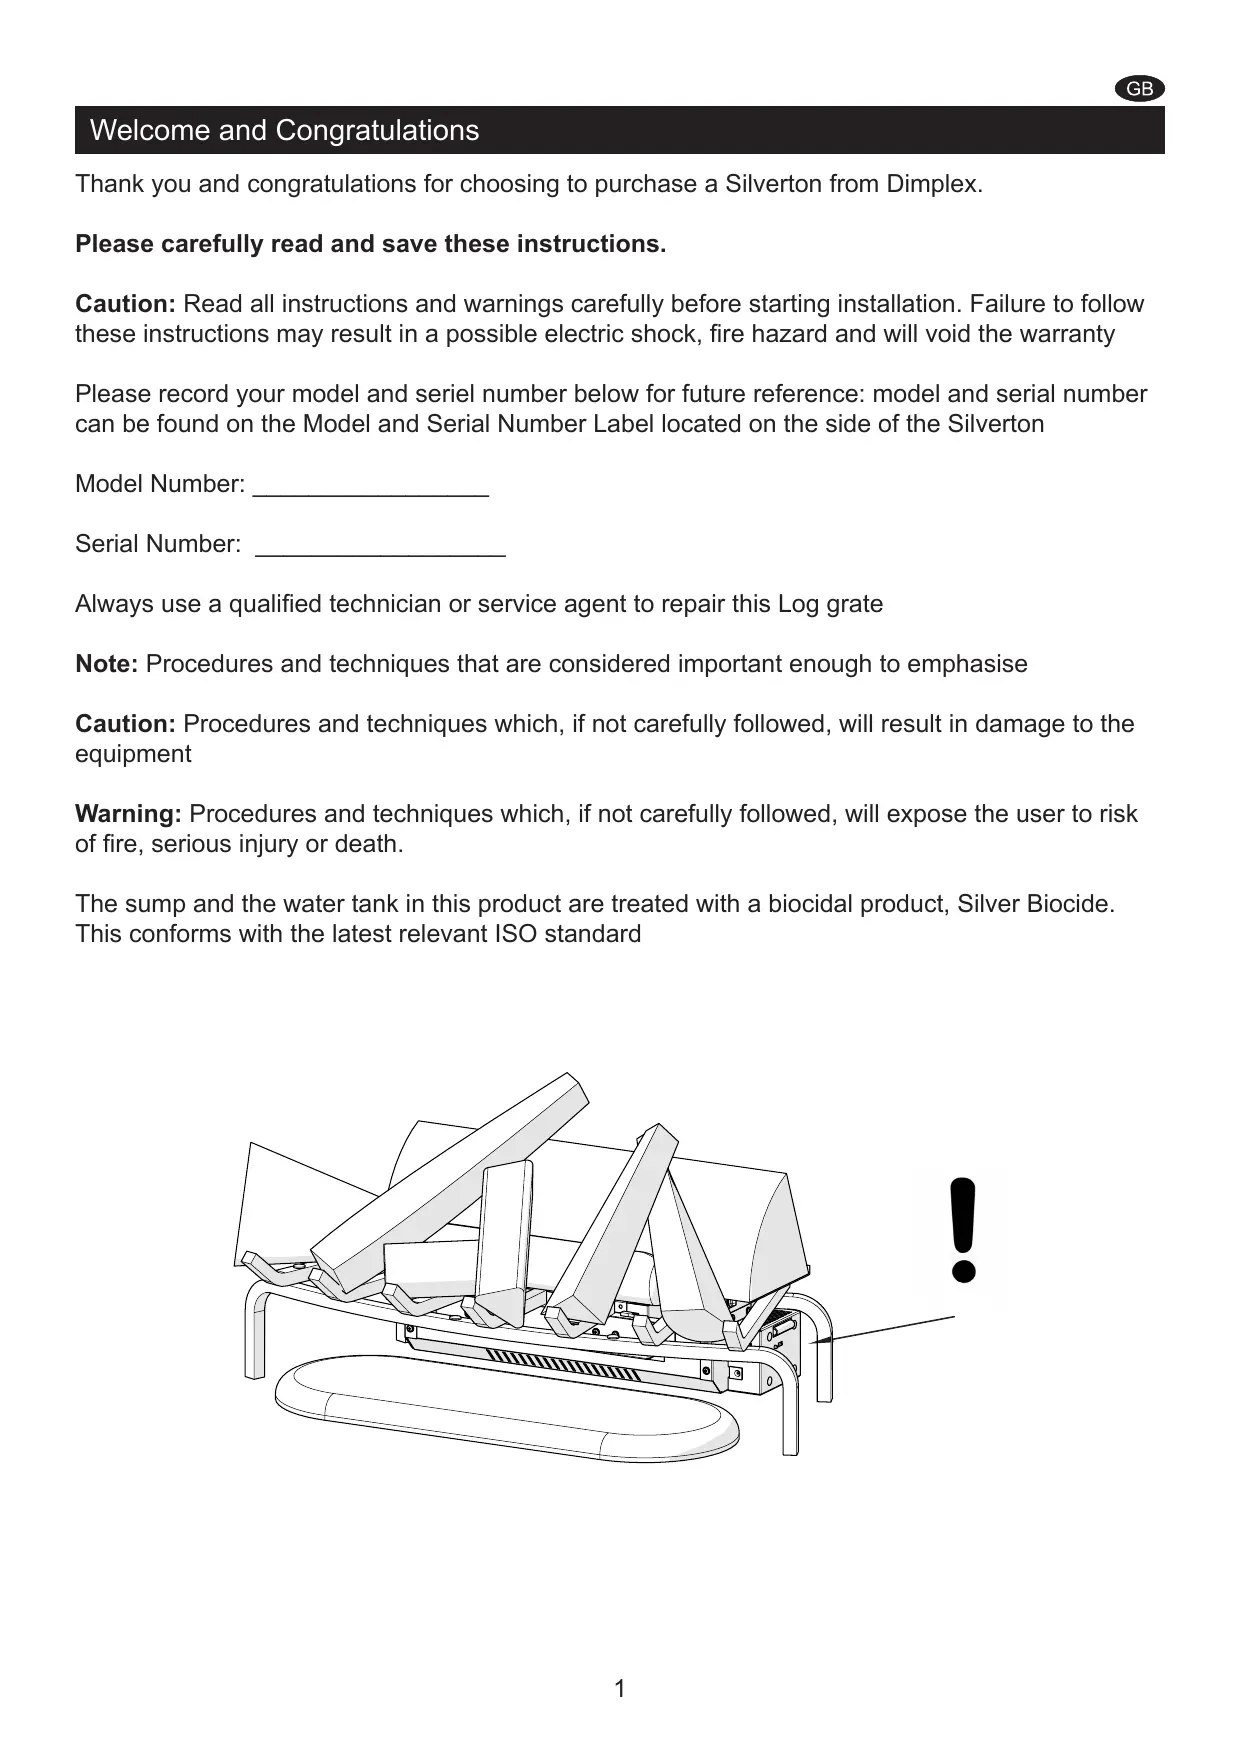
Always use a qualified technician or service agent to repair this Log grate
Note: Procedures and techniques that are considered important enough to emphasise
Caution: Procedures and techniques which, if not carefully followed, will result in damage to the equipment
Warning: Procedures and techniques which, if not carefully followed, will expose the user to risk of fire, serious injury or death.
The sump and the water tank in this product are treated with a biocidal product, Silver Biocide. This conforms with the latest relevant ISO standard

Important Instructions
Please read this information guide carefully to be able to safely install, use and maintain your product
When using electrical appliances, basic precautions should always be followed to reduce the risk of fire, electrical shock and injury to persons, including the following:
1. WARNING
Do not place material or garments on, or obstruct the air circulation around the appliance.
2. DAMAGE
If the appliance is damaged, check with the supplier before installation and operation.
If the supply cord is damaged it must be replaced by the manufacturer or service agent or a similarly qualified person in order to avoid a hazard.
3. LOCATION
Do not use outdoors.
Do not use in the immediate surroundings of a bath, shower or swimming pool.
Do not locate the fire immediately below a fixed socket outlet or connection box.
Ensure that furniture, curtains or other combustible material are positioned no closer than 1 metre from the appliance.
4. PLUG POSITIONING
The appliance must be positioned so that the plug is accessible.
Keep the supply cord away from the front of the appliance.
5. UNPLUGGING
In the event of a fault unplug the device.
Unplug the device when not required for long periods.
6. OWNER/USER
This appliance can be used by children aged form 8 years and above and persons with reduced physical, sensory or mental capabilities or lack of experience and knowledge if they have been given supervision or instruction concerning use of the appliance in a safe way and understand the hazards involved. Children shall not play with the appliance. Cleaning and user maintenance shall not be made by Children without supervision.
Children of less than 3 years should be kept away unless continuously supervised. Children aged from 3 years and less than 8 years shall only switch on/off the appliance provided that it has been placed or installed in its intended normal operating position and they have been given supervision or instruction concerning use of the appliance in a safe way and understanding the hazards involved. Children aged from 3 years and less than 8 years shall not plug in, regulate and clean the appliance or perform user maintenance.
7. ELECTRCITY
Before switching on, please read the safety advice and operating instructions.
Note: This appliance is only to be used with the power supply unit provided.
Only plug this appliance into a supply that corresponds to that displayed on the power supply unit. The appliance must only be supplied at extra low voltage corresponding to the markings on the appliance
CAUTION - Some parts of this product can become very hot and cause burns. Particular attention has to be given where children and vulnerable people are present.
8. USAGE
Do not burn wood or other materials in the log grate
Site Selections and Preparation
This section provides instructions for selecting a location and preparing the site to install the Log Grade
- Select a suitable location that ensures the Log Grate is sitting on a hard level surface for optimum flame effect
- Allow for approximately 5cm of clearance behind the unit ( from the frame to the back of the mantle) and 20cm directly above the back log to allow for removal of the Refill Container.
- Carefully unpack all of the components from the box.
Caution: Handle the logs carefully, that are fragile and can easily crack or break if dropped.
- Unpack the transducer (contained within the water reservoir) which has been wrapped to protect it during shipping. See Fig. 1.
To access the transducer;
- Remove the top cover by turning the retaining tabs on both ends of the water reservoir.
- Remove any packaging material.
- Install the transducer so that it is sitting level in the circular holding area in the reservoir.
- Orientate the transducer wire so that it does not sit directly above the Emitter and the wire passes through the slit in the side of the tank.
- Reinstall the top cover and ensure both retaining tabs have been turned so that they are pointing inwards.
Note: Completely assemble the unit before filling the water
Log Grate Assembly
Each log is a separate component that needs to be placed on the grate. Position each log so that the hook and loop pad on the backside of the log lines up with the corresponding hook and loop pad on the log grate. These pads assist with securing the logs to the grate. See Fig.A - Fig.J
Note: Each of these logs are hand made, and as such, the hook and loop pads on the logs and grate may not align perfectly, therefore, we have included additional pads should you need to reposition them.
Each of the logs contain LED lights to create a flickering effect. During the assembly, each log requires the electrical connectors on the log and grate to be connected as they are being placed. In some cases, these wires can have tie wraps added to prevent the wires from being seen after final assembly. (not included)
Caution: Handle logs carefully, they are fragile and can easily crack or break, if dropped.
Log Grate Installation
Only use filtered tap water in this appliance.
Once installed, never move this appliance or lay it on its back, without draining the water from the sump and water tank.
If you intend not using the appliance for longer that 2 weeks, drain the water from the reservoir and refill container.
The refill container, reservoir, cover and container cap must be cleaned once every two weeks, particularly in hard water areas.
1) Fill and install the Refill Container.
Note: During initial installation, the Refill Container should be refilled after the Reservoir has filled to ensure maximum operation time.
2) Make sure sure the On/Off switch is switched to Off (refer to Operating Instruction section)
3) Assemble power adapter (Fig. 2). Plug the power adaptor into the front of the unit, then plug the unit into a power socket
Operation
The manual controls for the Log Grade are located on the right side (Fig. 3).
A. On/Off Switch.
Supplies power to the Log Grade
B. Momentary Button
Pressing this button toggles between Logs, Logs and flame effect, and Off.
Remote Control
The unit is supplied with a radio frequency remote control. This remote control has a range of approximately 15m. It does not have to be pointed at the fireplace and can pass through most obstacles (including walls). It is supplied with one of 243 independent frequencies to prevent interference with other units. The frequency designation is indicated on the back of the remote control.
Note: Before attempting any operation with the remote control, pull the plastic insulator strip out from between the remote casing and the battery cover (Fig. 4).
Remote Control Initialisation/Reprogramming
Follow these steps for remote control initialisation and if required, re-initialisation;
- Unplug the power adaptor from the unit.
- Wait a minimum of five seconds and then plug the power adapter back into the unit
- Within ten seconds of re-acquiring power, press the ON button located on the remote control (Fig. 4)
This will synchronize the remote control and the receiver
Remote Control Usage
Pressing the On button, on the remote control, switches between the two levels:
Level 1: The Logs and lights are turned on.
Level 2: The logs and lights remain on and the flame effect is activated.
The fireplace can be turned off at any point by pressing the OFF button on the remote control.
Note: Once the mist has been activated, the unit will have to be turned Off, using either the momentary button, on the unit, on the Off button or the remote control, then back on to return to Level 1 - Logs and Lights only in operation.
Battery Replacement
To replace the battery,
- Slide the battery cover open on the remote control (Fig. 4)
- Install one 12v (A23) battery in the battery holder
- Close the battery cover
Maintenance
Warning: Disconnect the power before attempting any maintenance or cleaning to reduce the risk of fire, electric shock or damage to persons.
Log Grate Surface Cleaning
Use a warm damp cloth only to clean surfaces of the Log Grate. Do not use abrasive cleaners.
Water Reservoir
Note: There is no need to remove any of the logs or move the unit to access the water storage system. However if you decide to move the unit to perform any cleaning, ensure that the logs are stable before cleaning.
The water storage system is located behind the back log. It can easily be removed by lifting each of the components directly up. (Fig. 5).
Note: There are tabs, on each end, that need to be turned to release the component
Caution: Only filtered tap water should be used in the unit to prevent scaling of the components
If you do not intend on using the unit for longer than two weeks, empty and drain the unit of water, and dry all of the water containing components.
It is recommended that all of the water containing components are cleaned with soap and water on a biweekly basis. A small brush has been included to assist in cleaning difficult items/areas i.e. the transducer
Caution: Do not put plastic components into the dishwasher.
Note: If you need to move the unit ensure that all of the components that contain water have been emptied before relocating.
Additional Information
AFTER SALES SERVICE
Your product is guaranteed for two years from the date of purchase. Within this period, we undertake to repair or exchange this product free of charge (excluding lamps & subject to availability) provided it has been installed and operated in accordance with these instructions. Your rights under this guarantee are additional to your statutory rights, which in turn are not affected by this guarantee.
Should you require after sales information or assistance with this product please contact your supplier. Please retain your receipt as proof of purchase.
RECYCLING

For electrical products sold within the European Community - At the end of the electrical products useful life it not be disposed of with household waste. Please recycle where facilities exist. Check with your Local Authority or retailer for recycling advice in your country.
PATENT / PATENT APPLICATION
Products within the Optimyst range are protected by one or more of the following patents and patent applications:
Great Britain GB 2402206, GB 2460259, GB 2460453, GB 2418014, GB 2465738, GB 2449925, GB 2465537, GB2455277, GB1020534.2, GB1020537.5, GB1110987.3
United States US 7967690, US 2010299980, US 2011062250, US 2008028648, US 13/167,042
Russia RU2008140317
European EP 2029941, EP 2201301, EP 2315976, EP 1787063, EP07723217.1, EP11170434.2, EP 11170435.9
China CN 101883953, CN 200980128666.2, CN 101057105, CN 101438104
Australia AU 2009248743, AU 2007224634
Canada CA 2725214, CA 2579444, CA 2645939
International Patent Application WO 2006027272
South Africa ZA 200808702
Mexico MX 2008011712
Korea KR 20080113235
Japan JP 2009529649
Brazil BR P10708894-9
India IN 4122/KOLNP/2008
New Zealand NZ 571900
Troubleshooting
| Symptom | Cause | Corrective Action |
| The flame effect will not start. | Mains plug is not plugged in. | Check plug is connected to wall socket correctly. |
| Low water level. | Check that the water tank is full and there is water in the sump. | |
| Low voltage connector not connected properly. (See Fig.5) | Check that the connector is inserted correctly. (See Fig.5) | |
| The Transducer Unit is not sitting correctly in the sump | Ensure the Transducer in sitting down into the moulded recess in the sump | |
| The flame effect is too low. | The Metal Disc in the transducer might be dirty. | Clean the Metal Disc with soft brush supplied. See ‘Maintenance.’ for a step by step procedure. |
| The wire from the Transducer Unit is sitting over the metal disc | Direct the wire to the back of the sump and make sure it sits into the side slot exiting the sump. | |
| Unpleasant smell when unit is used. | Dirty or stale water. | Clean the unit as described under maintenance. |
| Using unfiltered tap water. | Use only filtered tap water. | |
| Main lamps are not working and there are no flames or smoke. | There is no water in the water tank | Follow instructions under Maintenance, ‘Filling the water tank’. Check the plug is connected to the wall socket correctly and that Switch ‘A’ Fig. 3 is in the ‘ON’ (I) position. |
USA US 7967690, US 2010299980, US 2011062250, US 2008028648, US 13/167,042
Australia AU 2009248743, AU 2007224634
Canada CA 2725214, CA 2579444, CA 2645939
Mexico MX 2008011712
Korea KR 20080113235
Japan JP 2009529649
Brasil BR P10708894-9
India IN 4122/KOLNP/2008
New Zealand NZ 571900
Feilsøking
USA US 7967690, US 2010299980, US 2011062250, US 2008028648, US 13/167,042
Rusland RU2008140317
Europa EP 2029941, EP 2201301, EP 2315976, EP 1787063, EP07723217.1, EP11170434.2, EP11170435.9
Kina CN 101883953, CN 200980128666.2, CN 101057105, CN 101438104
Australien AU 2009248743, AU 2007224634
Canada CA 2725214, CA 2579444, CA 2645939
International patentansøgning WO 2006027272
Sydafrika ZA 200808702
Mexico MX 2008011712
Korea KR 20080113235
Japan JP 2009529649
Brasilien BR P10708894-9
Indien IN 4122/KOLNP/2008
New Zealand NZ 571900
Fejlsøgning
PATENT / APLIKACJA PATENTOWA
He nCnoJb3yIe npi6op B HeNocpeIcTBeHHoB 6JIH3OCTn OT BaHHoJ KOMHaTbI, dyua IJIb 6aaccseHa.
He pacnojarate kAMn HENOCpeDCTBeHNO POD 7TeNCeIbHO pO3eTKo IIN COeHNHTeHOB Kopo6ko.
YbEHTecB TOM, YTO Ha paCCTOAHN 1 M OT yCTpoiCTBa OTCyTCTByET Me6eJIb, IITOpbl IIN dpyrHne rOpIouHe npEdMeTbI.
4. PACNOLOXHENE WTENCIELHOB BUNIKI
Pnp6opdoJxeh 6bItb yctaHOBneH TaK, YTO6bl COXpaHJNCy DOCTyn K WTeNCEbHOB BnIKe. CpeINTe 3a TeM, YTO6bl shHyp NiTaHnHe Oka3aJScB 3OHe nepei np6obopom.
5. OTKJIHOUHEHNE OT PO3ETKN
B cnyuae HnncnpabHocTn n3BnEKeNTe BNJky np6opa n3 po3etkn.
OTcoeDnHnTe np6Op OT po3eTkn, ecn OH He nCnoJb3yetcB TeueHne nnIteJbHoro BpeMeHn.
6. BILAДЕЛЕЦ/ПОЛьЗВATEЛь
3TOT npH6Op MOKeT NcNoJIb3OBAIbCra DeTbMn B Bo3paCTe OT 8 JeT n CTapSe, a TaKxe JInuamn C OrpaHnueHHbIMN Φn3nueCKmMn, CeHCOPHbIMN IJn YMCTBeHHbIMN CnOCo6HOCTaMn IJn C HeIOCTaTKOM ONbITa n 3HaHn, ecn OOn HaxODaTc POn KOHTPOJe MIn IpnOHCTpyKTIpOBaHbI O npaBnJax 6e3OpacCHOro NcNoJIb3OBAHnra Pnp60pa n IOHMaOT BO3MOxHbIe ONaCHocTn. DeTn He DOnJXbI INpTaB C np6Opom. Ounchka n ObcIyKnbAHne MOryT OcyUeCTBJaTBcRdTeBmN TOnbKO NO pncmOTPM B3Pocblix.
IeTeB B BO3pacte Do 3 Iet, ecn OHn He haoTcTc NOD HnpepbIBhIM KOHTPOJeM, CJeNyEt DEpKaTb NOaJIbWe ot npibOp. DeTn B BO3pacte OT 3 Do 8 Iet DOJXHbI TOlbKO BKIOUaTb/ BVIKIOuATb np6Op npu ycIOBn, UTO OH pa3MeueH nIN yCTaHOBHeB H HopMaJIbHOe pa6Oyee POLOXeHne, a DeTn HaxoTcTc NOD KOHTPOJeM nIN pONHCTpyKTIPOBaHbI O npaBnIax 6e30Pachoro INCNoB3OBAHnnp6OpA INOHMAOT BO3MOXHbIE ONaCHOCTN. DeTn B BO3pacte OT 3 Do 8 Iet He dONJHbI NOkJIIOUaTb, peYIpnoBaTb INuCTNTb np6Op nIN BBINOJIHrTb erO 6CbnyKINBaHne.
7. 3NEKTPNCHECTBO
Ipeed BkIoueHnem npnbopa 03HaKombbTecsb C yka3aHnMn NO 6e3OpacHOCTN INHCTpyKcnei NO 3KcPnyatau.
He cKnraIte Ha peIeTke IpeBecInHy I npYrne MaTePnaJIbl.
BbI6op nOJrTOBka MeCTa
B 3tOM pa3dJe npBVeJeHbI HNCTpyKcUn No Bb6Opy MeCTa yCTaHOBKn peSHTKN C NOJehbAmn I OINsCaHbI Heo6xOdmBle NODrTOBNTeJIbHbIe MEPONpTnA.
1.Чтобл обесеньюптумалын зф点点头памен, установныte peшету с поменьни на ровно, Тбердои поерхон'tи.
2. Octabte npn6n3ntbNo 5 cm cbo6oHoro Mecta no3aHn npnbopa (ot pambl do ctehbl) n 20 cm HeNocpeDCTBeHHo Haad 3aHNM NOJehOM (dJa CHrTna pe3epBHOJ emKoCTn).
3. OcToPoxKHO n3BnEKeNTe Bce DeTaNN n3 KOpObKn n pacNaKyIte nx.
OcToPoxHo! ByIbTe ocToPoxHbI npn o6paUeHN C nOpHeBMy — B cIyuae naDeHna OHN MOrTy TpeChyTb IJI N CLOMaTbCra.
B. KhONka MRHOBENHORO DeHCTBNA
BkIIOueHne 3oOeKTa «IoiEnbC 3oOeKToM MepuHaNra» IIN «IoiEnbC 3oOeKToM PJIaMeHn», BbIKIOUeHne npi6opa.
Пильдистанционно упразьени.
Ecnn Bbl He cobnpaTeCb nCnoB3OBaTb npnbop B TeueHne 6oJee 2 HeJeB, To CneYTe BODy n3 BOJHO CNCTeMbI IN POCUHTe BCE EMKOCTn DnA BOJbl.
Bce emkoctn IJIy BOdbI peKOMeHdyETcMbITb KaXObIE oBe HeoJU, NcNoJIb3yR BODy C MbllOM. B KOMnJIeKT BXOINT MaJIeHbKa YIeTKa IJIY ChCTKN TpydHOIOCTUYHbIX MeCT IN KOMnoHErTOB, HanpIMep Ipeo6pa3OBaTeJI.
OcToPoxKHo! He MoITe pIaCTMaCCOBbIe DeTaJI NpIbOpa B IocyDOMoEHyO MaIInHe.
PpimmeaHne. PpeTem KAK nepemeaTb npi6Op, cIeTe BODy I3O BCEX eMKoCTe IJRA BObl.
CLJIA: US 7967690, US 2010299980, US 2011062250, US 2008028648, US 13/167042
Pocsn:RU2008140317
Ebpona: EP 2029941, EP 2201301, EP 2315976, EP 1787063, EP 07723217.1, EP 11170434.2, EP 11170435.9
KuTaH: CN 101883953, CN 200980128666.2, CN 101057105, CN 101438104
АBSTрали: AU 2009248743, AU 2007224634
Kana: CA 2725214, CA 2579444, CA 2645939
3aBka Ha noJyHne MeKdyHapOndHoro nateHTa: WO 2006027272
IOxHnaAΦρnka: ZA 200808702
Mekcuka: MX 2008011712
Kopera: KR 20080113235
JIoHnIa: JP 2009529649
Бразниya: BR P10708894-9
Индnia: IN 4122/KOLNP/2008
Hobar 3eJauHdN: NZ 571900
YcTpaHHeHne HEnCnPaBHOCTeI
- Welcome and Congratulations
- Please carefully read and save these instructions.
- Important Instructions
- WARNING
- DAMAGE
- LOCATION
- PLUG POSITIONING
- UNPLUGGING
- OWNER/USER
- ELECTRCITY
- USAGE
- Site Selections and Preparation
- Log Grate Assembly
- Log Grate Installation
- Operation
- On/Off Switch.
- Momentary Button
- Remote Control
- Remote Control Initialisation/Reprogramming
- Remote Control Usage
- Battery Replacement
- Maintenance
- Log Grate Surface Cleaning
- Water Reservoir
- Additional Information
- AFTER SALES SERVICE
- RECYCLING
- PATENT / PATENT APPLICATION
- PATENT / APLIKACJA PATENTOWA
- PACNOLOXHENE WTENCIELHOB BUNIKI
- OTKJIHOUHEHNE OT PO3ETKN
- BILAДЕЛЕЦ/ПОЛьЗВATEЛь
- 3NEKTPNCHECTBO
- BbI6op nOJrTOBka MeCTa
- KhONka MRHOBENHORO DeHCTBNA
- Пильдистанционно упразьени.
Brand : DIMPLEX
Model : SILVERTON OPTIMYST - SVT20
Category : Decorative fireplace