VH23TCERAMIC - Cooker PROLINE - Free user manual and instructions
Find the device manual for free VH23TCERAMIC PROLINE in PDF.



| Product type | Built-in hob |
| Brand | PROLINE |
| Model | VH23TCERAMIC |
| Number of cooking zones | 2 cooking zones |
| Heating technology | Radiant (ceramic glass) |
| Front cooking zone diameter | 20.0 cm (1800 W max) |
| Rear cooking zone diameter | 16.5 cm (1200 W max) |
| Total power | 2700 - 3300 W |
| Voltage / Frequency | 220-240 V ~ 50/60 Hz |
| Product dimensions (W x D x H) | 288 x 520 x 55 mm |
| Cutout dimensions (W x D) | 268 x 490 mm |
| Net weight | 4.5 kg |
| Energy consumption | 179.0 Wh/kg (average) |
| Controls | Touch |
| Timer | Yes, programmable from 1 to 99 minutes |
| Child lock | Yes, lock key |
| Automatic shut-off | Yes, according to power level (2h to 8h) |
| Residual heat indicator | Yes, displays "H" |
| Surface material | Ceramic glass |
| Cleaning | Specific product for ceramic glass, scraper for residues |
| Installation | Built-in, by a qualified professional |
| Warranty and after-sales service | After-sales service: 0 978 970 970 (France) / +32 2 334 00 00 (Belgium) |
Frequently Asked Questions - VH23TCERAMIC PROLINE
User questions about VH23TCERAMIC PROLINE
0 question about this device. Answer the ones you know or ask your own.
Ask a new question about this device
Download the instructions for your Cooker in PDF format for free! Find your manual VH23TCERAMIC - PROLINE and take your electronic device back in hand. On this page are published all the documents necessary for the use of your device. VH23TCERAMIC by PROLINE.
USER MANUAL VH23TCERAMIC PROLINE
IMPORTANT SAFETY INSTRUCTIONS 5
INSTALLATION INSTRUCTIONS 6
Built-in scheme 6
Clearances 7
Fastening the hob to the bench 8
OVERVIEW 9
Top view 9
Control panel. 9
COOKING GUIDELINES 10
Cookware. 10
Cooking tips 11
OPERATION 13
Using the touch controls 13
To start cooking. 13
Locking the controls 16
Overheat sensor 16
Residual heat indicator. 16
Automatic stop function 17
Using the timer 17
CLEANING AND CARE 19
TROUBLESHOOTING 21
TECHNICAL DATA 22
WARNING
This appliance is intended to be used in household and similar applications such as:
- staff kitchen areas in shops, offices and other working environments;
- farm houses;
- by clients in hotels, motels and other residential type environments;
- bed and breakfast type environments.
If the supply cord is damaged, it must be replaced by the manufacturer, its service agent or similarly qualified persons in order to avoid a hazard.
WARNING: The appliance and its accessible parts become hot during use. Care should be taken to avoid touching heating elements.
Children less than 8 years of age shall be kept away unless continuously supervised.
This appliance can be used by children aged from 8 years and above and persons with reduced physical, sensory or mental capabilities or lack of experience and knowledge if they have been given
supervision or instruction concerning use of the appliance in a safe way and understand the hazards involved.
Children shall not play with the appliance. Cleaning and user maintenance shall not be made by children without supervision.
WARNING: Unattended cooking on a hob with fat or oil can be dangerous and may result in fire. NEVER try to extinguish a fire with water, but switch off the appliance and then cover flame e.g. with a lid or a fire blanket.
WARNING: Danger of fire: do not store items on the cooking surface.
WARNING: If the surface is cracked, switch off the appliance to avoid the possibility of electric shock.
A steam cleaner is not to be used.
Do not to stare at the hob elements.
The appliance is not intended to be operated by means of an external timer or separate remote-control system.
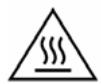
These surfaces can get hot.
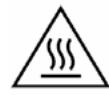
The surfaces are liable to get hot during
use.
Do not touch hot surface. Use the handle while moving the product.
Do not place the appliance in or near hot gas or electric burner, or permit to touch a heated ven or mini oven.
The temperature of accessible surfaces may be high when the appliance is operating. The plug must be remained easily accessible after installation of the appliance.
CAUTION: The cooking process has to be supervised. A short term cooking process has to be supervised continuously.
After use, switch off the hob element by its control and do not rely on the pan detector.
IMPORTANT SAFETY INSTRUCTIONS
- Read these instructions carefully before installing or using this hob.
- Do not place combustible material or products on the hob at any time.
- In order to avoid a hazard, this hob must be installed according to these instructions for installation.
- This hob is to be properly installed only by a qualified person.
- Never use this hob for warming or heating the room.
- Never leave metal objects on the hob as they can become hot very quickly.
- Turn the power off and remove the plug when the hob is not in use, left unattended and before cleaning. Allow to cool down before cleaning or storing the hob.
- Do not touch hot surfaces.
- Never use the hob as a work or storage surface.
- Never leave any objects or utensils other than suitable cookware on the appliance.
- Do not stand on the hob.
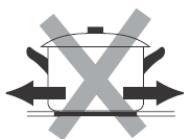
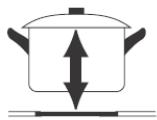
- Do not use pans with jagged edges or drag pans across the ceramic glass surface as this can scratch the glass.
- Do not clean the hob with abrasive cleaners.
INSTALLATION INSTRUCTIONS
Built-in scheme
In the bench top
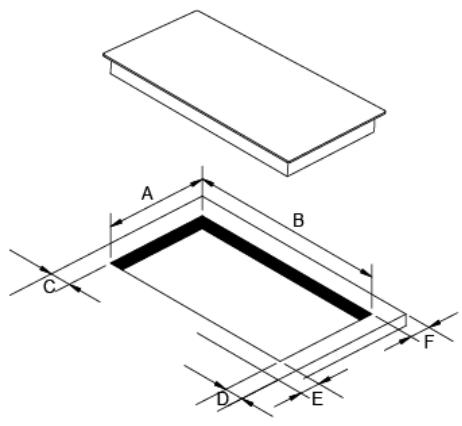
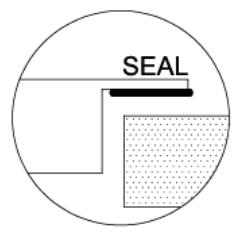
C/D/E/F: minimum distance between the cutout of the hob and the nearest surface
On the bench top
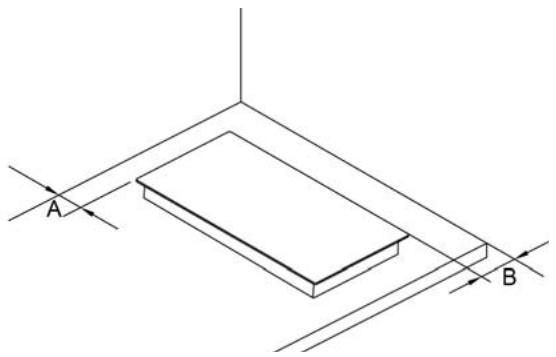
- The bench top is square and level, and no structural members interfere with space requirements.
- The bench top is made of a heat-resistant material.
- The installation will comply with all clearance requirements and applicable standards and regulations.
- There is adequate flow of fresh air from outside the cabinetry to the base of the hob.
- The hob must be installed by a qualified authorised person. Never try to install the appliance by yourself.
- Incorrect installation may cause harm and damage to people or property, for which the manufacturer accepts no responsibility.
-
The hob must not be installed above refrigerators, freezers, dishwashers or tumble dryers.
-
Install the hob away from heat sources such as ovens or direct sunlight.
- To avoid any damage, the sandwich layer and adhesive must be resistant to heat.
- A steam cleaner must not be used.
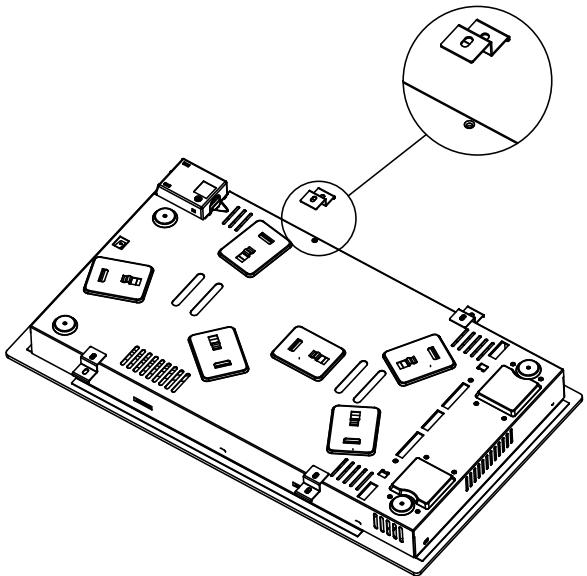
Fastening the hob to the bench
- Turn the hob upside down and place it on a soft surface.
- Mount the supplied clamps and screws onto the hob as shown, without tightening the screws.
- Place the hob into the cutout, and then tighten the screws to clamp the hob securely to the bench.
OVERVIEW
Top view
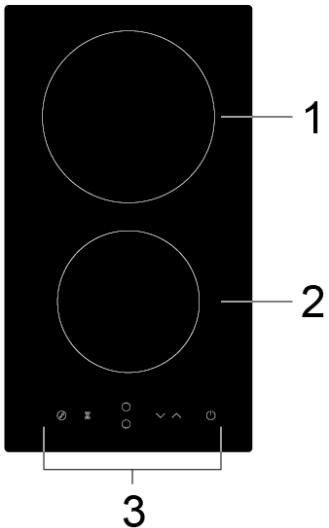
- Max. 1800 W cooking zone
- Max. 1200 W cooking zone
- Control panel
Control panel
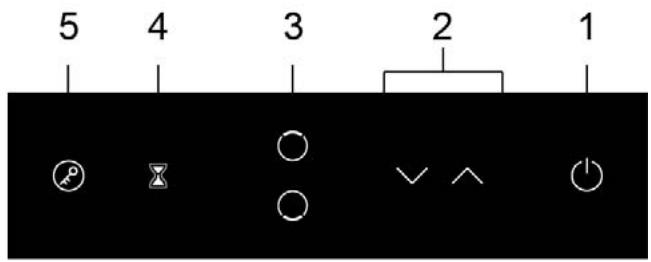
- ON/OFF control
- Heat or timer setting control
- Cooking zone selection control
- Timer setting control
- Key lock control
COOKING GUIDELINES
Cookware
- Use heavy-gauge, flat, smooth-based cookware that matches the diameter of the cooking zone.
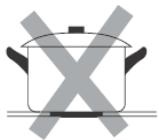

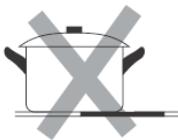
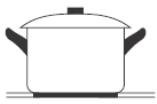
- Saucepans or heavy frying pans with jagged edges or a rough base will scratch the glass.
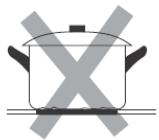
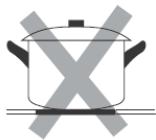
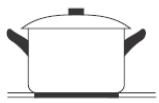
- Always lift pans off the hob. Do not slide them, or they may scratch the glass.
- Cookware with a stainless steel sandwich base or enamelled cast iron will give you the best results.
Cooking tips
Take care when deep-frying: oil or fat can overheat very quickly, particularly on a high setting.
- When food comes to the boil, reduce the temperature setting.
- Using a lid will reduce cooking times through retaining the heat.
- Minimise the amount of liquid or fat to reduce cooking times.
- Start cooking on a high setting and reduce the setting when the food has heated through.
Simmering, cooking rice
- Simmering occurs below boiling point, at around 85^ C , when bubbles are just rising occasionally to the surface of the cooking liquid. It is the key to delicious soups and tender stews because the flavours develop without overcooking the food. You should also cook egg-based and flour-thickened sauces below boiling point.
- Some tasks, including cooking rice by the absorption method, may require a setting higher than the lowest setting to ensure the food is cooked properly in the time recommended.
Searing steak
To cook juicy flavoursome steaks:
- Stand the meat at room temperature for about 20 minutes before cooking.
- Heat up heavy-based frying pan.
-
Brush both sides of the steak with oil. Drizzle a small amount of oil into the hot pan and then lower the meat onto the hot pan.
-
Turn the steak only once during cooking. The exact cooking time will depend on the thickness of the steak and how cooked you want it. Times may vary from about 2 – 8 minutes per side. Press the steak to gauge how cooked it is – the firmer it feels the more 'well done' it will be.
-
Leave the steak to rest on a warm plate for a few minutes to allow it to relax and become tender before serving.
For stir-frying
- Choose a flat-based wok or a large frying pan.
- Have all the ingredients and equipment ready. Stir-frying should be quick. If cooking large quantities, divide the food into several smaller batches.
- Preheat the pan briefly and add two tablespoons of oil.
- Cook any meat first, and then put it aside and keep warm.
- Stir-fry the vegetables. When they are hot but still crisp, turn the cooking zone to a lower setting, return the meat to the pan and add your sauce.
- Stir the vegetables gently to make sure they are heated through.
- Serve immediately.
OPERATION
Using the touch controls
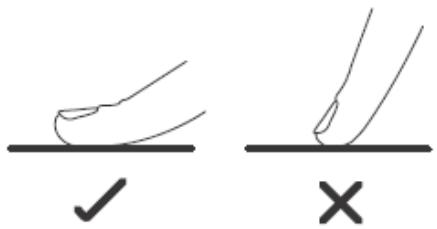
- The controls respond to touch, so you don't need to apply any pressure.
- Make sure the controls are always clean, dry, and there is no object (e.g. a utensil or a cloth) covering them.
To start cooking
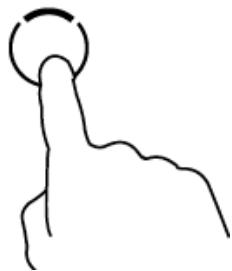
1. Touch .
- A beep will sound and all the indicator lights will show “—” or “— —”, indicating that the hob has entered the standby mode.
- If there is no operation within 1 minute, the hob will automatically switch off.
-
Touch the desired cooking zone control key.
-
The indicator next to the key will flash.
-
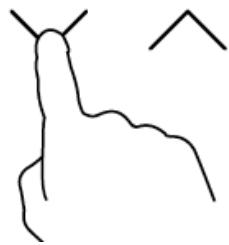
Set the power level by repeatedly touching or .
-
To change the power level during cooking, touch the cooking zone and then touch or until the desired power level is set.
Power level guideline
| Heat setting | Suitable for |
| 1 – 2 | •Delicate warming for small amounts of food •Foods that burn quickly •Gentle simmering •Slow warming |
| 3 – 4 | •Reheating •Rapid simmering •Cooking rice |
| 5 – 6 | Pancakes |
| 7 – 8 | •Sautéing •Cooking pasta |
| 9 | •Stir-frying •Searing •Boiling |
To switch off one cooking zone
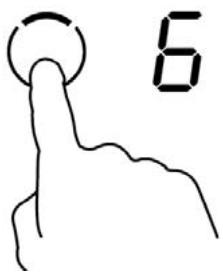
- Touch the corresponding key.
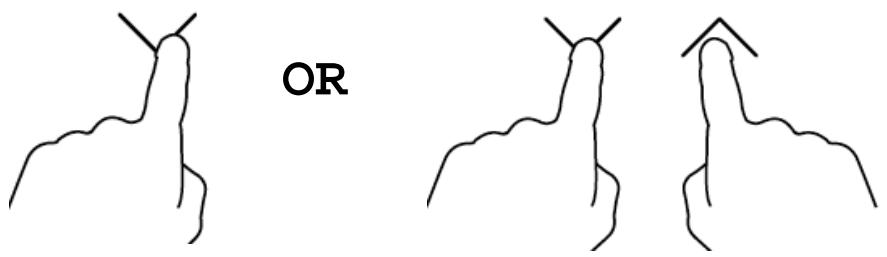
- Repeatedly touch or touch and at the same time. Make sure the display will show "0".
To switch off all cooking zones
Touch .
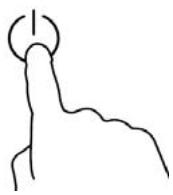
NOTE: After the hob is switched off, "H" will illuminate to indicate the cooking zone is hot. It will disappear when the cooking zone has cooled down.

Locking the controls
- You can lock the controls to prevent unintended use (for example children accidentally turning cooking zones on).
- When the controls are locked, all controls except the ON/OFF control are disabled.
To lock the controls
Touch the key lock control. "Lo" will flash on the timer display, indicating that the controls are locked.
NOTE: You can always turn the hob off in an emergency, but the controls will still be locked when you turn the hob on again. Unlock the controls first before operating the hob.
To unlock the controls
- Make sure the hob is turned on.
- Touch and hold the key lock control for 2 seconds. "Lo" will disappear.
- You can now start using the hob.
Overheat sensor
The hob is equipped with a sensor that monitors the temperature inside the hob. The hob will automatically turn off if this temperature becomes excessive.
Residual heat indicator
After intensive use, the cooking zone may remain hot. "H" will flash on the display after switching off a cooking zone or the complete stop of the hob.
"H" will disappear when the cooking zones may be touched without danger.
As far as "H" is flashing, do not touch the cooking zones and put any heat-sensitive object on them. There are risks of burn and fire!
Automatic stop function
The function activates automatically if you forget to turn off the hob after cooking.
| Power used | The cooking zone turns off automatically after approximately |
| Between 1....3 | 8 hours |
| Between 4....6 | 4 hours |
| Between 7....9 | 2 hours |
Using the timer
You can set the timer to automatically turn a cooking zone off when the set time is up.
! Never leave the hob unattended when in use, even if you have set the timer to automatically turn a cooking zone off.
- Select a cooking zone already in use.
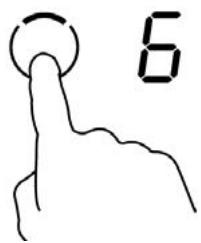
-
Select the timer.
-
"10" will flash on the timer display.
- The indicator on the cooking zone display means that the timer is ready to be set for this cooking zone.
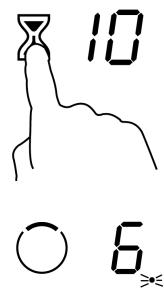
-
While “10” is flashing, set the digits using / .
-
Touch or once to decrease or increase the time by 1 minute.
The maximum time is 99 minutes. - Touch and hold / will increase or decrease time by 10 minutes.
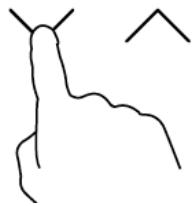
-
Press the timer setting control to confirm. The timer is now set and begins counting down.
-
If / is not operated while digits are flashing, when the digits stop flashing the timer is set.
-
The display will show the remaining time.
-
When the set time is up, a beep will be heard and the cooking zone will automatically turn off.
-
The cooking zone display will show "H" if the surface is hot.
To modify a timer setting, follow steps 1 to 3 above.
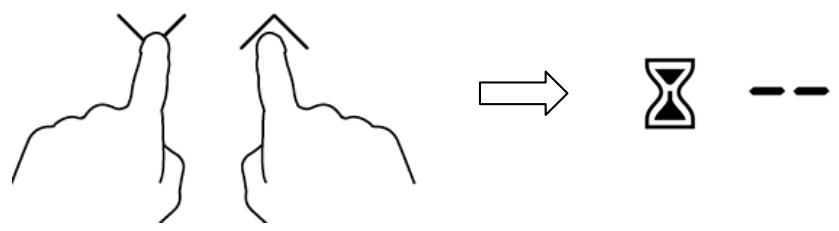
To cancel a timer setting, follow steps 1 and 2 above, then touch and together and the timer display will show "--".
CLEANING AND CARE
| What? | How? | Important! |
| Everyday soiling on glass (fingerprints, marks, stains left by non-sugary spillages on the glass) | 1. Switch the hob off. 2. Apply a hob cleaner while the glass is still warm (but not hot!). 3. Rinse and wipe dry with a clean cloth or paper towel. 4. Switch the hob back on. | ·When the hob is switched off, there will be no ‘hot surface’ warning but the cooking zone may still be hot! Take extreme care. ·Heavy-duty scourers, some nylon scourers and harsh/abrasive cleaning agents may scratch the glass. Always read the label to check if your cleaner or scourer is suitable. ·Never leave cleaning residue on the hob: the glass may become stained. |
| Burt-on food or grease, melts, sugary spillage on glass | Remove these immediately with a razor blade scraper suitable for ceramic glass cook tops, but beware of hot cooking zone surfaces: 1. Switch the hob off. 2. Hold the razor blade at a 30° angle and scrape the soiling or spill to a cool area of the | ·Remove stains left by melts and sugary food or spillages as soon as possible. If left to burn on or cool, they may be difficult to remove or even permanently damage the glass surface. ·Cut hazard: when the safety cover is retracted, the blade in a scraper is razor-sharp. Use with extreme care and |
| cooktop.3. Clean the soiling or spill up with a dish cloth or paper towel.4. As soon as the hob has cooled enough to safely touch, clean with cooktop cleaner following the instructions for ‘Everyday soiling on glass’ above.5. Switch the hob back on. | always store safely and out of reach of children. | |
| Spillage on the touch controls | 1. Switch the hob off.2. Soak up the spill.3. Wipe the touch control area with a clean damp sponge or cloth.4. Wipe the area completely dry with a paper towel.5. Switch the hob back on. | Beware of hot spills. |
TROUBLESHOOTING
| Problem | Possible causes | Possible solution |
| The hob cannot be turned on. | No power. | Make sure the hob is connected to the power supply and that it is switched on at the wall. Check whether there is a power outage in your home or area. If you have checked everything and the problem persists, consult a qualified technician. |
| The touch controls are unresponsive. | The controls are locked. | Unlock the controls. See section ‘Locking the controls’ for instructions. |
| The touch controls are difficult to operate. | You may be using the tip of your finger when touching the controls. | Use the ball of your finger when touching the controls. |
| The glass is being scratched. | Rough-edged cookware. | Use cookware with flat and smooth bases. See ‘Cookware’. |
| Unsuitable, abrasive scouser being used. | See “Cleaning and care’. | |
| Some pans make crackling or clicking noises. | This may be caused by the construction of your cookware (layers of different metals vibrating differently). | This is normal for cookware and does not indicate a fault. |
TECHNICAL DATA SHEET
Below is the sheet of domestic hob according to EU regulation No. 66/2014.
| Model identification | VH 23 T |
| Type of hob | Built-in hob |
| Number of cooking zones and/or areas | 2 |
| Heating technology (induction cooking zones and cooking areas, radiant cooking zones, solid plates) | Radiant cooking zones |
| For circular cooking zones or area: diameter of useful surface area per electric heated cooking zone, rounded to the nearest 5 mm | Zone1: 20.0 cm Zone2: 16.5 cm |
| Energy consumption per cooking zone or area calculated per kg | ECeletric cooking: Zone1: 181.6Wh/kg Zone2: 176.4 Wh/kg |
| Energy consumption for the hob calculated per kg | ECeletric hob :179.0 Wh/kg |
It is recommended to select the heat setting 3/9 to achieve maximum energy efficiency.
Note:
Energy consumption < 210Wh / kg according to EU regulation No. 66/2014.
The testing method is in compliance with the requirements of EN60350-2:2013+A11:2014
| Brand | Proline |
| Reference | VH 23 T |
| Category | 2 zones ceramic hob |
| Voltage/frequency V / Hz | 220-240V~ 50Hz or 60Hz |
| Rated – Total power (W) | 2700-3300W |
| Product Size (mm)(L*W*H) | 288*520*55 |
| Built-in Size (mm)(L*W) | 268*490 |
| Product Net weight (kg) | 4.5 kg |
| Made in | P.R.C |
We apologise for any inconvenience caused by minor inconsistencies in these instructions, which may occur as a result of product improvement and development.
DISPOSAL
As a responsible retailer we care about the environment.
As such we urge you to follow the correct disposal procedure for the appliance and packaging materials. This will help conserve natural resources and ensure that it is recycled in a manner that protects health and the environment.
You must dispose of this appliance and its packaging according to local laws and regulations.
Because this appliance contains electronic components, the appliance and its accessories must be disposed of separately from household waste when the appliance reaches its end of life.
Contact your local authority to learn about disposal and recycling.
The appliance should be taken to your local collection point for recycling. Some collection points accept appliance free of charge.
We apologise for any inconvenience caused by minor inconsistencies in these instructions, which may occur as a result of product improvement and development.
Table des matières
ATTENTION 24
MISES EN GARDE IMPORTANTES 28
INSTRUCTIONS D'INSTALLATION 29
Schemas d'encastrement 29
Espacements 30
Hotline Darty France
EU Declaration of Conformity
Product Description:
The object of the declaration described above is in conformity with the relevant Union
harmonisation legislation:
Low Voltage Directive (LVD)
Eco design requirements for energy-related products (ErP)
RoHS
EMC:
EN 55014-1:2017
EN IEC 61000-3-2:2019
EN 61000-3-3:2013+A1:2019
EN 55014-2:2015
LVD:
EN 60335-2-6:2015 + A1:2020 + A11:2020
EN 60335-1:2012 + A11:2014 + A13:2017 + A1:2019 + A14:2019 + A2:2019
EN 62233:2008
ErP:
(EU) No 66/2014
(EC) No 1275/2008
EN 60350-2:2013+A11
EN 50564:2011
This declaration of conformity is drawn up under the sole responsibility of the manufacturer.
The person responsible for this declaration is:
Place, Date / Lieu :
Ivry-sur-Seine, mars 8, 2022



- WARNING
- IMPORTANT SAFETY INSTRUCTIONS
- INSTALLATION INSTRUCTIONS
- Built-in scheme
- Fastening the hob to the bench
- OVERVIEW
- Top view
- Control panel
- COOKING GUIDELINES
- Cookware
- Cooking tips
- Simmering, cooking rice
- Searing steak
- For stir-frying
- OPERATION
- Using the touch controls
- To start cooking
- Touch .
- To switch off one cooking zone
- To switch off all cooking zones
- Locking the controls
- To lock the controls
- To unlock the controls
- Overheat sensor
- Residual heat indicator
- Automatic stop function
- Using the timer
- CLEANING AND CARE
- TROUBLESHOOTING
- TECHNICAL DATA SHEET
- Note:
- DISPOSAL
- Table des matières
- Hotline Darty France
- EMC:
- LVD:
- ErP:
Brand : PROLINE
Model : VH23TCERAMIC
Category : Cooker