USER MANUAL EA81M870 KRUPS
FR HOTLINE: BE: 3270233159 - FR: 0974501061 - CH: 0800377737
DE HOTLINE: DE: 08009800000 - AT: 0800225225 - CH: 0800377737
EN HOTLINE: UK: 0345 3306460 - ROI: (01) 6774003
NL HOTLINE: NL: 0318582424
IT SERVIZIO CONSUMATORI: IT: 199 207701 - CH: 0800 37 77 37
ES HOTLINE: ES: 902312300
PT CENTRO DE CONTACTO DO CONSUMIDOR: PT: 808284735
EL EANADA: GR: 2106371251
RU TOPRAJAJINHJ: RU: 4952133228
UK yKPAIHA: UK: 0443001304
PL INFOLINIA: PL: 0801300420
CS HOTLINE: CZ: 731010111
SK ZAKAZNcCKA LINKA: SK: 233595224
HU ÜGYFÉLSZOLGÁLAT: HU: (1) 8018434 567

Réf. 8080014573-04 03/2018
KRUPS
EA815 - EA816 - EA817


1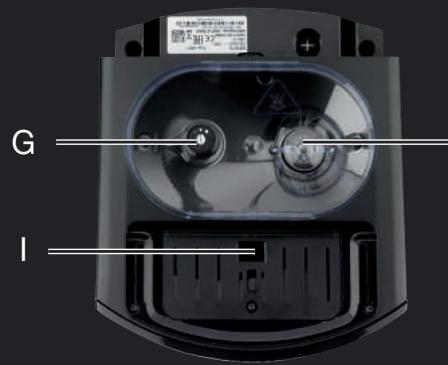
2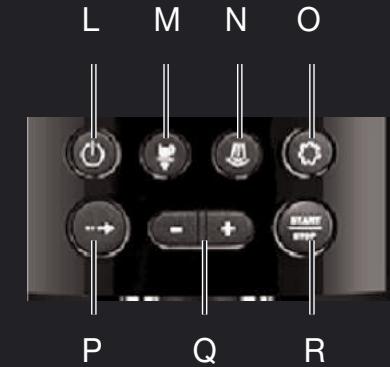


2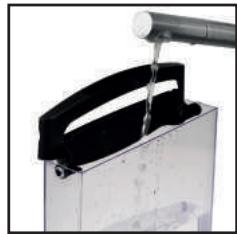
3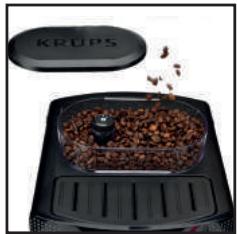
4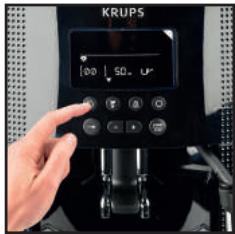
25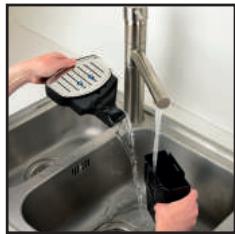
26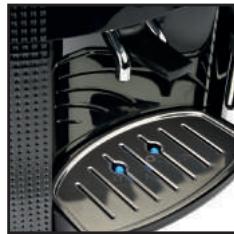
27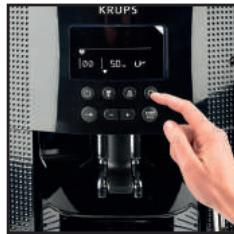
28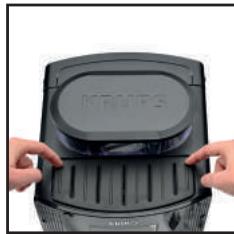
5
6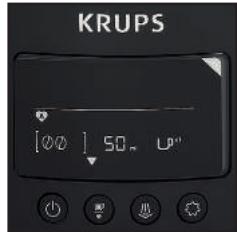
7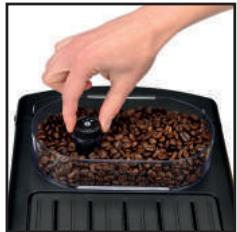
8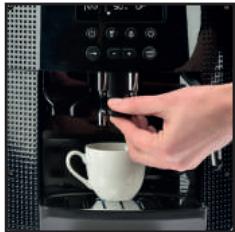
29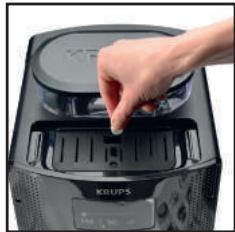
30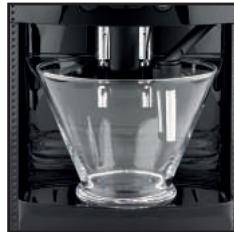
31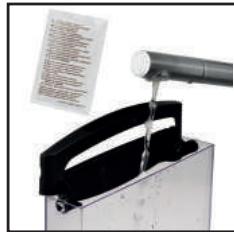
32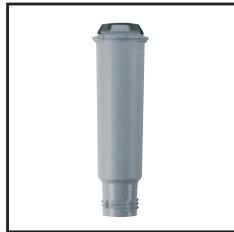
9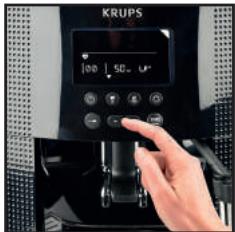
10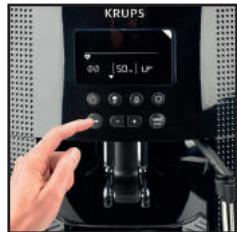
11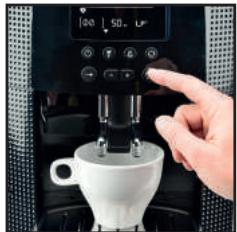
12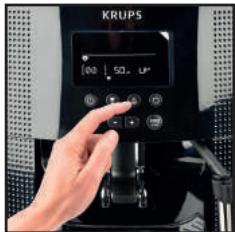
33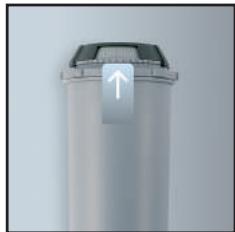
34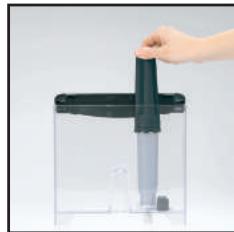
13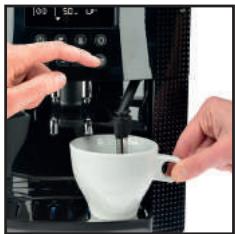
14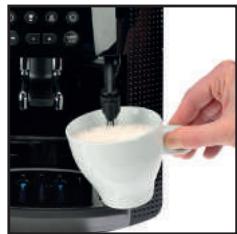
15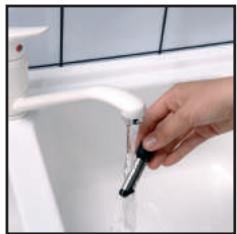
16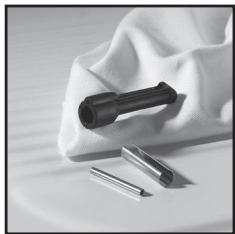
17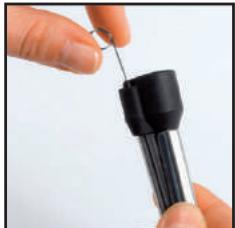
18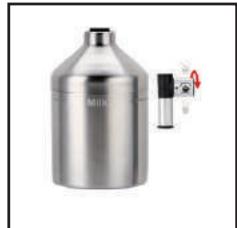
19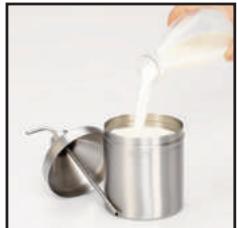
20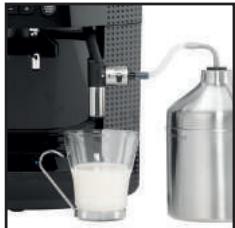
21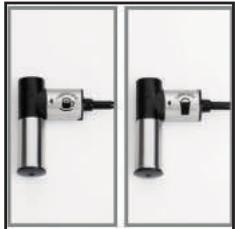
22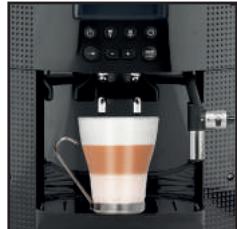
23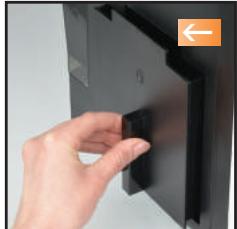
24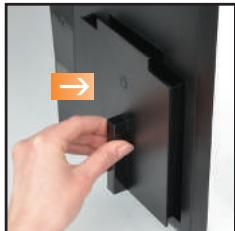
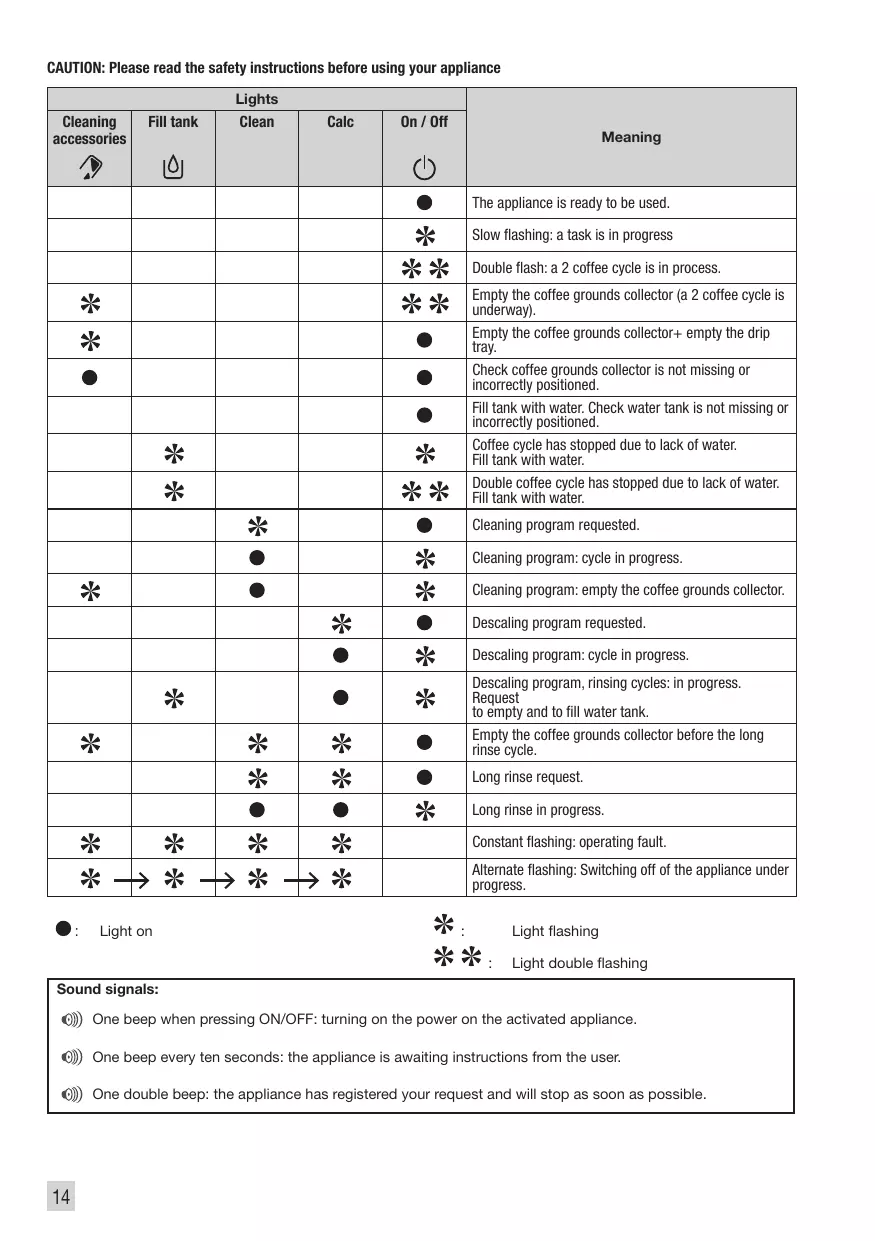
CAUTION: Please read the safety instructions before using your appliance
| Lights | Meaning |
| Cleaning accessories | Fill tank | Clean | Calc | On / Off |
| | | | ● | The appliance is ready to be used. |
| | | | * | Slow flashing: a task is in progress |
| | | | * * | Double flash: a 2 coffee cycle is in process. |
| * | | | | * * | Empty the coffee grounds collector (a 2 coffee cycle is underway). |
| * | | | | ● | Empty the coffee grounds collector+ empty the drip tray. |
| ● | | | | ● | Check coffee grounds collector is not missing or incorrectly positioned. |
| | | | ● | Fill tank with water. Check water tank is not missing or incorrectly positioned. |
| * | | | * | Coffee cycle has stopped due to lack of water. Fill tank with water. |
| * | | | * * | Double coffee cycle has stopped due to lack of water. Fill tank with water. |
| | * | | ● | Cleaning program requested. |
| | ● | | * | Cleaning program: cycle in progress. |
| * | | ● | | * | Cleaning program: empty the coffee grounds collector. |
| | | * | ● | Descaling program requested. |
| | | ● | * | Descaling program: cycle in progress. |
| * | | ● | * | Descaling program, rinsing cycles: in progress. Request to empty and to fill water tank. |
| * | | * | * | ● | Empty the coffee grounds collector before the long rinse cycle. |
| | * | * | ● | Long rinse request. |
| | ● | ● | * | Long rinse in progress. |
| * | * | * | * | | Constant flashing: operating fault. |
| *→ | *→ | *→ | * | | Alternate flashing: Switching off of the appliance under progress. |
Light on
* Light flashing ** : Light double flash
Sound signals:
One beep when pressing ON/OFF: turning on the power on the activated appliance. One beep every ten seconds: the appliance is awaiting instructions from the user. One double beep: the appliance has registered your request and will stop as soon as possible.
Dear Customer,
Thank you for having purchased this Krups Espresseria Automatic. We are sure you will enjoy both the quality of the coffee it makes and how easy it is to use.
Whether you want a short, strong shot of a ristretto, a good espresso, a larger and milder lungo, or a creamy cappuccino, your automatic coffee/espresso machine has been designed so you can enjoy the same quality at home as at the bistro, whatever the time of day and right through the week.
Thanks to its Thermoblock System, its 15 bar pump and because it uses real coffee beans that are ground just before the coffee is made, your Espresseria Automatic will give you a drink containing maximum aroma, with a fine creamy golden brown top produced by the natural oils contained in coffee beans.
To obtain an espresso at just the right temperature and a nice compact creamy top, we advise you to pre-heat your cup. After a few trial runs you will find the type of mix and roast of the coffee beans that suits your taste. The quality of the water used is obviously another essential factor in the coffee you get.
Make sure the water is fresh from the tap (contact with the air tends to make it stale), that it is free from chlorine odours and relatively cold.
Espresso coffee is richer in aroma than a conventional filter coffee. Despite its stronger, longer-lasting taste, espresso in fact contains less caffeine than filter coffee.
DESCRIPTION
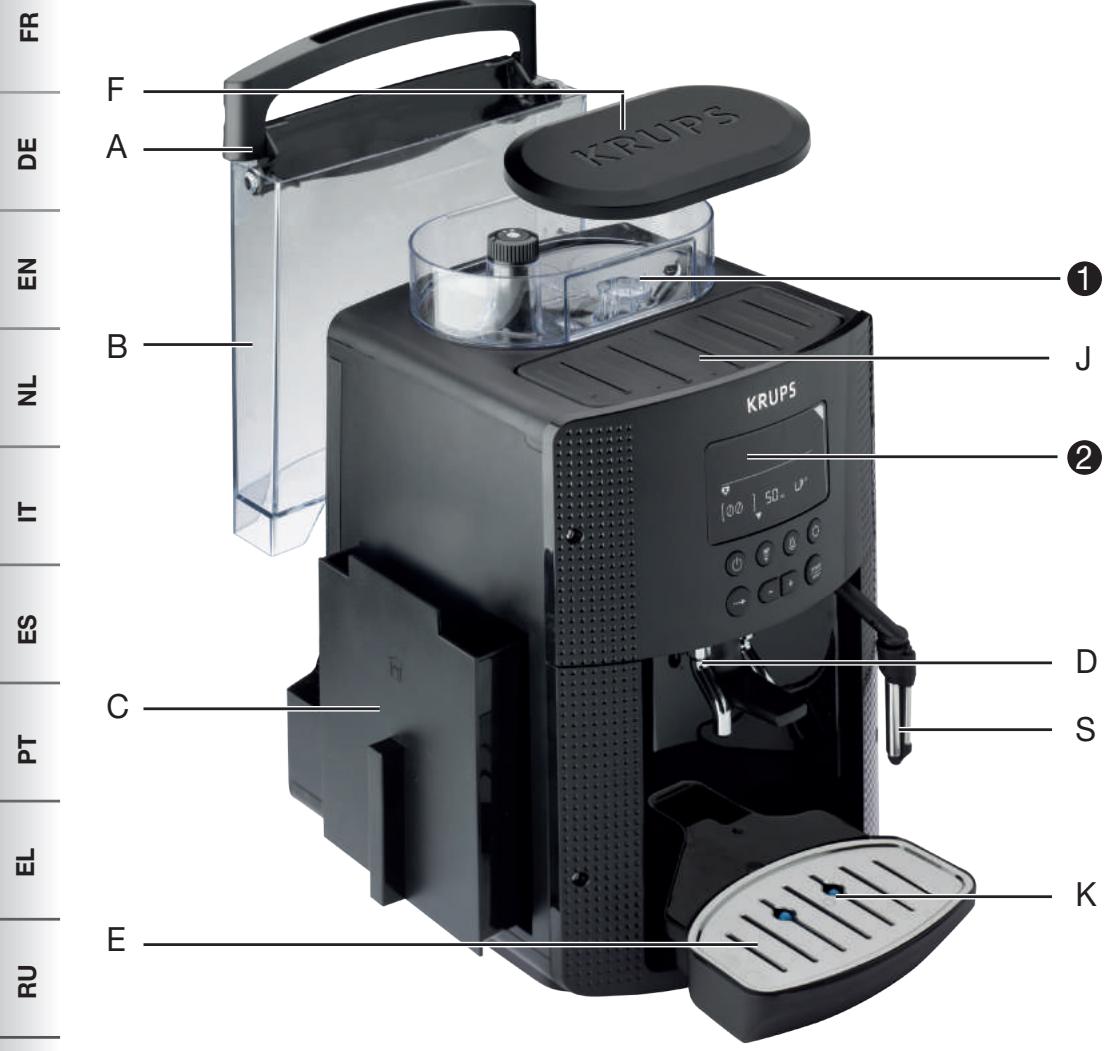
A Water tank handle/lid B Water tank C Coffee grounds collector D Coffee outlets with height adjusting handle E Removable drip grid and tray F Coffee bean container lid

Coffee bean container
G Grinding fineness setting knob H Metal grinding wheel Cleaning inlet J Digital display for parameter setting K Cup tray

Control panel
L Steam button M "On/Off" key and light N Coffee volume rotating button 0 "empty the coffee grounds" and "empty the drip tray" warning light P "Fill water tank" light Q Strong coffee key R Standard coffee key S "Scale removal" light T "Clean" light U "Rinsing/servicing" key
V Steam nozzle
W Water level floats

Danger :
Warning against the risk of serious or fatal injuries.
The lightning bolt symbol warns against electrical dangers.

Attention:
Warning against the risks of incorrect operation, damage or destruction of the appliance.

Important:
General or important note on the operation of the appliance.
Warning signals

Empty the coffee grounds collector and the drip tray, and wipe clean the area where the coffee drawer sits; the pot will remain on if the coffee grounds collector is not properly inserted or if it has been put back in place 4 seconds earlier.

Fill water tank
CLEAN Proceed with cleaning
CALC Proceed with scale removal
CLEAN + CALC Carry out a long rinse

Coffee bean grinding fineness setting

Standard

Steam button

Rinsing/servicing

Strong coffee
BEVERAGE PREPARATION
| TYPES OF COFFEE | Number of cups possible | Possible volume settings (ml) | Possible strength settings |
| RISTRETTO | 1 | 20 to 30 ml | ☐ or ☐ |
| 2 x 1 | 2 x 20 to 30 ml in two cycles |
| ESPRESSO | 1 | 30 to 70 ml | ☐ or ☐ |
| 2 x 1 | 2 x 30 to 70 ml in two cycles |
| COFFEE or LUNGO | 1 | 80 to 220 ml | ☐ or ☐ |
| 2 x 1 | 2 x 80 to 220 ml in two cycles |
BEFORE FIRST USE
Preparing the appliance
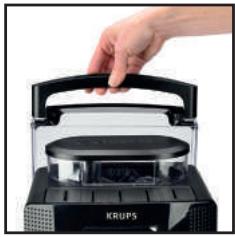
Pull out and fill the water tank - Fig. 1 and 2.
Put it back in place by pressing firmly and close the lid again - Fig. 3.
Open the coffee bean container lid. Add the coffee beans - Fig. 4.
Close the coffee bean container lid again.

Do not fill the water tank with hot water, milk or any other liquid. If you turn on the appliance when the water tank is not in place or not correctly filled (under the "min." level.), the light will come on and making an espresso or a cup of coffee will be made impossible.

NEVER PUT GROUND COFFEE IN THE COFFEE CONTAINER.
It is recommended that you do not use oily, caramelised or flavoured coffee beans for this appliance. These kinds of beans may damage the appliance.
Check that the coffee beans do not contain any foreign particles such as grit, as any damage caused by the presence of foreign particles will invalidate the guarantee.
Do not put water into the coffee bean container.
Remember to fit the drip tray to avoid waste water flowing onto the work surface and staining it or scalding you.
Check that your water tank is clean.
Initialisation cycle - total duration: around 3 minutes
Turn on the appliance by pressing the button 𝕀 - Fig. 5. The light 𝕀 is constant.
Put a container with a minimum capacity of 0.6 litres underneath the two coffee outlets and steam nozzle.
Press the 日 - Fig. 6 button: the appliance starts the initialisation cycle for rinsing of the steam and coffee circuits. The light 日 flashes.
The cycle is finished when the light 𝕀 becomes constant. The appliance is now ready to use.

It is preferable to rinse the 2 circuits out at least once after the appliance has not been used for several days. Each time you plug your appliance in, it will carry out an initialisation cycle.
Preparing the grinder
You can choose the strength of your coffee by setting the coffee bean grinding fineness. The finer the grinding setting, the stronger and creamier the coffee should be. Set the desired fineness for grinding by turning the 'Grinding fineness setting' knob. Turn to the left for finer grind. Turn to the right for coarser grind.

CHANGE THE SETTING DURING GRINDING.
Never force the grinding fineness setting button.
PREPARING ESPRESSO AND LONG COFFEES

YOUR APPLIANCE IS DESIGNED TO MAKE COFFEE FROM COFFEE BEANS ONLY.
When you first make coffee with the appliance or after a long period of absence or a cleaning or scale removal procedure, a little steam and hot water will come out of the steam nozzle (priming).
Splashing or scalding may occur if the coffee outlets are set too high in relation to the size of the cups.
Note:
The amount of water needed to make an espresso is between 30 and 70 ml.
The amount of water needed to make a coffee is between 80 and 220 ml.
Production of an espresso or coffee
Plug in your appliance.
Press the button ①. The light will flash during the pre-heating and initialisation cycle.
The light ① becomes constant.
Put a cup under the coffee outlets. You can lower or raise the coffee outlets to suit the size of your cups - Fig. 7.
Select the key to get a strong espresso or the key to get a standard espresso - Fig. 8.
You can change the volume of water at any time - Fig. 9.
To stop coffee flowing into the cup, you can either again press one of the ① or ② keys or turn the knob to the min. position.

The ground coffee is moistened with a little hot water after the grinding stage. A few moments later, percolation as such starts. Beyond a certain amount of coffee in the cup, we recommend - in order to obtain a stronger coffee - to divide your preparation into two separate cycles. Example: 2 x 70 ml cycles for a cup of 140 ml.
2 cup function
You can prepare 2 cups of coffee or espresso with your appliance.
Press the button ①. The light flashes during the pre-heating of the appliance.
The light ① becomes constant.
Place 2 cups under the coffee outlets. You can lower or raise the coffee outlets to suit the size of your cup - Fig. 10.
Select the button or according to your choice, by quickly pressing the button twice. The light ⓐ comes on with a double flash to inform you that you have requested two cups of coffee.

The appliance will automatically sequence 2 complete coffee-making cycles.
Make sure that you don't remove the cups after the first cycle.
If you press the button once and the button a second time (or the other way round), the second one isn't taken into account.
PREPARING STEAM
Steam froths up the milk to make a cappuccino or a caffe latte, for example, and also heats up liquids. As you need a higher temperature to produce steam than to make an espresso, the appliance runs an additional pre-heating phase for steam.
Plug in your appliance.
Press the ⊕ button: the light flashes during the pre-heating of the appliance.
The light ⓐ becomes constant.
Press the button 念 - Fig. 11.
The light ⓐ flashes during the pre-heating.
Once the pre-heating is finished, the light ① stays constant and you can start the steam production by pressing the ② button again.
Press the button again to stop the cycle.

The appliance goes back to its initial position if the steam control is not used after 2 mins.

Frothing milk
We recommend that you use pasteurized or UHT milk that has been recently opened. Untreated milk does not give the best results.
Pour the milk into your milk jug. Immerse the nozzle in the milk - Fig. 12.
Initiate the steam function as explained in the paragraph above.
Once your milk is frothy enough - Fig. 13 - press the button again to stop the cycle.
To remove any milk traces from the steam nozzle, place a container under the nozzle and restart a preparation with steam (around 10 seconds).
The steam nozzle can be removed for more intense cleaning. Wash it out with water and a little washing up liquid and a small non-abrasive brush. Rinse and dry it - Fig. 14. Before putting it back, ensure that the air inlet holes are not blocked by any milk residues. If necessary, unblock them using the needle supplied - Fig. 15.

Do not wash the steam nozzle in a dishwasher.
To interrupt the steam function, simply press any button.
If the nozzle is obstructed, unblock it with the needle provided.
Steam can be produced for a maximum of 2 minutes per cycle.

After the steam function has been used, the nozzle can be hot, and we recommend that you wait for a few moments before handling it.
Auto-cappuccino XS 6000 Set (sold separately)
This auto-cappuccino accessory enables you to make cappuccinos or lattes - Fig. 16. Connect the different parts to each other. Ensure that you do not pierce the pipe by keeping the button in the correct place.
After removing the lid, fill the jug with milk (Fig. 17) and place a cup or glass under the auto-cappuccino nozzle (Fig. 18).
- Select the cappuccino or latte position on the special nozzle (Fig. 19).
Start the steam, as indicated in the chapter 'Making drinks with steam'.
Once you have made the milk froth, place your cup under the coffee outlets and start a coffee cycle (Fig. 20).
To prevent the milk from drying on the auto-cappuccino accessory, ensure that you clean it thoroughly. You are advised to wash it immediately by running a steam cycle with the accessory jug filled with water in order to clean the inside of the nozzle. You can use the KRUPS liquid cleaner for this, available separately.
MAINTAINING YOUR APPLIANCE
Emptying the coffee grounds collector and the drip tray.
If the light flashes,
Remove, empty and clean the coffee ground collector (Fig. 21).
Replace the coffee grounds collector (Fig. 22).
Remove, empty and clean the drip tray (Fig. 23).
The drip tray is equipped with floats to indicate when it needs to be emptied.
Put all parts back in place.
As soon as you remove the coffee grounds collector, you will have to empty it completely to avoid any overflow.

The light will remain on if the coffee drawer area is not cleaned thoroughly and if the used grounds collector is not pushed firmly into place or is incorrectly installed.
You cannot make espresso or coffee while the light is on or is flashing. The coffee grounds collector has a capacity of 9 coffees.
Rinsing of circuits
These 2 functions are available anytime, except if the appliance requests a 'CLEAN' and/or 'CALC' cycle.
Rinsing out the coffee circuit:
Place a container under the coffee nozzles. Press the button - Fig. 6 quickly to start a coffee circuit rinsing cycle, which will automatically stop after around 40 ml.
Rinsing out the steam circuit:
Place a container under the steam nozzle and press the button for 3 seconds to start a steam circuit rinsing cycle, which will automatically stop after around 300 ml.
Appliance cleaning program - total duration: about 13 minutes
When a cleaning operation is necessary, the appliance warns you of this by flashing the 'CLEAN' light.
This program is only accessible when the appliance requests it (i.e. approximately every 300 coffees or espressos).

To benefit from the guarantee conditions, it is essential to perform the appliance cleaning cycle when informed to do so. Be sure to follow the procedure closely, step by step.
Only use KRUPS cleaning tablets. You can obtain cleaning tablets from KRUPS Service Centres.
When the indicator light flashes, you can continue to use the appliance but it is recommended that you carry out the program as soon as possible.
Start the cleaning program by pressing the button. The 'CLEAN' light becomes constant and the indicator lights and flash.
Remove, empty and clean the coffee ground collector - Fig. 21.
Replace the coffee grounds collector - Fig. 22
Remove, empty and clean the drip tray - Fig. 23.
Put all parts back in place.
The light goes out.
Remove, fill and put the water tank back into place.
Place a container with a minimum capacity of 0.6l under the coffee outlets - Fig. 24.
Open the maintenance hatch - Fig. 25 and insert a KRUPS cleaning tablet (XS3000) in the cleaning duct - Fig. 26.
Press the button to start a cleaning cycle.
The first phase (approximately 10 min) begins. At the end of this phase, the sound signal emits a beep every 10
seconds and you can empty the used water container and the drip tray.
Put the drip tray and container back in place for the next phase.
Press the button again to start the final phase. The sound signal stops.
Final phase (±3 min)
The program continues. It rinses the appliance and removes any traces of cleaner.
When the cleaning cycle is finished, the indicator light 'CLEAN' goes out.
Remove and empty the used water container.
Empty the drip tray and put it back into place.
Refill the water tank.
Your appliance is ready for the next use.

If there is not enough water in the water tank when you start the program, the light will come on to warn you. Add the appropriate amount of water to the container and cleaning will continue automatically.

If you unplug the appliance during cleaning, press the ① button, or if there is an electrical power cut, the cleaning program will start again from the beginning. In this case, another cleaning tablet may be necessary. Make sure to carry out the full cleaning cycle to ensure good maintenance of your appliance.
The cleaning cycle is intermittent: do not put your hands under the water outlets 'E' and 'W' while the cycle is in progress.
Only use KRUPS (XS3000) cleaning tablets. We cannot be held responsible for any damage that may result from the use of tablets from other brands.
You can obtain cleaning tablets from KRUPS Service Centres.
Scale removal program - total duration: about 20 minutes
The quantity of scale deposited depends on the hardness of the water used. The appliance will automatically warn you by the 'CALC' light coming on when you need to proceed with scale removal.
This program is only accessible when the appliance requests it.

To benefit from the guarantee conditions, it is essential to perform the appliance's scale removal cycle
when informed to do so. Be sure to follow the procedure closely step by step. You can continue to use the appliance when the light is on, but you are advised to perform the program as soon as possible.
If your appliance is fitted with our Claris - Aqua Filter System F088 cartridge, please remove the cartridge during the descaling operation.
Only use KRUPS scale removal products. You can obtain scale removal products from KRUPS Service Centres.
We cannot be held responsible for any damage that may result from the use of tablets from other brands.

Make certain to protect your work surface during cleaning and scale removal cycles, especially if it is made of marble, stone or wood.
Start the descending program by pressing the button. The 'CALC' light becomes constant and the indicator lights △ and ◇ flash.
Remove and clean the drip tray.
Place a container with a minimum capacity of 0.6 I under the coffee outlets as well as under the steam nozzle - Fig. 24.
Empty the tank and refill it with warm water up to the line 'CALC' - Fig. 33.
Dissolve a sachet of Krups (40 g) F054 descaler in the tank - Fig. 33.
Replace the water tank. The indicator light ○ switches off.
Press the button after carrying out all of these operations.
The first phase (approximately 8 min) begins.
The descending cycle will start automatically.
At the end of this phase, the sound signal beeps every 10 seconds and the indicator light ⟩ᴹ⟨ flashes.
Empty the used water container and put it back in place.
Empty and rinse the water tank - Fig. 34.
Refill the tank with water and put it back into place. The warning light goes out.
Press the button again to start the second phase. The sound signal stops.
The second phase (about 6 min) begins.
The program continues. It rinses the appliance and removes any traces of the descaler.
At the end of this phase, the sound signal beeps every 10 seconds.
Remove and empty your used water container and put it back in place.
Press the button again to start the final phase. The sound signal stops.
The final phase (approximately 6 min) begins.
The program continues. It removes the last particles of descaler.
When the descending cycle is finished, the indicator light 'CALC' goes out.
Refill your water tank.
Your appliance is ready for the next use.
If there is not enough water in the water tank, you will be warned by the light.
Add the appropriate amount of water to the tank and scale removal will continue automatically.

If you unplug the appliance during cleaning, press the button, or there is an electrical power cut, the cleaning program will start again from the beginning. In this case, another cleaning tablet may be necessary. Make sure to carry out the full cleaning cycle to ensure good maintenance of your appliance.
The cleaning cycle is intermittent: do not put your hands under the water outlets 'E' and 'W' while the cycle is in progress.
Long rinsing program - total duration: about 2 minutes
When it is necessary to make a long rinsing program, the appliance warns you of this by flashing the 'CLEAN' and 'CALC' lights.
Remove, fill and replace the water tank.
Place a container with a minimum capacity of 0.6 I under the coffee outlets and the steam nozzle.
Start the long rinsing program by pressing the button. The lights 'CLEAN' and 'CALC' become constant and the indicator light starts flashing.
When the long rinse is finished, the lights 'CLEAN' and 'CALC' go out and the indicator light becomes constant.
Your appliance is ready for the next use.
The appliance can ask you to empty the coffee ground collector.
OTHER FUNCTIONS
To switch the appliance off
You can switch off your appliance at any time. As the appliance is switching off, a double beep is emitted and all of the red lights flash, one after the other. The appliance has registered your request and will stop as soon as possible.
Installation of the filter cartridge - total duration: around 2 min
To get the best taste from your coffee and extend your appliance's service life, we advise you to use only the Claris - Aqua Filter System cartridge sold as an accessory.
Fig. 30 : Mechanism to indicate the month the cartridge was fitted and when to replace it (after 2 months at most).
Installing the cartridge in the appliance. On first use, screw the filter cartridge into the bottom of the water tank - Fig. 31.
Place a 0.6 l container under the steam nozzle.
Press the button for more than 3 seconds (unless the appliance requires a 'CLEAN' and/or 'CALC' maintenance).
The indicator light flashes.
When the installation of the filter cartridge is finished, the indicator light becomes constant.
Your appliance is ready for the next use.
The Claris cartridge needs to be replaced after about every 50 litres of water or every two months at least. If you are using the Claris - Aqua Filter System cartridge, set the water hardness to level 0.
Settings
Connect the appliance to the mains power supply but do not turn it on.
Lift the cup grid by pressing on the back to make it tilt - Fig. 25.
Press the A and E simultaneously - Fig. 27.
The digital display for parameter setting is under the servicing flap - Fig. 28.
Look down vertically to the bottom of the window - Fig. 29.
Proposed settings order:
- Adjust water hardness
- Adjust coffee temperature
- Adjustment of the auto-off function
- Info
1. Setting water hardness
Appliances are pre-set in the factory for hardness level 4.
Before using the appliance for the first time or if you have noted a change in water hardness, it is advisable to adapt the appliance to the water hardness. Please contact your water supplier to find out the water hardness in your area.
| Degree of hardness | 0 Verv soft | 1 soft | 2 moderately hard | 3 hard | 4 extremely hard |
| °f | < 5,4° | >7,2° | >12,6° | >25,2° | >37,8° |
| °dH | < 3° | >4° | >7° | >14° | >21° |
| °e | < 3,75° | >5° | >8,75° | >17,5° | >26,25° |
| Settings | 0 | 1 | 2 | 3 | 4 |
The "water tank" light will come on.
Press the E^D button - Fig. 32 as many times as are needed to select the hardness level for the water used: 0 = very soft, 1 = soft, 2 = moderately hard, 3 = hard, 4 = very hard.
To go to the next phase, press the button or to leave the settings mode press O
2. Setting the coffee temperature
Appliances are pre-set in the factory to level 2.
The 'CALC' light comes on.
Press the E^p - Fig. 32 button as many times as are needed to adjust the desired coffee temperature: 1, 2 or 3.
To go to the next phase, press the button or to leave the settings mode, press Theta.
3. Setting the automatic electrical power supply cut-off (auto-off)
Appliances are pre-set in the factory to 1 hour.
You can set your appliance to turn off after a pre-programmed number of hours.
The 'CLEAN' light comes on.
Press the button (Fig. 32) as many times as necessary to select the desired duration: 1 = 1h, 2 = 2h, 3 = 3h, 4 = 4h.
To go to the next phase, press the down arrow button, or to leave the settings mode, press the up arrow button.
4. Info (number of cycles)
The light comes on.
To go to the next stage, press the button. You will go back to adjustment 1.
To leave settings mode, press the button.

At any of these stages, you can leave settings mode by pressing the button if you have finished your adjustments. All of the lights will go off. These settings stay applicable even if there is an electric power cut. You can change these settings at any time by repeating these operations.
TROUBLESHOOTING, CORRECTIVE ACTIONS
| PROBLEM MALFUNCTION | CORRECTIVE ACTION |
| Your appliance detects a fault. | Switch off and disconnect the appliance, remove the fil-
ter cartridge, wait for a minute and restart the appliance. |
| The appliance does not turn on when the ① button is
pressed. | Check your fuses and plug sockets.
Check that the two power plugs are correctly pushed in
the socket. |
| The coffee grinder makes a strange noise. | There is a foreign body in the grinder. Disconnect the
apppliance before investigating. See if you can extract
the foreign body using your vacuum cleaner. |
| The steam nozzle makes a noise. | Check that the steam nozzle is correctly attached to its
corresponding end piece. |
| The steam nozzle on your appliance seems partially or
completely clogged. | Ensure that the opening in the end piece is not ob-
structed by milk residue or limescale. Unclog the holes
with the needle supplied with your appliance. |
| The steam nozzle makes little or no milk froth. | For milk-based drinks, use very fresh, very cold pa-
seurised or UHT milk. It is also advisable to use a cold
container. If the results do not improve, try changing the
brand of milk. |
| No steam comes out of the nozzle. | Empty the tank and temporarily remove the filter car-
tridge. Fill the water tank with mineral water which is
high in calcium (>100 mg/l) and run successive steam
cycles. |
| The auto-cappuccino set makes little or no froth.
The auto-cappuccino set does not take in milk. | Check that the accessory is correctly attached to the
apppliance, remove it then replace it.
Check that the flexible tube is not obstructed or pierced
and that it is correctly attached to the accessory so as
to make it airtight. Rinse and clean the accessory (refer
to the "Auto-cappuccino accessory" chapter). |
| There is water underneath the appliance. | Before removing the water tank, wait for 15 seconds
after the coffee has finished flowing so that the appli-
ance finishes its cycle properly.
Check that the drip tray is correctly positioned on the
apppliance; it should always be in place, even when the
apppliance is not in use.
Check that the drip tray is not full.
The drip tray should not be removed during a cycle.
Clean the tank and its connection regularly to avoid the
build up of scale, which can cause leaks. |
| After emptying the coffee grounds collector, the warning
message is still displayed on the screen. | Remove the coffee grounds collector and ensure it is
empty and clean. Wait at least 6 seconds before replac-
ing, and ensure it is correctly installed. |
| The coffee dispenses too slowly. | Turn the coffee fineness dial to the right to make the grounds courser (this could also depend on the type of coffee used).Run one or several rinsing cycles.Change the Claris Aqua Filter System cartridge (see “Installing the filter”). |
| The water/steam is not dispensed normally from the steam nozzle. | At the beginning or end of making a drink, the steam nozzle may drip slightly. |
| The coffee fineness dial is difficult to turn. | Only change the grinder setting when it is running. |
| The espresso or coffee is not hot enough. | Change the coffee temperature setting. Warm the cup by rinsing it with hot water before making the drink. |
| The coffee is too lightly coloured or too weak. | Avoid using oily, caramelised or flavoured coffee. Check that the coffee bean container has coffee in it and that it is dispensing correctly.Decrease the drink volume, increase the drink strength. Turn the coffee fineness dial to the left to make the grounds finer.Make the drink in two cycles by using the 2 cups function. |
| The appliance is not producing coffee. | A problem has been detected during preparation of the drink.The appliance has restarted automatically and is ready for a new cycle. |
| Why can I not start the descending or cleaning program? Why does my appliance not request to be descaled or cleaned? | The appliance only requests to be cleaned once it has made several types of coffee. The appliance only requests a descending cycle once it has made a certain number of drinks using steam. |
| A power failure occurs during a cycle. | The appliance is automatically restarted when power is switched back on. |
| Coffee flows behind the coffee nozzles. | Pour cold or room-temperature water into the tank. Reduce the temperature level. |
| The appliance is working but no liquid comes out. | Check that the water tank is in the correct position and that the cord is not jammed between the appliance and the water tank. |
| Ground coffee is in the drip tray. | Yes, to stay clean the appliance clears ground coffee which has fallen out of the percolation tank. |
Danger: Only a qualified technician is authorised to carry out repairs on the power cord and the electrical system. Failure to respect this exposes you to fatal injuries due to the presence of electricity. Do not use an appliance that is visibly damaged.

Here are some recipes you can make using your Espresseria Automatic:
Cappuccino
For a cappuccino in the rules of the art, the ideal proportions are as follows: 1/3 hot milk, 1/3 coffee, 1/3 milk froth.
Caffe Latte
To make coffee with milk, also often called Latte Macchiato, the proportions are as follows: 3/5 hot milk, 1/5 coffee, 1/5 milk froth.
- For these milk-based preparations, it is best to use cold skimmed milk straight from the refrigerator (ideally between 6 and 8°C).
- To finish off, you can sprinkle with cocoa.
Café Crème
- Prepare a conventional espresso in a large cup.
- Add a little cream to get a café crème.
Café corretto*
Prepare a cup of espresso as usual.
Then add 1/4 or 1/2 of a liqueur glass of Cognac to taste.
- You can also use anisette, brandy, Sambuca, Kirsch or Cointreau.
- There are many other ways to give some punch to your espresso.
- Just use your imagination.
Coffee liqueur*
Mix 3 cups of espresso, 250 g of brown sugar candy and 1/2 litre of Cognac or Kirsch in an empty 0.75 litre bottle.
Leave the mixture to macerate for at least 2 weeks.
- You will obtain a delicious liqueur. A real treat for coffee lovers.
Italian style iced coffee
4 scoops of vanilla ice-cream, 2 cups of espresso with sugar to taste, 1/8 litre milk, fresh cream, grated chocolate. - Mix the cold espresso with the milk. - Serve the scoops of ice-cream into the glasses, pour the coffee onto them and decorate with fresh cream and grated chocolate.
Café à la frisonne*
Add a small glass of rum to a cup of sweetened espresso.
Decorate with a good layer of fresh cream and serve.
Flambéed espresso*
2 cups of espresso, 2 small glasses of Cognac, 2 teaspoons of brown sugar, fresh cream. - Pour the Cognac into heat-resistant glasses, heat and light. - Add the sugar, mix, pour in the coffee and decorate with fresh cream.
Espresso Parfait*
2 cups of espresso, 6 egg yolks, 200g sugar, 1/8 litre of sweetened fresh cream, 1 small glass of orange liqueur. - Beat the egg yolks with the sugar until it forms a thick, frothy mass. - Add the cold espresso and the orange liqueur. - Then mix in the whipped fresh cream. - Pour the mix into saucer champagne glasses or ordinary. - Put the champagne glasses in the freezer.
(Remember, over-indulgence in alcohol is bad for the health.)
Making espresso and coffee
THIS MACHINE IS INTENDED EXCLUSIVELY FOR MAKING COFFEE WITH COFFEE BEANS.
Turn the knob - Fig. 32 to set the number of cups required for making the desired amount of coffee: 1, 2 or 3.
To switch to standby mode, press the knob or wait for the machine to enter standby automatically.
READY INDICATOR
*: The ready indicator lights up.
**: The ready indicator flashes.
SOUND SIGNALS:
1 short beep when pressing the "ON/OFF" button: power supply connected to the device. 1 short beep every 10 seconds: device waiting for user command. 1 long beep: device has received the request and performs the fastest possible stop.
Dear customers!
Congratulations on your purchase of the Espresseria Automatic Krups appliance. You will be able to appreciate the quality of this appliance and at the same time the great ease of its use when preparing coffee.
Espresso or Lungo, Ristretto or Cappuccino, this fully automatic espresso coffee machine is designed to allow you to enjoy at home the same quality of coffee as in a café, in half the time, in half the day of the week.
The Espresseria Automatic appliance works with a pressure of 15 bar and, since the machine operates exclusively with coffee beans, freshly ground immediately before preparation, it allows you to obtain a drink containing maximum aroma, with a very thick and creamy foam, a product obtained from the natural oil of coffee beans.
To obtain espresso with optimal temperature and good foam, we recommend that you preheat the cups. After a few preparations, you will be able to determine the blend of coffee bean roasting that best suits your tastes. The quality of the water used directly affects the quality of the coffee that will be in your cup.
Make sure that the water is fresh and cold (it has not been left standing in contact with air), and that it does not have a chlorine taste.
Espresso made with a comparison to coffee prepared using a regular filter. Despite the more intense taste, which will suit more and stronger, espresso contains practically less caffeine than coffee that is prepared through a filter.
Description
A Handle/lid of the water reservoir B Water reservoir with coffee grounds collector C Height-adjustable coffee outlet, handle D Drip tray grid E Drip tray for collecting drops F Lid of the container for coffee beans
1 Container for coffee beans
G Button for adjusting the fineness of grinding with ceramic burrs H Opening for tablets I Display for setting parameters
K Retail supply for home
2 Control panel
L "Steam" button M "On/Off" button with indicator light and rotary knob for adjusting coffee volume N Indicator light for empty coffee grounds collector O "Empty drip tray" indicator P Indicator light "Fill water reservoir" Q "Strong coffee" button R "Standard coffee" button S Indicator light "Clean descaling" T Indicator light "Clean" U "Rinse/maintenance" button
V Steam nozzle W Water level indicator
DESCRIPTION OF SYMBOLS
Z Danger!
Warning about the risk of death or serious injury.
Symbol warns of dangers associated with the presence of electricity.
Attention!
Warning about the possible occurrence of malfunctions, damage, or destruction of the device.
Obuee nIin BaxKhoe npImeuaHne o pa6oTe yctpoiCTBa.
PpeynpeinteHbIe NkTOrpaMMblnCnHaJIbI
OnyctoWite KOhteiHep IJRA OtpabotAHORO KoFe I NODIOH IJRA c6opa KaneIb: INDnKATOp npOdoNKTROPetb, ecNI KOHTeHep IJRA OtpabotAHORO KoFe BCTaBJIeH HeNPABINbHO IINu yCTaHOBNeH 6paTHo 6blcTpee Yem Chepe3 4 CekyHdbI.
HanoHnItepe3epByapIraBdo
CLEAN IpoBvEduTe OuCTky
CALC IpoBedeTe OChTky OT HaKnPi
PENEI PEPBbIM IcNoJIb3OBAHnEM
IoprotoBka npnbopa
I3BNeKeNtepe3epByap IJRA BOdbI HAnOpHnTe erO - pnc.1 u 2.
UcTaHOBInTe erO o6paTHo Ha MeCTo, TBepINO HaxKab BnI3 3aKpbIB KpbIiKy - pnc.3.
ÖtkpɔŋTe Kpbɪsʌkny KOHTeɪHepa dʒn KoΦe B 3ephax. Hacbɪnte KoΦe - pnc.4.
3aKpOHTe KpbIuKy KOHTeHepa dIy KoPe B 3epHaX.

He 3aONHnIe KOHTeHepROPBEH BOoD,MOIOKOM HINI IIO6O Bpyro JxNkOcTbHO.Ecnn npn BKIOUChENn npboopa pe3epBapar n an BoDy oTCyTCTByet nn 3aONHne He Do KOHca,3aORpTcN INdNKATOp U n pInrTOBJeHne 3cnpeco INI KoeC CTAHET BPEMEHNOHEB03MOXHO.

HNIKOrDA HE HAcbIaIaTE MOJOTbI KOΦE B KOHTeHEP IJIa KOΦE B 3EPHX.
It is not recommended to use oily, caramelized or aromatized coffee beans. Their use can lead to damage to the device.
Make sure that the container for coffee beans does not contain foreign objects, such as small stones that may be in the coffee beans. The warranty does not cover damage caused by foreign objects entering the container.
Do not pour water into the container for coffee beans.
To avoid burns and water leaks, do not forget to empty the drip tray.
Make sure that the water reservoir is empty.
Initialization cycle - total duration: approximately 3 minutes
Turn on the device by pressing the button ① - fig. 5. The indicator lights up intermittently.
Install the container with a capacity of at least 0.6 liters under the coffee and steam nozzle.
Press the button - fig. 6, the device will start the initialization cycle for the steam system and the coffee system. The indicator flashes.
The cycle is complete when the indicator lights up continuously. The machine is ready for preparing drinks.

It is advisable to perform one or more rinsing cycles of the systems if the device has not been used for several days. Each time you connect the device to the power supply, the machine performs the initialization cycles.
Preparing coffee
You can adjust the coffee strength by adjusting the fineness of the coffee bean grind. The finer the grind set in the coffee grinder, the stronger and better the coffee will be. Set the required degree of grinding by turning the grinding fineness knob. Turn left - finer grind. Turn right - coarser grind.

The adjustment can only be made during grinding.
Never try to change the position of the grinding fineness regulator by force.
The amount of water for one cup should be 80-220 ml.
Starting preparation of espresso or coffee
Plug the appliance into a power outlet.
Press button 1. The indicator flashes during the preheating of the machine.
The indicator lights up continuously.
Place the cup under the coffee outlet. You can lower or raise the coffee outlet according to the size of the cup - Fig.7.
Press button P for a strong espresso or button P for a standard espresso - Fig. 8.
You can always adjust the amount of water - Fig.9.
To stop filling the cup, you can either press one of the buttons or turn the rotary switch to the minimum position.

The coffee powder is moistened with a small amount of hot water after the grinding process. After a few seconds, the brewing process begins. Starting with a certain amount of coffee in the cup, we recommend dividing the preparation into two parts to produce a strong coffee. For example, 2 times 70 ml to produce a coffee with 140 ml.
Function "2 cups"
The device allows preparing 2 cups of espresso or coffee.
Press the button. The indicator flashes during the preheating of the machine.
The indicator lights up continuously.
Place the two cups under the coffee outlets. You can lower or raise the coffee outlets according to the size of the cups - Fig.10.
Press the P button twice to select your choice. Double flashing of the indicator means you have selected two cups of coffee.

The appliance will automatically perform 2 full brewing cycles.
Be careful, do not remove the cups after the first cycle.
If you press the P button and then the P button (or vice versa), the last press will not be taken into account.
STEAM PREPARATION
Steam is used to obtain milk froth for cappuccino or latte, as well as to heat liquids. Since steam production requires a higher temperature than espresso preparation, the machine performs an additional preheating phase before steam preparation.
Turn on the appliance.
Press the button. The indicator lights up during the preheating of the machine.
The indicator lights up continuously.
Press the button - Fig. 11.
The indicator lights up during the preheating.
When the preheating phase is complete, the indicator lights up continuously and you can start the steam delivery by pressing the button again.
Press the button again to stop the delivery.
The machine returns to its initial position if the regulator is not activated within 2 minutes.

The stop of the delivery is not immediate.
It is recommended to use pasteurized or ultra-pasteurized milk.
Raw milk does not provide optimal results.
Place the steam nozzle into the milk - Fig. 12.
Start the steam preparation function as described in the section above.
When enough foam has formed - Fig. 13 - press the steam stop button again.
To taste the milk with the steam nozzle, place a container under it and start the steam function again for about 10 seconds.
For deep cleaning of the steam nozzle, it can be removed. Wash it with a brush in water with a small amount of mild detergent, then rinse and dry - Fig. 14. Before reinstalling the nozzle, make sure that the air holes are not blocked by milk residues. If necessary, clean them with the needle included in the kit - Fig. 15.
Do not insert the steam nozzle into the milk frother.
To restore the steam function, simply press any button.
If the nozzle is clogged, clean it with the needle included in the kit.
The maximum duration of steam generation per cycle is no more than 2 minutes.

After using the steam function, the nozzle may be hot; we recommend waiting a few
minutes before performing any operations with it.
Dual milk frother XS 6000 (sold separately)
The manufacturer warns that the preparation of the capsule for latte is shown in Fig. 16. Connect its parts together. Make sure the tube is not kinked to maintain a comfortable position of the button.
After removing the lid of the container, fill it with milk - Fig. 17 and place the nozzle for the glass under the milk outlet of the autolatte - Fig. 18. Set the adjustable nozzle to position d for preparing the latte capsule - Fig. 19.
Read this as indicated in the chapter "Preparation and use".
As soon as the milk foam appears, place the cup under the coffee outlet and start the coffee cycle - Fig. 20.
To avoid milk splashing on the autolatte, it must be cleaned thoroughly. It is recommended to wash it immediately with the help of the rinse function after each use. For this purpose, you can also use liquid dishwashing detergent.
CARE OF THE APPLIANCE
Empty the container for used coffee grounds and the drip tray.
If the indicator lights up
Remove, empty and clean the coffee grounds container - Fig. 21.
Put the container for used coffee grounds back in place - Fig. 22.
Remove, empty and clean the drip tray - Fig. 23.
The drip tray has floats that signal the need to empty it.
Put all parts back in place.
As soon as you remove the coffee grounds container, you must empty it completely to avoid overflow later.

Indicator 1 continues to light if the coffee grounds container is not inserted or is inserted incorrectly, and also if it has been in place for less than 4 seconds.
When the indicator lights up, the appliance is ready for use, but it is impossible to prepare coffee or espresso. The collection container is designed for 9 cups of coffee.
RINSING THE SYSTEM
Access to these two functions can be obtained at any time, except in cases where the machine requires drying 'CLEAN' or 'CALC'.
Rinsing the system - preparation:
Place a container under the coffee spout. Quickly press the button . - Fig. 6 to start the rinsing cycle of the coffee system, which stops automatically after dispensing 40 ml of water.
Rinsing the steam system:
Place a container under the steam spout. Then press and hold the button to start the rinsing cycle of the steam system, which stops automatically after dispensing 300 ml of water.
CLEANING PROGRAM - duration: approximately 13 minutes
The appliance signals the need for cleaning by flashing the 'CLEAN' indicator light.
This program is available only when the appliance needs cleaning (approximately after 300 brewing cycles of coffee or espresso).

Under normal conditions, it is necessary to perform the cleaning cycle when the appliance requires it. Try to follow the correct procedure for the operation.
Use only KRUPS cleaning tablets. You can purchase KRUPS cleaning tablets from KRUPS service centers.
When the indicator lights up, you can continue using the appliance, but it is advisable to run the program as soon as possible.
Start the cleaning program by pressing the button . The 'CLEAN' indicator lights up continuously, and the indicators flash.
Remove, empty and clean the coffee grounds container - Fig. 21.
Install the container for used coffee in place. - Fig. 22.
Remove, empty and replace the drip tray. - Fig. 23.
Install all elements in place.
The indicator flashes.
Remove, fill and replace the water reservoir.
Install the coffee outlet with a capacity of at least 0.6 L - Fig. 24.
Open the descaling compartment door - Fig. 25 and insert the descaling tablet KRUPS (XS3000) into the descaling channel - Fig. 26.
Press the descaling start button.
The first stage (about 10 min) starts. At the end of this stage, a beep sounds every 10 seconds, and you can empty the container with used water and the drip tray.
Replace the drip tray and container for the next stage.
Press the button again to start the next stage. The beep stops.
Next stage (±3 min.)
The program continues. It allows rinsing the device and removing all residues of descaling agent.
When the descaling cycle is finished, the CLEAN indicator flashes.
Remove the empty container with used water.
Remove the descaling tablet and place it in its place.
Fill the reservoir with water.
The device is ready for operation.

If during the program start the water in the reservoir is insufficient, the device will notify you of this using the O1 indicator. Add the required amount of water to the reservoir, and the descaling cycle will continue automatically.

If you disconnect the device from the power outlet during descaling, or in case of a power failure, the descaling program will be executed from the very beginning. In this case, you will need a new descaling tablet. Perform the descaling steps again to ensure proper care of the machine.
The descaling cycle is intermittent; during its execution, do not place your hands under the water outlets 'E' and 'W'.
Use only KRUPS descaling tablets (XS3000). The manufacturer is not responsible for damage caused by the use of tablets of other brands.
You can purchase descaling tablets at KRUPS service centers.
Descaling program - total duration: approximately 20 minutes.
The amount of scale depends on the hardness of the water used. The device will warn you of the need to descale by lighting the 'CALC' indicator.
This program is available only when the device requires descaling.

For optimal operating conditions, it is necessary to perform the descaling cycle when the device requires it. Follow the descaling procedure step by step. When the indicator lights up, you can continue using the device, but it is advisable to run the program as soon as possible.
If a water filter (Claris - Aqua Filter System F088) is installed in the tank, do not forget to remove it before performing the descaling cycle.
Use only KRUPS descaling products. You can purchase descaling products at KRUPS service centers.
The manufacturer is not responsible for damage caused to the device as a result of using other products.

Before descaling, carefully inspect the working surface, especially if it is made of marble, stone, or wood.
Start the descaling program by pressing the button. The 'CALC' indicator flashes, and the indicators flash.
Remove the drip tray.
Place a container with a capacity of 0.6 liters under the coffee spouts, and also under the steam nozzle - Fig. 24.
Empty the reservoir and fill it with fresh water up to the 'CALC' mark - Fig. 33.
Dissolve the descaling agent Krups (40 g) in the reservoir - Fig. 33.
Fill the reservoir with water. The indicator goes out.
Press the button after performing all operations.
The first stage (about 8 minutes) starts.
The descaling cycle will be performed automatically.
At the end of this stage, a beep sounds for about 10 seconds, and the indicator flashes.
Pour out the used water from the container and put it back in place.
Empty and rinse the water reservoir - Fig. 34.
Fill the reservoir with water and put it back in place. The indicator goes out.
Press the button again to start the second stage. The beep is interrupted.
The final stage (about 6 min.) starts.
The program continues. It allows you to rinse the device and remove any remaining descaling solution.
At the end of this stage, an audible signal sounds every 10 seconds.
Remove the container used during the cycle and put it back in place.
Press the button again to start the last stage. The audible signal stops.
The last stage (about 6 min.) starts.
The program continues. It allows you to remove the last traces of descaling solution.
The cleaning cycle is complete, the 'CALC' indicator goes out.
Fill the reservoir with water.
The device is ready for operation.
If there is not enough water in the reservoir, the device will warn you with the indicator O.
Add enough water to the reservoir, and the descaling cycle will continue automatically.

If you unplug the device during descaling, press the button again or in case of power failure, the descaling program will be restarted from the beginning. In this case, it is not necessary to add more descaling solution. Perform a full descaling cycle to ensure proper machine maintenance.
The descaling cycle is intermittent; during its execution, do not place your hands under the water outlets E' and W'.
FAULTS AND REMEDIES
The appliance is intended for household use and similar applications, and must be kept in a dry place. It should be stored in the KRUPS service center.
Decorate with a thick layer of whipped cream and serve on the table.
2 Control panel
L Steam button and button "ON/OFF" with power indicator and rotary knob for steam regulation with indicator "Steam collection container" and "Steam for collecting cream" with indicator "Fill water reservoir" Q Button "Milk coffee" Button "Standard coffee" S Indicator "Descale" T Indicator "Clean" U Button "Rinse/Service" V Steam wand W Water level indicator
Description of symbols
Danger!
Warning about the risk of serious injury or death.
The lightning symbol warns of danger due to electric current.

Warning about hot surfaces, which can cause burns.

General or additional note about the device.
Warning pictograms and symbols
Clean the container for milk and the container for cream: the indicator continues to flash until the container for milk is properly inserted or until it has been placed in the correct position for 4 seconds.
Fill the water reservoir
CLEAN Perform cleaning
CALC Descale the appliance
CLEAN + CALC cycle of the coffee machine
Adjusting the grinder step
Standard coffee
Steam button
Washing/Service
Milk jug
PREPARING DRINKS
It is not recommended to use oily, caramelized or flavored coffee beans. This can damage the appliance.
Check that the water tank is not damaged by external objects. Especially when cleaning, which may be in the water tank. The warranty is valid only if the water tank is properly handled by external objects.
Do not pour water into the reservoir for coffee beans.
To avoid contamination of the working surface and the risk of getting burns from hot water, which may come from the appliance. Do not forget to install the drip tray.
Control the cleanliness of the water reservoir.
Initialization - total duration: approximately 3 minutes
Turn on the appliance by pressing the button - Fig. 5. The indicator will light up continuously. Wait until the appliance is ready, about 0.6 liters of water will flow through the coffee and steam system. Press the button - Fig. 6, the initialization process will start for the steam system and the coffee preparation system. The indicator will blink. It will stop when the indicator 1 lights up continuously. The coffee machine is ready for preparing your recipes.
Report the system status several times, if the appliance has not been used for a long time. Each time, when you turn on the appliance, the machine will perform initialization.
You can now start brewing coffee by adjusting the stepper switch. When moving the coffee beans, the coffee will be ground more finely. To adjust the stepper switch, turn the "Stepper adjustment" regulator. When turning the regulator, the movement will be different.
When the milk jug is ready, place the jug under the coffee spout and start brewing coffee - approx. 20.
Carefully wipe the milk frother so that milk does not dry on it. Rinse the nozzle immediately after frothing. To remove dried milk particles, use the accessory container filled with water. For cleaning, you can use the KRUPS accessories available for the accessory container.
CARE AND MAINTENANCE
Empty the coffee grounds container and the drip tray.
The indicator lights up.
Remove, empty and clean the coffee grounds container - Fig. 21.
Place the coffee grounds container back in place - Fig. 22.
Remove, empty and clean the drip tray - Fig. 23.
The drip tray is equipped with a float that indicates when it needs to be emptied. Keep all parts and put them back in place.
If you have removed the coffee grounds container and cleaned it completely, and then filled it with water, the coffee grounds will be ejected through the spout.

The indicator lights up when the coffee grounds container is not inserted or is inserted incorrectly, and also when it has been in place for more than 4 hours.
When the indicator lights up or flashes, the espresso or coffee preparation is impossible. The container is designed for 9 servings of coffee grounds.
System maintenance
The machine will automatically stop, except for the 'CLEAN' and/or 'CALC' maintenance programs.
Rinsing the coffee preparation system:
Place a container under the steam nozzle. Press and hold the button - fig. 6 to start the rinsing cycle of the coffee preparation system, which will stop automatically after 40 ml of water.
Rinsing the steam system:
Place a container under the steam nozzle. Then press and hold the button to start the rinsing cycle of the steam system, which will stop automatically after 300 ml of water.
Empty the used water from the container and put it back in place.
Rinse and fill the water reservoir - fig. 34.
Fill the water reservoir with water and put it back in place. The indicator goes off.
Press the button again to start the second phase. The acoustic signal is interrupted.
The second phase begins (duration approximately 6 min).
The program continues. The water will have time to pass through the circuits and remove all limescale deposits from the appliance.
During the second phase, an acoustic signal sounds every 10 seconds.
Empty the container, pour the used water out of it, and put it back in place.
Press the button again to start the last phase. The acoustic signal is interrupted.
The last phase begins (duration approximately 6 min).
The product is ready. It gives you the ability to see the descaling program for the descaling process.
When the descaling program is complete, the 'CALC' indicator goes out.
Pour water into the reservoir.
The appliance is ready for operation.
If there is not enough water in the reservoir, it will warn you with the indicator O
Add enough water to the reservoir, and the descaling program will continue automatically.

If you unplug the appliance during the descaling program, press the button 一 or switch off and on, the descaling program will be executed from the beginning. In this case, you will get a new tablet for descaling. Perform the full descaling cycle to ensure proper operation according to the instructions.
The descaling cycle runs with pauses; during its execution, do not touch the handles on the inlet and outlet 'E' and 'W'.
3. Adjustment of the automatic switch-off mechanism
If the malfunction indicated in the table list does not disappear, contact the authorized service center.
To get the best taste from your coffee and extend your appliance's service life, we advise you to use only the Claris -
Aqua Filter System cartridge sold as an accessory.
PROBLEM AND ITS SOLUTIONS
If the problem described in the table persists, please contact KRUPS customer service.
CLEAN Perform cleaning
CALC Perform descaling
You can set your appliance to turn off after a pre-programmed number of hours.