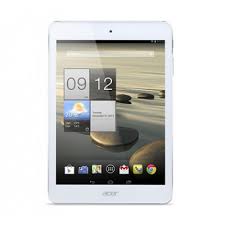
ICONIA A1-830, ICONIA A1-830 (NT.L3WEE.002) - Tablet ACER - Free user manual and instructions
Find the device manual for free ICONIA A1-830, ICONIA A1-830 (NT.L3WEE.002) ACER in PDF.
 FR
FR
 BG
BG
 CS
CS
 DA
DA
 DE
DE
 EL
EL
 EN
EN
 ES
ES
 ET
ET
 FI
FI
 HU
HU
 ID
ID
 IT
IT
 JA
JA
 KO
KO
 LT
LT
 LV
LV
 NL
NL
 NO
NO
 PL
PL
 PT
PT
 RO
RO
 RU
RU
 SK
SK
 SL
SL
 SV
SV
 TR
TR
 ZH
ZH
User questions about ICONIA A1-830, ICONIA A1-830 (NT.L3WEE.002) ACER
0 question about this device. Answer the ones you know or ask your own.
Ask a new question about this device
Download the instructions for your Tablet in PDF format for free! Find your manual ICONIA A1-830, ICONIA A1-830 (NT.L3WEE.002) - ACER and take your electronic device back in hand. On this page are published all the documents necessary for the use of your device. ICONIA A1-830, ICONIA A1-830 (NT.L3WEE.002) by ACER.
USER MANUAL ICONIA A1-830, ICONIA A1-830 (NT.L3WEE.002) ACER
Aspire Series Notebook PC
Model number:
Serial number:
Date of purchase:
Place of purchase:
Information for your safety and comfort
Safety instructions
Read these instructions carefully. Keep this document for future reference. Follow all warnings and instructions marked on the product.
Turning the product off before cleaning
Unplug this product from the wall outlet before cleaning. Do not use liquid cleaners or aerosol cleaners. Use a damp cloth for cleaning.
CAUTION for plug as disconnecting device
Observe the following guidelines when connecting and disconnecting power to the power supply unit:
Install the power supply unit before connecting the power cord to the AC power outlet.
Unplug the power cord before removing the power supply unit from the computer.
If the system has multiple sources of power, disconnect power from the system by unplugging all power cords from the power supplies.
CAUTION for Accessibility
Be sure that the power outlet you plug the power cord into is easily accessible and located as close to the equipment operator as possible. When you need to disconnect power to the equipment, be sure to unplug the power cord from the electrical outlet.
CAUTION for bundled dummy cards (only for certain models)
Your computer shipped with plastic dummies installed in the card slots. Dummies protect unused slots from dust, metal objects or other particles. Save the dummies for use when no cards are in the slots.
CAUTION for Listening
To protect your hearing, follow these instructions.
- Increase the volume gradually until you can hear clearly and comfortably.
- Do not increase the volume level after your ears have adjusted.
- Do not listen to music at high volumes for extended periods.
- Do not increase the volume to block out noisy surroundings.
Decrease the volume if you can't hear people speaking near you.
iv
Warnings
- Do not use this product near water.
- Do not place this product on an unstable cart, stand or table. If the product falls, it could be seriously damaged.
- Slots and openings are provided for ventilation to ensure reliable operation of the product and to protect it from overheating. These openings must not be blocked or covered. The openings should never be blocked by placing the product on a bed, sofa, rug or other similar surface. This product should never be placed near or over a radiator or heat register, or in a built-in installation unless proper ventilation is provided.
- Never push objects of any kind into this product through cabinet slots as they may touch dangerous voltage points or short-out parts that could result in a fire or electric shock. Never spill liquid of any kind onto or into the product.
- To avoid damage of internal components and to prevent battery leakage, do not place the product on a vibrating surface.
- Never use it under sporting, exercising, or any vibrating environment which will probably cause unexpected short current or damage rotor devices, HDD, Optical drive, and even exposure risk from lithium battery pack.
- The bottom surface, areas around ventilation openings and AC adapter may get hot. To avoid injury, ensure they do not come in contact with your skin or body.
- Your device and its enhancements may contain small parts. Keep them out of the reach of small children.
Using electrical power
- This product should be operated from the type of power indicated on the marking label. If you are not sure of the type of power available, consult your dealer or local power company.
- Do not allow anything to rest on the power cord. Do not locate this product where people will walk on the cord.
- If an extension cord is used with this product, make sure that the total ampere rating of the equipment plugged into the extension cord does not exceed the extension cord ampere rating. Also, make sure that the total rating of all products plugged into the wall outlet does not exceed the fuse rating.
- Do not overload a power outlet, strip or receptacle by plugging in too many devices. The overall system load must not exceed 80% of the branch circuit rating. If power strips are used, the load should not exceed 80% of the power strip's input rating.
- This product's AC adapter is equipped with a three-wire grounded plug. The plug only fits in a grounded power outlet. Make sure the power outlet is properly grounded before inserting the AC adapter plug. Do not insert the plug into a non-grounded power outlet. Contact your electrician for details.

Warning! The grounding pin is a safety feature. Using a power outlet that is not properly grounded may result in electric shock and/or injury.

Note: The grounding pin also provides good protection from unexpected noise produced by other nearby electrical devices that may interfere with the performance of this product.
- The system can be powered using a wide range of voltages; 100 to 120 or 220 to 240V AC. The power cord included with the system meets the requirements for use in the country/region where the system was purchased. Power cords for use in other countries/regions must meet the requirements for that country/region. For more information on power cord requirements, contact an authorized reseller or service provider.
Product servicing
Do not attempt to service this product yourself, as opening or removing covers may expose you to dangerous voltage points or other risks. Refer all servicing to qualified service personnel.
Unplug this product from the wall outlet and refer servicing to qualified service personnel when:
the power cord or plug is damaged, cut or frayed
liquid was spilled into the product
- the product was exposed to rain or water
the product has been dropped or the case has been damaged
- the product exhibits a distinct change in performance, indicating a need for service
- the product does not operate normally after following the operating instructions

Note: Adjust only those controls that are covered by the operating instructions, since improper adjustment of other controls may result in damage and will often require extensive work by a qualified technician to restore the product to normal condition.
Guidelines for safe battery usage
This notebook uses a Lithium-ion battery. Do not use it in a humid, wet or corrosive environment. Do not put, store or leave your product in or near a heat source, in a high temperature location, in strong direct sunlight, in a microwave oven or in a pressurized container, and do not expose it to temperatures over 60^ (140°F). Failure to follow these guidelines may cause the battery to leak acid, become hot, explode or ignite and cause injury and/or damage. Do not pierce, open or disassemble the battery. If the battery leaks and you come into contact with the leaked fluids, rinse thoroughly with water and seek medical attention immediately. For safety reasons, and to prolong the lifetime of the battery, charging will not occur at temperatures below 0^ (32°F) or above 40^ (104°F).
The full performance of a new battery is achieved only after two or three complete charge and discharge cycles. The battery can be charged and discharged hundreds of times, but it will eventually wear out. When the operation time becomes noticeably shorter than normal, buy a new battery. Use only the approved batteries, and recharge your battery only with the approved chargers designated for this device.
Use the battery only for its intended purpose. Never use any charger or battery that is damaged. Do not short-circuit the battery. Accidental short-circuiting can occur when a metallic object such as a coin, clip or pen causes direct connection of the positive (+) and negative (-) terminals of the battery. (These look like metal strips on the battery.) This might happen, for example, when you carry a spare battery in your pocket or purse. Short-circuiting the terminals may damage the battery or the connecting object.
The capacity and lifetime of the battery will be reduced if the battery is left in hot or cold places, such as in a closed car in summer or winter. Always try to keep the battery between 15^ and 25^ (59°F and 77°F). A device with a hot or cold battery may not work temporarily, even when the battery is fully charged. Battery performance is especially limited in temperatures well below freezing.
Do not dispose of batteries in a fire as they may explode. Batteries may also explode if damaged. Dispose of batteries according to local regulations. Please recycle when possible. Do not dispose as household waste.
Wireless devices may be susceptible to interference from the battery, which could affect performance.
Replacing the battery pack
The notebook uses lithium batteries. Replace the battery with the same type as that which came bundled with your product. Use of another battery may present a risk of fire or explosion.

Warning! Batteries may explode if not handled properly. Do not disassemble or dispose of them in fire. Keep them away from children. Follow local regulations when disposing of used batteries.
Caution for Optical Drive Device (only for certain models)
CAUTION: This appliance contains a laser system and is classified as a "CLASS 1 LASER PRODUCT." In case of any trouble with this device, please contact your nearest AUTHORIZED service station. To prevent direct exposure to the laser beam, do not try to open the enclosure.
CLASS 1 LASER PRODUCT
CAUTION: INVISIBLE LASER RADIATION WHEN OPEN. AVOID EXPOSURE TO BEAM.
APPAREIL A LASER DE CLASSE 1 PRODUIT
LASERATTENTION: RADIATION DU FAISCEAU LASER INVISIBLE EN CAS D'OUVERTURE. EVITTER Toute EXPOSITION AUX RAYONS.
LUOKAN 1 LASERLAITE LASER KLASSE 1
Telephone line safety
- Disconnect all telephone lines from the equipment when not in use and/or before servicing.
- To avoid the remote risk of electric shock from lightning, do not connect the telephone line to this equipment during lightning or thunderstorms.

Warning! For safety reasons, do not use non-compliant parts when adding or changing components. Consult your reseller for purchase options.
Operating environment

Warning! For safety reasons, turn off all wireless or radio transmitting devices when using your laptop under the following conditions. These devices may include, but are not limited to: wireless Ian (WLAN), Bluetooth and/or 3G.
Remember to follow any special regulations in force in any area, and always switch off your device when its use is prohibited or when it may cause interference or danger. Use the device only in its normal operating positions. This device meets RF exposure guidelines when used normally, and it and its antenna are positioned at least 1.5 centimeters (5/8 inches) away from your body (refer to the figure below). It should not contain metal and you should position the device the above-stated distance from your body. To successfully transmit data files or messages, this device requires a good quality connection to the network. In some cases, transmission of data files or messages may be delayed until such a connection is available. Ensure that the above separation distance instructions are followed until the transmission is completed. Parts of the device are magnetic. Metallic materials may be attracted to the device, and persons with hearing aids should not hold the device to the ear with the hearing aid. Do not place credit cards or other magnetic storage media near the device, because information stored on them may be erased.
Medical devices
Operation of any radio transmitting equipment, including wireless phones, may interfere with the functionality of inadequately protected medical devices. Consult a physician or the manufacturer of the medical device to determine if they are adequately shielded from external RF energy or if you have any questions. Switch off your device in health care facilities when any regulations posted in these areas instruct you to do so. Hospitals or health care facilities may be using equipment that could be sensitive to external RF transmissions.
Pacemakers. Pacemaker manufacturers recommend that a minimum separation of 15.3 centimeters (6 inches) be maintained between wireless devices and a pacemaker to avoid potential interference with the pacemaker. These recommendations are consistent with the independent research by and recommendations of Wireless Technology Research. Persons with pacemakers should do the following:
Always keep the device more than 15.3 centimeters (6 inches) from the pacemaker
- Not carry the device near your pacemaker when the device is switched off. If you suspect interference, switch off your device, and move it.
Hearing aids. Some digital wireless devices may interfere with some hearing aids. If interference occurs, consult your service provider.
Vehicles
RF signals may affect improperly installed or inadequately shielded electronic systems in motor vehicles such as electronic fuel injection systems, electronic antiskid (antilock) braking systems, electronic speed control systems, and air bag systems. For more information, check with the manufacturer, or its representative, of your vehicle or any equipment that has been added. Only qualified personnel should service the device, or install the device in a vehicle. Faulty installation or service may be dangerous and may invalidate any warranty that may apply to the device. Check regularly that all wireless equipment in your vehicle is mounted and operating properly. Do not store or carry flammable liquids, gases, or explosive materials in the same compartment as the device, its parts, or enhancements. For vehicles equipped with an air bag, remember that air bags inflate with great force. Do not place objects, including installed or portable wireless equipment in the area over the air bag or in the air bag deployment area. If in-vehicle wireless equipment is improperly installed, and the air bag inflates, serious injury could result. Using your device while flying in aircraft is prohibited. Switch off your device before boarding an aircraft. The use of wireless teledevices in an aircraft may be dangerous to the operation of the aircraft, disrupt the wireless telephone network, and may be illegal.
Potentially explosive environments
Switch off your device when in any area with a potentially explosive atmosphere and obey all signs and instructions. Potentially explosive atmospheres include areas where you would normally be advised to turn off your vehicle engine. Sparks in such areas could cause an explosion or fire resulting in bodily injury or even death. Switch off the device at refueling points such as near gas pumps at service stations. Observe restrictions on the use of radio equipment in fuel depots, storage, and distribution areas; chemical plants; or where blasting operations are in progress. Areas with a potentially explosive atmosphere are often, but not always, clearly marked. They include below deck on boats, chemical transfer or storage facilities, vehicles using liquefied petroleum gas (such as propane or butane), and areas where the air contains chemicals or particles such as grain, dust or metal powders. Do not switch the notebook on when wireless phone use is prohibited or when it may cause interference or danger.
Emergency calls
Warning: You cannot make emergency calls through this device. To make an emergency call you shall dial out through your mobile phone or other telephone call system.
Disposal instructions
Do not throw this electronic device into the trash when discarding. To minimize pollution and ensure utmost protection of the global environment, please recycle. For more information on the Waste from Electrical and Electronics Equipment (WEEE) regulations, visit http://www.acer-group.com/public/Sustainability/sustainability01.htm

Mercury advisory
For bulb-inside projectors or electronic products containing an non-LED-backlit-LCD/CRT monito or display: Lamp(s) inside this product contain mercury and must be recycled or disposed of according to

local, state or federal laws. For more information, contact the Electronic Industries Alliance at www.eiae.org. For lamp-specific disposal information, check www.lamprecycle.org.
ENERGY STAR

ENERGY STAR
Acer's ENERGY STAR qualified products save your money by reducing energy cost and protecting the environment without sacrificing features or performance. Acer is proud to offer our customers products with the ENERGY STAR mark.
What is ENERGY STAR?
Products that are ENERGY STAR qualified use less energy and prevent greenhouse gas emissions by meeting strict energy efficiency guidelines set by the U.S. Environmental Protection Agency. Acer is committed to offer products and services worldwide that help customers save money, conserve energy and improve the quality of our environment. The more energy we can save through higher energy efficiency, the more we reduce greenhouse gases and the risks of climate change. More information refers to http://www.energystar.gov or http://www.energystar.gov/powermanagement.
Acer ENERGY STAR qualified products: (only for certain models)
- Produce less heat and reduce cooling loads, and warmer climates.
- Automatically go into "display sleep" and "computer sleep" mode after 10 and 30 minute of inactivity respectively.
- Wake the computer from sleep mode by pushing keyboard or moving mouse.
Computers will save more than 80% energy at "sleep" mode.
ENERGY STAR and the ENERGY STAR mark are registered U.S. marks
Tips and information for comfortable use
Computer users may complain of eyestrain and headaches after prolonged use. Users are also at risk of physical injury after long hours of working in front of a computer. Long work periods, bad posture, poor work habits, stress, inadequate working conditions, personal health and other factors greatly increase the risk of physical injury.
Incorrect computer usage may lead to carpal tunnel syndrome, tendonitis, tenosynovitis or other musculoskeletal disorders. The following symptoms may appear in the hands, wrists, arms, shoulders, neck or back:
- numbness, or a burning or tingling sensation
- aching, soreness or tenderness
pain, swelling or throbbing
stiffness or tightness - coldness or weakness
If you have these symptoms, or any other recurring or persistent discomfort and/or pain related to computer use, consult a physician immediately and inform your company's health and safety department.
The following section provides tips for more comfortable computer use.
Finding your comfort zone
Find your comfort zone by adjusting the viewing angle of the monitor, using a footrest, or raising your sitting height to achieve maximum comfort. Observe the following tips:
- refrain from staying too long in one fixed posture
- avoid slouching forward and/or leaning backward
- stand up and walk around regularly to remove the strain on your leg muscles
- take short rests to relax your neck and shoulders
- avoid tensing your muscles or shrugging your shoulders
- install the external display, keyboard and mouse properly and within comfortable reach
- if you view your monitor more than your documents, place the display at the center of your desk to minimize neck strain
Taking care of your vision
Long viewing hours, wearing incorrect glasses or contact lenses, glare, excessive room lighting, poorly focused screens, very small typefaces and low-contrast displays could stress your eyes. The following sections provide suggestions on how to reduce eyestrain.
XII
Eyes
Rest your eyes frequently.
- Give your eyes regular breaks by looking away from the monitor and focusing on a distant point.
- Blink frequently to keep your eyes from drying out.
Display
- Keep your display clean.
- Keep your head at a higher level than the top edge of the display so your eyes point downward when looking at the middle of the display.
- Adjust the display brightness and/or contrast to a comfortable level for enhanced text readability and graphics clarity.
-
Eliminate glare and reflections by:
-
placing your display in such a way that the side faces the window on any light source
- minimizing room light by using drapes, shades or blinds
using a task light -
changing the display's viewing angle
using a glare-reduction filter
using a display visor, such as a piece of cardboard extended from the display's top front edge -
Avoid adjusting your display to an awkward viewing angle.
- Avoid looking at bright light sources, such as open windows, for extended periods of time.
Developing good work habits
Develop the following work habits to make your computer use more relaxing and productive:
Take short breaks regularly and often.
Perform some stretching exercises.
- Breathe fresh air as often as possible.
Exercise regularly and maintain a healthy body.

Warning! We do not recommend using the computer on a couch or bed. If this is unavoidable, work for only short periods, take breaks regularly, and do some stretching exercises.

Note: For more information, please refer to "Regulations and safety notices" on page 46.
First things first
We would like to thank you for making an Acer notebook your choice for meeting your mobile computing needs.
Your guides
To help you use your Acer notebook, we have designed a set of guides:
First off, the Quick start up guide...poster helps you get started with setting up your computer.
The Aspire series Generic User Guide contains useful information applying to all models in the Aspire product series. It covers basic topics such as Acer eRecovery Management, using the keyboard, audio, etc. Please understand that due to its nature, the Generic User Guide as well as the AcerSystem User Guide mentioned below will occasionally refer to functions or features which are only contained in certain models of the series, but not necessarily in the model you purchased. Such instances are marked in the text with language such as "only for certain models".
For more on how your computer can help you to be more productive, please refer to the AcerSystem User Guide. This guide contains detailed information on such subjects as system utilities, data recovery, expansion options and troubleshooting. In addition it contains warranty information and the general regulations and safety notices for your notebook. It is available in Portable Document Format (PDF) and comes preloaded on your notebook. Follow these steps to access it:
1 Click on Start > All Programs > AcerSystem.
2 Click on AcerSystem User Guide.

Note: Viewing the file requires Adobe Reader. If Adobe Reader is not installed on your computer, clicking on AcerSystem User Guide will run the Adobe Reader setup program first. Follow the instructions on the screen to complete the installation. For instructions on how to use Adobe Reader, access the Help and Support menu.
Basic care and tips for using your computer
Turning your computer on and off
To turn on the computer, simply press and release the power button below the LCD screen. Please refire to "Quick start up guide" for the location of the power button.
xiv
To turn the power off, do any of the following:
Use the Windows shutdown command Click on Start then click on Shut Down.
Use the power button
You can also put the computer in sleep mode by pressing the sleep hotkey

Note: If you cannot power off the computer normally, press and hold the power button for more than four seconds to shut down the computer. If you turn off the computer and want to turn it on again, wait at least two seconds before powering up.
Taking care of your computer
Your computer will serve you well if you take care of it.
- Do not expose the computer to direct sunlight. Do not place it near sources of heat, such as a radiator.
- Do not expose the computer to temperatures below 0^ ( 32^ ) or above 50^ ( 122^ ).
- Do not subject the computer to magnetic fields.
- Do not expose the computer to rain or moisture.
- Do not spill water or any liquid on the computer.
- Do not subject the computer to heavy shock or vibration.
- Do not expose the computer to dust or dirt.
- Never place objects on top of the computer.
- Do not slam the computer display when you close it.
- Never place the computer on uneven surfaces.
Taking care of your AC adapter
Here are some ways to take care of your AC adapter:
- Do not connect the adapter to any other device.
- Do not step on the power cord or place heavy objects on top of it. Carefully route the power cord and any cables away from foot traffic.
- When unplugging the power cord, do not pull on the cord itself but pull on the plug.
- The total ampere ratings of the equipment plugged in should not exceed the ampere rating of the cord if you are using an extension cord. Also, the total current rating of all equipment plugged into a single wall outlet should not exceed the fuse rating.
Taking care of your battery pack
Here are some ways to take care of your battery pack:
- Use only batteries of the same kind as replacements. Turn the power off before removing or replacing batteries.
- Do not tamper with batteries. Keep them away from children.
- Dispose of used batteries according to local regulations. Recycle if possible.
Cleaning and servicing
When cleaning the computer, follow these steps:
1 Turn off the computer and remove the battery pack.
2 Disconnect the AC adapter.
3 Use a soft, moist cloth. Do not use liquid or aerosol cleaners.
If either of the following occurs:
the computer has been dropped or the body has been damaged;
the computer does not operate normally
Please refer to "Frequently asked questions" on page 41.
Information for your safety and comfort iii
Safety instructions iii
Caution for Optical Drive Device (only for certain models) vii
Operating environment viii
Medical devices viii
Vehicles ix
Potentially explosive environments ix
Emergency calls ix
Disposal instructions
Mercury advisory x
ENERGY STAR
Tips and information for comfortable use xi
First things first xiii
Your guides xiii
Basic care and tips for using your computer xiii
Turning your computer on and off xiii
Taking care of your computer xiv
Taking care of your AC adapter xiv
Taking care of your battery pack XV
Cleaning and servicing XV
Special keys and indicators 1
Enabling your wireless devices 2
3
3 Touchpad basics (with two-click buttons)
Using the keyboard 4
Lock keys and embedded numeric keypad* 4
Hotkeys 5
Windows keys 6
Audio 7
Acer PureZone (only for certain models) 7
Tuba (only for certain models) 7
Using Dolby Home Theater for surround/
multi-channel sound (only for certain models) 7
Video 8
16:9 display 8
Using the system utilities 9
Acer Bio-Protection (only for certain models) 9
Acer Backup Manager 10
Power management 11
Acer eRecovery Management 12
Burn backup discs 13
Restore 14
Restore Windows from backup discs 15
Acer Arcade Deluxe 17
General controls 18
Navigation controls 18
Using social networking sites 18
Photo 18
Video 19
Player controls 19
Music 20
Update 20
Battery pack 21
Battery pack characteristics 21
Maximizing the battery's life 21
Installing and removing the battery pack 22
Charging the battery 23
Checking the battery level 23
Optimising battery life 23
Battery-low warning 24
Taking your notebook PC with you 25
Disconnecting from the desktop 25
Moving around 25
Preparing the computer 25
What to bring to meetings 26
Taking the computer home 26
Preparing the computer 26
What to take with you 26
Special considerations 27
Setting up a home office 27
Traveling with the computer 27
Preparing the computer 27
What to take with you 27
Special considerations 28
Traveling internationally with the computer 28
Preparing the computer 28
What to bring with you 28
Special considerations 28
Securing your computer 29
Using a computer security lock 29
Using passwords 29
Entering passwords 30
Setting passwords 30
Expanding through options 31
Connectivity options 31
Fax/data modem (only for certain models) 31
Built-in network feature 32
Consumer Infrared (CIR) (only for certain models) 32
Universal Serial Bus (USB) 33
IEEE 1394 port (only for certain models) 33
High-Definition Multimedia Interface
(only for certain models) 34
ExpressCard (only for certain models) 34
Installing memory (only for certain models) 35
Enjoying TV with Windows Media Center 37
Choose your input type 37
Watching TV using the optional DVB-T (digital TV)
antenna (for selected models) 37
To connect the digital antenna 37
Watching TV with an external antenna or cable socket 38
BIOS utility 39
Boot sequence 39
Enable disk-to-disk recovery 39
Password 39
Using software 40
Playing DVD movies 40
Frequently asked questions 41
Requesting service 44
International Travelers Warranty (ITW) 44
Before you call 44
Troubleshooting 45
Troubleshooting tips 45
Error messages 45
Regulations and safety notices 46
FCC statement 46
Modem notices (only for certain models) 47
LCD pixel statement 49
Radio device regulatory notice 49
General 49
The FCC RF safety requirement 50
Canada — Low-power license-exempt radio
communication devices (RSS-210) 51
Exposure of humans to RF fields (RSS-102) 51
LCD panel ergonomic specifications 52
Special keys and indicators
The special keys and indicators provide easy access to handy features and clear status information.
| Icon | Item | Description |
| Backup key | Launches Acer Backup Management for three-step data backup (only for certain models). | |
| P | PowerSmart key | Puts your computer into power-saving mode (only for certain models). |
| Programmable key | User-programmable (only for certain models). | |
| Power indicator | Indicates the computer's power status. | |
| Battery indicator | Indicates the computer's battery status. 1. Charging: The light shows amber when the battery is charging. 2. Fully charged: The light shows blue when in AC mode. | |
| Communication indicator | Indicates the computer's wireless connectivity device status. | |
| HDD indicator | Indicates when the hard disk drive is active. | |
| Num Lock indicator | Lights up when Num Lock is activated (only for certain models). | |
| A | Caps Lock indicator | Lights up when Caps Lock is activated (only for certain models). |
Enabling your wireless devices
The Launch Manager allows you to enable and disable the various wireless connectivity devices on your computer.
Press <Fn> + <F3> to bring up the Launch Manager window panel.
A red toggle indicates the device is off.
- Click the red toggle to turn the device on.
A green toggle indicates the device is on. - Click the green toggle to turn the device off.


Note: Communication devices may vary by system configuration. Remember to access the respective wireless devices' configuration panel for additional options.
Touchpad
The built-in touchpad is a pointing device that senses movement on its surface. This means the cursor responds as you move your finger across the surface of the touchpad. The central location on the palmrest provides optimum comfort and support.
Touchpad basics (with two-click buttons)
The following items show you how to use the touchpad with two-click buttons.
- Move your finger across the touchpad to move the cursor.
- Press the left and right buttons located beneath the touchpad to perform selection and execution functions. These two buttons are similar to the left and right buttons on a mouse. Tapping on the touchpad is the same as clicking the left button.
| Function | Left button | Right button | Main touchpad |
| Execute | Quickly click twice. | Tap twice (at the same speed as double-clicking a mouse button). | |
| Select | Click once. | Tap once. | |
| Drag | Click and hold, then use finger on the touchpad to drag the cursor. | Tap twice (at the same speed as double-clicking a mouse button); rest your finger on the touchpad on the second tap and drag the cursor. | |
| Access context menu | Click once. |

Note: Illustrations for reference only. The exact configuration of your PC depends on the model purchased.

Note: When using the touchpad, keep it — and your fingers — dry and clean. The touchpad is sensitive to finger movement; hence, the lighter the touch, the better the response. Tapping harder will not increase the touchpad's responsiveness.

Note: By default, vertical and horizontal scrolling is enabled on your touchpad. It can be disabled under Mouse settings in Windows Control Panel.
Using the keyboard
The keyboard has full-sized keys and an embedded numeric keypad*, separate cursor, lock, Windows, function and special keys.
Lock keys and embedded numeric keypad*
The keyboard has three lock keys which you can toggle on and off.
| Lock key | Description |
| Caps Lock | When Caps Lock is on, all alphabetic characters typed are in uppercase. |
| Num Lock | When Num Lock is on, the embedded keypad is in numeric mode. The keys function as a calculator (complete with the arithmetic operators +, -, *, and /). Use this mode when you need to do a lot of numeric data entry. A better solution would be to connect an external keypad. |
| Scroll Lock | When Scroll Lock is on, the screen moves one line up or down when you press the up or down arrow keys respectively. Scroll Lock does not work with some applications. |
The embedded numeric keypad functions like a desktop numeric keypad. It is indicated by small characters located on the upper right corner of the keycaps. To simplify the keyboard legend, cursor-control key symbols are not printed on the keys.
| Desired access | Num Lock on | Num Lock off |
| Number keys on embedded keypad | Type numbers in a normal manner. | |
| Cursor-control keys on embedded keypad | Hold <Shift> while using cursor-control keys. | Hold <Fn> while using cursor-control keys. |
| Main keyboard keys | Hold <Fn> while typing letters on embedded keypad. | Type the letters in a normal manner. |
- only for certain models
Hotkeys
The computer employs hotkeys or key combinations to access most of the computer's controls like screen brightness and volume output.
To activate hotkeys, press and hold the <Fn> key before pressing the other key in the hotkey combination.
| Hotkey | Icon | Function | Description |
| +Fn> + <F3> | ( ) | Communicatio n key | Enables / disables the computer's communication devices. (Communication devices may vary by configuration.) |
| <Fn> + <F4> | Z² | Sleep | Puts the computer in Sleep mode. |
| <Fn> + <F5> | □|□ | Display toggle | Switches display output between the display screen, external monitor (if connected) and both. |
| <Fn> + <F6> | ■ | Display off | Turns the display screen backlight off to save power. Press any key to return. |
| <Fn> + <F7> | ◇ | Touchpad toggle | Turns the internal touchpad on and off. |
| <Fn> + <F8> | ◇ | Speaker toggle | Turns the speakers on and off. |
| <Fn> + <F11> | NumLk | Turns the embedded numeric keypad on or off (only for certain models). | |
| <Fn> + <F2> | Brightness up | Increases the screen brightness. | |
| <Fn> + <F3> | Brightness down | Decreases the screen brightness. | |
| <Fn> + <F4> | Volume up | Increases the sound volume. | |
| <Fn> + <F5> | Volume down | Decreases the sound volume. | |
| <Fn> + <Home> | /| | | Play/Pause | Play or pause a selected media file. |
| <Fn> + <Pg Up> | ■ | Stop | Stop playing the selected media file. |
| <Fn> + <Pg Dn> | |▲| | Previous | Return to the previous media file. |
| <Fn> + <End> | ▶| | Next | Jump to the next media file. |
Windows keys
The keyboard has two keys that perform Windows-specific functions.
| Key | Description |
| Windows key | Pressed alone, this key has the same effect as clicking on the Windows Start button; it launches the Start menu. It can also be used with other keys to provide a variety of functions: |
| <>: Open or close the Start menu | |
| <> + <D>: Display the desktop | |
| <> + <E>: Open Windows Explore | |
| <> + <F>: Search for a file or folder | |
| <> + <G>: Cycle through sidebar gadgets | |
| <> + <L>: Lock your computer (if you are connected to a network domain), or switch users (if you're not connected to a network domain) | |
| <> + <M>: Minimizes all windows | |
| <> + <R>: Open the Run dialog box | |
| <> + <T>: Cycle through programs on the taskbar | |
| <> + <U>: Open Ease of Access Center | |
| <> + <X>: Open Windows Mobility Center | |
| <> + <BREAK>: Display the System Properties dialog box | |
| <> + <SHIFT+M>: Restore minimized windows to the desktop | |
| <> + <TAB>: Cycle through programs on the taskbar by using Windows Flip 3-D | |
| <> + <SPACEBAR>: Bring all gadgets to the front and select Windows Sidebar | |
| <CTRL> + <> + <F>: Search for computers (if you are on a network) | |
| <CTRL> + <> + <TAB>: Use the arrow keys to cycle through programs on the taskbar by using Windows Flip 3-D | |
| Note: Depending on your edition of Windows, some shortcuts may not function as described. | |
| Application key | This key has the same effect as clicking the right mouse button; it opens the application's context menu. |
Audio
The computer also comes with 32-bit High Definition (HD) Audio and speaker(s).
Acer PureZone (only for certain models)
The system provides you whole new enthusiastic audio experience including Acer PureZone with built-in stereo microphones featuring beam forming and echo cancellation technologies. Acer PureZone technology supports Acoustic Echo Cancellation, Beam Forming and Noise Suppression for pure sound recording. To set up your microphone, run the Acer HD Audio Manager by double-clicking the Acer HD Audio Manager icon in the system tray of your Windows system. The Acer HD Audio Manager dialog box will pop up. Click the Microphone tab, and then click the Microphone Effects tab. Select Beam Forming and Acoustic Echo Cancellation to set the microphone effect.

Note: Disable the beam forming to get the multi-sound source input.
Tuba (only for certain models)
The dedicated Tuba CineBass subwoofer pumps out earthshaking movie-house audio. The innovative design integrates the subwoofer with the tube-style hinge.
Using Dolby Home Theater for surround/ multi-channel sound (only for certain models)
Your Acer notebook comes with the Dolby Home Theater® audio enhancement featuring Dolby Pro Logic IIx, Dolby Digital Live, Dolby Headphone, Dolby Natural Bass and Dolby Sound Space Expander, Audio Optimization, High Frequency Enhancer technologies to give you high-quality digital surround sound for enjoying movies, games and music in a realistic, multi-channel audio environment.
Dolby Pro Logic IIx
Dolby Pro Logic IIx creates a vivid 5.1-channel surround sound experience from any stereo (two-channel) movie, music, TV, or game audio source. Dolby Pro Logic IIx examines the signal and uses that information to expand audio into up to 5.1 channels of highly realistic, natural surround sound.
Dolby Digital Live
Dolby Digital Live converts any audio signal in real time from PCs or game consoles into Dolby Digital for easy connection to home theater systems
through a single digital cable. Users can enjoy PC or game audio entertainment with exciting realism through home theater receivers or other devices equipped with Dolby Digital decoding technology.
Dolby Headphone
Dolby Headphone creates a personal surround sound experience using any set of headphones. The playback of music, movies, and games results in sound that is more spacious, open, and dramatic, improving listening comfort and making listeners feel as if the action is happening all around them.
Dolby Natural Bass
A bass enhancement system, which provides up to an octave of downward extension in the bass response of most speakers.
Dolby Sound Space Expander
A sound stage enhancer, which produces a wide stereo image and improves the separation of instruments without diminishing the center of the mix.
Video
16:9 display
16:9 display delivers Full HD movies at home like never before. Sky-high color saturation guarantees an authentic HD viewing experience.16:9 quality means true home theater visuals have finally arrived for notebook entertainment enthusiasts.
Using the system utilities
Acer Bio-Protection (only for certain models)
Acer Bio-Protection Fingerprint Solution is a multi-purpose fingerprint software package integrated with the Microsoft Windows operating system. Utilizing the uniqueness of one's fingerprint, Acer Bio-Protection Fingerprint Solution incorporates protection against unauthorized access to your computer with centralized password management via Password Bank; and fast application/ website launching and login with Acer FingerLaunch.
With Acer Bio-Protection Fingerprint Solution, you can now enjoy an extra layer of protection for your personal computer, as well as the convenience of accessing your daily tasks with a simple swipe of your finger!
For more information, refer to the Acer Bio-Protection help files.

Acer Backup Manager

Note: This feature is only available on certain models.
Acer Backup Manager is a simple three-step process that allows you to create backup copies of your entire system or selected files and folders according to a schedule or as you need to.
To start Acer Backup Manager, press the Acer Backup Manager key above the keyboard. Alternatively, you can go to Start > All Programs > Acer Backup Manager > Acer Backup Manager. This will open the Welcome screen; from this screen you will be taken through the three steps to setup scheduled back ups. Click Continue to proceed to the following screen. Click the + button and follow the onscreen instructions:
1 Select the content you want to back up. The less content you select, the quicker the process will be, but it will increase your risks of losing data.
2 Select where you want the backup copies to be stored. You will need to select an external drive or your D: drive; Acer Backup Manager cannot store a backup on the source drive.
3 Select how often you want Acer Backup Manager to create back ups.
Once you have finished these three steps, backups will be created according to the schedule. You can also create backups manually by pressing the Acer Backup Manager key.
If you wish to change your settings at any time, run Acer Backup Manager from the Start menu and go through the steps outlined above.

Power management
This computer has a built-in power management unit that monitors system activity. System activity refers to any activity involving one or more of the following devices: keyboard, mouse, hard disk, peripherals connected to the computer, and video memory. If no activity is detected for a period of time (called an inactivity timeout), the computer stops some or all of these devices in order to conserve energy.
This computer employs a power management scheme that supports the advanced configuration and power interface (ACPI), which allows for maximum power conservation and maximum performance at the same time. Windows handles all power-saving chores for your computer.
Acer PowerSmart key

Note: This feature is only available on certain models.
The Acer PowerSmart key uses the power-saving features of your computer's graphics sub-system to reduce overall power consumption. When you press the Acer PowerSmart key, the screen brightness is reduced and the graphics chip switched to a lower speed; PCI and WLAN switch to power-saving modes. Press the Acer PowerSmart key again to return to your previous settings.
Acer eRecovery Management
Acer eRecovery Management is a tool to quickly restore the system. You can back up/restore the factory default image, and reinstall applications and drivers.

Note: All of the following content is for general reference only. Actual product specifications may vary.
Acer eRecovery Management consists of the following functions:
1 Backup:
- Create Factory Default Disc
Create Drivers and Applications Disc
2 Restore:
- Completely Restore System to Factory Defaults
- Restore Operating System and Retain User Data
Reinstall Drivers or Applications
This chapter will guide you through each process.

Note: This feature is only available on certain models. For systems that do not have a built-in optical disc burner, plug in an external optical disc burner before entering Acer eRecovery Management for optical disc-related tasks.
To use the password protection feature of Acer eRecovery Management, you must first set the password. The password is set by launching Acer eRecovery Management and clicking Settings.

Burn backup discs
From the Backup page of Acer eRecovery Management, you can burn the factory default image or back up drivers and applications.
1 Click on Start > All Programs > Acer > Acer eRecovery Management.
2 Acer eRecovery Management opens to the Backup page.

3 Select the type of backup (factory default or drivers and applications) you would like to burn to disc.
4 Follow the instructions on screen to complete the process.

Note: Create a factory default image when you want to burn a bootable disc that contains your computer's entire operating system as it was delivered to you from the factory. If you wish to have a disc that will allow you to browse the contents and install selected drivers and applications, create a drivers and application backup instead — this disc will not be bootable.
Restore
The restore feature allows you to restore or recover the system from a factory default image or from previously created CD and DVD backups. You can also reinstall applications and drivers for your Acer system.
1 Click on Start, All Programs, Acer, AcerRecovery Management.
2 Switch to the Restore page by clicking Restore.

3 You can choose to restore the system from a factory default image or reinstall applications and drivers.
4 Follow the instructions on screen to complete the process.
Restore Windows from backup discs

Note: This feature is only available on certain models.
To restore Windows from your previously burned backup discs, you will need to insert the first backup disc and enable the F12 Boot Menu via the BIOS Setup Utility.
1 Turn on your computer and insert the first system recovery disc into the optical disc drive. Restart your computer.
2 During startup when the Acer logo shows, press the F2 key to enter BIOS Setup, where you can set system parameters.
3 Use the left and right arrow keys to select the Main menu.
4 Use the up and down arrow keys to select F12 Boot Menu.
5 Use the F5 or F6 key to change F12 Boot Menu to Enabled.
6 Press the ESC key to enter the Exit submenu, press the ENTER key to Exit Saving Changes. Press the ENTER key again to select Yes. The system will reboot.
7 After rebooting, when the Acer logo shows, press the F12 key to open the Boot Menu. Here you can select which device to boot from.
8 Use the arrow keys to select the IDE1*, then press the ENTER key. Windows will be installed from the recovery disc.
9 Insert the second recovery disc when prompted, then follow the onscreen prompts to complete the restore.
10 Remove the recovery disc from the optical drive once the restore is complete. Do this before rebooting your computer.
If you prefer to set the boot priority for long-term use, you should select the Boot submenu.
1 Turn on your computer and insert the first system recovery disc into the optical disc drive. Restart your computer.
2 During startup when the Acer logo shows, press the F2 key to enter BIOS Setup, where you can set system parameters.
3 Use the left and right arrow keys to select the Boot menu.
4 Use the up and down arrow keys to select the IDE1 device.
5 Use the F6 key to move the IDE1 device to the highest boot priority, or use the F5 key to move other devices to a lower boot priority. Ensure that the IDE1* device is the highest priority.
6 Press the ESC key to enter the Exit submenu, press the ENTER key to Exit Saving Changes. Press the ENTER key again to select Yes. The system will reboot.
7 When you reboot, Windows will be installed from the recovery disc.
8 Insert the second recovery disc when prompted, then follow the onscreen prompts to complete the restore.
9 Remove the recovery disc from the optical drive once the restore is complete. Do this before rebooting your computer.
Acer Arcade Deluxe

Note: This feature is only available on certain models.
Acer Arcade Deluxe is a player for music, photos and movies with integrated social networking tools. Use the MediaConsole (if available) or touchpad to select the media type you wish to enjoy or share with your friends via services such as YouTube, Facebook or Flickr.

- Photo — view photos stored on your hard disk or removable media.
Video - watch DVDs, VCDs, Blu-Ray movies, video clips or content on providers such as YouTube.
Music—listen to music files in a variety of formats.

Note: While watching videos, optical discs or slideshows, your screenshot and power-saving features are unavailable.
General controls
When watching video clips, movies or slideshows using full-screen resolution, two pop-up control panels are shown when you move the pointer. They automatically disappear after several seconds. The Navigation Controls panel appears at the top and the Player Controls panel appears at the bottom of the screen.
Navigation controls
To return to the Arcade home page, click the Home icon in the upper right corner of the window, the other buttons (minimize, maximize, close) have standard PC behaviors.
To quit Arcade, click the Close button in the upper right corner of the window.
Using social networking sites
If you have accounts with supported social networking sites, you can sign in to your accounts and view updated information directly from Acer Arcade Deluxe. The first time you click on one of the social networking links in the Photo or Video pages, you will be asked to enter your username and password for the site. If you check Remember me, Acer Arcade Deluxe will remember your login information and automatically display updated content the next time you enter the Photo or Video page.
You can also share content by clicking the Share on icon . This will allow you to upload photos and videos to selected sites, mobile devices or external storage devices. To share content, drag and drop the thumbnail from the list to the site or device you want to copy it to.
Photo
Acer Arcade Deluxe lets you view digital photos individually or as a slideshow, from any available drive on your computer. Click Photo to open the Photo page; here you can see thumbnails for individual pictures and folders. Click on a folder to open it.
To view a slideshow, open the folder containing the pictures you wish to view, select all or some of the pictures and click the Play icon. The slideshow is played at fullscreen resolution.
You can also view a single picture by clicking on it. This opens the picture at fullscreen resolution.
You can then use the onscreen controls to zoom in and out, and to pan in four directions.
Video
Double-click the icon for a movie or video clip that you want to watch. Depending in the type of optical drive installed in your computer, you can play movies from Blu-Ray discs, standard DVDs and video CDs (VCDs) with the Cinema function of Acer Arcade Deluxe. This player has the features and controls of a typical DVD player.
When you insert a disk into the DVD drive, the movie begins playing automatically. To control the movie, the pop-up player control panel appears at the bottom of the window when you move the pointer.
When viewing DVDs, the following special controls are added to the pop-up panel:
DVD Menu
- Subtitles
Language
- Snapshot
Angle
If you move your mouse/cursor while you're watching a movie, a menu bar will appear at the bottom of the screen. This contains buttons to control the movie playback, select subtitles, adjust volume, select soundtrack language and set advanced features.

Note: Function availability will depend on what the optical disc being played supports.
Clicking the stop button will stop the movie playback, and return you to the Videos screen. At the bottom of the screen are buttons that allow you to resume the movie from the point it was stopped, restart the movie from the beginning or eject the disc.
Player controls
At the bottom of the window, the player controls — used for video, slideshows, movies and music — are shown. They provide standard playback controls (play, pause, stop, etc.) and volume controls (mute and volume up/down).

Note: When playing movies from optical discs, there are additional controls added to the right of the volume controls. These are discussed in more detail in the Cinema of this guide.
Music
For convenient access to your music collection, click Music to open the Music page.
Select the folder, CD or category that contains the music you want to listen to. Click Play to listen to the entire content from the beginning, or select the song that you want to hear from the list.
The songs in the folder are shown as a list with album information at the top of the page, while the toolbar at the bottom of the page has controls for Play,
Shuffle, Repeat All, Visualize, Volume and Menu. Visualize allows you to watch computer-generated visuals while you listen to music.
Update
Click the Settings icon in the upper right corner to view the About information. The Update tab allows you to check for and download available updates to the software.
Battery pack
The computer uses a battery pack that gives you long use between charges.
Battery pack characteristics
The battery pack has the following characteristics:
- Employs current battery technology standards.
Delivers a battery-low warning.
The battery is recharged whenever you connect the computer to the AC adapter. Your computer supports charge-in-use, enabling you to recharge the battery while you continue to operate the computer. However, recharging with the computer turned off results in a significantly faster charge time.
The battery will come in handy when you travel or during a power failure. It is advisable to have an extra fully charged battery pack available as backup. Contact your dealer for details on ordering a spare battery pack.
Maximizing the battery's life
Like all other batteries, your computer's battery will degrade over time. This means that the battery's performance will diminish with time and use. To maximize your battery's life, you are advised to adhere to the recommendations set out below.
Conditioning a new battery pack
Before you use a battery pack for the first time, there is a "conditioning" process that you should follow:
1 Insert the new battery without turning the computer on.
2 Connect the AC adapter and fully charge the battery.
3 Disconnect the AC adapter.
4 Turn on the computer and operate using battery power.
5 Fully deplete the battery until the battery-low warning appears.
6 Reconnect the AC adapter and fully charge the battery again.
Follow these steps again until the battery has been charged and discharged three times.
Use this conditioning process for all new batteries, or if a battery hasn't been used for a long time. If the computer is to be stored for more than two weeks, you are advised to remove the battery pack from the unit.

Warning: Do not expose battery packs to temperatures below 0^ (32^) or above 45^ (113^) . Extreme temperatures may adversely affect the battery pack.
By following the battery conditioning process you condition your battery to accept the maximum possible charge. Failure to follow this procedure will prevent you from obtaining the maximum battery charge, and will also shorten the effective lifespan of the battery.
In addition, the useful lifespan of the battery is adversely affected by the following usage patterns:
- Using the computer on constant AC power with the battery inserted. If you want to use constant AC power, you are advised to remove the battery pack after it is fully charged.
- Not discharging and recharging the battery to its extremes, as described above.
- Frequent use; the more you use the battery, the faster it will reach the end of its effective life. A standard computer battery has a life span of about 300 charges.
Installing and removing the battery pack

Important! Before removing the battery from the unit, connect the AC adapter if you want to continue using your computer. Otherwise, turn off the computer first.
To install a battery pack:
1 Align the battery with the open battery bay; make sure that the end with the contacts will enter first, and that the top surface of the battery is facing up.
2 Slide the battery into the battery bay and gently push until the battery locks in place.
To remove a battery pack:
1 Slide the battery release latch to release the battery.
2 Pull the battery from the battery bay.
Charging the battery
To charge the battery, first make sure that it is correctly installed in the battery bay. Plug the AC adapter into the computer, and connect to a mains power outlet. You can continue to operate your computer on AC power while your battery is charging. However, charging the battery with the computer turned off results in a significantly faster charge time.

Note: You are advised to charge the battery before retiring for the day. Charging the battery overnight before traveling enables you to start the next day with a fully charged battery.
Checking the battery level
The Windows power meter indicates the current battery level. Rest the cursor over the battery/power icon on the taskbar to see the battery's present charge level.
Optimising battery life
Optimizing battery life helps you get the most out of battery operation, prolonging the charge/recharge cycle and improving recharging efficiency. You are advised to follow the suggestions set out below:
Purchase an extra battery pack.
- Use AC power whenever possible, reserving battery for on-the-go use.
- Eject a PC Card if it is not being used, as it will continue to draw power (for selected model).
- Store the battery pack in a cool, dry place. The recommended temperature is 10^ ( 50^ ) to 30^ ( 86^ ). Higher temperatures cause the battery to self-discharge faster.
- Excessive recharging decreases the battery life.
- Look after your AC adapter and battery.
Battery-low warning
When using battery power pay attention to the Windows power meter.

Warning: Connect the AC adapter as soon as possible after the battery-low warning appears. Data will be lost if the battery to become fully depleted and the computer shuts down.
When the battery-low warning appears, the recommended course of action depends on your situation:
| Situation | Recommended Action |
| The AC adapter and a power outlet are available. | 1. Plug the AC adapter into the computer, and then connect to the mains power supply. 2. Save all necessary files. 3. Resume work. Turn off the computer if you want to recharge the battery rapidly. |
| An extra fully charged battery pack is available. | 1. Save all necessary files. 2. Close all applications. 3. Shut down the operating system to turn off the computer. 4. Replace the battery pack. 5. Turn on the computer and resume work. |
| The AC adapter or a power outlet is unavailable. You have no spare battery pack. | 1. Save all necessary files. 2. Close all applications. 3. Shut down the operating system to turn off the computer. |
Taking your notebook PC with you
This section gives you tips and hints to consider when moving around or traveling with your computer.
Disconnecting from the desktop
Follow these steps to disconnect your computer from external accessories:
1 Save any open files.
2 Remove any media, floppy disks or compact disks from the drive(s).
3 Shut down the computer.
4 Close the display cover.
5 Disconnect the cord from the AC adapter.
6 Disconnect the keyboard, pointing device, printer, external monitor and other external devices.
7 Disconnect the Kensington lock if you are using one to secure the computer.
Moving around
When you are just moving within short distances, for example, from your office desk to a meeting room.
Preparing the computer
Before moving the computer, close and latch the display cover to place it in Sleep mode. You can now safely take the computer anywhere you go within the building. To bring the computer out of Sleep mode, open the display; then press and release the power button.
If you are taking the computer to a client's office or a different building, you may choose to shut down the computer:
Click on Start then click on Shut Down.
Or:
You can put the computer in Sleep mode by pressing Fn + F4 . Then close and latch the display.
When you are ready to use the computer again, unlatch and open the display; then press and release the power button.

Note: If the Sleep indicator is off, the computer has entered Hibernation mode and is turned off. If the power indicator is off but the Sleep indicator is on, the computer has entered Sleep mode. In both cases, press and release the power button to turn the computer back on. Note that the computer may enter Hibernation mode after being in Sleep mode for a period of time.
What to bring to meetings
If your meeting is relatively short, you probably do not need to bring anything with you other than your computer. If your meeting will be longer, or if your battery is not fully charged, you may want to bring the AC adapter with you to plug in your computer in the meeting room.
If the meeting room does not have an electrical outlet, reduce the drain on the battery by putting the computer in Sleep mode. Press Fn + F4 or close the display cover whenever you are not actively using the computer. To resume, open the display (if closed), then press and release the power button.
Taking the computer home
When you are moving from your office to your home or vice versa.
Preparing the computer
After disconnecting the computer from your desktop, follow these steps to prepare the computer for the trip home:
- Check that you have removed all media and compact disks from the drive(s). Failure to remove the media can damage the drive head.
- Pack the computer in a protective case that can prevent the computer from sliding around and cushion it if it should fall.

Caution: Avoid packing items next to the top cover of the computer. Pressure against the top cover can damage the screen.
What to take with you
Unless you have some items at home, take the following items with you:
AC adapter and power cord
The printed Quick start up guide
Special considerations
Follow these guidelines to protect your computer while traveling to and from work:
- Minimize the effects of temperature changes by keeping the computer with you.
- If you need to stop for an extended period of time and cannot carry the computer with you, leave the computer in the trunk of the car to avoid exposing the computer to excessive heat.
- Changes in temperature and humidity can cause condensation. Allow the computer to return to room temperature, and inspect the screen for condensation before turning on the computer. If the temperature change is greater than 10^ ( 18^ ), allow the computer to come to room temperature slowly. If possible, leave the computer for 30 minutes in an environment with a temperature between outside and room temperature.
Setting up a home office
If you frequently work on your computer at home, you may want to purchase a second AC adapter for use at home. With a second AC adapter, you can avoid carrying the extra weight to and from home.
If you use your computer at home for significant periods of time, you might also want to add an external keyboard, monitor or mouse.
Traveling with the computer
When you are moving within a larger distance, for instance, from your office building to a client's office building or traveling locally.
Preparing the computer
Prepare the computer as if you were taking it home. Make sure that the battery in the computer is charged. Airport security may require you to turn on your computer when carrying it into the gate area.
What to take with you
Take the following items with you:
- AC adapter
- Spare, fully-charged battery pack(s)
Additional printer driver files if you plan to use another printer
Special considerations
In addition to the guidelines for taking the computer home, follow these guidelines to protect your computer while traveling:
Always take the computer as carry-on luggage.
- If possible, have the computer inspected by hand. Airport security X-ray machines are safe, but do not put the computer through a metal detector.
- Avoid exposing floppy disks to hand-held metal detectors.
Traveling internationally with the computer
When you are moving from country to country.
Preparing the computer
Prepare the computer as you would normally prepare it for traveling.
What to bring with you
Bring the following items with you:
- AC adapter
Power cords that are appropriate for the country to which you are traveling - Spare, fully-charged battery packs
Additional printer driver files if you plan to use another printer
Proof of purchase, in case you need to show it to customs officials
International Travelers Warranty passport
Special considerations
Follow the same special considerations as when traveling with the computer. In addition, these tips are useful when traveling internationally:
- When traveling in another country, check that the local AC voltage and the AC adapter power cord specifications are compatible. If not, purchase a power cord that is compatible with the local AC voltage. Do not use converter kits sold for appliances to power the computer.
- If you are using the modem, check if the modem and connector is compatible with the telecommunications system of the country you are traveling in.
Securing your computer
Your computer is a valuable investment that you need to take care of. Learn how to protect and take care of your computer.
Security features include hardware and software locks — a security notch and passwords.
Using a computer security lock
The notebook comes with a Kensington-compatible security slot for a security lock.
Wrap a computer security lock cable around an immovable object such as a table or handle of a locked drawer. Insert the lock into the notch and turn the key to secure the lock. Some keyless models are also available.
Using passwords
Passwords protect your computer from unauthorized access. Setting these passwords creates several different levels of protection for your computer and data:
- Supervisor Password prevents unauthorized entry into the BIOS utility. Once set, you must enter this password to gain access to the BIOS utility. See "BIOS utility" on page 39.
- User Password secures your computer against unauthorized use. Combine the use of this password with password checkpoints on boot-up and resume from Hibernation for maximum security.
- Password on Boot secures your computer against unauthorized use. Combine the use of this password with password checkpoints on boot-up and resume from Hibernation for maximum security.

Important! Do not forget your Supervisor Password! If you forget your password, please get in touch with your dealer or an authorized service center.
Entering passwords
When a password is set, a password prompt appears in the center of the display screen.
- When the Supervisor Password is set, a prompt appears when you press < F2 > to enter the BIOS utility at boot-up.
- Type the Supervisor Password and press
to access the BIOS utility. If you enter the password incorrectly, a warning message appears. Try again and press . - When the User Password is set and the password on boot parameter is enabled, a prompt appears at boot-up.
- Type the User Password and press
to use the computer. If you enter the password incorrectly, a warning message appears. Try again and press .

Important! You have three chances to enter a password. If you fail to enter the password correctly after three tries, the system halts. Press and hold the power button for four seconds to shut down the computer. Then turn on the computer again, and try again.
Setting passwords
You can set passwords using the BIOS utility.
Expanding through options
Your notebook PC offers you a complete mobile computing experience.
Connectivity options
Ports allow you to connect peripheral devices to your computer as you would with a desktop PC. For instructions on how to connect different external devices to the computer, read the following section.
Fax/data modem (only for certain models)
Your computer has a built-in V.92 56 Kbps fax/data modem. (only for certain models)

Warning! This modem port is not compatible with digital phone lines. Plugging this modem into a digital phone line will damage the modem.
To use the fax/data modem port, connect a phone cable from the modem port to a telephone jack.


Warning! Please make sure that the cable you use is appropriate for the country in which you are working.
Built-in network feature
The built-in network feature allows you to connect your computer to an Ethernet-based network.
To use the network feature, connect an Ethernet cable from the Ethernet (RJ-45) port on the chassis of the computer to a network jack or hub on your network.

Consumer Infrared (CIR) (only for certain models)
The computer's Consumer Infrared (CIR) port is used to receive signals from your remote control, or other devices with CIR capability.
Universal Serial Bus (USB)
The USB 2.0 port is a high-speed serial bus which allows you to connect USB peripherals without taking up precious system resources.

IEEE 1394 port (only for certain models)
The computer's IEEE 1394 port allows you to connect to an IEEE 1394-compatible device like a video camera or digital camera. See your video or digital camera's documentation for details.

High-Definition Multimedia Interface (only for certain models)
HDMI (High-Definition Multimedia Interface) is an industry-supported, uncompressed, all-digital audio/video interface. HDMI provides an interface between any compatible digital audio/video source, such as a set-top box, DVD player, and A/V receiver and a compatible digital audio and/or video monitor, such as a digital television (DTV), over a single cable.
Use the HDMI port on your computer to connect with high-end audio and video equipment. Single cable implementation allows tidy setup and fast connection.

ExpressCard (only for certain models)
The ExpressCard is the newest version of the PC Card. It is a smaller and faster interface that further enhances the usability and expandability of your computer.
ExpressCards support a vast number of expansion options, including flash memory card adapters, TV-tuners, Bluetooth connectivity and IEEE 1394B adapters. ExpressCards support USB 2.0 and PCI Express applications.

Important! There are two types, ExpressCard/54 and ExpressCard/34 (54mm and 34mm), each with different functions. Not all ExpressCard slots will support both types. Please refer to your card's manual for details on how to install and use the card, and its functions.
Inserting an ExpressCard
Insert the card into the slot and push gently until it clicks into position.

Ejecting an ExpressCard
Before ejecting an ExpressCard:
1 Exit the application using the card.
2 Left-click on the remove hardware icon on the taskbar and stop the card operation.
3 Push the card gently into the slot and release to pop out the card. Then pull the card free from the slot.
Installing memory (only for certain models)
Follow these steps to install memory:
1 Turn off the computer, unplug the AC adapter (if connected) and remove the battery pack. Then turn the computer over to access its base.
2 Remove the screws from the memory cover; then lift up and remove the memory cover.
3 (a) Insert the memory module diagonally into the slot, then (b) gently press it down until it clicks into place.

4 Replace the memory cover and secure it with the screw.
5 Reinstall the battery pack, and reconnect the AC adapter.
6 Turn on the computer.
The computer automatically detects and reconfigures the total memory size. Please consult a qualified technician or contact your local Acer dealer.
Enjoying TV with Windows Media Center

Note: This feature is only available on certain models.
Computers that include Windows Media Center Edition or InstantOn Arcade may be used to watch TV and to access video content (via an audio/video connection to an external device, such as a video camera).
Choose your input type
The avdio/video connection may be either a DVB-T digital antenna (for selected models) or a PAL/SECAM or NTSC connector. Please refer to the appropriate section:
Watching TV using the optional DVB-T (digital TV) antenna (for selected models)
DVB-T digital TV is an international standard that is used to transmit terrestrial television services in digital format. It is gradually replacing analog broadcasts in many countries. The DVB-T digital antenna can be used with Windows Media Center to watch local DVB-T digital TV broadcasts on your notebook PC.
To connect the digital antenna
1 Plug the antenna cable into the RF jack of your computer.


Note: Do not twist or loop the antenna cable. Extending the antenna cable up to 20cm to improve signal quality.
Watching TV with an external antenna or cable socket
You may use conventional TV cables (connected to an external antenna or cable socket) to watch TV on your computer.
Connecting antenna cables
To connect your cables:
1 Plug the antenna connector into the RF jack of your computer.
2 Connect the other end to your TV cable, using the cable converter if necessary.


Important! Please ensure you use the correct cable system for your region before attempting to connect the antenna cable.
BIOS utility
The BIOS utility is a hardware configuration program built into your computer's BIOS.
Your computer is already properly configured and optimized, and you do not need to run this utility. However, if you encounter configuration problems, you may need to run it.
To activate the BIOS utility, press <F2> during the POST; while the notebook PC logo is being displayed.
Boot sequence
To set the boot sequence in the BIOS utility, activate the BIOS utility, then select Boot from the categories listed at the top of the screen.
Enable disk-to-disk recovery
To enable disk-to-disk recovery (hard disk recovery), activate the BIOS utility, then select Main from the categories listed at the top of the screen. Find D2D Recovery at the bottom of the screen and use the
Password
To set a password on boot, activate the BIOS utility, then select Security from the categories listed at the top of the screen. Find Password on boot: and use the <F5> and <F6> keys to enable this feature.
Using software
Playing DVD movies

Note: This feature is only available on certain models.
When the DVD drive module is installed in the optical drive bay, you can play DVD movies on your computer.
1 Eject the DVD disk.

Important! When you launch the DVD player for the first time, the program asks you to enter the region code. DVD disks are divided into 6 regions. Once your DVD drive is set to a region code, it will play DVD disks of that region only. You can set the region code a maximum of five times (including the first time), after which the last region code set will remain permanent. Recovering your hard disk does not reset the number of times the region code has been set. Refer to the table below for DVD movie region code information.
2 The DVD movie will automatically play after a few seconds.
| Region code | Country or region |
| 1 | USA, Canada |
| 2 | Europe, Middle East, South Africa, Japan |
| 3 | Southeast Asia, Taiwan, South Korea |
| 4 | Latin America, Australia, New Zealand |
| 5 | Former USSR, parts of Africa, India |
| 6 | People's Republic of China |

Note: To change the region code, insert a DVD movie of a different region into the DVD drive. Please refer to the online help for more information.
Frequently asked questions
The following is a list of possible situations that may arise during the use of your computer. Easy solutions are provided for each one.
I turned on the power, but the computer does not start or boot up.
Look at the power indicator:
-
If it is not lit, no power is being supplied to the computer. Check the following:
-
If you are using on the battery, it may be low and unable to power the computer. Connect the AC adapter to recharge the battery pack.
-
Make sure that the AC adapter is properly plugged into the computer and to the power outlet.
-
If it is lit, check the following:
-
Is a non-bootable (non-system) disk in the external USB floppy drive? Remove or replace it with a system disk and press <Ctrl> + <Alt> + <Del> to restart the system.
Nothing appears on the screen.
The computer's power management system automatically blanks the screen to save power. Press any key to turn the display back on.
If pressing a key does not turn the display back on, three things might be the cause:
- The brightness level might be too low. Press <Fn> + <D> (increase) to adjust the brightness level.
- The display device might be set to an external monitor. Press the display toggle hotkey <Fn> + <F5> to toggle the display back to the computer.
- If the Sleep indicator is lit, the computer is in Sleep mode. Press and release the power button to resume.
No audio is heard from the computer.
Check the following:
- The volume may be muted. In Windows, look at the volume control (speaker) icon on the taskbar. If it is crossed-out, click on the icon and deselect the Mute all option.
-
The volume level may be too low. In Windows, look at the volume control icon on the taskbar. You can also use the volume control buttons to adjust the volume.
-
If headphones, earphones or external speakers are connected to the line-out port on the computer, the internal speakers automatically turn off.
I want to eject the optical drive tray without turning on the power.
There is a mechanical eject hole on the optical drive. Simply insert the tip of a pen or paperclip into the hole and push to eject the tray.
The keyboard does not respond.
Try attaching an external keyboard to a USB port on the computer. If it works, contact your dealer or an authorized service center as the internal keyboard cable may be loose.
The printer does not work.
Check the following:
- Make sure that the printer is connected to a power outlet and that it is turned on.
- Make sure that the printer cable is connected securely to the computer's parallel port or a USB port and the corresponding port on the printer.
I want to restore my computer to its original settings without recovery CDs.

Note: If your system is the multilingual version, the operating system and language you choose when you first turn on the system will be the only option for future recovery operations.
This recovery process helps you restore the C: drive with the original software content that is installed when you purchase your notebook. Follow the steps below to rebuild your C: drive. (Your C: drive will be reformatted and all data will be erased.) It is important to back up all data files before using this option.
Before performing a restore operation, please check the BIOS settings.
1 Check to see if Acer disk-to-disk recovery is enabled or not.
2 Make sure the D2D Recovery setting in Main is Enabled.
3 Exit the BIOS utility and save changes. The system will reboot.

Note: To activate the BIOS utility, press <F2> during POST.
To start the recovery process:
1 Restart the system.
2 While the Acer logo is showing, press <Alt> + <F10> at the same time to enter the recovery process.
3 Refer to the onscreen instructions to perform system recovery.

Important! This feature occupies 15 GB in a hidden partition on your hard disk
Requesting service
International Travelers Warranty (ITW)
Your computer is backed by an International Travelers Warranty (ITW) that gives you security and peace of mind when traveling. Our worldwide network of service centers are there to give you a helping hand.
An ITW passport comes with your computer. This passport contains all you need to know about the ITW program. A list of available, authorized service centers is in this handy booklet. Read this passport thoroughly.
Always have your ITW passport on hand, especially when you travel, to receive the benefits from our support centers. Place your proof-of-purchase in the flap located inside the front cover of the ITW passport.
If the country you are traveling in does not have an Acer-authorized ITW service site, you can still get in contact with our offices worldwide. Please consult http://global.acer.com.
Before you call
Please have the following information available when you call Acer for online service, and please be at your computer when you call. With your support, we can reduce the amount of time a call takes and help solve your problems efficiently. If there are error messages or beeps reported by your computer, write them down as they appear on the screen (or the number and sequence in the case of beeps).
You are required to provide the following information:
Name:
Address:
Telephone number:
Machine and model type:
Serial number:
Date of purchase:
Troubleshooting
This chapter shows you how to deal with common system problems. Read it before calling a technician if a problem occurs. Solutions to more serious problems require opening up the computer. Do not attempt to open the computer yourself; contact your dealer or authorized service center for assistance.
Troubleshooting tips
This notebook PC incorporates an advanced design that delivers onscreen error message reports to help you solve problems.
If the system reports an error message or an error symptom occurs, see "Error messages" below. If the problem cannot be resolved, contact your dealer. See "Requesting service" on page 44.
Error messages
If you receive an error message, note the message and take the corrective action. The following table lists the error messages in alphabetical order together with the recommended course of action.
| Error messages | Corrective action |
| CMOS battery bad | Contact your dealer or an authorized service center. |
| CMOS checksum error | Contact your dealer or an authorized service center. |
| Disk boot failure | Insert a system (bootable) disk into the floppy drive (A:), then press <Enter> to reboot. |
| Equipment configuration error | Press <F2> (during POST) to enter the BIOS utility, then press Exit in the BIOS utility to reboot. |
| Hard disk 0 error | Contact your dealer or an authorized service center. |
| Hard disk 0 extended type error | Contact your dealer or an authorized service center. |
| I/O parity error | Contact your dealer or an authorized service center. |
| Keyboard error or no keyboard connected | Contact your dealer or an authorized service center. |
| Keyboard interface error | Contact your dealer or an authorized service center. |
| Memory size mismatch | Press <F2> (during POST) to enter the BIOS utility, then press Exit in the BIOS utility to reboot. |
If you still encounter problems after going through the corrective measures, please contact your dealer or an authorized service center for assistance. Some problems may be solved using the BIOS utility.
Regulations and safety notices
FCC statement
This device has been tested and found to comply with the limits for a Class B digital device pursuant to Part 15 of the FCC rules. These limits are designed to provide reasonable protection against harmful interference in a residential installation. This device generates, uses, and can radiate radio frequency energy and, if not installed and used in accordance with the instructions, may cause harmful interference to radio communications.
However, there is no guarantee that interference will not occur in a particular installation. If this device does cause harmful interference to radio or television reception, which can be determined by turning the device off and on, the user is encouraged to try to correct the interference by one or more of the following measures:
Reorient or relocate the receiving antenna.
- Increase the separation between the device and receiver.
- Connect the device into an outlet on a circuit different from that to which the receiver is connected.
- Consult the dealer or an experienced radio/television technician for help.
Notice: Shielded cables
All connections to other computing devices must be made using shielded cables to maintain compliance with FCC regulations.
Notice: Peripheral devices
Only peripherals (input/output devices, terminals, printers, etc.) certified to comply with the Class B limits may be attached to this equipment. Operation with non-certified peripherals is likely to result in interference to radio and TV reception.
Caution
Changes or modifications not expressly approved by the manufacturer could void the user's authority, which is granted by the Federal Communications Commission, to operate this computer.
Notice: Canadian users
This Class B digital apparatus complies with Canadian ICES-003.
Compliant with Russian regulatory certification

ME61
Modem notices (only for certain models)
Notice for USA
This equipment complies with Part 68 of the FCC rules. Located on the modem is a label that contains, among other information, the FCC Registration Number and Ringer Equivalence Number (REN) for this equipment. Upon request, you must provide this information to your telephone company.
If your telephone equipment causes harm to the telephone network, the telephone company may discontinue your service temporarily. If possible, they will notify you in advance. But, if advance notice is not practical, you will be notified as soon as possible. You will also be informed of your right to file a complaint with the FCC.
Your telephone company may make changes in its facilities, equipment, operations, or procedures that could affect the proper functioning of your equipment. If they do, you will be notified in advance to give you an opportunity to maintain uninterrupted telephone service.
If this equipment should fail to operate properly, disconnect the equipment from the phone line to determine if it is causing the problem. If the problem is with the equipment, discontinue use and contact your dealer or vendor.

Caution: To reduce the risk of fire, use only No. 26 AWG or larger UL Listed or CSA Certified Telecommunication Line Cord.
TBR 21
This equipment has been approved [Council Decision 98/482/EC - "TBR 21"] for single terminal connection to the Public Switched Telephone Network (PSTN). However, due to differences between the individual PSTNs provided in different countries, the approval does not, of itself, give an unconditional assurance of successful operation on every PSTN termination point. In the event of problems, you should contact your equipment supplier in the first instance. For more information about applicable countries, please refer to "Regulations and safety notices" on page 46
Notice for Australia
For safety reasons, only connect headsets with a telecommunications compliance label. This includes customer equipment previously labelled permitted or certified.
Notice for New Zealand
1 The grant of a Telepermit for any item of terminal equipment indicates only that Telecom has accepted that the item complies with minimum conditions for connection to its network. It indicates no endorsement of the product by Telecom, nor does it provide any sort of warranty. Above all, it provides no assurance that any item will work correctly in all respects with another item of Tele permitted equipment of a different make or model, nor does it imply that any product is compatible with all of Telecom's network services.
2 This equipment is not capable, under all operating conditions, of correct operation at the higher speeds for which it is designed. Telecom will accept no responsibility should difficulties arise in such circumstances.
3 Some parameters required for compliance with Telecom's Telepermit requirements are dependent on the equipment (PC) associated with this device. The associated equipment shall be set to operate within the following limits for compliance with Telecom's Specifications:
a There shall be no more than 10 call attempts to the same number within any 30 minute period for any single manual call initiation, and
b The equipment shall go on-hook for a period of not less than 30 seconds between the end of one attempt and the beginning of the next call attempt.
4 Some parameters required for compliance with Telecom's Telepermit requirements are dependent on the equipment (PC) associated with this device. In order to operate within the limits for compliance with Telecom's specifications, the associated equipment shall be set to ensure that automatic calls to different numbers are spaced such that there is not less than 5 seconds between the end of one call attempt and the beginning of another.
5 This equipment shall not be set up to make automatic calls to Telecom's 111 Emergency Service.
6 This device is equipped with pulse dialing while the Telecom standard is DTMF tone dialing. There is no guarantee that Telecom lines will always continue to support pulse dialing.
7 Use of pulse dialing, when this equipment is connected to the same line as other equipment, may give rise to bell tinkle or noise and may also cause a false answer condition. Should such problems occur, the user should NOT contact the telecom Fault Service.
8 This equipment may not provide for the effective hand-over of a call to another device connected to the same line.
9 Under power failure conditions this appliance may not operate. Please ensure that a separate telephone, not dependent on local power, is available for emergency use.
LCD pixel statement
The LCD unit is produced with high-precision manufacturing techniques. Nevertheless, some pixels may occasionally misfire or appear as black or red dots. This has no effect on the recorded image and does not constitute a malfunction.
Radio device regulatory notice

Note: Below regulatory information is for models with wireless LAN and / or Bluetooth only.
General
To prevent radio interference to the licensed service, this device is intended to be operated indoors.
This product complies with the radio frequency and safety standards of any country or region in which it has been approved for wireless use. Depending on configurations, this product may or may not contain wireless radio devices (such as wireless LAN and/or Bluetooth modules). Below information is for products with such devices.
Declaration of Conformity for EU countries
Hereby, Acer, declares that this notebook PC series is in compliance with the essential requirements and other relevant provisions of Directive 1999/5/EC.
List of applicable countries
EU member states as of July 2009 are: Belgium, Denmark, Germany, Greece, Spain, France, Ireland, Italy, Luxembourg, the Netherlands, Austria, Portugal, Finland, Sweden, United Kingdom, Estonia, Latvia, Lithuania, Poland, Hungary, Czech Republic, Slovak Republic, Slovenia, Cyprus, Malta, Bulgaria and Romania. Usage allowed in the countries of European Union, as well as Norway, Switzerland, Iceland and Liechtenstein. This device must be used in strict accordance with the regulations and constraints in the country of use. For further information, please contact local office in the country of use. Please see http://ec.europa.eu/enterprise/rtte/imply.htm for the latest country list.
The FCC RF safety requirement
The radiated output power of the wireless LAN Mini PCI Card and Bluetooth card is far below the FCC radio frequency exposure limits. Nevertheless, the notebook PC series shall be used in such a manner that the potential for human contact during normal operation is minimized as follows:
1 Users are requested to follow the RF safety instructions on wireless option devices that are included in the user's manual of each RF option device.

Caution: To comply with FCC RF exposure compliance requirements, a separation distance of at least 20cm (8 inches) must be maintained between the antenna for the integrated wireless LAN Mini PCI Card built in to the screen section and all persons.


Note: The wireless Mini PCI adapter implements a transmission diversity function. The function does not emit radio frequencies simultaneously from both antennas. One of the antennas is selected automatically or manually (by users) to ensure good quality radiocommunication.
2 This device is restricted to indoor use due to its operation in the 5.15 to 5.25 GHz frequency range. FCC requires this product to be used indoors for the frequency range 5.15 to 5.25 GHz to reduce the potential for harmful interference to co-channel Mobile Satellite systems.
3 High power radar are allocated as primary users of the 5.25 to 5.35 GHz and 5.65 to 5.85 GHz bands. These radar stations can cause interference with and/or damage this device.
4 An improper installation or unauthorized use may cause harmful interference to radio communications. Also any tampering of the internal antenna will void the FCC certification and your warranty.
Canada — Low-power license-exempt radio communication devices (RSS-210)
Exposure of humans to RF fields (RSS-102)
The notebook PC series employs low gain integral antennas that do not emit RF field in excess of Health Canada limits for the general population; consult Safety Code 6, obtainable from Health Canada's website at www.hc-sc.gc.ca/rpb.
This device complies with RSS210 of Industry Canada.
This Class B digital apparatus complies with Canadian ICES-003, Issue 4, and RSS-210, No 4 (Dec 2000) and No 5 (Nov 2001).
"To prevent radio interference to the licensed service, this device is intended to be operated indoors and away from windows to provide maximum shielding. Equipment (or its transmit antenna) that is installed outdoors is subject to licensing."
Caution: When using IEEE 802.11a wireless LAN, this product is restricted to indoor use due to its operation in the 5.15- to 5.25-GHz frequency range. Industry Canada requires this product to be used indoors for the frequency range of 5.15 GHz to 5.25 GHz to reduce the potential for harmful interference to co-channel mobile satellite systems. High power radar is allocated as the primary user of the 5.25- to 5.35-GHz and 5.65 to 5.85-GHz bands. These radar stations can cause interference with and/or damage to this device.
The maximum allowed antenna gain for use with this device is 6dBi in order to comply with the E.I.R.P limit for the 5.25- to 5.35 and 5.725 to 5.85 GHz frequency range in point-to-point operation.
LCD panel ergonomic specifications
| Design viewing distance | 500 mm |
| Design inclination angle | 0.0° |
| Design azimuth angle | 90.0° |
| Viewing direction range class | Class IV |
| Screen tilt angle | 85.0° |
| Design screen illuminance | • Illuminance level: [250 + (250cosα)] lx where α = 85° • Color: Source D65 |
| Reflection class of LCD panel (positive and negative polarity) | • Ordinary LCD: Class I • Protective LCD: Class III |
| Image polarity | Both |
| Reference white: | • Yn |
| Pre-setting of luminance and color temperature @ 6500K (tested under BM7) | • u'n • v'n |
| Pixel fault class | Class II |
Gamme Aspire
Acer Backup Manager 11
Acer eRecovery Management 13
Considerations speciales 31
LCD panel ergonomic specifications 54
Acer eRecovery Management
This Class B digital apparatus complies with Canadian ICES-003.
This device complies with RSS210 of Industry Canada.
This Class B digital apparatus complies with Canadian ICES-003, Issue 4, and RSS-210, No 4 (Dec 2000) and No 5 (Nov 2001).
"To prevent radio interference to the licensed service, this device is intended to be operated indoors and away from windows to provide maximum shielding. Equipment (or its transmit antenna) that is installed outdoors is subject to licensing."
Caution: When using IEEE 802.11a wireless LAN, this product is restricted to indoor use due to its operation in the 5.15- to 5.25-GHz frequency range. Industry Canada requires this product to be used indoors for the frequency range of 5.15 GHz to 5.25 GHz to reduce the potential for harmful interference to co-channel mobile satellite systems. High power radar is allocated as the primary user of the 5.25- to 5.35-GHz and 5.65 to 5.85-GHz bands. These radar stations can cause interference with and/or damage to this device.
The maximum allowed antenna gain for use with this device is 6dBi in order to comply with the E.I.R.P limit for the 5.25- to 5.35 and 5.725 to 5.85 GHz frequency range in point-to-point operation.
LCD panel ergonomic specifications
| Design viewing distance | 500 mm |
| Design inclination angle | 0.0° |
| Design azimuth angle | 90.0° |
| Viewing direction range class | Class IV |
| Screen tilt angle | 85.0° |
| Design screen illuminance | • Illuminance level: [250 + (250cosα)] lx where α = 85° • Color: Source D65 |
| Reflection class of LCD panel (positive and negative polarity) | • Ordinary LCD: Class I • Protective LCD: Class III |
| Image polarity | Both |
| Reference white: | • Yn |
| Pre-setting of luminance and color temperature @ 6500K (tested under BM7) | • u'n • v'n |
| Pixel fault class | Class II |
Aspire Serie
CLASS 1 LASER PRODUCT
ACHTUNG: INVISIBLE LASER RADIATION WHEN OPEN. AVOID EXPOSURE TO BEAM.
APPAREIL A LASER DE CLASSE 1 PRODUIT
LASERATTENTION: RADIATION DU FAISCEAU LASER INVISIBLE EN CAS D'OUVERTURE. EVITTER Toute EXPOSITION AUX RAYONS.
LUOKAN 1 LASERLAITE LASER KLASSE 1
Acer Backup Manager 12
Acer eRecovery Management 14
HDMI (High-Definition Multimedia Interface)
(disk-to-disk recovery) 43
Kennwort 43
(International Travelers Warranty; ITW) 48
Vor einem Anruf 48
Problemlösung 49
Tipps zur Problembehebung 49
Fehlermeldungen 49
LCD panel ergonomic specifications 54
Acer eRecovery Management
The operation of this product in the radio channel 2 (2417 MHz) is not authorized in the following cities: Agadir, Assa-Zag, Cabo Negro, Chaouen, Goulmima, Oujda, Tan Tan, Taourirt, Taroudant and Taza.
The operation of this product in the radio channels 4, 5, 6 et 7 (2425 - 2442 MHz) is not authorized in the following cities: Aéroport Mohamed V, Agadir, Aguelmous, Anza, Benslimane, Béni Hafida, Cabo Negro, Casablanca, Fès, Lakh Bab, Marrakech, Merchich, Mohammédia, Rabat, Sale, Tanger, Tan Tan, Taounate, Tit Mellil, Zag.
LCD panel ergonomic specifications
| Design viewing distance | 500 mm |
| Design inclination angle | 0.0° |
| Design azimuth angle | 90.0° |
| Viewing direction range class | Class IV |
| Screen tilt angle | 85.0° |
| Design screen illuminance | • Illuminance level: [250 + (250cosα)] lx where α = 85° • Color: Source D65 |
| Reflection class of LCD panel (positive and negative polarity) | • Ordinary LCD: Class I • Protective LCD: Class III |
| Image polarity | Both |
| Reference white: | • Yn |
| Pre-setting of luminance and color temperature @ 6500K (tested under BM7) | • u'n • v'n |
| Pixel fault class | Class II |
Série Aspire
CLASS 1 LASER PRODUCT
CAUTION: INVISIBLE LASER RADIATION WHEN OPEN. AVOID EXPOSURE TO BEAM.
APPAREL A LASER DE CLASSE 1 PRODUIT
LASERATTENTION: RADIATION DU FAISCEAU LASER INVISIBLE EN CAS D'OUVERTURE. EVITTER Toute EXPOSITION AUX RAYONS.
LUOKAN 1 LASERLAITE LASER KLASSE 1
Acer Backup Manager 10
Gestao de energia 11
Acer eRecovery Management 12
Gravar disco com copia de seguranca 13
Restaurant 14
Restaurant Windows a partir de discos de copia
de seguranca 15
Acer Arcade Deluxe 17
Controlosgerais 18
Controles de Navegacao 18
Utilizar os sites de redes sociales 18
Fotografia 18
Vdeo 19
LCD panel ergonomic specifications 52
Acer eRecovery Management
LCD panel ergonomic specifications
| Design viewing distance | 500 mm |
| Design inclination angle | 0.0° |
| Design azimuth angle | 90.0° |
| Viewing direction range class | Class IV |
| Screen tilt angle | 85.0° |
| Design screen illuminance | • Illuminance level: [250 + (250cosα)] lx where α = 85° • Color: Source D65 |
| Reflection class of LCD panel (positive and negative polarity) | • Ordinary LCD: Class I • Protective LCD: Class III |
| Image polarity | Both |
| Reference white: | • Yn |
| Pre-setting of luminance and color temperature @ 6500K (tested under BM7) | • u'n • v'n |
| Pixel fault class | Class II |
Aspire Serie
LASERPRODUCT KLASSE 1
VOORZICHTIG: ONZICHTBARE LASERSTRALING INDIEN GEOPEND. VOORKOM BLOOTSTELLING AAN STRAAL.
APPAREIL A LASER DE CLASSE 1 PRODUIT
LASERATTENTION: RADIATION DU FAISCEAU LASER INVISIBLE EN CAS D'OUVERTURE. EVITTER Toute EXPOSITION AUX RAYONS.
LUOKAN 1 LASERLAITE LASER KLASSE 1
Acer Backup Manager 12
Energiebeheer 13
Acer eRecovery Management 14
Backup-disk branden 15
Herstellen 16
ITW (International Travelers Warranty) 46
Voordat u belt 46
Problemen oplossen 47
LCD panel ergonomic specifications 51
Acer eRecovery Management
ITW (International Travelers Warranty)
LCD panel ergonomic specifications
| Design viewing distance | 500 mm |
| Design inclination angle | 0.0° |
| Design azimuth angle | 90.0° |
| Viewing direction range class | Class IV |
| Screen tilt angle | 85.0° |
| Design screen illuminance | • Illuminance level: [250 + (250cosα)] lx where α = 85° • Color: Source D65 |
| Reflection class of LCD panel (positive and negative polarity) | • Ordinary LCD: Class I • Protective LCD: Class III |
| Image polarity | Both |
| Reference white: | • Yn |
| Pre-setting of luminance and color temperature @ 6500K (tested under BM7) | • u'n • v'n |
| Pixel fault class | Class II |
Aspire-serien
KLASSE 1 LASERPRODUKT
FORSIKTIG: USYNLIG LASERSTRÁLING I ÅPEN TILSTAND. UNNGÅ STRÄLEN.
APPAREIL A LASER DE CLASSE 1 PRODUIT
LASERATTENTION: RADIATION DU FAISCEAU LASER INVISIBLE EN CAS
D'OUVERTURE. EVITTER Toute EXPOSITION AUX RAYONS.
LUOKAN 1 LASERLAITE LASER KLASSE 1
Acer Backup Manager 10
Strømstyring 11
Acer eRecovery Management 12
Lag sikkerhetskopidisk 13
Gjenopppretting 14
CIR-port (Consumer Infrared)
(bare for visse modeller) 32
Universal Serial Bus (USB) 33
IEEE 1394-port (bare for visse modeller) 33
International Travelers Warranty (ITW) 43
För du ringer 43
LCD panel ergonomic specifications 48
Acer eRecovery Management
CIR-port (Consumer Infrared) (bare for visse modeller)
International Travelers Warranty (ITW)
LCD panel ergonomic specifications
| Design viewing distance | 500 mm |
| Design inclination angle | 0.0° |
| Design azimuth angle | 90.0° |
| Viewing direction range class | Class IV |
| Screen tilt angle | 85.0° |
| Design screen illuminance | • Illuminance level: [250 + (250cosα)] lx where α = 85° • Color: Source D65 |
| Reflection class of LCD panel (positive and negative polarity) | • Ordinary LCD: Class I • Protective LCD: Class III |
| Image polarity | Both |
| Reference white: Pre-setting of luminance and color temperature @ 6500K (tested under BM7) | • Yn • u'n • v'n |
| Pixel fault class | Class II |
Aspire Seriens
CLASS 1 LASER PRODUCT
CAUTION: INVISIBLE LASER RADIATION WHEN OPEN. AVOID EXPOSURE TO BEAM.
APPAREIL A LASER DE CLASSE 1 PRODUIT
LASERATTENTION: RADIATION DU FAISCEAU LASER INVISIBLE EN CAS
D'OUVERTURE. EVITTER TOUTE EXPOSITION AUX RAYONS.
LUOKAN 1 LASERLAITE LASER KLASSE 1
Acer Backup Manager 10
Strømstyring 11
Acer eRecovery Management 12
High-Definition Multimedia Interface
International Travelers Warranty (ITW) 44
Indendringer 44
Fejlfinding pà computeren 45
Fejlfinding 45
Fejlmeddelelser 45
LCD panel ergonomic specifications 49
Acer eRecovery Management
International Travelers Warranty (ITW)
LCD panel ergonomic specifications
| Design viewing distance | 500 mm |
| Design inclination angle | 0.0° |
| Design azimuth angle | 90.0° |
| Viewing direction range class | Class IV |
| Screen tilt angle | 85.0° |
| Design screen illuminance | • Illuminance level: [250 + (250cosα)] lx where α = 85° • Color: Source D65 |
| Reflection class of LCD panel (positive and negative polarity) | • Ordinary LCD: Class I • Protective LCD: Class III |
| Image polarity | Both |
| Reference white: | • Yn |
| Pre-setting of luminance and color temperature @ 6500K (tested under BM7) | • u'n • v'n |
| Pixel fault class | Class II |
Aspire-serien
Allman anecdarguide
Aspire-serien -barbar PC-dator
Modellnummer:
Seriennummer:
Inkopsdatum:
Inkopsstalle:
KCLASS 1 LASERPRODUKT
WARNING: OSYNLIG LASERSTRÄLNING NÄR DENNA DEL ÄR ÖPPEN. UNDVIK ATT UTSÄTTA DIG FÖR STRÄLEN.
APPAREIL A LASER DE CLASSE 1 PRODUIT
LASERATTENTION: RADIATION DU FAISCEAU LASER INVISIBLE EN CAS
D'OUVERTURE. EVITTER Toute EXPOSITION AUX RAYONS.
LUOKAN 1 LASERLAITE LASER KLASSE 1
Acer Backup Manager 11
Acer eRecovery Management 13
International resegaranti (International Travelers Warranty; ITW) 44
Innan du ringer 44
Felsöka datorn 45
Felsökningstips 45
Felmeddelanden 45
LCD panel ergonomic specifications 49
Acer eRecovery Management
Aktivera disk-to-disk recovery
International resegaranti (International Travelers Warranty; ITW)
LCD panel ergonomic specifications
| Design viewing distance | 500 mm |
| Design inclination angle | 0.0° |
| Design azimuth angle | 90.0° |
| Viewing direction range class | Class IV |
| Screen tilt angle | 85.0° |
| Design screen illuminance | • Illuminance level: [250 + (250cosα)] lx where α = 85° • Color: Source D65 |
| Reflection class of LCD panel (positive and negative polarity) | • Ordinary LCD: Class I • Protective LCD: Class III |
| Image polarity | Both |
| Reference white: | • Yn |
| Pre-setting of luminance and color temperature @ 6500K (tested under BM7) | • u'n • v'n |
| Pixel fault class | Class II |
Aspire -sarja
Peruskëyttäjan opas
Acer Backup Manager 12
Virranhallinta 13
Acer eRecovery Management 14
Polta varmistuslevy 15
Palauta 16
LCD panel ergonomic specifications 50
Acer eRecovery Management
LCD panel ergonomic specifications
| Design viewing distance | 500 mm |
| Design inclination angle | 0.0° |
| Design azimuth angle | 90.0° |
| Viewing direction range class | Class IV |
| Screen tilt angle | 85.0° |
| Design screen illuminance | • Illuminance level: [250 + (250cosα)] lx where α = 85° • Color: Source D65 |
| Reflection class of LCD panel (positive and negative polarity) | • Ordinary LCD: Class I • Protective LCD: Class III |
| Image polarity | Both |
| Reference white: Pre-setting of luminance and color temperature @ 6500K (tested under BM7) | • Yn • u'n • v'n |
| Pixel fault class | Class II |
Cepnia Aspire
TINOBoe pyKoBOdCTBO POJIb3OBaTeJIa
TOpTaBnBbI KOMbHTeP cepu Aspire
Hormep mojenn:
CepnHbI HOMep:
Data nokyk:
MecTo nokynkn:
HΦopMaçnЯДЯВaшeи 6e3OpaCHOCTN yDObCTBa pa6OTbI
PpaBnla TexHnKn 6e3OnaChOCTn
BhIMaTeIbHo 03HaKOMbTeCb C3TnMn INHCTpyKcIyMn. CoXpaHIne 3TO TOKyMeHT dIra HabeDeHn cnpabok B bdyuIeM. CJeDyIte BCem INHCTpyKcIyM n npdeUnpexKeHnM, HaHeceHHbM Ha I3dJIeN.
BbIKIOUeHne ycTpoIcTBA nepeuNCTKOJ
Ipeedero YnCTKoI OTKIOUaJIte 3TO I3dJIeNE OTe HAcTeHNO pO3eTKn NHTAHJ. He nCNoJIb3yIte JxNkne IIN a3pO3OJIbHbIe YnCTaIe CpeIcTBA. IJIa YnCTKn IcNoJIb3yIte BnAkJHyIO TkaHb.
PNEUYPPEKDEHNE no noDKIIOyeHIO nOTKJIIOeHIO yCTpOJCTBa
IpeDynpexdHnE! B cnyae HnpaBnIbHorO o6paueHnAkkymyIaTOPhIe 6batapeN MoryT B3OpBaTbC. He pa3bpaIte NxH He 6pocaiTe B nIamA. Depxnte Nx Noalbwe OT dTeN I6bICTpo N36abJIAITeCb OT NcNoJIb3ObaHHbIX 6batape. PnYtINn3aunn Otpa6oTaHnHO AkkymyIaTopa Co6IIOdaIte MeCThbIe npaBnla.
viii
IpeDynpexKdEHne B OTHOUsHeHn npNBOda ONTNUeCKNX DnCKOB
(TOЛько ДЯ ONpeДeнньIX MOdЕи)
BnImaHne: B 3tOM yCTPOICTBe npIMeHaeTcja3epHaa CNTeMa, IO3tOMy OH cnTaetc"JIA3EPHbIM YCTPOICTBOM KJIACCA 1." B cnUye HeNoIaDOK B
pa6oTe 3Toro yctpoiCTBa o6paTnteCb 3a nOmoIbU B 6JIuKaIshn
ABTOPN3OBAHHbI cepBnchbI ueHtp. He oTKpbBaIe KoxyX, YTo6bI Ha BaC he nonan lyu na3epa.
CLASS 1 LASER PRODUCT
CAUTION: INVISIBLE LASER RADIATION WHEN OPEN. AVOID EXPOSURE TO BEAM.
APPAREIL A LASER DE CLASSE 1 PRODUIT
LASERATTENTION: RADIATION DU FAISCEAU LASER INVISIBLE EN CAS
D'OUVERTURE. EVITTER TOUTE EXPOSITION AUX RAYONS.
LUOKAN 1 LASERLAITE LASER KLASSE 1
Bcerda depkahty yctpoiCTBO Ha pacctoHn He Mehee 15,3 caHTmEpOB ot KapdnoctmUyIToPA
He hocntb BkIIOueHHOyeCTpoiCTBO pIaOM c KapdIOOCIMyJIaTOpOM.EcNn Bam nokajetc, yToBpaOte kapdIOCTmMyJIaTopa Bo3HNI NOMEXN, BblKJIIOUHTe yctpoiCTBOuY6epnTe ero.
Cnyxobble annapatbl. HeKOTOpbIe cHΦpOBblE bcnpoBOdHbIe ycTpoCTBa MOrTy Bb3bBAbTB NOMEXBpaOte CnyxOBblx annapatOB. Bcnyae Bo3NkHOBeHnI NOMEx 6bpaTNTecb 3a COBETOM K BaUeMy NoCTaBUnKy ycNyr.
ABTOMO6nJI
PCHINHbIbMOrT BnIbHa paOby He npabunbHO yctahOBnHex HInn
He npabunbHO 3KpaHnpoBaHHbIX 3NeKTPoHHbIX CnCTeM B ABTOMOBnJx, HApimep, 3NeKTPoHHbIX CnCTeM BnPbICKa TOnJIbBA, TopMO3HbIX CnCTeM NpOTIBOCOJIbXeHnA (NpOTIBO3aKJIINHBaHn), nepeKIOUeHnnepeDaY u npabLeHnB O3dyuHbIMn NOyukamn 6e30NaChOcTn. DOnONHtJIbHbIe CBeDeHnM OMKHO y3HaTb Y npedCTaBnteN 3aBOda-N3rOToBNTeR BaWero ABTOMOBnI INn DpyrOro
DOnONHtJIbHO yCTAHOBnEHHORo Hem o6OpyDOBaHn. IpOBoITb TexNHueckoe
O6CnykBaHnE yCTpoiCTBa INn yCTaHaBNIbaT erO B aTOMOBnIe DOJXhbl TOJIbKO KBaIINFuNPoBaHnIe CneuaIaNtBi. HenpabunbHna YCTAHOBka INn
O6CnykBaHnE MOrY Co3dAte b ONACHO t CdeJaTb HeJeCTBnHO rapaHTNIO HA 3TO yCTPOIcTB. PeryIaRPHo nPoBepaIe TnpabUNbHOCTb MOtaxa IN pABOTbl BCero padIOOBOPyOBaHn B BAwem aTOMOBnIE. He xpaHnte IN He nepeBO3nte
TopOHyne JxIDKocTn, Ra3OBe IIN INBzPbIOONaChNbe MaTePNAbl B ODNOM OTCeK e 3TmU yCTPOIcTBOM, erO DeTaIaM NIN DOnONHtJIbHbIMN
PpINAlekHOCTAMN K Hemy. EcnIN BaA w ATOMOBnIb OBopyDOBaHn BO3dyuHbIMN NOyukamn 6e30NaChOcTn, To NOMHnte, YTO ONI packPbIBaIOTc C OChEB 6OJIbJOIN CInNo. He NOMEsaIte PpeDMtBi, B TOM YNCle CMOTIPoBaHNbIe INN nepeHOChble paINOyCTPOIcTB, Na Bo3DyUnBIIMN NOyUKAMn 6e30NaChOcTn INN Ha PyTN INX packPbITra. B clyuae HnpabunbHO yCTAHOBKn BeCnPBoODHO OBopyDOBaHn B CAIOHe aTOMOBnIg packPbITne BO3DyUHoi NOyUKN IOyUKN 6e30NaChOcTn MOKeT
PpINBecTI K cepE3HO TpaVBme. IcNOlbZOBaHne yCTPOIcTB Ha 6OpTy camOneta BO BpMa IOneta 3aIpeSeHo. BIKIOUaIte BaWe yCTPOIcTB OpeNd NocAdKo B camOnet. IcNOlbZOBaHne 6eCnPBoODHbIX yCTPOIcTB CAMOnete MOKeT Bv3BaTb
ONachIbe NomExn B paOBe cNCTeM CamOneta, HapuHTb paNDOTeEOPhOHHyO CB83bN, KpOME TOrO, MOKET 6bITb 3aIPpeSeHo 3aKOHOM.
B3pbIBOOJaChbIe ycIOBnA
BbIKIyauTe yctpoCTBO B MeCTax C NOBbIeHHoB 3PbIBOONaCHocTbIO u CNeDuYte BCEM INHCTpyKUINM U yka3aHNiM Ha 3HaKaX. K B3PbIBOONaCHbIM MeCTAm OTHOcTc8 O6NaCTn, rDe MOrYT nonPoCITb BbIKIQUHTb DnIRaTeJIb aBTOMoB6uNl. Bo3NHKOHOBeHne NCKpbl B TAKNX MeCTAX MOKeT pInBecTn K B3PbIBY uIN IOKApY, YTO MOKeT Bbl3BaTb TpaBMbl IIN daJce Cmeptb. BbIKIQUaTe HOYtOyK prdOM c ra3OBbIMn Hacocamn i 6BeH3OKoIOnHKAMn Ha cepBvChbIX cTAHcIqx. O3HaKOMbTEcB c ORpaHnueHnma H nCNoIb3OBAHne paINOOBopdyOBaHnna B MeCTax XpaHEnn y pacnPpeJeHnna TOIInBa, XmMHuecknx 3aBODax IIN MecTax, rDe BeDyTCs B3PbIBHbIe pa60Tb. B3PbIBOONaCHbIe MeCTa o6bUHO (HO He o6raTeNbHO) OTMeueHbI cneuaJIbHbIMn 3HaKaMn. K TakIM MeCTAm OTHCNTcR NOJaIy6Hoe pNOcTpaHCTBO KOPa6Ne, MeCTa XpaHeHnI y pacPeJeHnna XmMKaTOb, aBTOMoB6uNl HA cXkNKeHHom r43e (IpONaHe
IIN6yTaHe),aTakKe OgbnactN,1eB BO3dyXe COdePkTaC TcXIMnueckne BeSeecTBA IINu CaTnUbI, TaKNe KaK MyKa, NblN INM MetaIIInuecka NyDpa. He BkIIOuAitTe HOytOyK B MeCTax, 1e3anpeUeHO IOnb3OBAtbc MObINbHbIMn TeNeΦoHaMn ININx IINcNoB3OBAHne MoKET Bbl3BaTb NOMEX ININ ONaCHYIO CNTyaUHIO.
3KcTpeHHbIe Bbl3OBbl
BHMaHne! BbIOJIHeHHe 3KCTpeHHbIX BbI3OBB C NOMOuBIO TOTOYCTBa HBeO3MOxHO. 3KCTpeHHbI Bbl3OB HUxHO CJeIaTb C BaWero MObIbHOro TeNeΦoHa IJIN C NOMOuBIO dpyroTteΦoHHO CNCTeMbI.
HctpyKuIN NO yTnIn3aCIN
He bIbpaBbIaIte 3TO 3NeKtpOnHoe yCTpoiCTBO MycOpHoe BeIpo. TTo6bI cOKpaTnTb Do MNHMMyMa 3arp3HeHne OkpyKaIoUe Cpebl I o6ecNeeHTb ee MaKcMImaJIbHyIO 3aUInTy, NoKaIyInCtA, CdAbaiTe erO Ha nepepaBoTky. DOnONHnTEbHbIe CBeDeHnO O npabINax yTuIN3aUnm OTCnyKBwero 3NeKtpOTexHnueckOrO IN 3NeKtpOnHOrO 6obpyDoBaHnna (Waste from Electrical and Electronics Equipment, WEEE) moxHo y3HaTb Ha Be6-CTpaHnue http://www.acer-group.com/public/Sustaina sustainability01.htm.

IpeDynpexKdEHeNe o cOepeXaHn npTyTN
JaMnOBIe npoEKTopbI nIN 3JNEKTPOHnA npOdyKuIc c JKK/3JT MOHITOPAMn 6e3 CBeTOnIOHOH NIOCBETKN:JaMna(bI) BHyTpIn 3TOrO yCTPOICTBa COePjAt pTyB I DOJNkhBb6bl Tpepea60TaHb INI JIKBnIDnPOBaHb I COOTBECTBUN C JOKaJIbHbIMN, UTAHTbIMN INI fedepaJIbHbIMN 3aKOHAMn. BoJee NIOpO6HyU INHOpMaunBO bIMoKeTe HauTN Ha caTte fepeapuNN 3JNEKTPOHbIX OTPaCIIe WwW e INHOpMaunO O JIKBnIDaunN KOHKPeTHbIX BINO BJaMn BBI MoXeTe H www.lamprecycle.org.

ENERGY STAR

ПюдукиАcer, COOTBETCTByUOЯТ tradeBOHnIM ENERGY STAR,ЗЮнOMIT BaшИСpeДСТВа,СнЖКЗ 3aTpAы Ha 3ЛЕТРОЗергИ,ИЗЗИЗЧАЕТ OKрУжагоусpeDу 6e3 COKpaцEHNФунKIOHAJIbHbIX BO3MOxHOCTe ИЛМ ChINKeHnI 6БICTPODEiCTBnI. Komпань Acer рада пpeДLOXHTb CBOUM NOKyPnteIЯmpюdukciuO c JorotInom ENERGY STAR.
CbeHnI n COBeTbI dIyO6CTBa pa60TbI
HnOra nOJb3OBaTeN, npOBoJxIe MHOrO BpeMeHn 3a KOMNbIOTePOM, JauLyIOCTa Ha qpe3MepHoE HapJxKeHne rna3 n roIoBHyo 60JI. POnj3OBaTeN TaKke cAtoPnCKyOT nOlyuHT fo3NueCkyo TpaBMy, ecn bdyT MHOrO YacOB NOpJrD CnDeTb 3a KOMNbIOTePOM. IpoDoJnxITbHoe BpeMa paBOtbl, HeYdoBHn aNo3a, HnPaBnJIbHaopraHn3aun paOchero Mecta, CTpeCC, HnOJXODJxIe ycNOBnpaBoTbl, COCToHHe IInuHOro 3dOpOBbI n DpyTne fakTopbl 3NaHTeHbHO yBeJInuBaIOT pNc NpUyeHn fN3NuCeKo TpaBMbl.
Henpabunbna na 3a KOMnbOpom MoKet npBecTn K NOBHeNIO 3aIcTHOrO cyXoJIbHO rCnHrPOMa, TeHNHHTy, BOCnAneHNO cyXoJInn I CnHOBaJIbHO cmKn nIIN dpynx cKeJeTHO-MblIeUHbIX 3a6OBeBaHn. B KcT8x pyk, 3aIpc7bax, nIeay, ppeDnEbyx, Wee nIIN CNHe MOrTy NOrBtBCs CNeDuOuine CmMTOMbl:
OHemeHne,XXeHne NIN NOKaJIbBaHne
JOMOTA,60e3HeHoe OuVueHne uN cna6OCTb
60JIb, ONVXOJIb HJIJI NIVJIbaCuaIa
OueeneHeIOCTb NJI HAnpJxKeHne
CVXOCTbNJNcJabOCTb
Пи наличим тaknx CmNTOMOB, NOBTOPЯJOUIXCЯ ИЛ NOCTOЯньх Oушselfny ДИСКOMфОртaN/NIN 60ANEHHeNbIX OушselfNYпri pabote 3a KOMblOTepom HemeДлЕнHO OБразITeCB 3a KOHCyIbTaциЕ KВpaЧу NCOOБцITE OБ 3TOM B OTdEN TEXHKN 6e3OJaNoCHOCtN IN OXpaHb 3dOpOBBy BaSeY KOMpaHIn.
B cneyuouem pa3dene npnbOaTcra coBeTb, kak cdeIaTb pa6oTy 3a KOMnblTePOM 6oone ydo6hoi.
Ponck ydo6horo pa6oeryo nooKeHn
HaIInTe IJIa Ce6Ma MAcCImaJIbHO yIObHoe NIOJoxHeNe 3a KOMlbIOTepOM, MeHЯ yron oB3Opa MOHITopa, IcNoJIb3yra NIOCTaBky IJRA Hor IIN peRynpYBaICOTy kpcna. BocnoJIb3yIteCb cneIyUoIIMn COBETAMn:
He CnDInTe PNOJINr B ODNH N03e
He CKIOHЯTeCb Hn3KO 3a CTOJOM I He OTKINdbIbAITeCb dAJIeKO Ha cINHKy KpeCJa
-перночеси Вставаite И похжьайтесь, чобі Chять Hanрженье В мускулax Hor
- DeNaIte KopoTKe nepepbIbbl, UTo6bl Ocna6nTb HapJxKeHne B Ie e n PnLeayax
He HapraTe MyCKyIbI He NIOHIMaTe BbICOKO IIeHu
yctahOBHTBHeHnI DnCnne,KnabnaTpy N MbIb Ha pa6OeM MecTe TaK, TTObI DO HN X 6bIIO JERKO DOTaHyTbcra
ecIN Bbl CMOTPnTe Ha MOHITOp YaSe, Yem Ha DOKyMeHTbI, To pa3MeCTnTe DnCIIe IIO CEHTpy CTOnA, YTObI Yeer HAprralacb KAK MOKHO MehBse
3a60Ta o 3peHm
Ecni nOIOIgry CMOTpeT ha MOHITOp, HOCHTb HenpaBnIbHO NOo6paHHbe OCHN IIN KOHTaKTHBe IINH3bl, INCIOJIb3OBAt bApKNI cBT NII paBOTaT b 3a cTOnOM c 6IeCTaIe NOBepxHOCTbIO, IINOxo OTpeYInpOBAt pe3KocT bKpaHa, INCIOJIb3OBAt MeIKNI UpiΦT IIN MaIOKOHTpAcTHbI dIcNIIe, To rIa3a 6yDt CInbHO yCTaBaTb. B cIeDyUOxN pa3DeJax pInBODIgTcOBeTb, KAK yMeHbUINb Ype3MepHoE hAnPjXeHne rna3.
Tn3a
- DabaTe rna3am YacTbI OTdbIX.
- Перiodи ueckn OTBOIDITE rla3a OT MOHITOPA n CMOTPte Ha KaKoH-Nb ydaJIeHHbI ppeDMET.
- Yacto Miraute, UTo6bl rna3a He 3acbixaJI.
Ducnnei
-ДеркпгЕдспгь Вчстote.
Baisha roIoba donJxHa haoDntbC BblIe HnXHne KpOMKn dncPner, YTObbl npnpocMTope n3O6paXeHnB U cHTpe dncPner rna3a cmOTpe nn CBepxy BN3.
- Otperynnpyte npkoctb n/nn KOHTpact dncnpe TaK, YTObI TeKCT bblno Ierko yntaTb, a rpaqika oToobpaqkanacb YeTKO.
- Umehbinte MepcaHne n OTPaKeHne:
yctahOBHTe DnCJIeTak, YTO6bI erO 60KOBaR KpOMKa 6bla ObaPeHa OKHy INN NCTOCHNY OCBeUeHnA
ymehbIHTeCBETB NOMEUHIN,NCNOL3yI NOPbepbl,ITOPbl IJI KAIIO3I
BKNHuaTe OcBeueHHe Ha pa6oHem MeCTe
- otperyniyte yron o63opa dincpnneer
- IcnoJb3yIte aHTn6JIKNKOBbl qHJbTp
yCTaHOBnTe Ha BepxHei KpOMKe DInCnIeR COINHcE3aUNTHbIK KO3bIpeK, HApPIMep, KapToHHyO NIOCKy
He cmToPte Ha dinCnIeN 3 Heyno6HOro noNoXeHna.
He cmOtpnte nOIOJry Ha nCToUHnK JPKOrO CBeTa, TaKne KaK OTKpbItble OkHa.
xiv
Bbipabotka npabnblhoro ctnla pa60tbI
BbpaobotaTe y c6e cnedyuonne npNBbIcN pa6oTb 3a KOMnbIOTePOM, KOToPbIE p03BOJr MT MeHwe yctabt n pa6oTaB 6OJIe npOdyKTnBHO:
-Делай Te KopoTKe NaCTbIe NepepbIBbI b pa6oTe.
-Делай Te KaKne-H6yBb ynpaxKHeHnIЯ pa3MnHKn.
KaK MoXHOaIe BbIXOIndTe NIOdbIaTb YnCTbIM, CBEXIM BO3dyxOM.
- Perynapno Deaie Tei3nueckyo 3apky, ykpenlaioy To.

PpeynpeXeHHe! He nolb3yItecb KOMnIbOTepom Ha nBaHe HIN B NoCTeH. Ecn 3TOro HEnb3a N36ExKaTb, To pa6OtaTe TOJbKO KOpOTKmM nepnoaMn, qacto DeJaTe nepepbIBbl BbInONHJrTe ynpaxHeHn dIra pa3MNKn.

Mby pa3pa6oTaII npI pyKOBoIcTB, KOToPbIe NOMOryT Bam B IcNoIb3OBAHIN HoyT6yka Acer:
Праздe BCero, плakat Quick start up guide...nomoket Bam no3HaKOMITbC c TeM,Κан HabtpaNBaTB KOMlbIOpTep.
TInnoBOe pyKoBOcCTBO noIb3OBeTeJIa CepNI Aspire coDepeKHT noJIe3HyU INHΦOpMaζIIO, pIImeHmIyIO KO BcEM MoIeJIaM cepNI Aspire. B HEM ONICbIbAHOcTc OCHOBHbIe TEMbl, TaKHe KaK TexHOJOrN Acer eRecovery Management, pa60a c KJIaBnAtypoi, 3ByKOM n T.D. IToKaJIyIcTa, ImeIte B BVNu, YTO TInnoBOe pyKoBOcCTBO noIb3OBeTeJIa UYOMaHyTOe HIXe AcerSystem User Guide ABJIaOTc oObIeHHbIMI, PO3TOMy B HNX INOHdA bUYt ONICbIbATbcr FyHKUIM NII CBOnCTBa, peAIIN3OBAHbIe He B KynPiJeHHoB BamM MoDEJIu, a LIIuB B ONPeJelEHHbIX MOdeJIax 3ToI cepNI. B TaKHX cIpyaX B TeKCTe IMeETc r NometTkA "ToJIbKO dIra ONpeJelEHbIX MoDEJIe".
YTo6bI y3HaTb 6oJIbSe O TOM, KaK IOBbICITb npOdyKTNBHOCTb BaUe paBOt b C NOMOuIbIO KOMMbIOTepa, Bbl MoKeTe o6paTbCRA K AcerSystem User Guide.
3To pyKOBODCTBO COePjXNT IopDpO6HyIO INHOpMaUIO O CnCTeMHbIX FyHKUHX, BOCCTAHOBLeHIM DaHHbIX, BO3MOXHOCTx PaCUINpeHIN I yCTpaHEHN
HeNCpABHOCTe.KpOME TORO, OHO COePjXNT rapaHTNHyIO INHOpMaUIO, a TAKKe
06uJe PpeDNsCAHIN I npAByINaBe3ONaChOcTN ppi pa6ote C BaUM HOYTOyKOM. PyKOBODCTBO NoCTabJIeTcB MecTe C KOMMbIOTepOM, PpeDbAPITeJIbHO
3aRpyKeHHO B Hrero B φOpMaTe PDF. YTo6bI o6paTbCRA K HeMy, Bam HaIo cDeJaTb
cIeNyUoee:
1 ⅢeKHTe KHOIky

Ipyck > Bce nporpamMbI > AcerSystem.
Acer Backup Manager 11
UnpaBJIeHne pHTaHHeM 12
Acer eRecovery Management 13
3aIncb pe3epBHOH KOHN Ha ONTtueckn dNcK 14
BocctaHOBJIeHne 15
BocctaHOBJeHne Windows c DnCKOB apXuBbIX KOni 16
Acer Arcade Deluxe 18
OprahbI ynpabJeHn 19
OprahbIy npablenia nepemuehenem 19
CaTbI couaJIbHbIX ceTei 19
ΦOTO 19
Bvndoe 20
OpranbI ynpaBHeHn BOCpOn3BeDeHnEm 21
My3blka 21
O6HOBHTb 21
AkkymyIaTOpHa 6aTape8 22
XapakTeepntKn aKkMyJrTopHoi 6aTapei 22
YBeJIuHHeHcPoka cnyKbI aKKyMylTOpHoi 6aTapen 22
UcTaHOBka n 13BLeueHHe aKkMyJrTOpHo6BaTapeu 24
3apdakkymyIaTOPHO6aTapei 24
IpoBepka ypOBnHa 3apJa aAkkymlaTOpHoi 6atapei 24
OnTmM3aIgN IcNoJIb3OBAHn6BaTapeN 25
IpeDynpexKdHnE O Hn3kOM ypOBHe 3apya
aKymyIaTOpHoi bAtapei 26
Bepem HooT6yK c co6oB 27
OTkIIOueHne ot paOchero cToJa 27
IpeeBnHexn 27
IoiroTOBka KOMNbIOTepa 27
UTo npHocntb Ha COBeuHaHn 28
3abpaem KOMnbTepeDoom 28
IpoTobka KOMNbIOTepa 28
UTo 6paTb c co6oB 29
Oco6bIe coo6paXeHn 29
UcTpaBbEm DomaHnOΦnc 29
IyTeWeCTBnC KOMNbIOTePOM 29
IoproTOBka KOMnbIOTepa 29
Uto 6paTb c co6oB 30
Oco6bIe coo6paXeHn 30
MekdynapoHbIe nyTeWeCTBnC KOMNbIoTePOM 30
Iodrotobka kombtopea 30
Uto 6paTb c co6oB 30
Ocoobie cooobpaxeHn 31
BézonaacHocTb BaUero KOMNbIOTepa 31
IcnoJIb3ObaHne 3aMka 6e3OpacHOCTN KOMNbHTepa 31
IcnoIb3OBAHne naponei 31
BboD napoJei 32
3aandne naponei 32
PacunpeHne c nOMOuI OOnHnTeJbHbIX BO3MOxHOCTe 33
CnoocbI nooknueHn 33
MOnem dIy nepeaun qakcoB/daHHbIX
(TOJIbKO IaI ONpeJeHbIX MoJeIe) 33
BcTpoEHnIbe cpeICTBa pa6Otbl Cetn 34
ИК-норт сандарт a Consumer Infrared (CIR)
(TOJIbKO IJRA ONpeIeJIeHHbIX MoJeIeIe) 34
YHnBepcaIbHa nocJeIOBaTeIbHa 1uHa (USB) 35
IopT IEEE 1394 (ToIbko dIy onpeJeIeHbIX MoIeJ)35
High-Definition Multimedia Interface
(TOJIbKO IJRA ONpeJeHnBIX MoJeIeN) 36
ExpressCard (ToIbko IJnOpeJeHbIX MoJeIe) 36
UcTaHOBKa pAmrTn (ToIbKO dIy OnPeJeHbIX MoJeIe) 37
(BocctaHOBLeHne "c dNcKa Ha dNcK") 41
Паров 41
Pa6oTa c nporpaMMaMn 42
IpoCMOTpΦnJIbMoB Ha DVD 42
43
ObpaueHne 3a TeXnueckoI POndePkoI 45
MekdunapodnbIe rapaHTnI dIpyTeWeCTByUoIx (ITW) 45
PpeKde, Yem obaaatbca 3a NOMOJIbIO 45
YctpaHHe HEnoJaOk KOMNbIoTepa 46
CobetbI no noncy u yctpaHEnH No HncnpaBHOtei 46
Coo6eHn8 o6 own6kax 46
IpaBnla n 3aMeuHn no 6e3OpacHOCTn 47
3ameuahne FeepaJIbHOJ KomnCCnn IO 3NeKtpocBra3N 47
PpIMeuaHnO MoJeMe (ToJIbKO dIg OIpEJaJIeHHbIX MoJeIe) 48
3aBHeHne O nKceIax KnIDKOpcTaalNueeCKOrO 3kpaHa 48
HopmatNBHOe yBeOMJIeHne B OTHoUeHN paINOyCTpoIcTB 48
Ombaayactb 49
Tpe6oBaHn8be3oNaChocTn FeepaBbHoN KomiccHn PO 3JeKTPoCBA3n B OTHOuEHH N BbICOKHX YaCTOT 49
KaHana-Hn3KOMOuHOCTHbIe,OCB6oXdEHHbIeOT\PiueH3n paAnIOKOMMyHnKaUHOHHbIe yCTpoiCTBa (RSS-210) 51
Bo3deIcTBnE Ha IIOeBbICOKOaCToTHbIX noJIeN (RSS-102) 51 LCD panel ergonomic specifications 51
CpeuaJIbHbIe KlaBnI IN HdNKaTOPbl
CneuNbHbIe KnaBnU INHnKaTOpbl ObecneuBaHT JeKm DoCTyn K yDoHbIM fHyHKnI M nNoHTHO OTo6paXeHHe COCTOHN.
"Launch Manager" no3B0JraT B KOMbIOTepe BKJIIOHaT b N BbIKJIIOHaT pa3JIINHbIe MoDyN 6ecnpoBOJHO CB3N.
HaxmTe Fn + F3 ,TObIOTKpbITbOKHO "Launch Manager".
KpaChbI INdNkATOp 03Naayet, YTO MoyNb BblKnHoyeH.
- UTo6bI BKNIOHNTb MOyJIb, HAnKMnTe KpaChbI INHdNKaTOP.
3eJIeHbI INdIkaTOp O3Haayet, YTO MoyIb BKIIouyeH.

- TTo6bI BbIKJIOUHTb MOdYbI, HaxMNTe 3eNeHbI INHdNkaTOp.

Прмочанe: TnT MoUyIЯ CBa3I 3aBcNIT OT KOHФИграци nCSteMbI. He 3a6bIbaiTe OTKpbIbA Tb NaHelen HacToPoiKu COOTBeTCTByUoIero MoUyIЯ DJIЯ BblOpa DoNoJIHInTeIbHbIX napametpoB.
CehcopnnaHeJIb
BcTpoeHnae cHcOpHa nAHeIb -3To yKa3bIBaIOoee ycTpoiCtBO, OuYuaIOoee DnIXeHnnoeroNOBepxHocTN.3To 03NaHaeT, YTO KycpCop OTBeuHaET Ha DnIXeHnnaIpbueB no NobepxHocTN cHcOpHoi nAHeIN. LcHTpaJIbHOe paCNOJIoKeHne ynpa IpnEoCTabJIeT MaKcImaJIbHOe yDObCTBO nIOdEprKky.
OCHOBbI NcNoJIb3OBaHnA CeHCOPHO nHaHeJI (C DByMg KHOKNKaMn)
CneyuOuIe 3nEmeHTbI NOKa3bIBaIOT, KaK IcNoJIb3OBaTb CeHcOpHyIO nAHeNb C DByMg KHOKNKaMn.
- YTO6bI DnBraTb KypCopOM, BODITe NaJIbCEm IO CeHCOPHO naHeH.
HaKab Ha JebuHn npaBHy KJIaBnHn, HaxOJaIeecsno Kpaam CeHCOPHO nanei, cMOKeTe oBeCneHTb cyHKunn Bbl6opn u cNoIHeHn. 3Tn DBe KJauHn PoIObHb npaBOu N Jbeo KJIaBnUam MbIu. IocTyKbBaHne no ceHCOPHO naneHn anaIOrmHNO HkaTNU neBOu KHONuMbIu.
KlajBnIshn 6IoknpOBKn I BCTpoEHna ZnΦpOBAJ KJIaBHaTpya\*
Ha KnaBnA type HaxoJrTc3 3KKnCnpUoiNe KnaBnI, KOTOpbIe Bbl MoKeTe BKHouTa b IIN OTKJIIOuTaTb.
PpmeaHne:3TaФyHKnIaIOCTyIHa He BO BCEx MoDeIax.
Iporpamma Acer Backup Manager 3a TPN poctbix wara no3Bonaet co3daBaTb pe3epBHyIO KONIO Bcei CnCTEmbl ININ OTdEJIbHbIX paaiIOB IN PAnOK IPO paCnicaHIO n IO Heo6XOДIMOCtN.
Стобул STANUCITb Acer Backup Manager,нжмite KnaBnUy Acer Backup ManagerВ Верхнeи чаTN KnaBnATypbI.ПИБо BыбepNT MeHIO Nysk >Вce nporpaMMbI >Acer Backup Manager > Acer Backup Manager.ОТКpoEТСЯКран ппВETCTBnR.C STOrO 3KpaHa 3a Tpru Stara Bbl CMOKeTe HAcTPOINb pe3epBHOe KOINPOBaHne nopacncaHIO.Чтобул поЕТи на СсLEdYUOsiN 3KpaH, StELKNITE ПpoJoJXHTb.JIeKHNTE KhoNky + И сLEdYIte yka3aHnI M NaKpaHe:
1 Bb6epnte coepxmoe nra pe3epBhoro konipobanhy. Yem mehbe coepxmoRO bblpaHO, Tem 6bictpee ocyuectBnIETc npoccc KOnipobAHN, HO TEM Bblwe pNC notepn daHHbIX.
2 BbIbepeMeToIgIxpaHeHnpe3epBbIxKoNII. IOTpe6yeTcBbIbPaTb BHeuHnDnCKIIN DnCKD: -Acer Backup Manager He MoXeT xpaHntb pe3epBbIe KOIN Ha ICXoHOM DnCke.
3 BbIbepeTe nepIOduNHOCTb, c KOTOpoi Acer Backup Manager 6ydet BblONHrTb pe3epBHOe KOINPOBaHne.
По заBERшEN 3tIX Trex WarOB pe3ePBHbIe KOJIIN 6byT co3daBaTbCS aBToMaTnueCKn corIaNo paCnIcAnIO. MoKHO taKKe co3dAteb pe3ePBHyIO KOJIINO ВучHuO haxaTneM KnaBnSiN Acer Backup Manager.
UTo6bI n3MeHnTb HAcTpoKn, B JIo6oe BpeM 3aynCTne Acer Backup Manager n3 MeHIO Nysck I NOBTopnTe OINcaHHbIe BblIe WArN.

YnpabJIeHne pNTaHnem
В данном komьютete ectв BCTOpeHnoe yctpoiCTBO ynpaBHeHnI nITaHnEM, KOTOpoe cneIHT 3a cnCTemHbIMN DeIcTBnMn. ПОД cnCTemHbIMN DeIcTBnMn IIOpa3yMeBaIOTcJIIObIe DeIcTBnC BOBNeHuHmOdHOrO nII IN HeCKoJIbKnx YcTpoiCTB, TAKNX KaK: KlaBnAtuPa, MblS, DnCKOBOD, JECTKN dIck, nepuФериНьie yctpoiCTBa, coeDInHeHbIe C nocJeDoBaTeNbIMn I npaPAnIeNBbIMn nopTaMn, a TAKXe BInDeonAmrTb. EcIIN 3a kaKoe-TO BpeMra (Tak Ha3bIbAeMOe BpeMЯ Be3deIcTBnR) He OTCLeJxIBaEtCЯ HnKaKaJЯ DeIeTeJIbHOCTb, KOMnbToTeP octaHaBnIBaet qactb nII IN BCE 3TN yCTpoiCTBa, YTObI 3KOHOMNTb 3HepriNo.
Acer eRecovery Management
Прилобенье Acer eRecovery Management npedHa3HaeHo Дяьбсгрог ВOCCTAHOBHeHЯ сСтЕмbl. Мохно coхpaHЯТь и ВOCSTaHbIbNbAыБОразы ИСХДНо КОнФиураци, a ТAKKE nepeyctaHaNbIbNbAы ДраьВеры InpINLOXeHЯ.

PpmeaHHe: Bc rIeDyUOaA HnOpMaun npuBeHa NCKIOHTBbHO B cnpaBOHybIX ueJx. PeaIbHbIe xapaKTepcntIKN yCTpoIcTB MOrT OTIIuATbcr OYka3aHHbIX.
B npInoxKeHHn Acer eRecovery Management ImeIoTc cIeDyUOuNe fynKm:
1 Pe3epBHOe KOIpOBoHaHne:
Co3daTb Dnck 3aBODcKnx HacTpoeK
Co3daTb dIck c dpaBepamn npJIOxehnma
2 BocctaHOBJIeHne:
- ПОЛhoe BOCCTaHOBJIeHHe 3aBOdCKnX HAcTpoE KcIcTeMbI
BocctaHObITb onepaunOHHyIO CnCTeMy n coxpaHITb noJIb3OBaTeIbckne daHHble - IpeyectaHOBt bpaIbepbl nI npIIOxHeHn
Hnke OnncaHO IX NCIOJIb3ObaHne.

PpmeaHne: 3Ta fynKuIyIOCTyINHa HE BO BCEx MoDeIax.
Ppi nCnOJIb3OBAHmN KOMNbIOTepa, B KOTOPOM BCTpoEHhbl NIIuUyIi
DnCKOBOD ONTNUeCKHX NcKOB He yCTaHOBJIeH, DnIg NcNoIb3OBAHn
fynKuIM 3aIINCI NDCKB ChauJaHeoBXoJIMo PNOJKIIOHTb
BHeHNI NIIuYuIi NDCKOBoD.
YtO6bI nCnObl3oBaTb fynHKUIO napOlBHO 3aUHTBI npOrpAmMbI Acer eRecovery Management dIra 3aUHTBI daHHbIX, HeO6xOIMMO yCTaHOBtB napOl. NapOlb MoXHO yCTaHOBtB, 3aNyCTNB yTINrty Acer eRecovery Management n Haxab "HAcTpoKa".

3a\Pncb pe3epBHOJ KOIN Ha ONTNUeCKN DnCK
Ha ctpaHnue Pe3epBHOe KOINPOBaHne nporpaMMbI Acer eRecovery Management MoKHO 3aIPCaTb Ha ONTIueckN DnCK Oba3 NcXOJHO 3aBOIDCKo KOnΦnrgpauCm INJIO C03DaTb pe3epBHyO KOINIO dpaIBePoB IN pnpIoKeHn.
1 HaxmTe Nysk > Bce nporpammbi > Acer > Acer eRecovery Management.
2 Порогамma Acer eRecovery Management otKpoetca Ha cTpaHne Pe3epBHOe konipobAHne.

3 BbIbepuTe Tn pe3epBHOJ KOIN (O6pa3 NcXoHbIX 3aBODcKHX HAcTPOEKN IIN dpaiBepbI INpNIIOXKeHNA), KOTOpBI Tpe6yETc3aNCAtB Ha DNCK.
4ДяЗаBERSEHINI npOeCCa CLEyIte INHCTpyKUIM Ha 3KpaHe.

PnmuMeaHne: BbIbepnte co3dAnne o6pa3a nCxOJHO KOHfNrgpaunn Dnla co3dAnn 3aRpy3oUHOro ONTtueckOro DNCKa, Coepkaueero POnHbO bpa3 OnpaunOHn CnCTemblB TOM BVNe, B KaKOM KOMnbTOpe IocTaBnJeTc NOKyNaTeJIIO. EcnB Bam Heo6xOJIM DNCK, P03BOJIoUm npOCMaTpNBaTB cOepXUMOE u BblbOpouHO yCTaHaBnBaTb pInIOxKeHn IN dpaiBepbl, BblbepNTe co3dAnne pe3epBHO KOnnn dpaBepOB IN pInIOxKeHn; TaKoDnCK He ABJIaeTc 3aRpy3oUHbIM.
BocctaHOBJeHne
Функця ВOCCTaHOBJIeHЯ NO3BOJЯET BOCCTaHaBbNBAt CnCTeMy n3 Opbaza IcXoJHoi KOHfIguraIIMI pE3epBbIX KOnM, 3aIncaHbIX paHee Ha KOMNaKT-dIck N DVD-DIck. KpOme TOrO, n3 apxINBa MOXHO NepeyctaHOBITdpaIbBepbI nPpIIOJKeHЯ.
1 HaxmTe Pnyck > Bce nporpammbi > Acer > Acer eRecovery Management.
2 IpeenIte Ha cTpaHnUy BocCTaHOBnTB, HaxkAB KHOJky BoCctaHOBnTB.

3 MoXHo BbIbpaTb BocCTaHOBJIeHHe CnCTeMb I3 O6pa3a NcXoJHOI KOHfNpyaunm nnnepeyctAHOBky dpaIBePoB nnpIoXKeHH.
4ДЯЗавершениprouceca cIeDyIte INHCTpyKUIM Ha 3KpaHe.
BocCTaHOBJIeHne Windows cДИСКOB apXINHBIX KONI

PpMueHne: 3Ta yHKnIaDocTyHa He BO BcEx MoJeIx.
YTo6bI BocCTaHOBnTb Windows c apxNBbIX KOJI, paHee 3aIncAHbIX Ha NcKIn, HxJH0 BCTaBnTb nepBbI apxNBbI dNc K B yTuJIte HAcTpoINBIOS BKIIouHTb MeHIO 3aRpy3Kn no F12.
1 BkIIOUHTe KOMNbHOTep IN B pINBOD ONTNUeCKHX DnCKOB BCTaBbTe NepBbI DnCK DnI BOCCTAHOBJIeHnA CnCTeMbI. Ipepe3arpy3nte KOMNbHOTep.
2 Bo Bpem 3ayncKa, KOrJa nOABNTc JIorOTn Acer, HaxMMte KJIaBmUy F2, UTO6bI BOITN B yTINrty HAcTpoiKa BIOS n B Hei HAcTPOntb npaMeTpbl CInCTEmbl.
3 HaxkataHem KnaBnU CO CTrpeNkAMN BnEBO N BnpaBO BbIeJIte IODMeHO TnaBHOe.
4 HaxaTneM KJIaBnIc O CTpeIknAMn BBePx N BnI3 BbIeJIInTe MeHIO 3arpy3Kn I0 F12.
5 HaxaTneM KJIabuNf F5 nF6 n3MeHnTe dIy MeHIO 3arpy3Kn no F12 3NaueHHe Ha BkJIoUeHo.
6 Haxmte KnaBnuy ESC, yTo6bI BOITN B IOMeHIO BixoJ, Haxmte KnaBnuy ENTER, yTo6bI BbItn, coXpaHNB n3MeHHe. Haxmte KnaBnuy ENTER eue pa3, yTo6bI BbIpaTb Da. Ipon3oienetpeepaRpy3ka cnCTembl.
7 Pocne nepe3arpy3kn, KOrda noRbTcI JorOTnAcer, HaxMITE KnaBnUy F12, YTO6bl OTKpbITb MeHIO 3arpy3kn. 3deCb MoJHO Bbl6paTb, C KaKOrO yCTpoiCTBa 6ydet 3arpykaTcR cNCTema.
8 HaxaTneM KlaBnUc oCTpeKamMbIeJIte IDE1*, 3aTeM HaxMMTe KlaBnUy ENTER.Cntema Windows 6byet yctahOBHeA C DnCKa BOCCTaHOBHeHn.
9 YBnDeB nprIraaHeHne, BCTaBbTe BTOPO DNCK BOCCTaHOBJIeHnA, 3ATEM BbIOJNHaTE yKa3aHnHa 3KpaHe Dnla 3aBepSeHnRA BOCCTaHOBJIeHnA.
10 Поспе 3аьершени BOCCTaHOBнени ИЗВЕКТЕ ДИСС BOCCTaHOBнени ИЗpinвда.ЭTO hyxHo CdeJaTb Do nepe3arpy3kn KOMMbIOTepa.
EcnI XOTnTe 3aadTb npnopTeT 3arpy3Kn Ha dIITeIbHbI CpOK, TO BbIeJIteIe IIOMeHIO 3arpy3ka.
1 BkIIOUHTe KOMNbHOTep nB npINbOD ONTNUeCKNX DnCKOB BCTaBBte nepBbI dNCK dIy BOCCTaHOBHeHnCnCTeMbI. Ipepe3arpy3nte KOMNbHOTep.
2 Bo Bpem 3ayncka, KoIJa NOBHTCJ IOROTn Acer, HaxMITE KJIaBmUy F2, UTO6bI BOITN BYTNITy HAcTpoiKa BIOS n B HeI HAcTPOINb npaMeTpbl CNTEmbl.
3 HaxaTneM KnaBnW CO CTpeNkAMN BnEBO N BnPaBO BbIeJIte IOpMeHIO 3arpy3ka.
4 HaxaTneM KnaBnSi CO CTePknAm BBepx N Bn3 BbIeJIte yCtpoiCTBO IDE1*.
5 HaxaTneM KnaBnIu F6 nepemecTne npBOD IDE1* B no3nIIO C hAnBbICnM npOpNTet 3arpy3kn nn HaxaTneM KnaBnIu F5 nepemecTne npytne ycTroNCTBa B no3nIIO C 6oOee Hn3Km npOpNTetOM 3arpy3Kn. Y6eDnTEcb, yTO dJa npBDoA IDE1* yctahOBJIe HAnBbICnI npOpNTet.
6 Haxmnte KnaBnuy ESC, yTo6bI BOITN B NOMeHIO BixoJ, HaxmTe KnaBnuy ENTER, yTo6bI BbiTn, coXpaHNB n3MeHeHHa. HaxmTe KnaBnuy ENTER eue pa3, yTo6bI BB6paTb Da. Ipon3Oien Tpee3arpy3ka cnCTembl.
7 Пи петаузke систema Windows 6удт усановлесс дисka BOCCTaHOBJIeHЯ.
8 YBnDeB nprrnaaehne, BCTaBte BTOPOI DnCK BOCCTaHOBJIeHnI, 3aTEM BbInONHnIte yka3aHnHa 3KpaHe Ipn 3aBepSeHnI BOCCTaHOBJIeHnI.
9 Iocne 3aBepseHn BOCCTaHOBnEHN n3BNEKNTe DnCK BOCCTaHOBnEHN n3 npBOda. 3To HxJHo CdeNaTb Do nepe3arpy3Kn KOMNbHOtepa.
Acer Arcade Deluxe

IoproTOBka HOBOJ aKKyMylTOpHOJ 6aTapeN K IcNoJIb3OBAHnIO
Ipeed nauanom nCnoJIb3OBAHnHO BOI aKKyMnyTOpHOn 6aTaPeN peKoMeHndyeTc npOBecTn npOeCC "IOJrTOBKn" ee K paBoTe:
1 BcTaBbTe HOByo akKymyIaTOpHyO 6aTapeIO B BbIKJIooHeHbI KOMNbIoTeP er He BKIIouaIte erO.
2 POKJIouHte aIaITepe 3JIeKTPoIHTaHnI INIOJIHOCTbIO 3apJITe 6aTaapeHo.
3 OtknouHTe aanTep 3JeKtpoNTaHna.
4 BkIIOHTe KOMNbIOTe np paOtaIte, nCnoJIb3yra 3JIeKTPoNTaHnA O T aKKMyJITOPHO6bATapeN.
5 IcnoIb3yIte KOMNbIOTep Do noJIHOrO pa3praJa 6aTapeu N IOBHeNn npEduynpeKdEHHo O Hn3KOM yPObHe 3apraJa.
6 IopKJIouHTe aanTep 3neKtpOnuTaHnA n BHObI NOHOCbIO 3apAnTe 6atapeo.
Ecnn He npoBoDntb npoceDpy npDroTobKn, 6aTape He cMOKeT 3apKaTbCnDo MaKcImaJbHoro ypOBnA, a CpOK ee Cnyk6bl COKpaTNTc.
ПOMIMOBbIepepeuCnHOroHa cpoK cnYk6bl 6aTapeu cyIeCTBeHHO BInIAOT CNeDyUOuE paKTopbl.
Pa60ta KOMnbIOTepa O T aIantepa NITaHnco BCTaBHeHHo 6batapee. Ipn pa60te OT aIantepa NITaHn peKOMeHdyETc n3BLeKaTb 6batapeo nocJe DOCTNKeHnMaKcImaJIbHO rpoBHra 3apJa.
HeBbIOpJIHHe NpOeDpybI PNOrTOBKn 6aTapeN K IcNoJIb3OBaHnIO, OINcAHHO BbIWe.
- ИnteHcNBOHOe IcNoJIb3OBAHHe; Yem QuIe IcNoJIb3YeTc8 BaTape, TeM 6blcTpee cokpaUaTe Tc8 ee pecypc. Pecypc cTaHdApTHoI aKKyMylrTopHoI bTaIepn IpnpeHocHOrO KOMNbIOTepa - Okono 300 uKIOB 3apJa/pa3Pra.
YcTaHOBKa n N3BJIeUeHHe aKKyMylrTopHOJ 6batapei

BhImaHne! EcIn Heo6xOJIMo npoOJIKHTb paObyt c KOMIbIOTepom, nepei n3BLeueHem 6batapei NOkIIOHTe aanTep 3NeKTponNTaHn. B pOnBHom cIyauet pepei n3BLeueHem 6batapei KOMIbIOTep Heo6xOJIMo BBIKIOHHTb.
UcTaHOBka aKkymyIaTpHoi 6aTapeu.
1 CoBmecTnTe kpa8baTapen C kpaamn 6batapeHoro oTceKa, y6eINBwInCb, yTO rpaHb 6batapeN C KOHTaKtAmn HAnpaBNeHa BOBHypb, a BepxHra NOBepxHOCTb 6batapeN - BBepX.
2 BCTaBbTe 6bTaapeoB 6bTaapeHbI OTcEK n CJIeRka HaxMnTe Ha Hee dIy KCaunn B OTcKe.
13BneueHne aKKymJrTopHOh 6bTapei:
1 CdbnHbTe pKcTop aKymyTHO bTapeu.
2 BbITaHInTe 6aTaapeNo n3 OTeKa.
3apayakymyTopno6aTapei
Ipeed 3apydom y6eintecb, yto 6atapey yctahOBnHa B 6atapeHOM OTcKe. IoiklnouhTe aadantep 3neKtponntaHnK KOMNbHOTepy n K cetn 3neKtponntaHnB. B npoccepe pa3raP moKHO npoDOnKaTb pa60Ty C KOMNbHOTepom. Tem He MeHee, 3apJd akKymJIaTOpHoi 6atapeu npi BblKnHHeHHOM KOMNbHOTepe 3aHImaet 3NaHTeJIbHO MeHbSe BpemHn.

3 BCTaBbTe MoUyIb NaMHTn DnaRHOHaJIbHO B CNOT (a), 3aTeM aKKypaTHo HaJaBNTe Ha Hero, NOKA OH He BCTaHET CO UeJYKOM Ha MeCTO (b).

4 YctahOBITE KpbIiKy Cnota namrtn ObaTHo Ha MeCTO 3aKpeINTE ee BHTOM.
5 YctaHOBHTe aKKymyIaTOp Ha MeCTO I NOIDCOEINHITe aIaNTep NpeMeHHoro TOka.
6 BkIIOHTe nITaHne KOMNbHOtepa.
KoMnIbIOTep aBTOMaTNUeCKn paCNo3Haet n IpeKeOHfNpyPuyET pa3MeP nAmrTn. IoxKaJyIcTa, noCobetyTEcB c KBaJIINΦuIzIpOBAHbIM TexHnueCKm CneUaJIInCTom uIN o6paTIteCb k MeCTHOMy dIJIepy KOMpAHm Acer.
Yacto 3aDaaemble BOpocbl
Далquee npивedingспссok Bo3MOxHbIX cTuyaци, KOtOpble MoryT BCTpeTITbCЯппльзOBaHHn BaSHIM KOMNbIOTepOM. Дя кадо сTuyaци npивedingыnpocstые OTBeTbI n peшеня.
Iocne haxatna KHONKn nHTaHnK KOMnbIOTeP He 3anyckaetc nnHe 3arpykaetc.
B3rIaHInTe Ha INdIkaTop Power (PiTaHne):
Ecn OH He CBeNTcA, nTahHe Ha KOMbIeTp e He NoaHo. PpOBepe TcneyUoee:
Ecni Bbl pa6oTaete OT aKkyMnyIaTopa, 3To MoKeT O3HaTuB, YTo erO 3apJd Hn3kN m HeCnoc6eH nITaTb KOMNbIOTep. POnKJIIOHTe aAnITe npemehnHO TOKa, YTO6bI 3apJdNTb AKKyMnyIaTOp.
- Y6eIntecb, YTO aIaITeP nepemEnHOrO TOKa dONKhblM o6pa3OM NOdkJIIOUeH K KOMNbIOTepy IN K CETN.
Ecnn HndkaTop cBeNTcT, npoBepbTe cneyuouee:
HaxoIITcI Jn He npEHa3HaueHHa IJn 3arpy3Kn (He CnCTeMHa) DnCKeTa BO BHeUHM USB-PrnBOde rIbKnx DNCKOB? BbIbTe 3Ty DNCKeTy IIN BCTaBbTe BmecTO Hee 3aRpy3OuHyIO (CnCTeMHyIO) DNCKeTy, 3aTeM IJIpe3aNycKa CNCTeMbI OJHOBpeMeHNO HaxMMTE KJIaBUNI .
KomnbIOpTeH BOCnPOn3BODnT 3ByK.
PpOBeBte cIeJeUoUee:
- Гомковъ можетьтв окноуна.В Windows,ВЗгеляне на 3нayok perуларopa Гомкови (ДиhamИК) на панели зач.Еслп on NepeчepKHyT, Нжмпerte на 3нayOKи OTmehnte onци Выkn. BCE.
- YpOBeHb rPOMKocTn MoKet 6bItb CInuKoM Hn3Ok. IpoBepbTe nIoXKeHne POn3yHka 3HaUca peYrJaTOpa rPOMKocTn Ha naHeNn 3aDaU Windows.ДЯpeYrJnPoBKN rPOMKocTn MOKHO TaQKe NcNoIb30BaTb KOJIeCnKO pPOKpyTKN, HeIMeOJee OrpaHnUHTeJIa, INI KNOpIKn peYrJnPoBKn rPOMKocTn.
Ecni roIobHbte TepeohbI, HayuHKn IIN BHeUHne DnHAMKn POdkNoeHb Ka pa3beMy IInHeHoro BbIXOda nepeDneH KOMNbIOTepa, To BHyTpeHHne DnHAMKn ABOTMATNueCKN OTKJIOnyAOTC.
Kak OTKpbItb IOTOK npNBOda ONTnueCKNX DCCKOB, He BKJIIOUaI NTaHHe KOMNbIoTEpa.
Ha npBbOe ONTNUeCKNX DnCKOB NMeETcra OTBepCTne dIg MEXaHnueckoro n3BNeueHnna DNcKa. YTo6bl BbIDBnHyTb IOTOK, BCTaBtBe B 3TO OTBepCTne KOHnK cTePKHNaAPNKOBpyKn INN KaHcJIePcKyU CKePNky HnAkmNTe.
KnaBnataHa He pearnpyeT.
PnmeaHne: EcnB Baae CnCTeMe 3aRpyKeHa MhOror3bHna BepnA onepaOnHOHcNCTeMbI, TO pIn NocLeyUOxN OpeaunX BOCCTaHOBJeHn6 ByT NcNoJb3ObaTcR ToIbKo Te BapnAHTb OC n 3bIka, KOTOpBe Bbl BbIbpaJI INp NEpbOM BKIIIOHeHH PNTaHn CnCTeMbI.
C nOMOJIbUdoHHOI npOeDpybl BOCCTaHOBNeHn MOKHO BOCCTaHOBNTb DnCK C:c opunHaJIbHbIM npOrpaMMbIM oEbcneYeHem, KOtOpoe 6blIO yCTaHOBNEHO, KOrda BBy npIO6pEtAn HoyT6yK.ДЯ BOCCTaHOBNeHn DnCKa C: BbINONHTe npOeDpy, npINBeDEHHUo HnKe. (DnCK C: 6UYET pepeOpMaTIPOBaH, N BCE DaHHbIe 6yDt ydaneHbI). Ipeep BbINONHeHnEM 3ToI npOeDpybl O8ra3aTeNbHO Co3daJIte pe3epBhIE KOnnn BCex φaIIOB.
Ipeed 3aynycOM npoceDpybI BocCTaHOBnEHH npOBepbTe HacTpoKn BIOS.
1 PpOBePbTe, BkJIuOeHa JIn ΦyHKcIa Acer disk-to-disk recovery.
2 YbEnTeCb, yTO fYHKnIa D2D Recovery B MeHIO Main yCTaHOBJIeHa B Enabled.
3 BbIaTe n3 yTnJIbTI bIOS, coXpaHb n3MeHeHna.

3anyc npoceDpyb BOCCTaHOBHeHnA:
1 Ipepe3a rpy3nte cncTeMy.
2 Poka oTo6paKaTe JIoroTIn Acer.ДЯЗAnycka npOeDpybI BOCCTaHOBNeHnHaXMMTE OJHOBpeMeHHo
3 Дя поведеня BOCCTaHOBJIeHЯ CnCTeMbI cNeyIte yKa3aHЯM, OTO6paXaEMbIM Ha 3KpaHe.

Baxho! 3Ta yTnIHa 3aHmMaet O T 15 I6aI T B CkpytOM pa3dene Ha JKeCTKOM DNCKe.
CobetbI IO NONCKU yCTpaHHeHIO HeNCnPaBHOCTeI
3TOT nopTaTHBbI KOMNbIOpTeP COePKeIT COBpeMeHHbIe pa3pa6oTKn, nO3BOJIAUcE BbIOaNTb COo6uHn8 O6 OwioKax Ha 3KpaH dIy oBneueHnA noncka HeNCnPabHOCTN.
EcIn CnCTema Coo6aet o6 Own6ke IINI IPOB8NIO7CmIMTOMbI Own6Kn, CM. "Co06eHn6 o6wn6kax". EcIn HeNoIaNka He MoKet 6bITb yCTpaHeHa, CBXNTecb c npOdaBcM. CM."ObpaSeHne 3a TexHnuecko nOpDepKko" Ha cTp.45.
Coo6uēnna 06 oùn6kαx
Ecni ciCTema BbIaet coo6eHne 6 ob oun6ke, 3aIIuNTe erO npIMTe MepbI dny UcTpaHEnn HeNCnPabHocTN. B cneJyUoSe TabNtce nepueCIneHbI COo6eHnA O bOun6kax B aIpabHTHom nopRdKe, a TaKKe peKOMeHdyEmbI deiCTBn no nx ycTpaHEnIO.
LCD panel ergonomic specifications
| Design viewing distance | 500 mm |
| Design inclination angle | 0.0° |
| Design azimuth angle | 90.0° |
| Viewing direction range class | Class IV |
| Screen tilt angle | 85.0° |
| Design screen illuminance | • Illuminance level: [250 + (250cosα)] lx where α = 85° • Color: Source D65 |
| Reflection class of LCD panel (positive and negative polarity) | • Ordinary LCD: Class I • Protective LCD: Class III |
| Image polarity | Both |
| Reference white: | • Yn |
| Pre-setting of luminance and color temperature @ 6500K (tested under BM7) | • u'n • v'n |
| Pixel fault class | Class II |
Ko mputer seri i Aspire
http://www.acer-group.com/public/Sustainability/sustainability01.htm

Acer Backup Manager 10
Zarzadzanie energia 11
Acer eRecovery Management 12
(International Travelers Warranty; ITW) 45
LCD panel ergonomic specifications 51
Acer eRecovery Management
LCD panel ergonomic specifications
| Design viewing distance | 500 mm |
| Design inclination angle | 0.0° |
| Design azimuth angle | 90.0° |
| Viewing direction range class | Class IV |
| Screen tilt angle | 85.0° |
| Design screen illuminance | • Illuminance level: [250 + (250cosα)] lx where α = 85° • Color: Source D65 |
| Reflection class of LCD panel (positive and negative polarity) | • Ordinary LCD: Class I • Protective LCD: Class III |
| Image polarity | Both |
| Reference white: Pre-setting of luminance and color temperature @ 6500K (tested under BM7) | • Yn • u'n • v'n |
| Pixel fault class | Class II |
Aspire sorozat
CLASS 1 LASER PRODUCT
CAUTION: INVISIBLE LASER RADIATION WHEN OPEN. AVOID EXPOSURE TO BEAM.
APPAREIL A LASER DE CLASSE 1 PRODUIT
LASERATTENTION: RADIATION DU FAISCEAU LASER INVISIBLE EN CAS
D'OUVERTURE. EVITTER TOUTE EXPOSITION AUX RAYONS.
LUOKAN 1 LASERLAITE LASER KLASSE 1
Acer Backup Manager 10
Acer eRecovery Management 12
LCD panel ergonomic specifications 51
Acer eRecovery Management
LCD panel ergonomic specifications
| Design viewing distance | 500 mm |
| Design inclination angle | 0.0° |
| Design azimuth angle | 90.0° |
| Viewing direction range class | Class IV |
| Screen tilt angle | 85.0° |
| Design screen illuminance | • Illuminance level: [250 + (250cosα)] lx where α = 85° • Color: Source D65 |
| Reflection class of LCD panel (positive and negative polarity) | • Ordinary LCD: Class I • Protective LCD: Class III |
| Image polarity | Both |
| Reference white: Pre-setting of luminance and color temperature @ 6500K (tested under BM7) | • Yn • u'n • v'n |
| Pixel fault class | Class II |
Rada Aspire
Acer Backup Manager 10
Rizeni spotreby 11
Acer eRecovery Management 12
Rozhrani CIR (Consumer infrared)
(pouze u vybranjch model) 32
LCD panel ergonomic specifications 49
Acer eRecovery Management
LCD panel ergonomic specifications
| Design viewing distance | 500 mm |
| Design inclination angle | 0.0° |
| Design azimuth angle | 90.0° |
| Viewing direction range class | Class IV |
| Screen tilt angle | 85.0° |
| Design screen illuminance | • Illuminance level: [250 + (250cosα)] lx where α = 85° • Color: Source D65 |
| Reflection class of LCD panel (positive and negative polarity) | • Ordinary LCD: Class I • Protective LCD: Class III |
| Image polarity | Both |
| Reference white: Pre-setting of luminance and color temperature @ 6500K (tested under BM7) | • Yn • u'n • v'n |
| Pixel fault class | Class II |
Séria Aspire
Acer Backup Manager 10
Správa napájania 11
Acer eRecovery Management 12
High-Definition Multimedia Interface
(len pre urcité modely) 34
ExpressCard (len pre urcité modely) 34
Instalacia pamate (len pre urcité modely) 35
LCD panel ergonomic specifications 49
Acer eRecovery Management
Acer eRecovery Management je nastroj na rychle obnovenie systému. Je moźne tież zalohovat' alebo obnovit' obraz predvoleny vyrobcom a preinstalovat' aplikácie a ovládače.

Poznamka: Vsetky nasledujuce informacia su len vseobecne. Parametre aktualnoho vyrobku mozu byt' odlišné.
Acer eRecovery Management obsahuje nasledujuce funkcie:
1 Záloha:
Vyvtorit' predvolen'y disk vyrobcu
Vytvorit disk Ovládače a aplikácie
2 Obnovenie:
- Üplné obnovenie systému na vyrobcom predvolený
Obnovit' operacny systém a ponechat' použív. udaje
Preinstalovat'ovladaeaplikacia
LCD panel ergonomic specifications
| Design viewing distance | 500 mm |
| Design inclination angle | 0.0° |
| Design azimuth angle | 90.0° |
| Viewing direction range class | Class IV |
| Screen tilt angle | 85.0° |
| Design screen illuminance | • Illuminance level: [250 + (250cosα)] lx where α = 85° • Color: Source D65 |
| Reflection class of LCD panel (positive and negative polarity) | • Ordinary LCD: Class I • Protective LCD: Class III |
| Image polarity | Both |
| Reference white: | • Yn |
| Pre-setting of luminance and color temperature @ 6500K (tested under BM7) | • u'n • v'n |
| Pixel fault class | Class II |
Serija Aspire
Acer Backup Manager 10
Upravljanje z napajanjem 11
Acer eRecovery Management 12
International Travelers Warranty (ITW)
(Mednarodna potovalna garancija) 43
PredenPoklicete 43
LCD panel ergonomic specifications 50
Posebne tipke in indicatorji
Acer eRecovery Management
LCD panel ergonomic specifications
| Design viewing distance | 500 mm |
| Design inclination angle | 0.0° |
| Design azimuth angle | 90.0° |
| Viewing direction range class | Class IV |
| Screen tilt angle | 85.0° |
| Design screen illuminance | • Illuminance level: [250 + (250cosα)] lx where α = 85° • Color: Source D65 |
| Reflection class of LCD panel (positive and negative polarity) | • Ordinary LCD: Class I • Protective LCD: Class III |
| Image polarity | Both |
| Reference white: | • Yn |
| Pre-setting of luminance and color temperature @ 6500K (tested under BM7) | • u'n • v'n |
| Pixel fault class | Class II |
Aspire seriija
Acer Backup Manager 10
Acer eRecovery Management 12
Snimanje diskova sa sigurnosnom kopijom 13
Povrat 14
Povrat Windows s diskova sa sigurnosnom kopijom 15
Acer Arcade Deluxe 17
Općenito o upravljanju 18
Upravljanje navigacijom 18
Koristenje drustvenih mreza 18
Fotografiae 18
Video 19
LCD panel ergonomic specifications 51
Posebne tipke i indicatori
Posebne tipke i indicatori pruzaju Jednostavni i praktični dostup do funkcjia i jASNi prikaz informacija o stanju.
| Ikona | Stavka | Opis |
| Tipka za sigurnosnu kopiju | Pokreće Acer Backup Management za sigurnosno sminanje podataka u tri koraka (samo za odreğene modele). | |
| P | PowerSmart tipka | Računalo pokreće rad s uštedom energije (samo za odreğene modele). |
| Programabilna tipka | Korisnički programabilna (samo za odreğene modele). | |
| Indikator napajanja | Pokazuje stanje napajanja računala. | |
| Indikator baterije | Pokazuje stanje baterije računala. 1. Punjenje: SvijetliŽuto kada se baterija puni. 2. Sasvim napunjeno: Svijetli plavo kada radi na izmjeničnom napajanju. | |
| Indikator komunikacije | Pokazuje status urežaja za bežićno spajanje računala. | |
| HDD indicator | Pokazuje kada je pogon tvrdog diska aktivan. | |
| Num Lock indicator | Svjetli kada je Num Lock aktiviran (samo za odreğene modele). | |
| Caps Lock indicator | Svjetli kada je Caps Lock aktiviran (samo za odreğene modele). |
Omogucava beziene uredeje
Acer eRecovery Management
Acer eRecovery Management je alat za brzi povrat sustava. Takoder možete izraditi sigurnosnu kopiju/povrat standardnog tvornickog imidza i ponovno instalirati aplikacije i upravljacke programe.

International Travelers jamstvo (ITW)
Vaše računalo je pod International Travelers jamstvom (ITW) koje vam daje sigurnost i spokoj kada putujete. Naša mreža servisnih centara diljem svijeta je tu da vam pruži pomoć.
LCD panel ergonomic specifications
| Design viewing distance | 500 mm |
| Design inclination angle | 0.0° |
| Design azimuth angle | 90.0° |
| Viewing direction range class | Class IV |
| Screen tilt angle | 85.0° |
| Design screen illuminance | • Illuminance level: [250 + (250cosα)] lx where α = 85° • Color: Source D65 |
| Reflection class of LCD panel (positive and negative polarity) | • Ordinary LCD: Class I • Protective LCD: Class III |
| Image polarity | Both |
| Reference white: | • Yn |
| Pre-setting of luminance and color temperature @ 6500K (tested under BM7) | • u'n • v'n |
| Pixel fault class | Class II |
Seria Aspire
Ghidul general de utilizes
Acer Backup Manager 10
Acer eRecovery Management 12
Inscriptionarea discurilor de siguranta 13
Restaurarea 14
Restaurati Windows de pe discurile de siguranta 15
Acer Arcade Deluxe 17
Comenzi generale 18
Comenzile de navigare 18
LCD panel ergonomic specifications 51
Acer eRecovery Management
LCD panel ergonomic specifications
| Design viewing distance | 500 mm |
| Design inclination angle | 0.0° |
| Design azimuth angle | 90.0° |
| Viewing direction range class | Class IV |
| Screen tilt angle | 85.0° |
| Design screen illuminance | • Illuminance level: [250 + (250cosα)] lx where α = 85° • Color: Source D65 |
| Reflection class of LCD panel (positive and negative polarity) | • Ordinary LCD: Class I • Protective LCD: Class III |
| Image polarity | Both |
| Reference white: Pre-setting of luminance and color temperature @ 6500K (tested under BM7) | • Yn • u'n • v'n |
| Pixel fault class | Class II |
Cepnia Aspire
YHnBepcaJIHo nOTpe6nteIcKo pKOBODCTBO
Cepnia Aspire Персанен hoytбук
MoeHnOmeP:
CepiH HOpE:
Да та на зakуванe:
MЯсто на закупва:
BHHIMABAITE 3a DoCTbIHOCT
Ybepete Ce, Ye eNEKtpnueckn KONTaKT, B KOITo BKJIIOUbaTe 3axpaHbaIe Ka6eI, e neCHO DoCTbIeH I CE HAMIPA Bb3MOXHO HAI-6IIIN3O DO YOBeKa, pa6Oteu C o6OpyDbaHeTo. Korato Ce HanaIa Da cnpTe 3axpaHbaHeTo KbM O6OpyDbaHeTo, He 3abpaBraIte Da n3BaInte 3axpaHbaIe Ka6eI OT eNEKtpnueckn KONTaKT.
BHHMABAITE 3a HaJIInuHne Ha n3KycTBeHn KapTu (cAmO 3a HjaKOI MoDeJIi)
KOMNIObPbT Bn e DoCTaBeH C nIaCTMaCOBn KApTn, NocTaBeHn B KApTOBnTe CLOTOBE. N3KycCTBeHnTe KApTn PpeJaNa3BaT Heu3NoJ3BaHnTe CLOTOBE OT npax, MeTaNHN IIN dpyrN YactnUz. 3ana3eTe N3KycCTBeHnTe KApTn I rN I3NoJ3BaJTe, KORATO B CLOTOBete HЯMa dpyrN KApTn.
BHHIMABAIte npicnyuzahe
3a da npednaTe cnyxa cn, cneBaIte Te3n INCTpykUn.
- YBeJIuYaBaIe CnIaTa Ha 3ByKa IocTepeHNo, JOKaTO He YyBaTe RaCHO N KOMΦOPTHO.
He yBeneucaBaTe CnlaTa Ha 3Byka, CneI KaTo UShTe Bn CBNKHaT.
iv
He cnyuatae Myzika C Bvcoka cnla Ha 3Byka Dblrnpn nepnoi OT BpeMe.
He yBeneuHabai Te CnIaTa Ha 3ByKa, 3a Da HeyTpauN3npaTe 6yMHa o6ctaHOBka.
- HamaIeTe CnIaTa Ha 3Byka, aKo He cyBaTe Xopata, KOITO ROBOPrT OKONo BAc.
PpeynpexkdeHn
He n3noI3BaIte npOdykTa 6bn3o do Boda.
He nocTabaIe npOdykTa Ha HeCTabuHa KOJIuKa, cToiKa IIN Maca. Ako npOdykTbT NaIHe, MoKe Da ce nobpeDu cepno3Ho.
- Има сnotobe и OTbOpn 3a BeHTnlaucn, KOINTO OcNHyprBaT HaedxHnata pa6ota Na npodykta n ro npEtna3Bat OT npErpbaVe. He 6nBa da 6nOKnPate nInn PokPbATE Te3n OTbOpn. 3a Da n He 6nOKnPate OTbOpnte, He 6nBa da noCTabTe nPodykta Na IerNo, DnBaH, KINIM INn NIOObHa NOBbPxHOCT. Hnkora He NoctabYte npodykta 6bn30 Do nINn Hnd paDnAtop, HargBaUc BeHTnI INn BrpaDeHa IHCTaNaucn, OCBeH aKO He CTe MY OcNHypruINu HuxHata BeHTnlaucn.
Hikora He nbxaIte HnkaBn IpeMeTn B npOdykTa Ipe3 OTbOpnte INpOceNITe, TbKaTO MoKe Da yUeJIte ONaCHN TOcN IOd HnPexKeHne INI da IpeDn3BnKaTe KbCO CbeEINHeHne, KOEtO MoKe npuHNIOJXAP INI TOKOB yIap. Hnkora He pa3nBaIte HnkaBn TeHocTn BbPxy INI B npOdykTa.
3a da n36eHHeTe NOBpexJaHe Ha BbTpEShHnTe KOMNoHEHTn I da npedotBpaTHe Teu Ha 6aTePunTe, He nOCTaBraIe npOdyKta Bbpxv Bn6pnpaun NOBbpXHOCTn.
Hnkora He ro n3no3BaIe B cpea, KbTeTo ce n3BpWBat CnOpT, fn3nueckny npaxHeHnna NIMnMA KAKBtO n da 6bNo Bn6paCnN, TbKATO ToBA BepoAHTO ue npuHNn HeOuaKaBaHO KbCo CbeINHeHne NIN ne NobpeDi POtopHnte yctPOnCTBa, TBbpDnA DnCK, ONTNHOTo yCTpoiCTBO, a MOKe DOpN da BN n3IOJxHa pNcK OTn3IOXeHne Ha NITNeBn6aTepeHn nakET.
- Долнота NOBbpxHOCT, Учсьцпго OKОВ BEHTINaCIOHNHITe OTBOPи И роменлівOTOKOBИТ АдАNTERМОже Да ce HARpeY. 3a Да ce n36ber He hapaHRBaHe, Te He TpRAБа Da ce DoПИрAT Do BaaWATA KOKA ИЛI TЯNo.
BaIeTo yCTPOiCTBO n DOnbIhEnHra Ta KbM Hero MoKe da cbIbPkaT dpe6Hn Yactu. IpbXte rN daJeY OT o6cera Ha MaJIkn deua.
I3noJ3BaHe Ha eJneKtpnueCTBO
To3n npOdykT Tp86Ba Da ce 3n0n3Ba C Tnla 3axpaHbaHe, nocOeHO Ha MapKnpOBkata. Ako He cTe cnryprn KaBc o 3axpaHbaHeto npi Bac, KOHCyIITnpaIte Ce c DnctpnbTyopapnn C MeCTHaTa eJekTpuecka KOMPnaHna.
He octabraye Hnio Bbpxy 3axpanbaunna Ka6en. He noctabraye npodykta Taka, ye nO ka6ena da cTbNbat xopa.
Ako n3noI3BaTe yDbJnxIeTc npOdykTa, yBepete ce, ye obuata HOMHaJIHa MoUHoc T ha 06OpuyBaHeTo, BKNIOyeHO B yDbJnxITeTn, He HaXxBpIa HOMHaJIHaT a MOUHoc T ha yDbJnxITeTn. CbIo taKa ce yBepete, ye obuata HOMHaJIHa MOUHoc T ha BCNUKIN pOdykTn, BKNIOyeHN B CTehHn KONTaKT, He HaXxBpIa MOUHocTTa Ha 6yUoHa.
He BkIIOUBAHMe MHORO yCTPOiCtBA HaBeIDhJx, 3a Da He npTeOBapITE eNEKTPuYeCKnKOHTAKT, Ka6eNIIIN6yKca. O6IoTO CnCTEmHO HATOBAPBaHe He 6bA da NaXBpIg 80% OT HOMHaIHATA MOHOC T ha pa3KIOHEHneTo. Ako n3IOJI3BaTe pa3KIOHInTeJ, HATOBAPBaHTo He 6bA da Na HApXBpIg 80% OT HOMHaJIHaTa BXODHa MOUHOCT Ha pa3KIOHInTeJ.
- AC aadantepbT ha npodukta e oobopydban c trnKuien h 3aemeh uencei. UencelbT nacba cmo Ha 3a3emeh eektpueckn KOHTAK. YbepeTe ce, ye eektpueckn KOHTAKe T e 3a3emeh npabUJIHO, npdeI da BKIOHITe uenceHa HA AC aanTepa. He BkIOUbaIte uencela B he3a3emeh eektpueckn KOHTAKT. 3a noboe neopdo6hoCTn nitaute CBOA eekTPOTexHnik.

BhImaHHe! 3a3eMaBaunrT uNfTe mApKra 3a 6e3OnaChocT. Ako n3NoJ3BaTe eJeKtpnueckn KOHTAKT, KOITo He e 3a3Emen npabJIHo, MoKe Da NOnyUHTe TOKOB ydap N/nn da Ce HapaHHTe.

Белека: 3a3eMraaTHTcntbToTaKa Bn npedna3Ba OT HeoaykbaH ym, npOn3BekdAn OT dpyr n eKeTpueckn yCtpoiCTBa Na6n3O, KoiTO MoKe Da nonpeHu Ha pa6oTaTHa npOdykTA.
CnCTeMaTAmoKe Da 6bJe 3axpaHeHa C HanpeXeHne OT roJAM dnaIa3OH: npomEniB TOK OT 100 do 120 nIn oT 220 do 240 V. 3axpaHbAunr Ra6en, DoCTaBeH 3aeJHO cBc CnCTeMaTa, OTROBaR Ha N3NCKBaHnraTa 3a N3IOJI3BaHe B CTpaHata/peRHOHa, KbDeTo CnCTeMaTa e 3akyneHa. 3axpaHbAunTe Ka6en 3a N3IOJI3BaHe B Dpyr CTpaHn/peRHOH Tp86Ba Da OTROBaRr HA N3NCKBaHnraTa 3a Te3n CTPaHn/ perNoH. 3a Nobee HnΦopMaunr OTHOCHO N3NCKBaHnraTa 3a 3axpaHbAunr Ka6en Ce CBbPjKeTe C OphiuaJNe DnCTpr6yTop nIn DoCTaBvHK Ha ycIyI.
O6cnyXbaHe Ha npoDyKta
He ce onntbaite da o6cnyKbate npodkyta camt, Tb KaTO OTbapraHTo nIM maxaHTo Ha kanaun MoKe Da BN N3IOXn Ha pNCK OT TOKOB ydap nn dpyn yBpeJdAnI. OctabeTe o6cnyKbAHeto KaBaNfNpUan cepBn3eH nepcoHaJI.
Ötkaayte npódykta ot CTehnna KOHTaNT N ICKaTe 06cnykBaHe OT KbaJIINΦuIpaH cepBn3eN nepcoHaI, KOrato:
3axpaHbauT Ka6eJ nnI uenCeJ e noBpeJe, cpr3aH nnI npOTpNT
Bbpxy npoDyKta e pa3Jra TeHocT
- npoodykTbTe 6nI n3IOKeH Na IbXd INI BODa
- npoDyKTbTe nadHaI nn KopnycbT My e 6nI yBpeDeH
ce H6nIqDaba p3ka n 3a6eJekma npomraHa b pa6oTaHa npOyKta, Koeto CoHn Hyjda ot cepBn3Ho 06cnykbaHe
IpoDyKbT He pa6oTn HOpMaHNo, BbIpeKn Ye cTe Cna3BaIn yKa3aHnraTa 3a pa6oTa
Белека: Perулираite calo Te3n KohtpoN, KOnTo ca onicaHb Yka3aHnraTa 3a pa6Ota, TbKato HnnpabInHTo peRylnpaHe Ha npTyKoHTpOJIMOKe Da npuHHn UeTeN uYeCTO Ue e HyXHa MHOrO pa6Ota OT KBaJIINΦUncipah TexHnK, 3a Da ce Bb3CTaHOBn pOdyKTa B HopMaIIHO CbCTOJHnE.
Yka3aHn3a 6e3oNa cha ynoTe6a Ha 6aTepeInTe
To3n HooTy6k u3non3Ba JIITneBO-IOHNa 6aTepy. He ro I3non3BaIte BvB BnaXHa, MOKpa IIN KOPo3NBa CpeA. He NoCTabYIte, He cIbXpaHraBaIte N He OCTabYIte npOdyKTA B INIb6bn30 Do I3TOUHnK Ha TOnIIIna, Ha MycTc O BVCoka TempePaTypa, NOI pIpa Ka CblHueBa CBeTIIna, B MIKPObJIHOBa NeyKa IIN B KOHTeHep IOI HAJraHe, a CbIo ToKa He ro I3nIaraiTe Ha TempePaTypu Na 60°C (140°F). Ako He cna3BaTe Te3N yka3AnHry, OT 6aTepyrTa MOKe Da npoteYe KncSeiHa, IIN IIbK cAmata 6aTepyra Da ce Harpee N 3anaJIn IIN ekCnIIOnpa, KoETO MoKe da npuHHI ueTN IIN HapAHraBaHry. He npobBaIte, He OTbApRte N He pa3rno6BaIte 6aTepyra. Ako 6aTepyra npoteYe n Ce DOKOCheTe DO I3TEKJIte TeHocTn, IIN PaakHe T O6nHO C BoDA n He3a6abHNO NOpTpceMeMdiunHcKa NOMou. Ot cbo6paKexHry 3a 6e3onacHocT, a n 3a da CE ydbJnx JxIBota Ha 6aTepyra, THe CE 3apeJda pni TempepAtypu NOD 0^ (32^) IINn HAD 40^ (104^)
Пьната eфektibnoct Ha HOBATA 6atepna Ce noctira qak cneДBA nIITPNI PtIbHn ZIKbIa Ha 3apejdahe n pa3pejdahe. Batepna TMOKe Da ce 3apekda n pa3pejda CTOTNt NbTn, Ho HAKPAA Se CE n3TOUIN. KOrATo BpeMeTo 3a paBoTa CtaHe 3abEnKInTeHNO NO-KpatKO OT HopMaHnOTo, KyNeTe HOBA 6atepna. I3NoJ3BaIte camo OdoBpeHn 6atepnu IN Ppe3apejdaIte 6atepnaTc n camo C oDoBpeHn 3apJdHn yCTpoiCTBa, npedHa3NaueHn 3a TOBA yCTpoiCTBO.
I3non3BaIte 6aTepeRyta cmo nnpedHa3Hauhene. HkOra He n3nON3BaIte nobpeDeHa 6aTeepn nn 3apJdHO yctpOcTBO.He npabete Kbco cbeDInHeHne C 6aTeepnTa.MoKe da ce noLyuH neymuJeHo KbCo cBeDInHeHne, KOraTO MeTaN pEmET KaTo MOHeTa,KnAme nn XmMkaJka Cb3dae npKa Bpb3ka MeJdy nOIOXHTeHATA (+) n OTrpuatEhata (-) KMeMa Ha 6aTeepnTa. (KlEMnte N3rIeKdAT KaTo MetaHn IeHTN Bbpy 6aTeepnTa.) ToBa MoKe da ce cnUyH hAnpImep Korato Hocnte pe3epBHa 6aTeepn B Dxko6a nn YaHtata cn. KbCOTcBeDInHeHne Ha KJIemTe MoKe da nOBpei 6aTeepnTa nn CBbp3aJn r n pPeMet.
KanaunTeTbT u KINBOuTbHa 6baTePnraTa 7e HamaJeT, ako 6aTePnraTa 6bJde OCTaBeHa Ha ropeu nn cTydeHm Mecta, Hapnimep B 3aTbOpeHa KOa npes 1IATOTOn nn 3Imata. BnHar nIeJaTe da IbPxNte 6aTePnraTa Ha TeMnpaTypa MExdy 15^ n 25^ (59^ n 77^) . YcTrooiCTBO c ropeua nn cTydeHa 6aTePnra Moke BpeMeHHo Da He npopabotn, dOpn aKO 6aTePnraTa e HanblHo 3apeHeHa. Pa6oTata Ha 6baTePnraTa e ocobeno HeeΦeKTtBHa npi TEmnpaTypn MHoro NOD TOckata Ha 3Ampb3BaHe.
He n3xBpIyIe 6aTePInTe BOrbH, TbKato MoKeJa eKcPiOJnPaT. BaTePInTe MoRat Da EKcPiOnIuP aT CbIo TaKa N aKO ca NOBpeHn. N3xBpIyIe I3N03BaHInTe 6aTePInB CbOTBeTCTBne C MeCTHIne 3aKoHOBn pa3npoeD6n. MoJr, peUKNpaIte rN BnHaRn, KOraTo e Bb3MOxHo. He rN n3XBpIyIe C dOmaknHcknte OTNaDbuN.
БezжунITE yctpoCTBa moKe da yceuat cmyeHnO T batepnaT, KoTo zuBLOsh pa6oTaT aM.
CmHa Ha batepHnna naket
Hoyt6ykbT n3non3Ba IINTnEbn 6aTeepn. CMeHeTe 6aTeepnTa cBc CbIuN BnD KaTo Ta3N, KOJTO e Do7la c PpOdykTa OTHaHANO. AKO n3non3BaTe dpyra 6aTeepn, CbIeCTByBa pNCK oT noKap nII N EKcNIO3N.

BHHMaHHe! BaTePnHTe MoTa Da EKcNlOuHpaT, aKO He 6opaBnte T TpX npAunHo. He rna pa3rno6BaIte N He rnu 3xVBpIraTe B OrBn. DpbkTe rna daJeY ot Deua. Cb6JIIOdaBaIte MeCTHnte 3aKoHOBn pa3nopeD6n, KORATO n3XBpIraTe n3NoI3BaHn 6aTePnN.
IpeDynpexKeHne 3a ypei C onTnUHO yCTPOIcTBO (cAmO 3a HЯKoN MoJeIN)
BnmaHne:To3n ypeI cbIbprka Ia3epHa cncTeMa n e KlnacnPhiuPAn KaTO "IA3EPEH IPOJYKT KJAC 1".B cnyau Ha KaKbTOn I da 6nIo npO6IeM C To3n ypeI MOJI cBbPrKeTe ce c Hai-6n3KnI Do BAc OΦNlUJIAEH cepBn3.3a Da ce npEJa3nte OT dIpuKeTHo N3Iarane Ha Ia3epHnI bYu, He ce ONITBaIte da OTbaprTe Kopnyca.
JI3EPEH IPOyKT KJIAC 1
BHNMAHNE:IPNOTBAPRHECEI3JIbYBAHEBIVIMLAJIA3EPHA
PAIIAUJRA.I35BRAITE DA CE I3NAFTA HAIbua.
APPAREIL A LASER DE CLASSE 1 PRODUIT
LASERATTENTION: RADIATION DU FAISCEAU LASER INVISIBLE EN CAS D'OUVERTURE. EVITTER Toute EXPOSITION AUX RAYONS.
LUOKAN 1 LASERLAITE LASER KLASSE 1
VORSICHT: UNSICHTBARE LASERSTRAHLUNG, WENN ABDECKUNG GEOFFNET NICT DEM STRAHLL AUSSETZEN
PRODUCTO LÁSER DE LA CLASE I
ADVERTENCIA: RADIACION LÁSER INVISIBLE AL SER ABIERTO. EVITE EXPONERSE A LOS RAYOS.
ADVARSEL: LASERSTRÁLING VEDÁBNING SE IKKE IND I STRÄLEN.
VARO! LAVATTAESSA OLET ALTTINA LASERSATEILLYLLE.
VARNING: LASERSTRÄLNING NÄR DENNA DEL ÅR ÖPPNAD ÅLÅ TUIJOTA SÄTEESEENSTIRRA EJ IN I STRÄLEN
VARNING: LASERSTRÁLNING NAR DENNA DEL ÅR ÖPPNADSTIRRA EJ IN I STRÄLEN
ADVARSEL: LASERSTRÄLING NAR DEKSEL ÅPNESSTIRR IKKE INN I STRÄLEN
БezonaCHOCT Ha TeJeΦoHnHTe JInHm
- Otkaute BCnKn TepeonHn JInnO T O6OpyBaHeto, KOrato He ro n3noJ3BaTe N/Inn npedn o6cIyKbaHe.
3a da n36erHete daneuHnry pNCK OT TOKOB yIap OT MbInHry, He CbP3BaITe TelefoHHata LInnra C TOBA obOpdyBaHe no BpeMe Ha rpbMOteBvHn Hbyp.

BHMaHHe!OTcbo6paXeHn3a6e3oNaChocT,He n3non3BaIte HeoO6peHn YacTn,Korato Do6abTe NIn CMeHrTe KOMnoHEHTn. IITaTe DnCTp6yTopa CN KaKBO MoKTe Da 3akynite.
Pabotna cpea

BhimaHne!OTcbo6paKeHn3a6e3OnacHocT,ИЗКЛЮчBAite BCuKn 6e3KuHn nI np paIOnpeDaBaTeJIHn yCTpoIcTBa,Korato nIOn3BaTe IanToNa npCneIHnTe yCNoBn. Te3n yCNoBn BkJIOUbAT,HO He ce orpaHnUbaTc:6e3KuHn LAN (WLAN), Bluetooth n/In 3G.
He 3a6paBraIte Da CnA3BaTe BcKaKbN CnEuaHn PeryLauu N BcNla Ha BCaKo
MRCTO IN BUNAHn IN3KJIIOUBAIte YCTPOINCTBOTO, KORATO IN3NON3BaHEnO My e 3a6paHEnO
INII KORATO MOKE DA INpeDn3Bnka INTEPpepeHnue INn ONaChOCT. IN3NON3BaIte
yCTPOINCTBOTo cAmo B HOPMaHInTe 3a pa60ta NOJoxeHn IIOuHn. UCTPOINCTBOTo
OTROBAPr HA PA3NOpEIDbIte 3a IN3IarHe Na PAINOueCTOTHO (RF) IN3lbYBaHe,
KORATO CE IN3NON3BA HOPMaHNO IN KORATO TO IN ANTeHATA MY Ca HA NOHE
1,5 CAHTUMETPa (5/8 INHua) OT TANOTO BN (BnXte INIOCTPAunraTApno-dOny). He 6bVa
da CbDbpKa MetaJI IN TpABba DA NocTaNBE YCTPOINCTBOTo HA RopENOCOeHOTo
pa3CTOARHe OTE TAnlOTo Cn. 3a DA INpeDABA FaINObe C daHNn INI INCBouHn
ycneHNO, YCTPOINCTBOTo CE HxJDAe OT Do6pa, KaueCTBeHa Bp3ka C Mpekata.
B HAKON CnyuAn, INPEXBpIaNHeTo HA faINObe C daHNn INI INCBouHn MoKe Da CE
3a6abN, DOKATO HE Ce NOBn Takaba Bp3ka. YBepete Ce, Ye rOpENOCOeHNTe
yKa3AHN 3a PA3CTOARHHeTo CE CnA3BaT, DOKATO INPEXBpIaNHeTo HE pNkJIIOUHy.
HAKON qactn OT yCTPOINCTBOTo Ca MarHETNUH. YCTPOINCTBOTo MOKe Da pINBnuHa
HAKON METaHn INpeDMTeA, A Xopa Cbc CnyXOBn anapatYe He 6bNA Da IbpxKat
yCTPOINCTBOTo BIn3O Do yXOTO, B KOEt IOMat CnyXOB anapat. He nocTABaIte
KPeDInTH KAPTN INI INDpyr MaHNTHN HOCHTeIN BIn3O Do yCTPOINCTBOTo, Tb Kato
INΦopMaUaYTA BbPx TYKMOse Da 6bDe IN3TpNTa.
MeiHcN yCTPOIcTba
Pa6oTaTc BcKaKbVa paIIOIN3JIbVbATEHNO O6OpyDbaHe, BkIIOHTeNHO 6e3JNUHn TeJefoHn, MoKe Da nonpeuHa yHKUHOaHIOCTTa Ha HeIOCTaYH0 Do6pe 3aIHTeHm MeiunHcN yCTPOINCTBa. KoHCytnpaiTe Ce c Jekap INn C npON3BOINTEHn HA MeiUNHcKOTo YcTPOINCTBO, 3a Da pa36epete DaII To e NaIENXHO 3aIHTeHO OT BbHIna PaINOueCTOThA EHeprn AIN Ako IMaTe DpyrN BbIpocn, CBbp3AHn C Hero. N3KIOUByte YcTPOINCTBOTo CN B 3dpaBHN 3abeHnra, KOrato TAm IMa peYlnauHn, KOITOn NCKAT TOBA OT Bac.
BONHnIte HIN 3dpaBHNTe 3aBeDHeNIA MoKe da n3IOJI3BaT o6OpyIbAHe, YCBCTBnTEJIHO KbM BbHUN paJIoNcEToTH TpaHCmCmN.
Писмейкрп. Пюпзвдтелпite Ha пс smeКьрп прорьчВат мннмално pa3ctогне ot 15,3 caHTIMeТра (6 Ича) Мжdy пс smeКьрИ в BCЯКВИ 6e3ЖИЧИ NGTOICTBA, 3a DA ce ИЗбERне BCЯКВИ eBEHTYaJIHа INTEРФЕPERHЯ CпсSmeKьр. Te3n прорьки ca NOДКpeReHи OT He3aBvCmIMTe ИЗСLEДВАнЯ INpPepOBkITE Ha ИНСТИТуTA 3a ИЗСLEДВАнe Ha 6e3ЖИЧИte TExHONOrn WiReless Technology Research. Лицata c пс smeKьрп ТябBAда Спa3ВAT спEDHITe yka3AHIN:
BnHaN npbXte ycTpoiCTBOTO Ha noHe 15,3 caHTmEtpa (6 nHya) ot neiCMeiKbpa.
He hocTe yctpoiCTBOTo 6n30 Do neiCmeKbpa Cn,doKaTO To E BkIIOyeHO. Ako npO3npaTe, Ye nMa pNcK OT INTeppepeHzma, n3KJIIOyete yctpoiCTBOTo I ro npemecTeTe.
Cnyxobn anapatn. Haryon cnpobu 6e3kuny uctpoCTBa npedn3BKNBaT INTEPpepeHcny y hkyoN CnyxOBn anapatn. Ppi TaKbB cnyaCe CBpKeTe C IOCTaBvNka Ha cnyxOBn anapat.
MOTOPHNI ppeBO3Hn cpeDCTBa
PapnochctoTHne CnHann MoRat da 3aceHnat He npabunno IHCTaInpaHn IIN Hnpabunno PpeDna3eHN eNEKtpoHHN CNTeMn B MOTOPHn PpeBO3Hn CpeCDtBA KATO HapnPmep eNeKtpoHHN CNTeMn 3a BnpbckBaHe Ha TropBTO, eNEKtpoHHN CNTeMn IPOTNB 6LokpAne Ha CnIPauchKeT, eNEKtpoHHN CNTeMn 3a KOHTpOHa Na CKOpocTTa N CNTeMn 3a B3dUnHbNHn. PoTppcTe NOBue HHΦopMaJnpi IPOUN3BOUInTe - INI HiROB PpeCDtaBnTe- Ha BaWTo EPEBO3HO CpeCDtBO INI HA DoobABenHO obopyuBaHe. Camo KBaJIINPhiUpan nepcoHAn Tpr8Ba Da ObcLyXBa yCTpoCTBO INI Da INCTaJIpa UCTPOJCTBO B MOTOPHO PpeBO3HO CpeCDtBO. HnpabunHte INCTaJIpaUN INI OBClyXBAHe MORAT Da CA ONAHn DA anHyIpat rapanrTa Ha YcTPOCTBO.T PeOBHO PpOBepraBaiTe DaIIIN BCNUKs Be3KnuHn UpeDN B MOTOPHO Bn PpeBO3HO CpeCDtBO Ca MOHTnpaHn INФHKUOnHpuT IPOBILNO. He CBxpanBaIte IN He ppeacayTE 3anaIMn TeHuOCTn, ra3ObE INI EKCIIIO3NBn MATEpHAn INI30 DO YcTPOJCTBO, HerOBITE qactn INI DOnbJIneHn. Ppi MOTOPHn PpeBO3HN CpeCDtBA C B3dUnHa B3rNaBHnCce HadyBat C rIONa. He NoCTaBAYe PpeDMTe, BKlouHTeJIHO INCTaJIpaHO INI PpeHOCMO Be3KnuHo ObopyuBaHe, INI IN3XODa H B3dUnHATA B3rJIaBHnCA INI TaM, KbDeTO ce pa3dyBa T. AKO B MOTOPHO PpeBO3HO CpeCDtBO IMA HEPaBUNHO INCTaJIpaHO 6Be3KnuHNo ObopyuBaHe IN B3dUnHata B3rNaBHnCA CE OTBOpN, MOKe Da CE NOLyUcat cepINO3HN HapaHABaHry. IN3No13BaHeto Ha YcTPOCTBO IO Bpeme Ha camOJeTe honet e 3abpaHeo. IN3KnUoyBaTe YcTPOCTBO, PpeDN da CE KaYBaTe Ha camOJe. IN3No13BaHeto Ha Be3KnuHn YcTPOCTBA B camOJeT MoKe da 3aCtPaUba paBoTaT ha camOJeT INI da cmUaaba 6e3KnuHata TelefoHHa Mpxka, a cbto Taka MOKe da e HezakOHNO.
B3pmb0oNacHa cpea
ИЗк nullуайе усторьOTO сь Вь Вся КОТУ Има B3рун�а са atMocфера,и сддайе BCNCHN 3нauи Uka3аня.Взрун�асна tata atMocфера ВК nullуаймесда,Кьдeto obNKHOBEH BO INHCTpyKTnpat DA n3KIOUHTe DBURAteЯ Ha abTomobилca си.Исрпге на пообн IMecTa MOrAT DA npuynHrt EKCIIIOZHЯ Или nojak,КоЕTO nbK можde La npedIN3Bnka Telechн HapanBaHЯ Или Дори CBpt. ИЗк nullуайе усторьOTO ha Mehta 3a npe3apexJdahe C ropIBO KaTo Hanpimep 6beHsinocTahmIn IraSTAHmIn.Спа3BaIte OррачehнЯТа 3a yNtpe6ha paДINOOBOPyDbaHe B ropINbHcKlaIDObe,30HN 3a cbxpaHЯ И рa3пpeDEJIENHe; XIMNUECKN 3aBOIN;ИПИНЯМЕТа, KBdETO CE N3BbPbWBat B3prNBH DeHOCTHN. MecTATA C B3рун�аСАн aTmOCфepa YecTo, HO He BINAIn, CA OT6eJIAHЯ NO. Te BKNUHbNTOMeSEHnRA TPOI NaIy6bata HA ПлавATEJIHc bDOBe, NomseHЯ 3a cbxpaHЯпЕпЕпЕпЕпЕпЕпЕпЕпЕпЕпЕпЕпЕпЕпЕпЕпЕпЕпЕпЕпЕпЕпЕпЕпЕпЕпЕпЕпЕпЕпЕпЕпЕпЕпЕпЕпЕпЕпЕпЕпЕпЕпЕпЕпЕпЕпЕпЕпЕпЕпEW BTEHHeRg3 (KATO pponAN INIb ByTaH), KAKTO IN MecTa, KbDETo Bb3dYbXbT CbDbpxa XIMNKaII INIчAcTIu Kato 3PbNHua, pax INIIM Metaln npaUnHKn. He BKNUHbTae HoYt6yka, KbDETo e 3a6paHeHa yNtpe6bata Ha Be3KUnHn TeNeΦoHn INI KdTeO MoKe Da npedIN3BnKa INHTepΦepeHcNry INIOnachOCT.
CneuHn o6aJdAnna
BhImaHHe: He moKeTe da npaBnTE cneuHN o6aKdAnHrye3 ToBa ycTpoiCTBO. 3a da hApabnTE cneuHO o6aKdane, Tp8bA da nahepeTe OT MobuHnra Cn Tepeon uIn dpyra cnCTema 3a TepeOnHHo6aKdAnHr.
Yka3aHnna 3a n3XbPpIHe
He n3xBbprnIte ToBa eNeKtpoHNo yCtpoNCTBO B6oknyka. 3a da HamaJInte 3ambpcraBaHeTo n Da ce norpnnKeTe 3a 3auNTaHa cBeTobHATA npriOda, MoJr peuKnipaIte. 3a noBee uHΦopMaun oTHOCHO pa3npoe6bIte 3a OTnaDbUc r ot eNeKtpuYecko u eNeKtpoHNO o6OpyDbaHe (Waste from Electrical and Electronics Equipment, WEEE), nocTeTe http://www.acer-group.com/public/Sustainability/sustainability01.htm.

BHHMaHHe-JKnBaK
3a npoeKtopn c BrpaDeHa Iamna nIeJeKtpOnHn npOyKtn c LCD/CRT MOHITOPn nn DnCpIe 6e3 3aIHO OCBTeBAHe: lamnta/nte B To3n npOyKT cbDbPkaT KINBAk nTrp6Ba Da ce peuKnIpaT nIIN 3xBbPnT B CbOTBeTCTBne C MeCTHnTE, DpbXaBHNte nIIN fpeepaHnTE 3aKOHn.
3a nobEue INhOpMaun, CbPjKeTe ce cbc Cb03a Ha eJeKtpOnHnTe INducptn (Electronic Industries Alliance) Ha www.eiae.org.
3a cneuPhiUHa INhOpMaun 3a n3xBbpJnHe Ha lamnTe, BnKTe Ha www.lamprecycle.org.

ENERGY STAR

IpoodykTnte ha Acer c IoroTO ENERGY STAR Bn nomarat da nectnte napu kaTO hAmalraBAT pa3xoJa Bn ha eHeprna 3auiTabat OKoJNaTa CpeDa 6e3 ToBa Da e B oUbPb6 Ha fynKzntte nn IpOn3BDoNTeJIHoCTTa Ha yCtpoiCTBOTo. Acer ce rOpdee C TOBA, Ye MoKe Ja npEIOXn Ha KIneHTnte cn IpoodykTn, Hocese IoroTO ENERGY STAR.
KaKBo e ENERGY STAR?
IpoodykTn c loroto ENERGY STAR kohcymnpat no-maiko eheprna n npedotbpaTBAt emncn Ha napHnikOBn ra3Obe KaTO OTROBAPRT Ha CTpNKTHnTe pa3nope6bn 3a eheprnHa efeKTHBnOCT Ha AreHcunrTa 3a 3auNTa Ha OKJNHTa cpeHa CAU. Acer e npednara npodykTn u ycnyr No ceJe CCBT, KOITo NOMarat Ha KIneHTnte da neCTr napn i eheprnHa da NODobprBaT kaecTBOTo HA OKJNHTa cpeHa. KoIKOTO NOBEe eheprn MoXem Da CneTm Upe3 NO-BVCOKA eheprnHa efeKTHBnOCT, TOnKOBA NOeue MOxem Da HAMJIIM EMEcNtHe Ha napHnikOBn ra3Obe n pICKOBe 3a IpomraHa Ha KINMaTa. 3a NOeue INHΦopMaIg BIXKe http://www.energystar.gov nIu http://www.energystar.gov/powermanagement.
Molra, BnKTe "YeTo 3aDaBaHb Vbnpoc" Ha cTp. 41.
HΦopMaζη 3a Baʌe yɒobCTBO n 6e3ɔnacHoCT
III
Yka3aHn 3a6e3oNaCHOCT
iii
IpeynpexkdeHne 3a ypeD c ONTnUHO yctpoiCTBO
vii
(CAMO 3a HЯков модал)
viii
Pa6o7Ha cpea
viii
MeiHnckyctpoIcTba
ix
MToPnH IpeB03Hn CpeDCTBa
X
BzpuBooNaCHa cpeDa
X
CneuH noobaxdAnn
X
Yka3aHnI 3a n3XbPnIHe
X
BHHMaHHe-JKnBaK
xi
ENERGY STAR
xi
CbBETI INHΦopMaZIa 3a yIO6Ho I3NoJ3BaHe
xiv
PpeiBcNcuKo
BaunTe pBkoBOdCTBa
xiv
CbBETn 3a OCHOBa rpnKa n 3nON3BaHe Ha KOMNIOTpba
XV
BkJIIOUbaHe n 3KJIIOUbaHe
XV
Гриха за компговра
XV
Tpnx3aBaunAC aanTep
XVI
Tpnx3a naketa 6aTeepn
XVI
IounCTBaHe n o6cnykBaHe
XVI
CneuajnKJIaBmN INHdkaTopn
AknBipaHa He 6e3KuHn yCTpoiCTBa
2
Tbyna
3
OchOBHn Heu3a 3bYuaD (c6yToHn C DBOHn HATNCKaHe)
3
Kak ce n3noJ3Ba KnaBnAtypTa
Lock kIaNbIuN bVrpaDen uIppeH naD*
4
Topeu KnaBn
5
Windows KlabuSh
6
Aydno
7
Acer PureZone (cMo 3a HЯкоМоДeЛи)
7
Tuba (cAmO 3a HЯкоMоДeЛи)
7
I3no3BaHe Ha Dolby Home Theater 3a cbpayHd/
7
MHOROKAHaJIeH 3ByK (cAmO 3a HЯКоN MoDeJIu)
8
Bndeo
8
16:9Диспел.
9
I3noJ3BaHe Ha cNCTeMHHTe IHCTpyMeHTn
Acer Bio-Protection (camoto 3a HЯков moDeJI)
9
Acer Backup Manager
10
UnpaBJIeHne Ha 3axpaHbaHeTo
11
Acer eRecovery Management
12
3aHcBaHe Ha pe3epBHN DnCKOBe
13
Restore (Bb3ctaHOByaHe)
14
Bb3taHOBBaHe Ha Windows ot pe3epBn DnckObe 15
Acer Arcade Deluxe 17
Obuntpoi 18
KoHTpoJIi 3a HabirraIa 18
I3noJI3BaHe Ha ye6 caIToBe Ha coUaJIHmpeXn 18
CHIMKIN 18
Bvdeo 19
KoHTpoJI Na nJIeIbpa 20
Mузиka 20
Akyaun3aun 20
Бастенпaket 21
XapakTeepntKnHa6aTePmHna KaTe 21
YBeJIuHaBaHe Ha Jxmbota Ha 6aTepeyra 21
IocTaeHne n 3BaXdaHe Ha 6aTePnHnna NaKeT 22
3apekdaheHa6aTepeyra 23
IoiroTBaHe Ha KOMnIObpa 25
KakBo da Hocnte Ha deIIOBn cpeu 26
Ipehahe Ha KOMIObpa KbM Doma 26
IoproTBaHeHaKOMnIObpa 26
KaKBo Da Hocnte cbccebe cn 27
CneuaJIHn npenopbKn 27
Ioppejdahe Ha domaue H oΦnc 27
TbTyBaHe c KOMnIOrba 27
IoiTbHe Ha KOMIOtbpa 27
KaKBO da HocHTe cbc cebe cn 28
CneuaaHn npenopbKn 28
MekdynapoNDNo nbTyBaHe c KOMNIOTbpa 28
IoiTbHe Ha KOMIObpa 28
KaKBo Da Hocnte cbccebe cn 28
CneuaaHn npenopbKn 29
IpeiNa3BaHe Ha KOMnIOrTbpa 29
N3noJ3BaHe Ha KOMnIObpeH 3aKJIIOUBaU MEXaHN3bM 29
I3noJI3BaHe Ha napoH 29
BbBexdaheHa napoH 30
3aandaheHa napoJI 30
ДопьнHTeЛНВБ3MOXHOCTH 31
BapnAnTn 3a Bpb3ka 31
Moem 3a fakc/daHnn (cAmo 3a HjaKoM oMeJIi) 31
BrrpaedHaMpexKoBaФyHKuHOHaHnOCT 32
IopTeBnTeJcNnHpauepeBEN (CIR) npT
BucokokacyeCTBeH MyTmmeDneH INTepeic
(cam03aHЯkonMOdeJIIN) 34
ExpressCard (cAmO 3a HЯКоMоДeЛи) 34
IocTaBHe Ha nAmEt (cAmO 3a HЯkon MoJeJi) 35
Гледаite Телевизяс Windows Media Center 37
I36epete Bnda Ha BXOJauN CnHaI 37
TJIeJaHe Ha TeJeBn3nca DVB-T aHTeHa (3a HJKOu MoJeIn) 37
Cbpb3BaHe Ha znpobata anTeHa 37
TJIeIaHe Ha TeIeBn3nC BbHsHa aHTeHa IIN
ka6eJHa Bpb3ka 38
BIOS coptyep 39
IocneIOBaTeJIHOCT3a3apeXdane 39
Kak da aKTbBpuaTe Bb3TaHOBaHe disk-to-disk 39
Iapona 39
I3noJI3BaHe Ha coΦTyep 40
Bb3npoU3BExkdaHe HaΦnIMNa DVD 40
YeTo 3aDaBaHn Bbnpocn 41
CepBn3Ho o6cnykBaHe 44
MekdynapoHa nBtHnuecka rapaunia (ITW) 44
PpeDn da P03BbHnTe 44
OtctpaHraBaHe Ha npo6IeMn 45
CbBETn 3a oTcTpaHЯBaHe Ha npo6IeMn 45
CboeHna 3a rpeika 45
YbeDOMJIeHn3apeRyJauCnN6e3OnacNoCT 46
IeknapauncBtnachoH3NCKBaHHnTaHaΦeepaJIHaTa
KOMNcIyNo cboBSeHnraHa CAU (FCC) 46
YBeDOMJIeHn3aMOJEMn (cAmO 3a HJKOINMOJeIi) 47
3aBHeHne 3a LCD nKceJn 49
PerylaTOpHNo yBeDMJIeHne 3a paIIOuCTpOJCTBa 49
O6u 49
I3nckBaHeto 3a paAnoOeCToTHa 6e3OnacHOCT Ha FCC 50
KaHaJa—HnCKo-MoUHocTHn paDnOKOMyHnKaUOHHN
yctpoiCTBa 6e3 Hxkda OT IInceH3 (RSS-210) 51
I3JIaRaHe Ha Xopa Ha Bb3dEiCTBnETo Ha paIIOueCTOTHn
noneta (RSS-102) 51
LCD panel ergonomic specifications 52
CpezaJIHn KJIaBnIu INHdNkATOpN
Te3n CneuJIH N KJIaBNI IN HJNkATOpIN DaBaT IeceH DoCTbN DO yIobHn FyHKUIN n 3NUCTBaT INHOFOpMaunraTa 3a CTaTyca.
Acer eRecovery Management
Acer eRecovery Management e HnctpymeHt 3a 6b30 Bb3ctaHOBaHe h cnCTemata. MoKTe da apxNBpuATE/Bb3CTaHOBHTe MMIDka Ha pa6pnuHnTe hAcTpoKn i Da npEnHCTaINPate pnpINOKeHnTa n DpaBepHTe.

Белека: Спениото сьдьрхане само за обши пордства.
PeалнITE поюктовспсифигаши мочи на ce paэлчавat.
Acer eRecovery Management pa3nonara cbc cIeHNTE yHKUIN:
1 Backup (Pe3epBHO KOIIe):
Cb3daBaHe Ha dNcK c fa6pUHn HactpoiKn
Cb3daBaHe Ha dNcK c dpaBepn npniloxeHna
2 Restore (Bb3ctaHOBAhe):
Bb3ctahOBn n3zraJIO fapHnHTe hactpoKn Ha cncTeMaTa
Bb3ctahOByBaHe Ha onepaunOHHa Tcntema n 3ana3BaHe ha noTpe6nTeJNCnTe daHHN
- Ппенистапане на драиьери и прложеня.
Ta3n TJIaBa 5e Bn HAcOyBa BBB BCEKN OT Te3n IpoUecN.

Bélejexka: Ta3n ΦyHKuη e HαNlUHа cAmO npri NγKoN MoDeI.
Pπr CnCTeMn, KONTO HmAt BpAdeHa 3aNtCBAuKa 3a ONTnHn
DnCKOBe, BKNIOUHeTe BbHUnHa 3aNtCBAuKa Ha ONTnHn DnCKOBe,
npedn Da n3nON3BaTe Acer eRecovery Management 3a Heua,
CBbp3aHn C ONTnuHn DnCKOBe.
3a da akTbBnape Te n 3nnon3BaTe onueta 3a 3aueta qpe3 napoHa Acer eRecovery Management, Tp6Ba nbpBo da 3aadete napoHa. NapoIata ce hacTroBa upe3 cTaptnpahe Ha Acer eRecovery Management n 4paKaBaHe Ha HAcTroKn.

3aПИСВаHe Na peЗерВи ДИСКОВЕ
OT ctpaHncaTa "Backup (Pe3epBn KOnna)" Ha Acer eRecovery Management MoKeTe Da 3aI\PeTe IIMUJka Ha fapbUnHnTe cToHocTn IIN da cb3daTe pe3epBHO KOnne Ha dpaJIbEpN IN pnpIoKeHn.
1 Kπικητe Cṭaρτ > Bcιчκι προραμι > Acer > Acer eRecovery Management.
2 Acer eRecovery Management oTbapr cTpaHncaTa Backup (Pe3epBn konna).

3 I36epete Tnpa pe3epBHO KOJIne (ФабрчнСToHOCTH NIIДраьВери npInnoKeHn),KoITo NCKaTe Da 3aINuSeTe Ha DNCKa.
4 CneDbaiTe INCTpyKuINTE Ha ekpaHa, 3a da n3BbpuINTE npoueca.

Белека: Сьздайе Фабриец Имдж, Когато жениerteдаимшeteсторов ДИСК, КОТО сьдьржcaцлала ТОЕРAZHANCSCTeMaHaKOMПOTbpaBnTaka,KaKTO BnEДОCTaBeHaOTФабркata.Акожениerteда IMмATEДИСК,КОТTO DA Bn ПОЗВOLЯВадаперлждateСьдьрханetoида ИНСТАЛИРATEОпpeDEJIENIDpaIBepriпLOЖЕня,Сьздайтpe3ePВHOКОпЕ HaДраIBери ИприлжЕня;ВПрOTИBEнсучай —ДИСКБТНЯМада eсторBOT(bootable).
Restore (Възтановаяпe)
ФункцяТа Вьзстановьаге Ви пОБЯВа Да ВьзврпeTe Илд Да Вьзстановite CNTeMaT OТ ИМДж Ha ФбчнITE NaCTpoКИ Илд OTпpeДвapnteH NOc3dadeHn apxuBn CD n DVD. Можete CBso Taka Да пeINHCTaInpate Ппложени и дайВери на CBoRTa Acer cnCTema.
1 KπικHeTe Cṭaŋr > Bcηκι προραμι > Acer > Acer eRecovery Management.
2 IpnemHeTe KbM CTpaHnua B3ctaHOBaHe Upe3 1paKaBaHe Bbpxy B3CTaHOBaHe.

3 MoXeTe Da n36peTe Da Bb3CTaHOBtE CnCTeMaTa O T pa6puH e HmNdk, Da npEnHCTaInpaTe npInIOKeHn I dpaiBepu.
4 CneDbai Te HnctpykunTe Ha ekpaHa, 3a da n3Bbpsnte npoceca.
Bb3ctaHOBBaHe Ha Windows ot pe3epBnI nickOBe

Benzka: Ta3nФункция e haJIuHa cAmo npn HЯkon MOneJIn.
3a da Bb3ctaHOBnTe Windows ot npedBapntelNo 3aIncaHbBpxy NcKOBe pe3epBn KOnn, Ie Tp6Ba Da noCTaBnTE B KOMNtBpa nbpBnO T Tx n da akTbBnPaTe onuTa F12 Boot Menu npe3 BIOS Setup Utility.
1 BkIIOHeTe KOMNIObpa I NoCTaBeTe B ONTNUHOTO INCKOBO yCTPOJCTBO NpBnIA DnCK 3a Bb3cTaHOBRAHe Ha CnCTeMaT. PecTApTnpaIte Baunia KOMNIObP.
2 Korato ha ekpaHa e nokaKe Ioro Ha Acer no BpeMe Ha cTapTupaHeTo, HATNCHeTe 6yToHa F2 3a Da Bne3eTe B BIOS Setup, KbIeTO MOKeTe Da 3aJaTeCnCTeMHn npaMeTpN.
3 I3noJI3BaIte KJIaBnIInTe 3a CTrpeJIka HArope nHaOny, 3a da I36epeTe Main (IJIaBHO) noJMeHIO.
4 Μιπολβαντε Κλανυημιθε 3a Στρελκα Ḥαρορε ένη λαδόγ, 3a Αα Ιιδερετε F12 Boot Menu.
5 I3noJIaBaiTe KnaBnI F5 nIi F6, 3a da npomehnte F12 Boot Menu B Enabled (AkTINBeH).
6 HaTnchete ESC 3a da BneseTe e NOpMeHIO Exit (U3xoI); HaTnchete ENTER 3a "U3xoI cBc 3aapanBaHe Ha npomEn" Exit Saving Changes. HaTnchete OTHOBO ENTER, 3a da U3bepeTe Yes. Cnctemata ue ce pectaptnpa.
7 Cnepectaptnpahe, koraTo ce nokaxe Joroto Acer, hataChete F12 3a OTbapareHa MeHIO Boot Menu. TyK moKeTe da n36epeTe ot Koe yCTpoiCTBO NCKaTe da B3eMeTe daHHnte.
8 I3noJI3BaIte KJIaBUNITE CTpeNk, 3a Da nI36epeTe IDE1*, cIeI TOBa HATnCHete ENTER. Windows ue 6bJe INHCTaJInpaH OT DnCKa 3a Bb3CTaHOBBAHe.
9 IocTaBeTe BToRnI DaNCK 3a Bb3CTaHOBRAHe, KOraTO NOncKa OT BaC CnCTeMaTAt, n CJIeT TOBa CNeDBAIte INHCTpyKcNITe Ha ekpaHa 3a 3aBbPbBaHe Ha Bb3CTaHOBRAHETO.
10 Cne KaTo npKKnOCh npOuecBt, n3BaTe DnCKa 3a Bb3CTaHOBBaHe OT ONTHHOTo yctpoIcTB. N3BaTe ro npedn da pecTpIpaTe KOMNHTbpa cn.
YBeJInuIaBaHe Ha JxIBota Ha 6aTeepnTa
Kato Bcunkn DpynBbATEpnn, bATEpnaHa KOMNIObpa BN Ue Ce BLOUN C BpeMeTo. Toba O3NaUaBa, Ye eFeKTNBHOCTTa Ha bATEpnaHaMaJIraBa C BpeMeTo nI3NoJ3BaHHeTo. 3a Da yBeInuHTe MaKcIMaJIHO XINBOTa Ha bATEpnaTcN, CbBeTBaMe BN Da cJeDbate Te3n npenOpbkN.
Подговен Ha HOBбатейн пaket
Ipei Da n3non3BaTe daenb 6aTepeH naKeT 3a npbB nbT,Ima onpeJen npouec no "conditioning", KoTo e do6pe Da cneBate:
1 IocTaBeTe HOBaTa 6aTeepn, 6e3 Da BkHIOuBaTe KOMIOTbpa.
2 CbpxkeTe AC aanterpa n 3apeTe 6aetepnTa Hanblno.
3 Otkaute AC aanTepa.
4 BknHouTe KOMnHbpa n pa6oTeTe Ha ToK OT 6aTepeyra.
5 I3toeTe 6aTeepnTa HAnbIHO,doKaTo Ce nOaBn npEynpeKdHneTO 3a naHaHa 6aTeepn.
6 CbpxkeTe AC aanTepa n OTHOBo 3apeTe 6aTePnTa HnblHNo.
Ha ekpaHa He ce nOraBa HnIoo.
CnCTemata 3a ynpabLeHne Ha 3axpaHbAHeTo Ha KOMNtBpa aBTOMaTNo H3KnIOUba ekpHa, 3a da neCTn eHepn. Hatnche Tpon3BOJeH KnaBn, 3a da BKNIOHTe DnCInJe OTHOBO.
Ako He ycneete Da ro BKJIouHte Upe3 npOu3BOJeH KJaBnI, IMa TpN Bb3MOxHn npUHH:
HnBOTO Ha npKoCT MoKe Da e npKeJaNeHo HnCKo. HaTnCHeTe
- Диспейноту усточь може д e наласенда Излгизв ВьншемOTOP. HatИСHTe ropeцma Клавиш за певклчыане HaДиспей
Ako INHdkaTopbT 3a "3acnBaHe" e BKIoueH, TO KOMIObPbTe B peKIM "3acnBaHe".HaTncHete n OTnyChete 6byToHa 3a 3axpaHbaHe, 3a da npodblknte pa60ta.
He ce yBa ayDnO OT KOMNIObpa.
Поберете следнице неа:
- Moze 6n cte cnpei 3Byka. B Windows, norneHete nKOHkata 3a KOHTpon Ha 3Byka (BvcoKorOBOpTeNHe) ha JeHtata 3a 3aDaun. Ako e 3aDpackaHa, KINKHETe Bbpxy Heu MxHete OTMeTKaTa OT ONUyTA Be3 3Byk BCnuKn.
HnBOTO Ha 3Byka MoKeJa e npEkanEno Hncko. B Windows, norIeHete IKOHkata 3a KOHTpOHa 3Byka Ha IeHTaTa 3a 3aauN. MoKeTe Da hAcTpoBaTe CInlata Ha 3Byka N C6yTOHnTE 3a KOHTpOHa 3Byka.
Ako KbMaaydno-H3XoDnHnI NOPT Ha KOMIObTa ca CbP3aHNcnyuAnKn INBbHJH N KOLOHNI, BbTpeSHHTe BNCOKOBOOpNTeIN ABTomATNUHO Ce N3KJIIOUBAr.
Ickam Da I3BaJa NOHa Ha ONTnHOTO yCTpoiCTBO, 6e3 Da BKJIIOuBaM KOMNtBpa.
Ontuyhoto yctpoiCTBO Ima dynka 3a MexaHnHO n3BaXdaHe. 3a da otBopnte yctpoiCTBOTo, npocTo nbxHete Bbpxa Ha XmMkAknKa nn KlaMepe B dyPkata n HATNCHeTe.
KnaBnatypata He pearupa.
OnntaTe da npkaHTe BbHnHa KnaBnAtya KbM HraKo ot USB nopToBeHa KAOMNtbpa. Ako Ta pa60Tn, NotbpcTe DnCTpHiTopa Cn Nn OToPiapc cepBn3eH ceHTbp, Tb KaTO Ka6eIbT Ha BbTpEiHa TKAnbNAtya MoKe da ce e pa3Xna6nI.
PnHTepbT He pa6oTn.
IpoBepe cIeHnTe Heua:
- YbepeTe ce, ye npnHTepbT e Cbbp3aH c eJeKTpueckn KOHTaKT n E BKJIoueH.
- Ybepete ce, che KaBeIbT ha npInTepe e cBbP3aH npaBnIHO C npapaJIeHNia nopT nIN USB nopT ha KOMNIObpa, KaKTo I cBc CbOTBeTHnI npT ha camna npInTep.
Ickam Da Bb3ctaHOBOpuHnHaJIHnTe HaCTpoIKn Ha KOMNHTbpa cn,6e3 Da n3PON3BaMe CneUaJIHn DnCKOBe.

Белека: Акocстемата Ви e мMHOroe3nHata Bepcna,Операцinhata снсtemа и eзИКа, КоТо CTe Ибрали пппьвOTOBKIIIOvBaHe NaСтематa, УSe bДaT eДINHCTBЕнЯ BapnaHT 3aБdEши ВьЗТановITEЛНОпeraци.
To3n npoec Bn nomara da Bb3ctaHOBte ycTpoCTBO C: c opunHahnoTO coΦTyepHO cbDpbXaHne, INcTaInpaHO pIn 3akynyBaHeTO Ha HOyt6yka Bn. CneBaIte Te3n CTbnK, 3a da Bb3ctaHOBte CBOEto ycTpoCTBO C: . (BaTeO yCtpoCTBO C: 5e 6bJe ppeOpMaTnpaHO n BCnKn DaHHN Ha Hero 5e 6bDaT u3TpTu.) BaxHo e da HapabNTe pe3epBHN KOnnHa BCnKn DaHHN, Ppei Da u3non3BaTe Ta3n Onuia.
IpeNi da n3BbPnTe Bb3cTaHOBnTeJHa onepaun, MoJn npoBepTe BIOS NaCTpOyKnTe.
1 Повере te Дали onцяta Acer disk-to-disk recovery (Acer Bb3ctaHOBraHe OTДИСК HaДИСК) e ПОЗВОЛЕHA.
2 YBepTe Ce, Ye HacTpoKata D2D Recovery (D2D Bb3cTaHOBraHe) B Main (TnaBn) e Enabled (P03BoJeHa).
3 I3neTe ot BIOS nHcTpymeHTa n 3ana3eTe npomeHnte. CnCTemaTae ce pectaptnpa.

Белека: 3a за akтувinate BIOS Инструмента, натусане
3a da cTaptnape Tpoceca no Bb3ctaHOBBAhe:
1 PecTapTnpaIte cHCTemata.
2 IokaTo ce noka3Ba IoroTo Ha Acer,HaTncHeTe
3 CnEaBaiTe INCTpyKcunTe Ha ekpaHa, 3a Da N3BbPUnTe Bb3TaHOBaHe Ha cnCTeMaT.

Baxho! Ta3nФункця 3aema 15GBВ HeBnIMДЯн Ha Baunr TBbpD DnCK
CepBn3Ho 06cIyXBaHe
MekdynapoHa nTnHuecka rapaHcna (ITW)
Baujart KomnoTbmpma MexdynapoHa nbltnHuecka rapaHua (International Travelers Warranty, ITW), kOTo BN daBa cnrypHocT n cNoKoIcTBnE no BpeMe Ha nbTyBaHe. Hauata cbetobHa MPeka ot cepBn3Hn ceHTpoBe Ie Bn NOMorHe BnHaR, KOrato mMaTe Hxkda.
Baunr nacnpr ndBa c ITW nacnpr. Tozni nacnpr cbbpbka BCNUKO, KOeTo e Heo6xoImmo da 3haTe 3a nporpaMaTa ITW. B 6poUypaTn Ma CnncbKc Otopn3npaHnTe cepBn3Hn CEHTPOBe. IpOyTeTe nacnpra BHIMaTeNoHO.
Bnarn Hocete cBor ITW nacnpot noDpbka, oOcboHO no BpeMe Ha nbTybaHe, 3a da ce B3no3BaTe OT cepBn3HnTE Hn CEHTPOBE. Nocabe Te kacOBaTa 6eJekka IINI faktypata 3a 3aknyBaHe Na KOMNIObPa B CneuaJIHHra JxKo6 OT BbTpeHHaTa CTpHa Na npedHaTc Kopuca Ha ITW nacnpota.
Ako B cTpaHata, B KOrTo PbTyBaTe, Hma OToPun3pan OH Acer ITW cepBn3eH
ZeHTbP, nak MoXeTe Da ce CbBpXeTe C oOpncIte Hn No CBeta. Monra, BuxTe
http://global.acer.com.
Ppei Da nO3BbHnTe
MOnIy, nOIOrTOBte cIeHnata INHΦOpMauny, npei Da ce oBaJITe Ha Acer 3a OHnaih NODIbPbXkA, a CbTc Taka - MOnIy, bIeTe Do KOMNHTbPa Cn, KOraTO ce obaxdAte. CBaHa nOMoU, MOxem Da hAmalIM BpeMeTo, KOeTo OTHEMA oBaxdaHeTo, i Da BV nOMoRHeM eФnKaCHo DA peuIne Ipo6bEmITE Cn. Ako KOMNHTbPbT BV dAba CbO6UeHnra 3a rpeKka INI IN3daba 3Byu, 3aIIuWeTe rN, KOraTO ce nOABRT Ha ekpaHa (INI 3aIIuWeTe 6pOry INopeDHocTTa, AKO ca nIyKaUn 3Byu).
OT BaC ce nCKa Da daTe CeIeHaTa INHOpMaUHa:
Ume:
Ampes:
TeJeDoHeH Homep:
Maunha n Tn mOdeJ:
CepneH Homep:
ДаТаHaЗakунBaHe:
C HactoItoAcer DeKnapipa,Ye Ta3n Cepna NepcoHaJIH KOMNHTPN TIN "HOyToyK"Ca B CbOTBeTCTBne CbC CbUeCTBeHNTe 3NCKBaHn I dpyTnTe npInIOxIMn NoCTaHOBHeHn Ha DnpeKTnBa 1999/5/EC.
CnncbKaHa cboTBeTHNte CtpaHn
CtpaHnTe-ueHKn Ha EC KbM. I0nn 2009 r. ca: Bemn, DaHn, TepMaHnna, Tbpun, NcpanHn, FpaHn, NpHaHn, NtAInn, JIOKcEm6pyr, HndepNaHn, AbCTPn, IpOpyraJn, FmHnlaHn, UBeu, OBeDInHeHTo KpAInCTBO, ECTOnHn, PaTbN, NtBa, POnsA, YHrpA, YeKhata peny6nka, CNoBaXkata peny6nka, CNoBEnn, KInTp, MaINa, BbIparN n PymhN. N3noN3BaHeto Ha yctpoiCTBoto e no3BolenoB v CtpaHnTe OT Ebponeckn CbO3, KaKTo n B HopBerN, UBeWzapn, NcIaNn i NIXTeHsaH. YcPoRcTBTO Tpr6Ba da ce n3noN3Ba B cTpora cbO6pa3HOCT cpeYnaUnte n OrpaHneHnTa Ha dBpXabata, B KoYTo ce n3noN3Ba. 3a DOnbJIHNTeHa INΦopMaun, MoNc CBbPxTe ce C MeCTHn oΦnc B dBpxAbata, B KoYTo ro n3noN3BaTe. MonB VbXTe http://ec.europa.eu/enterprise/rttte/implem.htm 3a aKtyaIIN3npaH cnncbK ha cTpaHnTe.
ИЗнСКВанeto 3a радиоуесТОТна 6e3ОпаСноCT ha FCC
Изльчваразиховда мошоста Mini PCI kapтata 3a 6e3кчен LANи Bluetooth Kapтata eMHORO NOД ORPANHChENЯТа 3a paDNIOHecTOTHО ИЗлагане Ha FCC. BbIpeknTOBA, caprTa HOY76yK KOMNIOTpN Tp86Ba DA ce INON3Ba Taka,Ye NOTEHциалт3a YOBeSWK KOHTAOKT NOВЕм Ha HOPMaJIHa pa60Ta DA 6bJe CBeDeHdo MHNIMYM, KaKTO CNeDla:
1 Ot notpe6nteIte Ce 3nckBa Da cneBat yka3aHnra 3a paIIOueCTOHa 6e3oNacHOCT Ha 6e3xKUnHtE yCtpoiCTBA, KOInTO ca ONsCaHN B Notpe6nteJcKOTo pKoBOdCTBO Ha BCaKO paIIOueCTOHOyCTPOIcTBO.

BHMaHHe:3a Da ce OTROBaRHa Hn3NcKBaHnraTa 3a paAnOChTeOTHO o6bUbaHe Ha FCC, Tp6Ba Da ce NOpIbPka pa3CToHne OT noHe 20 cm (8 nHu) MeKdy aHTeHaTa 3a INTErPnPaHaTata Mini PCI KapTa 3a 6e3xuHcEN LAN, BrpaDeHa B OTdeneHMeTo Ha ekpaHa, n Xopata HaOKONo.


Белека: Адгетерт ha 3a 6e3xuHnata Mini PCI Kapta Иma Функцяla 3a pa3hOo6pa3aBaHe Ha TpaHcMncnTe. Ta3n Функцян He ИЗльчba paДIOUcEToTи eDINObPemEHNo IOT DBeTe aHTeHn.ЕДнATA aHTeHa ceИЗбпа abTomatuHо Ил pBuHо (OT NOTpe6nteJInte), 3a Да OсИгур nВСОКОKaueCTBeHn paДIOKOMyHnkaUIn.
2 Toba yctpoCTBO e orpaHnueHo 3a n3noI3BaHe cAmo Ha 3akpnto npaIpa6oTaMyBuecToTHna Dnana3OH MeKdy 5,15 u 5,25 GHz.FCC n3nckBa npOdykTA da ce n3noI3Ba Ha 3akpnto 3apaDiyeceToTHna Dnana3OH MeKdy 5,15 u 5,25 GHz,3a da ce HamaII noTeHuaJa 3a BpeHa INTEppeHcnra C MObInHnTe caTeiHTnCnCTeMaHa cbuNTe KaHaII.
3 OchOBHnTe nOTpeBnTeHaJeHTe oT 5,25 do 5,35 GHz u 5,65 do 5,85 GHz ca paadapnte C BnCoka MouHocT. Te3n paadapn CTaHcnn MOrat da npuHnrt INTEpffepeHcNna H/INn Da yBpeJrTOBa yCTpojCTBO.
4 HenpaBnHata nHctaIauIy IIn HeyIbIhOMoIeHOTo nOJI3BaHe MOraT da npuHnT INTEppeHcIuaC paIIOKOMyHkaIuNTe. BcKaKBO MoIuHcIpaHa Ha BbTpewHata aHTeHa aHyInpa FCC ceptuKaIuTa n rapaHuaTBA.
KaHaJa—HnCKo-MOuHocTHn paIIOKOMyHnKaUHOHH yCTpoIcTba 6e3 Huxda OT IInCeH3 (RSS-210)
I3laRaHe Ha Xopa Ha Bb3JeICTBnETo Ha paAnOueCTOTnI NOJeTa (RSS-102)
Cepnra HOyTbK KOMNHTPNI 3NIOJI3Ba INHTePpALH NANTEH C HNCbK KOeFNIeHT Ha ycINBaHe, KOINTO He I3JIbYBaT paINOChcTOH NOIE, NaXbBpJIaIO rpaHnCIte, ONpeJeHnOT MInHCtepCTBOTo HA 3dpaBeONa3BaHeTo HA KaHaNda 3a HaceneHneTo; HanpaBete cnpBaK b KoJekCa nO 6eONaChocT 6 (Safety Code 6), KOINTo MoKeJaHaMEpnte Ha ye6caIa Ha MinHCtepCTBOTo Ha 3dpaBeONa3BaHeTo Ha KaHaNda: www.hc-sc.gc.ca/rpb.
LCD panel ergonomic specifications
| Design viewing distance | 500 mm |
| Design inclination angle | 0.0° |
| Design azimuth angle | 90.0° |
| Viewing direction range class | Class IV |
| Screen tilt angle | 85.0° |
| Design screen illuminance | • Illuminance level: [250 + (250cosα)] lx where α = 85° • Color: Source D65 |
| Reflection class of LCD panel (positive and negative polarity) | • Ordinary LCD: Class I • Protective LCD: Class III |
| Image polarity | Both |
| Reference white: | • Yn |
| Pre-setting of luminance and color temperature @ 6500K (tested under BM7) | • u'n • v'n |
| Pixel fault class | Class II |
Aspire seeria
Üldkasutusjuhend
Aspire seeria sulearvuti
Mudeli number:
Seerianumber:
Ostukuupaev:
Ostukoht:
Acer eRecovery Management
12
Varuketaste körvetamine
13
Taastamine
14
Windows taastamine varundusketakastelt
15
Acer Arcade Deluxe
LCD panel ergonomic specifications 50
Acer eRecovery Management
LCD panel ergonomic specifications
| Design viewing distance | 500 mm |
| Design inclination angle | 0.0° |
| Design azimuth angle | 90.0° |
| Viewing direction range class | Class IV |
| Screen tilt angle | 85.0° |
| Design screen illuminance | • Illuminance level: [250 + (250cosα)] lx where α = 85° • Color: Source D65 |
| Reflection class of LCD panel (positive and negative polarity) | • Ordinary LCD: Class I • Protective LCD: Class III |
| Image polarity | Both |
| Reference white: | • Yn |
| Pre-setting of luminance and color temperature @ 6500K (tested under BM7) | • u'n • v'n |
| Pixel fault class | Class II |
Aspire sērija
Acer eRecovery Management 12
Dublejumkopiju 13
Restore (Atjaunošana) 14
Windows atjaunošana no dubljumkopiju diskiem 15
Acer Arcade Deluxe 17
LCD panel ergonomic specifications 49
Ipašie taustişi un indicatori
Acer eRecovery Management
LCD panel ergonomic specifications
| Design viewing distance | 500 mm |
| Design inclination angle | 0.0° |
| Design azimuth angle | 90.0° |
| Viewing direction range class | Class IV |
| Screen tilt angle | 85.0° |
| Design screen illuminance | • Illuminance level: [250 + (250cosα)] lx where α = 85° • Color: Source D65 |
| Reflection class of LCD panel (positive and negative polarity) | • Ordinary LCD: Class I • Protective LCD: Class III |
| Image polarity | Both |
| Reference white: | • Yn |
| Pre-setting of luminance and color temperature @ 6500K (tested under BM7) | • u'n • v'n |
| Pixel fault class | Class II |
Aspire seriju
Bendroji naudiojimosi instrukcija
© 2010 Visos teisés saugomos.
Aspire seriju, bendroji naudojimos instrukcija
Originalus leidimas: 08/2010
Aspire seriju nešiojamasis kompiuteris
Modelio numeris:
Serijos numeris:
Pirkimo data:
Pirkimo vieta:
Acer Backup Manager 12
Energios valdymas 13
Acer eRecovery Management 14
Atsarginiu kopiju disku jra'symas 15
Restore (atstatymas) 16
Windows atstatymas is rezerviniu kopiju disku 17
,Acer Arcade Deluxe" 19
Bendrasis valdymas 20
Consumer Infrared (CIR)
High-Definition Multimedia Interface
(“High-Definition” multimedia sasaja)
International Travelers Warranty (ITW) guarantija 45
Priešskambinant 45
Gedimung diagnostika 46
Gedimu diagnostikos patarimai 46
Klaiduypranešimai 46
LCD panel ergonomic specifications 52
Acer eRecovery Management
Acer eRecovery Management – priemoné greitam sistemas atstatymui. Ja galite padaryti atsarginé kopija/atstatyti gamyklinius parametrus, perjdiegti programas ir tvarkykles.

"Acer Arcade Deluxe"

International Travelers Warranty (ITW) garantija
LCD panel ergonomic specifications
| Design viewing distance | 500 mm |
| Design inclination angle | 0.0° |
| Design azimuth angle | 90.0° |
| Viewing direction range class | Class IV |
| Screen tilt angle | 85.0° |
| Design screen illuminance | • Illuminance level: [250 + (250cosα)] lx where α = 85° • Color: Source D65 |
| Reflection class of LCD panel (positive and negative polarity) | • Ordinary LCD: Class I • Protective LCD: Class III |
| Image polarity | Both |
| Reference white: Pre-setting of luminance and color temperature @ 6500K (tested under BM7) | • Yn • u'n • v'n |
| Pixel fault class | Class II |
Σειρά Aspire
Acer eRecovery Management 14
UToOoXnC KaIomega 41
(International Travelers Warranty; ITW) 47
Piv va tnaepwvnoe 47
AvtietwTion npoBAnmuTswv oToV UToLoyioTnou 48
LCD panel ergonomic specifications 53
Acer eRecovery Management
To npoypauma Acer eRecovery Management evai eva epyaiaio tou xpoimuotoeitai yia nTv taxaia etavaopac tou ouatnmuato. Mtopeite va kteleaeet n diadikaia eepoieac/ettavaopac tsnc poteiiayevns epyoataiaikc sikova c kai va taveykataotnoe Tepapoyec kai npoypamata oohynons.

LCD panel ergonomic specifications
| Design viewing distance | 500 mm |
| Design inclination angle | 0.0° |
| Design azimuth angle | 90.0° |
| Viewing direction range class | Class IV |
| Screen tilt angle | 85.0° |
| Design screen illuminance | • Illuminance level: [250 + (250cosα)] lx where α = 85° • Color: Source D65 |
| Reflection class of LCD panel (positive and negative polarity) | • Ordinary LCD: Class I • Protective LCD: Class III |
| Image polarity | Both |
| Reference white: Pre-setting of luminance and color temperature @ 6500K (tested under BM7) | • Yn • u'n • v'n |
| Pixel fault class | Class II |
Aspire Serisi
Genel Kullanici Kilavuzu
http://www.acer-group.com/public/Sustainability/sustainability01.htm.

Civa uyarisi
Acer Backup Manager 10
Güç yönetimi 11
Acer eRecovery Management 12
Yedekleme disklerinin yakilmasi 13
Geri Yukleme 14
Exposure of humans to RF fields (RSS-102) 48
LCD panel ergonomic specifications 48
Acer eRecovery Management
USB 2.0imentary noktası, zor bulunan system kaynaklarina®, kalmadan USB®, cevrebirimlerine®,®,®,®,®,®,®,®,®,®,®,®,®,®,®,®,®,®,®,®,®,®,®,®,®,®,®,®,®,®,®,®,®,®,®,®,®,®,®,®,®,®,®,®,®,®,®,®,®,®,®,®,®,®,®,®,®,®,®,®,®,®,®,®,®,®,®,®,®,®,®,®,®,®,®,®,®,®,®,®,®,®,®,®,®,®,®,®,®,®,®,®,®,®,®,®,®,®,®,®,®. - USB 2.0imentary noktası, zor bulunan system kaynaklarina®®®®®®®®®®®®®®®®®®®®®®®®®®®®®®®®®®®®®®®®®®®®®®®®®®®®®®®®®®®®®®®®®®®®®®®®®®®®®®®®®®®®®®®®®®®®®®®®®© - USB 2.0imentary noktası, zor bulunan system kaynaklarina™ ® ® ® ® ® ® ® ® ® ® ® ® ® ® ® ® ® ® ® ® ® ® ® ® ® ® ® ® ® ® ® ® ® ® ® ® ® ® ® ® ® ® ® ® ® ® ® ® ® ® ® ® ® ® ® ® ® ® ® ® ® ® ® ® ® ® ® ® ® ® ® ® ® ® ® ® ® ® ® ® ® ® ® ® ® ® ® ® ® ® ® ® ® ® ® ® ® ® ® ®

Exposure of humans to RF fields (RSS-102)
The notebook PC series employs low gain integral antennas that do not emit RF field in excess of Health Canada limits for the general population; consult Safety Code 6, obtainable from Health Canada's website at www.hc-sc.gc.ca/rpb.
LCD panel ergonomic specifications
| Design viewing distance | 500 mm |
| Design inclination angle | 0.0° |
| Design azimuth angle | 90.0° |
| Viewing direction range class | Class IV |
| Screen tilt angle | 85.0° |
| Design screen illuminance | • Illuminance level: [250 + (250cosα)] lx where α = 85° • Color: Source D65 |
| Reflection class of LCD panel (positive and negative polarity) | • Ordinary LCD: Class I • Protective LCD: Class III |
| Image polarity | Both |
| Reference white: Pre-setting of luminance and color temperature @ 6500K (tested under BM7) | • Yn • u'n • v'n |
| Pixel fault class | Class II |
Aspire フリーニス
汎用一一沙发
CLASS 1 LASER PRODUCT
CAUTION: INVISIBLE LASER RADIATION WHEN OPEN. AVOID EXPOSURE TO BEAM.
APPAREIL A LASER DE CLASSE 1 PRODUIT
LASERATTENTION: RADIATION DU FAISCEAU LASER INVISIBLE EN CAS
D'OUVERTURE. EVITTER TOUTE EXPOSITION AUX RAYONS.
LUOKAN 1 LASERLAITE LASER KLASSE 1
http://www.acer-group.com/public/Sustainability/
sustainability01.htmをご参照くたさ。

水銀にての注意
Acer Backup Manager 10
11
Acer eRecovery Management 12
ハクアフデスの書き达成 13
復元 14
buckappdStk 15
Acer Arcade Deluxe 17
全般的なコntロ一ル 18
18
18
才卜 18
19
19
20
20
21
Büttel一の特徴 21
21
battel一の装着と取外L 22
トリ一の充電 22
23
battel一の寿命を最適化する 23
低残量警告 23
本ノ一ト複クPCの携帯 25
周边装置の取は除外 25
短距离の移動 25
携带するたの準備 25
会议に持ていくもの 26
自宅に持ち歸る 26
携带するたの準備 26
持ていくもの 27
注意事项 27
27
長距離の移動 27
携带するたの準備 27
持ていくもの 28
注意事項 28
海外旅行 28
携带するたの準備 28
持ていくもの 28
注意事項 29
七卍リテ機能 29
せんリテイキ一口クの使用 29
29
八斯力一の入力 30
八ssw一のせト 30
才Pshonを使った拏張 31
接統才予 31
(International Travelers Warranty; ITW) 43
43
力斯マーダーナービスenteda 43
トラフル対策 44
トラル対策のヒCNT 44
工拉一Mss一 44
規制と安全通知 45
FCC 規定 45
LCD panel ergonomic specifications 49
特殊合一とインジケ一夕
Acer eRecovery Management
(International Travelers Warranty; ITW)
Federal Communications Commission
各規格の準拡
LCD panel ergonomic specifications
| Design viewing distance | 500 mm |
| Design inclination angle | 0.0° |
| Design azimuth angle | 90.0° |
| Viewing direction range class | Class IV |
| Screen tilt angle | 85.0° |
| Design screen illuminance | • Illuminance level: [250 + (250cosα)] lx where α = 85° • Color: Source D65 |
| Reflection class of LCD panel (positive and negative polarity) | • Ordinary LCD: Class I • Protective or Acer CrystalBrite™ LCD: Class III |
| Image polarity | Both |
| Reference white: | • Yn |
| Pre-setting of luminance and color temperature @ 6500K (tested under BM7) | • u'n • v'n |
| Pixel fault class | Class II |
Aspire
日
Aspire 5i1z n3bPC
M
- 用法:
国 1
国 1
安進具用的
anext
iJzHJ.
通和之
IiNtBkRnEiOeRnREiRnRnRnRnRnRnRnRnRnRnRnRnRnRnRnRnRnRnRnRnRnRnRnRnRnRnRnRnRnRnRnRnRnRnRnRnRnRnRnRnRnRnRnRnRnRnRnRnRnRnRr.60°C(140°F)IiEiEiEiEiEiEiEiEiEiEiEiEiEiEiEiEiEiEiEiEiEiEiEiEiEiEiEiEiEiEiEiEiEiEiEiEiEiEiEiEiEiEiEiEiEiEiEiEiEiEi EiiEiEiEiEiEiEiEiEiEiEiEiEiEiEiEiEiEiEiEiEiEiEiEiEiEiEiEiEiEiEiEiEiEi Eii Eii Eii Eii Eii Eii Eii Eii Eii Eii Eii Eii Eii Eii Eii Eii Eii Eii Eii Eii Eii Eii Eii Eii Eii Eii Eii Eii Eii Eii Eii Eii Eii Eii Eii Eii Eii Eii Eii Eii Eii Eii Eii Eii Eii Eii Eii Eii Eii Eii EII EII EII EII EII EII EII EII EII EII EII EII EII EII EII EII EII EII EII EII EII EII EII EII EII EII EII EII EII EII EII EII EII EII EII EII EII EII EII EII EII EII EII EII EII EII EII EII EII EII E-II 40°C (104°F) IeHiH eHJH HJH HJH HJH HJH HJH HJH HJH HJH HJH HJH HJH HJH HJH HJH HJH HJH HJH HJH HJH HJH HJH HJH HJH HJH HJH HJH HJH HJH HJH HJH HJH HJH HJH HJI HJH HJI HJH HJI HJH HJI HJH HJI HJH HJI HJH HJI HJH HJI HJH HJI HJH HJI HJH HJI HJH HJI HJH HJI HJH HJI HJH HJI HJH HJI HJH HJI HJH HJI HJH HJI HJH HJI HJH HJH HJI HJH HJI HJH HJI HJH HJI HJH HJI HJH HJI HJH HJI HJH HJI HJH HJI HJH HJI HJH HJI HJH HJI HJH HJI HJH HJI HJH HJI HJH HJI HJH HJI HJH HJI HJH HJI H
Acer 不豆鼎部将从朝朝朝朝朝朝朝朝朝朝朝朝朝朝朝朝朝朝朝朝朝朝朝朝朝朝朝朝朝朝朝朝朝朝朝
賀請請請請請請請請請請請請請請請請請請請請請請請請請請請請請請請請請請請請請請請請請請請請請請請請請請請請請請請請請請請請請請請請請請請請請請請請請請請請請請請請請請請請請請請請請請請請請請請請請請
UwN Quick start up guide... FoSTeTnE KcFpuTe SeIeRt to sIakHsTbe Df UyOuHsHnLiD.
eRecovery Management
Backer Dusk
Restore(默)
Backer Dusksk Aepf Windows
III
iii
vii
vii
viii
viii
ix
ix
ix
ix
X
X
XIII
XIII
xiv
xiv
xiv
XV
XV
XV
1
2
3
3
4
4
5
6
7
7
7
7
8
8
9
9
0
11
12
13
14
15
Acer Arcade Deluxe 17
18
18
山 18
18
19
glereiherkntre 19
20
10 20
Babrili 21
Babrlikpiksek 21
[BaT]RiSsMgJ 21
BateRl 阳 电 士 车 制 22
Babrili 女贞 22
[BaTeRl SuZn HkIn 23
BabrLi SuMg ChEeH 23
[BaT]RiB#K
25
TeS3K3eTepF 25
*25
25
26
26
KemfdTe 26
26
27
27
試試試試試試試試試試試試試試試試試試試試試試試試試試試試試試試試試試試試試試試試試試試試試試試試試試試試試試試試試試試試試試試試試試試試試試
1987年1月27日
27
28
28
KemFyTe 28
28
28
1982 29
KcFyTeBHOHgJGJGJ 29
AMHJ 29
AMHIOI 30
AMH 30
31
31
默斯/DEIHToMoE(↑歌,
基本版新同的内式用克能 32
CIR (Consumer Infrared) (The development of the use of infrared sensors in agriculture) 32
burgng 33
ITW (International Travelers Warranty) 44
44
25 45
25
OMI 45
46
FCC 46
多國同的相(轉定,
LCD 风生的风声 49
49
49
FCCRFanxtyogua 49
50
RFJ (RSS-102) 50
LCD panel ergonomic specifications 51
図多贝
専求舌与印社等用通他,用之能已,要也。
Acer eRecovery Management
彌歌!Ii moEe foTne ndiJrJrJrJrJrJrJrJrJrJrJrJrJrJrJrJrJrJrJrJrJrJrJrJrJrJrJrJrJrJrJrJrJrJrJrJrJrJrJrJrJrJrJrJrJrJrJrJrJrJrJ
默斯/ДeIeTeroMoTtToRtoSsHagHrReMnMoTtToWxTHeHgKcHbLorEnGhHahSiSiO.


完也!
基本貢通のNehtwo克能
NeTlWeyKJGnH#eHJFJFJFJFJFJFJFJFJFJFJFJFJFJFJFJFJFJFJFJFJFJFJFJFJFJFJFJFJFJFJFJFJFJFJFJFJFJFJFJFJFJFJFJFJFJFJFJFJFJFJ

FroLInTeHaJx#DyJtJHnNcYU.
当是 香 要到的,
ITW (International Travelers Warranty)
ITW
LCD panel ergonomic specifications
| Design viewing distance | 500 mm |
| Design inclination angle | 0.0° |
| Design azimuth angle | 90.0° |
| Viewing direction range class | Class IV |
| Screen tilt angle | 85.0° |
| Design screen illuminance | • Illuminance level: [250 + (250cosα)] lx where α = 85° • Color: Source D65 |
| Reflection class of LCD panel (positive and negative polarity) | • Ordinary LCD: Class I • Protective LCD: Class III |
| Image polarity | Both |
| Reference white: Pre-setting of luminance and color temperature @ 6500K (tested under BM7) | • Yn • u'n • v'n |
| Pixel fault class | Class II |
Aspire 系列
一般使用指南
Aspire系列筆記型電腦
產品型號:
產品序號:
購買日期:
購買地點:
安全與舒適性的相關資訊
重要安全指示
CLASS 1 LASER PRODUCT
CAUTION: INVISIBLE LASER RADIATION WHEN OPEN. AVOID EXPOSURE TO BEAM.
APPAREIL A LASER DE CLASSE 1 PRODUIT
LASERATTENTION: RADIATION DU FAISCEAU LASER INVISIBLE EN CAS D'OUVERTURE. EVITTER TOUTE EXPOSITION AUX RAYONS.
LUOKAN 1 LASERLAITE LASER KLASSE 1
Acer Backup Manager 9
電源選項 10
Acer eRecovery Management 11
燒錄備份光碟 12
還原 13
從備份磁碟還原 Windows 14
Acer Arcade Deluxe 15
一般控制項 16
導覽控制項 16
使用社交網站 16
相片 16
視訊 16
播放器控制項 17
音樂 17
更新 17
電池組 18
電池組特性 18
強化電池使用壽命 18
安裝和移除電池組 19
電池充電 20
檢查電池電量 20
最佳化電池使用壽命 20
低電量警告 21
移動您的筆記型電腦 22
移除與其他裝置的連接 22
移動電腦 22
前置作業 22
帶著電腦參加會議 23
帶著電腦回家 23
前置作業 23
23
特殊考量事項 23
設置家庭辦公室 24
帶著電腦出差 24
前置作業 24
24
特殊考量事項 24
帶著電腦到國外出差 24
前置作業 24
25
特殊考量事項 25
保護您的電腦 26
使用電腦安全鎖 26
使用密碼 26
輸入密碼 27
設定密碼 27
透過選購品擴充 28
連線用選購項目 28
LCD panel ergonomic specifications 45
特殊按键和指示燈
Acer eRecovery Management
LCD panel ergonomic specifications
| Design viewing distance | 500 mm |
| Design inclination angle | 0.0° |
| Design azimuth angle | 90.0° |
| Viewing direction range class | Class IV |
| Screen tilt angle | 85.0° |
| Design screen illuminance | • Illuminance level: [250 + (250cosα)] lx where α = 85° • Color: Source D65 |
| Reflection class of LCD panel (positive and negative polarity) | • Ordinary LCD: Class I • Protective LCD: Class III |
| Image polarity | Both |
| Reference white: Pre-setting of luminance and color temperature @ 6500K (tested under BM7) | • Yn • u'n • v'n |
| Pixel fault class | Class II |
Aspire 系列
普通用户指南
Aspire 系列笔记本电脑
产品型号:
产品序号:
购买日期:
购买地点:
有关安全和舒适性的信息
重要安全须知
CLASS 1 LASER PRODUCT
CAUTION: INVISIBLE LASER RADIATION WHEN OPEN. AVOID EXPOSURE TO BEAM.
APPAREIL A LASER DE CLASSE 1 PRODUIT
LASERATTENTION: RADIATION DU FAISCEAU LASER INVISIBLE EN CAS
D'OUVERTURE. EVITTER TOUTE EXPOSITION AUX RAYONS.
LUOKAN 1 LASERLAITE LASER KLASSE 1
Acer Backup Manager 9
电源管理 10
Acer eRecovery Management 11
刻录备份光盘 12
恢复 13
从备份光盘恢复Windows 14
Acer Arcade Deluxe 15
常用控制 16
导航控制 16
使用社交网站 16
照片 16
视频 16
播放器控制 17
音乐 17
更新 17
电池组 18
电池组特点 18
最大限度延长电池的寿命 18
安装和卸下电池组 19
给电池充电 20
检查电池电量 20
优化电池寿命 20
电量不足警告 21
随身携带笔记本电脑 22
断开笔记本电脑与桌面设备的连接 22
携带笔记本电脑 22
准备作业 22
出席会议需携带的物品 23
携带电脑回家 23
准备作业 23
携带物品 23
特别注意事项 23
布置您的家庭办公室 24
携带笔记本电脑旅行 24
准备作业 24
携带物品 24
特别注意事项 24
携带笔记本电脑进行国际旅行 24
准备作业 24
携带物品 25
特别注意事项 25
保护您的电脑 26
使用电脑安全锁 26
使用密码 26
输入密码 27
设置密码 27
使用选项扩展性能 28
连接选项 28
LCD panel ergonomic specifications 43
特殊键和指示灯
Acer eRecovery Management
LCD panel ergonomic specifications
| Design viewing distance | 500 mm |
| Design inclination angle | 0.0° |
| Design azimuth angle | 90.0° |
| Viewing direction range class | Class IV |
| Screen tilt angle | 85.0° |
| Design screen illuminance | • Illuminance level: [250 + (250cosα)] lx where α = 85° • Color: Source D65 |
| Reflection class of LCD panel (positive and negative polarity) | • Ordinary LCD: Class I • Protective LCD: Class III |
| Image polarity | Both |
| Reference white: | • Yn |
| Pre-setting of luminance and color temperature @ 6500K (tested under BM7) | • u'n • v'n |
| Pixel fault class | Class II |
Seri Aspire
Acer eRecovery Management
12
Bakar cakram cadangan
13
Kembalikan 14
ITW (International Travelers Warranty) 44
Persiapan sebelum menghubungti 44
Exposure of humans to RF fields (RSS-102) 51
LCD panel ergonomic specifications 52
Acer eRecovery Management
Printer didnt berfungsi.
ITW (International Travelers Warranty)
Exposure of humans to RF fields (RSS-102)
The notebook PC series employs low gain integral antennas that do not emit RF field in excess of Health Canada limits for the general population; consult Safety Code 6, obtainable from Health Canada's website at www.hc-sc.gc.ca/rpb.
LCD panel ergonomic specifications
| Design viewing distance | 500 mm |
| Design inclination angle | 0.0° |
| Design azimuth angle | 90.0° |
| Viewing direction range class | Class IV |
| Screen tilt angle | 85.0° |
| Design screen illuminance | • Illuminance level: [250 + (250cosα)] lx where α = 85° • Color: Source D65 |
| Reflection class of LCD panel (positive and negative polarity) | • Ordinary LCD: Class I • Protective LCD: Class III |
| Image polarity | Both |
| Reference white: | • Yn |
| Pre-setting of luminance and color temperature @ 6500K (tested under BM7) | • u'n • v'n |
| Pixel fault class | Class II |
Aspire
n nn nnnn
y
nnnnnnnnnnnnnnnnn
wunwnnnnne nnennnnn nannnnnnnnnnnnnnnnnnnnnnnnnnnnnnnnnnnnnnnnnnnnnnnnnnnnnnnnnnnnnnnnnnnnnnnnnnnnnnnnnnnnnnnnnnnnnnnn
Jnnnnaaannnnnne nnnnnnnnnnnnnnnnnnnnnnnnnnnnnnnnnnnnnnnnnnnnnnnnnnnnnnnnnnnnnnnnnnnnnnnnnnnnnnnnnnnnnnnnnnnnn
Wooanannnwnnnnnnnnnnnnnnnnnnnnnnnnnnnnnnnnnnnnnnnnnnnnnnnnnnnnnnnnnnnnnnnnnnnnnnnnnnnnnnnnnnnnnnnnnnnnnnnnnnnnnnnnnnnnnnn
nnaaannnnnnnnnnnnnnnnnnnnnnnnnnnnnnnnnnnnnnnnnnnnnnnnnnnnnnnnnnnnnnnnnnnnnnnnnnnnnnnnnnnnnnnnnnnnnnnnnnnnnnnnnn
ywnnnn nn nnnnnnnnnnnnnnnnnnnnnnnnnnnnnnnnnnnnnnnnnnnnnnnnnnnnnnnnnnnnnnnnnnnnnnnnnnnnnnnnnnnnnnnnnnnnnnn
- 100 120 220 240 V AC
- wwnwwnwnwnwnwnwnwnwnwnwnwnwnwnwnwnwnwnwnwnwnwnwnwnwnwnwnwnwnwnwnwnwnwnwnwnwnwnwnwnwnwnwnwnwnwnwnwnwnwnwnwnwnwnwnwnwnwnwnwnwnwnwnwnwnwnwnwnwnwnwnwnwn
m
wwwwwnnnnnaaannnnnneanennnnnnnnnnnnnnnnnnnnnnnnnnnnnnnnnnnnnnnnnnnnnnnnnnnnnnnnnnnnnnnnnnnnnnnnnnnnnnnnnnnnnnnnnnnnnnnnnnnnnnnnnnnnnnnnnnnnnnnnnnnn
nnaeaeaaeeaaeeaaeeaaeeaaeeaaeeaaeeaaeeaaeeaaeeaaeeaaeeaaeeaaeeaaeeaaeeaaeeaaeeaaeeaaeeaaeeaaeeaaeeaaeeaaeeaaeeaaeeaaeeaaeeaaeeaaeeaaeeaaeeaaeeaaeeaaeeaaeeaaeeaaeeaaeeaaeeaaeeaaeeaaeeaaeeaaeeaaeeaaeeaaeeaaeeaa
WwWwWwWwWwWwWwWwWwWwWwWwWwWwWwWwWwWwWwWwWwWwWwWwWwWwWwWwWwWwWwWwWwWwWwWwWwWwWwWwWwWwWwWwWwWwWwWwWwWwW
-
nnae: 1nnnnnnnnnnnnnnnnnnnnnnnnnnnnnnnnnnnnnnnnnnnnnnnnnnnnnnnnnnnnnnnnnnnnnnnnnnnnnnnnnnnnnnnnnnnnnnnnnnnnnnnnnnnnnnnnnnnnnnnnnnnnnnnnnnnnnnnnnnnnnnn nn
H
L 60°C (140°F) mnnnnnnnnnnnnnnnnnnnnnnnnnnnnnnnnnnnnnnnnnnnnnnnnnnnnnnnnnnnnnnnnnnnnnnnnnnnnnnnnnnnnnnnnnnnnnnnnnnnnnnnnnnnnnnnnnnnnnnnnnnnnnnnnn nn nannn nn nannn nn nannn nn nannn nn nannn nn nannn nn nannn nn nannn nn nannn nn nannn nn nannn nn nannn nn nannn nn nannn nn nannn nn nannn nn nannn nn nannn nn nannn nn nannn nn nannn nn nannn nn nannn nn nannn nn nannn nn nennn nn nannn nn nannn nn nannn nn nannn nn nannn nn nannn nn nannn nn nannn nn nannn nn nannn nn nannn nn nannn nn nannn nn nannn nn nannn nn nannn nn nannn nn nannn nn nannn nn nannn nn nannn nn nannn nn nannn nn nannn nn n ann
aannnnnnae aennnnnne nnnnnnne nnne nnnnnnne nnnnnnne nnnnnnne nnnnnnne nnnnnnne nnnnnnne nnnnnnne nnnnnnne nnnnnnne nnnnnnne nnnnnnne nnnnnnne nnnnnnne nnnnnnne nnnnnnne nnnnnnne nnnnnnne nnnnnnne nnnnnnne nnnnnnne nnnnnnee
y
()
nnaaannnnnnaanennnnnnaanennnnnnnnnnnnnnnnnnnnnnnnnnnnnnnnnnnnnnnnnnnnnnnnnnnnnnnnnnnnnnnnnnnnnnnnnnnnnnnnnnnnnnnnnnnnnnnnnnnnnnnnnnnnnnnnnnnnnnnnnnnnnnnnnnnnnnnnnnnnnnnnnn
CLASS 1 LASER PRODUCT
CAUTION: INVISIBLE LASER RADIATION WHEN OPEN. AVOID EXPOSURE TO BEAM.
APPAREIL A LASER DE CLASSE 1 PRODUIT
LASERATTENTION: RADIATION DU FAISCEAU LASER INVISIBLE EN CAS D'OUVERTURE. EVITTER Toute EXPOSITION AUX RAYONS.
LUOKAN 1 LASERLAITE LASER KLASSE 1
VORSICHT: UNSICHTBARE LASERSTRAHLUNG, WENN ABDECKUNG GEOFFNET NICT DEM STRAHLL AUSSETZEN
PRODUCTO LÁSER DE LA CLASE I
ADVERTENCIA: RADIACION LÁSER INVISIBLE AL SER ABIERTO. EVITE EXPONERSE A LOS RAYOS.
ADVARSEL: LASERSTRÁLING VEDÁBNING SE IKKE IND I STRÁLEN.
VARO! LAVATTAESSA OLET ALTTINA LASERSATEILYLLE.
VARNING: LASERSTRÄLNING NÄR DENNA DEL ÅR ÖPPNAD ÅLÅ TUIJOTA SÄTEESEENSTIRRA EJ IN I STRÄLEN
WARNING: LASERSTRÁLNING NAR DENNA DEL ÅR ÖPPNADSTIRRA EJ IN I STRÅLEN
ADVARSEL: LASERSTRÄLING NAR DEKSEL ÅPNESSTIRR IKKE INN I STRÄLEN
y
- wannnnnnaaennnnnnaeennnnnneennnnnnnnnnnnnnnnnnnnnnnnnnnnnnnnnnnnnnnnnnnnnnnnnnnnnnnnnnnnnnnnnnnnnnnnnnnnnnnnnnnnnnnnnnnnnnnnnnnnnnnnnnnnnnnn

iouu uuuuuaaunu uuuuuuuuuuuuuuuuuuuuuuuuuuuuuuuuuuuuuuuuuuuuuuuuuuuuuuuuuuuuuuuuuuuuuuuuuuuuuuuuuuuuuuuuuuuuuuuuuuuuuuuuuuuuuuuuuuuuuuuuuuuuuuuuuuuuuuuuuuuuuuuuuuuuuuuuuuuuuuuuuuuuuuuuuuuuuuuuuUU

nnaaannnnnnae nnaanennnnae naanennnnae nnaanennnnae nnaanennnnae nnaanennnnae nnaanennnnae nnaanennnnae nnaanennnnae nnaanennnnae nnaanennnnae nnaanennnnae nnaanennnnae nnaanennnnae nnaanennnnae nnaanennnnae nnaanennnnae nnaanannnnae nnaanennnnae nnaanennnnae nnaanennnnae nnaanennnnae nnaanennnnae nnaanennnnae nnaanennnnae nnaanennnnae nnaanennnnae nnaanennnnae nnaanennnnae nnaanennnnae nnaanennnnae nnaanennnnee
南
6
mnnnnaaannnnnnaanennnne nnnnnnnnnnnnnnnnnnnnnnnnnnnnnnnnnnnnnnnnnnnnnnnnnnnnnnnnnnnnnnnnnnnnnnnnnnnnnnnnnnnnnnnnnnnnnnnnnnnnnnnnnnnnnnnnnnnnnnnnnnnnnnnnnnnnnn nn
15.3 15000 (6) 20000
Lngnnnnnnnnnnnnnnnnn 15.3 (6)
Wnwnnnn nn nnnnnnnnnnnnnnnnnnnnnnnnnnnnnnnnnnnnnnnnnnnnnnnnnnnnnnnnnnnnnnnnnnnnnnnnnnnnnnnnnnnnnnnnnnnnnnnnnnnnnnnnnnnnnnn
Wn
27667996
non-LED-backlit-LCD/CRT non-LED-backlit-LCD

Electronic Industries Alliance www.elae.org www.lamprecycle.org
ENERGY STAR

ENERGY STAR
Acer ENERGY STAR W Acer
ENERGY STAR
ENERGY STAR
1uunnnnne nannnnnnae annnnnne aannnnnne anennnne annnnnne annnnnne annnnnne annnnnne annnnnne annnnnne annnnnne annnnnne annnnnne annnnnne annnnnne annnnnne annnnnne annnnnne annnnnne annnnnne annnnnne annnnnne annnnnne annnnnne annnnnne annnnnne annnnnne annnnnne annnnnne annannnne annnnnne annnnnne annnnnne annnnnne annnnnne annnnnne annnnnne annnnnne annnnnne annnnnne annnnnne annnnnne annnnnne annnnnne annnnnne annnnnne annnnnne annnnnne annnnnne annnnnne annnnnne annnnnne annnnnne annnnnne ann
Acer ENERGY STAR:
- y
- " sleep
ENERGY STAR ENERGY STAR
777777777777777777777777
nannnnnnnnnnnnnnnnnnnnnnnnnnnnnnnnnnnnnnnnnnnnnnnnnnnnnnnnnnnnnnnnnnnnnnnnnnnnnnnnnnnnnnnnnnnnnnnnnnnnnnnnnnnnnnnnnnnnnnnnnnnnnnnnnnnnnnnnnnnnnnnnnnnnnnnnnnnnnnnnnnn nn nannn nannn nannn nannn nannn nannn nannn nannn nannn nannn nannn nannn nannn nannn nannn nannn nannn nannn nannn nannn nannn nannn nannn nannn nannn nannn nannn nannn nannn nannn nannn nannn nannn nannn nn annn nn annn nn annn nn annn nn annn nn annn nn annn nn annn nn annn nn annn nn annn nn annn nn annn nn annn nn annn nn annn nn annn nn annn nn annn nn annn nn annn nn annn nn annn nn annn nn annn nn annn nn annn nn ann
nnaa: aaiyaaayaaayuui 15200
"nguaaauauauauauauauauuuuuuuuuuuuuuuuuuuuuuuuuuuuuuuuuuuuuuuuuuuuuuuuuuuuuuuuuuuuuuuuuuuuuuuuuuuuuuuuuuuuuuuuuuuuuuuuuuuuuuuuuuuuuuuuuuuuuuuuuuuuuuuuuuuuuuuuuuuuuuuuuuuuuuuuuuuuuuuuuuuuuuuuuuuuuuuuuuuuuuuuuuuuuuuuuuuuuuuuuUU
nuaa
"Quick start up guide"
w
Shutdown Windows Start (L) Shut Down
- 1234567890123456789012345678901234567890123456789012345678901234567890123456789012345678901234567890123456789

nnae: nnnnnaaennnnaaennnnae ennnnne nnnnne nnne
777777777777777777777
nnuuunnuuunnuuuuuuuuuuuuuuuuuuuuuuuuuuuuuuuuuuuuuuuuuuuuuuuuuuuuuuuuuuuuuuuuuuuuuuuuuuuuuuuuuuuuuuuuuuuuuuuuuuuuuuuuuuuuuuuuuuuuuuuuuuuuuuuuuuuuuuuuuuuuuuuuuuuuuuuuuuuuuuuuuuuuuuuuuuuuuuuuuuuuuuuuuuuuuuuuuuuuuuuuuUUUUUUUUUUUUUUUUUUUUUUUUUUUUUUUUUUUUUUUUUUUUUUUUUUUUUUUUUUUUUUUUUUUUUUUUUUUUUUUUUUUUUUUUUUUUUUUUUUUUUUUUUUUUUUUUUUUUUUUUUUUUUUUUUUUUUUUUUUUUUUUUUUUUUUUUUUUUUUUUUUUUUUUUUUUUUUUUUUUUUUUUUUUUUUUUUUUUUUUU
nath xili
y i xi
yuyu yuyu yuyu yuyu yuyu yuyu yuyu yuyu yuyu yuyu yuyu yuyu yuyu yuyu yuyu yuyu yuyu yuyu yuyu yuyu yuyu yuyu yuyu yuyu yuyu yuyu yuyu yuyu yuyu yuyu yuyu yuyu yuyu yuyu y
1
3
3
4
4
5
6
7
Acer PureZone (Lwzwnrnnn) 7
Tuba (Lwzwnrnnnnn) 7
Dolby Home Theater Wwneywn/wnnnn (Lwzwnrnnnnn) 7
Video 8
LRAJWA16:9 8
9
Acer Bio-Protection (
Acer Backup Manager 10
11
Acer eRecovery Management 12
13
14
Windows 15
Acer Arcade Deluxe 17
18
18
18
Photo (mww) 18
19
19
Music (W) 20
20
21
21
21
22
23
23
23
24
25
unannnnaaannnnnnaa 25
wunong 25
25
26
26
26
27
27
27
27
27
28
28
28
28
28
29
30
30
m 30
31
31
32
32
() 32
33
Consumer Infrared (CIR) (Lwzwnnnn) 33
Universal Serial Bus (USB) 34
WEEE 1394 (Lwwnnnn) 34
High-Definition Multimedia Interface (wzwnnn) 35
ExpressCard (wzwnnnn) 35
() 36
Windows Media Center 38
38
mnnnannnnnnn DVB-T (TV) 38
d 38
39
BIOS 40
40
40
40
41
DVD 41
42
45
mssuunwunwnnnn (ITW) 45
45
mouny 46
46
46
47
FCC 47
nnaaannnnn (naanennnnn) 48
50
50
50
FCC 51
y
(RSS-210) 52
(RSS-102) 52
LCD panel ergonomic specifications 53
JW694 62276801
JWnnaaannnnnnnnnnnnnnnnnnnnnnnnnnnnnnnnnnnnnnnn
4.2.1946.10.17 20.10.18
| ### | ### | ### |
| ### | ### | ### |
| P | ### PowerSmart | ### |
| ### | ### | |
| ### | ### | ### |
| ### | ### | ### |
| ### | ### | ### |
| ### | ### | ### |
| ### | ### | ### |
| ### | ### | ### |
| ### | ### | ### |
| ### | ### | ### |
| ### | ### | ### |
| ### | ### | ### |
| ### | ### | ### |
| ### | ### | ### |
| ### | ### | ### ### |
| ### | ### | ### |
| ### | ### | ### |
| ### | ### | ### |
| ### | ### | ### |
| ### | ### | ### |
| ### | ### | ### |
| ### | ### | ### |
| ### | ### | ### |
| ### | ### | ### |
| ### | ### | ### |
| ### | ### | ### |
| ### | ### | ### |
mraa aannnnae
Launch Manager ou- wu wu wu wu wu wu wu wu wu wu wu wu wu wu wu wu wu wu wu wu wu wu wu wu wu wu wu wu wu wu wu wu wu wu wu wu wu wu wu wu wu wu wu
nFn> +
a
-
a


nannnnn nnnnnnnnnnnnnnnnnnnnnnnnnnnnnnnnnnnnnnnnnnnnnnnnnnnnnnnnnnnnnnnnnnnnnnnnnnnnnnnnnnnnnnnnnnnnnnnnnnnnnnnnnnnnnnnnnnnnnnnnnnnnnnn
y
WuWuWuWu (WuJU JNnJU J)
y
- 1
| 摘要 | 摘要 | 摘要 |

y


n 10000000000000000000000000000000000000000000000000000000000000000
n
y
J7J7J7J7J7J7J7
Acer PureZone wawwluw
Acer PureZone
Acoustic Echo wewwauwauwauwauwauwauwauwauwauwauwauwauwauwauwauwauwauwauwauwauwauwauwauwauwauwauwauwauwauwauwauwauwauwauwauwauwauwauwauwauwauwauwauwauwauwauwauwauwauwauwuu Acer HD Audio Manager
Acer HD Audio Manager uwwuwwuwwu Windows uwwu uwwu
Acer HD Audio Manager uwwuwwuwwu Microphone uwwuwwuwwu Microphone Effects
Bem Beam Forming uuc Acoustic Echo Canellation uwwuwwuwwu

nanae: 1nnnnae neaee
Tuba (wunnuuunnnn)
Tuba CineBass 1
Dolby Home Theater wWwWuWuWuWuWuWuWuWuWuWuWuWuWuWuWuWuWuWuWuWuWuWuWuWuWuWuWuWuWuWuWuWuWuWuWuWuWuWuWuWuWuWuWuWuWuWuWuWuWuWuWw
Acer acer acer acer acer acer acer acer acer acer acer acer acer acer acer acer acer acer acer acer acer acer acer acer acer acer acer acer acer acer acer acer acer acer acer acer acer acer acer acer acer acer acer acer acer acer acer acer acer acer acer acER acER acER acER acER acER acER acER acER acER acER acER acER acER acER acER acER acER acER acER acER acER acER acER acER acER acER acER acER acER acER acER acER acER acER acER acER acER acER
Dolby Pro Logic IIx
Dolby Pro Logic Ix 5.1 uuuuauuuuuuuuuuuuuuuuuuuuuuuuuuuuuuuuuuuuuuuuuuuuuuuuuuuuuuuuuuuuuuuuuuuuuuuuuuuuuuuuuuuuuuuuuuuuuuuuuuuuuuuuuuuuuuuuuuuuuuuuuuuuuuuuuuuuuuuuuuuuuuuuuuuuuuuuuuuuuuuuuuuuuuuuuuuuuuuuuuuuuuuUU
Dolby Digital Live
Dolby Digital Live 2017-2018
N3 Dolby
Dolby
Dolby Natural Bass
1
Dolby Sound Space Expander
Video
16:9
nnsuana 16:9 nnnnnnnnnnnnnnnnnnnnnnnnnnnnnnnnnnnnnnnnnnnnnnnnnnnnnnnnnnnnnnnnnnnnnnnnnnnnnnnnnnnnnnnnnnnnnnnnnnnnnnnnnnnnnnnnnnnnnnnnnnnnnnnnnnnnnnnnnnnnnnnnnnnnnnnnnnn
nra 2y y
Acer Bio-Protection (wJnJnJnJnJnJn)
Acer Bio-Protection Fingerprint Solution 10000000000000000000000000000000000000000000000000000000000000000000000000000000000000000000000
Acer Bio-Protection Fingerprint Solution 1111111111111111111111111111111111111111111111111111
Acer Bio-Protection Fingerprint Solution 123456789
Acer FingerLaunch
Acer Bio-Protection Fingerprint Solution
Acer Bio-Protection

Acer Backup Manager

nnaa: nanaanwnnnnnaannnna
Acer Backup Manager 1uununununununununununununununununununununununununununununununununununununununununununununununununununununununununununununununununununununun unumn unumn unumn unumn unumn unumn unumn unumn unumn unumn unumn unumn unumn unumn unumn unumn unumn unumn unumn unumn unumn unumn unumn unumn unumn unumn unumn unumn unumn unumn unumn unumn unumn unumn uuuuuuuuuuuuuuuuuuuuuuuuuuuuuuuuuuuuuuuuuuuuuuuuuuuuuuuuuuuuuuuuuuuuuuuuuuuuuuuuuuuuuuuuuuuuuuuuuuuuuuuuuuuuuuuuuuuuuuuuuuuuuuuuuuuuuuuuuuuuuuuuuuuuuuuuuuuuuuuuuuuuuuuuuuuuuuuuuuuUU
1 电电电电电电电电电电电电电电电电电电电电电电电电电电电电电电电电电电电电电电电电电电电电电电电电电电电电电电电电电电电电电电电电电电电电电电电电电电电电电电电电电电电电电电电电电电电电电电电电电电电电
Wnwnnnnnnnnnnnnnnnnnnnnnnnnnnnnnnnnnnnnnnnnnnnnnnnnnnnnnnnnnnnnnnnnnnnnnnnnnnnnnnnnnnnnnnnnnnnnnnnnnnnnnnnnnnnnnnnnnnnnnnnnnnnnnnnnnnnnnnnnnnnnnnnnnnnnnnnnnnnnnnnnnnnnnnnnnnnnnnnn nn nannn nn nannn nn nannn nn nannn nn nannn nn nannn nn nannn nn nannn nn nannn nn nannn nn nannn nn nannn nn nannn nn nannn nn nannn nn nannn nn nannn nn nannn nn nannn nn nannn nn nannn nn nannn nn nannn nn nannn nn nannn nn nennn nn nannn nn nannn nn nannn nn nannn nn nannn nn nannn nn nannn nn nannn nn nannn nn nannn nn nannn nn nannn nn nannn nn nannn nn nannn nn nannn nn nannn nn nannn nn nannn nn nannn nn nannn nn nannn nn nannn nn nannn nn n ann

6920000000000000
1
Advanced configuration and power interface (ACPI) Windows
Acer PowerSmart

nana: nanaunwnnaaunnuun
Acer PowerSmart 1
Acer eRecovery Management
Acer eRecovery Management 1

ywnn: ywnnynnnnaa nnnnnn nnannnnnnnnnnnnnnnnnnnnnnnnnnnnnnnnnnnnnnnnnnnnnnnnnnnnnnnnnnnnnnnnnnnnnnnnnnnnnnnnnnnnnnnnnnnnnnnnnnnnnnnnnnnn
Acer eRecovery Management 1
1
-
2
-
luuunuaunauwaaanou

Nnnae: nnnnnnnnnnnnnnnnnnnnnnnnnnnnnnnnnnnnnnnnnnnnnnnnnnnnnnnnnnnnnnnnnnnnnnnnnnnnnnnnnnnnnnnnnnnnnnnnnnnnnnnnnnnnnnnnnnnnnnnnnnnnnnnnnnnnnnnnnn nn
Acer eRecovery Management
Acer eRecovery
Management Settings

W
nncnncnncnncnncnncnncnncnncnncnncnncnncnncnncnncnncnncnncnncnncnncnncnncnncnncnncnncnncnncnncnncnncnncnncnncnncnncnncnncnccnnnnnnnnnnnnnnnnnnnnnnnnnnnnnnnnnnnnnnnnnnnnnnnnnnnnnnnnnnnnnnnnnnnnnnnnnnnnnnnnnnnnnnnnnnnnnnnnnnnnnnnnnnnnnnnnnnnnnnnnnnnnnn
1 Start > All Programs > Acer > Acer eRecovery Management
2 Acer eRecovery Management Backup

3
4


Wwwwauwauwauwauwauwauwauwauwauwauwauwauwauwauwauwauwauwauwauwauwauwauwauwauwauwauwauwauwauwauwauwauwauwauwauwauwauwauwauwauwauwauwauwauwauwauwauwauwauwauw
Facebook Flickr

- Photo (nwa) -
Video (2) DVD, VCD w Blu-Ray uauuauuuuauuuuauuuuuuuuuuuuuuuuuuuuuuuuuuuuuuuuuuuuuuuuuuuuuuuuuuuuuuuuuuuuuuuuuuuuuuuuuuuuuuuuuuuuuuuuuuuuuuuuuuuuuuuuuuuuuuuuuuuuuuuuuuuuuuuuuuuuuuuuuuuuuuuuuuuuuuuuuuuuuuuuuuuuuuuuuUU
Music (Wai) - Waiwaewauiuunu

nnae: 1nnnne nnnnne, aennnnnne nee
nnaaennnnn
wouwuyuoyuoyuoyuuy
nnaeae nne ne eae ne aeene ne aee
n
nnnnnnnnnnnnnnnnnnnnnnnnnnnnnnnnnnnnnnnnnnnnnnnnnnnnnnnnnnnnnnnnnnnnnnnnnnnnnnnnnnnnnnnnnnnnnnnnnnn
nnnnnnnnnnnnn
a a a a a a a a a a a a a a a a a a a a a a a a a a a a a
y
1
1
n
nannnnnnnnnnnnnnnnnnnnnnnnnnnnnnnnnnnnnnnnnnnnnnnnnnnnnnnnnnnnnnnnnnnnnnnnnnnnnnnnnnnnnnnnnnnnnnnn
1
2 1
3 甲AC
4
5
6

y
y

45°C (113°F)
mnnnnnnaaannnnnne nnnnnnnnnnnnnnnnnnnnnnnnnnnnnnnnnnnnnnnnnnnnnnnnnnnnnnnnnnnnnnnnnnnnnnnnnnnnnnnnnnnnnnnnnnnnnnnnnnnnnnnnnnnnnnnnnnnnnnnnnnnnnnnnnnnnn
Hnnnnn nn nnnnnnnnnnnnnnnnnnnnnnnnnnnnnnnnnnnnnnnnnnnnnnnnnnnnnnnnnnnnnnnnnnnnnnnnnnnnnnnnnnnnnnnnnnnnnnnnnnnnn
WAC 1
·
300
nnaaannnnnnnnn

nnaaannnnnnnnnnnnnnnnnnn nnnnnnnnnnnnnnnnnnnnnnnnnnnnnnnnnnnnnnnnnnnnnnnnnnnnnnnnnnnnnnnnnnnnnnnnnnnnnnnnnnnnnnnnnnnnnnnnnnnnnnnnnnnnnnn
aannnnnnae
1 1
2 2
a
1
2
1
T 1

y
T
Www 111111111111111111111111111111
7
nnnnnnnnnnnnnnnnnnnnnnnnnnnnnnnnnnnnnnnnnnnnnnnnnnnnnnnnnnnnnnnnnnnnnnnnnnnnnnnnnnnnnnnnnnnnnnnnnnnnnnnnnnnnnnnnnnnnnnnnnnnnnnn
WAC
- 1
10°C (50°F) 30°C (86°F)
mnnnnnnaaannnnnnnnnnnnnnnnnnnnnnnnnnnnnnnnnnnnnnnnnnnnnnnnnnnnnnnnnnnnnnnnnnnnnnnnnnnnnnnnnnnn
AC
nnaaannnnnnae
W

aannnnaaacnACnnnnnnnnnnnnnnnnnnnennn nnnnnnnnnnnnnnnnnnnnnnnnnnnnnnnnnnnnnnnnnnnnnnnnnnnnnnnnnnnnnnnnnnnnnnnnnnnnnnnnnnnnnnnnnnnnnnnnnnnnnnnnnnnnnnn
1
| 成语 | 成语 |
| 甲壳虫足浴AC uatai足浴 | 1. 足浴足浴足浴足浴足浴足浴足浴足浴足浴足浴足浴足浴足浴足浴足浴足浴足浴足浴足浴足浴足浴足浴足浴足浴足浴足浴足浴足浴足浴足浴足浴足浴足浴足浴足浴足浴足浴足浴足浴足浴足浴足浴足浴足浴足浴足浴足浴足浴足浴足浴足浴足够浴足浴足浴足浴足浴足浴足浴足浴足浴足浴足浴足浴足浴足浴足浴足浴足浴足浴足浴足浴足浴足浴足浴足浴足浴足浴足浴足浴足浴足浴足浴足浴足浴足浴足浴足浴足浴足浴足浴足浴足浴足浴足浴足浴足浴足浴足浴足浴足浴足浴充足浴足浴足浴足浴足浴足浴足浴足浴足浴足浴足浴足浴足浴足浴足浴足浴足浴足浴足浴足浴足浴足浴足浴足浴足浴足浴足浴足浴足浴足浴足浴足浴足浴足浴足浴足浴足浴足浴足浴足浴足浴足浴足浴足浴足浴足浴足浴足浴足浴足浴不足浴足浴足浴足浴足浴足浴足浴足浴足浴足浴足浴足浴足浴足浴足浴足浴足浴足浴足浴足浴足浴足浴足浴足浴足浴足浴足浴足浴足浴足浴足浴足浴足浴足浴足浴足浴足浴足浴足浴足浴足浴足浴足浴足浴足浴足浴足浴足浴足浴足浴满足浴足浴足浴足浴足浴足浴足浴足浴足浴足浴足浴足浴足浴足浴足浴足浴足浴足浴足浴足浴足浴足浴足浴足浴足浴足浴足浴足浴足浴足浴足浴足浴足浴足浴足浴足浴足浴足浴足浴足浴足浴足浴足浴足浴足浴足浴足浴足浴足浴足浴足足浴足浴足浴足浴足浴足浴足浴足浴足浴足浴足浴足浴足浴足浴足浴足浴足浴足浴足浴足浴足浴足浴足浴足浴足浴足浴足浴足浴足浴足浴足浴足浴足浴足浴足浴足浴足浴足浴足浴足浴足浴足浴足浴足浴足浴足浴足浴足浴足浴足浴足迹浴足浴足浴足浴足浴足浴足浴足浴足浴足浴足浴足浴足浴足浴足浴足浴足浴足浴足浴足浴足浴足浴足浴足浴足浴足浴足浴足浴足浴足浴足浴足浴足浴足浴足浴足浴足浴足浴足浴足浴足浴足浴足浴足浴足浴足浴足浴足浴足浴足浴无浴足浴足浴足浴足浴足浴足浴足浴足浴足浴足浴足浴足浴足浴足浴足浴足浴足浴足浴足浴足浴足浴足浴足浴足浴足浴足浴足浴足浴足浴足浴足浴足浴足浴足浴足浴足浴足浴足浴足浴足浴足浴足浴足浴足浴足浴足浴足浴足浴足浴尽浴足浴足浴足浴足浴足浴足浴足浴足浴足浴足浴足浴足浴足浴足浴足浴足浴足浴足浴足浴足浴足浴足浴足浴足浴足浴足浴足浴足浴足浴足浴足浴足浴足浴足浴足浴足浴足浴足浴足浴足浴足浴足浴足浴足浴足浴足浴足浴足浴足浴走满浴走满浴走满浴走满浴走满浴走满浴走满浴走满浴走满浴走满浴走满浴走满浴走满浴走满浴走满浴走满浴走满浴走满浴走满浴走满浴走满浴走满浴走满浴走满浴走满浴走满浴走满浴走满浴走满浴走满浴走满浴走满浴走满浴走满语无语无语无语无语无语无语无语无语无语无语无语无语无语无语无语无语无语无语无语无语无语无语无语无语无语无语无语无语无语无语无语无语无语无语无语无语无语无语无语无语无语无语无语无语无语无语无语无语无语无语无法无法无法无法无法无法无法无法无法无法无法无法无法无法无法无法无法无法无法无法无法无法无法无法无法无法无法无法无法无法无法无法无法无法无法无法无法无法无法无法无法无法无法无法无法无法无法无法无法无法无法无法无法无法无法无法无法无法无法无法无法无法无法无法无法无法无法无法无法无法无法无法无法无法无法无法无法无法无法无法无法无法无法无法无法无法无法无法无法无法无法无法无法无法无法无法无法无法无法无法无论无论无论无论无论无论无论无论无论无论无论无论无论无论无论无论无论无论无论无论无论无论无论无论无论无论无论无论无论无论无论无论无论无论无论无论无论无论无论无论无论无论无论无论无论无论无论无论无论无论无论无论无论无论无论无论无论无论无论无论无论无论无论无论无论无论无论无论无论无论无论无论无论无论无论无论无论无论无论无论无论无论无论无论无论无论无论无论无论无论无论无论无论无论无论无论无论无论无论无论无论是无论无论无论无论无论无论无论无论无论无论无论无论无论无论无论无论无论无论无论无论无论无论无论无论无论无论无论无论无论无论无论无论无论无论无论无论无论无论无论无论无论无论无论无论无论无论无论无论无论无论无论无论无论无论无论无论无论无论无论无论无论无论无论无论无论无论无论无论无论无论无论无论无论无论无论无论无论无论无论无论无论无论无论无论无论无论无论无论无论无论无论无论无论无论无论无论无论无论无论无比无比无比无比无比无比无比无比无比无比无比无比无比无比无比无比无比无比无比无比无比无比无比无比无比无比无比无比无比无比无比无比无比无比无比无比无比无比无比无比无比无比无比无比无比无比无比无比无比无比无比无比无比无比无比无比无比无比无比无比无比无比无比无比无比无比无比无比无比无比无比无比无比无比无比无比无比无比无比无比无比无比无比无比无比无比无比无比无比无比无比无比无比无比无比无比无比无比无比无比 |
7 7
aunuuaanrnnnnaeannnnnneennnnnnnnnnnnnnnnnnnnnnnnnnnnnnnnnnnnnnnnnnnnnnnnnnnnnnnnnnnnnnnnnnnnnnnnnnnnnnnnnnnnnnnnnnnnnnnnnnnnnnnn
nannnnnaaannnnnna
y
1
2
3
4
5
6
7
yIi
Jnannnnnnnnnnnnnng nnnnnnnnnnnnnnnnnnnnnnnnnnnnnnnnnnnnnnnnnnnnnnnnnnnnnnnnnnnnnnn
1
Consumer Infrared (CIR) (JWJNJHnH)
Consumer Infrared (CIR)
Universal Serial Bus (USB)
w USB 2.0 1


WOW IEEE 1394 (wWvJvJvNvNv)
WEEEEE 1394 wunwnwnwnwnwnwnwnwnwnwnwnnnnwn


High-Definition Multimedia Interface (wwnnnnnn)
HDMI (High-Definition Multimedia Interface) 100mm x 100mm x 100mm x 100mm x 100mm x 100mm x 100mm x 100mm x 100mm x 100mm x 100mm x 100mm x 100mm x 100mm x 100mm x 100mm x 100mm x 10

ExpressCard (wJyHm)
ExpressCard 1
ExpressCard 1394B ExpressCard USB 2.0 PCI Express

HNNNHNNNNNNNNNNNNNNNNNNNNNNNNNNNNNNNNNNNNNNNNNNNNNNNNNNNNNNNNNNNNNNNNNNNNNNNNNNNNNNNNNNNNNNNNNNNNNNNNNNNNNNNNNNNNNNNNN
nunnnnnnnnnnnnnnnnnnnnnnnnnnnnnnnnnn n C: nnnnnnnnnnnnnnnnnnnnnnnnnnnnnn nn n C: nnnnnnnnnnnnnnnnnnnnnnnnnn nn n C: nnnnnnnnnnnnnnnnnnnnnn nn n C: nnnnnnnnnnnnnnnnnnnn nn n C: nannnne nannn nannn nannn nannn nannn nannn nannn nannn nannn nannn nannn nannn nannn nannn nannn nannn nannn nannn nannn nannn nannn nannn nannn nannn nannn nannn nannn nannn nannn nannn nannn nannn nannn nannn
nannnnnnnnnnnnnnnnnnnnnnnnnnnnnnnnnnnnnnnnnnnnnnnnnnnnnnnnnnnnnnnnnnnnnnnnnnnnnnnnnnnnnnnnnnnnnnnnnnnnnnnnnnnnnnnnnnnnnnnnnnnnnnnnnn
1 Acer disk-to-disk recovery
2 2
3 0aannnBIOS

nana: wadlwnu BOS yannnn
waaanannnnnnaaennn
1
2 1nAcer gnauagaae
3

WNTWNTWNTWNTWNTWNTWNTWNTWNTWNTWNTWNTWNTWNTWNTWNTWNTWNTWNTWNTWNTWNTWNTWNTWNTWNTWNTWNTWNTWNTWNTWNTWNTWNTWNTWNTWNTWNTWNTWNTWNTWNTWNTW
Wwwnwnnwn ITW wnnnnn nn nnnnnn nn nnnnnn nn nnnnnnnnnnnnnnnnnnnnnnnnnnnnnnnnnnnnnnnnnnnnnnnnnnnnnnnnnnnnnnnnnnnnnnnnnnnnnnnnnnnnnnnnnnnnnnnnnnnnnnnnnnnnnnnnnnnnnnnnnnnnnnnnnnnnn
wnnnnne nannnnnnnnnnnnnnnnnnnnnnnnnnnnnnnnnnnnnnnnnnnnnnnnnnnnnnnnnnnnnnnnnnnnnnnnnnnnnnnnnnnnnnnnnnnnnnnnnnnnnnnnnnnnnnnnnnnnnnnnnnnnnnnnnnnnnnnnnnn nn
http://global.acer.com
77
Acer aunnnnnaaannnnaaannnnaaannnnaaannnnaaannnnaaannnnaaannnnaaannnnaaannnnaaannnnaaannnnaaannnnaaannnnaaannnnaaannnnaaannnnaaannnnaaannnnaaannnnaaannnnaaannnnaaannnnaaannnnaaannnnaaannnnaaennnnaaannnnaaannnnaaannnnaaannnnaaannnnaaannnnaaannnnaaannnnaaannnnaaannnnaaannnnaaannnnaaannnnaaannnnaaannnnaaannnnaaannnnaaannnnaaannnnaaannnnaaannnnaaannnnaaannnnaaannnnaa annnnnnnnnnnnnnnnnnnnnnnnnnnnnnnnnnnnnnnnnnnnnnnnnnnnnnnnnnnnnnnnnnnnnnnnnnnnnnnnnnnnnnnnnnnnnnnnnnnnnnnnnnnnnnnnnnnnnnnnnn
nannnnnnnnnnnnnnnnnnnnnnnnnnnnnnnnnnnnnnnnnnnnnnnnnnnnnnnnnnnnnnnnnnnnnnnnnnnnnnnnnnnnnnnnnnnnnnnnnnnnnnnn
70:
may:
nannnnn
Juznniin pi i^dJi^2Ji^2Ji :
修辞法的作用 265
nraan
nnaaannnnn
Iuunnnnnaaannnnnnaanennnnnnaanennnnnnaanennnnnnaanennnnnnaan
"nnnnaaannnnnnaanennnnaanennnnaanennnnaanennnnaanennnnaanennnnaanennnnaanennnnaanennnnaanennnnaanennnnaanennnnaanennnnaanennnnaanennnnaanennnnaanennnnaanennnnaanannnnnnaanannnnnnaanannnnnnaanannnnnnaanannnnnnaanannnnnnaanannnnnnaanannnnnnaanannnnnnaanannnnnnaanannnnnnaanannnnnnaanannnnnnaanannnnnnaanannnnnnaanannnnnnaanannnnnnaanannnnnnaanannnnnnaanannnnnnaanann
2
| CMOS battery bad | ### |
| CMOS checksum error | ### |
| Disk boot failure | ### (###) A: ### |
| Equipment configuration error | ### Exit (###) |
| Hard disk 0 error | ### |
| Hard disk 0 extended type error | ### |
| I/O parity error | ### |
| Keyboard error or no keyboard connected | ### |
| Keyboard interface error | ### |
| Memory size mismatch | ### Exit (###) |
y
2
FCC
unnnnnaaannnnnnnnnnnnnnnnnnnnnnnnnnnnnnnnnnnnnnnnnnnnnnnnnnnnnnnnnnnnnnnnnnnnnnnnnnnnnnnnnnnnnnnnnnnnnnnnnnnnnnnnnnnnnnnnnnnnnnnnnnnnnnnnnnnnnnnnnnnnnnnnnnnnnnnnnnnnnnnnnnnnnnnnnnnn
aunnnnnae annnnnnnnnnnnnnnnnnnnnnnnnnnnnnnnnnnnnnnnnnnnnnnnnnnnnnnnnnnnnnnnnnnnnnnnnnnnnnnnnnnnnnnnnnnnnnnnnnnnnnnnnnnnnnnnnnnnnnnnnnnnnnnnnnnnnnnnnnnnnnnnnnnnnnnnnnann
-
-
1767 2018: 20161111111111111
FCC
nna:nnnnnnnnnnn
aunnnn (aunnnnnn/naan, wwW, www y) nannnnnnn nnrnnn Class B wnnnnnnnnnnnnnnnnnnnnnnnnnnnnnnnnnnnnnnnnnnnnnnnnnnnnnnnnnnnnnnnnnnnnnnnnnnnnnnnnnnnnnnnnnnnn
2017年/3月2日
Ferderal Communications Commission
7777777777777777
Class B Canadian ICES-003
FCC (FCC Registration Number) Ringer Equivalence Number (REN)
wnnnaaannnnnnnnnnnnnnnnnnnnnnnnnnnnnnnnnnnnnnnnnnnnnnnnnnnnnnnnnnnnnnnnnnnnnnnnnnnnnnnnnnnnnnnnnnnnnnnnnnnnnnnnnnnnnnnnnnnnnnnnnnnnnnnnnnnnnnnnnnnnnnnnnnnnnnnnnnnnnnnnnnnnnnnnnnn nn n nn nn nn nn nn nn nn nn nn nn nn nn nn nn nn nn nn nn nn nn nn nn nn nn nn nn nn nn nn nn nn nn nn nn nn nn nn nn nn nn nn nn nn nn nn nn nn nn nn nn nn nn nn nn nn nn nn nn nn nn nn nn nn nn nn nn nn nn nn nn nn nn nn nn nn nn nn nn nn nn nn aan annn anan anan anan anan anan anan anan anan anan anan anan anan anan anan anan anan anan anan anan anan anan anan anan anan anan anan anan anan anan anan anan anan anan anan anan anan anan anan anan anan anan anan anan anan anan anan anan anan anan anan an
1 1

yaa: waaanuunuunuunuunuunu AWG No. 26 na UL yauuunnnaaunuunu CSA Certified Telecommunication Line Cord uuu
TBR 21
LCD panel ergonomic specifications
| Design viewing distance | 500 mm |
| Design inclination angle | 0.0° |
| Design azimuth angle | 90.0° |
| Viewing direction range class | Class IV |
| Screen tilt angle | 85.0° |
| Design screen illuminance | • Illuminance level: [250 + (250cosα)] lx where α = 85° • Color: Source D65 |
| Reflection class of LCD panel (positive and negative polarity) | • Ordinary LCD: Class I • Protective LCD: Class III |
| Image polarity | Both |
| Reference white: | • Yn |
| Pre-setting of luminance and color temperature @ 6500K (tested under BM7) | • u'n • v'n |
| Pixel fault class | Class II |