DSB-B270 - Satellite decoder SAMSUNG - Free user manual and instructions
Find the device manual for free DSB-B270 SAMSUNG in PDF.
Pick your language and provide your email: we'll send you a specifically translated version.
| Product type | Satellite decoder |
| Brand | Samsung |
| Model | DSB-B270 |
| Power supply | 100-240 V AC, 50-60 Hz |
| Power consumption | 15 W (max) |
| Dimensions (W x D x H) | 30 x 20 x 5 cm |
| Weight | 1 kg |
| Connectivity | Satellite input (F), HDMI, SCART, USB, optical digital audio |
| Video formats | MPEG-2, MPEG-4, H.264 |
| Maximum resolution | 1080p (Full HD) |
| Main functions | Satellite channel reception, electronic program guide (EPG), favorites list, parental control, satellite software update |
| Supplied accessories | Remote control, HDMI cable, SCART cable, power adapter, batteries |
| Control unit | Infrared remote control |
| Operating temperature | 0°C to 40°C |
| Maintenance and cleaning | Disconnect before cleaning; use a soft, dry cloth; do not use solvents |
| Safety | Do not expose to moisture; do not block ventilation; use the supplied adapter |
| Spare parts and repairability | Contact a Samsung authorized service center; repairability index not communicated |
| General information | User manual available for download in PDF format |
Frequently Asked Questions - DSB-B270 SAMSUNG
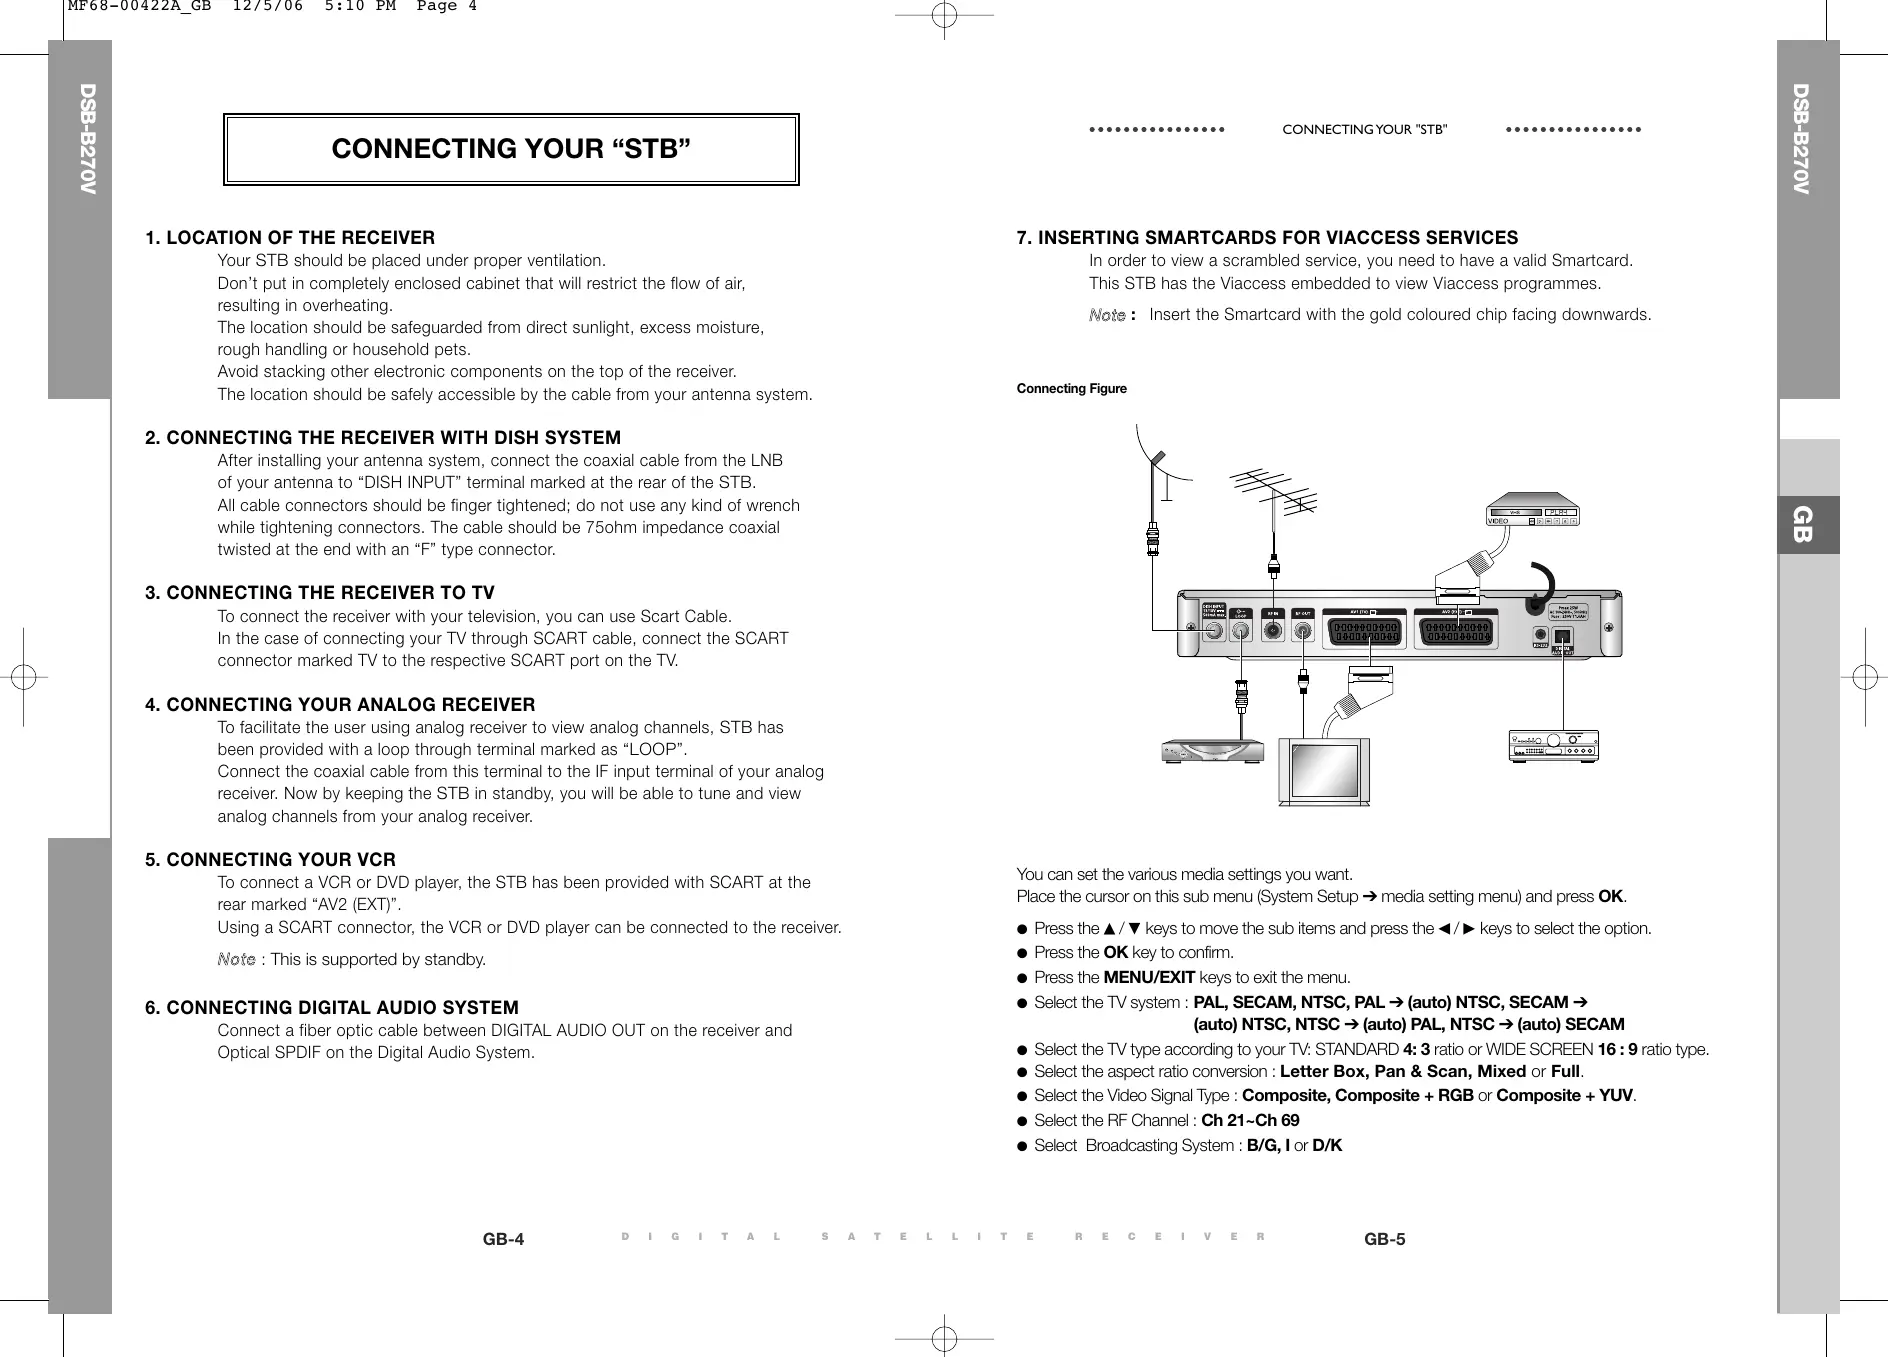
How to connect the Samsung DSB-B270 satellite decoder?
Connect the satellite cable to the LNB input on the back. Connect the decoder to your TV via HDMI or SCART. Finally, connect the power adapter to an electrical outlet.
How to search for channels on the DSB-B270?
Go to the Installation menu then Automatic Search. Select your satellite and start the search. The channels will be saved automatically.
What to do if the screen displays 'No signal'?
Check that the satellite cable is properly connected and that the dish is correctly aligned. Make sure the cable is not damaged. Try restarting the decoder.
How to reset the decoder to factory settings?
Go to the Settings menu -> Reset or press and hold the Menu button for 10 seconds (depending on version). This erases all personal data.
The decoder does not turn on, what to do?
Check the power adapter connection and try another outlet. If the light remains off, the power adapter may be defective. Contact Samsung support.
How to update the software of the DSB-B270?
Go to Menu -> Installation -> Software Update and choose Via Satellite. Make sure the dish receives the signal. Do not cut off power during the update.
Can I record programs with this decoder?
This model does not have an internal hard drive. You can connect an external hard drive via the USB port to record on some models. Check the manual if USB recording is supported.
How to set up parental control?
Go to Menu -> Settings -> Parental Control. Enter the default PIN (0000 or 1234). You can block channels or restrict by age categories.
The remote control does not work, what to do?
Check the batteries and their orientation. Point the remote directly at the decoder. If the problem persists, reset the remote by removing the batteries for 30 seconds.
How to get the full manual for the DSB-B270?
The manual is available for free download in PDF format at notice-facile.com. You can also request a translation in your language via the form on the site.
User questions about DSB-B270 SAMSUNG
0 question about this device. Answer the ones you know or ask your own.
Ask a new question about this device
No questions yet. Be the first to ask one.
Download the instructions for your Satellite decoder in PDF format for free! Find your manual DSB-B270 - SAMSUNG and take your electronic device back in hand. On this page are published all the documents necessary for the use of your device. DSB-B270 by SAMSUNG.